
디펜스 게임 스타크래프트 맵 모음
'디펜스 게임' 태그가 등록된 맵을 모았습니다. 장르 하나로 찾기 어려운 플레이 방식, 난이도와 특징을 중심으로 인기 맵과 최신 맵을 비교해 보세요.
- 등록 맵
- 21개
- 누적 다운로드
- 2
- 누적 조회
- 632
인기 맵
다운로드와 조회 반응이 높은 맵입니다.
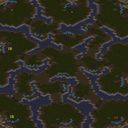
헌터 SandBox
헌터 SandBox는 스타크래프트 브루드워의 유즈맵으로, 모래 사막 지형을 배경으로 한 샌드박스형 디펜스 맵입니다. 맵 곳곳에 흩어져 있는Hunter(사냥꾼) 유닛을 조합하여 끊임없이 몰려오는 적들을 방어하는 것이 주된 목표입니다. 맵 중앙의 넓은 개활지와 곳곳의 협곡, 언덕 지형이 특징으로, 사냥꾼의 이동 경로와 시야 확보가 전략의 핵심입니다.Hunter는 기본적으로 근접 공격을 하지만, 특정 조건에서 원거리 공격이나 특수 능력이 발동되는 것으로 추정됩니다. 플레이어는 초기 자원을 확보한 후, 사냥꾼을 생산해 방어 라인을 구축하거나, 자원을 투자해 강력한 유닛으로 업그레이드할 수 있습니다. 적의 공격 패턴은 랜덤으로 생성되는 것으로 보이며, 난이도가 높아질수록 적의 숫자와 체력이 증가합니다.맵의 구조상, 초기 방어 라인을 구축하는 것이 중요합니다. 중앙 개활지는 넓은 시야를 제공하지만, 적의 접근로가 많아 신속한 대응이 요구됩니다. 반면, 협곡과 언덕 지형은 적의 접근을 지연시킬 수 있는 요충지이므로, 방어 병력을 배치하는 데 유리합니다. 또한, 맵 곳곳에 흩어진 자원 채취 지역을 확보하여 지속적인 자원 공급을 유지하는 것이 게임의 장기전을 좌우합니다.헌터 SandBox는 비교적 높은 난이도를 자랑하는 디펜스 유즈맵으로, 전략적 사고와 빠른 판단력이 요구됩니다. 초기 자원 관리와 방어 라인 구축에 실패하면 게임이 순식간에 끝날 수 있으므로, 플레이어는 신중하게 판단을 내려야 합니다. 또한,Hunter의 특수 능력이나 업그레이드 시스템이 맵의 재미를 높이는 요소로 작용할 수 있습니다. 이 맵은 디펜스를 즐기는 플레이어뿐만 아니라, 전략적 사고를 테스트해보고 싶은 유저들에게도 추천할 만합니다. 특히, 사막 지형의 독특한 분위기와 조화로운 맵 디자인이 게임의 몰입감을 더해줍니다.플레이 전에는 Hunter의 공격 패턴과 특수 능력, 그리고 맵의 주요 자원 채취 지역을 미리 숙지하는 것이 좋습니다. 또한, 방어 라인을 구축할 때, 협곡이나 언덕 지형을 최대한 활용하여 적의 접근을 지연시키는 전략을 세워야 합니다. 초기 자원 관리에도 신경을 써서, 지속적인 자원 공급을 유지하는 것이 중요합니다. Hunter SandBox is a custom defense map from StarCraft: Brood War, set in a sandy desert landscape. The core objective is to defend against waves of enemies by combining Hunter units scattered across the map. The map features a wide open central area, canyons, and elevated terrain, making strategic positioning and visibility key to success. Hunters primarily engage in melee attacks, but they may also gain ranged or special abilities under certain conditions. Players start by securing resources, which can be used to produce Hunters for reinforcing defense lines or upgrading them into more powerful units. Enemy attack patterns appear to be randomly generated, with both their numbers and health increasing as difficulty rises. Given the map’s layout, establishing an early defense line is crucial. The central open area offers broad visibility but has many enemy approach routes, requiring quick reactions. Canyons and elevated terrain, however, can slow enemy advances, making them ideal defensive strongholds. Additionally, controlling resource-gathering spots scattered across the map is vital for sustaining long-term gameplay. Hunter SandBox is a challenging defense custom map that demands strategic thinking and rapid decision-making. A single misstep in early resource management or defense line setup can lead to a swift defeat, so players must make careful choices. The special abilities and upgrade system for Hunters further enhance the map’s appeal, making it enjoyable for both defense enthusiasts and players looking to test their strategic skills. The unique desert atmosphere and cohesive map design also contribute to an immersive experience. Before playing, it’s advisable to familiarize yourself with Hunter attack patterns, special abilities, and key resource locations. When building defense lines, leverage canyons and elevated terrain to delay enemy movements. Efficient early resource management is equally important to maintain a steady supply for upgrades and reinforcements.
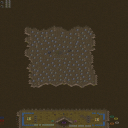
이라크 폭격!!! (BOMB IRAQ!!!)
‘BOMB IRAQ!!!!!!!!!’은 스타크래프트 브루드워의 유즈맵으로, 플레이어들이 이라크의 지도자 사담 후세인을 찾아 제거하는 미션을 수행하는 디펜스형 게임입니다. 맵은 넓은 황무지 타일셋으로 구성되어 있으며, 4096x4096 크기의 넓은 공간에서 펼쳐지는 전투가 특징입니다. 내부 맵 설명에서 확인할 수 있듯이, ‘Find and Kill Saddam Heussain! Have fun! hahaha!’라는 문구는 게임의 목표와 분위기를 단적으로 보여줍니다. 편집자 코멘트에서 알 수 있듯이, 이 맵은 ‘I_spank_monkies’에 의해 최초 제작되었고, ‘oopsman_90[TnB]’에 의해 수정되었습니다. 제목에 포함된 ‘!!!!!!!!!’는 게임의 분위기를 과장된 excitement로 표현한 것으로 보이며, 초기에 ‘BOMB IRAQ!’라는 제목으로 시작되었음을 파일명과 내부 설명에서 확인할 수 있습니다. 이 맵은 7명의 플레이어가 참여할 수 있도록 설계되어 있으며, 디펜스 또는 컴까기 스타일의 플레이가 예상됩니다. 넓은 필드에서 적의 공격을 방어하거나, 후세인을 찾아 제거하는 임무를 수행하는 방식으로 진행되는 것으로 추정됩니다. 맵의 넓은 공간과 황무지 타일셋은 전쟁이나 폭격의 분위기를 연출하는 데 효과적입니다. 다만, 맵 설명이나 승리 조건에 대한 구체적인 정보는 제공되지 않아, 정확한 진행 방식은 플레이 경험을 통해 확인해야 합니다. 또한, 제목의 과도한 느낌표와 내부 설명의 유머러스한 톤은 플레이어들에게 재미와 긴장을 동시에 제공할 것으로 보입니다. 이 맵은 전쟁 테마의 디펜스 게임을 선호하는 플레이어들에게 특히 매력적으로 다가갈 수 있습니다. 플레이 전 확인해야 할 포인트는 크게 세 가지입니다. 첫째, 후세인을 찾는 방법과 제거 조건이 명확히 정의되어 있는지 확인해야 합니다. 둘째, 맵의 넓은 공간에서 발생할 수 있는 적의 공격 패턴과 방어 구조가 어떻게 배치되어 있는지 미리 파악해야 합니다. 셋째, 팀플레이가 필요한지 여부와 팀 구성 방식에 대한 설명이 맵에 포함되어 있는지 확인하는 것입니다. 이러한 요소들은 게임의 난이도와 플레이 경험에 큰 영향을 미치기 때문에, 플레이 전 사전 준비를 철저히 하는 것이 좋습니다. 또한, 이 맵은 전쟁 테마를 다루고 있으므로, 민감한 주제에 대한 이해와 배려가 필요할 수 있습니다. 이 맵은 스타크래프트 유즈맵 커뮤니티에서 전쟁 테마의 디펜스나 컴까기 게임을 즐기는 플레이어들에게 추천할 수 있습니다. 특히, 넓은 맵과 전략적 요소가 결합된 디펜스 게임을 선호하는 경우, 이 맵이 흥미로운 경험을 제공할 것입니다. 다만, 전쟁 테마에 대한 민감한 반응을 보이는 플레이어는 주의가 필요합니다. "BOMB IRAQ!!!!!!!!!" is a *StarCraft: Brood War* custom map where players complete a defense-style mission to locate and eliminate Iraqi leader Saddam Hussein. The map features a vast desert tile set, unfolding in a massive 4096x4096 battle space. As noted in the internal map description, the phrase "Find and Kill Saddam Heussain! Have fun! hahaha!" directly reflects the game's objective and tone. According to the editor's comments, the map was originally created by "I_spank_monkies" and later modified by "oopsman_90[TnB]." The excessive exclamation marks in the title suggest an exaggerated sense of excitement, and the original title "BOMB IRAQ!" is confirmed in the file name and internal description. Designed for up to seven players, the map likely involves defense or "comp-stomp" mechanics, where players either defend against enemy attacks or hunt down Hussein in a wide-open battlefield. The expansive desert setting and tile set effectively evoke the atmosphere of war or bombing raids. However, specific details about the victory conditions or exact gameplay mechanics are not provided, so players will need to experience it firsthand to understand the full scope. The over-the-top exclamation marks and humorous internal descriptions add a mix of fun and tension, making the map particularly appealing to fans of war-themed defense games. Key points to check before playing include: first, whether the methods for finding Hussein and the conditions for eliminating him are clearly defined; second, how enemy attack patterns and defensive structures are arranged across the vast map; and third, whether team play is required and how teams are structured. These factors significantly impact difficulty and overall experience, so thorough preparation is recommended. Additionally, since the map deals with a war theme, players should be mindful of its sensitive nature. This custom map is recommended for players in the *StarCraft* custom map community who enjoy war-themed defense or "comp-stomp" games. Those who prefer large-scale maps with strategic elements will likely find it an engaging experience. However, players sensitive to war-related themes should approach with caution.
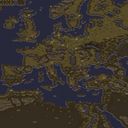
더 라스트 레전드 v.1.1 (The Last Legion v.1.1)
스타크래프트 브루드워의 대표적인 UMS 유즈맵인 〈더 라스트 레전드〉는 로마 제국의 몰락을 배경으로 한 대규모 디펜스 형식의 게임이다. 플레이어는 고대 로마의 영토를 침략하는 적군들을 상대로 방어선을 구축하고, 제한된 자원으로 병력과 건물을 관리해야 한다. 맵의 중심부는 넓은 평야와 요새로 구성되어 있으며, 적군은 주변에서 끊임없이 밀려오기 때문에 빠른 판단력과 전략적 배치력이 요구된다. 미니맵에서는 적의 움직임이 실시간으로 표시되어 실시간 대응이 가능하지만, 자원 수급은 비교적 제한적이어서 효율적인 관리 없이는 금방 무너질 수 있다. 특히 초반과 중반의 균형 잡힌 병력 운용이 승패를 좌우하는데, 초보자들은 자원을 과도하게 소비하거나 방어를 소홀히 하는 경우가 많아 쉽게 무너진다. 반면 숙련자들은 적의 공세를 예측하고 방어선을 재배치하는 등 능동적인 대처가 가능하다. 맵의 특징은 넓은 맵 크기와 세부적으로 배치된 요새 구조로, 플레이어의 시야와 전략적 깊이를 시험한다. 또한 적군의 종류와 공격 패턴이 단계적으로 강화되기 때문에 긴장감을 유지할 수 있다. 이 맵은 디펜스 장르를 любителей УЗМ에 소개하고자 하는 플레이어들에게 강력한 추천 대상이다. 다만, 넓은 맵과 복잡한 구조 때문에 초심자는 처음부터 어려움을 느낄 수 있으니, 간단한 방어형 맵으로 연습을 권장한다. 게임을 시작하기 전에는 자원 관리와 요새 배치 우선순위를 미리 숙지하는 것이 중요하다. 전체적으로 〈더 라스트 레전드〉는 전략성과 긴장감을 동시에 제공하는 훌륭한 유즈맵으로, 디펜스 장르의 정수를 느낄 수 있는 작품이다. StarCraft: Brood War’s iconic UMS custom map, *The Last Legend*, is a large-scale defense game set against the fall of the Roman Empire. Players must build defensive lines against invading forces, managing troops and structures with limited resources. The map’s center features wide plains and fortresses, with enemies continuously pouring in from the edges, demanding quick decision-making and strategic positioning. The minimap displays enemy movements in real time for responsive counterplay, but resource income is scarce, making efficient management crucial—otherwise, the defense collapses rapidly. Balanced troop deployment in the early and mid-game often determines victory or defeat; beginners frequently struggle by overspending resources or neglecting defenses, while experienced players adapt by predicting enemy assaults and repositioning their lines. The map’s defining traits—its vast size and intricately placed fortresses—test players’ vision and strategic depth, while the enemy’s evolving types and attack patterns maintain high tension throughout. Ideal for UMS enthusiasts seeking a defense experience, it’s best approached with prior practice on simpler defensive maps due to its complexity. Before starting, mastering resource management and prioritizing fortress placement is essential. Overall, *The Last Legend* delivers a masterful blend of strategy and suspense, encapsulating the essence of the defense genre.
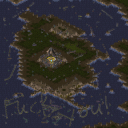
인디펜던스 데이 2 (Independence Day 2)
‘인디펜던스 데이 2’는 스타크래프트 브루드워의 UMS 유즈맵으로, 영화 ‘인디펜던스 데이’의 후속 버전을 체험할 수 있는 디펜스 장르의 맵입니다. 맵의 전체적인 분위기는 사막 지형을 배경으로 펼쳐지며, 중앙에 위치한 거대한 우주선이 등장하는 등 영화의 iconic한 요소들이 배치되어 있습니다. 플레이어는 외계인 침공으로부터 인류의 방어선을 지키기 위해 협력하거나 경쟁하는 구조를 가집니다. 맵의 규모는 2048x2048로 достаточно 넓지만, 주요 전투 지역은 중앙에 집중되어 있어 전략적인 움직임이 중요합니다. 외계인 유닛들은 끊임없이 밀려오며, 플레이어는 방어타워를 건설하거나 유닛을 직접 조종하여 이를 저지해야 합니다. 맵의 난이도는 맵 내부의 트리거나 유닛 배치에 따라 달라질 수 있으나, 기본적으로는 초보부터 숙련자까지 즐길 수 있도록 설계된 것으로 보입니다. 특히 사막 지형과 우주선이라는 테마는 시각적으로도 흥미를 유발하며, 플레이어 간의 협력이나 대결을 통해 긴장감을 높입니다. 이 맵을 즐기기 위해서는 방어 전략을 숙지하고, 외계인 웨이브에 대한 대비가 필요합니다. 또한, 맵의 넓이를 고려하여 자원 관리와 유닛 배치에 신경을 써야 합니다. 추천 대상은 스타크래프트의 디펜스 유즈맵을 좋아하는 플레이어이며, 특히 영화의 팬이라면 더욱 흥미롭게 즐길 수 있을 것입니다. Independence Day 2 is a UMS custom map in StarCraft: Brood War, offering an experience inspired by the sequel to the movie ‘Independence Day.’ The map features a desert terrain background with iconic elements like a massive mothership positioned at the center, capturing the essence of the film. Players either cooperate or compete to defend humanity’s perimeter against relentless alien invasions. Despite the large 2048x2048 map size, key combat zones are concentrated in the center, emphasizing strategic mobility. Alien forces continuously assault, requiring players to either construct defensive towers or directly command units to repel them. While difficulty may vary based on internal triggers or unit placements, the map appears designed to cater to both beginners and advanced players. The desert theme paired with the mothership creates a visually engaging atmosphere, enhancing tension through cooperative or competitive gameplay. To fully enjoy this map, players should prioritize defensive strategies and prepare for alien waves. Given the map’s scale, resource management and unit positioning are crucial. This map is recommended for fans of StarCraft’s defense custom maps, especially those who appreciate the movie’s theme.
Stacked Cannon Defense 10-Way
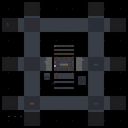
스타크래프트 브루드워의 대표적인 방어형 유즈맵인 〈Stacked Cannon Defense 10-Way〉는 10방향의 다양한 경로로 몰려드는 적을 상대하는 디펜스 장르의 정석으로 꼽힌다. 맵 중앙에 위치한 플레이어 기지에서부터 사방으로 뻗어나가는 길목을 따라 수많은 웨이브가 끊임없이 밀려오며, 각 라인은 각각의 포지션에 특화된 방어 건물과 유닛으로 무장되어 있다. 특히, 10개의 방향 중 일부는 좁고 복잡한 길로 구성되어 있어 유닛의 배치와 업그레이드 타이밍이 승패를 좌우하는 핵심 요소로 작용한다. 맵은 우주 테마의 타일셋을 사용해 우주 공간 속에서 전투가 벌어지는 듯한 분위기를 연출하며, 타일 단위는 128x128로 넓게 펼쳐진 맵의 스케일을 느낄 수 있다. 플레이어는 제한된 자원으로 최적의 방어 라인을 구축해야 하며, 자원 관리와 병력 배치를 동시에 신경 써야 한다. 또한, 맵의 난이도는 각 웨이브의 강도와 적의 조합에 따라 달라지며, 특히 후반부로 갈수록 강력한 적들이 등장해 전략의 변화가 요구된다. 초보자들은 기본적인 방어 라인 구축과 자원 확보에 집중하는 것이 중요하고, 숙련자들은 자원 효율과 업그레이드 우선순위를 고려한 플레이가 필요할 것이다. 맵의 구조상 중앙 기지 방어 외에도 측방 및 후방 경로도 중요하기 때문에, 모든 방향을 균형 있게 방어하는 능력이 요구된다. 또한, 적의 진로가 겹치는 지점에서는 다중 방어 라인을 구축해 효율성을 극대화할 수 있다. 이 맵은 디펜스 장르에 익숙한 플레이어뿐만 아니라, 새로운 전략을 시도해 보고 싶은 유저들에게도 좋은 도전 과제가 될 것이다. 맵의 인기는 오랜 기간 동안 유지되고 있으며, 다양한 커스텀 맵과의 비교를 통해 더욱 발전된 디펜스 전략을 세울 수 있는 기회를 제공한다. 플레이 전에는 맵의 구조를 미리 숙지하고, 각 방향의 진로와 주요 방어 포인트를 확인하는 것이 좋다. 또한, 자원 확보와 업그레이드 타이밍을 연습해 두면 실전에서도 보다 안정적인 플레이가 가능하다. 이 맵은 디펜스 유저라면 반드시 한 번쯤은 플레이해 볼 만한 가치가 있는 맵으로, 반복 플레이를 통해 자신의 전략을 다듬어 나갈 수 있을 것이다. 디펜스 장르의 기본기를 쌓기에 최적화된 맵으로, 방어의 묘미를 느낄 수 있는 작품이다. "Stacked Cannon Defense 10-Way" is a quintessential defense-style custom map in *StarCraft: Brood War*, renowned for its classic gameplay where players defend against waves of enemies approaching from ten distinct directions. Waves continuously surge along paths radiating from the central player base, with each route equipped with specialized defensive structures and units tailored to its challenges. Some of the ten paths feature narrow, intricate corridors, making unit placement and upgrade timing critical factors in determining victory or defeat. The map employs a space-themed tileset, immersing players in the sensation of combat unfolding in the vastness of outer space, with its expansive 128x128 tile layout amplifying the scale of the battlefield. Players must construct optimal defense lines under resource constraints, balancing resource management with strategic troop deployment. The difficulty escalates with each wave, as enemy compositions grow stronger, demanding adaptive strategies—especially in the later stages. Beginners should focus on establishing basic defense lines and securing resources, while experienced players must prioritize resource efficiency and upgrade timings. Given the map’s structure, defending side and rear paths is just as crucial as protecting the central base, requiring players to maintain balanced coverage across all directions. Where enemy routes converge, building multiple layers of defense can maximize efficiency. This map serves as an excellent challenge not only for seasoned defense players seeking to refine their strategies but also for those eager to experiment with new tactics. Its enduring popularity has fostered continuous evolution, allowing players to compare and integrate advanced defense strategies from various custom maps. Before playing, it’s advisable to familiarize yourself with the map’s layout, identifying key paths and critical defense points. Practicing resource gathering and upgrade timings beforehand will ensure smoother, more stable gameplay in actual matches. A must-play for defense enthusiasts, "Stacked Cannon Defense 10-Way" offers a rewarding experience that rewards repeated attempts, allowing players to hone their strategies over time. It stands as an ideal title for mastering the fundamentals of the defense genre while appreciating the artistry of strategic fortification.
골렘 No Double Perfected (Golem No Double Perfected)
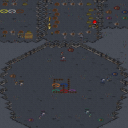
스타크래프트 브루드워의 유즈맵 '골렘 No Double Perfected'는 고전적인 '골렘' 장르의 유즈맵을 한층 더 강화한 버전으로, 원본의 단점을 보완하고 완벽한 밸런스를 추구한 작품이다. 이 맵은 플레이어가 황금색 골렘을 조종해 적의 공격을 방어하며, 일정 조건을 달성하면 승리하는 디펜스형 유즈맵으로, 'No Double'이라는 이름에서 알 수 있듯 골렘의 중복 생성이나 특수 효과 중복 버그를 완벽히 제거했다는 특징이 있다. 맵의 주요 특징은 골렘의 단계별 진화와 강력한 스킬 시스템에 있다. 초반에는 기본 골렘으로 시작해 적의 공격을 방어하며 자원을 모은 뒤, 특정 조건(예: 특정 적 처치, 시간 경과 등)을 만족하면 더 강력한 골렘으로 진화할 수 있으며, 각 골렘은 고유한 스킬을 보유하고 있어 전략적 플레이가 요구된다. 특히, 맵의 오른쪽에 위치한 오렌지색 기지에서 시작하는 플레이어는 버그 없이 안정적으로 골렘을 운용할 수 있도록 설계되어 있으며, 이는 맵의 'Perfected'라는 수식어가 붙은 이유이기도 하다. 맵의 구조는 중앙에 위치한 넓은 길과 양옆의 협소한 길로 나뉘어 있어, 플레이어는 자신의 골렘을 효율적으로 배치하고 적의 공격을 방어해야 한다. 또한, 맵 곳곳에 배치된 자원 상자와 미네랄 멀티는 골렘의 진화를 가속화하는 데 도움을 주며, 이를 활용한 전략적 플레이가 승리의 관건이 된다. 이 맵은 5인용으로 설계되었지만, 팀플레이보다는 개별 플레이어가 골렘을 조종하는 1인용 디펜스 게임에 가깝다. 초보 플레이어의 경우 골렘의 특성이나 맵의 구조를 제대로 이해하지 못해 어려움을 느낄 수 있지만, 골렘의 스킬을 숙지하고 자원을 효율적으로 관리한다면 충분히 도전해 볼 만한 가치가 있다. 특히, 골렘의 진화 조건과 스킬의 조합을 익히는 것이 관전 포인트다. 이 맵을 플레이하기 전에는 골렘의 진화 단계와 각 단계별 스킬을 미리 확인하고, 맵의 주요 자원 위치와 적의 공격 패턴을 숙지하는 것이 중요하다. 또한, 오렌지색 기지에서 시작하는 플레이어는 초반 방어에 좀 더 신경 쓸 필요가 있으며, 중앙 길의 협소한 구간에서는 골렘의 배치 위치를 신중히 결정해야 한다. 이 맵은 디펜스 장르에 익숙한 플레이어에게는 훌륭한 도전 과제가 될 것이며, 골렘의 전략적 운용을 통해 새로운 재미를 느낄 수 있을 것이다. 그뿐만 아니라, 'No Double'이라는 이름처럼 버그가 완벽히 제거된 맵이기 때문에 안정적인 플레이가 가능하다는 점도 큰 장점이다. "Golem No Double Perfected," a classic *Golem*-genre custom map from *StarCraft: Brood War*, is an enhanced version that addresses the flaws of the original while striving for perfect balance. This defense-style map has players controlling a golden golem to fend off enemy attacks, achieving victory upon meeting specific conditions. As the name *No Double* suggests, the map eliminates all duplicate golem spawning and special effect bugs, ensuring a polished experience. The map’s core mechanics revolve around golem evolution and its robust skill system. Players begin with a basic golem, gathering resources while defending against attacks. Once certain conditions are met—such as defeating specific enemies or passing a time threshold—the golem evolves into a stronger form, each with unique abilities that demand strategic play. Notably, the player starting at the orange base on the right can operate their golem without bugs, a key reason for the "Perfected" in the title. The map’s layout features a wide central path flanked by narrow side routes, requiring players to position their golems efficiently and defend against incoming assaults. Scattered resource boxes and mineral patches across the map accelerate golem evolution, making resource management a critical factor in victory. Though designed for five players, the gameplay leans more toward a solo defense experience, where individual players control their golems rather than relying on teamwork. Beginners may struggle initially due to unfamiliarity with golem mechanics or map layout, but mastering the golems’ skills and optimizing resource use makes the challenge rewarding. The real highlight lies in experimenting with different golem evolution paths and skill combinations. Before playing, it’s essential to study the golem’s evolution stages and abilities, identify key resource locations, and learn enemy attack patterns. Orange-base players should prioritize early defense, while those navigating the narrow central paths must carefully plan golem placements. For fans of defense games, this map offers a compelling challenge, delivering fresh strategic depth through golem management. Additionally, its bug-free design—reflected in the *No Double* name—ensures a stable and enjoyable experience.
케리건의 몰락: SC Kerrigan's Fall from Grace (SC: Kerrigan's Fall from Grace)
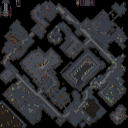
스타크래프트: 브루드워의 UMS 유즈맵 'SC: Kerrigan's Fall from Grace'는 3명의 플레이어가 4명의 적을 상대하는 독특한 팀전 구조로 구성된 디펜스형 맵이다. 맵 제목에서 짐작할 수 있듯 스타크래프트의 iconic 캐릭터 케리건이 중심이 되어 전개되는 스토리텔링을 담고 있으며, 플레이어는 케리건의 힘을 빌려 적을 공격하거나, 반대로 케리건을 조종해 침략자들을 물리쳐야 한다. 맵은 8192x4096의 넓은 우주 테마 타일셋으로 제작되어 우주 공간의 광활함과 긴장감을 동시에 제공한다. 중앙에 위치한 거대한 케리건의 형상 주변으로 세 개의 플레이어 기지가 배치되어 있으며, 각각의 기지에는 방어용 유닛 생산 시설과 자원 채취 지역이 마련되어 있다. 적 진영은 4개의 기지로 나뉘어 있으며, 이들은 끊임없이 공격해오므로 플레이어는 능동적인 방어와 반격을 동시에 준비해야 한다. 맵의 특징은 케리건의 포스 필드나 특수 능력과 같은 오브젝트 트리거가 포함되어 있어, 맵 진행에 따라 케리건의 스킬이나 상태가 변화한다는 점이다. 또한, 맵 설명에서 제안하는 대로 3v2v1, 3v2, 3v1 등 다양한 팀 구성이 가능해 전략적 다변화를 제공한다. 플레이어는 초반 자원 수집과 동시에 방어선을 구축하며, 중반부터 케리건의 능력을 활용한 공격과 방어 전략을 구사해야 한다. 맵의 넓은 공간을 활용한 지형지물 활용과 케리건의 특수 능력 타이밍이 승부를 가르는 핵심 요소로 보인다. 특히 케리건의 'Fall from Grace'라는 테마에 맞게, 그녀의 몰락과 부활을 둘러싼 스토리텔링이 맵 곳곳의 오브젝트와 이벤트를 통해 전달된다는 점에서 단순한 디펜스 맵을 넘어서는 플레이 경험을 제공한다. 초보 플레이어는 방어 우선 전략을, 숙련자는 케리건의 능력을 적극 활용한 공격적 플레이를 시도해 볼 수 있는 맵으로 추천된다. 이 맵은 블리자드에서 제공한 우주 타일셋을 기반으로 제작되었으나, 내부적으로는 케리건을 중심으로 한 스토리텔링과 사용자 지정 트리거가 적용되어 유즈맵으로서의 독창성을 강하게 어필한다. 특히 케리건의 몰락과 부활을 테마로 삼은 스토리텔링은 스타크래프트 팬들에게는 감동적인 요소로 다가올 것이다. 넓은 맵 크기와 세밀한 오브젝트 배치로 인해 초반에는 다소 복잡하게 느껴질 수 있지만, 한 번 익숙해지면 전략적 깊이와 몰입감을 동시에 느낄 수 있는佳作 유즈맵이다. StarCraft: Brood War's UMS custom map *SC: Kerrigan's Fall from Grace* is a unique team-based defense map where three players face off against four enemies. As suggested by the title, the map centers around the iconic StarCraft character Kerrigan, weaving a narrative-driven experience. Players can either harness Kerrigan’s power to attack or take direct control of her to fend off invaders. The map spans a vast 8192x4096 cosmic-themed tileset, evoking both the grandeur and tension of outer space. Three player bases are positioned around a colossal central structure of Kerrigan, each equipped with defensive unit production facilities and resource-gathering zones. The four enemy bases are spread out, launching relentless assaults, forcing players to balance proactive defense with counterattacks. A standout feature is the inclusion of object triggers like Kerrigan’s Force Field and special abilities, which evolve as the game progresses, altering her skills and status. The map also supports flexible team compositions—such as 3v2v1, 3v2, or 3v1—allowing for diverse strategic approaches. Early gameplay focuses on gathering resources and fortifying defenses, but mid-game demands leveraging Kerrigan’s abilities for both offensive and defensive maneuvers. The map’s sprawling terrain and precise timing of Kerrigan’s special abilities are key to victory. The narrative, tied to Kerrigan’s "Fall from Grace," unfolds through in-game objects and events, transforming this from a mere defense map into a deeply immersive experience. Beginners may prioritize defense, while experienced players can experiment with aggressive strategies centered on Kerrigan’s powers. Though built on Blizzard’s cosmic tileset, the map distinguishes itself with its Kerrigan-focused storytelling and custom triggers, offering a fresh take as a UMS map. The theme of her downfall and rebirth resonates strongly with StarCraft fans, making it a compelling choice. While the map’s size and intricate object placements may feel overwhelming at first, mastering it reveals a rich blend of strategic depth and immersive storytelling that makes it a standout custom creation.
FFVII: 미드가르로의 귀환 (FFVII: Return to Midgar)
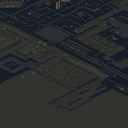
이 맵은 스타크래프트: 브루드워의 UMS(유즈맵) 장르로, 《FINAL FANTASY VII》의 세계관을 배경으로 한 디펜스형 맵이다. 플레이어는 에어리어 1에 위치한 넥서스를 지켜내며, 맵 중앙에 위치한 적 기지(마크로 반응로)를 파괴하는 것이 주요 목표로 추정된다. 맵의 중앙부는 넓은 평야와 산맥으로 구분되어 있으며, 플레이어는 선택한 진영에 따라 다양한 유닛을 생산하고 방어선을 구축할 수 있다. 맵의 외곽부는 설원 지형으로 둘러싸여 있어 자원 채취와 기지 확장이 제한적이므로, 신중한 자원 관리와 전략적 배치력이 요구된다. 맵 곳곳에 배치된 미네랄과 가스 지대는 중앙부와 떨어진 위치에 있어, 초반 자원 확보가 중요하다. 또한, 맵의 구조상 중앙 통로와 고지대가 존재해, 적의 진격을 예상하고 방어 태세를 갖추는 것이 승리의 관건으로 보인다. 맵의 분위기는 dark fantasy에 가까우며, 《FINAL FANTASY VII》의 iconic한 배경음악과 연출이 포함되어 있을 가능성이 높다. 초보자보다는 적응력이 필요한 맵으로, 맵의 특징을 숙지한 후 플레이하는 것이 좋다. 특히, 넥서스 보호와 동시에 공격 루트를 확보하는 밸런스가 핵심이며, 협동 플레이가 필수적인 구조로 보인다. 맵의 난이도는 맵의 크기와 구조상 '보통' 정도로 추정되지만, 세부적인 밸런스는 플레이어 간의 협의나 추가 설명이 필요할 수 있다. 이 맵은 《FINAL FANTASY VII》 팬들에게는无疑의 매력을 느낄 수 있는 작품으로, 스토리성이 강한 유즈맵을 찾는 플레이어라면 충분히 도전해볼 만한 가치가 있다. This map is a UMS (User-Made Scenario) in *StarCraft: Brood War*, set in the world of *FINAL FANTASY VII* as a defense-style map. The primary objective appears to be protecting the Nexus located in Area 1 while destroying the enemy base (Macro Reactor) situated at the map’s center. The central area is divided into vast plains and mountain ranges, allowing players to produce various units and establish defensive lines depending on their chosen race. The outer edges of the map are surrounded by snowy terrain, restricting resource gathering and base expansion. This demands careful resource management and strategic positioning. Mineral and gas deposits scattered across the map are positioned away from the central area, making early resource securing crucial. The map’s structure features central pathways and elevated positions, requiring players to anticipate enemy advances and prepare defensive measures to secure victory. The atmosphere leans toward dark fantasy, likely incorporating iconic *FINAL FANTASY VII* background music and visual effects. This map is more suited for players with adaptability rather than beginners, and understanding its features before playing is recommended. The key to success lies in balancing Nexus protection with securing attack routes, and the map’s structure suggests that cooperative play is essential. While the overall difficulty is estimated to be moderate due to the map’s size and layout, finer balancing may require coordination between players or additional guidance. For fans of *FINAL FANTASY VII*, this map offers undeniable appeal, making it a worthwhile challenge for players seeking story-driven UMS maps.
좀비아포칼립스 Final+1.6 (Zombie Apocalypse Final+1.6)
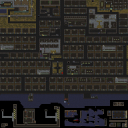
‘좀비아포칼립스Final+1.6’는 스타크래프트 브루드워의 대표적인 유즈맵 장르 중 하나로, 좀비 아포칼립스 세계관을 배경으로 한 디펜스형 게임이다. 맵은 황무지 타일셋을 기반으로 6144×6144의 거대한 크기를 자랑하며, 플레이어는 생존자 역할을 맡아 끊임없이 몰려오는 좀비 무리로부터 체력을 지키며 버텨야 한다. 맵의 특징은 숨겨진 요소와 원작자인 Bigbro의 개성이 반영된 다양한 구성 요소에 있다. 특히 ‘Final+1.6’ 버전에서는 맵 곳곳에 숨겨진 트리거나 아이템이 배치되어 있어, 단순히 방어만으로는 승리를 장담할 수 없고 전략적 탐색과 자원 관리가 필요하다. 맵의 진행은 웨이브 형식으로 이루어지며, 웨이브가 반복될수록 좀비의 종류와 수가 증가하는 방식으로 난이도가 상승한다. 플레이어는 시작 지점에서부터 자원을 확보하고 방어 건물을 건설하거나 업그레이드하며, 좀비가 방어선을 돌파하지 못하도록 세심한 배치와 타이밍을 요구한다. 맵의 분위기는 어두운 황무지와 잔해가 흩어져 있는 배경으로 인해 좀비의 출몰에 대한 긴장감을 한층 높인다. 추천 대상은 디펜스 게임을 좋아하는 플레이어이며, 특히 전략적 사고와 긴장감 있는 전투를 즐기는 유저들에게 적합하다. 플레이 전에는 맵 곳곳에 숨겨진 요소나 트리거가 존재할 수 있으니, 맵을 처음 플레이할 때는 주변을 탐색하며 숨겨진 기능을 찾아내는 것이 중요하다. 또한 방어 건물의 배치와 자원 관리에 신경을 써야 하며, 웨이브가 진행될수록 좀비의 공격 패턴이 변하므로 이에 대응할 수 있는 준비를 미리 해두는 것이 좋다. ‘Zombie Apocalypse Final+1.6’ is a defense-style game set in a zombie apocalypse world, one of the most representative user-made map genres in *StarCraft: Brood War*. The map features a vast 6144×6144 wasteland tileset, where players take on the role of survivors defending their health against relentless waves of zombies. What sets this map apart are its hidden elements and the creator Bigbro’s unique design choices. In the *Final+1.6* version, hidden triggers and items are scattered throughout, meaning victory isn’t guaranteed by defense alone—strategic exploration and resource management are key. The gameplay unfolds in waves, with each successive wave introducing stronger and more numerous zombies, increasing the difficulty. Players must secure resources from the starting point, construct or upgrade defensive buildings, and carefully position defenses to prevent breaches. The dark, debris-strewn wasteland atmosphere heightens the tension of the zombie threat. This map is ideal for fans of defense games, particularly those who enjoy strategic thinking and high-stakes combat. Before playing, it’s important to explore the map thoroughly, as hidden elements and triggers may be present. Pay close attention to defensive structure placement and resource management, and prepare for evolving zombie attack patterns as waves progress.
죄수 탈출 (Der Gefangene)
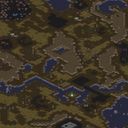
Der Gefangene는 독일어로 '죄수'를 뜻하는 이 맵은 스타크래프트 브루드워의 유즈맵으로, 단일 플레이어용 탈출형 디펜스 장르에 속한다. 맵은 황무지 타일셋을 기반으로 한 4096x4096의 넓은 공간을 자랑하며, 중앙에 위치한 감옥 구조물을 중심으로 적의 지속적인 공격을 방어하면서 목표물을 해방하거나 탈출하는 것이 주요 목표로 보인다. 맵의 지형은 대체로 평탄한 황무지 지형에 감옥 건물과 주변 방어 시설이 배치되어 있어, 적의 접근로를 차단하거나 요격할 수 있는 구조로 설계된 것으로 추정된다. 맵의 중앙에 위치한 감옥은 플레이어가 조종하는 유닛이 일정 시간 동안 머무르며 적의 공격을 버텨야 하는 핵심 구조물로 보이며, 주변에는 적의 소규모 병력이 끊임없이 생산되어 공격해 오는 것으로 보인다. 플레이어는 제한된 자원과 유닛을 활용해 감옥을 방어하거나 탈출 경로를 확보해야 하며, 맵의 지형을 활용한 전략적 요격이 중요할 것으로 보인다. 맵의 난이도는 감옥 주변의 방어 시설과 지형의 난해함에 따라 초보와 숙련자 모두 즐길 수 있을 것으로 보이며, 특히 방어와 자원 관리 능력이 요구되는 하드코어한 플레이 경험을 제공할 것으로 예상된다. 추천 대상은 스타크래프트의 디펜스 및 서바이벌 장르에 익숙한 플레이어, 또는 단일 플레이어용 맵을 즐기는 유저들에게 적합할 것이다. 플레이 전 감옥 주변의 방어 시설과 지형적 특징을 미리 파악하고, 자원 관리와 유닛 배치 전략을 숙지하는 것이 중요하다. 또한, 적의 공격 패턴이 반복적이므로 이를 예측하고 대응하는 연습이 필요하다. This map, titled *Der Gefangene* (meaning "The Prisoner" in German), is a *StarCraft: Brood War* custom map in the single-player escape defense survival genre. Set on a vast 4096x4096 wasteland tile, the map revolves around a central prison structure where players must defend against relentless enemy waves while either rescuing a target or making their escape. The terrain is mostly flat, featuring the prison and surrounding defensive structures designed to block or intercept enemy approaches. The prison itself serves as a key location where the player’s units must hold out against attacks for a set duration. Small enemy forces continuously spawn and launch assaults from the surroundings, forcing the player to manage limited resources and units strategically. Due to the map’s defensive structures and terrain complexity, it offers an engaging challenge for both beginners and experienced players, delivering a hardcore survival experience that demands strong defense and resource management skills. It’s best suited for those familiar with *StarCraft*’s defense or survival modes or players who enjoy single-player custom maps. Before playing, it’s crucial to study the prison’s defensive layout and terrain features, refine unit placement strategies, and practice predicting and countering repetitive enemy attack patterns.
짐 레이너의 기억 (Jim Raynor's Memory)
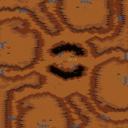
스타크래프트 브루드워의 유즈맵 <Jim Raynor's Memory>는 8명의 플레이어가 참여하는 대규모 전략 디펜스 장르의 맵으로,Jim Raynor의 독특한 테마와 함께 스토리텔링이 돋보이는 작품이다. 황혼 타일셋을 기반으로 한 넓은 맵은 중앙에 위치한 거대한 구조물을 중심으로 펼쳐지며, 플레이어들은 이를 방어하거나 공격적으로 활용하는 전략을 펼쳐야 한다. 맵의 특징은 중앙 구조물 주변의 좁은 통로와 방어 거점이 조밀하게 배치되어 있어, 소규모 병력 컨트롤과 자원 관리가 중요한 요소가 된다. 특히, 각 플레이어의 시작 위치가 맵 외곽에 배치되어 있어 초반 자원 수급이 다소 어렵지만, 중앙 구조물로의 접근을 통제하는 것이 승리의 핵심이다. 맵의 진행은 주로 방어에 중점을 두고 있지만, 일부 맵 요소에서는 공격적인 플레이도 가능하다는 점에서 전략의 다양성을 느낄 수 있다. 플레이어들은 중앙 구조물을 지켜내거나, 이를 파괴하기 위한 팀플레이와 전략적 협력이 요구된다. 추천 대상은 브루드워의 다양한 유즈맵을 즐기는 플레이어들로, 특히 디펜스 장르에 익숙한 유저라면 재미있게 플레이할 수 있을 것이다. 플레이 전에는 중앙 구조물의 역할과 맵의 좁은 통로에서 발생할 수 있는 병력 충돌을 미리 숙지하는 것이 좋다. 또한, 자원 관리와 생산 건물의 배치 역시 승리를 좌우하는 중요한 요소이므로 신중하게 계획해야 한다. Jim Raynor's Memory is a large-scale strategy defense map in StarCraft: Brood War, designed for 8 players, featuring a unique Jim Raynor theme and storytelling elements. Built on the Twilight tileset, the expansive 4096x4096 map centers around a massive structure, requiring players to either defend it or leverage it strategically. The map's design includes dense choke points and defensive positions around the central structure, emphasizing micro-management of small forces and resource control. While starting positions are placed on the outer edges of the map, making early resource gathering challenging, controlling access to the central structure becomes crucial for victory. The gameplay leans heavily toward defense but allows for occasional offensive strategies, adding depth to the experience. This map is ideal for players familiar with Brood War custom maps, particularly those who enjoy the defense genre. Before playing, it's essential to understand the central structure's role and potential clashes in narrow pathways. Resource management and strategic building placement are also key to success, requiring careful planning from the outset.
뉴 패밀리 가이 Ver. 5 (New Family Guy Ver. 5)
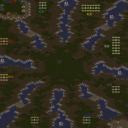
이 맵은 스타크래프트 브루드워의 유즈맵으로, <Family Guy>라는 인기 애니메이션을 모티브로 제작된 특색 있는 디펜스 장르의 맵이다. 맵의 이름은 ‘New Family Guy Ver. 5’로, 내부적으로는 ‘Family Guy speed feeder 2’라는 파일명을 사용하고 있으며, 제작자는 ‘FlippyTheGoober’로 추정된다. 맵의 배경은 사막 타일셋을 기반으로 하며, 맵의 중심부에는 주요 건물이 배치되어 있고, 외곽으로는 방어 건물을 건설할 수 있는 공간이 마련되어 있다. 맵의 구조상으로는 적의 공격을 방어하며 건물을 보호하는 ‘컴퓨터 상대 디펜스’ 스타일의 플레이가 주를 이루며, 맵의 이름과 설명에서 ‘SPOONER STREET’라는 지명이 언급되어 있어 해당 애니메이션의 배경과 연관성이 있는 것으로 보인다. 플레이 방식은 주로 적의 웨이브가 끊임없이 몰려오는 형태의 디펜스로, 플레이어는 건물을 지키고 방어 건물을 건설하여 적을 저지해야 한다. 맵의 해상도는 3072x3072로 상당히 넓으며, 타일 단위는 96x96로 구성되어 있다. 맵의 크기가 크기 때문에 초중반에는 넓은 시야를 활용한 전략적 배치와 관리가 중요하며, 후반으로 갈수록 적의 공격 패턴이 다양해지고 강도가 높아지는 특징을 보인다. 맵의 인코딩은 cp1252로 되어 있으며, 내부 설명에서 ‘Unrigged’라는 표현이 사용된 점으로 보아 밸런스 조절이 이루어진 버전임을 알 수 있다. 이 맵은 디펜스 장르의 유즈맵 중에서 비교적 규모가 크고, 애니메이션을 모티브로 한 개성 있는 테마로 주목받을 만한 요소다. 특히 ‘Family Guy’의 팬이라면 더욱 흥미롭게 플레이할 수 있을 것이며, 디펜스 장르 초보자보다는 어느 정도의 전략적 사고와 피지컬이 요구되는 맵으로 보인다. 맵의 난이도는 제작자나 커뮤니티 평가가 없으므로 명확하지 않지만, 넓은 맵과 다양한 적 웨이브를 고려했을 때 ‘보통’ 이상의 난이도로 예상된다. 방어 건물을 건설할 수 있는 공간이 충분하고, 적의 공격 루트가 명확하게 나뉘어 있어 전략적 플레이가 가능한 맵으로, 디펜스 장르를 люби하는 플레이어들에게 추천할 만한 작품이다. 플레이 전에는 맵의 구조와 방어 건물의 배치 가능 지역을 미리 숙지하는 것이 중요하며, 특히 초반에는 자원 관리와 건물 건설 타이밍을 신중히 결정해야 한다. This map is a custom *StarCraft: Brood War* defense game inspired by the popular animated series *Family Guy*. Officially titled "New Family Guy Ver. 5" (internally referred to as "Family Guy speed feeder 2"), it was likely created by a mapper known as 'FlippyTheGoober.' The map features a desert-themed tileset, with key structures positioned at the center and designated spaces along the outskirts for constructing defensive buildings. The gameplay revolves around a classic "computer defense" style, where players must protect their buildings from relentless enemy waves. The map's name and description reference "SPOONER STREET," hinting at its connection to the show's setting. Players are tasked with fortifying their defenses by strategically placing buildings to fend off increasingly frequent and intense enemy assaults. With a resolution of 3072x3072 and tile units of 96x96, the map is quite expansive, making early-game strategic positioning and resource management crucial. As the game progresses, enemy attack patterns grow more varied and aggressive. Encoded in cp1252 and labeled "Unrigged" in its internal notes, this version appears to have undergone balance adjustments. Among custom defense maps, it stands out for its large scale and unique animated theme, offering an engaging experience—especially for fans of *Family Guy*. While the difficulty isn't officially rated, the map’s size and diverse enemy waves suggest it’s designed for players with solid strategy and execution skills, likely ranking above "average" in challenge. The map provides ample space for defensive structures, with clearly defined enemy attack routes that allow for tactical play. It’s a recommended choice for defense genre enthusiasts, though players should familiarize themselves with the layout and potential building spots before starting. Early-game decisions regarding resource allocation and construction timing are particularly critical to success.
최근 등록된 맵
새로 추가된 파일과 버전을 확인하세요.
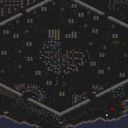
서울에 나타난 용가리 (Seoul Dragon Appears)
‘서울에 나타난 용가리’는 스타크래프트 브루드워의 UMS 유즈맵으로, 서울을 무대로 외계 생명체가 도시를 파괴하는 시나리오를 펼치는 디펜스 장르의 맵입니다. 맵의 중심부에는 거대한 ‘용가리’와 ‘불가사리’가 등장하며, 플레이어는 이들에 맞서 ‘사이커’를 포함한 3명의 방어군으로 맞서 싸워야 합니다. 맵의 전체적인 구조는 서울의 도시 지형을 재현한 듯한 디자인으로 구성되어 있으며, 중앙의 넓은 평야와 그 주변의 건물, 도로 등이 배치되어 있습니다. 플레이어는 5vs3 구도로 진행되며, 방어군은 다수의 외계 생명체를 상대로 건물을 보호하고 도시를 지켜내야 합니다. 맵의 특징은 중앙 광장과 같은 넓은 공간에서 대규모 전투가 벌어지는 점과, 외계 생명체의 지속적인 소환을 방어해야 한다는 점입니다. 또한, 맵 곳곳에 배치된 방어 시설이나 트리거가 존재할 가능성이 있으며, 이를 활용해 전략적으로 전투를 이끌어나가야 합니다. 이 맵은 디펜스 유즈맵의 특성상 지속적인 전투와Resource 관리, 그리고 효율적인 유닛 컨트롤이 요구됩니다. 초보자의 경우 맵의 구조와 외계 생명체의 패턴을 숙지하는 데 시간이 걸릴 수 있지만, 꾸준한 플레이를 통해 점차 적응할 수 있습니다. 추천 대상은 스타크래프트의 디펜스 게임을 즐기는 유저들이며, 특히 대규모 전투와 전략적 플레이를 좋아하는 게이머들에게 적합합니다. 플레이 전에는 맵의 주요 건물 위치와 공격로, 그리고 외계 생명체의 소환 위치를 미리 확인하는 것이 좋습니다. 또한, 방어군의 유닛 조합과 빌드 오더를 미리 준비해두면 전투에서 큰 도움이 될 것입니다. ‘Seoul’s Emerging Wyrm’ is a UMS custom map from *StarCraft: Brood War* set in Seoul, where players defend the city against an alien invasion in a defense-style scenario. The map features a massive ‘Wyrm’ and ‘Ultralisk’ at its center, and players must counter them with a team of three defenders, including a ‘High Templar.’ The layout mirrors Seoul’s urban terrain, with a central plain surrounded by buildings, roads, and other structures. The match follows a 5v3 format, where the defenders must protect key buildings from waves of alien forces. A key feature of the map is the large central plaza, where massive battles unfold, along with the constant need to fend off relentless enemy spawns. Scattered across the map are defensive structures and hidden triggers that players can exploit to gain strategic advantages. Like most defense custom maps, this one demands efficient resource management, precise unit control, and adaptability. Beginners may struggle initially with the map’s layout and enemy patterns but can improve with consistent practice. It’s best suited for players who enjoy *StarCraft* defense games, particularly those who prefer large-scale battles and tactical play. Before starting, it’s wise to memorize key building locations, attack routes, and enemy spawn points. Preparing a strong unit composition and build order in advance will also give defenders a significant edge in combat.
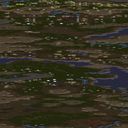
카이다린 (Khaidarin)
이 맵은 스타크래프트 브루드워의 유즈맵으로, 사막 타일셋을 기반으로 한 디펜스 장르의 맵이다. 플레이어는 단독으로 진행하는 구조로 보이며, 사막 지형을 배경으로 한 방어전을 펼치게 된다. 맵의 전체적인 분위기는 드넓은 사막 평야와 드문드문한 오아시스, 바위 지형이 어우러져 있으며, 이는 디펜스 전장에서 흔히 볼 수 있는 오픈형 맵 디자인을 연상시킨다. 맵의 크기는 2048 x 8192로 매우 길고 넓어, 플레이어는 한 쪽 끝에서 적의 공격을 방어해야 하는 구조로 추정된다. 맵의 제목과 내부 설명에 따르면, 러시아어와 이 포함되어 있어 국제적인 감수성이 반영된 작품으로 보인다. 디펜스 장르답게, 플레이어는 일정 시간 동안 적의 웨이브 공격을 막아내야 하며, 이를 위해 전략적인 자원 관리와 병력 배치가 필수적일 것으로 예상된다. 맵의 타일 단위가 64 x 256으로 높게 설정되어 있어, 세부적인 지형 디자인과 전략적 깊이가 강조될 가능성이 크다. 이 맵은 초보 플레이어보다는 디펜스 장르에 익숙한 유저들에게 추천되며, 긴 플레이 타임과 전략적 요구로 인해 집중력이 요구되는 경험을 제공할 것으로 보인다. 플레이 전에는 맵의 vittoria 조건과 스킬/업그레이드 시스템을 미리 확인하는 것이 좋다. 또한, 사막 타일셋의 특성상 시야 확보와 지형지물 활용이 중요할 것으로 예상된다. This map is a *StarCraft: Brood War* custom map in the defense genre, built on a desert tileset. Players progress solo, engaging in defense battles across vast desert plains dotted with occasional oases and rocky terrain—an open-style layout typical of defense maps. The map’s dimensions (2048 x 8192) are extremely long and wide, suggesting a structure where players must defend one end from waves of enemy attacks. The title and internal descriptions include translations in Russian and English, reflecting an internationally minded design. As a defense-focused game, players must withstand enemy waves over time, requiring strategic resource management and troop positioning. With a high tile unit size (64 x 256), the terrain and strategic depth are likely to be finely detailed. This map is better suited for players familiar with defense genres rather than beginners, offering a long playtime and demanding focus. It’s advisable to check the victory conditions and skill/upgrade systems before playing. Given the desert setting, securing vision and leveraging terrain features will be crucial.
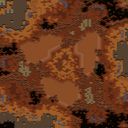
아포칼립스 1.4 샌드박스 (Apocalypse 1.4 SandBox)
스타크래프트 브루드워의 유즈맵 ‘아포칼립스 1.4 샌드박스’는 ‘Use Map Settings’ 전용으로 제작된 대규모 디펜스형 맵으로, 황혼 테마의 넓은 평원과 독특한 구조물이 특징이다. 맵의 핵심은 플레이어가 다양한 유닛과 업그레이드를 활용해 끊임없이 몰려드는 적 웨이브를 방어하는 것이며, 샌드박스 모드답게 맵 설정에서 난이도와 적 유닛, 수비 패턴 등을 자유롭게 조정할 수 있다. 맵의 크기는 4096x4096으로 매우 넓으며, 중앙에 위치한 넓은 평원과 주위에 배치된 요새형 건물들이 방어 거점으로 활용된다. 맵의 인코딩은 utf8로 한글 표시가 깨지지 않으며, 내부 제목과 파일명에서도 확인되는 것처럼 ‘Apocalypse 1.4 SandBox’라는 제목이 자연스럽게 표시된다. 플레이어는 시작 지점에서부터 조종 가능한 유닛을 배치하거나, 요새를 업그레이드하며 적의 공격을 막아내야 한다. 샌드박스 모드 특성상 게임의 밸런스는 플레이어의 설정과 전략에 따라 크게 달라지며, 맵의 넓은 공간을 활용한 대규모 전투가 예상된다. 또한, 제작자 정보와 이메일이 명시되어 있어 추가적인 피드백이나 업데이트 정보를 확인할 수 있다. 이 맵은 디펜스 장르에 익숙한 플레이어들에게는 물론, 샌드박스 모드를 통해 자신만의 전술을 시험해보고 싶은 유저들에게도 추천할 만한 작품이다. 특히, 넓은 맵과 다양한 구조물을 활용한 디자인으로 인해 플레이 경험이 풍부해질 수 있으며, 적의 웨이브가 끊임없이 이어지므로 긴장감을 유지할 수 있다. 사용 전 반드시 맵 설정을 확인하여 자신의 플레이 스타일에 맞는 난이도와 적 유닛을 설정하는 것이 중요하며, 넓은 맵을 활용한 전략적 배치와 업그레이드 타이밍이 승패를 좌우할 수 있다. 또한, 샌드박스 모드답게 초보자부터 숙련자까지 다양한 층위의 플레이어가 자신에게 맞는 설정을 적용해 즐길 수 있는 장점이 있다. Apocalypse 1.4 SandBox is a large-scale defense-style custom map in StarCraft: Brood War, designed exclusively for the 'Use Map Settings' mode. The map features a twilight-themed vast plain with distinctive structures, where players must defend against endless waves of enemies using various units and upgrades. As a sandbox mode, players can freely adjust difficulty, enemy units, and defense patterns through map settings. The map spans 4096x4096, offering ample space for strategic gameplay, with a central plain and fortress-like buildings positioned around it for defense. The utf8 encoding ensures Korean text displays correctly, and the title 'Apocalypse 1.4 SandBox' is consistently visible in both the internal title and filename. Players start from designated positions, deploying units or upgrading fortresses to withstand enemy attacks. Given the sandbox nature, balance heavily depends on player settings and strategies, with large-scale battles unfolding across the expansive map. The inclusion of creator information and an email address allows for potential feedback or update inquiries. This map is ideal for players familiar with the defense genre, as well as those eager to test their tactics in sandbox mode. Its wide map design and diverse structures provide a rich gameplay experience, with continuous enemy waves maintaining high tension throughout. Before playing, it is essential to check map settings to customize difficulty and enemy units to match your playstyle. Strategic unit placement and upgrade timing across the vast map are critical to victory. The sandbox mode’s flexibility allows both beginners and experienced players to tailor settings for an enjoyable experience.
헌터 SandBox
헌터 SandBox는 스타크래프트 브루드워의 유즈맵으로, 모래 사막 지형을 배경으로 한 샌드박스형 디펜스 맵입니다. 맵 곳곳에 흩어져 있는Hunter(사냥꾼) 유닛을 조합하여 끊임없이 몰려오는 적들을 방어하는 것이 주된 목표입니다. 맵 중앙의 넓은 개활지와 곳곳의 협곡, 언덕 지형이 특징으로, 사냥꾼의 이동 경로와 시야 확보가 전략의 핵심입니다.Hunter는 기본적으로 근접 공격을 하지만, 특정 조건에서 원거리 공격이나 특수 능력이 발동되는 것으로 추정됩니다. 플레이어는 초기 자원을 확보한 후, 사냥꾼을 생산해 방어 라인을 구축하거나, 자원을 투자해 강력한 유닛으로 업그레이드할 수 있습니다. 적의 공격 패턴은 랜덤으로 생성되는 것으로 보이며, 난이도가 높아질수록 적의 숫자와 체력이 증가합니다.맵의 구조상, 초기 방어 라인을 구축하는 것이 중요합니다. 중앙 개활지는 넓은 시야를 제공하지만, 적의 접근로가 많아 신속한 대응이 요구됩니다. 반면, 협곡과 언덕 지형은 적의 접근을 지연시킬 수 있는 요충지이므로, 방어 병력을 배치하는 데 유리합니다. 또한, 맵 곳곳에 흩어진 자원 채취 지역을 확보하여 지속적인 자원 공급을 유지하는 것이 게임의 장기전을 좌우합니다.헌터 SandBox는 비교적 높은 난이도를 자랑하는 디펜스 유즈맵으로, 전략적 사고와 빠른 판단력이 요구됩니다. 초기 자원 관리와 방어 라인 구축에 실패하면 게임이 순식간에 끝날 수 있으므로, 플레이어는 신중하게 판단을 내려야 합니다. 또한,Hunter의 특수 능력이나 업그레이드 시스템이 맵의 재미를 높이는 요소로 작용할 수 있습니다. 이 맵은 디펜스를 즐기는 플레이어뿐만 아니라, 전략적 사고를 테스트해보고 싶은 유저들에게도 추천할 만합니다. 특히, 사막 지형의 독특한 분위기와 조화로운 맵 디자인이 게임의 몰입감을 더해줍니다.플레이 전에는 Hunter의 공격 패턴과 특수 능력, 그리고 맵의 주요 자원 채취 지역을 미리 숙지하는 것이 좋습니다. 또한, 방어 라인을 구축할 때, 협곡이나 언덕 지형을 최대한 활용하여 적의 접근을 지연시키는 전략을 세워야 합니다. 초기 자원 관리에도 신경을 써서, 지속적인 자원 공급을 유지하는 것이 중요합니다. Hunter SandBox is a custom defense map from StarCraft: Brood War, set in a sandy desert landscape. The core objective is to defend against waves of enemies by combining Hunter units scattered across the map. The map features a wide open central area, canyons, and elevated terrain, making strategic positioning and visibility key to success. Hunters primarily engage in melee attacks, but they may also gain ranged or special abilities under certain conditions. Players start by securing resources, which can be used to produce Hunters for reinforcing defense lines or upgrading them into more powerful units. Enemy attack patterns appear to be randomly generated, with both their numbers and health increasing as difficulty rises. Given the map’s layout, establishing an early defense line is crucial. The central open area offers broad visibility but has many enemy approach routes, requiring quick reactions. Canyons and elevated terrain, however, can slow enemy advances, making them ideal defensive strongholds. Additionally, controlling resource-gathering spots scattered across the map is vital for sustaining long-term gameplay. Hunter SandBox is a challenging defense custom map that demands strategic thinking and rapid decision-making. A single misstep in early resource management or defense line setup can lead to a swift defeat, so players must make careful choices. The special abilities and upgrade system for Hunters further enhance the map’s appeal, making it enjoyable for both defense enthusiasts and players looking to test their strategic skills. The unique desert atmosphere and cohesive map design also contribute to an immersive experience. Before playing, it’s advisable to familiarize yourself with Hunter attack patterns, special abilities, and key resource locations. When building defense lines, leverage canyons and elevated terrain to delay enemy movements. Efficient early resource management is equally important to maintain a steady supply for upgrades and reinforcements.
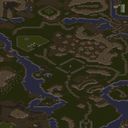
왕국 전쟁 (Kingdom War)
‘왕국 전쟁’은 8명의 플레이어가 참가하는 스타크래프트 브루드워의 유즈맵으로, 잃어버린 왕국들의 전쟁을 테마로 한 디펜스 장르의 맵이다. 맵 내부는 사막 타일셋으로 구성되어 있으며, 중앙에 위치한 주요 전장과 그 주변을 따라 배치된 방어 거점으로 구성되어 있다. 플레이어는 각각의 왕국을 대표하는 유닛을 조종하며, 끊임없이 몰려오는 적의 공격을 방어해야 한다. 맵의 특징 중 하나는 ‘용의 동굴’이 밸런스 패치를 통해 하향 조정되었다는 점과 ‘불타는 다리’라는 새로운 요소가 추가되었다는 점인데, 이는 플레이어들에게 더 전략적인 대비를 요구한다. 맵의 구조는 중앙 교두보를 중심으로 방어선을 구축할 수 있도록 설계되어 있으며, 좁은 통로와 넓은 평지 사이를 오가며 유닛의 배치와 운영이 중요한 포인트로 작용한다. 초반에는 소수의 방어 유닛으로 적의 공격을 버텨내야 하며, 시간이 흐를수록 적의 공격 규모와 난이도가 증가하는 구조로 보인다. 맵의 난이도는 맵 제작자가 직접 밸런스를 조정했다는 점을 고려할 때, 초보 플레이어보다는 중급 이상의 실력을 가진 유저들이 즐기기에 적합할 것으로 추정된다. 또한, 맵의 배경 스토리나 승리 조건 등은 명확히 드러나 있지 않지만, ‘전쟁’이라는 주제에 맞게 적의 본진 파괴보다는 방어에 중점을 둔 플레이가 주를 이룰 것으로 보인다. 이 맵을 플레이하기 전에는 맵 에디터에서 제공되는 기본 유닛과 특수 유닛의 특징을 미리 확인하고, 방어선 구축에 필요한 자원 관리와 유닛 조합을 숙지하는 것이 중요하다. 특히, ‘용의 동굴’과 ‘불타는 다리’가 어떻게 전장에 영향을 미치는지 미리 테스트해 보는 것이 좋다. 전체적으로는 디펜스 장르의 유즈맵답게 전략성과 긴장감을 동시에 느낄 수 있는 맵으로, 팀 플레이보다는 개인 방어 능력을 중시하는 경험을 제공할 것이다. ‘Kingdom War’ is a StarCraft: Brood War user-made map for eight players, featuring a defense-style theme centered around the wars of lost kingdoms. The interior of the map is built with a desert tileset, consisting of a central battlefield surrounded by strategically placed defensive strongholds. Players control units representing their respective kingdoms and must defend against relentless enemy attacks. One of the map’s key features is the balance adjustment of the ‘Dragon’s Cave,’ which has been weakened, alongside the addition of a new element called the ‘Burning Bridge.’ These changes demand more strategic preparation from players. The map’s design allows players to build defensive lines around the central foothold, with narrow passages and open plains requiring careful unit placement and management. Early on, players must endure enemy attacks with only a few defensive units, and as time passes, the scale and difficulty of enemy assaults increase. Given that the map creator has personally balanced its difficulty, it is likely best suited for intermediate or higher-level players rather than beginners. While the background story and victory conditions are not explicitly clear, the theme of ‘war’ suggests that the focus lies more on defense than destroying the enemy’s main base. Before playing, it’s important to review the characteristics of the basic and special units provided in the map editor, familiarize yourself with resource management for building defenses, and understand optimal unit compositions. In particular, testing how the ‘Dragon’s Cave’ and ‘Burning Bridge’ influence the battlefield beforehand is recommended. Overall, this is a defense-style custom map that delivers both strategy and tension, offering an experience that emphasizes individual defensive skills over team play.
죄수 탈출 (Der Gefangene)
Der Gefangene는 독일어로 '죄수'를 뜻하는 이 맵은 스타크래프트 브루드워의 유즈맵으로, 단일 플레이어용 탈출형 디펜스 장르에 속한다. 맵은 황무지 타일셋을 기반으로 한 4096x4096의 넓은 공간을 자랑하며, 중앙에 위치한 감옥 구조물을 중심으로 적의 지속적인 공격을 방어하면서 목표물을 해방하거나 탈출하는 것이 주요 목표로 보인다. 맵의 지형은 대체로 평탄한 황무지 지형에 감옥 건물과 주변 방어 시설이 배치되어 있어, 적의 접근로를 차단하거나 요격할 수 있는 구조로 설계된 것으로 추정된다. 맵의 중앙에 위치한 감옥은 플레이어가 조종하는 유닛이 일정 시간 동안 머무르며 적의 공격을 버텨야 하는 핵심 구조물로 보이며, 주변에는 적의 소규모 병력이 끊임없이 생산되어 공격해 오는 것으로 보인다. 플레이어는 제한된 자원과 유닛을 활용해 감옥을 방어하거나 탈출 경로를 확보해야 하며, 맵의 지형을 활용한 전략적 요격이 중요할 것으로 보인다. 맵의 난이도는 감옥 주변의 방어 시설과 지형의 난해함에 따라 초보와 숙련자 모두 즐길 수 있을 것으로 보이며, 특히 방어와 자원 관리 능력이 요구되는 하드코어한 플레이 경험을 제공할 것으로 예상된다. 추천 대상은 스타크래프트의 디펜스 및 서바이벌 장르에 익숙한 플레이어, 또는 단일 플레이어용 맵을 즐기는 유저들에게 적합할 것이다. 플레이 전 감옥 주변의 방어 시설과 지형적 특징을 미리 파악하고, 자원 관리와 유닛 배치 전략을 숙지하는 것이 중요하다. 또한, 적의 공격 패턴이 반복적이므로 이를 예측하고 대응하는 연습이 필요하다. This map, titled *Der Gefangene* (meaning "The Prisoner" in German), is a *StarCraft: Brood War* custom map in the single-player escape defense survival genre. Set on a vast 4096x4096 wasteland tile, the map revolves around a central prison structure where players must defend against relentless enemy waves while either rescuing a target or making their escape. The terrain is mostly flat, featuring the prison and surrounding defensive structures designed to block or intercept enemy approaches. The prison itself serves as a key location where the player’s units must hold out against attacks for a set duration. Small enemy forces continuously spawn and launch assaults from the surroundings, forcing the player to manage limited resources and units strategically. Due to the map’s defensive structures and terrain complexity, it offers an engaging challenge for both beginners and experienced players, delivering a hardcore survival experience that demands strong defense and resource management skills. It’s best suited for those familiar with *StarCraft*’s defense or survival modes or players who enjoy single-player custom maps. Before playing, it’s crucial to study the prison’s defensive layout and terrain features, refine unit placement strategies, and practice predicting and countering repetitive enemy attack patterns.
Stacked Cannon Defense 10-Way
스타크래프트 브루드워의 대표적인 방어형 유즈맵인 〈Stacked Cannon Defense 10-Way〉는 10방향의 다양한 경로로 몰려드는 적을 상대하는 디펜스 장르의 정석으로 꼽힌다. 맵 중앙에 위치한 플레이어 기지에서부터 사방으로 뻗어나가는 길목을 따라 수많은 웨이브가 끊임없이 밀려오며, 각 라인은 각각의 포지션에 특화된 방어 건물과 유닛으로 무장되어 있다. 특히, 10개의 방향 중 일부는 좁고 복잡한 길로 구성되어 있어 유닛의 배치와 업그레이드 타이밍이 승패를 좌우하는 핵심 요소로 작용한다. 맵은 우주 테마의 타일셋을 사용해 우주 공간 속에서 전투가 벌어지는 듯한 분위기를 연출하며, 타일 단위는 128x128로 넓게 펼쳐진 맵의 스케일을 느낄 수 있다. 플레이어는 제한된 자원으로 최적의 방어 라인을 구축해야 하며, 자원 관리와 병력 배치를 동시에 신경 써야 한다. 또한, 맵의 난이도는 각 웨이브의 강도와 적의 조합에 따라 달라지며, 특히 후반부로 갈수록 강력한 적들이 등장해 전략의 변화가 요구된다. 초보자들은 기본적인 방어 라인 구축과 자원 확보에 집중하는 것이 중요하고, 숙련자들은 자원 효율과 업그레이드 우선순위를 고려한 플레이가 필요할 것이다. 맵의 구조상 중앙 기지 방어 외에도 측방 및 후방 경로도 중요하기 때문에, 모든 방향을 균형 있게 방어하는 능력이 요구된다. 또한, 적의 진로가 겹치는 지점에서는 다중 방어 라인을 구축해 효율성을 극대화할 수 있다. 이 맵은 디펜스 장르에 익숙한 플레이어뿐만 아니라, 새로운 전략을 시도해 보고 싶은 유저들에게도 좋은 도전 과제가 될 것이다. 맵의 인기는 오랜 기간 동안 유지되고 있으며, 다양한 커스텀 맵과의 비교를 통해 더욱 발전된 디펜스 전략을 세울 수 있는 기회를 제공한다. 플레이 전에는 맵의 구조를 미리 숙지하고, 각 방향의 진로와 주요 방어 포인트를 확인하는 것이 좋다. 또한, 자원 확보와 업그레이드 타이밍을 연습해 두면 실전에서도 보다 안정적인 플레이가 가능하다. 이 맵은 디펜스 유저라면 반드시 한 번쯤은 플레이해 볼 만한 가치가 있는 맵으로, 반복 플레이를 통해 자신의 전략을 다듬어 나갈 수 있을 것이다. 디펜스 장르의 기본기를 쌓기에 최적화된 맵으로, 방어의 묘미를 느낄 수 있는 작품이다. "Stacked Cannon Defense 10-Way" is a quintessential defense-style custom map in *StarCraft: Brood War*, renowned for its classic gameplay where players defend against waves of enemies approaching from ten distinct directions. Waves continuously surge along paths radiating from the central player base, with each route equipped with specialized defensive structures and units tailored to its challenges. Some of the ten paths feature narrow, intricate corridors, making unit placement and upgrade timing critical factors in determining victory or defeat. The map employs a space-themed tileset, immersing players in the sensation of combat unfolding in the vastness of outer space, with its expansive 128x128 tile layout amplifying the scale of the battlefield. Players must construct optimal defense lines under resource constraints, balancing resource management with strategic troop deployment. The difficulty escalates with each wave, as enemy compositions grow stronger, demanding adaptive strategies—especially in the later stages. Beginners should focus on establishing basic defense lines and securing resources, while experienced players must prioritize resource efficiency and upgrade timings. Given the map’s structure, defending side and rear paths is just as crucial as protecting the central base, requiring players to maintain balanced coverage across all directions. Where enemy routes converge, building multiple layers of defense can maximize efficiency. This map serves as an excellent challenge not only for seasoned defense players seeking to refine their strategies but also for those eager to experiment with new tactics. Its enduring popularity has fostered continuous evolution, allowing players to compare and integrate advanced defense strategies from various custom maps. Before playing, it’s advisable to familiarize yourself with the map’s layout, identifying key paths and critical defense points. Practicing resource gathering and upgrade timings beforehand will ensure smoother, more stable gameplay in actual matches. A must-play for defense enthusiasts, "Stacked Cannon Defense 10-Way" offers a rewarding experience that rewards repeated attempts, allowing players to hone their strategies over time. It stands as an ideal title for mastering the fundamentals of the defense genre while appreciating the artistry of strategic fortification.
이블 하우스 (Evil House)
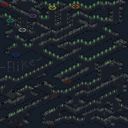
스타크래프트 브루드워의 공포 테마 유즈맵 「Evil House」는 이름 그대로 공포를Theme를 극대화한 디펜스 장르의 맵입니다. 맵 내부에는 어두운 배경과 붉은 조명으로 가득한 집 구조가 펼쳐지며, 플레이어는 이 공간에서 끊임없이 몰려오는 적 유닛을 상대로 방어전을 펼쳐야 합니다. 맵의 구조는 복잡한 복도와 방으로 구성되어 있어, 적의 이동 경로를 예측하고 요새화된 포인트를 확보하는 전략이 중요합니다. 특히, 맵 곳곳에 배치된 '소리'와 같은 시각적 효과가 공포감을 조성하며, 플레이어의 긴장감을 높이는 요소로 작용합니다. 전투는 주로 건물이나 방어 시설을 건설해 적을 막아내는 방식으로 진행되며, 일부 구간에서는 제한된 자원으로 버텨야 하는 타이트한 상황이 펼쳐집니다. 맵의 난이도는 적의 밀집도와 패턴에 따라 좌우되며, 초보 플레이어는 방어 라인을 구축하는 데 어려움을 느낄 수 있습니다. 「Evil House」는 공포와 디펜스의 조화를 추구하는 맵으로, 공포감을 즐기는 유저들에게 특히 추천됩니다. 다만, 맵의 공포 요소는 주관적일 수 있어 플레이 전 자신의 감수성을 고려해 보시기 바랍니다. 또한, 맵의 내부 설명에서 제작자가 언급한 것처럼, 후속작 「Evil House 2」가 더 나아질 것이라 언급된 만큼, 현재 버전의 완성도는 다소 아쉬울 수 있습니다. nevertheless, 공포와 전략의 조합을 경험하고자 한다면 시도해볼 만한 가치가 있습니다. Evil House is a Brood War custom map that maximizes the horror theme through a defense-style gameplay. The map features a dark, claustrophobic house structure illuminated by eerie red lighting, where players must continuously fend off waves of enemy units. The layout consists of intricate corridors and rooms, requiring strategic placement of defenses and prediction of enemy movement paths. Visual effects like 'sounds' enhance the terrifying atmosphere, heightening player tension. Gameplay revolves around constructing buildings or fortifications to block enemies, with some segments demanding survival under tight resource constraints. Difficulty scales with enemy density and patterns, posing challenges for beginners in establishing defensive lines. Designed for horror and defense enthusiasts, Evil House caters to players seeking a thrilling experience. However, the map's horror elements are subjective, so players should assess their sensitivity beforehand. The creator’s note about a potential sequel suggests improvements may come, but the current version offers a unique blend of fear and strategy worth exploring.
맵 선택 가이드
태그는 맵의 핵심 특징을 빠르게 설명하지만 제작 버전마다 규칙이 다를 수 있습니다. 상세 설명에서 권장 인원, 난이도, 플레이 시간과 버전을 함께 확인한 뒤 다운로드하세요.