
도전형 맵 스타크래프트 맵 모음
'도전형 맵' 태그가 등록된 맵을 모았습니다. 장르 하나로 찾기 어려운 플레이 방식, 난이도와 특징을 중심으로 인기 맵과 최신 맵을 비교해 보세요.
- 등록 맵
- 2개
- 누적 다운로드
- 0
- 누적 조회
- 69
인기 맵
다운로드와 조회 반응이 높은 맵입니다.
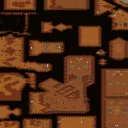
Impossible Scenarios Desert2 (불가능한 시나리오: 황무지2)
‘Impossible Scenarios Desert2’는 스타크래프트 브루드워의 유즈맵으로, ‘Fadetoblack’이 제작한 ‘Impossible Scenarios’ 시리즈의 Desert 스타일을 계승한 맵이다. 이 맵은 황무지 지형과 섬세한 타일셋을 기반으로 삼아 플레이어에게 끊임없는 도전과 긴장감을 제공하는 디펜스 장르의 유즈맵으로 분류된다. 맵의 전체적인 분위기는 어두운 황무지와 붉은 노을이 어우러져 있으며, 맵 중앙에는 거대한 요새와 같은 구조물이 자리 잡고 있다. 이를 둘러싼 길목과 협소한 통로들은 적의 물량 공격을 효과적으로 방어할 수 있는 구조로 설계되어 있으며, 플레이어는 제한된 자원으로 끊임없이 밀려오는 적을 상대로 전략을 세워야 한다. 플레이 방식은 기본적으로 컴퓨터(저그, 테란, 프로토스)의 지속적인 러시를 방어하는 ‘컴까기’ 형식으로 진행된다. 맵 곳곳에 배치된 방어 건물과 유닛 생산 시설은 플레이어의 전략에 따라 자유롭게 활용할 수 있으며, 지형 특성을 살려 요새화할 수 있는 위치가 다수 존재한다. 특히 맵의 가장자리와 중앙 요새 주변은 방어 포인트로 활용하기 좋은 지형으로, 플레이어는 이들을 중심으로 방어 라인을 구축하는 것이 핵심이다. 또한, 맵의 일부 구역은 협소한 통로로 연결되어 있어 방어에 유리한 지형을 만들 수 있지만, 반대로 적의 진입로를 한 곳에 집중시킬 수 있어 위험하기도 하다. 이 맵의 가장 큰 특징은 ‘불가능한 시나리오’라는 컨셉에 맞게 극한의 난이도를 자랑한다는 점이다. 시리즈의 이름에서 알 수 있듯이, 이 맵은 단순히 방어하는 것을 넘어 플레이어의 전략적 사고와 순발력을 끊임없이 시험한다. 맵 곳곳에는 숨겨진 트리거나 특수한 조건이 있을 가능성이 있으며, 이를 파악하고 대비하는 것이 승리의 열쇠가 될 수 있다. 또한, 맵의 전체적인 규모가 크고 복잡한 구조를 가지고 있어 초보자는 물론 경험자도 쉽게 적응하기 어려운 구조로 설계되어 있다. 이 맵을 추천하는 대상은 스타크래프트 유즈맵 중에서도 도전적인 플레이를 즐기는 유저들이다. 특히 디펜스 장르에 익숙하지 않거나, 새로운 전략을 시도해 보고 싶은 플레이어에게 적합하다. 또한, 팀 플레이보다는 혼자서도 충분히 즐길 수 있는 구조지만, 팀원과의 협동 플레이가 필요하다면 팀원 간의 원활한 소통이 필수적일 것이다. 플레이 전에는 맵의 구조를 꼼꼼히 분석하고, 방어 라인 구축에 필요한 자원의 배치를 미리 계획하는 것이 중요하다. 또한, 예상치 못한 적의 공격 패턴에 대비해 유연하게 대처할 수 있는 준비를 갖춰야 한다. ‘Impossible Scenarios Desert2’ is a custom map for *StarCraft: Brood War*, inheriting the Desert style from the *Impossible Scenarios* series created by Fadetoblack. This map is classified as a defense genre custom map, offering players endless challenges and tension through its barren terrain and intricate tileset. The overall atmosphere blends a dark wasteland with a crimson sunset, and at the center of the map stands a massive fortress-like structure. The narrow paths and constricted passages surrounding it are designed to effectively counter waves of enemy attacks, forcing players to strategize with limited resources against relentless enemy forces. The gameplay follows a "comp-scumming" format, where players must defend against continuous rushes from AI-controlled factions (Zerg, Terran, and Protoss). Defense buildings and unit production facilities scattered across the map can be freely utilized based on the player’s strategy, with multiple locations that allow for fortification by leveraging the terrain. Key defensive spots include the edges of the map and areas around the central fortress, where players should focus on establishing strong defensive lines. Some zones are connected by tight corridors, which can create advantageous defensive terrain but also concentrate enemy entry points, posing risks. The map’s defining feature is its extreme difficulty, living up to the "impossible scenarios" concept. Beyond mere defense, it constantly tests the player’s strategic thinking and quick decision-making. Hidden triggers or special conditions may exist throughout the map, and uncovering and preparing for them could be the key to victory. The map’s large scale and complex structure make it difficult for both beginners and experienced players to adapt to easily. This map is recommended for players who enjoy challenging custom maps in *StarCraft*. It suits those looking to try new strategies or unfamiliar with the defense genre. While it can be enjoyed solo, team coordination is essential if playing cooperatively. Before starting, it’s important to carefully analyze the map’s layout, plan resource distribution for defense lines, and prepare flexible responses to unexpected enemy attack patterns.
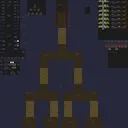
트리 디펜스 프릭킨 하드 (Tree Defense Fricken HARD)
스타크래프트 브루드워의 유즈맵 장인들에게 단연 주목받는 디펜스 맵 'Tree Defense Fricken HARD'는 이름 그대로 극한의 난이도를 자랑하는 트리 디펜스 유형으로, 플레이어는 끊임없이 몰려오는 적 공세를 방어하며 나무를 성장시켜야 한다. 맵은 넓은 황무지 타일셋을 배경으로 펼쳐지며, 중앙에는 거대한 나무가 자리 잡고 있어 이를 보호하는 동시에 성장시켜야 하는 것이 핵심 목표로 보인다. 적_COLOR1_이나 적_COLOR2_ 유닛들이 끊임없이 스폰되어 나무 주변을 공격해 오며, 플레이어는 제한된 자원과 유닛으로 이를 저지해야 한다. 특히 'Fricken HARD'라는 제목에서 짐작할 수 있듯, 난이도는 매우 높게 설계되어 있어 초보자는もちろん, 숙련자조차도 전략과 타이밍을 carefully 하게 조율해야만 살아남을 수 있을 정도다. 나무의 성장 단계에 따라 방어 능력과 보상이 달라지는 구조로, 초기에는 약한 유닛으로 버티며 중반에는 강력한 방어 타워를 건설하고, 후기로 갈수록 적의 공세가 거세지는 패턴이 반복된다. 맵의 디자인 특성상, 플레이어는 항상 적의 스폰 위치를 주시하며 자원을 효율적으로 배분해야 하고, 나무의 성장 속도를 끌어올리기 위한 추가적인 전략이 요구된다. 이 맵은 단순히 방어뿐만 아니라 자원 관리와 성장 관리까지 종합적으로 요구하는 종합 전략 게임으로, 디펜스 유즈맵의 진수를 느낄 수 있는 작품이다. 추천 대상은 디펜스와 전략 게임을 좋아하는 플레이어로, 특히 극한의 난이도를 즐기는 유저라면 한 번 도전해 볼 만한 가치가 있다. 플레이 전에는 나무의 성장 단계와 적의 스폰 패턴을 미리 숙지하고, 초반 자원 관리와 방어 타워의 배치에 신경 쓰는 것이 중요하다. 또한, 맵의 넓고 복잡한 구조상 미니맵을 적극 활용해 적의 움직임을 실시간으로 파악하는 것이 필수적이다. 이 맵을 플레이하면서 얻은 전략적 감각은 다른 디펜스 유즈맵에서도 큰 도움이 될 것이다. StarCraft: Brood War's custom map masterpiece, *Tree Defense Fricken HARD*, is a defense-type map renowned for its extreme difficulty. As the name suggests, it’s a tree defense game where players must fend off relentless enemy waves while nurturing a growing tree. Set against a vast wasteland tileset, the map features a massive tree at its center that players must both protect and help grow. Enemies—spawned continuously by enemy_COLOR1_ and enemy_COLOR2_—swarm the area around the tree, forcing players to hold them off with limited resources and units. As the title *Fricken HARD* implies, the difficulty is punishing; even experienced players must carefully coordinate strategies and timing to survive. The tree’s growth stages directly influence defensive capabilities and rewards, creating a cycle where early waves are endured with weak units, mid-game calls for constructing powerful towers, and late-game escalates with increasingly intense enemy assaults. Due to the map’s design, players must constantly monitor spawn points, allocate resources wisely, and employ additional strategies to accelerate the tree’s growth. This isn’t just a defense challenge—it’s a comprehensive strategy game demanding resource management, growth optimization, and tactical foresight. For fans of defense and strategy games, especially those seeking brutal difficulty, it’s a must-try. Before playing, study the tree’s growth phases and enemy spawn patterns, and prioritize early resource management and tower placement. Given the map’s sprawling and intricate layout, using the minimap to track enemy movements in real time is essential. Mastering this map will sharpen your strategic instincts for other defense-style custom maps.
최근 등록된 맵
새로 추가된 파일과 버전을 확인하세요.
트리 디펜스 프릭킨 하드 (Tree Defense Fricken HARD)
스타크래프트 브루드워의 유즈맵 장인들에게 단연 주목받는 디펜스 맵 'Tree Defense Fricken HARD'는 이름 그대로 극한의 난이도를 자랑하는 트리 디펜스 유형으로, 플레이어는 끊임없이 몰려오는 적 공세를 방어하며 나무를 성장시켜야 한다. 맵은 넓은 황무지 타일셋을 배경으로 펼쳐지며, 중앙에는 거대한 나무가 자리 잡고 있어 이를 보호하는 동시에 성장시켜야 하는 것이 핵심 목표로 보인다. 적_COLOR1_이나 적_COLOR2_ 유닛들이 끊임없이 스폰되어 나무 주변을 공격해 오며, 플레이어는 제한된 자원과 유닛으로 이를 저지해야 한다. 특히 'Fricken HARD'라는 제목에서 짐작할 수 있듯, 난이도는 매우 높게 설계되어 있어 초보자는もちろん, 숙련자조차도 전략과 타이밍을 carefully 하게 조율해야만 살아남을 수 있을 정도다. 나무의 성장 단계에 따라 방어 능력과 보상이 달라지는 구조로, 초기에는 약한 유닛으로 버티며 중반에는 강력한 방어 타워를 건설하고, 후기로 갈수록 적의 공세가 거세지는 패턴이 반복된다. 맵의 디자인 특성상, 플레이어는 항상 적의 스폰 위치를 주시하며 자원을 효율적으로 배분해야 하고, 나무의 성장 속도를 끌어올리기 위한 추가적인 전략이 요구된다. 이 맵은 단순히 방어뿐만 아니라 자원 관리와 성장 관리까지 종합적으로 요구하는 종합 전략 게임으로, 디펜스 유즈맵의 진수를 느낄 수 있는 작품이다. 추천 대상은 디펜스와 전략 게임을 좋아하는 플레이어로, 특히 극한의 난이도를 즐기는 유저라면 한 번 도전해 볼 만한 가치가 있다. 플레이 전에는 나무의 성장 단계와 적의 스폰 패턴을 미리 숙지하고, 초반 자원 관리와 방어 타워의 배치에 신경 쓰는 것이 중요하다. 또한, 맵의 넓고 복잡한 구조상 미니맵을 적극 활용해 적의 움직임을 실시간으로 파악하는 것이 필수적이다. 이 맵을 플레이하면서 얻은 전략적 감각은 다른 디펜스 유즈맵에서도 큰 도움이 될 것이다. StarCraft: Brood War's custom map masterpiece, *Tree Defense Fricken HARD*, is a defense-type map renowned for its extreme difficulty. As the name suggests, it’s a tree defense game where players must fend off relentless enemy waves while nurturing a growing tree. Set against a vast wasteland tileset, the map features a massive tree at its center that players must both protect and help grow. Enemies—spawned continuously by enemy_COLOR1_ and enemy_COLOR2_—swarm the area around the tree, forcing players to hold them off with limited resources and units. As the title *Fricken HARD* implies, the difficulty is punishing; even experienced players must carefully coordinate strategies and timing to survive. The tree’s growth stages directly influence defensive capabilities and rewards, creating a cycle where early waves are endured with weak units, mid-game calls for constructing powerful towers, and late-game escalates with increasingly intense enemy assaults. Due to the map’s design, players must constantly monitor spawn points, allocate resources wisely, and employ additional strategies to accelerate the tree’s growth. This isn’t just a defense challenge—it’s a comprehensive strategy game demanding resource management, growth optimization, and tactical foresight. For fans of defense and strategy games, especially those seeking brutal difficulty, it’s a must-try. Before playing, study the tree’s growth phases and enemy spawn patterns, and prioritize early resource management and tower placement. Given the map’s sprawling and intricate layout, using the minimap to track enemy movements in real time is essential. Mastering this map will sharpen your strategic instincts for other defense-style custom maps.
Impossible Scenarios Desert2 (불가능한 시나리오: 황무지2)
‘Impossible Scenarios Desert2’는 스타크래프트 브루드워의 유즈맵으로, ‘Fadetoblack’이 제작한 ‘Impossible Scenarios’ 시리즈의 Desert 스타일을 계승한 맵이다. 이 맵은 황무지 지형과 섬세한 타일셋을 기반으로 삼아 플레이어에게 끊임없는 도전과 긴장감을 제공하는 디펜스 장르의 유즈맵으로 분류된다. 맵의 전체적인 분위기는 어두운 황무지와 붉은 노을이 어우러져 있으며, 맵 중앙에는 거대한 요새와 같은 구조물이 자리 잡고 있다. 이를 둘러싼 길목과 협소한 통로들은 적의 물량 공격을 효과적으로 방어할 수 있는 구조로 설계되어 있으며, 플레이어는 제한된 자원으로 끊임없이 밀려오는 적을 상대로 전략을 세워야 한다. 플레이 방식은 기본적으로 컴퓨터(저그, 테란, 프로토스)의 지속적인 러시를 방어하는 ‘컴까기’ 형식으로 진행된다. 맵 곳곳에 배치된 방어 건물과 유닛 생산 시설은 플레이어의 전략에 따라 자유롭게 활용할 수 있으며, 지형 특성을 살려 요새화할 수 있는 위치가 다수 존재한다. 특히 맵의 가장자리와 중앙 요새 주변은 방어 포인트로 활용하기 좋은 지형으로, 플레이어는 이들을 중심으로 방어 라인을 구축하는 것이 핵심이다. 또한, 맵의 일부 구역은 협소한 통로로 연결되어 있어 방어에 유리한 지형을 만들 수 있지만, 반대로 적의 진입로를 한 곳에 집중시킬 수 있어 위험하기도 하다. 이 맵의 가장 큰 특징은 ‘불가능한 시나리오’라는 컨셉에 맞게 극한의 난이도를 자랑한다는 점이다. 시리즈의 이름에서 알 수 있듯이, 이 맵은 단순히 방어하는 것을 넘어 플레이어의 전략적 사고와 순발력을 끊임없이 시험한다. 맵 곳곳에는 숨겨진 트리거나 특수한 조건이 있을 가능성이 있으며, 이를 파악하고 대비하는 것이 승리의 열쇠가 될 수 있다. 또한, 맵의 전체적인 규모가 크고 복잡한 구조를 가지고 있어 초보자는 물론 경험자도 쉽게 적응하기 어려운 구조로 설계되어 있다. 이 맵을 추천하는 대상은 스타크래프트 유즈맵 중에서도 도전적인 플레이를 즐기는 유저들이다. 특히 디펜스 장르에 익숙하지 않거나, 새로운 전략을 시도해 보고 싶은 플레이어에게 적합하다. 또한, 팀 플레이보다는 혼자서도 충분히 즐길 수 있는 구조지만, 팀원과의 협동 플레이가 필요하다면 팀원 간의 원활한 소통이 필수적일 것이다. 플레이 전에는 맵의 구조를 꼼꼼히 분석하고, 방어 라인 구축에 필요한 자원의 배치를 미리 계획하는 것이 중요하다. 또한, 예상치 못한 적의 공격 패턴에 대비해 유연하게 대처할 수 있는 준비를 갖춰야 한다. ‘Impossible Scenarios Desert2’ is a custom map for *StarCraft: Brood War*, inheriting the Desert style from the *Impossible Scenarios* series created by Fadetoblack. This map is classified as a defense genre custom map, offering players endless challenges and tension through its barren terrain and intricate tileset. The overall atmosphere blends a dark wasteland with a crimson sunset, and at the center of the map stands a massive fortress-like structure. The narrow paths and constricted passages surrounding it are designed to effectively counter waves of enemy attacks, forcing players to strategize with limited resources against relentless enemy forces. The gameplay follows a "comp-scumming" format, where players must defend against continuous rushes from AI-controlled factions (Zerg, Terran, and Protoss). Defense buildings and unit production facilities scattered across the map can be freely utilized based on the player’s strategy, with multiple locations that allow for fortification by leveraging the terrain. Key defensive spots include the edges of the map and areas around the central fortress, where players should focus on establishing strong defensive lines. Some zones are connected by tight corridors, which can create advantageous defensive terrain but also concentrate enemy entry points, posing risks. The map’s defining feature is its extreme difficulty, living up to the "impossible scenarios" concept. Beyond mere defense, it constantly tests the player’s strategic thinking and quick decision-making. Hidden triggers or special conditions may exist throughout the map, and uncovering and preparing for them could be the key to victory. The map’s large scale and complex structure make it difficult for both beginners and experienced players to adapt to easily. This map is recommended for players who enjoy challenging custom maps in *StarCraft*. It suits those looking to try new strategies or unfamiliar with the defense genre. While it can be enjoyed solo, team coordination is essential if playing cooperatively. Before starting, it’s important to carefully analyze the map’s layout, plan resource distribution for defense lines, and prepare flexible responses to unexpected enemy attack patterns.
맵 선택 가이드
태그는 맵의 핵심 특징을 빠르게 설명하지만 제작 버전마다 규칙이 다를 수 있습니다. 상세 설명에서 권장 인원, 난이도, 플레이 시간과 버전을 함께 확인한 뒤 다운로드하세요.