
도전형 스타크래프트 맵 모음
'도전형' 태그가 등록된 맵을 모았습니다. 장르 하나로 찾기 어려운 플레이 방식, 난이도와 특징을 중심으로 인기 맵과 최신 맵을 비교해 보세요.
- 등록 맵
- 17개
- 누적 다운로드
- 0
- 누적 조회
- 570
인기 맵
다운로드와 조회 반응이 높은 맵입니다.
불가능한 열사병 (Impossible Heat Stroke)
《임포서블 히트 스트로크》는 스타크래프트 브루드워의 컴까기 유즈맵으로, ‘불가능한 도전’이라는 콘셉트에 맞춰 설계된 디펜스 장르의 맵이다. 4명의 플레이어가 하나의 팀을 이뤄 광활한 황무지와 사막 지형을 배경으로 끊임없는 적의 공세를 방어해내는 구조가 인상적이다. 맵 중앙에서 펼쳐지는 본진 외곽의 방어선은 좁고 긴 길목을 중심으로 이뤄져 있으며, 곳곳에 배치된 포톤 캐논, 터렛, 포세이돈과 같은 방어 건물들이 전략적 요충지를 차지하고 있다. 이미지에서 확인되는 고정된 방어 건물 외에도, 플레이어는 전투 중에 추가 건물이나 유닛을 확보할 수 있는 것으로 보인다. 맵의 이름은 ‘Impossible Heat Stroke’이지만, 실제로는 ‘열사병’이라는 키워드에 맞춰 극한의 환경과 압박감을 조성하는 디자인으로 보인다. 맵 곳곳의 황량한 지형과 붉은 색조는 사막의 혹독한 환경감을 살려내며, 플레이어는 끊임없이 밀려드는 저그와 테란 혼합의 적군을 상대해야 한다. 게임의 핵심은 방어선의 유지와 자원 관리, 그리고 타이밍을 노린 반격에 있다. 특히 좁은 길목을 중심으로 한 방어는 마치 ‘입구막기’와 같은 느낌을 주지만, 보다 넓은 지역에서의 전투도 요구되어 전략의 다양성을 높인다. 이 맵은 초보자보다는 어느 정도의 테크닉과 맵 이해도가 있는 플레이어에게 적합하며, 디펜스에 대한 기본적인 이해와 빠른 판단력이 요구된다. 또한, 팀 플레이의 중요성이 두드러지므로 팀원 간의 호흡이 필수적이다. 맵의 난이도는 방심할 수 없을 정도로 높은 편으로 보이며, 플레이어는 끊임없이 변화하는 전황에 적응해야 한다. 리플레이를 통해 전략을 분석하거나, 팀원과의 소통을 통해 실수를 줄이는 것이 클리어의 관건이 될 것이다. 《Impossible Heat Stroke》 is a StarCraft: Brood War user-made defense map where four players team up to defend against endless enemy attacks across vast wastelands and desert terrain. The map’s standout feature is its defense line outside the main base, structured around narrow, elongated pathways, with strategic choke points reinforced by fixed defensive structures like photon cannons, turrets, and Poseidons. In addition to these fixed defenses, players can secure additional buildings or units during combat. The map’s name, "Impossible Heat Stroke," reflects its design, which emphasizes extreme environmental pressure and harsh conditions. The barren landscapes and red color palette evoke the brutal conditions of a desert, as players face relentless waves of mixed Zerg and Terran enemies. The core gameplay revolves around maintaining the defense line, managing resources, and launching well-timed counterattacks. While the choke-point defense feels like a classic "blocking the entrance" strategy, the map also demands broader combat tactics, adding depth to its strategy. This map is better suited for players with solid mechanics and map knowledge rather than beginners, requiring a strong grasp of defense fundamentals and quick decision-making. Teamwork is crucial, as coordination among teammates is essential. The difficulty is unforgiving, forcing players to adapt constantly to shifting battle conditions. Analyzing replays and improving communication with teammates will be key to clearing the map successfully.
Impossible Continuum 4.0
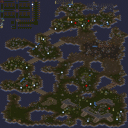
스타크래프트 브루드워의 유즈맵 'Impossible Continuum 4.0'은 5명의 플레이어가 참여하는 디펜스 장르의 도전형 맵으로, 사막 타일셋으로 구성된 넓은 공간에서 끊임없이 몰려오는 적을 상대로 자신의 건물을 지켜내는 것이 핵심이다. 맵 중앙에는 방어 건물이 배치되어 있으며, 주변으로는 적의 웨이브가 끊임없이 유입되는 구조로 구성되어 있다. 플레이어는 제한된 자원으로 방어 시설을 강화하고, strategic retreat(전략적 후퇴)나 perimeter control(주변 통제)을 통해 생존을 도모해야 한다. 특히 'Impossible'이라는 이름에 걸맞게 난이도가 매우 높으며, 초보 플레이어보다는 숙련된 유저가 도전하는 것이 권장된다. 맵의 특징은 끊임없는 적의 웨이브와 제한된 자원 관리인데, 이는 플레이어의 집중력과 전략적 사고력을 동시에 요구한다. 또한, 맵의 디자인과 시야 차단 요소들이 적의 움직임을 읽기 어렵게 만들어 전략적 깊이를 더한다. 이 맵은 주로 컴퓨터 상대 유즈맵으로 분류되며, 다운로드 후 로컬에서 플레이하는 방식으로 즐길 수 있다. 초보자라면 먼저 쉬운 디펜스 맵에서 기본기를 다지고 도전하는 것이 좋으며, 숙련자라면 빠른 결정과 효율적인 자원 관리를 위해 지속적인 연습이 필요하다. 맵의 긴장감과 반복적인 도전 욕구는 유저들에게 강한 몰입감을 제공한다. 플레이 전에는 맵의 구조와 적의 웨이브 패턴을 충분히 숙지하고, 방어 건물의 배치와 업그레이드 우선순위를 미리 계획하는 것이 중요하다. 또한, 팀 플레이가 가능하다면 팀원 간의 역할 분배를 명확히 하고, 실시간 커뮤니케이션을 통해 효율적인 방어 전략을 구사해야 한다. Impossible Continuum 4.0 is a challenging defense-style custom map for StarCraft: Brood War, designed for up to 5 players. Set in a vast desert tile-based environment, the core gameplay revolves around defending your buildings from relentless waves of enemies that continuously spawn around the map. The central area features defensive structures, while the surrounding zones serve as entry points for enemy forces. Players must strategically manage limited resources to upgrade defenses, employing tactics like strategic retreat or perimeter control to survive. The map lives up to its 'Impossible' title, offering an extremely high difficulty level that demands advanced player skills and quick decision-making. The design incorporates visual obstructions and uneven terrain, making it difficult to predict enemy movements and adding layers of strategic depth. This map is primarily intended as a single-player or cooperative challenge against AI opponents, requiring local download and installation to play. Beginners are advised to build foundational skills with easier defense maps before attempting this one, while experienced players will appreciate the need for rapid resource allocation and efficient upgrades. The map’s tension and replayability stem from its unforgiving waves and the player’s growing familiarity with enemy patterns. Before playing, it’s crucial to study the map layout, understand enemy spawn points, and plan defensive structures and upgrade priorities. If playing in a team, clear role distribution and real-time communication are essential for executing an effective defense strategy.
Impossible map suliStio (이뽀서블 맵 술리스티오)
‘Impossible map suliStio’는 스타크래프트 브루드워 유즈맵으로, 제한된 유닛만으로 모든 레벨을 돌파해야 하는 도전형 디펜스 맵이다. 맵 이름은 ‘불가능’이라는 수식어가 붙을 정도로 난이도가 높을 것으로 예상되지만, 오히려 그러한 극한의 조건이 플레이어의 전략적 사고를 극대화하는 재미를 선사한다. 내부 설명에서도 ‘제한된 유닛을 활용해 살아남아야 한다’고 명시되어 있어, 자원 관리와 유닛 배치에 몰입할 수밖에 없는 구조다. 전체적으로는 협동 플레이가 핵심으로, ‘서로 협력해야 한다’는 설명이 길게 반복되며 팀웍의 중요성을 강조한다. 맵의 구조는 비교적 단순하지만, 레벨별로 요구 조건이 달라지는 방식으로 설계된 것으로 보인다. 예를 들어 초기에는 기본 유닛만으로 방어선을 구축해야 하고, 중반부에는 특정 유닛의 조합이 필수적이거나 보스전과 유사한 형태의 전투가 예상된다. 맵 이미지 상으로는 넓은 평지 위에 다수의 건물이 배치되어 있으며, 중앙부에 주요 방어 거점이 위치하는 것으로 추정된다. 또한, 맵 곳곳에 배치된 자원 멀티나 보급 기지가 제한적이어서 자원 확보가 치열할 것으로 보인다. 이러한 조건은 플레이어가 초반 자원 운용을 신중히 결정해야 하며, späteren 스테이지로 갈수록 유닛의 업그레이드와 조합을 신중히 계획해야 함을 암시한다. 플레이어는 6인으로 구성된 팀으로 참여하며, 각자 제한된 유닛 풀을 가지고 시작한다. 맵의 해상도는 6144x6144로 상당히 크며, 타일셋은 우주를 기반으로 하고 있어 광활한 공간감과 함께 SF 분위기를 느낄 수 있다. 하지만 넓은 맵과 제한된 유닛이라는 조건이 맞물려, 초반 방어와 자원 확보가 쉽게 무너질 수 있어 전략적 깊이가 요구된다. 특히, 협동이 필수라는 점에서 팀원 간의 호흡이 중요하며, 개인의 실력보다는 팀의 전략적 판단이 승패를 좌우할 가능성이 높다. 난이도는 내부 설명에서 ‘불가능’이라는 표현이 있지만, 실제로는 팀워크와 전략에 따라 극복할 수 있는 난이도로 설계되었을 것이다. 이 맵은 초보자들이 도전하기에는 다소 버겁지만, 경험이 있는 플레이어들에게는 한층 깊은 전략적 재미를 제공할 것으로 예상된다. 특히, 제한된 자원과 유닛을 활용한 창의적인 플레이가 요구되므로, 브루드워의 기본기를 다지고 싶거나 협동 플레이의 묘미를 느끼고 싶은 유저들에게 추천할 만한 작품이다. 단, 맵의 난이도가 높다는 점을 감안해, 팀원 간의 사전 협의가 충분히 이루어진 상태에서 플레이하는 것이 바람직하다. 또한, 맵의 해상도가 크고 타일셋이 우주라는 점을 고려해, 넓은 시야와 거리감을 활용한 전략적 플레이가 필요할 것이다. This StarCraft: Brood War custom map, ‘Impossible map suliStio’, challenges players to survive through multiple levels using only the limited units provided at the start. The name itself hints at the extreme difficulty, but this very challenge becomes the core of the map’s strategic depth and engaging gameplay. The internal description emphasizes „working together is the key," making teamwork a non-negotiable aspect of success, as players must collaborate to overcome increasingly tough obstacles. The map’s layout appears straightforward at first glance, yet its true complexity lies in the evolving requirements per level. Early stages likely demand efficient base-building and unit management with minimal resources, while later phases may introduce mandatory unit combinations or boss-like encounters. The image suggests a large, open terrain with strategic buildings scattered across, particularly around a central defense point. Limited resource nodes and supply depots scattered sparsely across the map force players to prioritize resource gathering and allocation carefully, adding tension to every decision. Designed for six players, the team starts with a restricted pool of units, and the vast 6144x6144 map size—paired with a space-themed tileset—creates an immersive, sci-fi atmosphere. However, the combination of a sprawling battlefield and constrained unit options means early defenses and resource control are fragile. Success hinges not on individual skill but on coordinated team strategy, making communication and planning critical. While the name suggests impossibility, the map is likely balanced to be beatable with the right strategy and teamwork. While this map may be daunting for beginners, it offers a rewarding experience for seasoned players seeking to test their strategic prowess and teamwork. The emphasis on limited resources and units encourages creative problem-solving, making it a great choice for those looking to refine their Brood War fundamentals or enjoy the synergy of cooperative play. Players should coordinate with teammates beforehand, especially given the map’s high difficulty. Additionally, the map’s vast scale and space-themed aesthetic call for strategic use of vision and distance to outmaneuver opponents.
Impossible Soul (임파서블 소울)
스타크래프트 브루드워의 Impossible Soul은 6명의 플레이어가 함께 도전하는 컴까기 유즈맵으로, 7개의 정해진 레벨을 돌파해 '비컨(Beacon)'에 접근하는 것이 목표다. 각 레벨은 고유한 구조와 적 배치로 구성되어 있으며, 맵 곳곳의 비컨에 도달하면 다음 단계로 넘어갈 수 있다. 이미지 상에서 확인되는 맵의 중앙 구조물과 주변의 방어 건물들은 방어전을 유도하는 구조로 보이며, 플레이어는 끊임없이 몰려오는 적들을 상대하면서 비컨에 도달해야 한다. 맵의 배경은 어두운 톤의 화산 지형으로, 전체적으로 긴장감을 조성하는 분위기를 연출한다. 각 레벨이 끝날 때마다 다음 단계로의 진입 조건이 제공되며, 이는 맵 내부의 트리거나 구조물로 추정된다. 컴까기 맵답게 지속적인 적의 공격과 빠른 판단력이 요구되며, 특히 중앙 구조물 주변은 주요 교전 지역으로 예상된다. 초반에는 소규모 груп 전투가, 후반으로 갈수록 대규모 병력과 조합된 적들이 등장할 것으로 보인다. 플레이어는 자원 관리보다는 방어와 진격 타이밍에 집중해야 하며, 팀워크가 핵심인 팀플레이 맵으로 보인다. 초보 플레이어는 낮은 난이도의 레벨에서 기본적인 전투와 맵 이해를 먼저 습득하는 것이 좋으며, 숙련자는 빠르게 비컨에 도달하는 전략을 구사해야 한다. 맵을 플레이하기 전에는 각 레벨의 비컨 위치와 주요 길목을 미리 확인해 두는 것이 중요하다. 또한, 맵의 어두운 배경 탓에 시야 확보를 위한 detector 유닛 활용도 전략적으로 고려해야 한다. 맵의 구조상, 중앙 지역을 장악하는 플레이어가 유리한 고지를 점할 가능성이 높으므로, 초반부터 적극적인 진출을 계획하는 것이 좋다. StarCraft: Brood War's Impossible Soul is a co-op Zerg rush custom map where six players work together to clear seven predetermined levels and reach the 'Beacon.' Each level features unique layouts and enemy placements, and players can advance to the next stage by reaching beacons scattered across the map. The central structure and defensive buildings visible in the images appear designed to force defensive battles, requiring players to constantly fend off waves of enemies while pushing toward the beacon. Set against a dark volcanic terrain, the map creates a tense atmosphere. Entry conditions to the next level are provided at the end of each stage, likely through triggers or structures within the map. As a co-op Zerg rush map, it demands continuous enemy attacks and quick decision-making, with the central structure's surroundings expected to be major battle zones. Early levels feature small group fights, while later stages introduce larger forces and combined enemy compositions. Players should focus more on defense and timing their advances rather than resource management, making teamwork essential in this team-based map. Beginners are advised to start with lower difficulty levels to grasp basic combat and map mechanics, while experienced players should prioritize strategies to reach the beacon quickly. Before playing, it's crucial to scout beacon locations and key pathways. Given the map's dark visuals, strategically using detector units for vision is also important. Controlling the central area early on can provide a significant advantage, so planning aggressive expansions from the start is recommended.
마린 버로우 금지! (Don’t Burrow The Marine!ucant)
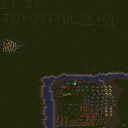
스타크래프트 브루드워의 유즈맵 중에서도 독특한 콘셉트를 가진 ‘Don’t Burrow The Marine!ucant’는 이름부터 도전적인 메시지를 담고 있는 맵입니다. 이 맵의 핵심은 이름에서부터 드러나듯, 마린을 버로우시킬 수 없다는 점에 초점을 맞추고 있습니다. 제작자인 exobyte는 설명에서 '어차피 버로우시킬 수 없으니 괜히 시도하지 말라'는 도발적인 멘트를 통해 유저들에게 도전 정신을 자극합니다. 맵의 배경은 사막 지형으로, 전체적으로 넓은 평야가 펼쳐져 있어 전략적 움직임이 중요해 보입니다. 또한, 맵의 크기가 4096x4096으로 상당히 넓은 편이어서, 넓은 시야와 전략적 배치의 중요성이 강조됩니다. 이 맵은 단순히 마린을 버로우시키는 것이 불가능하다는 메커니즘뿐만 아니라, 그로 인해 발생하는 다양한 전략적 변수와 상대방의 행동에 대한 대응을 요구합니다. 예를 들어, 마린의 이동 패턴을 예상하며 방어선을 구축하거나, 적의 공격 패턴을 분석해 효율적으로 대처해야 합니다. 특히, 넓은 맵에서 발생하는 수많은 전투 상황에서 마린의 특성상 근접 전투가 필수적이므로, 유저들은 마린의 강점을 최대한 활용할 수 있는 전략을 구상해야 합니다. 또한, 맵의 사막 지형은 시야 확보와 기동성에 영향을 미치므로, 맵의 특성을 잘 이해하고 활용하는 것이 중요합니다. 이 맵은 마린을 주력으로 삼는 플레이어들에게는 훌륭한 연습 opportunities를 제공할 것이며, 반대로 마린의 한계를 느껴보고 싶어하는 유저들에게는 흥미로운 도전 과제가 될 것입니다. 특히, 마린의 특성을 최대한 활용하며 상대방의 전략을 분석하고 대응하는 재미가 있을 것으로 예상됩니다. 다만, 넓은 맵에서 발생하는 전투는 지루해질 수 있으므로, 빠른 진행을 위한 추가적인 메커니즘이나 페이스가 보완된다면 더욱 흥미로울 것입니다. 이 맵은 주로 마린을 주력으로 삼는 유저나, 넓은 맵에서 전략적 대결을 즐기는 유저들에게 추천할 만합니다. 또한, 스타크래프트 유즈맵의 새로운 콘셉트를 경험하고 싶어하는 유저들에게도 흥미로운 선택지가 될 것입니다. 플레이 전에는 맵의 넓이와 사막 지형의 특성을 충분히 숙지하고, 마린의 특성과 한계를 정확히 이해한 뒤 전투에 임하는 것이 중요합니다. 또한, 상대방의 전략을 예측하고 대응할 수 있는 준비를 갖추는 것이 필수적입니다. Among the custom maps of *StarCraft: Brood War*, "Don’t Burrow The Marine!ucant" stands out with its unique concept, even from its name. As the title suggests, the core focus of this map is that Marines cannot burrow, a restriction emphasized by the creator, exobyte, who provocatively warns players not to waste their efforts attempting it. Set in a desert landscape with vast open plains, the map demands strategic movement, with its large 4096x4096 size highlighting the importance of vision and tactical positioning. Beyond the simple impossibility of burrowing Marines, the map introduces dynamic strategic variables that require players to adapt to their opponent’s actions. Players must anticipate Marine movement patterns to fortify defenses or analyze enemy tactics to counter effectively. Given the map’s size, close-quarters combat is inevitable, pushing players to maximize Marine strengths in their strategies. The desert terrain further influences visibility and mobility, making it crucial to understand and leverage its mechanics. For players who favor Marines, this map offers excellent practice opportunities, while those curious about the unit’s limitations will find it a compelling challenge. The joy lies in optimizing Marine abilities while dissecting and countering opponents’ strategies. However, the large-scale battles might feel slow-paced, so additional mechanics or pacing adjustments could enhance the experience. This map is highly recommended for players who prioritize Marines or enjoy strategic battles on expansive maps, as well as those seeking fresh custom map concepts in *StarCraft*. Before playing, it’s essential to familiarize yourself with the map’s scale and desert terrain, fully grasp Marine capabilities and limitations, and prepare to predict and counter opponent strategies.
러닝 저글링 런 3.0 (Run Zergling Run 3.0)
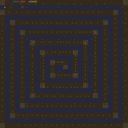
스타크래프트 브루드워 유즈맵의 명작 중 하나로 꼽히는 <러닝 저글링 런 3.0>은 저글링을 조종해 다양한 장애물을 피해 목적지까지 도달하는 도전형 디펜스 맵이다. 맵의 핵심은 빠른 판단력과 컨트롤을 요구하는 저글링의 움직임에 있으며, 끊임없이 쏟아지는 적 유닛과 함정, 좁은 길목에서 벌어지는 피하기 플레이가 주를 이룬다. 맵은 총 6명의 플레이어가 동시에 참여할 수 있도록 설계되어 있으며, 각 플레이어는 자신의 저글링을 조종하며 공통된 목적지까지 도달해야 한다. 저글링의 체력이 낮고 이동 속도가 빠르며, 맵 곳곳에 배치된 장애물과 적 유닛이 끊임없이 방해하기 때문에 초반부터 신중한 움직임을 요구한다. 또한 맵의 난이도는 조절 가능한 요소로, 낮게 설정할 경우 비교적 쉽게 목적지에 도달할 수 있지만 높아질수록 적 유닛의 공격력과 밀도가 급격히 증가해 플레이어의 컨트롤과 반응 속도를 극한까지 시험하게 된다. 맵의 볼륨은 상당하며, 맵 곳곳에 숨겨진 숏컷이나 숨겨진 길도 존재하는데, 이를 발견하는 것이 성공의 열쇠가 될 수 있다. 특히 맵의 후반부로 갈수록 복잡한 길목과 예측 불가능한 적 패턴이 등장하기 때문에, 미리 맵을 숙지하고 여러 번 플레이해 보는 것이 좋다. 이 맵은 단순한 피하기 게임을 넘어, 저글링의 특성을 십분 활용한 전략적 플레이와 빠른 적응력이 요구되는 종합적인 도전 과제를 제공한다. 초보자는 물론이고 숙련자까지도 끊임없이 새로운 도전을 제공하는 이 맵은 스타크래프트 유즈맵의 클래식한 명작으로 손꼽히며, 특히 피하기와 서바이벌 요소가 결합된 디펜스 장르를 люби하는 유저들에게 강력히 추천할 만한 작품이다. 플레이 전에는 저글링의 기본 컨트롤과 맵의 주요 루트를 미리 익혀두는 것이 좋으며, 특히 장애물과 적 유닛의 패턴을 외워두면 성공 확률을 크게 높일 수 있다. <Running Zergling Run 3.0> is a legendary Brood War custom map renowned for its challenging gameplay, where players control a Zergling to navigate through a series of obstacles and reach the destination. The core of the map revolves around quick decision-making and precise control, as players constantly evade enemy units, traps, and tight spaces. Designed for up to six players, each controls their own Zergling, racing toward a shared goal. With low health and high speed, Zerglings face relentless obstacles and enemy interference from the start, demanding careful movement early on. The difficulty is adjustable—lower settings allow easier progress, while higher ones drastically increase enemy aggression and density, pushing players to their limits in reflexes and control. The map is expansive, featuring hidden shortcuts and alternate paths that can be crucial to success. As the stages progress, the routes become more complex and enemy patterns more unpredictable, so memorizing the layout through repeated plays is highly recommended. Beyond just an evasion game, it challenges players to leverage the Zergling’s traits strategically while adapting quickly. Whether you're a beginner or a veteran, this map offers endless challenges and stands as a classic in the custom map genre, especially recommended for fans of dodging and survival defense mechanics. Before playing, mastering basic Zergling controls and key routes will greatly improve your odds, with memorizing obstacle and enemy patterns being particularly effective.
Impossible Challanger
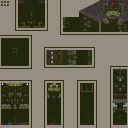
‘Impossible Challenger’는 스타크래프트 브루드워의 유즈맵으로, 플레이어들이 끊임없는 적의 공격과 다채로운 맵 구조를 극복하며 생존을 도전하는 디펜스 장르의 유즈맵이다. 맵 제목에서부터 느껴지듯, 이 맵은 난이도를 ‘불가능’에 가까울 정도로 높게 설정해 플레이어의 전략적 사고와 피지컬을 동시에 요구한다. 4096x4096의 넓은 타일셋과 사막 테마가 어우러진 배경은 광활한 공간감을 제공하며, 중앙에 위치한 주요 거점 주위에 펼쳐진 복잡한 지형은 방어선을 구축하거나 후퇴하는 데 strategic depth를 더한다. 적의 공격 패턴은 랜덤 디펜스와 유사하게 무작위로 나타나며, 특히 초반과 중반에 걸쳐 progressively 강력한 웨이브가 몰려온다. 플레이어는 초반 자원 확보와 방어 건물 배치에 주안점을 두고, 중반부터는 유닛 관리와 기지 확장 사이에서 균형을 잡아야 하는데, 이 과정에서 맵 곳곳에 흩어져 있는 추가 자원 지점과 방어 가능한 요충지가 중요한 역할을 한다. 이 맵의 특징은 바로 ‘Challenger’라는 이름에 걸맞게, 실시간으로 변하는 난이도 상승 시스템에 있다. 초반에는 비교적 수월한 적 웨이브가 나오지만, 시간이 지날수록 적의 유닛 조합이 increasingly diverse해지며, 심지어는 특수 유닛이나 버프를 받은 적들이 등장하기도 한다. 또한, 맵의 구조상 일부 지역은 후방으로 우회하여 기습을 당할 위험이 있어, 지속적인 시야 확보와 방어 건물의 재배치가 필수적이다. 특히 플레이는 1팀(1vX) 구조로 진행되며, 플레이어는 동맹을 맺을 수도 없고 오직 혼자서 모든 공격을 막아내야 한다. 이는 디펜스 장르의 정수를 보여주며, 플레이어의 집중력과 전략적 유연성을 극한까지 시험한다. ‘Impossible Challenger’는 초보보다는 적어도 스타크래프트의 기본적인 유닛 컨트롤과 빌드 오더에 익숙한 플레이어에게 추천된다. 난이도가 매우 높기 때문에, 초반 방어에 실패하면 곧바로 게임이 끝나버릴 수 있으며, 중반 이후로는 리스크 관리와 자원 효율화가 승패를 좌우한다. 또한, 넓은 맵을 효율적으로 활용하기 위해, 시야 확장(예: 커맨드 센터나 감시탑 건설)과 기동성 있는 유닛의 활용이 중요하다. 이 맵을 즐기기 위해서는 디펜스 유즈맵에 대한 기본적인 이해와, 끊임없는 연습이 필요하다는 점을 유념해야 한다. 마지막으로, 맵 곳곳에 숨겨진 보너스 자원이나 숨은 길 등을 찾아내는 것도 승리의 열쇠가 될 수 있다. Impossible Challenger is a UMS-style custom map in StarCraft: Brood War where players must defend against relentless enemy waves in a vast desert-themed battlefield. The name itself hints at the map's punishing difficulty, designed to push even seasoned players to their limits. With a massive 4096x4096 tile layout, the map offers ample space for strategic maneuvering, base expansion, and dynamic defense setups. The desert terrain not only provides an immersive visual experience but also creates natural choke points and high-ground advantages, which players must leverage to survive increasingly tough enemy assaults. The core challenge of Impossible Challenger lies in its progressive difficulty curve. Early waves are manageable, but as the game advances, enemies adapt by introducing mixed unit compositions, special buffs, and even surprise attacks from unexpected directions. The map’s layout encourages players to balance resource gathering, defensive positioning, and occasional counterattacks, as holding key chokepoints becomes critical. Since the game is structured as a single-player challenge (1vX), there’s no room for teamwork—every decision, from unit selection to tower placement, must be made autonomously. This makes the map a true test of endurance, reflexes, and tactical foresight. Due to its high difficulty, Impossible Challenger is best suited for players with prior experience in StarCraft’s mechanics, particularly those familiar with custom defense maps. Beginners may struggle to adapt to the rapid enemy adaptations and the map’s sprawling scale. Effective play requires constant scouting, smart resource allocation, and the ability to pivot strategies mid-game. Hidden paths, bonus resource nodes, and strategic high-ground positions are often the difference between survival and defeat. For those seeking a brutal but rewarding challenge, this map delivers an unforgettable experience that rewards precision and adaptability.
도망가기 2 (Run away 2)
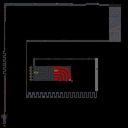
《Run away 2》는 스타크래프트 브루드워의 컴까기 장르 유즈맵으로, 플레이어가 끊임없이 몰려드는 적군 웨이브를 피해 살아남아야 하는 도전형 디펜스 게임이다. 맵은 넓은 평야와 중앙에 위치한 안전한 거점 구조로 이루어져 있으며, 플레이어는 시작 지점에서 출발해 적의 공격을 피하면서 거점을 방어하거나 탈출 루트를 찾아야 한다. 화면에는 붉은색으로 표시된 적군이 끊임없이 스폰되어 맵 곳곳을 공격해 오며, 플레이어는 개별적으로 또는 팀을 이루어 맵 내의 자원을 활용해 방어선을 구축하거나 후퇴를 반복해야 한다. 맵의 주요 특징으로는 넓은 개활지와 복잡한 지형이 없어 이동이 자유로운 대신, 적의 공격 루트가 예측 가능하다는 점이 있다. 플레이어는 미네랄과 가스를 확보해 유닛을 생산하고, 방어 건물이나 보호를 위한 유닛을 배치할 수 있다. 그러나 맵 내에 보호막이나 회복 시설은_visible하지 않으며, 대부분의 전투는 플레이어의 기지나 거점에서 벌어지는 것으로 보인다. 난이도는 스폰되는 적군의 수와 속도에 따라 조절되며, 초보자는 기본적인 방어 전략을 익히기 어려울 수 있어 보통 이상의 난이도를 지닌다. 맵의 승패 조건은 게임 내에 명시된 바는 없지만, 일반적으로는 거점의 유지 여부나 적군 웨이브를 얼마나 오랫동안 버티느냐가 관건으로 추정된다. 플레이 전에는 맵의 구조와 적의 스폰 위치를 정확히 숙지하는 것이 중요하며, 특히 중앙 거점 주변의 방어 시설 구축이 생존률을 높이는 핵심 전략이 될 수 있다. 추천 대상은 컴까기 장르에 익숙한 플레이어나 도전 정신을 가진 초보자 이상 유저로, 넓은 공간을 활용한 전략적 방어보다는 빠른 판단과 유연한 대처가 요구되는 맵이다. 맵의 재미 요소는 끊임없는 긴장감과 적응력 테스트에 있으며, 한 번의 실수가 치명적인 결과를 초래할 수 있어 플레이어의 집중력을 요한다. Run away 2 is a UMS-style user-made map in StarCraft: Brood War, classified under the escape-defense genre where players must survive endless waves of enemy attacks. The map features a large open field with a central safe zone, where players start and must either defend a base or find an escape route. Red-colored enemy units continuously spawn across the map, attacking players individually or in teams. The map’s design emphasizes wide open spaces for free movement, though enemy attack patterns appear predictable. Players can gather minerals and gas to build units and defensive structures, but no visible shield or healing facilities are present. The difficulty scales with the number and speed of spawned enemies, making it suitable for intermediate players. Victory conditions are not explicitly stated, but generally revolve around either holding the central base or surviving as long as possible against waves. Before playing, it’s crucial to memorize the map layout and enemy spawn points. Effective defense near the central zone is key to survival. This map is recommended for players familiar with escape-defense games or those seeking a challenge, as it demands quick decisions and adaptability. The core appeal lies in the constant tension and need for situational awareness, where a single mistake can lead to failure.
도지 더 래피스트 프로버전 (Dodge The Rapist ProVersion)
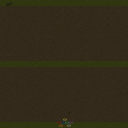
스타크래프트 브루드워의 디펜스 장르 유즈맵 〈Dodge The Rapist ProVersion〉은 플레이어가 끊임없이 쏟아지는 적 유닛을 피해 살아남는 도전형 맵이다. 맵 중앙에 위치한 플레이어는 좌우로 이동하며 적의 공격을 피해야 하며, 바닥에 설치된 방어 건물이나 특수 오브젝트를 활용해 진행을 유리하게 이끌어갈 수 있다. 적 유닛은 다수의 웨이브로 구성되어 있으며, 난이도가 점진적으로 상승하는 구조로 설계되어 있어 플레이어의 집중력과 반응 속도가 요구된다. 맵의 배경은 사막 타일셋으로 구성되어 있으며, 시야를 가리는 요소 없이 깔끔한 맵 디자인이 특징이다. 방어 건물이나 보조 오브젝트의 위치는 플레이어의 전략적 선택에 따라 결정되며, 맵의 난이도 조절을 위해 다양한 종류의 적 유닛이 등장한다. 또한, 맵의 중앙 통로와 좌우 бок 구역이 명확히 구분되어 있어, 플레이어는 자신의 위치와 이동 경로를 신중히 계획해야 한다. 이 맵은 특히 반응 속도와 손놀림이 중요한 요소로 작용하며, 초보자보다는 숙련된 플레이어에게 더 적합한 플레이 경험을 제공한다. 맵의 핵심은 적의 공격을 효과적으로 피하면서도, 방어 건물이나 보조 오브젝트를 활용해 최대한 오래 살아남는 것이다. 맵의 구성상, 방어 건물의 배치와 유닛의 이동 경로 간에 밸런스가 중요하며, 이를 통해 플레이어는 더 오랫동안 생존할 수 있는 전략을 구사할 수 있다. 이 맵은 디펜스 장르의 기본 틀을 유지하면서도, 피하기와 생존에 중점을 둔 독특한 플레이 경험을 제공하며, 같은 장르의 다른 맵들과 차별화되는 요소로 작용한다. 추천 대상은 스타크래프트의 디펜스 장르를 즐기는 플레이어이며, 특히 반응 속도와 손놀림이 뛰어난 분들에게 적합하다. 플레이 전에 맵의 구조와 적 유닛의 패턴을 숙지하는 것이 중요하며, 방어 건물이나 보조 오브젝트의 위치를 미리 확인해 두는 것이 좋다. 또한, 맵의 난이도가 점진적으로 상승하기 때문에, 초반 웨이브에서 최대한 많은 적을 제거하거나 피하는 전략을 세우는 것이 중요하다. 맵의 플레이 시간은 약 20~30분 정도로 예상되며, 난이도는 보통 수준이지만, 후반부로 갈수록 매우 어려워질 수 있어 집중력을 요한다. 이 맵은 디펜스 장르의 팬이라면 누구나 즐길 수 있지만, 특히 피하기와 생존에 중점을 둔 플레이 스타일을 선호하는 분들에게 추천한다. StarCraft: Brood War's defense-genre custom map *Dodge The Rapist ProVersion* challenges players to survive by dodging an endless onslaught of enemy units. Positioned in the center of the map, players must move left and right to evade attacks while using defensive structures or special objects on the ground to gain an advantage. The enemies arrive in waves, with difficulty escalating progressively, demanding sharp focus and quick reflexes. The map features a clean desert tile set with unobstructed visibility, allowing for strategic placement of defensive buildings and auxiliary objects. The central pathway and side areas are distinctly separated, requiring players to carefully plan their positioning and movement. The game prioritizes reaction speed and precision, making it more suited for experienced players than beginners. The core objective is to survive as long as possible by effectively dodging attacks and utilizing defensive structures or objects. Balancing building placement and movement routes is key to maximizing survival time. While maintaining the defense genre's framework, this map stands out by emphasizing evasion and survival, offering a unique experience compared to other maps in the genre. Ideal for players who enjoy defense maps, especially those with strong reflexes and hand-eye coordination. Before playing, familiarize yourself with the map layout and enemy patterns, and identify key defensive structures or objects in advance. Since difficulty ramps up gradually, a solid strategy for early waves—whether eliminating or dodging enemies—is crucial. The average playtime is around 20 to 30 minutes, with difficulty remaining moderate at first but becoming extremely challenging later, requiring sustained concentration. While accessible to all defense map fans, it is particularly recommended for those who prefer gameplay centered on evasion and survival.
OMFG 더 울트라리스크 (OMFG The Ultralisk)
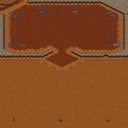
‘OMFG THE ULTRALISKS’는 스타크래프트: 브루드워의 유즈맵으로, 이름 그대로 울트라리스크와 맞서 싸워야 하는 디펜스 장르의 도전형 맵이다. 내부 설명에서도 유추할 수 있듯이 ‘OMFG The Zerglings Did Ya?’와 같은 시리즈물로 추정되는 이 맵은, 플레이어가 조종하는 유닛을 보호하며 끊임없이 밀려드는 적군을 상대하는 방식으로 진행된다. 맵 중앙에 위치한 본진 주변으로 울트라리스크 및 저글링, 뮤탈리스크 등으로 구성된 적 군단이 끊임없이 스폰되어 공격을 가하며, 이를 방어하는 것이 주 목표로 보인다. 적군의 공격 패턴은 빠르게 변화하며, 특히 울트라리스크의 파괴력은 매우 강력하기 때문에 효율적인 빌드와 유닛 관리가 필수적이다. 맵의 구조는 비교적 평탄한 지형을 기반으로 하지만, 곳곳에 배치된 건물이나 지형지물이 방어선을 구축하는 데 도움을 줄 수 있다. 또한, 맵의 가장자리에는 방어용 건물을 설치할 수 있는 공간이 마련되어 있어, 이를 활용한 전략적 방어가 가능할 것으로 보인다. 플레이어는 초반부터 끊임없이 밀려오는 적을 상대해야 하며, 후반부로 갈수록 적군의 스폰 속도와 강도가 증가하는 구조로 보인다. 이 맵은 초보자보다는 어느 정도의 스타크래프트 경험과 전략적 사고력이 필요한데, 특히 유닛의micro 컨트롤과 자원 관리 능력이 요구된다. 또한, 팀 플레이가 가능하다면 방어 efficiency가 크게 향상될 수 있기 때문에, 팀원 간의 협력이 중요한 요소로 작용할 것이다. 이 맵을 플레이하기 전에는 빌드 옵저버와 같은 유틸리티 유닛의 활용 가능성, 그리고 방어 건물의 배치 위치와 타워 러시의 가능성을 미리 숙지해 두는 것이 좋다. 무엇보다도, 끊임없이 밀려오는 적군을 상대해야 하기 때문에 체력 관리와 자원 확보가 핵심이다. 이 맵은 디펜스 장르의 특징을 잘 살린 동시에, 울트라리스크라는 강력한 적 유닛을 활용하여 플레이어의 전략적 깊이를 요구하는 뛰어난 유즈맵으로 평가된다. 특히, 적군의 스폰 위치와 공격 패턴을 빠르게 파악하고 대응하는 능력이 이 맵의 재미를 크게 좌우할 것이다. ‘OMFG THE ULTRALISKS’ is a StarCraft: Brood War custom map where, as the name suggests, players must defend against waves of Ultralisk-based enemies in a challenging defense genre map. Based on the in-game description, this appears to be part of a series similar to ‘OMFG The Zerglings Did Ya?’, where players protect their controlled units while fending off relentless enemy attacks. The main objective seems to be defending the main base located at the center of the map, which is constantly assaulted by enemy forces consisting of Ultralisk, Zerglings, Mutalisks, and more. The enemy’s attack patterns shift rapidly, and the sheer destructive power of Ultralisk makes efficient build orders and unit management essential. While the map features relatively flat terrain, strategic placement of buildings and terrain obstacles can help establish defensive lines. Additionally, designated spaces along the map’s edges allow for the construction of defensive structures, enabling more tactical defensive setups. Players must face waves of enemies from the start, with the spawn rate and intensity of attacks increasing as the game progresses. This map is better suited for players with some StarCraft experience and strategic thinking rather than beginners, demanding strong micro-management skills and resource management. Team play can significantly improve defensive efficiency, making cooperation among teammates a crucial factor. Before playing, it’s wise to familiarize yourself with utility units like the Build Observer, optimal defensive structure placement, and potential tower rushes. Most importantly, managing health and securing resources are key to surviving the endless enemy waves. This map excels in capturing the essence of the defense genre while incorporating the challenge of facing powerful Ultralisk enemies, making it a standout custom map that demands deep strategic play. The ability to quickly recognize enemy spawn locations and adapt to their attack patterns will greatly influence the enjoyment and success in this map.
랜덤미션컨트롤OZ Final.V (Random Mission Control OZ Final.V)
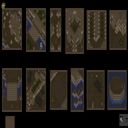
랜덤미션컨트롤OZ Final.V는 스타크래프트 브루드워에서 즐길 수 있는 미니게임형 유즈맵으로, 제작자 SAKURA08가 제공한 '랜덤미션컨트롤 OZ' 시리즈의 최신 버전이다. 맵의 전체적인 구조는 넓은 사막 지형을 기반으로 하며, 일종의 '랜덤 디펜스' 또는 '컴퓨터 상대 도전형' 플레이가 가능한 것으로 보인다. 플레이어는 맵 좌측 하단에 위치한 본진에서 시작하며, 우측 상단으로 이어지는 다양한 경로와 장애물을 통과해야 하는 구조로 추정된다. 게임의 핵심은 랜덤으로 배치된 적군 기지나 방어선을 돌파하는 데 있으며, 맵 곳곳에 있는 좁은 통로와 지형적 요소가 플레이어의 전략과 속도를 요구할 것으로 예상된다. 특히, 맵의 넓고 복잡한 지형은 초보자보다는 경험이 있는 플레이어에게 더 적합할 수 있으며, 다채로운 길목과 예기치 못한 장애물 배치로 인해 반복 플레이 시에도 새로운 도전 과제를 제공할 가능성이 높다. 맵의 제목에서 'Final.V'라는 접미사는 해당 시리즈의 완결판임을 암시하며, 제작자의 네이버 카페를 통한 제작문의가 명시되어 있어 공식적인 배포와 지원이 이루어진 작품임을 유추할 수 있다. 이 맵은 주로 1인 플레이를 상정하고 있는 것으로 보이나, 팀플레이도 가능할 수 있는 넓은 맵 구조를 갖추고 있다. 플레이어는 맵의 특성상 빠른 반응력과 적절한 유닛 컨트롤을 요구받을 것이며, 특히 좁은 통로나 지형적 이점을 활용한 전략이 중요해 보인다. 맵을 시작하기 전에는 맵의 전체적인 경로와 주요 방어선을 숙지하는 것이 중요하며, 특히 랜덤으로 배치된 적군 유닛에 대응하기 위한 대비가 필요하다. 또한, 맵의 넓고 복잡한 구조상 맵 에디터를 통한 경로 분석이나 시연 영상 등을 참고하면 더 효과적인 플레이가 가능할 것이다. Random Mission Control OZ Final.V is a mini-game-style custom map for StarCraft: Brood War, created by SAKURA08 as part of the 'Random Mission Control OZ' series. The map features a vast desert terrain, suggesting a 'random defense' or 'AI challenge' gameplay where players must navigate from the starting base on the bottom-left to the top-right, overcoming various obstacles and enemy positions. The terrain includes narrow paths and strategic chokepoints that demand careful unit control and quick decision-making, making it more suitable for experienced players. The 'Final.V' suffix in the title indicates this is likely the concluding version of the series, and the inclusion of a Naver Cafe link for inquiries suggests official distribution and community support. While designed primarily for single-player, the expansive layout also allows for potential team-based strategies. Players should familiarize themselves with the map's pathways and key defensive points before starting, as the random enemy unit placements require adaptability. The complex terrain may benefit from prior analysis or demonstration videos to optimize gameplay efficiency and success rates.
IQ Test
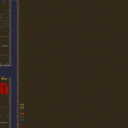
스타크래프트 브루드워의 유즈맵 <IQ Test>는 플레이어가 맵 상의 장애물을 빠르게 통과하며 최단 시간을 기록하는 퍼즐형 맵입니다. 내부 설명에서도 알 수 있듯이 '코스를 가능한 한 빠르게 통과하라'는 목표가 명확하며, 좁은 길목과 함정, 지뢰, 함정 건물 등이 복잡하게 배치된 구조가 특징입니다. 맵의 전체적인 분위기는 어두운 황무지 타일셋을 기반으로 하여 침울하고 긴장감이 느껴지지만, 밝은 색상의 시작 지점과 엔딩 지점이 대비되어 진행 과정을 시각적으로 구분할 수 있습니다. 플레이어는 시작 지점에서 출발하여 지정된 루트를 따라 이동해야 하며, 도중에 등장하는 장애물이나 함정을 피하거나 제거하는 방식으로 시간을 단축해야 합니다. 맵의 난이도는 장애물의 밀도와 복잡도에 따라 달라질 수 있으며, 특히 좁은 통로나 연속된 함정 구간에서 실수가 발생하기 쉽습니다. 제한된 공간 안에서 빠른 판단과 정확한 조작이 요구되는 만큼, 전략적인 움직임과 타이밍이 승패를 좌우합니다. 초보 플레이어는 맵의 구조를 숙지하지 못해 여러 번 실패할 가능성이 높으므로, 반복 플레이를 통해 루트를 암기하는 것이 중요합니다. 또한, 맵의 특성상 단일 플레이어나 소규모 팀 플레이에 적합하며, 6인까지 참여할 수 있는 구조로 설계되었습니다. 맵의 완성도는 간결하면서도 도전적인 퍼즐 요소와 시각적 디자인으로 구성되어 있으며, 스타크래프트 유즈맵의 특색을 잘 살린 작품 중 하나로 평가됩니다. 특히, 짧은 플레이 타임과 높은 재플레이 가치를 제공하는 점에서 유즈맵爱好者들에게 인기 있을 만한 요소들이 포함되어 있습니다. 플레이 전에는 맵의 전체적인 구조를 미리 파악하고, 가능한 한 빠른 루트를 찾는 연습을 추천합니다. 또한, 함정이나 장애물의 패턴을 분석하여 효율적인 통과 방법을 찾아내는 것이 핵심입니다. 맵의 난이도는 초반에는 쉬울 수 있으나, 후반부로 갈수록 복잡해지는 구조로 인해 숙련된 플레이어에게 더 적합하다는 점도 고려해야 합니다. StarCraft: Brood War's custom map *IQ Test* is a puzzle-style map where players navigate through obstacles on the map to record the fastest possible time. As indicated in the in-game description, the clear objective is to "pass through the course as quickly as possible," and the map features a complex layout with narrow passages, traps, landmines, and hazardous buildings. The overall atmosphere is based on a dark, desolate tileset, giving it a somber and tense feel, though the bright-colored start and end points contrast sharply, visually separating the progression stages. Players must begin at the starting point and follow the designated route, shortening their time by either avoiding or eliminating obstacles and traps encountered along the way. The difficulty varies depending on the density and complexity of the obstacles, with mistakes being especially easy to make in tight corridors or sequences of traps. Since quick decision-making and precise control are required within limited space, strategic movement and timing determine victory or defeat. Novice players may struggle due to unfamiliarity with the map’s layout and fail repeatedly, so memorizing the route through repeated play is essential. Given the map’s nature, it is best suited for solo play or small team formats, though it is designed to accommodate up to six players. The map’s polished design combines concise yet challenging puzzle elements with strong visual aesthetics, earning recognition as a well-crafted custom map that captures the essence of StarCraft’s custom map scene. Its short playtime and high replay value make it particularly appealing to custom map enthusiasts. Before playing, it’s recommended to familiarize yourself with the overall structure and practice finding the fastest route possible. Analyzing trap and obstacle patterns to discover efficient passage methods is also key. While the early sections may seem easier, the increasing complexity toward the later stages makes this map more suitable for experienced players.
최근 등록된 맵
새로 추가된 파일과 버전을 확인하세요.
도망가기 2 (Run away 2)
《Run away 2》는 스타크래프트 브루드워의 컴까기 장르 유즈맵으로, 플레이어가 끊임없이 몰려드는 적군 웨이브를 피해 살아남아야 하는 도전형 디펜스 게임이다. 맵은 넓은 평야와 중앙에 위치한 안전한 거점 구조로 이루어져 있으며, 플레이어는 시작 지점에서 출발해 적의 공격을 피하면서 거점을 방어하거나 탈출 루트를 찾아야 한다. 화면에는 붉은색으로 표시된 적군이 끊임없이 스폰되어 맵 곳곳을 공격해 오며, 플레이어는 개별적으로 또는 팀을 이루어 맵 내의 자원을 활용해 방어선을 구축하거나 후퇴를 반복해야 한다. 맵의 주요 특징으로는 넓은 개활지와 복잡한 지형이 없어 이동이 자유로운 대신, 적의 공격 루트가 예측 가능하다는 점이 있다. 플레이어는 미네랄과 가스를 확보해 유닛을 생산하고, 방어 건물이나 보호를 위한 유닛을 배치할 수 있다. 그러나 맵 내에 보호막이나 회복 시설은_visible하지 않으며, 대부분의 전투는 플레이어의 기지나 거점에서 벌어지는 것으로 보인다. 난이도는 스폰되는 적군의 수와 속도에 따라 조절되며, 초보자는 기본적인 방어 전략을 익히기 어려울 수 있어 보통 이상의 난이도를 지닌다. 맵의 승패 조건은 게임 내에 명시된 바는 없지만, 일반적으로는 거점의 유지 여부나 적군 웨이브를 얼마나 오랫동안 버티느냐가 관건으로 추정된다. 플레이 전에는 맵의 구조와 적의 스폰 위치를 정확히 숙지하는 것이 중요하며, 특히 중앙 거점 주변의 방어 시설 구축이 생존률을 높이는 핵심 전략이 될 수 있다. 추천 대상은 컴까기 장르에 익숙한 플레이어나 도전 정신을 가진 초보자 이상 유저로, 넓은 공간을 활용한 전략적 방어보다는 빠른 판단과 유연한 대처가 요구되는 맵이다. 맵의 재미 요소는 끊임없는 긴장감과 적응력 테스트에 있으며, 한 번의 실수가 치명적인 결과를 초래할 수 있어 플레이어의 집중력을 요한다. Run away 2 is a UMS-style user-made map in StarCraft: Brood War, classified under the escape-defense genre where players must survive endless waves of enemy attacks. The map features a large open field with a central safe zone, where players start and must either defend a base or find an escape route. Red-colored enemy units continuously spawn across the map, attacking players individually or in teams. The map’s design emphasizes wide open spaces for free movement, though enemy attack patterns appear predictable. Players can gather minerals and gas to build units and defensive structures, but no visible shield or healing facilities are present. The difficulty scales with the number and speed of spawned enemies, making it suitable for intermediate players. Victory conditions are not explicitly stated, but generally revolve around either holding the central base or surviving as long as possible against waves. Before playing, it’s crucial to memorize the map layout and enemy spawn points. Effective defense near the central zone is key to survival. This map is recommended for players familiar with escape-defense games or those seeking a challenge, as it demands quick decisions and adaptability. The core appeal lies in the constant tension and need for situational awareness, where a single mistake can lead to failure.
썬켄 4웨이 어드밴스드 FIX (Sunken 4 Way Advanced FIX)
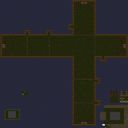
‘썬켄 4웨이 어드밴스드 FIX’는 스타크래프트: 브루드워의 유즈맵으로서, 6명의 플레이어가 육지 지형에서 시작해 한 방향으로만 나아가는 좁은 길목을 통과하는 도전형 디펜스 맵이다. 맵의 전체적인 구조는 사막 타일셋을 기반으로 하며, 중앙의 좁은 통로 양옆으로 지상 유닛을 생산할 수 있는 공간이 배치되어 있다. 플레이어는 시작 지점에서부터 끝까지 도달하지 못하도록 적의 유닛을 막아야 하며, 특히 단 한 기의 유닛이라도 끝까지 도달하지 못하도록 신경 써야 한다. 맵의 제목에서 알 수 있듯이 ‘4웨이’라는 단어는 네 방향으로 갈라지는 분기점을 가리키지만, 실제로는 중앙 통로의 구조상 한 방향으로만 유닛이 이동할 수 있도록 설계된 듯 보인다. 맵의 난이도는 플레이어의 조합과 전략에 따라 크게 달라지며, 특히 좁은 길목에서 다수의 적을 막아내야 하는 상황이 자주 발생한다. 초보자의 경우 쉽게 무너질 수 있지만, 경험 있는 플레이어는 지형과 유닛의 특성을 활용해 효율적으로 방어할 수 있다. 이 맵은 주로 팀플레이보다는 개인 간의 경쟁 구도로 진행되며, 플레이어 간의 소통보다는 개인의 판단력과 컨트롤이 요구된다. 맵의 제목에 ‘FIX’라는 단어가 포함된 점으로 미루어 보아, 과거 버전의 문제점을 보완한 개선판일 가능성이 높다. 따라서 플레이 전에는 맵의 구조와 유닛의 생산 위치를 충분히 숙지하고, 가능한 한 빠른 시간 내에 방어 태세를 갖추는 것이 중요하다. 이 맵은 ‘썬켄’이라는 이름과 사막 타일셋 덕분에 시각적으로도 흥미로운 분위기를 자아내며, 특히 건물과 유닛의 배치로 인해 긴장감을 유발하는 디자인으로 완성되어 있다. 초보자의 경우 기지 방어의 기본기를 다진 후 도전하는 것이 좋으며, 숙련자의 경우 다양한 유닛 조합을 실험해 보는 것도 재미있는 요소 중 하나다. 'Sunken 4-Way Advanced FIX' is a user-made defense map in *StarCraft: Brood War* where six players start on land terrain and must navigate a narrow path in a single direction, defending against waves of enemy units. The map features a desert tile set, with production spaces for ground units placed along both sides of the central narrow corridor. Players must prevent enemy units from reaching the end, ensuring not a single unit slips through. As suggested by its title, "4-Way" implies four branching paths, but the actual layout restricts movement to a single direction due to the corridor's design. Difficulty varies greatly depending on the player's unit composition and strategy, with frequent situations requiring blocking multiple enemies in the tight passage. Beginners may struggle, but experienced players can leverage terrain and unit advantages for efficient defense. Unlike team-based maps, this one emphasizes individual competition, relying more on personal judgment and control than teamwork. The inclusion of "FIX" in the title suggests this is an improved version addressing flaws from earlier iterations. Thus, it's crucial to study the map's layout and unit spawn points before playing, quickly setting up defenses for the best chance of success. The 'Sunken' name and desert theme create a visually engaging atmosphere, enhanced by the tense design of building and unit placements. Beginners should solidify their base defense skills before attempting this map, while veterans can experiment with different unit combinations for added enjoyment.
러닝 저글링 런 3.0 (Run Zergling Run 3.0)
스타크래프트 브루드워 유즈맵의 명작 중 하나로 꼽히는 <러닝 저글링 런 3.0>은 저글링을 조종해 다양한 장애물을 피해 목적지까지 도달하는 도전형 디펜스 맵이다. 맵의 핵심은 빠른 판단력과 컨트롤을 요구하는 저글링의 움직임에 있으며, 끊임없이 쏟아지는 적 유닛과 함정, 좁은 길목에서 벌어지는 피하기 플레이가 주를 이룬다. 맵은 총 6명의 플레이어가 동시에 참여할 수 있도록 설계되어 있으며, 각 플레이어는 자신의 저글링을 조종하며 공통된 목적지까지 도달해야 한다. 저글링의 체력이 낮고 이동 속도가 빠르며, 맵 곳곳에 배치된 장애물과 적 유닛이 끊임없이 방해하기 때문에 초반부터 신중한 움직임을 요구한다. 또한 맵의 난이도는 조절 가능한 요소로, 낮게 설정할 경우 비교적 쉽게 목적지에 도달할 수 있지만 높아질수록 적 유닛의 공격력과 밀도가 급격히 증가해 플레이어의 컨트롤과 반응 속도를 극한까지 시험하게 된다. 맵의 볼륨은 상당하며, 맵 곳곳에 숨겨진 숏컷이나 숨겨진 길도 존재하는데, 이를 발견하는 것이 성공의 열쇠가 될 수 있다. 특히 맵의 후반부로 갈수록 복잡한 길목과 예측 불가능한 적 패턴이 등장하기 때문에, 미리 맵을 숙지하고 여러 번 플레이해 보는 것이 좋다. 이 맵은 단순한 피하기 게임을 넘어, 저글링의 특성을 십분 활용한 전략적 플레이와 빠른 적응력이 요구되는 종합적인 도전 과제를 제공한다. 초보자는 물론이고 숙련자까지도 끊임없이 새로운 도전을 제공하는 이 맵은 스타크래프트 유즈맵의 클래식한 명작으로 손꼽히며, 특히 피하기와 서바이벌 요소가 결합된 디펜스 장르를 люби하는 유저들에게 강력히 추천할 만한 작품이다. 플레이 전에는 저글링의 기본 컨트롤과 맵의 주요 루트를 미리 익혀두는 것이 좋으며, 특히 장애물과 적 유닛의 패턴을 외워두면 성공 확률을 크게 높일 수 있다. <Running Zergling Run 3.0> is a legendary Brood War custom map renowned for its challenging gameplay, where players control a Zergling to navigate through a series of obstacles and reach the destination. The core of the map revolves around quick decision-making and precise control, as players constantly evade enemy units, traps, and tight spaces. Designed for up to six players, each controls their own Zergling, racing toward a shared goal. With low health and high speed, Zerglings face relentless obstacles and enemy interference from the start, demanding careful movement early on. The difficulty is adjustable—lower settings allow easier progress, while higher ones drastically increase enemy aggression and density, pushing players to their limits in reflexes and control. The map is expansive, featuring hidden shortcuts and alternate paths that can be crucial to success. As the stages progress, the routes become more complex and enemy patterns more unpredictable, so memorizing the layout through repeated plays is highly recommended. Beyond just an evasion game, it challenges players to leverage the Zergling’s traits strategically while adapting quickly. Whether you're a beginner or a veteran, this map offers endless challenges and stands as a classic in the custom map genre, especially recommended for fans of dodging and survival defense mechanics. Before playing, mastering basic Zergling controls and key routes will greatly improve your odds, with memorizing obstacle and enemy patterns being particularly effective.
랜덤 마이크로 챌린지 X (RandomMicroChallengeX)
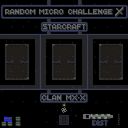
스타크래프트 브루드워의 유즈맵 계통에서 ‘랜덤 마이크로 챌린지 X(RandomMicroChallengeX)’는 플레이어들에게Micro 컨트롤 능력을 극한까지 테스트하는 아레나 장르의 도전적인 맵입니다. 맵의 전체적인 구조는 넓은 중앙 전투 공간을 중심으로 세 개의 주요 진영이 배치되어 있으며, 각 진영은 좁은 입구와 다수의 보급로로 연결되어 있습니다. 맵의 이름에 포함된 ‘랜덤’이라는 키워드에서 짐작할 수 있듯이, 맵은 플레이어의 위치를 랜덤으로 배치하는 시스템을 채택하고 있어 매 게임마다 새로운 전략과 대처법이 요구됩니다. 맵의 가장 큰 특징은Micro 컨트롤의 비중이 매우 높다는 점으로, 저글링, 질럿, 드라군 등 소수 병력 간의 치열한 전투가 벌어지며, 한 순간의 판단과 컨트롤이 승패를 좌우합니다. 특히, 맵 중앙에 위치한 넓은 개활지는 대규모 병력 싸움보다는 소규모 전투가 자주 발생하며, 이는 플레이어의 개별 유닛 조작 능력을 더욱 중요하게 만듭니다. 또한, 맵 곳곳에 배치된 자원 지점은 초반 자원 확보 경쟁을 유도하며, 이를 바탕으로 빠른Micro 컨트롤과 생산력 향상이 필수적입니다. 이 맵은 초보자보다는 숙련된 플레이어, 특히Micro 컨트롤에 자신 있는 유저들에게 적합하며, 맵 설명에서도 ‘초보자나 실력이 없는 플레이어에게 적합하지 않다’라고 명시되어 있어 난이도가 상당히 높음을 짐작할 수 있습니다. 플레이어는 각 진영의 특성을 잘 이해하고, 적의 움직임을 예측하며 신속한 반응을 보여야만 승리를 거머쥘 수 있습니다. 맵의 인상적인 점은 넓은 개활지와 좁은 통로의 조화가Micro 전투의 긴장감을 배가시킨다는 점으로, 이는 마치 체스와 같은 전략적 깊이를 제공하면서도 실시간 액션의 재미를 놓치지 않는 구조로 설계되어 있습니다. 이 맵을 플레이하기 전에는 Micro 컨트롤 연습과 더불어, 각 종족의 특성을 숙지하고, 맵의 주요 통로와 자원 위치를 미리 숙지하는 것이 좋습니다. 또한, 랜덤 배치 시스템을 고려할 때, 다양한 전략을 준비하고, 적응력 있는 플레이 스타일을 구사하는 것이 중요합니다. 이 맵은 아레나 장르의 정수를 담은 동시에, Micro 컨트롤의 중요성을 극대화한 작품으로, 스타크래프트 유즈맵 팬들에게는 필수 체험 작품 중 하나로 손꼽힙니다. In *StarCraft: Brood War*'s custom map scene, *RandomMicroChallengeX* is a challenging arena-style map that pushes players to their limits in micro-control. The map features a large central battle area surrounded by three main bases, each connected by narrow entrances and multiple supply routes. As suggested by the "Random" in its name, the map employs a system that randomly assigns player starting positions, demanding new strategies and adaptability in every match. The defining feature of this map is its heavy emphasis on micro-control. Battles often revolve around small-scale clashes between units like Zerglings, Zealots, and Dragoons, where split-second decisions and precise control can determine victory or defeat. The wide open central area frequently hosts these skirmishes rather than large-scale engagements, further emphasizing individual unit management. Scattered resource points across the map also spark early competition for resources, making rapid micro-control and efficient production essential. This map is tailored for experienced players—particularly those confident in their micro-control skills—rather than beginners, as explicitly stated in its description: "Not suitable for beginners or unskilled players." Success hinges on understanding each race's strengths, predicting enemy movements, and reacting swiftly. The map’s standout design lies in its balance of open spaces and tight corridors, amplifying the tension of micro battles while offering strategic depth akin to chess alongside real-time action. Before playing, it’s recommended to practice micro-control, study each race’s traits, and familiarize yourself with key paths and resource locations. Given the random starting system, preparing multiple strategies and maintaining adaptable playstyles are crucial. *RandomMicroChallengeX* encapsulates the essence of arena maps while maximizing the importance of micro-control, making it a must-play title for *StarCraft* custom map enthusiasts.
OMFG 더 울트라리스크 (OMFG The Ultralisk)
‘OMFG THE ULTRALISKS’는 스타크래프트: 브루드워의 유즈맵으로, 이름 그대로 울트라리스크와 맞서 싸워야 하는 디펜스 장르의 도전형 맵이다. 내부 설명에서도 유추할 수 있듯이 ‘OMFG The Zerglings Did Ya?’와 같은 시리즈물로 추정되는 이 맵은, 플레이어가 조종하는 유닛을 보호하며 끊임없이 밀려드는 적군을 상대하는 방식으로 진행된다. 맵 중앙에 위치한 본진 주변으로 울트라리스크 및 저글링, 뮤탈리스크 등으로 구성된 적 군단이 끊임없이 스폰되어 공격을 가하며, 이를 방어하는 것이 주 목표로 보인다. 적군의 공격 패턴은 빠르게 변화하며, 특히 울트라리스크의 파괴력은 매우 강력하기 때문에 효율적인 빌드와 유닛 관리가 필수적이다. 맵의 구조는 비교적 평탄한 지형을 기반으로 하지만, 곳곳에 배치된 건물이나 지형지물이 방어선을 구축하는 데 도움을 줄 수 있다. 또한, 맵의 가장자리에는 방어용 건물을 설치할 수 있는 공간이 마련되어 있어, 이를 활용한 전략적 방어가 가능할 것으로 보인다. 플레이어는 초반부터 끊임없이 밀려오는 적을 상대해야 하며, 후반부로 갈수록 적군의 스폰 속도와 강도가 증가하는 구조로 보인다. 이 맵은 초보자보다는 어느 정도의 스타크래프트 경험과 전략적 사고력이 필요한데, 특히 유닛의micro 컨트롤과 자원 관리 능력이 요구된다. 또한, 팀 플레이가 가능하다면 방어 efficiency가 크게 향상될 수 있기 때문에, 팀원 간의 협력이 중요한 요소로 작용할 것이다. 이 맵을 플레이하기 전에는 빌드 옵저버와 같은 유틸리티 유닛의 활용 가능성, 그리고 방어 건물의 배치 위치와 타워 러시의 가능성을 미리 숙지해 두는 것이 좋다. 무엇보다도, 끊임없이 밀려오는 적군을 상대해야 하기 때문에 체력 관리와 자원 확보가 핵심이다. 이 맵은 디펜스 장르의 특징을 잘 살린 동시에, 울트라리스크라는 강력한 적 유닛을 활용하여 플레이어의 전략적 깊이를 요구하는 뛰어난 유즈맵으로 평가된다. 특히, 적군의 스폰 위치와 공격 패턴을 빠르게 파악하고 대응하는 능력이 이 맵의 재미를 크게 좌우할 것이다. ‘OMFG THE ULTRALISKS’ is a StarCraft: Brood War custom map where, as the name suggests, players must defend against waves of Ultralisk-based enemies in a challenging defense genre map. Based on the in-game description, this appears to be part of a series similar to ‘OMFG The Zerglings Did Ya?’, where players protect their controlled units while fending off relentless enemy attacks. The main objective seems to be defending the main base located at the center of the map, which is constantly assaulted by enemy forces consisting of Ultralisk, Zerglings, Mutalisks, and more. The enemy’s attack patterns shift rapidly, and the sheer destructive power of Ultralisk makes efficient build orders and unit management essential. While the map features relatively flat terrain, strategic placement of buildings and terrain obstacles can help establish defensive lines. Additionally, designated spaces along the map’s edges allow for the construction of defensive structures, enabling more tactical defensive setups. Players must face waves of enemies from the start, with the spawn rate and intensity of attacks increasing as the game progresses. This map is better suited for players with some StarCraft experience and strategic thinking rather than beginners, demanding strong micro-management skills and resource management. Team play can significantly improve defensive efficiency, making cooperation among teammates a crucial factor. Before playing, it’s wise to familiarize yourself with utility units like the Build Observer, optimal defensive structure placement, and potential tower rushes. Most importantly, managing health and securing resources are key to surviving the endless enemy waves. This map excels in capturing the essence of the defense genre while incorporating the challenge of facing powerful Ultralisk enemies, making it a standout custom map that demands deep strategic play. The ability to quickly recognize enemy spawn locations and adapt to their attack patterns will greatly influence the enjoyment and success in this map.
랜덤미션컨트롤OZ Final.V (Random Mission Control OZ Final.V)
랜덤미션컨트롤OZ Final.V는 스타크래프트 브루드워에서 즐길 수 있는 미니게임형 유즈맵으로, 제작자 SAKURA08가 제공한 '랜덤미션컨트롤 OZ' 시리즈의 최신 버전이다. 맵의 전체적인 구조는 넓은 사막 지형을 기반으로 하며, 일종의 '랜덤 디펜스' 또는 '컴퓨터 상대 도전형' 플레이가 가능한 것으로 보인다. 플레이어는 맵 좌측 하단에 위치한 본진에서 시작하며, 우측 상단으로 이어지는 다양한 경로와 장애물을 통과해야 하는 구조로 추정된다. 게임의 핵심은 랜덤으로 배치된 적군 기지나 방어선을 돌파하는 데 있으며, 맵 곳곳에 있는 좁은 통로와 지형적 요소가 플레이어의 전략과 속도를 요구할 것으로 예상된다. 특히, 맵의 넓고 복잡한 지형은 초보자보다는 경험이 있는 플레이어에게 더 적합할 수 있으며, 다채로운 길목과 예기치 못한 장애물 배치로 인해 반복 플레이 시에도 새로운 도전 과제를 제공할 가능성이 높다. 맵의 제목에서 'Final.V'라는 접미사는 해당 시리즈의 완결판임을 암시하며, 제작자의 네이버 카페를 통한 제작문의가 명시되어 있어 공식적인 배포와 지원이 이루어진 작품임을 유추할 수 있다. 이 맵은 주로 1인 플레이를 상정하고 있는 것으로 보이나, 팀플레이도 가능할 수 있는 넓은 맵 구조를 갖추고 있다. 플레이어는 맵의 특성상 빠른 반응력과 적절한 유닛 컨트롤을 요구받을 것이며, 특히 좁은 통로나 지형적 이점을 활용한 전략이 중요해 보인다. 맵을 시작하기 전에는 맵의 전체적인 경로와 주요 방어선을 숙지하는 것이 중요하며, 특히 랜덤으로 배치된 적군 유닛에 대응하기 위한 대비가 필요하다. 또한, 맵의 넓고 복잡한 구조상 맵 에디터를 통한 경로 분석이나 시연 영상 등을 참고하면 더 효과적인 플레이가 가능할 것이다. Random Mission Control OZ Final.V is a mini-game-style custom map for StarCraft: Brood War, created by SAKURA08 as part of the 'Random Mission Control OZ' series. The map features a vast desert terrain, suggesting a 'random defense' or 'AI challenge' gameplay where players must navigate from the starting base on the bottom-left to the top-right, overcoming various obstacles and enemy positions. The terrain includes narrow paths and strategic chokepoints that demand careful unit control and quick decision-making, making it more suitable for experienced players. The 'Final.V' suffix in the title indicates this is likely the concluding version of the series, and the inclusion of a Naver Cafe link for inquiries suggests official distribution and community support. While designed primarily for single-player, the expansive layout also allows for potential team-based strategies. Players should familiarize themselves with the map's pathways and key defensive points before starting, as the random enemy unit placements require adaptability. The complex terrain may benefit from prior analysis or demonstration videos to optimize gameplay efficiency and success rates.
99개의방! 4번째! (99 Rooms! 4th!)
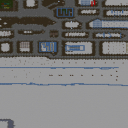
스타크래프트 브루드워의 유즈맵으로 유명한 ‘99개의방!④번째!’는 이름 그대로 수많은 방들을 통과해야 하는 도전형 디펜스 맵이다. 맵의 구조는 5명의 플레이어가 동시에 참여할 수 있도록 설계되어 있으며, 각 방마다 숨겨진 함정, 적절한 방어 유닛 배치, 또는 순발력을 요구하는 퍼즐 요소가 포함되어 있다. 이미지 상에서 확인되는 방의 수는 상당히 많고, 각각의 방은 연결되어 하나의 긴 스테이지처럼 느껴진다. 플레이어는 방을 통과할 때마다 자원을 획득하거나 방어력을 강화할 수 있는 아이템을 얻을 수 있으며, 일부 방에서는 적의 공격이 집중적으로 쏟아지는 경우도 보인다. 맵의 전체적인 분위기는 어둡고 긴장감 넘치며, 초보자와 숙련자 모두를 고려한 디자인으로 보인다. 초보자라면 방 하나하나의 패턴을 carefully 파악해야 하며, 숙련자라면 빠른 판단과 자원 관리로 efficiency를 높이는 플레이가 요구된다. 맵의 난이도는 방의 수가 많아질수록 점차 높아지는 구조로, 후반부로 갈수록 적의 공격 패턴도 복잡해진다. 플레이어는 제한된 자원으로 방어선을 구축하거나, 때로는 회피 전략을 통해 다음 방으로 넘어가는 방법을 선택해야 한다. 맵의 완성도는 방의 배치와 아이템 밸런스가 잘 조화되어 있어, 반복 플레이를 하더라도 새로운 전략을 시도해 볼 수 있는 재미가 있다. 특히 팀플레이 시 서로 다른 방에서 동시에 발생하는 이벤트를 공유하고 대응하는 협동심이 중요해진다. 추천 대상은 디펜스와 도전형 맵을 좋아하는 유저이며, 혼자서든 팀으로든 즐길 수 있는 구조로 구성되어 있다. 플레이 전에는 방의 개수와 아이템 위치, 적의 배치 패턴을 미리 숙지하고 가는 것이 좋다. 또한, 자원의 효율적 사용과 침착한 판단력이 이 맵의 핵심 열쇠가 될 것이다. This Brood War custom map, famous for its StarCraft gameplay, "99 Rooms! 4th!" is a challenge-type defense map where you must pass through countless rooms, as the name suggests. Designed for five players to participate simultaneously, each room features hidden traps, strategically placed defensive units, or puzzle elements that test quick thinking. The map contains a large number of rooms, connected in a way that feels like one long stage. Players gain resources or defensive-boosting items with each cleared room, though some rooms are met with concentrated enemy assaults. The overall atmosphere is dark and tense, with design considerations for both beginners and experts. Beginners should carefully study each room’s patterns, while experts must rely on quick decision-making and resource management to maximize efficiency. The difficulty escalates as the number of rooms increases, and enemy attack patterns grow more complex in later stages. Players must build defenses with limited resources or sometimes rely on evasion tactics to advance. The map’s completeness shines through its balanced room layouts and item distribution, offering fresh strategies even after repeated plays. Teamwork is especially crucial, as events in different rooms require coordination and shared responses. Recommended for users who enjoy defense and challenge maps, it can be enjoyed solo or with a team. Before playing, it’s wise to familiarize yourself with the number of rooms, item locations, and enemy patterns. Efficient use of resources and calm judgment are key to mastering this map.
Impossible Soul (임파서블 소울)
스타크래프트 브루드워의 Impossible Soul은 6명의 플레이어가 함께 도전하는 컴까기 유즈맵으로, 7개의 정해진 레벨을 돌파해 '비컨(Beacon)'에 접근하는 것이 목표다. 각 레벨은 고유한 구조와 적 배치로 구성되어 있으며, 맵 곳곳의 비컨에 도달하면 다음 단계로 넘어갈 수 있다. 이미지 상에서 확인되는 맵의 중앙 구조물과 주변의 방어 건물들은 방어전을 유도하는 구조로 보이며, 플레이어는 끊임없이 몰려오는 적들을 상대하면서 비컨에 도달해야 한다. 맵의 배경은 어두운 톤의 화산 지형으로, 전체적으로 긴장감을 조성하는 분위기를 연출한다. 각 레벨이 끝날 때마다 다음 단계로의 진입 조건이 제공되며, 이는 맵 내부의 트리거나 구조물로 추정된다. 컴까기 맵답게 지속적인 적의 공격과 빠른 판단력이 요구되며, 특히 중앙 구조물 주변은 주요 교전 지역으로 예상된다. 초반에는 소규모 груп 전투가, 후반으로 갈수록 대규모 병력과 조합된 적들이 등장할 것으로 보인다. 플레이어는 자원 관리보다는 방어와 진격 타이밍에 집중해야 하며, 팀워크가 핵심인 팀플레이 맵으로 보인다. 초보 플레이어는 낮은 난이도의 레벨에서 기본적인 전투와 맵 이해를 먼저 습득하는 것이 좋으며, 숙련자는 빠르게 비컨에 도달하는 전략을 구사해야 한다. 맵을 플레이하기 전에는 각 레벨의 비컨 위치와 주요 길목을 미리 확인해 두는 것이 중요하다. 또한, 맵의 어두운 배경 탓에 시야 확보를 위한 detector 유닛 활용도 전략적으로 고려해야 한다. 맵의 구조상, 중앙 지역을 장악하는 플레이어가 유리한 고지를 점할 가능성이 높으므로, 초반부터 적극적인 진출을 계획하는 것이 좋다. StarCraft: Brood War's Impossible Soul is a co-op Zerg rush custom map where six players work together to clear seven predetermined levels and reach the 'Beacon.' Each level features unique layouts and enemy placements, and players can advance to the next stage by reaching beacons scattered across the map. The central structure and defensive buildings visible in the images appear designed to force defensive battles, requiring players to constantly fend off waves of enemies while pushing toward the beacon. Set against a dark volcanic terrain, the map creates a tense atmosphere. Entry conditions to the next level are provided at the end of each stage, likely through triggers or structures within the map. As a co-op Zerg rush map, it demands continuous enemy attacks and quick decision-making, with the central structure's surroundings expected to be major battle zones. Early levels feature small group fights, while later stages introduce larger forces and combined enemy compositions. Players should focus more on defense and timing their advances rather than resource management, making teamwork essential in this team-based map. Beginners are advised to start with lower difficulty levels to grasp basic combat and map mechanics, while experienced players should prioritize strategies to reach the beacon quickly. Before playing, it's crucial to scout beacon locations and key pathways. Given the map's dark visuals, strategically using detector units for vision is also important. Controlling the central area early on can provide a significant advantage, so planning aggressive expansions from the start is recommended.
맵 선택 가이드
태그는 맵의 핵심 특징을 빠르게 설명하지만 제작 버전마다 규칙이 다를 수 있습니다. 상세 설명에서 권장 인원, 난이도, 플레이 시간과 버전을 함께 확인한 뒤 다운로드하세요.