
도전 스타크래프트 맵 모음
'도전' 태그가 등록된 맵을 모았습니다. 장르 하나로 찾기 어려운 플레이 방식, 난이도와 특징을 중심으로 인기 맵과 최신 맵을 비교해 보세요.
- 등록 맵
- 67개
- 누적 다운로드
- 4
- 누적 조회
- 2,201
인기 맵
다운로드와 조회 반응이 높은 맵입니다.
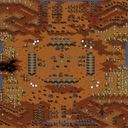
햄버거힐 1.9: 월남전의 지옥 (Test of Survival - Hamburger Hill 1.9)
스타크래프트 브루드워의 대표적인 서바이벌 유즈맵인 <Test of Survival - 햄버거힐1.9>는 이름에서 느껴지듯 치열한 전투가 끊임없이 펼쳐지는 맵이다. 햄버거힐이라는 지명과 월남전의 지옥이라는 설명에서부터 알 수 있듯, 이 맵은 전쟁터의 한복판에서 펼쳐지는 전투를 재현한 것으로 보인다. 맵 중앙에 위치한 넓은 평야와 그 주변을 둘러싼 언덕 지형은 플레이어에게 넓은 시야와 다양한 전략적 선택지를 제공하며, 4차례의 지원부대라는 설명은 끊임없이 몰려오는 적군을 상대로 지속적인 저항을 요구한다는 점을 시사한다. 이 맵은 기본적으로 적군 컴퓨터를 상대로 건물을 파괴하고 유닛을 섬멸하는 Survival(서바이벌) 장르에 속한다. 맵의 구조는 비교적 단순하지만, 넓은 전장과 지속적인 적의 공격은 플레이어에게 전략적 깊이와 긴장감을 동시에 제공한다. 특히 햄버거힐이라는 이름에 걸맞게 맵 곳곳에 흩어져 있는 언덕과 골짜기는 시야 확보와 진형 배치에서 중요한 역할을 한다. 또한, 맵 상단과 하단에 위치한 4차례의 지원부대 지원 지역은 플레이어가 일정 시간마다 추가적인 자원이나 유닛을 확보할 수 있는 기회를 제공하며, 이를 통해 지속적인 전투를 유지할 수 있도록 돕는다. 이 맵을 플레이하기 위해서는 기본적인 스타크래프트 멀티 플레이 전략과 더불어,Earth에서 제공하는 다양한 유닛과 건물의 특성을 숙지하고 있어야 한다. 또한, 넓은 전장과 끊임없는 적의 공격에 대응하기 위한 빠른 판단력과 효율적인 자원 관리 능력이 요구된다. 특히, 초보자의 경우 맵의 구조와 적의 공격 패턴을 충분히 숙지하지 못한 상태에서 플레이할 경우 쉽게 무너질 수 있으므로, 사전 연습이 필수적이다. 이 맵은 주로 혼자서 컴퓨터 상대를 상대로 플레이하는 1인용 맵으로, 난이도는 비교적 높은 편으로 추정된다. 맵의 제목과 설명에서 느껴지는 긴장감과 더불어, 실제 게임 플레이에서도 끊임없는 적의 공격과 제한된 자원으로 인한 압박감이 플레이어에게 지속적인 도전을 안겨준다. 따라서, 이 맵은 기존의 스타크래프트 유저들에게는 새로운 도전 과제로, 초보자에게는 경험을 쌓을 수 있는 좋은 기회로 작용할 수 있을 것이다. StarCraft: Brood War's iconic survival custom map, *Test of Survival - Hamburger Hill 1.9*, lives up to its name with relentless, high-stakes combat unfolding continuously. As the map's name and description—"Hamburger Hill" and "Hell of the Vietnam War"—suggest, it recreates the chaos of a battlefield at its most intense. The wide central plain surrounded by hilly terrain gives players broad visibility and a variety of strategic options, while the mention of four waves of reinforcements implies a constant need to fend off waves of enemy forces. The map primarily falls under the Survival genre, tasking players with destroying enemy buildings and eliminating units against AI-controlled opponents. Though its layout is relatively straightforward, the expansive battlefield and unending enemy assaults deliver both strategic depth and high tension. True to its name, *Hamburger Hill*, scattered hills and valleys across the map play a crucial role in scouting and positioning. Meanwhile, the four reinforcement zones at the top and bottom of the map allow players to secure additional resources or units at regular intervals, helping sustain prolonged combat. To play effectively, players need a solid grasp of StarCraft’s multiplayer mechanics, along with a deep understanding of the unique properties of units and buildings provided by Earth. Fast decision-making and efficient resource management are essential to cope with the vast battlefield and relentless enemy pressure. Beginners, in particular, can easily falter if they don’t first study the map’s layout and enemy attack patterns, making practice sessions a necessity. Designed primarily as a single-player challenge against AI, *Test of Survival - Hamburger Hill 1.9* is considered fairly difficult. The tension suggested by its title and description carries into actual gameplay, where constant enemy attacks and limited resources create sustained pressure. For veteran StarCraft players, it offers a fresh challenge, while for newcomers, it serves as an excellent opportunity to build experience.
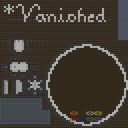
1 Million Zerglings (100만 저글링)
스타크래프트 브루드워의 유즈맵 중에서도 손꼽히는 괴작이자, 플레이어들에게 강한 인상을 남기는 ‘1 Million Zerglings(원 밀리언 저글링)’은 이름 그대로 저글링 100만 마리를 상대로 싸우는 디펜스 형식의 컴까기 맵이다. 맵의 전체적인 배경은 어두운 톤의 우주 공간으로, 중앙에 위치한 플레이어의 본진을 중심으로 거대한 저글링 웨이브가 끊임없이 밀려오는 구조로 구성되어 있다. 플레이어는 초반부터 끊임없이 쏟아지는 저글링 무리를 방어해야 하며, 유닛을 생산하거나 업그레이드를 진행하는 동시에 전략을 세워야만 살아남을 수 있다. 맵의 특징은 단순히 숫자에만 의존하지 않고, 저글링의 스펙과 배치 패턴이 조금씩 변화한다는 점이다. 초반에는 약한 개체들이 무더기로 몰려오지만, 시간이 지날수록 체력이 높아지고 공격력이 증가하는 저글링이 등장하며, 특정 시점부터는 다수의 브루탈리스크나 뮤탈리스크까지 등장하는 등 난이도가 급격히 상승한다. 방어에 실패하면 본진이 순식간에 무너질 수 있기 때문에, 플레이어는 자원을 효율적으로 관리하며 빠른 판단력과 손놀림을 요구받는다. 또한, 맵 곳곳에 배치된 방어 건물이나 특수 아이템(추정됨)을 활용하여 생존 확률을 높일 수 있다. 이 맵은 초보 플레이어에게는 엄청난 난이도를 자랑하지만, 숙련된 유저들에게는 극한의 조작력과 전략을 시험하는 도전 과제로 다가온다. 특히, 저글링의 물량과 스펙 변화에 맞춰 빌드를 유연하게 변경하는 능력이 핵심이며, 지속적인 업그레이드와 건물 관리가 필수적이다. 오랜 시간동안 플레이어들에게 사랑받는 이유 중 하나는 바로 이 ‘도전과 극복’의 재미에 있다. 맵을 처음 접하는 플레이어는 저글링의 물량을 버티지 못하고 순식간에 무너질 수 있지만, 몇 번의 시도 끝에 패턴을 익히고 전략을 세우면 그 쾌感은 이루 말할 수 없다. 또한, 맵의 атмосphere와 긴장감이 조성된 사운드 디자인(추정됨)이 플레이어의 몰입감을 더해준다. 이 맵을 추천하는 대상은 ‘스타크래프트의 기본기를 다지고 싶다’는 생각이 있는 유저들이나, 유즈맵의 새로운 장르를 탐험하고 싶은 이들에게 적합하다. 반대로, 손이 느리거나 전략적인 사고가 약한 플레이어에게는 추천하기 어려운 맵이기도 하다. 플레이 전에는 맵의 구조와 저글링의 패턴 변화 시점을 미리 확인하고, 방어 건물의 배치와 유닛 생산 라인을 미리 세워두는 것이 중요하다. 또한, 맵의 특성상 자원 수급이 제한적이므로, 초반 자원 관리에 특히 신경을 써야 한다. 마지막으로, 맵의 긴장감을 높이기 위해 사운드와 그래픽 설정을 최적화하는 것도 좋은 방법이다. ‘1 Million Zerglings’는 단순히 저글링을 막는 것이 아니라, 자신을 극한으로 몰아세우는 듯한 플레이 경험을 제공하는 맵으로, 스타크래프트 유즈맵의 진수를 느낄 수 있는 작품 중 하나다. 이 맵을 통해 자신의 실력을 시험해보고, 그 짜릿한 승리감을 느껴보길 바란다. 이 맵을 즐기기 위한 필수 조건은 ‘빠른 손놀림’과 ‘유연한 전략’뿐이다. Among Brood War custom maps, *1 Million Zerglings* stands out as one of the most notorious and unforgettable experiences. As the name suggests, it’s a defense-style "comp stomp" map where you fight against a relentless horde of 1 million Zerglings. The map’s atmosphere is set in a dark, cosmic void, with the player’s main base at the center and waves of Zerglings continuously surging toward it. From the start, you must defend against an endless tide of Zerglings while producing units, upgrading, and devising strategies to survive. What makes this map challenging isn’t just the sheer numbers—it’s the evolving specs and patterns of the Zerglings. Early waves consist of weak, swarming units, but as time passes, tougher variants appear with higher HP and attack power. Later stages introduce Brutalisks and Mutalisks, drastically increasing the difficulty. A single mistake can lead to your base collapsing in seconds, forcing you to manage resources efficiently and make quick decisions with precise execution. You can also improve your odds by utilizing defensive structures scattered across the map and special items (likely power-ups). While the map is brutally difficult for beginners, seasoned players see it as the ultimate test of mechanical skill and strategy. The key to success lies in adapting your build dynamically to the changing Zergling waves, constantly upgrading, and meticulously managing your buildings. What keeps players coming back is the thrill of overcoming this brutal challenge. Newcomers may crumble under the initial onslaught, but once they learn the patterns and refine their strategies, the satisfaction is unmatched. The immersive atmosphere and tense sound design (likely) further heighten the experience. This map is ideal for players looking to sharpen their Brood War fundamentals or explore fresh custom map genres. However, it’s not recommended for those with slow reflexes or weak strategic thinking. Before jumping in, study the map layout and the points where Zergling patterns shift, plan your defensive structures and unit production lines, and prioritize resource management—since income is limited. Optimizing sound and graphics settings can also enhance the intense atmosphere. *1 Million Zerglings* isn’t just about surviving waves of Zerglings; it’s an experience that pushes you to your limits, offering a taste of the best that Brood War custom maps have to offer. Give it a try if you’re ready to test your skills and chase that exhilarating sense of victory. The only requirements? Quick reflexes and adaptable strategy.
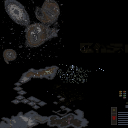
화면피하기 Impossible BETA4 (Screen Avoidance Impossible BETA4)
화면피하기 장르의 유즈맵인 '화면피하기 Impossible BETA4'는 기존 피하기 게임과는 차원이 다른 난이도와 독특한 진행 방식을 통해 플레이어들에게 강렬한 도전 정신을 요구하는 맵이다. 맵 제목에서 알 수 있듯 'Impossible'이라는 수식어에 걸맞게 피할 수 없는 장애물 패턴과 예측 불가능한 랜덤 요소들이 조합되어 있어, 초보자에게는 쉽게 느껴질 수 있지만 숙련자들에게는 끊임없는 긴장감을 선사한다. 이미지 상에서 보이는 맵 구조는 크게 두 가지 영역으로 나뉘는데, 왼쪽의 넓은 공간은 플레이어의 피할 공간을 제공하는 주요 필드로, 오른쪽의 복잡한 장애물 배치는 랜덤 디펜스와 유사한 패턴으로 구성되어 있다. 플레이어는 화면 하단에서 출발하여 상단으로 이동하는 과정에서 장애물을 피해야 하며, 특히 오른쪽 영역으로 진입하면 랜덤으로 생성되는 장애물과 함께 예고 없이 등장하는 공격 패턴에 대응해야 한다. 맵의 난이도를 높이는 핵심 요소는 'BETA4' 버전에서 추가된 것으로 추정되는 미세한 장애물 간격과 예측 불가능한 타이밍인데, 이는 플레이어의 반응 속도와 패턴 인지력을 극한까지 시험한다. 또한 맵 우측 상단에 표시되는 점멸하는 빛은 특정 페이즈 전환 신호로, 이 신호를 놓치면 예기치 못한 장애물 폭탄에 노출될 위험이 있다. 이러한 구조는 단순히 피하기 게임을 넘어 전략적 사고를 요구하는 디펜스 형태로 발전시키며, 특히 7인 플레이를 고려한 맵 디자인으로 보이나 개별 플레이어의 컨트롤 실력이 직접적인 승패를 가르는 주요 요소가 된다. 추천 대상은 기존 피하기 게임에 익숙한 플레이어들로, 특히 반응 속도와 집중력이 뛰어난 고수층에게 적합한 맵이며, 초보자는 난이도 조절이나 연습 모드를 통해 점차 숙련도를 높이는 것이 바람직하다. 플레이 전 확인해야 할 점은 맵의 랜덤 요소 비중과 장애물 패턴의 변화 주기인데, 이는 맵 설명이나 제작자 노트에 명시되어 있지 않지만 실제 플레이에서 체감할 수 있는 부분이다. 화면피하기 Impossible BETA4는 단순히 피하기 게임을 넘어서는 새로운 경험을 제공하며, 스타크래프트 유즈맵의 가능성을 넓히는 데 기여한 작품으로 평가된다. The U.S. map "Screen Avoidance Impossible BETA4," a genre of avoidance-style custom maps, demands intense challenge from players through its unparalleled difficulty and unique progression system unlike traditional avoidance games. As the title suggests, the map lives up to its "Impossible" label with an array of unavoidable obstacle patterns and unpredictable random elements, which may feel easy for beginners but offers relentless tension for seasoned players. The map structure visible in the image is divided into two main areas: the wide space on the left serves as the primary field where players dodge obstacles, while the complex obstacle layout on the right is arranged in patterns similar to random defense. Players start at the bottom of the screen and must navigate upward, avoiding obstacles along the way, especially when entering the right area where they must react to randomly generated obstacles and sudden attack patterns. The key factors raising the map's difficulty, likely introduced in the BETA4 version, are the tight spacing between obstacles and their unpredictable timing, pushing players to their limits in reaction speed and pattern recognition. Additionally, the flashing light in the top-right corner signals specific phase transitions—missing this cue risks exposure to unexpected obstacle bombs. This design elevates the game beyond a simple avoidance challenge into a strategic defense format, though individual player control remains the deciding factor in victory, even in a 7-player setup. The map is best suited for experienced players familiar with avoidance games, particularly those with sharp reflexes and high concentration; beginners are advised to gradually build skill through difficulty adjustments or practice modes. Before playing, it’s important to note the map’s reliance on random elements and the frequency of obstacle pattern changes, details not always specified in the map description or creator’s notes but easily felt during gameplay. "Screen Avoidance Impossible BETA4" goes beyond a standard avoidance game, offering a fresh experience that expands the possibilities of StarCraft custom maps.
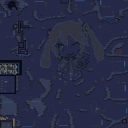
하츠네미쿠에게서 살아남기 (Survive from Hatsune Miku)
하츠네미쿠에게서 살아남기(Survive from Hatsune Miku)는 스타크래프트 브루드워 유즈맵 세계관에서 독특한 콘셉트와 도전적인 난이도를 선사하는 서바이벌 장르의 맵입니다. 화산 타일셋을 배경으로 펼쳐지는 이 맵은 맵 전반에 걸쳐 캐릭터의 형태를 시각적으로 구현한 독창적인 지형 디자인이 시선을 사로잡습니다. 플레이어는 제한된 환경 속에서 끊임없이 다가오는 위협을 극복하고 생존을 도모해야 하며, 맵 구조 곳곳에 숨겨진 공략 요소를 파악하는 것이 핵심 진행 방식입니다. 단순한 물량 공세나 무작정 버티기에서 벗어나, 정해진 패턴과 유닛 활용법을 찾아내어 난관을 돌파하는 재미를 강조합니다. 이 맵은 제작자의 수차례 밸런스 조정을 거친 1.14 버전을 기반으로 하며, 배틀크루저 가격 조정 및 특수 스킬 가스 소모량 최적화 등이 반영되어 있습니다. 전체적으로 난이도가 다소 높은 편에 속하지만, 뚜렷한 클리어 방법이 존재하므로 철저한 빌드 연구와 시행착오를 즐기는 유저들에게 알맞은 플레이 경험을 제공합니다. 특히 서바이벌이나 독특한 컨셉의 유즈맵을 선호하는 플레이어라면 도전 의식을 불태우기 좋습니다. 대규모 멀티플레이 상황에서도 협력과 각자의 역할 분담이 중요하게 작용하며, 독특한 지형 지물과 유닛 조합을 활용해 생존을 이뤄내는 성취감을 느낄 수 있습니다. 기존의 전형적인 밀리 플레이에서 벗어나 색다른 방식의 스타크래프트 브루드워 유즈맵을 찾고 있는 유저들에게 추천할 만한 작품입니다. Survive from Hatsune Miku is a survival-genre map that presents a unique concept and challenging difficulty within the world of StarCraft: Brood War use maps. Set against a volcanic tileset, this map immediately captures attention with its original terrain design, which visually implements a character's shape across the entire map. Players must overcome continuous threats in a constrained environment to survive, and understanding the strategic elements hidden throughout the map's structure is the core gameplay method. Rather than relying solely on overwhelming forces or endless waiting, it emphasizes the fun of discovering predetermined patterns and unit utilization methods to break through difficult obstacles. This map is based on version 1.14, which has undergone several balance adjustments by the creator, reflecting changes such as battlecruiser cost adjustments and optimization of special skill gas consumption. Although the overall difficulty is somewhat high, clear methods to clear it do exist, providing a satisfying play experience for users who enjoy rigorous build research and trial and error. In particular, players who prefer survival or uniquely conceptualized use maps will find it a great way to ignite their competitive spirit. Cooperation and division of roles are crucial even in large multiplayer situations, allowing players to feel a sense of achievement by surviving through unique terrain features and unit combinations. It is a recommended work for users looking for a different style of StarCraft: Brood War use map away from the typical melee gameplay.
도지 더 라바 v1.5 (Dodge The LaRvA v1.5)
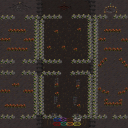
‘도지 더 라바(Dodge The LaRvA)’는 스타크래프트: 브루드워의 미니게임 장르 유즈맵으로, 맵 중앙에서 끊임없이 쏟아지는 라바(저글링)를 피하는 것이 핵심인 피하기 게임이다. 7인용 맵으로 설계된 이 작품은 한 명의 플레이어가 고정된 위치에서 무작위로 쏟아지는 적군 유닛을 회피하는 동시에, 일정 시간 동안 생존하는 방식으로 진행된다. 맵 구조는 중앙에 넓은 공간을 두고 그 주변을 좁은 길로 둘러싼 형태인데, 이 길은 라바가 몰려오는 주요 루트로 추정되며, 플레이어는 이 경로를 신속히 이동하며 적의 공격을 피해야 한다. 맵의 배경은 정글 테마로 꾸며져 있으며, 맵 중앙의 어두운 공간에서 라바가 끊임없이 생성되는 메커니즘이 보인다. 플레이어는 조종 가능한 유닛이 없으며, 오로지 이동만으로 생존을 도모해야 하므로, 전략보다는 순간적인 반응과 손속이 중요하다. 맵 제목에서 ‘Dodge’는 회피를 의미하는 만큼, 이 게임의 핵심은 바로 적의 공격을 피하는 데에 있으며, 이는 마치 고전 아케이드 게임의 feel을 스타크래프트에서 재현한 듯한 느낌을 준다. 플레이어는 맵의 좁은 통로를 빠르게 이동하며, 라바의 움직임 패턴을 예측하고 순간적인 판단을 내려야 하므로, 반복 플레이를 통해 적응력이 요구된다. 초보 플레이어에게는 다소 어려운 편이지만, 익숙해지면 손속에 따라 생존 시간이 길어지며, 일종의 도전 과제로 즐길 수 있는 맵이다. 추천 대상은 스타크래프트의 미니게임을 좋아하는 유저나, 빠른 반응력을 테스트해 보고 싶은 유저, 또는 간단한 yet 중독성 있는 게임을 즐기고 싶은 유저들에게 알맞다. 플레이 전에는 라바의 생성 패턴과 맵의 주요 루트를 미리 숙지하는 것이 중요하며, 특히 좁은 통로에서 라바가 몰려올 때의 타이밍을 연습하는 것이 좋다. 맵의 밸런스나 난이도 조절에 대한 정보는 제공되지 않지만, 7인용으로 설계된 만큼 다인 플레이에서도 즐길 수 있도록 배려된 듯하다. 다만, 플레이 인원이 많을수록 라바의 생성 속도가 빨라질 가능성이 있으므로, 이는 플레이어 간의 협의가 필요한 부분이다. ‘Dodge The LaRvA’ is a mini-game style custom map from *StarCraft: Brood War* where the main objective is to avoid lava (zerglings) continuously pouring out from the center of the map. Designed for seven players, this map challenges one player to survive by dodging randomly spawned enemy units from a fixed position. The map features a wide open space in the center surrounded by narrow paths, which are likely the main routes where the lava swarms in. Players must quickly navigate these paths to evade attacks. The jungle-themed background adds to the atmosphere, with lava constantly spawning in the dark central area. Since players have no controllable units and can only move, survival depends on quick reflexes rather than strategy. The title "Dodge" highlights the core mechanic—avoiding enemy attacks—which gives the map a classic arcade feel within *StarCraft*. Players must move swiftly through narrow corridors, predict the lava’s movement patterns, and make split-second decisions, requiring adaptability through repeated plays. While it may be challenging for beginners, mastering hand-eye coordination can extend survival time, making it a fun challenge. This map is ideal for players who enjoy *StarCraft* mini-games, want to test their reflexes, or are looking for a simple yet addictive game. Before playing, it’s crucial to familiarize yourself with the lava’s spawning patterns and the map’s key routes, especially practicing timing when lava swarms through narrow passages. While details on balance or difficulty adjustments aren’t provided, the map seems designed to accommodate multiplayer with seven players. However, as the number of players increases, the lava’s spawn rate may quicken, so coordination among players is necessary.
생존의 시험 - 죽음!!!! (Test of Survival - DEATH!!!!)
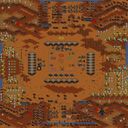
황혼의 어두운 대지 위에서 시작되는 이 서바이벌 맵은 제목 그대로 죽음과의 끈질긴 싸움을 강요한다. 다섯 명의 플레이어가 각자 제한된 자원과 좁은 공간에서 시작하며, 주변은 적대적인 컴퓨터 유닛과 건물로 빽빽하게 둘러싸여 있다. 맵의 핵심 목표는 단순하지만 가혹하다. 컴퓨터의 모든 유닛과 건물을 파괴하고 살아남아야 한다. 내부 설명에 적힌 “Can U Win? Or Will U Just Die?”라는 문구가 이 맵의 정체성을 단적으로 드러낸다. 초반 몇 분은 숨 돌릴 틈 없이 몰려오는 공격을 방어하느라 정신이 없다. 자원은 극도로 부족하고, 병력 생산 속도는 적의 공세를 따라잡기 어렵게 설계되어 있어 한순간의 방심이 곧바로 전멸로 이어진다. 이 맵은 전형적인 건설형 서바이벌 장르에 속하며, 협동을 전제로 하지만 실제로는 각자의 진영이 개별적으로 압박을 견뎌내는 방식으로 진행된다. 동료가 무너지면 그 여파가 순식간에 자신의 진영으로 번지기 때문에, 모두가 끝까지 버텨야 한다는 부담감이 상당하다. 제작자는 “재미를 더했다”고 밝혔지만, 그 재미는 극한의 난이도에서 오는 쾌감에 가깝다. 적을 하나씩 제거하며 조금씩 전선을 확장할 때의 성취감은 분명히 존재한다. 하지만 이 과정이 매우 더디고, 적의 병력 구성은 예측을 벗어나며, 한 번 밀리기 시작하면 회복이 거의 불가능하다. 특히 후반으로 갈수록 컴퓨터의 방어선이 견고해지고 공격도 거세져서, 플레이어는 끊임없이 멀티태스킹을 강요받는다. 이 맵을 제대로 즐기기 위해서는 빠른 초반 방어 체계 구축과 자원 관리에 능숙해야 하며, 서바이벌 장르 특유의 끈기와 인내심이 필수적이다. 캐주얼한 플레이어보다는 극한의 도전을 원하는 숙련된 플레이어 그룹에게 적합하다. 플레이 전 반드시 모든 참가자가 이 맵의 특성, 즉 무자비한 난이도와 긴 플레이 시간을 감수할 각오가 되어 있는지 확인해야 한다. 중간에 한 명이라도 포기하면 경험이 급격히 무너지므로, “TRY NOT TO QUIT!!!!!”이라는 경고는 단순한 협박이 아니라 이 맵을 체험하기 위한 유일한 지침이다. The survival map begins on the twilight terrain, and as the title suggests, it forces a relentless struggle against death itself. Five players start with severely limited resources and cramped space, immediately surrounded by a dense swarm of hostile computer units and structures. The core objective is brutally simple: destroy every enemy unit and building and stay alive. The internal description’s challenge, “Can U Win? Or Will U Just Die?” perfectly encapsulates the map’s identity. The opening minutes are a frantic blur of defending against waves of attacks that leave no room to breathe. Resources are painfully scarce, and unit production speed is deliberately outpaced by the enemy’s aggression, meaning a single moment of carelessness leads directly to annihilation. This map belongs to the classic build-and-survive genre, designed for cooperation, yet in practice each player’s base is individually pressured. If an ally collapses, the gap floods toward the others instantly, creating immense pressure for everyone to hold on until the end. The creator claimed to have made it “more fun,” but that fun is akin to the thrill derived from overcoming extreme adversity. There is genuine satisfaction in destroying enemy pockets one by one and gradually expanding your front line, but the process is brutally slow and unforgiving. The enemy force composition is unpredictable, and once you start losing ground, recovery becomes nearly impossible. As the game progresses into the later stages, the computer’s defensive lines harden and their offensives intensify, constantly forcing players into relentless multitasking. To face this map, you must be proficient in rapid early-game defense setups and efficient resource management, and an innate patience for the survival genre is mandatory. It is far more suitable for a group of highly skilled players seeking extreme challenges than for casual enjoyment. Before playing, every participant must fully understand and accept the map’s nature, namely its merciless difficulty and the lengthy time commitment required. If even one person quits midway, the entire experience collapses, so the warning “TRY NOT TO QUIT!!!!!” is not just a threat but the single essential rule for experiencing this map.
도지 더 레이피스트 v4.4 (Dodge The Rapist v4.4)
‘도지 더 레이피스트’(Dodge The Rapist)는 스타크래프트: 브루드워 유즈맵의 한 종류로, 이름에서 느껴지듯 플레이어가 위험한 적으로부터 벗어나야 하는 회피형 미니게임이다. 맵은 넓은 사막 지형으로 구성되어 있으며, 적들이 지속적으로 쏟아져 나오면서 플레이어를 향해 다가오는 구조로 보인다. 플레이어는 화면 하단에 위치한 캐릭터를 조종하여 좌우로 움직이며 적의 공격을 피해야 하며, 맵 상단에 위치한 탈출 지점에 도달하면 승리하는 방식일 것으로 추정된다. 맵 제목과 설명에서 느껴지는 유저들의 창작 의도가 강렬하게 느껴지는 점은, 이 맵이 단순히 회피를 넘어 일종의 공포나 긴장감을 조성하도록 설계되었음을 시사한다. 맵의 제목과 설명이 자극적인 표현을 사용하고 있으나, 실제 게임 플레이는 순수하게 회피와 생존에 초점을 맞추고 있을 가능성이 높다. 맵의 크기가 4096x4096으로 매우 넓고, 타일셋이 사막인 점은 넓은 맵에서 펼쳐지는 긴장감을 더해주는 요소로 작용할 수 있다. 플레이어는 맵 전체를 활용하여 적의 공격을 피할 공간을 찾아야 하며, 좁은 길목이나 장애물 주변에서 상대적으로 안전한 위치를 차지하는 전략이 필요할 것으로 보인다. 이 맵은 특히 긴장감을 좋아하는 유저들에게 어필할 수 있으며, 팀 플레이보다는 혼자서 또는 제한된 인원으로 플레이하는 구성이 предполага된다. 맵의 특징상 난이도는 적의 수와 패턴에 따라 달라질 수 있으므로, 초보자는 난이도 조절이 가능한 버전을 찾는 것이 좋으며, 숙련된 플레이어는 더 높은 난이도에서 도전해볼 수 있을 것이다. 맵을 플레이하기 전에는 맵의 설명과 표시된 주의 사항을 꼼꼼히 읽어보는 것이 중요하며, 적의 패턴을 익히고 맵의 지형을 숙지하는 데 시간을 투자하는 것이 좋다. 또한, 맵의 버전이 여러 번 업데이트된 점으로 미루어 보아, 플레이어들의 피드백을 반영하여 지속적으로 개선되고 있는 맵이라는 점도 긍정적 요소로 작용할 수 있다. “Dodge the Rapist” is a type of *StarCraft: Brood War* custom map where players must evade dangerous enemies in a dodge-style mini-game. The map features a vast desert terrain, with enemies continuously spawning and moving toward the player. The objective appears to be reaching an escape point at the top of the screen by controlling a character at the bottom, maneuvering left and right to avoid attacks. The intense title and description suggest the map is designed not just for simple dodging but to create a sense of fear or tension. Despite the provocative wording, the actual gameplay likely focuses purely on evasion and survival. With a massive 4096x4096 size and a desert tile set, the map amplifies the tension of navigating wide-open spaces. Players must utilize the entire map to find safe spots, employing strategies like positioning near narrow paths or obstacles to minimize risk. This design makes it especially appealing to those who enjoy high-pressure gameplay, though it seems intended for solo play or small teams rather than large groups. Difficulty varies depending on enemy spawns and patterns, so beginners should seek versions with adjustable settings, while experienced players can test their skills in higher difficulties. Before playing, carefully reading the map’s instructions and warnings is crucial, as is studying enemy behavior and terrain layout. The fact that the map has undergone multiple updates indicates it’s actively refined based on player feedback, a positive sign of ongoing improvement.
패스트 클릭 (FAST CLICK)
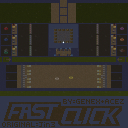
‘FAST CLICK(패스트 클릭)’은 스타크래프트 브루드워의 유즈맵으로, 빠른 클릭과 반응 속도를 요구하는 미니게임 장르에 속하는 맵이다. 맵의 중앙에 위치한 거대한 사각형 구역을 중심으로 플레이어는 순간적인 판단을 필요로 하며, 각종 이벤트나 목표가 충돌 없이 빠르게 처리되어야 한다. 이미지 상으로는 맵 중앙에 넓은 테두리 없이 빈 공간이 있고, 그 주변으로 건물이 배치되어 있는 구조가 보이며, 이는 플레이어의 시야를 확보하고 클릭 반경의 민첩성을 시험한다. 맵의 제목과 파일명에 ‘FAST CLICK’이라는 키워드가 명시되어 있어, 게임의 핵심 메커니즘이 클릭 속도에 있음을 직관적으로 알 수 있다. 게임 진행 중에는 예상치 못한 트리거나 이벤트가 발생할 수 있으며, 이는 플레이어의 집중력과 손 velocidade를 동시에 시험한다. 초보자보다는 숙련된 플레이어에게 더욱 어울리며, 특히 반응 속도를 경쟁하고 싶어 하는 유저들에게 적합한 맵으로 추정된다. 플레이 전에는 마우스 감도와 클릭 민첩성을 미리 조정하는 것이 좋으며, 맵의 넓은 공간을 활용한 전술적 클릭이 필요한 만큼 시야 확보와 예기치 않은 상황의 대처가 중요하다. 맵의 구조상 중앙 구역이 넓고 평탄한데, 이는 클릭의 정확성과 속도 모두를 요구하는 요소로 작용할 수 있다. 또한, 맵의 테두리 부분에 위치한 건물들은 시각적 방해 요소로 작용하지 않으며, 오히려 플레이어의 시선 분산을 최소화하는 역할을 한다. 맵의 해상도와 타일셋은 사막 테마로 구성되어 있으며, 이는 넓은 시야와 개방감을 강조하는 데 기여한다. 이 맵은 스타크래프트의 유즈맵 커뮤니티에서 ‘클릭 테스트’나 ‘반응 속도 테스트’ 등으로 불리며, 짧은 플레이 타임에도 불구하고 높은 재플레이 가치를 지닌다. 특히, 경쟁력 있는 플레이를 즐기는 유저들에게는 도전 과제로 작용할 수 있는 맵으로 보인다. “Fast Click” is a StarCraft: Brood War custom map that falls under the minigame genre, demanding quick clicks and fast reflexes. Players must make split-second decisions around the large rectangular zone in the map’s center, rapidly handling various events and objectives without collisions. Visually, the map features an open empty space in the middle with buildings arranged around the perimeter, ensuring clear sightlines and testing the player’s click responsiveness. The name and filename both include “Fast Click,” immediately signaling that speed is the core mechanic. Unexpected traps or events can occur during play, pushing both concentration and hand-eye coordination to the limit. This map is better suited for experienced players, especially those looking to compete in reaction-speed challenges. Before playing, it’s wise to adjust mouse sensitivity and click responsiveness; the wide open space requires tactical clicking, so maintaining awareness and handling surprises are crucial. The central area is large and flat, which can both enhance and challenge click accuracy and speed. The buildings along the edges don’t obstruct vision—they actually help minimize distractions. The map’s desert-themed tileset and resolution emphasize openness and wide visibility. Within the StarCraft custom-map community, it’s often called a “click test” or “reaction-speed test,” offering high replay value despite its short playtime. For players who enjoy competitive play, it presents a compelling challenge.
Impossible Continuum 4.0
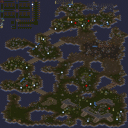
스타크래프트 브루드워의 유즈맵 'Impossible Continuum 4.0'은 5명의 플레이어가 참여하는 디펜스 장르의 도전형 맵으로, 사막 타일셋으로 구성된 넓은 공간에서 끊임없이 몰려오는 적을 상대로 자신의 건물을 지켜내는 것이 핵심이다. 맵 중앙에는 방어 건물이 배치되어 있으며, 주변으로는 적의 웨이브가 끊임없이 유입되는 구조로 구성되어 있다. 플레이어는 제한된 자원으로 방어 시설을 강화하고, strategic retreat(전략적 후퇴)나 perimeter control(주변 통제)을 통해 생존을 도모해야 한다. 특히 'Impossible'이라는 이름에 걸맞게 난이도가 매우 높으며, 초보 플레이어보다는 숙련된 유저가 도전하는 것이 권장된다. 맵의 특징은 끊임없는 적의 웨이브와 제한된 자원 관리인데, 이는 플레이어의 집중력과 전략적 사고력을 동시에 요구한다. 또한, 맵의 디자인과 시야 차단 요소들이 적의 움직임을 읽기 어렵게 만들어 전략적 깊이를 더한다. 이 맵은 주로 컴퓨터 상대 유즈맵으로 분류되며, 다운로드 후 로컬에서 플레이하는 방식으로 즐길 수 있다. 초보자라면 먼저 쉬운 디펜스 맵에서 기본기를 다지고 도전하는 것이 좋으며, 숙련자라면 빠른 결정과 효율적인 자원 관리를 위해 지속적인 연습이 필요하다. 맵의 긴장감과 반복적인 도전 욕구는 유저들에게 강한 몰입감을 제공한다. 플레이 전에는 맵의 구조와 적의 웨이브 패턴을 충분히 숙지하고, 방어 건물의 배치와 업그레이드 우선순위를 미리 계획하는 것이 중요하다. 또한, 팀 플레이가 가능하다면 팀원 간의 역할 분배를 명확히 하고, 실시간 커뮤니케이션을 통해 효율적인 방어 전략을 구사해야 한다. Impossible Continuum 4.0 is a challenging defense-style custom map for StarCraft: Brood War, designed for up to 5 players. Set in a vast desert tile-based environment, the core gameplay revolves around defending your buildings from relentless waves of enemies that continuously spawn around the map. The central area features defensive structures, while the surrounding zones serve as entry points for enemy forces. Players must strategically manage limited resources to upgrade defenses, employing tactics like strategic retreat or perimeter control to survive. The map lives up to its 'Impossible' title, offering an extremely high difficulty level that demands advanced player skills and quick decision-making. The design incorporates visual obstructions and uneven terrain, making it difficult to predict enemy movements and adding layers of strategic depth. This map is primarily intended as a single-player or cooperative challenge against AI opponents, requiring local download and installation to play. Beginners are advised to build foundational skills with easier defense maps before attempting this one, while experienced players will appreciate the need for rapid resource allocation and efficient upgrades. The map’s tension and replayability stem from its unforgiving waves and the player’s growing familiarity with enemy patterns. Before playing, it’s crucial to study the map layout, understand enemy spawn points, and plan defensive structures and upgrade priorities. If playing in a team, clear role distribution and real-time communication are essential for executing an effective defense strategy.
탈옥 2 V.Better (Jail Break 2 V.Better)
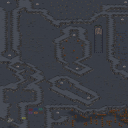
스타크래프트 브루드워의 유즈맵 <Jail Break 2 V.Better>는 이름 그대로 '탈옥'을 주제로 한 퍼즐형 맵이다. 플레이어는 감옥에 갇힌 상태에서 탈출구를 찾아야 하며, 오직 지형과 장애물, 그리고 제한된 자원을 활용해 길을 개척해 나가야 한다. 맵의 특징은 탈출 경로가 한정되어 있지만, 각 라운드마다 배치되는 장애물과 함정의 조합이 달라져 매번 새로운 도전이 되는 점이다. 특히 우주 테마의 타일셋이 어두운 분위기를 조성하며, 긴장감 있는 탈출을 강조한다. 퍼즐의 난이도는 점차 상승하는 구조로, 초반에는 단순한 길 찾기에서 시작하지만 후반부로 갈수록 복잡한 함정과 좁은 통로를 통과해야 한다. 추천 대상은 퍼즐을 즐기거나 스타크래프트에서 새로운 게임 방식을 경험하고 싶은 유저들이다. 플레이 전에는 맵의 구조와 함정 배치 패턴을 미리 파악하는 것이 중요하며, 특히 팀플레이가 가능한 맵이 아니므로 혼자서 집중하며 진행해야 한다. 맵의 제목처럼 '두 번째 탈옥'답게, 전작보다 더 정교해진 장애물과 새로운 함정이 추가되어 재플레이 가치를 높였다. 5명의 플레이어가 동시에 참여할 수 있지만, 각 플레이어는 개별적으로 탈출을 시도해야 한다. 맵의 분위기는 어둡고 긴박感이 느껴지며, 탈출에 성공했을 때의 성취감은 이 맵의 큰 매력 포인트다. 다만, 퍼즐의 난이도가 높기 때문에 초보 유저는 어려움을 느낄 수 있어, 적절한 난이도 조절이 필요할 수 있다. Jail Break 2 V.Better, a custom map from StarCraft: Brood War, is a puzzle-style map centered around the theme of "escape." Players begin trapped in a prison and must find an escape route, navigating terrain, obstacles, and limited resources to forge their path. The map’s defining feature is its fixed escape routes, though the combination of obstacles and traps shifts each round, offering fresh challenges every time. The cosmic-themed tileset sets a dark, tense atmosphere, heightening the urgency of the escape. The puzzle difficulty escalates progressively, starting with simple pathfinding before evolving into intricate traps and narrow passages. Ideal for players who enjoy puzzles or want to experience a new gameplay style in StarCraft, it demands solo focus, as team play isn’t supported. Like the title suggests, this "second escape" refines obstacles from the original and introduces new traps, boosting replayability. While up to five players can participate, each must attempt to escape independently. The map’s dark, high-stakes ambiance makes success deeply rewarding, though its difficulty may overwhelm beginners, requiring careful balance adjustments.
임파서블 니르바나 픽스드 (Impossible Nirvana Fixed)
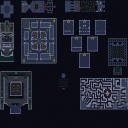
임파서블 니르바나 픽스드(Impossible Nirvana Fixed)는 스타크래프트 브루드워에서 즐길 수 있는 독특한 구조의 유즈맵으로, 화산 타일셋을 기반으로 제작되었습니다. 전체적인 맵 구성을 살펴보면 플레이어가 탐험하고 돌파해야 할 다양한 구역과 미로 형태의 공간, 그리고 독립된 방들이 사방으로 배치되어 있는 것을 확인할 수 있습니다. 이러한 구조는 단순한 전투를 넘어 특정 목표를 달성하거나 장애물을 극복하며 앞으로 나아가는 방식의 플레이를 유도하는 것으로 추정됩니다. 특히 여러 개의 독립된 구역과 복잡하게 얽힌 길들은 플레이어 간의 협동이나 역할 분담, 또는 개인의 컨트롤 능력을 시험하는 요소로 작용할 가능성이 높습니다. 미로와 방마다 배치된 유닛과 구조물들은 각 구역마다 색다른 공략법이 필요함을 암시하며, 도전적인 난이도를 선호하는 유저들에게 흥미로운 경험을 제공합니다. 이 맵은 전통적인 밀리 방식에서 벗어나 유즈맵만의 색다른 규칙과 진행 방식을 즐기는 이들에게 적합하며, 특히 복잡한 지형을 분석하고 여러 스테이지나 구역을 순차적으로 돌파하는 도전을 즐기는 플레이어들에게 추천할 만합니다. 플레이를 시작하기 전에는 지형의 특성과 각 구역으로 향하는 동선을 미리 파악하고, 함께 즐기는 동료들과의 협동 전략을 세우는 것이 중요합니다. 화산 지형 특유의 어둡고 거친 분위기 속에서 펼쳐지는 독특한 모험을 통해 색다른 재미를 느낄 수 있을 것입니다. Impossible Nirvana Fixed is a unique use map for StarCraft: Brood War, built upon a volcanic tileset. Looking at the overall map layout, various zones, maze-like areas, and independent rooms are arranged across the space, suggesting a gameplay style where players must explore, overcome obstacles, and progress through specific objectives. The interconnected paths and distinct sections likely require cooperation, role division, or individual control skills to navigate successfully. The placement of units and structures within each maze and room implies that different strategies are needed for each area, offering an engaging experience for users who enjoy a challenging difficulty level. This map is well-suited for those who prefer the distinctive rules and progression of use maps over traditional melee games, especially players who relish analyzing complex terrain and sequentially conquering multiple stages or zones. Before starting the game, it is important to understand the terrain characteristics and movement routes to each area, as well as to establish cooperative strategies with fellow players. You will be able to experience a unique kind of fun through this distinctive adventure unfolding within the dark and rugged atmosphere characteristic of volcanic terrain.
대시 3 (Dash 3)
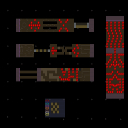
‘대시 3(Dash 3)’는 스타크래프트: 브루드워의 디펜스 장르 유즈맵으로, 이름 그대로 ‘달리기’와 ‘장애물 통과’에 중점을 둔 플레이가 특징이다. 맵 중앙을 가로지르는 긴 통로와 곳곳에 배치된 붉은색 장애물(적 유닛 또는 구조물)이 주요한 게임 요소로 보인다. 플레이어는 이 장애물을 피해 목표 지점까지 도달하거나, 일정 시간 내에 특정 조건을 완수해야 하는 방식으로 진행된다. 맵 전체가 어두운 분위기의 황무지 타일셋으로 구성되어 있어 긴장감을 조성하며, 장애물의 위치나 개수가 난이도를 좌우할 것으로 추정된다. 내부 맵 설명에 따르면, 이메일로 제작자에게 결과를 전송할 수 있는 기능도 포함되어 있어 커뮤니티와의 상호작용을 유도하는 구조로 보인다. 이 맵은 6인 플레이를 지원하며, 팀 구분은 없어 개별 플레이가 주가 될 것으로 예상된다. 디펜스 장르이지만, traditional한 방어전보다는 ‘도전과 통과’라는 요소가 더 강해 보인다. 플레이어는 맵 곳곳의 장애물을 피해 나아가야 하며, 장애물의 종류나 패턴에 따라 전략이 달라질 것이다. 예를 들어, 붉은색 동그라미로 표시된 장애물은 일정 시간 후 사라지거나 이동하는 패턴을 가질 가능성이 있다. 맵의 해상도와 타일셋 크기를 고려할 때, 세밀한 장애물 배치와 시야 조절이 중요한 요소로 작용할 것이다. 초보 플레이어는 장애물의 패턴을 익히는 데 시간이 필요할 것이며, 숙련자는 보다 빠른Clear을 노릴 수 있을 것이다. 추천 대상은 스타크래프트의 기본 조작에 익숙한 플레이어로, 빠른 반응력과 공간 인지력이 요구되는 맵이다. 특히, ‘달리기’와 ‘회피’라는 간단한 조작만으로 진행되는 만큼, 이는 스트레스 해소용이나 친구와의 경쟁용으로도 손색이 없을 것이다. 주의할 점은 맵의 난이도가 장애물의 배치와 밀접하게 연관되어 있어, 초기에 제공되는 패턴을 숙지하지 않으면 쉽게 실패할 수 있다는 점이다. 또한, 내부 맵 설명에 따르면 이메일 전송 기능이 포함되어 있지만, 이는 필수 요소는 아니므로 맵 자체의 재미에 집중하는 것이 좋다. Another game of dash!Complete the obstacles and win, then email it to:Roy_Gallant@hotmail.com Dash 3 is a StarCraft: Brood War defense-style custom map focused on running and overcoming obstacles. The map features a long central corridor lined with red obstacles (likely enemy units or structures), which players must navigate to reach the goal or complete conditions within a time limit. The dark, barren terrain tile set adds to the tense atmosphere, while the positioning and number of obstacles appear to dictate difficulty levels. The map supports up to six players without team divisions, suggesting an individual challenge rather than a cooperative one. The gameplay revolves around avoiding or strategically passing obstacles, which may include disappearing or moving patterns indicated by red circles. Given the map's high resolution and tile size, precise movement and spatial awareness are crucial. Beginners may struggle with obstacle patterns, while experienced players can aim for faster clear times. This map is ideal for players familiar with basic StarCraft controls, offering a fast-paced, reaction-based experience suited for stress relief or friendly competition. Players should note that the map's difficulty heavily depends on obstacle arrangements, requiring memorization of patterns to avoid repeated failures. While the email submission feature exists, it is optional and does not impact core gameplay enjoyment.
최근 등록된 맵
새로 추가된 파일과 버전을 확인하세요.
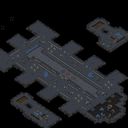
Hold a Candle to
Hold a Candle to는 우주 타일셋을 사용한 유즈맵으로, 플레이어는 특정 상황에서 다른 사람들과 비교되는 상황을 경험하게 됩니다. 이 맵은 상황에 따라 비교가 공정한지에 대한 질문을 던지며, 플레이어는 이 질문에 대한 답을 찾기 위해 다양한 도전을 극복해야 합니다. 맵의 설명에서 언급된 'USE MAP SETTINGS'는 맵을 플레이하기 전에 설정을 확인해야 함을 의미합니다. 이 맵은 1人の 플레이어만을 위해 설계되었으며, 전체적인 플레이 시간과 난이도는 맵의 설명이나 제목에서 직접적으로 언급되지 않습니다. 그러나 맵의 설계와 설명으로부터, 이 맵은 플레이어의 판단력과 상황 대처 능력을 테스트하는 데 중점을 둔 것으로 보입니다. 따라서, 이 맵은 도전을 즐기고 자신의 능력을 테스트하려는 플레이어에게 적합할 것입니다. Hold a Candle to is a UMS map that utilizes the space tileset, where players experience situations where they are compared to others. The map poses a question about whether comparison is fair in certain situations, and players must overcome various challenges to find the answer. The mention of 'USE MAP SETTINGS' in the map description implies that players should check the settings before playing the map. This map is designed for a single player, and the overall playtime and difficulty are not directly mentioned in the map description or title. However, based on the map design and description, it seems to focus on testing the player's judgment and situational handling skills. Therefore, this map is suitable for players who enjoy challenges and want to test their abilities.
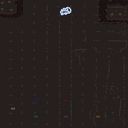
9999의 발키리잡아라 (Valkyrie Hunting 9999)
‘9999의 발키리잡아라’는 스타크래프트 브루드워에서 제공하는 유즈맵으로, 플레이어들이 발키리를 잡는 전투를 펼치는 디펜스형 맵이다. 맵의 목표는 맵 중앙에 등장하는 발키리 유닛을 제한된 시간 안에 제거하는 것이며, 난이도는 제작자의 설명대로 ‘상당히 어려움’으로 설정되어 있다. 맵 전체는 정글 타일셋으로 이루어져 있으며, 넓은 공간과 복잡한 지형이 특징이다. 발키리는 지속적으로 이동하거나 공격을 가하며 플레이어의 병력을 소모시키기 때문에, 효율적인 자원 관리와 전략 구사가 필수적이다. 맵의 이름과 설명에서 알 수 있듯이, 발키리 제거라는 단순한 목표와는 달리 난이도가 높아져서 도전적인 경험을 제공한다. 특히 발키리의 패턴을 숙지하고, 병력 조합 및 배치에 신경을 써야만 성공할 수 있다. 제작자 주석에 따르면 이 맵은 심심할 때 만들기 시작한 것으로 보이며, 커스텀 게임에서 즐기기에 적합한 유즈맵으로 보인다. 초보 플레이어는 발키리의 공격 패턴과 맵 구조를 충분히 숙지한 후 참여하는 것이 좋으며, 충분한 연습을 통해 클리어 확률을 높일 수 있을 것이다. 디펜스 장르 특성상 맵의 밸런스와 난이도 조절이 핵심인데, 제작자는 이를 ‘상당히 어려움’으로 명시해 과도한 난이도를 설정했을 가능성이 있다. 따라서 플레이어는 맵의 특성과 발키리의 행동을 분석하여 전략을 세우는 것이 중요하다. 이 맵은 발키리 제거라는 명확한 목표와 함께, 전략적 사고와 적응력을 요구하는 디펜스 게임으로 즐길 수 있으며, 특히 도전적인 유저들에게 추천할 만하다. 맵을 플레이하기 전에는 발키리의 이동 경로와 공격 범위를 미리 확인하고, 병력 생산 및 업그레이드 타이밍을 조율하는 데 중점을 두는 것이 좋다. ‘Catch the Valkyries’ in StarCraft: Brood War is a custom defense map where players engage in combat to hunt down Valkyries. The objective is to eliminate the Valkyries that appear in the center of the map within a limited time, with the difficulty set to "very hard" as described by the creator. The entire map features a jungle tileset, characterized by its vast open spaces and intricate terrain. Since Valkyries continuously move or attack to deplete players' forces, efficient resource management and strategic execution are essential. Despite the straightforward goal of eliminating Valkyries, the difficulty is heightened by their patterns, requiring players to master the Valkyries' behavior, troop compositions, and positioning to succeed. According to the creator’s notes, the map was likely made during a spare moment and seems well-suited for casual custom games. Beginners should familiarize themselves with the Valkyries' attack patterns and map layout before attempting, as practice will significantly improve their chances of clearing the map. As a defense genre map, balancing difficulty is key, and the creator’s "very hard" classification may indicate an intentionally high challenge. Players should analyze the map’s mechanics and Valkyries’ behavior to devise effective strategies. With its clear objective and emphasis on strategic thinking and adaptability, this map offers an engaging defense experience, especially recommended for those seeking a challenge. Before playing, it’s wise to study the Valkyries’ movement paths and attack ranges and focus on coordinating troop production and upgrade timing.
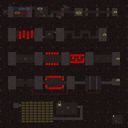
폭탄피하기 최신 4배속 (Bomb Avoidance: Latest 4x Speed)
스타크래프트 브루드워의 대표적인 미니게임 중 하나인 '폭탄피하기 최신 4배속'은 이름 그대로 폭발하는 폭탄을 피해 살아남는 단순하면서도 중독성 강한 플레이가 특징이다. 맵 전체가 좁은 길로 구성되어 있으며, 플레이어는 중앙의 시작점에서부터 빠져나가기 위해 좌우로 움직이며 끊임없이 떨어지는 폭탄을 피해야 한다. 특히 '4배속'이라는 타이틀이 시사하듯, 맵의 속도가 매우 빨라 조작감이 타이트하고 긴장감이 지속된다. 맵 중앙에는 여러 개의 통로가 있으며, 일부 통로는 벽으로 막혀 있어 우회로가 제한적이다. 폭탄은 마치 비처럼 일정 패턴으로 떨어지는데, 이 패턴을 숙지하고 타이밍을 맞춰 움직여야만 살아남을 수 있다. 미니게임답게 난이도는 플레이어의 숙련도에 따라 크게 달라지며, 초보자는 첫 시도에서 쉽게 실패할 수 있지만, 반복 플레이를 통해 패턴을 익히면 점차 안정적으로 클리어할 수 있다. 이 맵의 가장 큰 매력은 바로 속도감과 달성감으로, 짧은 플레이 타임 안에 긴장감을 유지하며 빠르게 결과를 확인할 수 있다는 점이다. 또한, 7인까지 동시에 플레이할 수 있어 타인과의 경쟁이나 협력 플레이도 가능하다는 점이 재밌는 요소로 작용한다. 다만, 통로가 좁고 폭탄의 밀도가 높아져 난이도가 급격히 상승하는 후반 구간에서는 실수가 용납되지 않으므로, 집중력을 잃지 않는 것이 중요하다. 이 맵은 스타크래프트의 기본 조작만 익숙하다면 누구나 쉽게 접근할 수 있지만, 숙련자를 위한 고수준의 플레이도 요구되는 등 초보자부터 고수까지 폭넓은 층에서 즐길 수 있는 콘텐츠로 평가된다. 마지막으로, 맵의 색상 구성과 타일셋이 단순하면서도 깔끔하여 시야 방해 요소가 적다는 점도 장점으로 작용한다. 이렇듯 '폭탄피하기 최신 4배속'은 스타크래프트의 유즈맵 중에서도 손꼽히는 재미와 접근성을 지닌 미니게임으로, 짧은 시간 안에 많은 재미를 제공하는 콘텐츠를 찾는 플레이어들에게Strongly recommended이다. This StarCraft: Brood War mini-game, '폭탄피하기 최신 4배속' (Bomb Avoidance: Latest 4x Speed), delivers a fast-paced, adrenaline-fueled challenge where players must navigate through narrow pathways while dodging falling bombs. The map’s name hints at its core mechanic—speed—which is amped up to four times the usual, creating a frantic experience that demands quick reflexes and precise movement. The layout consists of a central starting point connected to multiple narrow corridors, some of which are blocked by walls, forcing players to strategize their escape routes. Bombs rain down in a predictable yet dense pattern, requiring players to memorize their trajectories and time their movements accordingly. While the game is simple in concept, its difficulty scales sharply with speed and bomb density, making it accessible for beginners yet challenging enough to engage experienced players. The ability to support up to seven players adds a layer of competition or cooperation, enhancing replayability. The map’s minimalist design, featuring clean visuals and a jungle-themed tileset, ensures minimal visual clutter, allowing players to focus solely on the action. Despite its straightforward premise, '폭탄피하기 최신 4배속' offers a satisfying blend of tension, skill progression, and instant gratification, making it a standout mini-game in the StarCraft community. Whether you're looking for a quick break or a test of reflexes, this map delivers a fun and rewarding experience for all skill levels.
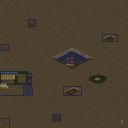
미친새 피하기 v1.2
‘미친새 피하기’는 스타크래프트: 브루드워의 유즈맵으로, 이름 그대로 미친듯이 날아오는 새를 피하는 미니게임이다. 맵 중앙에 거대한 둥지가 자리 잡고 있으며, 그곳에서 끊임없이 새들이 쏟아져 나온다. 플레이어는 맵 가장자리로 이동해 새들이 접근하지 못하게 해야 한다. 새들은 플레이어 방향으로 날아오며, 닿기 전까지 피하지 못하면 체력이 깎인다. 맵 здесь는 비교적 단순하지만, 새의 속도와 패턴이 점차 빨라지면서 난이도가 올라간다. 특히 둥지에서 나오는 새의 수가 많아질수록 압박이 커지므로, 초반에는 여유롭게 대처하더라도 후반에는 집중력을 요구한다. 맵의 배경은 사막 타일셋으로 이루어져 있으며, 넓은 공간과 대비되는 둥지의 위치를 잘 파악하는 것이 핵심이다. 초보 플레이어는 천천히 적응해가며 패턴을 익히는 것이 좋고, 숙련자라면 최대한 빠르게 움직이며 새를 피해 다녀야 한다. 이 맵은 짧고 집중력 있는 플레이를 즐기는 유저들에게 적합하며, 간단한 조작으로도 재미를 느낄 수 있다. 다만, 혼자서 플레이하는 것보다 여럿이서 협동하며 하는 것이 더 재미있고 효과적이다. 맵의 특징상 특정한 승리 조건이나 스토리는 없지만, 새를 피하는 데 얼마나 오래 버티느냐가 관건이다. 플레이는 6인까지 가능하며, 팀 플레이보다는 개개인의 반사신경과 판단력이 중요한 구성이다. 맵을 플레이하기 전에는 둥지의 위치와 새의 출현 패턴을 미리 확인해두는 것이 좋다. 또한, 미니맵을 자주 확인해 주변의 새의 움직임을 살피는 것도 중요하다. 새의 움직임이 빨라지는 후반부에는 실시간으로 대응해야 하므로, 미리 연습해두는 것이 좋다. 이 맵은 단순한 구조와 조작으로 누구나 쉽게 접근할 수 있지만, 높은 점수를 노리려면 꾸준한 연습이 필요하다.特にターン制ではなく、常に動き続けるため、反射神経と集中力が求められる点が特徴だ。 This is a StarCraft: Brood War custom map called "Mad Bird Avoidance," where, as the name suggests, you dodge birds flying at you like crazy. A massive nest sits in the center of the map, constantly spawning birds that pour out. Players must move to the edges of the map to avoid the birds getting too close. The birds fly toward the player, and if they touch you before you dodge, your health decreases. While the map layout is relatively simple, the birds' speed and patterns gradually increase, raising the difficulty. As more birds spawn from the nest, the pressure builds, so even if you handle it easily at first, you'll need sharp focus later on. The map uses a desert tileset, and understanding the nest's position relative to the open space is key. Beginners should take their time adapting and learning the patterns, while skilled players need to move as fast as possible to avoid the birds. The map suits players who enjoy short, intense sessions and can be fun even with simple controls. However, playing cooperatively with others is more enjoyable and effective than going solo. Though the map lacks a specific win condition or story, the challenge lies in surviving as long as possible. Up to six players can join, and the focus is on individual reflexes and judgment rather than team play. Before playing, it's good to check the nest's location and the birds' spawning patterns. Also, frequently checking the minimap to track nearby birds is crucial. In the later stages, when the birds move faster, you'll need to react in real time, so practicing beforehand helps. While the map is easy to pick up due to its simple structure and controls, consistent practice is necessary if you want to aim for high scores. Unlike turn-based games, this map constantly demands movement, making quick reflexes and concentration essential.
등산하기 1.7Ver (Mount Impossible 1.7Ver)
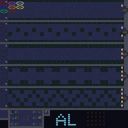
‘등산하기 1.7Ver’는 스타크래프트 브루드워의 유즈맵 중 하나로, 7명의 플레이어가 협동하여 산을 오르는 تحدي(도전)형 디펜스 맵이다. 맵의 전체적인 테마는 등산으로, 화산 지형 위에 조성된 산길을 따라 플레이어들이 점차 정상까지 도달하는 것이 목표로 보인다. 맵 중앙에는 큰 산봉우리가 위치하고 있으며, 산등성이에는 체력 회복 아이템을 비롯한 보급품이 배치되어 있어 전략적인 플레이가 요구된다. 산길은 좁고 구불구불하여 플레이어끼리의 충돌이 빈번할 것으로 예상되며, 중간중간 배치된 방해 요소를 피하거나 제거해야만 정상까지 도달할 수 있다. 맵 좌측 상단에는 제작자 및 한글화 패치 정보가 표시되어 있으며, 맵의 전체적인 분위기는 등산이라는 테마에 맞게 조화롭게 구성되어 있다. 특히 화산 타일셋을 사용한 덕분에 산의 험난한 분위기를 잘 연출하고 있으며, 산길의 디자인도 플레이어들에게 긴장감을 조성하는 데 중점을 둔 것으로 보인다. 이 맵은 단순히 등산을 완료하는 것이 아니라, 등산 도중 발생할 수 있는 다양한 장애물을 극복하고 동료들과의 협동을 통해 목표를 달성해야 하는 것이 핵심이다. 따라서 이 맵은 전략적 사고와 팀워크를 요구하는 유즈맵으로, 초보 플레이어보다는 중급 이상의 실력을 갖춘 플레이어들에게 추천된다. 또한, 맵의 난이도는 등산 경로의 복잡성과 장애물의 배치에 따라 달라질 수 있으므로, 플레이 전 맵의 구조를 충분히 파악하는 것이 중요하다. 등산 경로의 중간중간 배치된 아이템 위치와 장애물의 종류를 미리 확인하여, 효율적인 진행을 도모할 필요가 있다. 이 맵은 등산이라는 독특한 테마와 함께 전략적 요소를 더해 스타크래프트 유즈맵의 새로운 경험을 제공한다. 특히 산길을 따라 오르는 과정에서 발생하는 긴장감과 коллек티브 플레이의 재미가 이 맵의 가장 큰 매력 포인트로 작용할 것이다. 다만, 맵의 난이도가 높을 경우 플레이 시간이 길어질 수 있으므로, 여유 있는 시간 투자와 팀원 간의 원활한 협력이 필수적이다. ‘Climb Up 1.7Ver’ is a custom StarCraft: Brood War defense map where seven players work together to ascend a mountain. The map’s central theme revolves around mountain climbing, with players navigating winding trails on a volcanic terrain to reach the summit. A large peak dominates the center of the map, and supply points, including health-restoring items, are strategically placed along the ridges, demanding tactical play. The narrow, winding paths increase the likelihood of collisions between players, and obstacles must be avoided or cleared to progress. The top-left corner displays the creator’s information and localization patch details, while the overall atmosphere aligns seamlessly with the climbing theme. The use of a volcanic tileset effectively conveys the ruggedness of the terrain, and the path design is crafted to heighten tension for players. This map isn’t just about reaching the top—it challenges players to overcome various obstacles along the way and achieve their goal through teamwork. As such, it’s a custom map that emphasizes strategic thinking and cooperation, making it more suitable for intermediate to advanced players rather than beginners. The difficulty can vary depending on the complexity of the ascent and the placement of obstacles, so familiarizing yourself with the map’s layout beforehand is crucial. Identifying item locations and obstacle types along the route will help optimize your progress. ‘Climb Up 1.7Ver’ offers a fresh experience in StarCraft custom maps by blending the unique theme of mountain climbing with strategic elements. The thrill of ascending the trail and the enjoyment of collective play stand out as its biggest draws. However, given its high difficulty, the game may take longer to complete, so investing ample time and ensuring smooth teamwork are essential for success.
저글링 마인유혹하기 (Zergling Mine Temptation - Ultra Extreme)
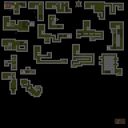
‘저글링 마인유혹하기 (초극악)’은 스타크래프트 브루드워에서 감상과 도전욕을 동시에 자극하는 유즈맵으로, 이름부터가 플레이어의 도전 정신을 자극한다. 맵의 제목이 시사하듯 저글링을 조종하여 지뢰나 함정 사이를 통과하거나 유도하는 플레이가 핵심인데, 단순히 통과하는 수준을 넘어 맵 곳곳에 배치된 마인을 clever 하게 유인하거나 조종해야 한다는 점이 특징이다. 맵 상단과 하단에 가로로 긴 구조가 반복되는 듯한 디자인으로 보아, 저글링의 기동성과 컨트롤력을 최대한 요구하는 퍼즐 디펜스에 가깝다. 특히 마인이 배치된 구간은 시야를 가리는 장애물과 연계되어 있어, 초심자는 물론 숙련자도 실수를 유발할 수밖에 없는 구조로 설계된 것이 눈에 띈다. 맵의 배경은 사막 타일셋을 사용해 황량한 분위기를 연출하며, 이는 긴장감을 더하는 요소로 작용한다. 맵 이미지에서 확인되는 대로, 저글링이 지나갈 수 있는 좁은 통로와 마인의 배치 패턴이 규칙적으로 반복되는 구조는 플레이어가 맵의 패턴을 익히고 이를 극복하는 재미를 제공한다. 저글링의 속도와 마인의 폭발 범위가 조화를 이룰 때 비로소 클리어할 수 있는 구조이기 때문에, 속도와 타이밍을 맞추는 것이 가장 큰 관건이다. 이 맵은 초보자가 처음 플레이할 경우 마인을 피하는 것만으로도 상당한 스트레스를 받겠지만, 패턴을 익히고 나면 점차 자신감이 생길 것이다. 또한 숙련자에게는 최단 시간 클리어와 퍼펙트 클리어를 노리는 도전 과제가 주어질 수 있다. 이 맵은 기본적으로 저글링을 조종하는 재미와 마인을 clever 하게 다루는 묘미를 동시에 제공하기 때문에, 스타크래프트의 기본 컨트롤과 전략적 사고를 모두 요구하는 유즈맵으로 평가할 수 있다. 플레이 전에는 마인의 배치 패턴을 미리 숙지하고, 저글링의 이동 경로를 미리 계획하는 것이 성공의 열쇠가 될 것이다. 특히 좁은 길목을 통과할 때는 저글링의 이동 속도를 조절하여 마인의 폭발 타이밍을 정확히 예측해야 하므로, 충분한 연습이 필요하다. ‘Zergling Mine Temptation (Extremely Difficult)’ is a user-made map in *StarCraft: Brood War* that simultaneously stimulates both appreciation and the desire to challenge oneself, as the name itself sparks the player’s competitive spirit. As the title suggests, the core gameplay revolves around controlling zerglings to navigate through or manipulate mines and traps, but what sets this map apart is the need to cleverly lure or guide the mines—far beyond just passing through them. The design, featuring repetitive horizontal structures at the top and bottom of the map, leans toward a puzzle defense that demands maximum mobility and control from the zerglings. The sections where mines are placed, combined with obstructive barriers that block vision, make the layout unforgiving—prone to mistakes even for experienced players. The map’s desert tile set enhances its desolate atmosphere, further heightening the tension. As seen in the map preview, the narrow corridors zerglings can traverse and the recurring mine placement patterns offer players the satisfaction of learning and overcoming the map’s challenges. The structure is designed so that success hinges on harmonizing the zerglings’ speed with the mines’ blast radius, making timing and precision the ultimate keys to victory. While beginners may find the stress of simply dodging mines overwhelming at first, mastering the patterns will gradually build confidence. For skilled players, the challenge extends to aiming for the fastest possible clear or a perfect run. By blending the fun of zergling control with the intricacy of outsmarting mines, this map stands out as a user-made experience that tests both fundamental StarCraft mechanics and strategic thinking. Before playing, studying the mine placement patterns and planning the zerglings’ path will be crucial to success. Special care is needed when navigating tight passages, where adjusting the zerglings’ speed to predict the mines’ explosion timing precisely becomes essential—requiring plenty of practice.
감옥탈출!!! Ver1.7
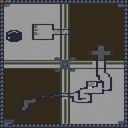
‘감옥탈출!!! Ver1.7’이라는 제목처럼 이 맵은 플레이어가 감옥에 갇힌 상태에서 다양한 퍼즐과 장애물을 해결하며 탈출하는 구조의 유즈맵이다. 맵 이미지 상단에는 넓은 평지형 공간이 펼쳐져 있으며, 중앙을 가로지르는 굵은 벽과 사각형 블록들이 배치되어 있다. 하단에는 좁은 통로와 계단식 구조가 보이며, 곳곳에 아이템 상자나 스위치로 추정되는 블록들이 배치되어 있다. 좌측 상단과 우측 상단에는 각각의 색상(파란색, 초록색)으로 구분된 구역이 보이며, 이 구역들이 탈출 경로의 핵심 포인트로 추정된다. 맵 중앙의 굵은 벽은 플레이어의 이동을 제한하는 주요 장벽으로 보이며, 이를 넘어가기 위한 아이템이나 스위치가 필요할 것으로 보인다. 이 맵은 퍼즐 장르답게 전략적인 사고와 빠른 반응력이 요구되며, 특히 좁은 통로와 블록 배치 때문에 실수 하나로 게임이 끝날 수 있는 리스크가 크다. 초보자도 쉽게 접근할 수 있는 ‘쉬운버전’이라는 파일명과 달리, 퍼즐의 난이도는 내부 설명에 ‘더 새로워요’와 ‘Show me the money!!!!!!!!!!!’ 같은 표현이 포함되어 있어 다소 도전적인 요소가 있을 수 있다. 이 맵을 플레이하기 위해서는 팀보다는 개인 플레이가 주를 이룰 것으로 보이며, 각 플레이어가 맡은 구역의 퍼즐을 해결하거나 협력하여 탈출 루트를 찾아야 할 것이다. 맵의 전체적인 분위기는 밝고 신나는 편으로, 탈출 성공 시의 성취감을 강조하는 듯하다. 퍼즐의 복잡도는 맵 크기에 비해 크지 않지만, 각 구역의 블록 배치와 스위치의 연계성을 잘 파악해야만 효율적인 탈출이 가능할 것이다. 특히 좌측 상단과 우측 상단의 색상 구분이 플레이어의 이동 경로를 안내하는 역할을 할 가능성이 높다. 이 맵을 추천하는 대상은 퍼즐 게임을 좋아하는 플레이어나, 스타크래프트의 유즈맵 중 독특한 장르를 탐구하는 유저들이다. 퍼즐을 풀며 발생할 수 있는 실수를 줄이기 위해, 플레이 전 맵의 주요 구조와 스위치의 위치를 미리 확인하는 것이 좋다. 또한, 팀 플레이 시에는 각 플레이어의 구역을 명확히 분담하여 협력하는 것이 중요할 것이다. 이 맵은 퍼즐의 난이도가 일정하지 않을 수 있으므로, 초보자는 난이도를 낮춰 플레이하는 것도 하나의 방법이다. Like the title "Prison Break!!! Ver1.7" suggests, this is a custom StarCraft map where players start trapped in a prison and must solve various puzzles and overcome obstacles to escape. At the top of the map image lies a wide open area, with a thick wall running through the center and square blocks scattered around. The bottom features narrow passages and tiered structures, along with scattered blocks that appear to be item chests or switches. The top-left and top-right corners each have distinct colored zones (blue and green), likely serving as key points in the escape route. The thick wall in the center seems to be a major barrier restricting movement, requiring special items or switches to bypass. As a puzzle map, it demands strategic thinking and quick reactions, with a high risk of failure due to the tight corridors and block placements—one mistake could end the game. Despite the filename hinting at an "easy version," phrases like "more challenging" and "Show me the money!!!!!!!!!!!" in the internal description suggest it may still be quite difficult. While the map seems designed for solo play rather than teamwork, players will need to solve their assigned puzzles or collaborate to find the escape route. The overall tone is bright and exciting, emphasizing the sense of achievement upon success. Although the puzzle complexity isn’t overwhelming given the map size, efficiently escaping requires a solid understanding of block arrangements and switch interactions. The color-coded zones in the top corners likely guide players along the correct path. This map is best suited for puzzle enthusiasts or players looking to explore unique genres within StarCraft custom maps. To minimize mistakes, it’s wise to study the map’s key structures and switch locations beforehand. In team play, clear role division is crucial. Since difficulty may vary, beginners might opt to lower the challenge settings when playing.
생존의 시험 - 죽음!!!! (Test of Survival - DEATH!!!!)
황혼의 어두운 대지 위에서 시작되는 이 서바이벌 맵은 제목 그대로 죽음과의 끈질긴 싸움을 강요한다. 다섯 명의 플레이어가 각자 제한된 자원과 좁은 공간에서 시작하며, 주변은 적대적인 컴퓨터 유닛과 건물로 빽빽하게 둘러싸여 있다. 맵의 핵심 목표는 단순하지만 가혹하다. 컴퓨터의 모든 유닛과 건물을 파괴하고 살아남아야 한다. 내부 설명에 적힌 “Can U Win? Or Will U Just Die?”라는 문구가 이 맵의 정체성을 단적으로 드러낸다. 초반 몇 분은 숨 돌릴 틈 없이 몰려오는 공격을 방어하느라 정신이 없다. 자원은 극도로 부족하고, 병력 생산 속도는 적의 공세를 따라잡기 어렵게 설계되어 있어 한순간의 방심이 곧바로 전멸로 이어진다. 이 맵은 전형적인 건설형 서바이벌 장르에 속하며, 협동을 전제로 하지만 실제로는 각자의 진영이 개별적으로 압박을 견뎌내는 방식으로 진행된다. 동료가 무너지면 그 여파가 순식간에 자신의 진영으로 번지기 때문에, 모두가 끝까지 버텨야 한다는 부담감이 상당하다. 제작자는 “재미를 더했다”고 밝혔지만, 그 재미는 극한의 난이도에서 오는 쾌감에 가깝다. 적을 하나씩 제거하며 조금씩 전선을 확장할 때의 성취감은 분명히 존재한다. 하지만 이 과정이 매우 더디고, 적의 병력 구성은 예측을 벗어나며, 한 번 밀리기 시작하면 회복이 거의 불가능하다. 특히 후반으로 갈수록 컴퓨터의 방어선이 견고해지고 공격도 거세져서, 플레이어는 끊임없이 멀티태스킹을 강요받는다. 이 맵을 제대로 즐기기 위해서는 빠른 초반 방어 체계 구축과 자원 관리에 능숙해야 하며, 서바이벌 장르 특유의 끈기와 인내심이 필수적이다. 캐주얼한 플레이어보다는 극한의 도전을 원하는 숙련된 플레이어 그룹에게 적합하다. 플레이 전 반드시 모든 참가자가 이 맵의 특성, 즉 무자비한 난이도와 긴 플레이 시간을 감수할 각오가 되어 있는지 확인해야 한다. 중간에 한 명이라도 포기하면 경험이 급격히 무너지므로, “TRY NOT TO QUIT!!!!!”이라는 경고는 단순한 협박이 아니라 이 맵을 체험하기 위한 유일한 지침이다. The survival map begins on the twilight terrain, and as the title suggests, it forces a relentless struggle against death itself. Five players start with severely limited resources and cramped space, immediately surrounded by a dense swarm of hostile computer units and structures. The core objective is brutally simple: destroy every enemy unit and building and stay alive. The internal description’s challenge, “Can U Win? Or Will U Just Die?” perfectly encapsulates the map’s identity. The opening minutes are a frantic blur of defending against waves of attacks that leave no room to breathe. Resources are painfully scarce, and unit production speed is deliberately outpaced by the enemy’s aggression, meaning a single moment of carelessness leads directly to annihilation. This map belongs to the classic build-and-survive genre, designed for cooperation, yet in practice each player’s base is individually pressured. If an ally collapses, the gap floods toward the others instantly, creating immense pressure for everyone to hold on until the end. The creator claimed to have made it “more fun,” but that fun is akin to the thrill derived from overcoming extreme adversity. There is genuine satisfaction in destroying enemy pockets one by one and gradually expanding your front line, but the process is brutally slow and unforgiving. The enemy force composition is unpredictable, and once you start losing ground, recovery becomes nearly impossible. As the game progresses into the later stages, the computer’s defensive lines harden and their offensives intensify, constantly forcing players into relentless multitasking. To face this map, you must be proficient in rapid early-game defense setups and efficient resource management, and an innate patience for the survival genre is mandatory. It is far more suitable for a group of highly skilled players seeking extreme challenges than for casual enjoyment. Before playing, every participant must fully understand and accept the map’s nature, namely its merciless difficulty and the lengthy time commitment required. If even one person quits midway, the entire experience collapses, so the warning “TRY NOT TO QUIT!!!!!” is not just a threat but the single essential rule for experiencing this map.
맵 선택 가이드
태그는 맵의 핵심 특징을 빠르게 설명하지만 제작 버전마다 규칙이 다를 수 있습니다. 상세 설명에서 권장 인원, 난이도, 플레이 시간과 버전을 함께 확인한 뒤 다운로드하세요.