
단일 플레이 스타크래프트 맵 모음
'단일 플레이' 태그가 등록된 맵을 모았습니다. 장르 하나로 찾기 어려운 플레이 방식, 난이도와 특징을 중심으로 인기 맵과 최신 맵을 비교해 보세요.
- 등록 맵
- 58개
- 누적 다운로드
- 8
- 누적 조회
- 2,142
인기 맵
다운로드와 조회 반응이 높은 맵입니다.
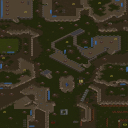
초원에서 살아남기 LUNATIC (Survive in the Grassland LUNATIC)
《초원에서 살아남기 LUNATIC》은 스타크래프트 브루드워의 UMS 유즈맵으로, 넓은 초원 지형에서 적절한 자원 관리와 병력 운용을 통해 살아남아야 하는 생존형 디펜스 장르의 맵이다. 맵의 중앙에는 넓은 평지가 펼쳐져 있으며, 외곽으로는 언덕과 협곡이 둘러싸인 구조로, 적의 공격을 방어하면서 자원을 확보하고 건물을 짓는 전략적 요소가 강조된다. 맵 내부는 사막 타일셋으로 구성되어 있어 건물이 배치된 곳과 자연 지형이 대비되어 시각적 구분이 명확하다. 플레이어는 초원 지형에서 시작하며, 주기적으로 밀려오는 적군(주로 저그 종족으로 추정된다)을 상대로 방어선을 구축해야 한다. 링 모양의 방어선 안쪽으로는 자원과 건물을 배치할 수 있는 공간이 마련되어 있어, 초반에는 소수의 병력으로 방어에 집중하고, 중반부터는 적극적인 확장을 노릴 수 있도록 설계된 듯하다. 맵의 난이도는 LUNATIC 등급으로 표시되어 있으며, 이는 최고 난이도를 의미하여 플레이어의 전략적 판단과 반응 속도가 요구된다. 특히 이 맵의 특징은 초원 환경에서 펼쳐지는 생존형 전투로, 넓은 시야와 전략적 요충지를 장악하는 것이 핵심이다. 초반에는 적의 공격을 버티면서 자원을 모아 병력을 증강하고, 중반 이후에는 역공이나 방어선 재정비로 전환해야 한다. 또한 맵의 구조상 언덕과 협곡을 활용한 포지셔닝이 중요하며, 외곽의 협곡 지형은 적의 침공을 늦추는 데 유용할 것으로 보인다. 맵의 크기는 4096x4096으로 상당히 넓어 넓은 시야를 확보할 수 있지만, 동시에 적의 공격 루트가 여러 갈래로 나뉠 수 있어 신중한 대처가 필요하다. 이 맵은 초보보다는 중급 이상의 플레이어에게 적합하며, 특히 디펜스와 생존형 전략 게임을 즐기는 유저들에게 추천할 만하다.LUNATIC 난이도 특성상 한 번의 실수가 치명적일 수 있으니, 초반 자원 관리와 방어 우선순위를 신중히 결정해야 한다. 또한 맵의 구조상 언덕과 협곡을 활용한 전략적 방어선을 구축하는 것이 성패의 열쇠가 될 것이다. This UMS custom map, titled 《초원에서 살아남기 LUNATIC》 (Survive in the Grassland LUNATIC), is a survival defense game set in the expansive terrain of StarCraft: Brood War. The map features a central grassland surrounded by hills and ravines, creating a strategic environment where players must balance resource management and troop deployment while defending against waves of enemy attacks. The gameplay revolves around establishing a defensive perimeter within the grassy interior while expanding resources and structures. The LUNATIC difficulty indicates a high level of challenge, demanding precise strategy and quick reactions from players. The map's desert tileset provides a clear visual contrast between built-up areas and natural terrain, enhancing strategic planning. A key aspect of this map is its emphasis on survival in a grassland setting, where controlling strategic high-ground positions and choke points is crucial. Early gameplay focuses on withstanding enemy assaults while accumulating resources, transitioning to offensive or defensive restructuring in mid-game. The 4096x4096 map size offers ample visibility but also multiple attack routes for enemies, requiring careful positioning and resource allocation. This map is best suited for intermediate to advanced players, particularly those who enjoy defense and survival strategy games. The LUNATIC difficulty means that even minor mistakes can have severe consequences, so players should prioritize early resource management and defensive priorities. Leveraging the map's terrain—such as hills and ravines—for strategic positioning will be key to success.
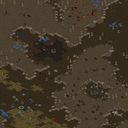
T6) 신년 대첩 (New Year's Day)
스타크래프트 브루드워의 유즈맵 ‘T6) New Year's Day’는 캠페인 스타일의 서바이벌 디펜스 맵으로, 단일 플레이어가 적의 끊임없는 공격을 막아내는 형식의 플레이 경험을 제공한다. 맵의 배경은 황무지로 추정되며, 중앙에 위치한 방어 거점을 중심으로 적의 공세가 끊임없이 이어진다. 플레이어는 듀크라는 유닛을 조종해 적의 공격을 방어해야 하며, 맵 곳곳에 배치된 방어 시설과 유닛 생산 건물을 활용해 전선을 유지하는 것이 핵심 전략이다. 이미지에서 확인되는 다수의 적 유닛과 방어 거점의 배치로 미루어보아, 맵은 난이도가 점차 상승하는 구조로 구성되어 있으며, 후반부로 갈수록 적의 공격 패턴이 복잡해지고 강해지는 특징을 지닌다. 추천 대상은 스타크래프트의 맵 디펜스 장르를 선호하는 플레이어로, 긴장감 있는 서바이벌 플레이를 즐기고자 하는 유저에게 적합하다. 플레이 전에는 맵의 방어 거점 위치와 주요 자원 분포를 미리 확인해, 초반 방어 라인을 어떻게 구축할지를 계획하는 것이 중요하다. 또한, 적의 공격 패턴이 시간에 따라 변화하므로, 맵의 진행 상황에 따라 유닛 생산과 방어 전략을 유연하게 조정해야 한다. 맵의 분위기는campaign-terran-terran06.scm 파일명과 내부 설명에서 유추할 수 있듯 테란 캠페인 스타일을 반영하고 있으며, 듀크와 Mengsk, Raynor, Kerrigan 같은 인물들이 언급되어 스토리성이 일부 포함되어 있음을 짐작할 수 있다. 그러나 맵의 실제 플레이 경험은 서바이벌 디펜스에 중점을 두고 있으므로, 스토리보다는 전투와 방어에 집중하는 것이 좋다. 맵의 난이도는 초보자의 경우 적응이 필요할 수 있으나, 점차적인 패턴 학습을 통해 익숙해질 수 있는 구조로 설계되어 있다. 특히, 후반부로 갈수록 적의 공격이 치열해지므로, 자원 관리와 유닛 업그레이드에 신경을 써야 한다. 맵의 타일셋은 황무지로 구성되어 있으며, 황량한 분위기가 긴장감을 더하는 요소로 작용한다. 마지막으로, 맵의 해상도와 타일 단위가 크고 세밀하게 배치되어 있어, 디펜스 맵으로서의 완성도를 높이는 데 기여하고 있다. The StarCraft: Brood War custom map *T6) New Year's Day* is a campaign-style survival defense map where a single player must fend off endless waves of enemy attacks. Set in a desolate wasteland, the map centers around a key defensive stronghold that faces constant assaults. Players control the unit Duke, using scattered defensive structures and production buildings to hold the line. Enemy units and the stronghold’s layout suggest a progressively increasing difficulty, with attacks growing more complex and intense as the game advances. Ideal for fans of the map defense genre, this map offers tense survival gameplay. Before playing, it’s crucial to study the stronghold’s location and resource distribution to plan your initial defense line. Since enemy attack patterns evolve over time, adapt your unit production and strategy dynamically as the match progresses. The map’s atmosphere, hinted at by filenames like *campaign-terran-terran06.scm* and references to characters such as Duke, Mengsk, Raynor, and Kerrigan, carries a Terran campaign feel with some narrative elements. However, the core experience revolves around survival defense rather than storytelling, so focus on combat and fortification. While the difficulty may require adjustment for beginners, the map is designed to become manageable through pattern recognition. Late-game attacks are brutal, so prioritize resource management and unit upgrades. With its expansive, meticulously detailed wasteland tileset, the map enhances the defensive experience with its stark, immersive setting.
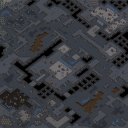
일鼓作气 (One Drumbeat Moment)
스타크래프트 브루드워 유즈맵 [5]一鼓作气는 단일 플레이어를 위한 디펜스 장르의 전략 맵으로, 듀란의 저그 병력과 사르나가 에너지를 흡수하는 후방 기지를 파괴하는 것이 주 목표로 보인다. 맵은 우주 타일셋을 기반으로 펼쳐지며, 중앙 통로와 측면을 따라 배치된 병력들과 기지 구조가 특징적이다. 맵의 이름은 ‘일鼓作气’로, 중국어 격언 ‘한 번 북을 울려 기를 일으킨다’는 의미를 담고 있어, 한 번의 공격으로 목표를 완수하라는 전략적 메시지가 느껴진다. 맵의 전체적인 분위기는 테란과 프로토스 간의 전쟁 후 잔재가 남아 있는 듯한 분위기로, 듀란의 야망을 저지하기 위한 마지막 전투를 연상시킨다. 플레이어는 유령 특공대를 지휘하여 듀란의 후방 기지를 파괴해야 하며, 맵 곳곳에 배치된 저그 병력과 마주치게 된다. 맵의 구조는 비교적 단순하지만, 병력의 배치와 기동성, 타이밍을 적절히 조절해야만 승리를 이끌어낼 수 있다. 특히, 맵의 좌우측면에 위치한 기지 구조는 듀란의 주요 방어 거점으로, 이를 파괴하기 위한 전략적 접근이 요구된다. 맵의 난이도는 중상으로 추정되며, 초보 플레이어보다는 적절한 경험을 쌓은 플레이어에게 더 적합할 것으로 보인다. 이 맵은 단일 플레이어용으로 설계되었기 때문에, 타 플레이어와의 협력이나 경쟁 없이 오로지 자신의 전략과 판단력으로 승리를 쟁취해야 한다. 맵의 진행은 비교적 직관적이지만, 듀란의 방어 병력과 기지 구조를 신중히 분석해야만 효율적인 공략이 가능하다. 또한, 맵의 후반부로 갈수록 방어 병력의 수가 늘어나고, 기지 구조가 복잡해지므로, 플레이어는 지속적인Resource 관리와 병력 컨트롤이 필요하다. 이 맵은 스타크래프트 브루드워의 유즈맵 중에서도 전략적 깊이와 몰입감을 제공하는 작품으로, 디펜스 장르에 익숙한 플레이어라면 충분히 즐길 수 있는 콘텐츠다. 맵의 분위기와 전략적 요구사항을 고려할 때, 테란과 프로토스 간의 전쟁 후遗址를 배경으로 한 스토리가 연상되며, 플레이어는 듀란의 야망을 저지하기 위한 마지막 전투를 경험할 수 있을 것이다. 맵의 구조와 진행 방식은 비교적 명확하지만, 난이도 조절이 적절히 이루어져 있지 않아, 초보자는 어려움을 느낄 수 있다. 따라서, 이 맵을 플레이하기 전에 최소한의 스타크래프트 경험과 전략적 사고력이 요구된다. This StarCraft: Brood War custom map, [5]一鼓作气, is a single-player defense strategy map where the player must destroy Duran's rear base and stop the Zerg forces from absorbing Sarna's energy. The map uses a space-themed tileset, featuring a central corridor and side structures that add depth to the gameplay. The title, meaning 'strike while the iron is hot' in Chinese, hints at the map's core strategy: a swift and decisive attack to achieve victory. The player controls ghost operatives to dismantle Duran's facilities scattered across the map. The primary challenge lies in navigating through waves of Zerg units while managing resources and timing attacks effectively. The map's design is straightforward but requires strategic planning, especially when targeting the side bases that serve as Duran's strongholds. The difficulty is estimated to be moderate, making it more suitable for experienced players who can adapt their tactics quickly. As a single-player experience, the map relies solely on the player's ability to strategize and execute without external cooperation or competition. The progression becomes increasingly challenging as more defensive units spawn and base structures grow more complex. Players must balance resource management and unit control to maintain momentum throughout the game. This custom map stands out in the defense genre of StarCraft: Brood War UMS maps, offering a blend of strategic depth and immersive storytelling. The post-war Terran and Protoss ruins backdrop enhances the narrative, immersing players in a mission to thwart Duran's ambitions. While the map's mechanics are intuitive, its difficulty curve may pose challenges to beginners, necessitating prior experience with real-time strategy games. Overall, [5]一鼓作气 is a must-play for fans of defense strategy maps seeking a test of skill and tactics.
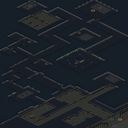
적 건물 파괴 미션 (Untitled Scenario)
이 맵은 스타크래프트 브루드워의 유즈맵으로, 적 건물 파괴를 목표로 하는 단순하면서도 긴장감 넘치는 디펜스형 미션이다. 내부 설명에서도 확인되듯 ‘모든 적 건물 파괴’를 승리 조건으로 삼고 있으며, 설원 타일셋의 차가운 배경이 어우러져 차분하면서도 긴박한 분위기를 연출한다. 맵 크기는 4096x4096의 거대한 설원 평원으로, 플레이어는 이広大한 공간에서 적의 건물을 찾아내 파괴해야 한다. 적의 방어 시설이나 유닛 배치에 따라 전략이 달라질 수 있어, 탐색과 공격의 균형을 잘 잡아야 한다. 설정상으로는 테란 캠페인 미션으로 분류되어 있지만, 실제로는 유즈맵으로서의 활용이 주목적이다. 플레이어는Resources를 확보한 상태에서 시작하며, 맵 곳곳에 흩어져 있는 적 건물들을 하나씩 제거해야 한다. 적의 방어가 치밀할수록 난이도가 높아지므로, 효율적인 자원 관리와 유닛 운용이 필수적이다. 특히, 넓은 맵에서 적의 위치를 정확히 파악하지 못하면 자칫Resources 낭비로 이어질 수 있어 신중한 플레이가 요구된다. 이 맵은 초보자보다는 어느 정도 스타크래프트에 익숙한 플레이어에게 추천된다. 단순한 목표와 승리 조건에도 불구하고, 넓은 맵과 적절한 방어 시설의 배치로 인해 전략적 사고가 필요하기 때문이다. 또한, 설원 타일셋의 시각적 아름다움과 차가운 분위기가 플레이에 몰입감을 더해준다. 다만, 맵의 규모가 크기 때문에 Resources 확보나 적 건물 탐색에 시간이 다소 소요될 수 있어, 여유 있는 플레이 타임을 확보하는 것이 좋다. 플레이 전에는 맵의 타일셋과 구조를 숙지하고, 적 건물의 예상 배치 위치를 미리 살펴보는 것이 중요하다. 또한, Resources 확보를 위한 SCV나 드론의 배치와, 적 유닛의 공격을 방어할 방어 시설의 구축 계획을 미리 세워두면 보다 수월한 플레이가 가능하다. 이 맵은 디펜스와 공격의 균형을 맞추는 재미가 있는 만큼, 전략적 플레이를 즐기는 유저들에게 좋은 선택이 될 것이다. 특히, 캠페인 미션으로서의 정체성보다는 유즈맵으로서의 활용 가능성이 더 크므로, 다양한 전략을 시도해보는 것도 좋다. This is a StarCraft: Brood War custom map where the goal is to destroy enemy buildings in a tense, defensive mission. As the internal description states, the victory condition is "destroy all enemy buildings," and the cold snowy tile set creates a calm yet intense atmosphere. The map spans a vast 4096x4096 snowy plain, and players must locate and destroy enemy buildings across this expansive space. Strategies will vary depending on enemy defenses and unit placements, so balancing exploration and aggression is key. Officially classified as a Terran campaign mission, its primary purpose is as a custom map. Players start with resources in hand, scattered with enemy buildings that must be eliminated one by one. The denser the enemy defenses, the higher the difficulty, making efficient resource management and unit control essential. Without precise knowledge of enemy positions on such a large map, wasted resources can quickly become an issue, demanding careful play. This map is recommended for players already familiar with StarCraft rather than beginners. Despite its simple objective and win condition, the vast map and strategic enemy defenses require thoughtful decision-making. The snowy tile set’s visual beauty and cold atmosphere also enhance immersion. However, due to the map’s scale, securing resources and locating enemy buildings can take time, so players should set aside ample time for an unhurried experience. Before playing, it’s important to study the map’s tile set and layout, as well as anticipate likely enemy building placements. Planning ahead—such as positioning SCVs or drones for resource gathering and constructing defensive structures to counter enemy attacks—will make gameplay smoother. With its balance of defense and offense, this map offers an enjoyable strategic challenge, making it a great choice for players who enjoy tactical gameplay. Since its potential as a custom map outweighs its identity as a campaign mission, experimenting with different strategies is highly encouraged.
![[11] 레이크시스 구출 작전 (Lexis Rescue Operation) 맵 미리보기](https://cdn-star-data.huzy.net/thumbnail_8a1a80629db54fdfa6d032f6fec8a4f8.jpg)
[11] 레이크시스 구출 작전 (Lexis Rescue Operation)
이 맵은 스타크래프트 브루드워의 유즈맵으로, 단일 플레이어가 적대 세력의 연합군을 상대로 방어전을 펼치는 디펜스 장르에 속한다. 맵의 배경은 우주 공간으로, 어두운 톤의 타일셋과 화산 지형을 기반으로 한 지형 디자인이 특징적이다. 플레이어는 [11]莱克西斯的救援이라는 제목에서 알 수 있듯이, '레이크시스'라는 이름의 세력을 구출하는 임무를 수행해야 하며, 이는 내부의 설명문에서도 '三族联军'을 격파하라는 목표로 언급된다. 맵의 구조는 중앙에 위치한 본진 지역을 중심으로 삼각형 형태로 배치된 적군 기지들이 나타나며, 이들을 파괴하거나 무력화하는 것이 주 목표로 보인다. 적군은 프로토스, 저그, 테란 세 종족이 연합한 형태로 등장할 것으로 추정되며, 각 세력의 특성을 반영한 방어 시설이나 유닛들이 배치될 가능성이 높다. 플레이 방식은 일반적으로 디펜스 유즈맵에서 볼 수 있는 '방어 + 공격'의 혼합 형태로, 플레이어는 자원을 수집하여 방어력을 강화하거나 공격 유닛을 생산해 적을 섬멸하는 방식으로 진행된다. 맵의 규모가 4096x4096으로 상당히 크며, 타일 단위가 128x128로 세밀한 지형 디자인이 가능하다는 점을 고려할 때, 맵의 디자인과 진행 방식이 다소 복잡할 수 있음을 예상할 수 있다. 초보 플레이어보다는 적어도 기본적인 유즈맵 진행 경험이 있는 플레이어에게 적합하며, 세 종족의 특성을 이해하고 효율적인 방어 전략을 구사할 수 있어야 원활한 진행이 가능하다. 맵을 플레이하기 전에는 자원 관리와 방어 건물의 배치를 미리 계획하는 것이 중요하며, 적의 공격 패턴을 분석하여 대응 전략을 마련하는 것이 핵심이다. 또한, 맵의 배경 스토리나 승리 조건 등은 내부 설명문에 의존해야 하므로, 게임 시작 전에 맵 설정이나 설명을 꼼꼼히 확인하는 것이 바람직하다. This map is a *StarCraft: Brood War* custom map where a single player engages in a defensive battle against a coalition of hostile forces. Set in outer space, the map features a dark-toned tile set and terrain designed around volcanic landscapes. As indicated by the title "[11] Lexis's Rescue," the player must rescue a faction called "Lexis," with the in-game objective described as defeating the "Three-Race Allied Army." The map is structured with enemy bases arranged in a triangular formation around a central player base, and the primary goal appears to be destroying or neutralizing these bases. The enemy forces are likely composed of a combined army of Protoss, Zerg, and Terran units, with defensive structures and units reflecting each race's unique characteristics. The gameplay blends elements typical of defense custom maps, featuring a mix of resource gathering, base defense, and offensive unit production to eliminate enemies. Given the map's large scale (4096x4096) and fine tile resolution (128x128), the design and mechanics may be somewhat complex. It is best suited for players with at least basic experience in custom map gameplay rather than complete beginners. A solid understanding of each race's strengths and effective defensive strategies is essential for smooth progression. Before playing, it’s crucial to plan resource management and the placement of defensive structures, while analyzing enemy attack patterns to develop counter-strategies. Since the background story and victory conditions rely on the in-game description, carefully reviewing the map settings and instructions before starting is highly recommended.
친숙한 적 (Familiar Enemy)
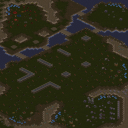
「[2]熟悉的敌人」은 스타크래프트: 브루드워의 유즈맵으로, 한 명의 플레이어가 인간 잔존 세력을 상대하는 디펜스 및 서바이벌 장르의 맵이다. 맵은 사막 타일셋으로 구성되어 있으며, 초반에는 저그의 본진 지역이 보이고, 이어지는 테란/프로토스 잔존 세력이 플레이어의 본진을 향해 끊임없이 공격을 퍼붓는 구조다. 맵의 중앙부는 비교적 평탄한 지형이지만, 곳곳에 바위와 협곡이 배치되어 있으며, 후방으로 갈수록 방어선이 좁아지는 특징을 보인다. 플레이어는 기본적으로 테란과 프로토스의 혼합된 병력을 지휘하게 되며, 각 유닛의 스킬과 조합을 통해 적의 공격을 막아내야 한다. 특히, 적의 공세는 초반에는 약하지만 시간이 지날수록 점점 강해지며, 후반에는 대규모의 고급 유닛들이 등장한다. 맵의 특징 중 하나는 '적응형 공세'로, 플레이어가 특정 유닛을 과도하게 사용하거나 방어선을 무너뜨리면 그 빈틈을 노리고 새로운 전략을 구사하는 적 AI가 등장한다는 점이다. 또한, 맵 곳곳에 숨겨진 보급품과 업그레이드 포인트가 배치되어 있어 장기전을 대비한 전략적 선택이 요구된다. 이 맵의 가장 큰 매력은 단일 플레이어의 긴장감과 전략적 깊이다. 한 명의 플레이어가 모든 것을 통제해야 하며, 실수 하나하나가 치명적으로 이어질 수 있다. 또한, 사막 테마의 시각적 조화와 함께, 적의 공격 패턴이 점차 변해가는 디자인 덕분에 플레이어는 끊임없이 새로운 전략을 고민해야 한다. 추천 대상은 스타크래프트의 디펜스 및 서바이벌 장르를 любить하는 플레이어, 혼자서 긴장감 있는 플레이를 즐기는 유저, 그리고 다양한 유닛 조합과 타이밍을 연습하고 싶은 초중급자들에게 적합하다. 다만, 초보자는 처음엔 공세에 밀려 당황할 수 있으니, 기본적인 테란/프로토스 유닛의 성능과 스킬을 숙지한 후 도전하는 것이 좋다. 플레이 전 반드시 확인해야 할 요소는 다음과 같다. 첫째, 맵의 중앙 지형과 방어선의 좁아지는 부분을 미리 파악하여, 주요據點(거점)을 어디에 둘 것인지 계획해야 한다. 둘째, 적은 초반에는 약하지만 후반으로 갈수록 강력해지므로, 초반 자원과 업그레이드에 충분한 투자를 해야 한다. 셋째, 숨겨진 보급품과 업그레이드 포인트를 찾는 방법을 미리 익혀두면, 후반 전투에서 큰 도움이 된다. 넷째, 적의 공격 패턴이 변한다는 점을 염두에 두고, 유닛 조합을 유동적으로 변경할 준비를 해야 한다. 이 맵은 스타크래프트의 유즈맵 역사에서 자주 언급되는 서바이벌 및 디펜스 장르의 대표작 중 하나로, 그만큼 플레이어의 집중력과 전략적 사고를 요구하는 작품이다. 특히, 한 명의 플레이어가 모든 것을 책임져야 한다는 점에서 '혼자서 모든 것을 해결해야 한다'는 성취감을 느낄 수 있으며, 적의 공격 패턴이 점차 변하는 디자인 덕분에 매번 새로운 도전이 된다. 사막 분위기의 시각적 아름다움과 함께, 긴장감 넘치는 전투가 계속되는 이 맵은 오랫동안 기억에 남는 경험을 선사할 것이다. This StarCraft: Brood War custom map, titled 「[2]熟悉的敌人」, falls under the defense and survival genre, where a single player faces relentless human remnant forces led by the Zerg. Set in a desert-themed tile, the map features a central open area surrounded by rocky terrain and narrow choke points, forcing strategic positioning from the outset. The enemy, composed of Terran and Protoss units, escalates their assaults over time, beginning with basic forces and progressing to high-tier compositions, including adaptive counter-strategies based on the player's weaknesses. The core gameplay revolves around managing limited resources, upgrading units, and exploiting hidden supply caches scattered across the map. Players must balance economy and defense, as early neglect can lead to overwhelming pressure in later stages. The AI's ability to adapt to the player's tactics adds depth, making each playthrough unique. The map's visual design, enhanced by the desert theme, complements the high-stakes tension of holding ground against an ever-increasing onslaught. Recommended for players who enjoy single-player survival challenges, those seeking to refine their Terran and Protoss unit control, and intermediate players looking to test their strategic adaptability. Beginners may find the early waves manageable, but the escalating difficulty demands prior familiarity with unit matchups and micro-management. Key preparation includes scouting the map's choke points, prioritizing early upgrades, and memorizing the locations of hidden upgrades to maximize efficiency in the late game. 「[2]熟悉的敌人」 stands as a testament to the creativity and depth of StarCraft custom maps, offering a tense, immersive experience where every decision counts. Its blend of strategic planning, adaptive enemy AI, and atmospheric desert design ensures replayability, making it a must-try for fans of survival and defense genres.
Polypoid 단솔 5팩타이밍 연습
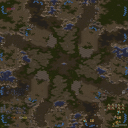
스타크래프트 브루드워의 유즈맵 중 하나로, 폴리포이드(Polypoid)라는 제작자에 의해 2019년 11월에 배포된 ‘단솔 5팩타이밍 연습’이란 이름을 가진 맵입니다. 맵의 제목에서 짐작할 수 있듯이, 저그 종족의 핵심 유닛인 저글링의 5팩 타이밍 러쉬를 연습할 수 있는 구조로 설계되었습니다. 맵의 배경은 사막 타일셋으로 구성되어 있으며, 넓은 평지 위에 각 플레이어가 시작 지점을 확보한 후 본진과 앞마당을 중심으로 Ressource Area(자원 지역)이 배치되어 있습니다. 맵의 중앙부는 비교적 평탄한 지형이지만, 각 플레이어의 시작 지점과 멀어질수록 언덕과 바위가 곳곳에 배치되어 있어 시야 확보와 병력의 기동성에 영향을 미칩니다. 맵의 테두리에는 보라색 블러드(바이오스포어)와 같은 장식 요소가 배치되어 있으며, 이는 맵의 분위기를 살리는 역할을 합니다. 맵의 전체적인 구조는 저그의 빠른 확장을 억제하고, 5팩 타이밍 러쉬를 성공적으로 수행할 수 있도록 밸런스를 맞춘 것으로 보입니다. 플레이어는 맵의 시작 지점에서부터 빠르게 미네랄과 가스를 확보하며, 동시에 5팩 타이밍을 노려 상대방의 본진을 공격하는 전략을 구사해야 합니다. 맵의 특성상 초보자와 숙련자 모두에게 적합한 연습용 맵으로, 타이밍 러쉬의 중요성과 효율적인 자원 관리, 병력 운용의 기본기를 다질 수 있는 구조로 구성되어 있습니다. 다만, 맵의 중앙부가 비교적 개방되어 있어 러쉬 타이밍을 잘못 잡으면 역공을 당할 위험이 있으니 주의가 필요합니다. 또한, 맵의 언덕과 바위 지형은 시야를 차단할 수 있어, 정찰과 병력 배치에 신경을 써야 합니다. 이 맵은 스타크래프트 유즈맵 커뮤니티에서 저그의 타이밍 러쉬 연습용으로 자주 추천되는 맵 중 하나로, 저그의 기본기를 다지고자 하는 플레이어들에게 유용한 리소스가 될 것입니다. 맵의 디자인과 밸런스는 폴리포이드 제작자의 손길을 느낄 수 있으며, 특히 5팩 타이밍을 노리는 플레이어들에게는 필수적인 연습 공간으로 손색이 없습니다. 단, 맵의 난이도 조절이 되어 있지 않기 때문에, 초보자의 경우 난이도를 낮춰서 연습하는 것이 좋습니다. 또한, 맵의 중앙부 언덕 지형은 러쉬 타이밍을 늦추는 요인으로 작용할 수 있으니, 이를 고려한 전략 수립이 필요합니다. 맵의 전체적인 분위기는 저그의 기본기와 공격적 플레이를 강조하는 구조로, 스타크래프트의 유즈맵 중에서도 손꼽히는 타이밍 러쉬 연습용 맵으로 자리매김하고 있습니다. This is a custom map from *StarCraft: Brood War* created by a mapper named Polypoid and released in November 2019 under the title *"Dan Sol 5-Fact Timing Practice."* As the name suggests, the map is designed to help players practice the 5-fact timing rush—a core strategy for the Zerg race centered around Zergling production. The map uses a desert tileset, with each player starting on a wide, flat plain where the main base and natural expansion are situated within a Resource Area. While the central area remains relatively open, the terrain becomes more rugged with hills and rocks as you move away from the starting positions, affecting vision and troop mobility. Decorative elements like purple blood (Biospheres) line the map’s edges, enhancing its atmosphere. The map’s layout is balanced to suppress Zerg’s early expansion while enabling a successful 5-fact timing rush. Players must secure minerals and gas quickly from the start and then launch an attack on the opponent’s main base at the precise 5-fact timing. The structure makes it suitable for both beginners and experienced players, helping them refine timing rushes, resource management, and basic unit control. However, the open central area means a mistimed rush can leave you vulnerable to a counterattack, so caution is advised. The hills and rocky terrain also block vision, requiring careful scouting and positioning. This map is frequently recommended in the *StarCraft* custom map community as a go-to for practicing Zerg timing rushes. It serves as a valuable resource for players looking to strengthen their fundamentals. The design and balance reflect Polypoid’s skill, making it an essential training ground for those aiming to master the 5-fact timing. That said, the difficulty isn’t adjustable, so beginners may want to practice on an easier setting. The central hills can also delay rush timing, so strategic adjustments are necessary. Overall, the map emphasizes Zerg’s core mechanics and aggressive playstyle, earning its place as one of the top timing rush practice maps in *StarCraft: Brood War*’s custom map scene.
Z8) 어둠의 템플러 (Z8) The Dark Templar)
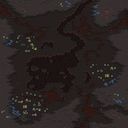
스타크래프트 브루드워의 유즈맵으로 알려진 <Z8) The Dark Templar>는 캠페인 스타일의 디펜스와 서바이벌 요소가 혼합된 전략 게임으로, 플레이어는 다른 종족의 유닛을 조종하며 특정 목표를 달성해야 한다. 이 맵은 내부 제목과 설명에서 알 수 있듯이 ‘어둠의 템플러’를 파괴하는 것이 주 목표로 설정되어 있으며, 이를 위해 플레이어는 제한된 자원과 유닛을 효율적으로 배치하고 관리해야 한다. 맵의 배경은 정글 타일셋을 활용해 어두운 분위기를 자아내며, 복잡한 지형과 요새화된 적의 배치로 전략적 깊이를 더한다. 맵의 크기는 4096x4096으로 대규모 전투가 가능한 공간을 제공하지만, 플레이어는 단일 플레이어 모드로 진행되므로 팀 전략보다는 개인의 판단력과 유닛 관리 능력이 중요하다. 본 맵은 UMS(유즈맵) 장르에 속하며, 특히 ‘컴퓨터 상대 디펜스’ 유형의 플레이 스타일을 요구한다. 플레이어는 초반부터 끊임없이 몰려오는 적의 공격을 방어해야 하며, 미션 클리어 조건을 달성하기 위해 특정 유닛이나 건물을 보호하거나 파괴해야 한다. 맵의 난이도는 맵 내부의 배치와 적의 공격 패턴에 따라 달라지지만, 대체로 ‘보통’ 수준으로 설정되어 있으며, 초보 플레이어는 적의 공격을 방어하는 데 어려움을 느낄 수 있다. рекомен된 플레이 시간은 없지만, 맵의 규모와 전투Density를 고려했을 때 약 30분 내외로 진행될 것으로 예상된다. 이 맵은 스타크래프트 브루드워의 밸런스를 활용한 전략적 플레이를 즐기고 싶은 유저들에게 적합하다. 특히, 캠페인식의 스토리 진행과 제한된 자원의 활용을 요구하는 점에서 전략적 사고와 긴장감을 동시에 느낄 수 있다. 또한, 맵의 어두운 분위기와 정글 타일셋은 몰입감을 높이는 데 기여하며, 디펜스와 서바이벌 요소가 조화를 이루는 점에서도 높은 평가를 받을 만하다. 다만, 단일 플레이어 모드로 진행되므로 팀 플레이를 선호하는 유저들에게는 다소 아쉬울 수 있다. 맵을 플레이하기 전에는 맵의 지형과 적의 배치 패턴을 충분히 숙지하고, 유닛의 생산과 방어 라인의 구축을 신중히 계획할 필요가 있다. The StarCraft: Brood War custom map known as <Z8) The Dark Templar> is a strategy game that blends campaign-style defense and survival elements. Players control units from different races to achieve specific objectives. As indicated by its internal title and description, the primary goal is to destroy the Dark Templar, requiring efficient management and placement of limited resources and units. The map employs a jungle tileset to create a dark atmosphere, with complex terrain and fortified enemy placements that add strategic depth. While the 4096x4096 size allows for large-scale battles, the single-player mode means individual judgment and unit control are crucial rather than team coordination. This map falls under the UMS (custom map) genre, specifically demanding a "computer opponent defense" playstyle. Players must defend against relentless enemy waves from the start while protecting or destroying certain units or structures to meet mission objectives. The difficulty varies based on enemy placement and attack patterns but is generally set to a "normal" level, which may pose challenges for beginners. While no recommended playtime is provided, the map's scale and combat density suggest a runtime of around 30 minutes. Ideal for players who enjoy strategic gameplay leveraging StarCraft: Brood War’s balance, this map offers a mix of campaign-style progression and resource management, creating tension and requiring strategic thinking. The dark atmosphere and jungle tileset enhance immersion, and the balance between defense and survival elements makes it highly praised. However, since it’s designed for single-player, those who prefer team-based gameplay may find it less appealing. Before playing, it’s important to thoroughly understand the terrain, enemy patterns, and carefully plan unit production and defensive layouts.
정복자들: 보너스 레벨 (Conquistadores: Bonus Level)
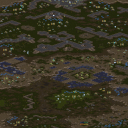
‘정복자들: 보너스 레벨’은 스타크래프트 브루드워의 유즈맵으로, 단일 플레이어용으로 설계된 디펜스 장르의 맵이다. 맵의 배경은 사막 지형으로 펼쳐지며, 중앙에 위치한 본진을 중심으로 적의 끊임없는 웨이브가 밀어닥치는 구조를 갖추고 있다. 플레이어는 프로토스 종족을 선택해, 강력한 방어 건물과 유닛을 배치하고 자원을 관리하면서 적의 공격을 방어해야 한다. 맵 곳곳에는 방어 타워를 설치할 수 있는 공간과 자원 채취 지역이 배치되어 있어, 전략적으로 건물을 배치하고 자원을 확보하는 것이 핵심이다. 이 맵의 가장 큰 특징은 바로 ‘보너스 레벨’이라는 이름에 걸맞게, 플레이어의 선택에 따라 다양한 전략을 펼칠 수 있는 유연성을 제공한다는 점이다. 예를 들어, 초반에 자원을 집중해 강력한 방어 건물을 짓거나, 적의 공격 패턴을 분석해 유닛을 효율적으로 배치할 수 있다. 또한, 맵의 중앙에 위치한 넓은 평원은 방어 건물의 배치와 유닛의 이동 경로를 결정짓는 중요한 요소로 작용한다. 플레이어는 이 평원을 어떻게 활용하느냐에 따라 방어 성공 여부가 갈릴 수 있다. ‘정복자들: 보너스 레벨’의 또 다른 매력은 바로 긴 플레이 시간과 높은 난이도다. 맵의 크기가 크고, 적의 공격이 끊임없이 이어지기 때문에 플레이어는 긴장감을 늦추지 않고 estratégia를 세워야 한다. 또한, 맵 곳곳에 숨겨진 자원과 보너스 아이템을 찾아내어 활용하는 것도 성공의 열쇠가 된다. 이 맵은 단순히 방어하는 것에서 그치지 않고, 자원의 관리와 전략적 계획이 요구되는 고난이도의 디펜스 게임으로, 스타크래프트 유즈맵의 매력을 한껏 느낄 수 있는 작품이다. 이 맵을 추천하는 대상은 바로 디펜스 게임을 즐기며, 전략적 사고와 긴장감을 동시에 경험하고 싶은 플레이어들이다. 특히, 단일 플레이어용 디펜스 맵을 선호하는 유저들에게는 최적의 선택지가 될 것이다. 또한, 프로토스 종족의 특성을 살려 플레이하고 싶은 유저들에게도 적합한 맵으로, 다양한 유닛과 건물의 조합을 통해 자신만의 전략을 펼쳐볼 수 있다. 마지막으로, 긴 플레이 시간을 즐기며 반복 플레이를 통해 실력을 향상시키고 싶은 유저들에게도 추천할 만한 작품이다. 플레이 전 반드시 확인해야 할 사항은 다음과 같다. 먼저, 맵의 크기가 크기 때문에 자원의 분배와 건물의 배치에 신중을 기해야 한다. 또한, 적의 공격 패턴을 미리 분석해 방어 전략을 세우는 것이 중요하다. 마지막으로, 맵 곳곳의 자원과 보너스 아이템을 빠르게 찾아내어 활용하는 연습을 해두면 더 효과적으로 플레이할 수 있다. English review text without any translation heading ‘Conquistadores: Bonus Level’ is a custom map for StarCraft: Brood War, designed as a single-player defense game. The map unfolds across a vast desert terrain, where the player’s base is positioned centrally, surrounded by waves of enemy units that relentlessly assault from all directions. Players control the Protoss faction, tasked with building defenses, gathering resources, and strategically positioning units to withstand continuous enemy pressure. The defining feature of this map is its flexibility, embodied in the ‘Bonus Level’ designation. Players can adapt their strategy based on resource availability and enemy patterns. For instance, early-game tower rushes or defensive setups can be viable, while mid-to-late game requires balancing unit production with base expansion. The central open area plays a crucial role in determining unit movement and building placement, making spatial awareness a key factor in survival. A standout aspect of ‘Conquistadores: Bonus Level’ is its extended playtime and high difficulty. The map’s large scale and persistent enemy waves demand sustained focus and adaptability. Hidden resources and bonus items scattered across the map add depth, rewarding thorough exploration and resource management. This map transcends typical tower defense mechanics by integrating resource scarcity, strategic depth, and real-time decision-making, offering a challenging yet rewarding experience. This map is ideal for players who enjoy defense-focused custom maps and seek a combination of strategic depth and tension. It caters especially to those who prefer single-player scenarios, as well as Protoss enthusiasts looking to leverage the faction’s unique strengths. The extended playtime and replayability make it a great choice for players who enjoy refining their tactics over multiple attempts. Before diving in, players should prioritize careful resource allocation and base layout, as the map’s size amplifies the consequences of poor planning. Analyzing enemy attack patterns and securing bonus resources early will significantly improve long-term survival. Familiarity with Protoss tech trees and defensive structures is also beneficial, as the map rewards disciplined macro-management alongside tactical micro-decisions.
스타게이트 2: 생명?(Stargate(2): ¿Vida inteligente?)
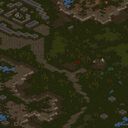
스타크래프트 브루드워 유즈맵 〈Stargate(2): ¿Vida inteligente?〉는 단일 플레이어용 디펜스 장르로, 플레이어는 ‘스타게이트’ 팀의 생존을 책임지는 임무를 맡는다. 맵은 사막 타일셋으로 구성되어 있으며, 중앙의 본진과 주변으로 펼쳐지는 넓은 평지에서 적의 끊임없는 공격을 방어해야 한다. 이미지에서 확인되는 바와 같이, 본진 주변에는 자원 미네랄과 가스 геisers가 배치되어 있어 지속적인 자원 수급이 가능하고, 방어 건물과 유닛 생산 건물을 건설할 수 있는 공간이 마련되어 있다. 맵의 특이한 점은 오른쪽 상단에 위치한 ‘훈련소’( предположительно barracks)로 보이는 건물로, 이곳에서 유닛을 생산하여 방어에 활용할 수 있다. 왼쪽 하단에는 ‘기지 확장 지역’이 있으며, 이곳을 활용해 두 번째 방어선을 구축할 수 있어 전략적 깊이를 더한다. 적의 공격은 초반에는 저글링과 히드라리스크 위주로 시작되나, 진행에 따라 울트라리스크와 디바우러까지 등장하는 등 점차 강해지는 패턴을 보인다. 플레이어는 제한된 자원으로 효율적인 방어선을 구축하고, 유닛 조합을 신중히 결정해야 한다. 맵의 난이도는 ‘보통’ 정도로 설정되어 있으며, 초보자도 기본적인 방어 전략을 익히면 클리어할 수 있지만, 높은 난이도로 도전하고자 한다면 자원 관리와 유닛 컨트롤에 대한 숙련도가 요구된다. 맵을 플레이하기 전에는 본진 주변의 방어 건물 배치 가능 지역과 확장 기지의 위치를 미리 확인하고, 자원 수급이 원활한지 점검하는 것이 중요하다. 또한, 훈련소에서 생산 가능한 유닛의 특성을 숙지하여 적의 공격 패턴에 맞춰 대응할 준비를 해야 한다. 이 맵은 디펜스 게임을 즐기는 플레이어뿐만 아니라, 전략적 사고와 자원 관리를 연마하고 싶은 유저에게도 좋은 연습 opportunities를 제공한다. 특히, 한정된 공간에서 최대한의 효율성을 추구하는 플레이 스타일이 매력적으로 느껴질 것이다. Stargate(2): ¿Vida inteligente? is a single-player defense-style custom map for StarCraft: Brood War, where the player takes on the role of protecting the Stargate team's survival. Set in a desert tileset, the map features a central base with mineral patches and gas geisers, allowing for continuous resource gathering and unit production. The top-right section includes what appears to be a barracks, enabling the construction of defensive units, while the bottom-left area offers an expansion zone for establishing a secondary defensive line. Enemy attacks escalate from early-game Zerglings and Hydralisks to later Ultralisk and Devourer units, requiring strategic adaptation. Players must balance resource management with unit composition to effectively counter escalating threats. Designed with a 'medium' difficulty level, the map is accessible to beginners who grasp basic defense tactics but demands refined skills for higher difficulties. Before playing, it's crucial to scout the base layout, identify potential defensive structures, and ensure smooth resource flow. Familiarizing yourself with unit production options at the barracks will also enhance your ability to respond to enemy strategies. This map appeals to both defense game enthusiasts and players looking to refine strategic thinking and resource management. Its emphasis on maximizing efficiency in limited space makes it a compelling choice for strategic players.
임파서블 케익스 (Impossible Keks)
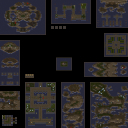
임파서블 케익스는 스타크래프트 브루드워의 유즈맵으로, 이름에서부터 느껴지듯 어려운 난이도로 유명한 컴까기 맵이다. 맵은 사막 테마의 넓은 공간에 여러 개의 건물이 흩어져 있는 구조로, 플레이어는 제한된 자원으로 끊임없이 몰려오는 적군 유닛을 상대해야 한다. 맵의 핵심은 '불가능'이라는 이름에 걸맞게 극한의 방어와 자원 관리인데, 초반에는 비교적 손쉬운 적들이 등장하지만 점차 난이도가 올라가면서 조합된 유닛과 다량의 공격을 버텨내야 한다. 맵의 특징은 건물 배치와 자원 분배의 중요성으로, 초반에 실수를 하면 중반 이후부터는 심각한 자원 부족에 시달리게 된다. 또한, 맵 곳곳에 숨겨진 자원 상자와 미네랄 멀티가 배치되어 있어 전략적인 자원 확보가 필수적이다. 플레이어는 기본적으로 넥서스와 커맨드 센터를 방어하는 동시에, 추가 건물을 지어 자원 채취 효율을 높이는 동시에 적의 공격을 효과적으로 방어하는 방법을 모색해야 한다. 맵의 볼륨은 상당히 크며, 맵 전체에 걸쳐 건물과 유닛이 배치되어 있어 플레이 중에는 시야 확보와 자원 관리에 신경을 써야 한다. 이 맵은 초보 플레이어보다는 중급 이상의 실력을 가진 유저에게 적합하며, 특히 막히기 쉬운 구간에 도달하면 전략적 접근 방식의 변화가 요구된다. 추천하는 플레이 방식은 초반에 빠른 자원 확보와 방어 건물 건설을 우선시하고, 중반부터는 공격형 건물과 유닛 생산을 병행하는 것이다. 맵의 난이도가 높기 때문에 실패를 반복하며 전략을 수정하는 과정이 필요하며, 이는 맵의 جذ감을 크게 높이는 요소로 작용한다. 또한, 맵의 난이도를 낮추고 싶다면 시작 지점 근처의 미네랄 멀티를 최대한 빨리 확보하는 것이 중요하다. 이 맵은 스타크래프트 유즈맵 커뮤니티에서 어려운 맵으로 알려져 있으며, 클리어에 성공한 플레이어는 큰 성취감을 느낄 수 있을 것이다. 맵의 플레이 시간은 약 30분에서 1시간 정도로 예상되며, 팀 플레이보다는 개인 플레이에 최적화되어 있다. 맵의 구조상 자원 확보와 방어 라인 구축이 가장 중요하므로, 이러한 요소에 집중하며 플레이하는 것이 좋다. 마지막으로, 맵의 모든 요소를 익히려면 여러 번의 시도와 실수를 감수해야 한다. 맵의 난이도가 높기 때문에 플레이 전에는 반드시 맵의 구조와 자원 분포를 숙지하는 것이 좋다. 이 맵은 스타크래프트 유즈맵 중에서도 손꼽히는 어려운 맵으로, 도전欲을 자극하는 요소로 가득하다. 맵의 볼륨이 크고 디테일이 풍부하기 때문에, 한번 성공하면 여러 번 플레이하고 싶어질 만한 매력이 있다. Impossible Keks is a challenging UMS (Use Map Settings) custom map in StarCraft: Brood War, designed for solo players seeking a tough survival experience. Set in a desert-themed terrain, the map features scattered buildings and strategic resource points, requiring players to manage limited resources while defending against relentless waves of enemy units. The name 'Impossible' reflects its punishing difficulty, where early waves are manageable but rapidly escalate in intensity, forcing players to master base defense and resource allocation. Key mechanics include hidden resource boxes and mineral expansions, making efficient gathering and base expansion critical. The map demands careful attention to building placement, as poor initial decisions lead to severe resource shortages later. Mid-game strategies should balance defensive structures with offensive production, adapting as enemy compositions shift. The large map size and dense unit distribution necessitate constant vigilance over vision and resource management. This map is best suited for intermediate to advanced players familiar with UMS mechanics, especially those who enjoy overcoming steep learning curves. Players should prioritize securing nearby mineral expansions early and adjusting strategies after setbacks. While the expected playtime ranges from 30 to 60 minutes, the true challenge lies in repeated attempts to refine tactics. The map's depth and replayability stem from its unforgiving yet rewarding mechanics, making it a standout title in the StarCraft custom map community. Its design encourages players to analyze failures and experiment with new approaches, enhancing long-term engagement.
라커 디펜스 온 유어 오운! 5.0 (Lurker Defense On Your Own! 5.0)
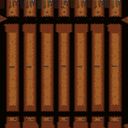
스타크래프트 브루드워의 ‘라커 디펜스 온 유어 오운!(Lurker Defense On Your Own!)’은 이름 그대로 라커 유닛을 중심으로 한 디펜스형 유즈맵으로, 총 30레벨을 클리어해야 하는 구조를 갖고 있다. 게임은 화면 하단에서 적 유닛이 끊임없이 몰려오는 것을 라커로 저지하는 것이 주 목표이며, 각 레벨마다 정해진 수의 적을 막아내면 다음 단계로 넘어갈 수 있다. 라커의 특성상 지상 유닛에만 효과가 있으므로 공중 유닛이나 특수 유닛이 등장할 때는 추가 대응이 필요하다는 점이 특징이다. 맵의 전체적인 디자인은 황혼 테마의 타일셋을 기반으로 깔끔하게 구성되어 있으며, 하단 중앙에서 적들이 쏟아져 나오는 구조는 전형적인 디펜스 게임의 흐름을 따르고 있다. 플레이어는 제한된 자원으로 라커를 배치하고, 때로는 보조 유닛을 활용해 적의 진격을 늦추거나 제거해야 한다. 레벨이 진행될수록 적의 종류와 수가 늘어나며, 일부 레벨에서는 특정 조건(예: 특정 유닛만 통과시키지 않기, 특정 유닛만 제거하기)이 추가되어 전략의 다양성을 요구한다. 초보 플레이어는 라커의 사정거리와 공격 타이밍을 익히는 데 시간이 걸릴 수 있지만, 난이도가 점차 상승하면서 자연스럽게 숙련도를 높일 수 있는 구조로 설계되어 있다. 이 맵은 1인 플레이에 최적화되어 있으며, 특히 라커의 활용법과 적의 패턴을 익히는 데 초점을 맞추고 있는 만큼, 디펜스 장르에 익숙한 플레이어뿐만 아니라 새로운 유즈맵을 찾는 이들에게도 추천할 만한 작품이다. 다만, 라커의 특성상 공중 유닛에 대한 대처가 필수적이므로, 공중 유닛이 등장하는 레벨에서는 보조 유닛이나 스킬을 적극 활용하는 것이 중요하다. 전체적으로는 긴 플레이타임을 요구하지 않지만, 각 레벨을 클리어할 때마다 느끼는 성취감이 큰 맵으로, 꾸준한 도전欲을 자극하는 디자인이다. Lurker Defense On Your Own!5.0 is a classic defense-style custom map in StarCraft: Brood War, where players must survive 30 increasingly challenging levels by preventing enemy units from reaching the bottom of the screen. The core mechanic revolves around strategically placing Lurkers—ground-based units with area-of-effect attacks—to block and eliminate waves of incoming enemies. While Lurkers excel against ground units, players must adapt their strategies when facing air units or special enemy types, often requiring auxiliary units or quick reactions. The map’s design utilizes a twilight-themed tileset, creating a clean and immersive aesthetic that enhances the gameplay experience. Each level introduces new enemy compositions and mechanics, such as conditional objectives like preventing specific units from passing or eliminating certain enemies. Early levels serve as a gentle introduction to Lurker positioning and timing, but the difficulty ramps up significantly, demanding sharper decision-making and adaptability. This single-player experience is ideal for both seasoned defense-map enthusiasts and newcomers looking to explore StarCraft’s custom content. The challenge lies in mastering Lurker mechanics while balancing resource management, especially when air units become prominent. With a rewarding progression system and a satisfying sense of accomplishment after each level, the map offers a compelling and engaging experience that keeps players motivated.
최근 등록된 맵
새로 추가된 파일과 버전을 확인하세요.
에피소드 III: 테이커의 추락
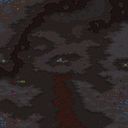
에피소드 III: 테이커의 추락은 스타크래프트 브루드워의 유즈맵으로, 단일 플레이어를 대상으로 하는 구조 임무 형식의 맵이다. 내부 맵 설명에서 확인되는 ‘구조 임무’라는 키워드는 이 맵이 정해진 목표를 달성하는 데 집중된 플레이 스타일을 지녔을 가능성이 높음을 시사한다. 맵의 전체적인 분위기는 정글 타일셋을 활용해 어두운 녹색과 갈색 톤으로 구성되어 있으며, 중앙에 위치한 커다란 구조물을 중심으로 다양한 지형이 배치되어 있는 것으로 보인다. 이 구조물을 둘러싼 광활한 공간은 플레이어가 이동하거나 자원을 확보하는 데 사용할 수 있는 넓은 지역을 제공할 것으로 추정된다. 맵의 규모가 4096x4096으로 상당히 크고, 타일 단위가 128x128로 설정되어 있어 세밀한 지형 디자인과 넓은 시야를 확보할 수 있도록 설계되었음을 알 수 있다. 플레이어는 맵 중앙의 주요 구조물을 중심으로 자원 수집, 방어, 또는 임무 수행을 해야 할 것으로 보이며, 맵의 이름 ‘테이커의 추락’은 아마도 스토리나 목표와 연관된 네이밍으로, 플레이어에게 특정 임무를 부여하고 그 과정에서 발생하는 사건이나 도전을 다루는 구조 임무일 가능성이 높다. 이 맵은 단일 플레이어용으로 제작되었으므로, 타임어택이나 목표 달성형 플레이가 주가 될 것으로 예상되며, 플레이어는 맵을 탐험하며 자원을 확보하고 적절한 전략을 세워야 할 것이다. 특히 구조 임무라는 특징상, 맵을 한 번 플레이한 후에는 재플레이어에 대한 재미를 높이기 위해 맵의 배치나 목표가 변동될 가능성이 있으며, 이는 플레이어가 계속해서 새로운 전략을 시도해 볼 수 있는 동기를 제공할 것이다. 또한 맵의 크기와 타일셋을 고려할 때, 플레이어는 넓은 시야를 바탕으로 맵을 정찰하고 자원을 확보하는 능력을 키워야 할 필요가 있을 것이다. 이 맵은 구조 임무라는 특성상 초보자보다는 어느 정도의 스타크래프트 경험이 있는 플레이어에게 더 적합할 것으로 보이며, 넓은 맵을 활용한 전략적 사고와 자원 관리가 요구될 것이다. 맵을 플레이하기 전에는 맵의 전체적인 배치와 주요 자원 위치를 파악하는 것이 중요하며, 목표가 무엇인지 명확히 이해한 후 플레이를 시작하는 것이 좋다. 또한 맵의 규모가 크기 때문에, 빠른 이동이나 시야 확보를 위한 유닛의 활용이 필수적일 것으로 예상된다. 이 맵은 구조 임무라는 특성상, 플레이어의 목표 달성을 위한 전략적 사고와 신중한 자원 관리가 핵심 요소로 작용할 것이다. 특히 맵의 이름과 내부 설명에서 느껴지는 분위기는 다소 어두운 스토리나 긴장감을 동반할 가능성이 있으며, 이는 플레이어에게 더 몰입감 있는 경험을 제공할 수 있을 것이다. Episode III: Fall of the Taker is a *StarCraft: Brood War* custom map designed for single-player structured missions. The term "structured mission" mentioned in the internal map description suggests that this map likely emphasizes a playstyle focused on achieving predefined objectives. The overall atmosphere of the map is built around a jungle tileset, featuring dark green and brown tones, with a large central structure surrounded by diverse terrain. The vast open space surrounding this structure appears to provide ample room for movement and resource gathering. With a map size of 4096x4096 and a tile unit of 128x128, the design allows for intricate terrain details and broad visibility. Players are expected to engage in resource collection, defense, or mission execution centered around the main structure in the middle of the map. The name "Fall of the Taker" likely ties into the map’s story or objectives, implying a structured mission where players are assigned specific tasks and face challenges throughout the process. As a single-player map, time-attack or goal-oriented gameplay is likely the primary focus, requiring players to explore the map, secure resources, and devise appropriate strategies. Given its structured mission format, the map’s layout or objectives may change after each playthrough to enhance replayability, encouraging players to experiment with new strategies. Considering the map’s scale and tileset, players will need to develop scouting and resource management skills to leverage the wide field of view effectively. Due to its structured mission nature, this map may be better suited for players with some *StarCraft* experience rather than beginners, as it demands strategic thinking and resource management over a large area. Before playing, it’s important to familiarize yourself with the overall layout and key resource locations, as well as clearly understand the objectives. Given the map’s size, efficient unit movement and visibility control will likely be essential. The structured mission format means that strategic planning and careful resource management are crucial for success. The somber atmosphere conveyed by the map’s name and internal descriptions may also enhance immersion by adding a sense of tension or narrative depth to the experience.
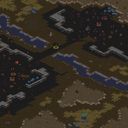
임무 4: 청소 (Invasion 4: Cleanup)
‘임무 4: 청소’는 스타크래프트 브루드워의 유즈맵으로, 단일 플레이어의 정신체 섬멸전을 중심으로 구성된 디펜스 장르 맵이다. 맵의 배경은 황무지 타일셋으로 꾸며졌으며, 중앙에 위치한 옛 기지 안을 따라 저그의 정신체 구조물이 다수 배치되어 있다. 플레이어는 이 구조물들을 제거하는 것이 목표로, 맵 곳곳에 흩어진 저그 유닛과 건물을 공격해 처리해야 한다. 맵의 구조는 비교적 간소한 편이지만, 저그의 공격 패턴과 기지 내의 배치된 방어 시설이 플레이어의 전략을 요구한다. 맵의 크기는 3072x3072로 크지 않지만, 타일셋과 구조물의 밀도로 인해 긴장감을 유지할 수 있다. 플레이어는 초반부터 저그의 공격을 받으며, 이를 방어하면서 정신체 구조물을 파괴하는 것이 핵심이다. 맵의 진행은 비교적 직관적이지만, 저그의 공격 패턴과 방어 시설의 위치에 따라 난이도가 달라질 수 있어 전략적 선택이 중요하다. 특히, 정신체 구조물 주변의 방어 시설은 제거하지 않으면 지속적인 공격을 받기 때문에, 신속한 판단과 공격이 필요하다. 맵의 이름은 ‘청소’라는 다소 가벼운 표현이지만, 실제로는 섬멸전과 디펜스의 조합으로 긴장감을 높이는 요소로 작용한다. 이 맵은 스타크래프트의 유즈맵 특유의 긴장감과 전략적 깊이를 제공하며, 단일 플레이어용으로 설계되어 있어 혼자서도 충분히 즐길 수 있는 구조다. 다만, 맵의 난이도는 플레이어의 실력에 따라 크게 달라질 수 있으며, 초보자의 경우 정신체 구조물 주변의 방어 시설 처리에 어려움을 느낄 수 있다. 또한, 맵의 진행 중 저그의 공격 패턴이 변동될 가능성이 있어, 이를 예측하고 대비하는 것이 중요하다. 맵을 플레이하기 전에는 저그의 공격 패턴과 방어 시설의 위치를 미리 파악하는 것이 좋으며, 빠른 조작과 전략적 사고가 요구된다. 맵의 볼륨은 크지 않지만, 디펜스와 섬멸전의 조합으로 스타크래프트의 유즈맵 특유의 매력을 느낄 수 있는 작품이다. 특히, 단일 플레이어용으로 설계되어 있어 친구가 없어도 혼자서 즐길 수 있다는 점에서 접근성이 높다. 다만, 반복 플레이 시에는 저그의 공격 패턴이 익숙해지면서 난이도가 다소 낮아질 수 있어, 이를 극복하기 위한 변형 플레이가 필요할 수도 있다. Mission 4: Cleanup is a custom StarCraft: Brood War defense map focused on a single-player Zerg Overmind elimination mission. The map features a wasteland tileset, with multiple Overmind structures scattered throughout an old base in the center. The player’s objective is to destroy these structures by attacking the Zerg units and buildings scattered across the map. While the layout is relatively simple, the Zerg’s attack patterns and the defensive structures within the base demand strategic planning from the player. Despite the map’s modest size (3072x3072), the dense tileset and structure placement maintain a high level of tension. Players face early Zerg attacks, requiring them to defend while simultaneously destroying the Overmind structures. The progression is straightforward, but difficulty varies depending on the Zerg’s attack patterns and the placement of defensive buildings, making strategic choices crucial. The name "Cleanup" may sound lighthearted, but the map combines elimination and defense mechanics to heighten tension. Designed for solo play, it offers the unique tension and strategic depth typical of StarCraft custom maps, allowing players to enjoy it even without friends. However, difficulty heavily depends on the player’s skill, and beginners may struggle with clearing the defensive structures around the Overmind. The Zerg’s attack patterns can also shift during the mission, so predicting and adapting to them is essential. Before playing, it’s advisable to familiarize yourself with the Zerg’s attack patterns and defensive structure locations, as quick reflexes and strategic thinking are key. While the map’s scale is small, its blend of defense and elimination captures the charm of StarCraft custom maps. Its solo-friendly design ensures accessibility, though repeated playthroughs may reduce difficulty as patterns become predictable, potentially requiring variations to maintain challenge.
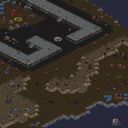
발크혼의 나쁜 시절 1 (Balkhorn's Bad Times I)
‘발크혼의 나쁜 시절 1’(Áåëêõîðí - 1 ìèññèÿ)은 스타크래프트 브루드워의 유즈맵으로, 단일 플레이어용으로 설계된 전략 시뮬레이션 장르의 맵이다. 이 맵은 러시아어와 한국어 혼용 제목으로 표시되어 있지만, 내부 설명과 파일명을 통해 러시아어 원본 ‘Balkhorn's Bad Times I’의 번역본임을 확인할 수 있다. 맵의 배경은 황무지 타일셋을 기반으로 하며, 대공원과 중앙 건물이 prominent하게 배치되어 있어 전쟁 사령부를 연상시킨다. 플레이어는 초반 자원과 유닛을 확보한 후, 맵 하단에 위치한 ‘발크혼’이라는 이름의 유닛을 중심으로 독립된 세력을 구축해야 한다. 맵의 핵심은 자원 관리와 유닛 생산, 방어선 구축에 초점을 맞추며, 맵 중앙의 넓은 평야와 언덕을 활용한 전략적 배치와 기습 공격이 가능하다. 맵의 진행은 다소 선형적이지만, 중간중간 등장하는 적대 세력의 공격 패턴과 맵 곳곳의 자원 분포가 플레이어의 전략을 다양화할 수 있도록 설계되어 있다. 특히, 맵 하단의 넓은 평야는 초반 확장을 용이하게 하며, 언덕 지형은 방어에 유리한 위치를 제공한다. 그러나 맵의 난이도는 초보자에게 다소 어려울 수 있으며, 적절한 유닛 조합과 방어 전략을 숙지하지 않으면 쉽게 무너질 위험이 있다. 추천하는 플레이 방식은 초반 빠른 자원 확보와 방어 시설 구축에 중점을 두고, 중반부터는 공격과 방어의 균형을 맞춰 게임을 이끌어가는 것이다. 이 맵은 단일 플레이어용으로 제작되었지만, 전략적 깊이가 있어 여러 번 플레이해도 새로운 전술을 시도할 수 있는 재미를 제공한다. 특히, 러시아어와 한국어의 혼용 제목은 맵의 이국적 분위기를 강조하며, 플레이어에게 독특한 경험을 선사한다. 맵을 플레이하기 전에는 맵의 구조와 자원 분포를 숙지하고, 적의 공격 패턴을 분석하는 것이 중요하다. 또한, 유닛의 생산과 업그레이드는 신중하게 계획해야 하며, 방어 시설의 위치는 언덕과 평야를 적절히 활용하는 것이 핵심이다. ‘Balkhorn’s Bad Times 1’ is a *StarCraft: Brood War* custom map designed as a single-player strategy simulation. Though the title appears in a mix of Russian and Korean, the internal descriptions and filenames confirm it as a translation of the original Russian *Balkhorn's Bad Times I*. The map’s aesthetic is built on a wasteland tileset, with prominent structures like a central building and a large plaza that evoke a war command center. Players begin by securing early resources and units, then establish an independent faction centered around a unit named *Balkhorn*, located at the bottom of the map. The core gameplay revolves around resource management, unit production, and fortifying defenses, with opportunities for strategic positioning and ambushes across the map’s wide plains and hills. While the progression is somewhat linear, the map introduces varied enemy attack patterns and scattered resource distribution to encourage diverse strategies. The expansive plain at the bottom of the map facilitates early expansion, while the elevated terrain offers defensive advantages. However, the difficulty may pose a challenge for beginners, as improper unit compositions or defensive tactics can lead to quick defeats. A recommended approach is to prioritize rapid resource gathering and defensive structures early on, then balance offense and defense as the game progresses. Though designed for solo play, the map’s strategic depth allows for repeated attempts with fresh tactics. The bilingual title—mixing Russian and Korean—enhances the map’s exotic atmosphere, offering players a unique experience. Before playing, it’s crucial to study the map’s layout and resource distribution, analyze enemy attack patterns, and carefully plan unit production and upgrades. Proper placement of defensive structures, utilizing both hills and plains, is key to success.
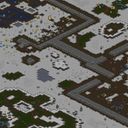
Ashen's Quest 5 (어떻게 살아야 할까?)
이 맵은 스타크래프트 브루드워의 유즈맵으로, 단일 플레이어용으로 제작된 미니 RPG형 디펜스 게임이다. 맵 제목이 kyrillize(키릴 문자) 형태로 깨져 있어 정확한 한국어 제목은 확인되지 않지만, 내부 설명과 플레이 스타일로 미루어 보아 'Ashen's Quest' 시리즈의 다섯 번째 작품으로 추정된다. 게임은 플레이어가 특정 목표를 완수하기 위해 적절한 전략을 구사하며 진행되는 구조로, 방어전과 미션형 전투가 혼합된 형태로 보인다. 맵 중앙의 넓은 공간을 중심으로 방어 건물이 배치되어 있으며, 주변으로 적의 웨이브가 계속해서 밀려오는 디펜스 스타일의 플레이가 예상된다. 내부 설명에 따르면 플레이어는 일종의 '상실감'이나 '고독'을 테마로 삼아 진행하는 스토리형 게임으로 보이며, 이러한 스토리적 요소가 전투와 함께 어우러져 플레이어의 몰입도를 높이는 데 중점을 둔 것으로 판단된다. 플레이어는 제한된 자원으로 방어 건물을 건설하고, 지속적으로 공격해오는 적군을 상대로 버텨내야 한다. 맵의 규모가 크고 구조가 복잡하기 때문에, 초보 플레이어는 난이도를 높이기 쉽다. 반면 숙련된 플레이어는 방어 라인을 효율적으로 구축하고, 자원 관리와 타이밍을 적절히 조절하여 오랫동안 버티는 전략을 구사할 수 있을 것이다. 맵의 해상도가 4096x4096으로 상당히 크기 때문에, 플레이어는 넓은 시야를 활용하여 적의 움직임을 예측하고 방어선을 강화하는 데 주력해야 한다. 또한, 내부 설명에 등장하는 'Church'와 'C@HeK'라는 이름의 제작자와 번역가 정보가 제공되어 있어, 해당 맵이 커뮤니티에서 제작된 유즈맵임을 짐작할 수 있다. 맵의 배경과 테마가 어둡고 스토리적 요소가 강하기 때문에, 분위기 있는 플레이를 선호하는 유저들에게 추천할 만한 작품이다. 다만, 맵의 난이도가 명확히 표시되지 않아 초보자는 진입 장벽이 높을 수 있으니, 게임을 시작하기 전에 맵의 구조와 방어 전략을 충분히 숙지하는 것이 중요하다. This StarCraft: Brood War custom map blends mini RPG and defense mechanics into a single-player experience. Despite the title being displayed in corrupted Cyrillic characters (Êàê ìíå æèòü?), the internal description and gameplay context strongly suggest it is 'Ashen's Quest 5', part of a narrative-driven series. The map features a large central battlefield surrounded by defensive structures, where players must withstand waves of enemy attacks while managing limited resources. The theme appears to revolve around solitude or loss, as hinted by the Russian lyrics embedded in the map description, adding an atmospheric layer to the gameplay. The gameplay loop involves constructing defenses, allocating resources wisely, and timing attacks to counter incoming enemy forces. Given the map's considerable size (4096x4096 tiles), players need to leverage the expansive terrain to position defenses strategically and monitor enemy movements carefully. While the difficulty isn't explicitly rated, the complexity of the layout and the need for precise resource management suggest it leans toward an intermediate or advanced skill level. Players who enjoy immersive, story-driven custom maps with strategic depth will likely find this appealing. However, newcomers may face challenges due to the map's scale and lack of clear difficulty indicators, so familiarizing oneself with the layout beforehand is highly recommended.
프로샤니예 (Proshchaniye)
이 맵의 제목 ‘Ïðîùàíèå’는 러시아어로 ‘작별’을 뜻하는데, 내부 맵 제목과 파일명에서도 확인되는 것처럼 러시아어와 함께 등장하는 기묘한 인코딩 오류가 이 맵의 첫인상을 결정짓습니다. 눈 덮인 설원 타일셋과 차가운 푸른 톤의 배경은 차분한 분위기를 연출하지만, 정작 맵의 정체는 ‘컴퓨터 상대 전투’를 의미하는 MELEE 장르로, 플레이어는 단 한 명의 저그로 시작해 적의 공격을 방어하며 자원을 확보하고 조종사를 보호하는 목표를 추정할 수 있습니다. 맵 중앙의 넓은 평야는 전투가 벌어지기 쉬운 개활지이지만, 주변 언덕과 얼음 지형은 strategic depth를 제공하며 시야 확보와 기지 방어에 유리한 위치를 제공합니다. 티어 1 및 티어 2 유닛의 생산 및 방어 시설이 맵 곳곳에 분산되어 있어 초보자는 쉽게 접근할 수 있지만, 차근차근 자원을 확보하며 조종사를 보호하는 전략적 플레이가 요구됩니다. 특히, 적의 다수 뮤탈리스크 또는 디파일러 테크에 대응하기 위해 방어선을 신속히 구축해야 하며, 자원 수집과 동시에 시야 확보를 위한 오버로드 배치도 중요합니다. 맵의 인코딩 문제와 제목의 언어적 혼합은 플레이어의 첫 경험을 혼란스럽게 만들 수 있지만, 그만큼 이 맵이 갖는 독특한 매력 중 하나로 남습니다. 초보자는 기본적인 저그 빌드를 숙지하고, 중간 난이도 이상에서는 다중 기지 운영과 방어 시설 배치에 주의를 기울여야 합니다. 또한, 맵의 넓은 공간을 활용한 기습적인 러시나 한타 싸움도 고려해 볼 만한 요소입니다. 이 맵은 러시아어와 인코딩 오류가 주는 이색적인 감성을 즐기며, 저그 플레이의 기본기와 전략적 깊이를 동시에 느껴 보고 싶은 유저에게 추천합니다. 플레이 전에는 맵의 인코딩 오류로 인한 제목과 설명을 주의 깊게 확인하고, 맵의 주요 지형과 자원 분포를 미리 숙지하는 것이 좋습니다. 또한, 조종사 보호와 동시에 자원 확보를 병행하는 균형 감각이 이 맵의 핵심이라 할 수 있습니다. This map’s title ‘Ïðîùàíèå’ means ‘farewell’ in Russian, but the garbled encoding that appears in both the internal title and filename immediately sets the tone for an unusual experience. The snowy, icy tileset and cool blue palette create a serene atmosphere, yet the map’s core identity aligns with the MELEE genre—specifically, a single-player battle against the computer. Players start as a lone Zerg, tasked with defending their commander, securing resources, and fending off enemy waves. The central open plain serves as a natural battleground, but the surrounding hills and icy terrain offer strategic advantages for vision control and base defense. Scattered production and defensive structures for Tier 1 and Tier 2 units encourage a methodical approach, making the map accessible to beginners while rewarding those who plan their expansion and resource gathering carefully. Players should prioritize placing Overlords for vision and constructing defensive lines early, as enemy Mutalisks or Defiler tech can quickly overwhelm an unprepared base. The encoding issues and bilingual title add a layer of quirkiness, making the map memorable despite—or perhaps because of—them. For those seeking a blend of nostalgic charm and tactical depth in Zerg play, this map delivers a unique challenge. Before diving in, players are advised to familiarize themselves with the terrain, resource distribution, and the balance between defending the commander and expanding efficiently. The map rewards patience, adaptability, and a keen eye for strategic positioning.
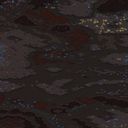
포얍례녜 (Mission 14)
‘포얍례녜’(Mission 14)는 스타크래프트 브루드워의 유즈맵으로, 한 명의 플레이어가Resources(자원) 수집과 방어 임무를 수행하는 UMS 장르의 맵이다. 맵의 전체적인 분위기는 어두운 색조의 정글 테마로 구성되어 있으며, 중앙에 위치한 자원 밀집 지역과 이를 둘러싼 방어 포인트가 눈에 띈다. 플레이어는 시작 지점에서 출발해 맵 곳곳에 흩어져 있는 자원(녹색 크리스탈)을 수집해야 하며, 동시에 중앙 지역을 중심으로 끊임없이 몰려드는 적 유닛으로부터 기지를 방어해야 한다. 맵의 구조는 비교적 복잡하지 않지만, 자원이 흩어져 있어 efficient(효율적인) 자원 수집 루트를 찾기 위해 여러 번의 플레이가 필요할 수 있다. 또한, 방어 포인트 주변에는 얇은 벽이나 지형이 배치되어 있어 적의 접근을 제한할 수 있도록 설계된 것으로 보인다. 이 맵은 ‘DaMnUFo0’에 의해 제작되었으며, 러시아어 기반의 스토리를 가지고 있다. 플레이어는 ‘마그나’라는 행성에 불시착한 ‘쿠페르’와 그의 팀을 이끌고 ‘프라베드니크’라는 존재를 위해 자원을 수집하는 임무를 수행한다. 스토리상 예상치 못한 상황이 기다리고 있다는 암시가 있지만, 실제 게임 플레이에서는 자원 수집과 방어에 초점을 맞추게 된다. 맵의 난이도는 자원의 위치와 적의 공격 패턴에 따라 달라질 수 있으며, 초보 플레이어는 자원 수집 루트를 숙지하고 방어 포인트를 강화하는 데 주의를 기울여야 한다. 또한, 맵의 크기가 비교적 크기 때문에 빠른 진행보다는 전략적인 자원 관리와 방어가 중요하다. 이 맵은 자원 수집과 방어가 혼합된 UMS 장르의 특징을 살려, 플레이어에게 끊임없는 긴장감을 제공한다. 특히, 적의 공격이 끊임없이 이루어지기 때문에 방어 설비의 중요성이 크며, 자원의 수집을 위해서는 맵의 지형을 잘 이해하고 효율적인 경로를 찾아야 한다. 초보자보다는 중급 이상의 플레이어에게 더 적합한 맵으로, 꾸준한 플레이를 통해 최적의 전략을 찾을 수 있을 것이다. ‘Mission 14’ (also known as ‘Po Yap Rye Nye’) is a custom map from *StarCraft: Brood War* in the UMS genre, where a single player gathers resources and defends their base. The map features a dark jungle-themed aesthetic, with a central resource-rich area surrounded by defensive points. The player starts at a designated location and must collect scattered resources (green crystals) while simultaneously defending their base against waves of enemies that continuously spawn near the center. While the layout isn’t overly complex, the scattered resources make it necessary to experiment with efficient gathering routes over multiple playthroughs. Thin walls and terrain barriers around key defense points also help restrict enemy movement, adding strategic depth. The map was created by ‘DaMnUFo0’ and is based on a Russian-language story. Players take on the role of leading ‘Kuper’ and his team, who have crash-landed on the planet ‘Magna,’ gathering resources to aid the mysterious entity known as ‘Pravbednik.’ Though the narrative hints at unexpected twists, the actual gameplay focuses on resource collection and base defense. The difficulty varies depending on resource placement and enemy attack patterns, so beginners should prioritize memorizing optimal gathering routes and reinforcing defensive structures. Given the map’s size, strategic resource management and defense are more important than speed. By blending resource gathering with constant defense, this UMS map delivers sustained tension. The relentless enemy assaults emphasize the need for strong defensive setups, while efficient navigation is key to maximizing resource collection. As a result, the map is better suited for intermediate to advanced players who can refine their strategies through repeated attempts.
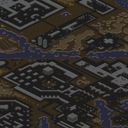
여정 (Puteshestvie)
이 맵은 스타크래프트: 브루드워의 유즈맵으로, 'Ïóòåøåñòâèå'라는 제목과 함께 러시아어와 한국어의 혼합된 내부 설명을 담고 있다. 러시아어 제목 'Ïóòåøåñòâèå'는 '여행' 또는 '여정'을 의미하며, 내부 설명을 통해 쿠퍼와 그의 부대가 개선된 화염방사기 모델의 판매를 기다리며 여러 감염된 도시를 통과해야 하는 스토리가 추정된다. 맵의 전체적인 배경은 황무지로 구성되어 있으며, 8192x8192의 대형 맵 크기를 자랑한다. 맵의 구조는 단일 플레이어용으로 설계된 것으로 보이며, 진행 방식은 일종의 '여정'을 따라가며 목표를 달성하는 방식으로 추정된다. 플레이어는 주로 컴퓨터-controlled 적과 마주하게 될 것이며, 맵 곳곳에는 방해 요소나 장애물이 배치되어 있을 가능성이 크다. 이러한 특징을 바탕으로 볼 때, 이 맵은 디펜스나 서바이벌, 혹은 일종의 '여정'을 테마로 한 서바이벌 디펜스 형식의 맵으로 추정된다. 특히, 스토리상 감염된 도시를 통과해야 한다는 설정은 '탈출'이나 '서바이벌' 요소를 강하게 연상시킨다. 플레이 전에는 맵의 전체 구조와 주요 포인트를 숙지하는 것이 중요하며, 특히 감염된 지역을 통과하는 과정에서의 전략적 접근이 필요할 것으로 보인다. 추천 대상은 스타크래프트 유즈맵을 즐기는 플레이어, 특히 단일 플레이어용 서바이벌 디펜스 맵을 선호하는 유저들에게 적합할 것이다. 또한, 맵의 대형 크기와 복잡한 구조를 즐기는 플레이어들에게도 추천할 만하다. 다만, 맵의 내부 설명이 불완전하고 일부 텍스트가 깨져 있어, 정확한 플레이 방식이나 목표는 맵을 직접 플레이해 보아야 명확히 알 수 있을 것이다. This map is a StarCraft: Brood War custom map featuring a title in mixed Russian and Korean, *"Ïóòåøåñòâèå"*, which translates to "journey" or "odyssey" in Russian. The internal descriptions suggest a story where Cooper and his squad must pass through multiple infected cities while awaiting the sale of an improved flamethrower model. The map is set in a desolate wasteland and boasts a massive 8192x8192 size. Its structure appears designed for single-player, following a "journey" format where players achieve objectives along the way. Players will primarily face computer-controlled enemies, with potential obstacles and hazards scattered throughout the map. Based on these features, the map likely falls under the survival defense genre, blending defense, survival, and a "journey" theme. The narrative of traversing infected cities strongly evokes elements of escape or survival. Before playing, it's crucial to familiarize yourself with the map's overall layout and key points, particularly when strategizing how to navigate infected areas. It’s recommended for players who enjoy StarCraft custom maps, especially those who prefer single-player survival defense maps, as well as those who appreciate large-scale and complex structures. However, since the internal descriptions are incomplete and some text is corrupted, the exact gameplay mechanics and objectives may only become clear upon playing the map directly.
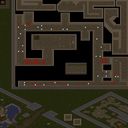
아그로박의 신비: 야생 저그와 숨은 사원 (Agrovak's Mystery: Wild Zergs and Hidden Temple)
‘Â áîé’는 스타크래프트 브루드워의 유즈맵으로, 디펜스와 서바이벌 요소가 혼합된 독특한 플레이 경험을 제공하는 맵이다. 맵의 제목은 인코딩 오류로 인해 깨져 보이지만, 내부 맵 제목과 설명을 통해 러시아어와 영어가 혼합된 제목임을 유추할 수 있다. ‘Agrovak’라는 단어가 반복적으로 등장하며, 이는 맵의 핵심 콘셉트로 추정된다. 플레이어는 한 명의 유닛을 조종하며, 맵 곳곳에 흩어져 있는 ‘디ких зергов(야생 저그)’을 상대해야 한다. 맵 중앙에는 ‘таинственный храм(신비한 사원)’으로 추정되는 구조물이 있으며, 이 구조물을 파괴하거나 특정 조건을 달성해야 하는 목표가 있을 가능성이 높다. 맵의 배경은 사막 타일셋으로 구성되어 있으며, 넓은 평원과 협소한 길목이 조화를 이루고 있다. 적 유닛들은 일정 주기로 리젠되며, 플레이어는 지속적인Resource 관리와 병력 배치, 그리고 지형 활용을 통해 생존해야 한다. 맵의 디자인상으로는 초보자보다는 경험이 있는 플레이어에게 적합하며, 맵의 복잡한 구조와 적의 패턴을 익히는 데 시간이 소요될 것으로 보인다. 또한, 맵의 넓고 개방적인 공간은 때로는 피로를 유발할 수 있으나, 전략적인 ritirata(후퇴)와 시야 관리 등이 중요한 포인트로 작용할 것이다. 이 맵은 ‘Agrovak’이라는 키워드를 중심으로 한 스토리나 세계관의 존재가 의심되며, 플레이어는 단순히 맵을 완주하는 것뿐만 아니라 맵 내의 숨은 요소나 패턴을 발견하는 재미도 느낄 수 있을 것이다. This StarCraft: Brood War custom map, titled ‘Â áîé’, blends defense and survival mechanics into a unique gameplay experience. The title appears corrupted due to encoding issues, but the internal map title and description suggest a mix of Russian and English, centered around the term ‘Agrovak’. Players control a single unit against waves of ‘wild Zergs’ scattered across the map, with a central structure—likely a ‘mysterious temple’—that may hold the key to victory or a hidden objective. The desert-themed tileset features expansive plains and narrow pathways, forcing players to balance resource management, unit positioning, and terrain utilization for survival. The map’s design leans toward experienced players, as mastering enemy patterns and map mechanics requires time and strategy. While the open spaces can feel overwhelming, strategic retreats and map awareness are crucial. The term ‘Agrovak’ hints at a potential backstory or lore, though the map’s primary focus remains on survival and discovery. Hidden elements or patterns within the map add an extra layer of engagement, rewarding players who explore beyond the surface objectives.
맵 선택 가이드
태그는 맵의 핵심 특징을 빠르게 설명하지만 제작 버전마다 규칙이 다를 수 있습니다. 상세 설명에서 권장 인원, 난이도, 플레이 시간과 버전을 함께 확인한 뒤 다운로드하세요.