
다인 플레이 스타크래프트 맵 모음
'다인 플레이' 태그가 등록된 맵을 모았습니다. 장르 하나로 찾기 어려운 플레이 방식, 난이도와 특징을 중심으로 인기 맵과 최신 맵을 비교해 보세요.
- 등록 맵
- 67개
- 누적 다운로드
- 0
- 누적 조회
- 2,132
인기 맵
다운로드와 조회 반응이 높은 맵입니다.
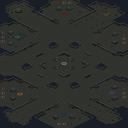
알 매드니스 (Egg Madness)
스타크래프트 브루드워의 유즈맵 《Egg Madness》는 제한된 자원으로 스마트한 운영과 공격 타이밍을 요구하는 디펜스형 맵입니다. 맵 중앙에는 커다란 알이 위치해 있으며, 플레이어는 이 알을 중심으로 무한히 생성되는 저글링, 파이어뱃, 골리앗을 조합해 적의 공격을 방어해야 합니다. 맵의 특징은 무한한 유닛 생성에 있지만, 자원과 생산 건물의 제한으로 인해 무작정 밀어붙이는 전략은 통하지 않으며, 효율적인 유닛 관리와 위치 선정이 핵심입니다. 맵의 배경은 설원 테마로, 하얀색 설산과 푸른 얼음 지형이 시각적으로도 인상적입니다. 플레이어는 시작 시 제한된 미네랄과 가스로 시작하며, 알 주변에 있는 생산 건물을 통해 유닛을 지속적으로 보충할 수 있습니다. 알을 중심으로 한 방어 라인이 뚫리면 게임이 종료되므로, 미세한 컨트롤과 타이밍을 맞추는 것이 중요합니다. 맵의 난이도는 유닛의 조합과 배치에 따라 달라지지만, 대체로 초보자가 осво하기는 어려운 편입니다. 특히, 저글링과 파이어뱃의 조합으로 근접과 원거리 공격을 동시에 방어해야 하므로, 유닛의 특성과 counters를 잘 이해하고 있어야 합니다. 이 맵은 혼자서 플레이하는 싱글 모드가 아닌, 3~6명의 플레이어가 동시에 참여하는 멀티플레이 기반입니다. 맵 설정에서 플레이어 수를 조절할 수 있어, 팀 플레이와 경쟁적인 요소도 강합니다. 또한, 맵의 구조상 중앙 알을 중심으로 한 공격과 방어가 반복되므로, 전략적 사고와 순간적인 판단력이 요구됩니다. 초보자의 경우, 기본적인 유닛 컨트롤과 자원 관리를 먼저 익힌 후 도전하는 것이 좋습니다. 숙련자라면 알의 보호와 공격 타이밍을 최적화해 최대한 긴 플레이 타임을 확보하는 전략을 세워볼 수 있습니다. 추천하는 플레이 스타일은 방어 라인을 굳건히 유지하면서도, 상대방의 약점을 공략하는 것입니다. 알 주변의 건물을 보호하는 동시에, 상대방의 생산 건물을 파괴하거나 유닛을 몰아내는 데 집중해야 합니다. 맵의 배경이 아름다운 설원 테마이기 때문에, 시각적으로도 즐거운 플레이가 가능하다는 점도 장점입니다. 다만, 맵의 난이도가 높고 전략적 깊이가 깊어, 단순히 유닛을 밀어붙이는 것만으로는 승리하기 어려운 맵이라는 점을 기억해야 합니다. StarCraft: Brood War’s custom map *Egg Madness* is a defense-style map that demands smart resource management and precise attack timing. At the center of the map sits a massive egg, and players must defend it by combining an endless stream of Zerglings, Firebats, and Goliaths. While units spawn indefinitely, limited resources and production buildings prevent reckless rushes—effective unit control and positioning are key. The snowy theme, with its white mountain peaks and icy terrain, adds a striking visual contrast. Players begin with restricted minerals and vespene gas, replenishing units through production buildings around the egg. The game ends if the defense line around the egg is breached, so tight micro-management and timing are essential. Difficulty varies based on unit composition and placement, but the map is generally tough for beginners. Defending against both melee and ranged threats with Zerglings and Firebats requires a solid grasp of unit strengths and counters. Unlike a single-player mode, *Egg Madness* supports 3–6 players in a multiplayer format, with adjustable player counts in the settings to accommodate team play and competitive matches. The map’s structure revolves around repeated cycles of attacking and defending the central egg, demanding strategic foresight and quick decision-making. Beginners should master basic unit control and resource management before tackling this challenge, while advanced players can optimize egg protection and attack timing to extend their play sessions. A recommended strategy is to maintain a strong defensive line while exploiting opponent weaknesses—prioritizing the destruction of enemy production buildings or driving their units back while safeguarding your own structures. The map’s serene snowy aesthetic also makes for a visually rewarding experience. However, its high difficulty and deep strategy mean that brute-forcing with unit waves alone won’t secure victory.
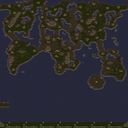
리스크 v3.28 (베타) 액션 (RISK v3.28 (Beta) Action)
스타크래프트 브루드워의 ‘리스크(RISK) v3.28 (베타) 액션’이란 이름의 유즈맵은 세계 정복을 주제로 한 전략형 RPG 장르의 맵으로, 7명의 플레이어가 각자 대륙을 차지하며 전투와 동맹을 통해 승리를 쟁취하는 게임이다. 맵은 거대한 대륙과 바다로 구성되어 있으며, 각 플레이어는 시작 지점에서 출발해 자원을 획득하고 병력을 키워나가며 영토 확장과 침략을 반복한다. 게임의 특징으로는 ‘카미카제’, ‘비컨 레이더’, ‘문’, ‘핵무기’ 같은 특수 유닛과 아이템이 등장해 전략의 깊이를 더하고 있다. 또한 게임 길이 조절 기능이 있어 플레이어끼리 협의해 플레이 시간을 조율할 수 있다. 맵의 구조는 대륙 간의 연결성을 중심으로 디자인되어 있어, 해상 전투와 육상 전투의 균형을 맞추며 진행된다. 특히 ‘비컨 레이더’는 적 영토의 시야를 확보하거나 전략적 이동을 돕는 등 게임의 판도를 뒤집을 수 있는 핵심 요소로 보인다. 맵의 분위기는 사막 타일셋을 기반으로 한 황량한 대륙과 바다의 조합으로, 전쟁의 무게감을 강조하고 있다. 플레이어는 자원 관리, 동맹 형성, 영토 분쟁 등 다방면의 전략을 구사해야 하며, 특히 초반Resource 확보와 중반 영토 확장 타이밍이 승패를 좌우할 가능성이 높아 보인다. 이 맵은 7인 이상의 대규모 플레이를 전제로 제작되었으므로, 소규모 그룹에서는 플레이 밸런스가 맞지 않을 수 있다. 또한 베타 버전인 만큼 밸런스 조정이나 버그 수정이 필요한 부분이 있을 수 있으니, 플레이 전 공지 사항을 확인하는 것이 좋다. 추천 대상은 전략 게임을 즐기며, 다인 플레이를 선호하는 스타크래프트 유즈맵 팬들에게 적합하다. 특히 세계 정복의 재미와 동맹의 흥정, 전쟁의 긴장감을 동시에 느낄 수 있는 이 맵은 RPG와 전략 장르의 조합으로 스타크래프트 유즈맵의 새로운 경지를 개척한 작품으로 평가된다. StarCraft: Brood War’s custom map *Risk v3.28 (Beta) Action* is a strategy RPG-style game where seven players compete to conquer the world by controlling continents, engaging in battles, and forming alliances. The map features vast continents and seas, where each player starts at a designated location, gathers resources, builds armies, and expands their territory through conquest. Unique units and items like *Kamikaze*, *Beacon Radar*, *Moon*, and *Nuclear Weapons* add depth to the gameplay, allowing for varied strategies. The game also includes a time-adjustment feature, letting players negotiate playtime before starting. Designed with a focus on intercontinental connectivity, the map balances naval and ground combat, with *Beacon Radar* serving as a pivotal tool for scouting enemy territory or executing strategic movements. The desert-themed tileset—featuring barren continents and expansive oceans—enhances the map’s war-torn atmosphere. Players must balance resource management, diplomacy, and territorial disputes, with early resource acquisition and mid-game expansion timing often determining victory. Tailored for large-scale play with seven or more participants, the map may feel unbalanced in smaller groups. As a beta version, some balance adjustments and bug fixes may still be needed, so players should review the latest announcements before diving in. This map is ideal for fans of strategy games and multiplayer custom maps in StarCraft, offering a blend of world domination, alliance negotiations, and wartime tension. Combining RPG and strategy elements, *Risk v3.28* pushes the boundaries of StarCraft custom maps, delivering a fresh and immersive experience.
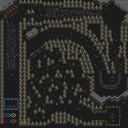
투패스트 투 퓨리어스 (2Fast 2 Furious)
‘투패스트 투 퓨리어스(2Fast 2 Furious)’는 스타크래프트 브루드워의 유즈맵 중 하나로, 레이싱과 경쟁을 결합한 독특한 장르의 맵이다. 이 맵은 플레이어들이 서로 경주하며AI 또는 다른 플레이어들과 경쟁하는 방식으로 구성되어 있어, 경쟁과 속도감을 중시하는 유저들에게 적합하다. 특히 7명의 플레이어가 참여할 수 있으며, 각 플레이어는 맵 상의 트랙을 따라 진행하며ゴール을 향해 달려야 한다. 맵의 배경은 황무지 타일셋을 활용해 넓은 트랙과 주변 환경이 조성되어 있으며, 맵 중앙에는 다리를 건너는 구간이 있어 지형을 활용한 전략적 플레이가 가능하다. 레이싱 맵의 특성상 맵의 흐름과 트랙의 배치, 그리고 장애물의 존재가 플레이 경험을 좌우한다. 이 맵에서는 AI 또는 다른 플레이어들과의 경쟁이 주요 포인트로, 순위 경쟁 및 속도 최적화, 그리고 트랙 상의 장애물 회피 전략이 요구된다. 또한 맵의 크기가 3072x2048로 비교적 크기 때문에 넓은 시야를 활용한 전략적 판단이 중요하다. 맵의 인코딩은 cp949로 설정되어 있어 한글 사용 환경에서 안정적으로 구동되며, 타일셋은 황무지 기반으로 제작되어 있어 황량한 분위기의 레이싱 트랙이 연출된다. 레이싱 맵의 경우, 플레이어 간의 경쟁 외에도 AI의 난이도나 트랙의 복잡도가 플레이 경험을 결정짓는 요소로 작용한다. 이 맵은 레이싱이라는 장르의 특성상 빠른 판단력과 정확한 조작이 요구되며, 특히 7명이라는 인원이 참여할 수 있어 다인 플레이에서도 흥미로운 경쟁을 즐길 수 있다. 레이싱의 재미를 극대화하기 위해서는 맵의 구조를 숙지하고, AI의 패턴이나 다른 플레이어의 움직임을 예측하는 능력이 필요하다. 또한 트랙의 장애물을 어떻게 회피하거나 활용할지에 따라 순위가 갈릴 수 있으므로, 전략적인 플레이가 중요하다. 레이싱 맵을 좋아하는 유저들이라면 이 맵의 트랙과 경쟁 요소를 통해 재미있는 시간을 보낼 수 있을 것이다. 이 맵을 플레이하기 전에 확인해야 할 요소는 트랙의 배치와 장애물의 위치, 그리고 AI의 난이도 설정이다. 트랙의 복잡한 구간이나 좁은 길목에서는 충돌이나 추월 시도를 주의해야 하며, AI의 난이도에 따라レース의 난이도가 달라질 수 있으므로 자신에게 맞는 난이도를 선택하는 것이 중요하다. 또한 맵의 넓은 크기를 고려하여, 시야를 넓게 활용하고 빠르게 이동할 수 있는 유닛이나 구조물을 활용하는 전략도 고려해 볼 만하다. ‘2Fast 2 Furious’ is a unique custom map in *StarCraft: Brood War* that blends racing and competitive gameplay. Players compete against AI or other players by racing along a track, making it ideal for users who enjoy speed and competition. The map supports up to seven players, each navigating the track toward the finish line. Set in a wasteland tile theme, the map features wide tracks and surrounding environments, with a bridge-crossing section in the center that allows for strategic terrain-based play. In a racing map, the flow of the track, its layout, and obstacles are key factors that shape the player experience. Here, the main focus is on competing against AI or other players, requiring strategies for ranking, optimizing speed, and avoiding obstacles on the track. With a large map size of 3072x2048, players must make strategic decisions based on a broad field of vision. The map is encoded in CP949 for stable operation in Korean environments, and its wasteland-based tile set creates a desolate racing track atmosphere. Beyond player competition, the AI difficulty and track complexity also influence the experience. As a racing map, it demands quick decision-making and precise control, especially with up to seven players, offering engaging multiplayer competition. To maximize the fun, players should familiarize themselves with the map’s layout, predict AI patterns or opponent movements, and strategize obstacle avoidance or utilization—key factors that can determine rankings. Fans of racing maps will likely enjoy the track design and competitive elements this map provides. Before playing, check the track layout, obstacle locations, and AI difficulty settings. Be cautious of collisions or overtaking attempts in tight or complex sections, as the AI difficulty directly affects race difficulty—choosing the right setting is crucial. Given the map’s size, consider strategies that utilize wide vision and fast-moving units or structures for efficient movement.
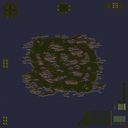
마기컬 디바이니티 v2.1 (Magical Divinity v2.1)
‘마기컬 디바이니티 v2.1(Magical Divinity v2.1)’은 스타크래프트 브루드워의 유즈맵으로, 여덟 명의 고유한 영웅 중 하나를 선택해 스킬과 업그레이드를 통해 적 건물과 플레이어를 섬멸하는 액션 전략 장르의 맵이다. 맵은 대형 사막 타일셋으로 구성되어 있으며, 넓은 평지 위에 흩어져 있는 자원과 주요 건물이 배치되어 있다. 플레이어는 영웅의 성장과 스킬 활용을 중심으로 전술을 세우게 되며, 맵 중앙 부근의 대형 건물이 승리 조건에 관여하는 것으로 보인다. 맵의 구조적 특징은 넓은 시야와 빠른 이동이 가능한 평지를 기반으로 하며, 지형적 제약은 크지 않지만 자원의 분배와 주요 건물의 위치를 신중히 판단해야 한다. 영웅의 개성이 두드러지는 만큼, 플레이어는 각 영웅의 특성과 스킬 트리를 숙지하고 상황에 맞는 전투와 업그레이드 전략을 구사해야 한다. 맵의 분위기는 판타지적이면서도 스타크래프트의 특유의 전술적 요소와 결합되어 있어, 액션과 전략의 균형을 추구하는 플레이어에게 적합하다. 특히, 다인 플레이에서 팀워크와 개인 전투력이 모두 요구되며, 초보자는 영웅의 스킬과 맵 구조를 충분히 이해한 후 참여하는 것이 좋다. 맵의Balance를 고려할 때, 팀 대 팀 전투보다는 각 플레이어가 독립적으로 영웅을 성장시키고 주요 건물을 파괴하는 형태가 주를 이룰 것으로 추정된다. 또한, 맵의 난이도는 영웅의 선택과 스킬 사용, 업그레이드 전략에 따라 크게 달라질 수 있으며, 초보자도 기본적인 전술만 익힌다면 충분히 즐길 수 있는 구조로 보인다. 맵의 디자인과 시스템은 유즈맵 특유의 창의성을 잘 반영하며, 플레이어 간의 경쟁과 협력을 동시에 경험할 수 있는 흥미로운 요소로 가득 차 있다. Magical Divinity v2.1 is a custom map for StarCraft: Brood War where players choose one of eight unique heroes, utilize their skills, and strategically destroy enemy players and buildings. Set on a vast desert tileset, the map features scattered resources and key structures across open terrain, emphasizing mobility and vision. Players must focus on their hero’s growth, skill selection, and upgrades while navigating the map’s wide-open spaces. Although the terrain offers few natural obstacles, resource distribution and building placement require careful planning. Each hero’s distinct abilities demand that players adapt their tactics based on individual strengths. The map blends fantasy elements with StarCraft’s tactical depth, making it ideal for players who enjoy action and strategy. In multiplayer scenarios, teamwork and individual combat skills are essential, though the map seems designed more for solo hero progression and building elimination rather than strict team-based objectives. Difficulty varies significantly depending on the hero chosen and the player’s understanding of skills and upgrades, but even beginners can enjoy the experience with basic strategy knowledge. The map’s design showcases creative customization typical of UMS titles, offering a mix of competitive and cooperative gameplay that keeps players engaged.
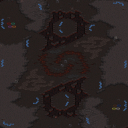
장미의 가시 (Ash Rose (Ob))
스타크래프트 브루드워의 유즈맵 〈Ash Rose (Ob)〉는 관전자를 포함한 최대 8명이 플레이할 수 있는 특이한 구조의 맵입니다. 맵 중앙에 위치한 거대한 장미 문양이 인상적인 디자인으로, 관전자를 포함하여 2명의 플레이어와 6명의 관전자가 동시에 참여할 수 있도록 구성되어 있습니다. 내부 맵 설명에 따르면 2005년에 Bill307에 의해 제작되었으며, Liquid`Nazgul과 Brank[konijn]에게 특별한 감사를 표하고 있습니다. 맵의 배경은 정글 타일셋을 사용해 마치 밀림 속의 신비로운 공간을 연상시키며, 장미 문양의 중앙에는 다양한 구조물이 배치되어 있어 전략적인 플레이가 요구됩니다. 플레이어는 맵 곳곳에 분포된 자원과 건물을 활용해Resource를 확보하고, 장미 문양 주변의 방어 시설이나 전략적 요충지를 차지해야 합니다. 관전자 기능이 포함되어 있어 경기 진행을 실시간으로 확인하거나 전략을 분석할 수 있는 점이 특징입니다. 맵의 전체적인 분위기는 신비롭고 아름다우면서도 전략적인 전투가 펼쳐질 수 있도록 설계되어 있습니다. 특히 장미 문양의 복잡한 구조는 시야를 가리고 공격로를 제한하는 요소로 작용할 수 있어, 플레이어는 맵의 지형을 잘 활용해야 유리한 위치를 선점할 수 있습니다. 이 맵은 주로 관전자를 포함한 다인 플레이에 최적화되어 있으며, 전략적 사고와 지형 활용이 중요한 포인트입니다. 또한, 맵의 미려한 디자인과 특이한 구조는 시각적 즐거움도 제공합니다. 초보자보다는 어느 정도의 스타크래프트 경험과 맵 리딩 능력이 요구되는 편이며, 팀 플레이보다는 개인의 전략과 판단력이 더 중요하게 작용할 수 있습니다. 맵의 난이도는 명확히 제시되어 있지 않지만, 맵의 복잡한 구조와 관전자 기능을 고려할 때 보통 이상의 난이도를 예상해 볼 수 있습니다. 플레이 전에는 맵의 구조와 주요 자원 분포, 관전자 기능을 충분히 숙지하는 것이 중요합니다. 또한, 맵의 중앙 장미 문양 주변의 방어 시설이나 요충지를 미리 점검하여 전략을 수립하는 것이 좋습니다. 맵의 특성상 관전자와의 상호작용도 중요하기 때문에, 관전자의 피드백을 참고하여 플레이를 조정하는 것도 좋은 전략이 될 수 있습니다. 이 맵은 스타크래프트 유즈맵의 장르 중에서도 독특한 디자인과 전략적 깊이를 동시에 제공하는 작품으로, 관전자를 포함한 다인 플레이를 즐기고자 하는 유저들에게 추천할 만합니다. StarCraft: Brood War’s custom map *Ash Rose (Ob)* features a unique layout that supports up to eight players, including spectators. The map’s standout design centers on a massive rose motif in the middle, accommodating two active players and six spectators simultaneously. According to the in-game description, it was created by Bill307 in 2005, with special thanks given to Liquid`Nazgul and Brank[konijn]. The jungle-themed tileset evokes a mysterious jungle space, while the rose motif’s core is dotted with various structures that demand strategic play. Players must secure resources scattered across the map and control defensive structures or key positions around the rose motif. The inclusion of a spectator mode allows real-time viewing and strategic analysis during matches. The map blends an enigmatic, beautiful aesthetic with opportunities for tactical combat. The intricate design of the rose motif can obscure vision and restrict attack paths, forcing players to leverage the terrain effectively to claim advantageous positions. Optimized for multiplayer with spectators, *Ash Rose (Ob)* emphasizes strategic thinking and terrain awareness. Its elegant design and unconventional layout also provide visual appeal. While no specific difficulty rating is given, the map’s complexity and spectator features suggest a challenge above average. It favors experienced players over beginners and prioritizes individual strategy and decision-making over team coordination. Before playing, it’s crucial to familiarize yourself with the map layout, key resource locations, and spectator features. Scouting defensive structures and strategic points around the central rose motif helps in forming a solid game plan. Given the map’s nature, engaging with spectator feedback can also refine your approach. With its distinctive design and depth of strategy, *Ash Rose (Ob)* stands out in the custom map genre and comes highly recommended for those seeking a multiplayer experience that includes spectators.
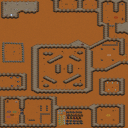
글래디에이터스 RPG 2 (Gladiators RPG 2)
스타크래프트 브루드워의 대표적인 RPG 유즈맵인 〈Gladiators RPG 2〉는 전투를 통해 최강의 왕권을 차지하는 경쟁심을 자극하는 흥미로운 플레이 경험을 제공한다. 맵은 대규모의 전투가 벌어질 수 있도록 넓은 맵 공간을 활용하며, 플레이어는 각자 자신의 왕을 대표하는 신으로 변신하여 전투에 참여한다. 맵의 중앙에는 거대한 전투장이 마련되어 있어 다수의 유닛이 동시에 교전할 수 있으며, 주변부는 안전한 시작 지역으로 활용되어 전략적인 움직임을 풍부하게 한다. 전투는 주로 근접 유닛 간의 싸움으로 진행되며, 맵 곳곳에 배치된 아이템과 보물 상자는 전투력을 강화하거나 보조 능력을 제공하여 플레이어 간의 격차를 좁히거나 넓힐 수 있는 요소가 된다. 맵의 구조는 플레이어들이 각각의 영웅을 조종하며 팀 간 또는 개인 간 경쟁을 펼칠 수 있도록 설계되어 있으며, 승리 조건은 명시되지 않았지만 전투에서의 성과와 생존 여부가 핵심으로 보인다. 초보 플레이어는 맵의 넓은 공간과 다수의 적 유닛으로 인해 다소 혼란스러울 수 있지만, 각 영웅의 특성과 아이템의 활용법을 익히면 전략적인 전투를 즐길 수 있다. 또한, 맵 곳곳에 배치된 장애물과 좁은 통로는 전투의 흐름을 끊어 전략의 다양성을 높이는 장치로 활용된다. 〈Gladiators RPG 2〉는 대규모의 전투와 영웅 간의 경쟁을 즐기고자 하는 플레이어들에게 특히 매력적인 선택지가 될 것이다. 복잡한 전략보다는 순간의 판단과 영웅의 스킬 활용이 승부를 가르는 만큼, 빠른 판단력과 전투 감각을 키우고 싶은 유저들에게 추천할 만한 맵이다. 다만, 맵의 넓은 공간 때문에 초반에는 적의 위치를 파악하기 어려울 수 있으므로, 시작 지점에서 주변을 정찰하는 습관을 들이는 것이 중요하다. 또한, 아이템의 위치를 숙지하고 전투 전에 영웅의 능력치를 확인하는 것이 승률을 높이는 핵심 포인트가 될 것이다. 맵의 디자인과 플레이 방식은 클래식한 RPG의 feel을 살리면서도 전략적인 전투 요소를 강하게 내포하고 있어, 유즈맵의 장점을 극대화한 작품으로 평가할 수 있다. 특히, 팀 플레이보다는 개인 간의 경쟁을 즐기고자 하는 플레이어들에게는 더욱 흥미로운 경험을 선사할 것이다. 전투가 치열해질수록 맵의 전체적인 분위기는 열정적이고 박진감 넘치며, 이는 곧 유즈맵의 재미를 극대화하는 요소로 작용한다. 플레이 전 준비 사항으로는 맵의 주요 아이템 위치와 영웅의 스킬 구성을 미리 숙지하는 것이 중요하며, 특히 전투 중에는 맵의 넓은 공간을 활용한 우회 공격과 기습 전략을 고려해 볼 필요가 있다. 이 맵은 넓은 맵 공간과 다수의 유닛을 활용한 전투로 인해 플레이 시간이 다소 길어질 수 있지만, 그만큼 긴장감과 재미를 동시에 제공하는 훌륭한 유즈맵이라 할 수 있다. StarCraft: Brood War’s classic RPG custom map, *Gladiators RPG 2*, delivers an engaging competitive experience that fuels players’ drive to claim the throne through battle. The expansive map allows for large-scale combat, where players transform into gods representing their kings and join the fray. A massive arena in the center enables multiple units to clash simultaneously, while the surrounding safe zones provide strategic starting points that enrich movement and planning. Combat primarily unfolds through melee unit battles, with scattered items and treasure chests scattered across the map boosting combat power or granting auxiliary abilities—elements that can either narrow or widen the gap between players. Designed for players to control individual heroes and compete in team or solo matches, the victory condition remains undefined, with performance and survival in battle serving as the core focus. While newcomers may feel overwhelmed by the vast space and numerous enemy units, mastering each hero’s traits and item utilization unlocks strategic depth. Obstacles and narrow passages scattered throughout the map disrupt combat flow, enhancing tactical variety. *Gladiators RPG 2* stands out as an appealing choice for players seeking large-scale battles and hero-driven competition, where split-second decisions and skill mastery determine victory rather than complex strategies. For those looking to sharpen reflexes and combat instincts, this map is a strong recommendation. However, the wide-open space can make locating enemies difficult early on, so developing a habit of scouting from the starting point is crucial. Memorizing item locations and reviewing hero stats before battle are key to improving win rates. The map’s design and gameplay blend classic RPG elements with deep strategic combat, maximizing the strengths of custom maps. It particularly shines for players who prefer solo competition over team play, as the intensity of battle builds an energetic, adrenaline-fueled atmosphere that amplifies the fun. Before diving in, familiarize yourself with key item spots and hero skill sets, and consider flanking maneuvers or ambush tactics to exploit the map’s open terrain. While the extended playtime from large-scale combat may test patience, the map excels in delivering sustained tension and enjoyment, making it a standout custom map experience.
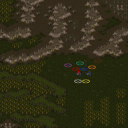
Monkey hide n go seek
이 맵은 ‘Monkey hide n go seek’이라는 이름 그대로 숨바꼭질 요소가 중심이 되는 UMS 유즈맵이다. 사막 타일셋을 사용해 2048×2048 규모의 넓은 필드를 제공하며, 플레이어는 최대 8명까지 동시에 참여할 수 있다. 시작 지점마다 서로 다른 숨을 수 있는 구역이 배치돼 있어, 초기 위치 선정이 전략의 핵심이 된다. 게임 진행은 기본적으로 한 명이 숨는 동안 나머지 플레이어들이 찾아내는 형태이며, 숨는 플레이어는 이동 속도가 약간 감소하지만 시야가 넓어지는 특수 효과가 적용되는 경우가 있다. 맵 내부에 배치된 작은 오브젝트와 지형 장애물은 이동 경로를 제한하고, 은신에 유리한 위치를 제공한다. 따라서 은신과 추적을 반복하는 리듬감 있는 플레이 경험을 원하는 유저에게 적합하다. 특히 팀을 나누어 숨는 팀과 찾는 팀으로 역할을 나누면 협동과 경쟁을 동시에 즐길 수 있다. 플레이 전에 확인해야 할 포인트는 각 플레이어의 시작 위치와 맵 가장자리의 탈출 구역 유무이다. 탈출 구역이 존재한다면 숨는 쪽은 이를 활용해 오래 살아남을 수 있고, 찾는 쪽은 탈출 경로를 차단하는 전략을 세워야 한다. 또한 사막 타일셋 특성상 시야가 제한되는 구역이 많아, 미니맵을 적극 활용하거나 시야 확대 아이템을 적절히 배치하면 게임 흐름을 크게 개선할 수 있다. 전반적으로 은신·추적 중심의 게임 메커니즘을 좋아하는 플레이어, 파티 플레이를 즐기는 유저, 그리고 간단하지만 긴장감 있는 라운드 기반 게임을 찾는 사람들에게 추천한다. This map, titled “Monkey hide n go seek,” lives up to its name by centering on hide‑and‑seek mechanics within a UMS user‑made map. It uses a desert tileset and offers a large 2048×2048 battlefield, supporting up to eight players simultaneously. Each spawn point contains distinct hiding zones, making initial placement a strategic decision. The gameplay follows a classic pattern: one player hides while the others hunt, with the hidden player often receiving a slight speed penalty but a wider field of view as a special effect. Small objects and terrain obstacles scattered across the map restrict movement paths and provide advantageous cover for stealth. Consequently, the map delivers a rhythmic experience of concealment and pursuit, ideal for players who enjoy alternating between hiding and seeking. Splitting into teams—hiders versus seekers—adds cooperative and competitive layers. Before starting, players should check their spawn locations and whether exit zones exist at the map’s edges; exit zones allow hiders to survive longer, while seekers must devise ways to block those routes. Because the desert tileset creates many vision‑blocked areas, using the minimap actively or placing vision‑enhancing items can significantly improve flow. Overall, this map is recommended for those who like stealth‑focused mechanics, enjoy party play, and seek quick, tension‑filled rounds.
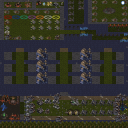
디아블로2 RPG Final Bite Easier (Diablo2RPG Final Bite Easier)
스타크래프트 브루드워의 RPG 장르 유즈맵으로, 디아블로 2의 시스템과 분위기를 오마주한 《Diablo2RPGv.Finalabiteasier》는 플레이어들에게 던전 탐험과 몬스터 사냥의 짜릿함을 제공하는 디펜스형 RPG 맵이다. 맵은 사막 타일셋으로 구성되어 있으며, 2048x2048 크기의 넓은 공간에 펼쳐진 여러 개의 방과 통로가 플레이어의 시선을 사로잡는다. 각 방은 고유한 몬스터 무리와 상호작용 가능한 오브젝트로 구성되어 있으며, progression을 따라 레벨을 올려가며 강력한 아이템과 스킬을 획득할 수 있는 구조로 설계되어 있다. 맵의 핵심은 몬스터 웨이브와 보스전을 통해 진행되는 서바이벌 디펜스 방식으로, 플레이어는 제한된 자원을 활용해 끊임없이 밀려오는 적들을 막아내며 성장해야 한다. 특히, 방과 방 사이의 통로가 좁게 배치되어 있어 전략적인 위치 선정과 자원 관리가 매우 중요하다. 맵의 분위기는 디아블로 시리즈의 어두운 판타지 feel을 살리면서도, 스타크래프트의 유닛 디자인과 연출로 재해석한 점이 특징적이다. 추천 대상은 RPG와 디펜스 요소에 익숙한 플레이어로, 6인까지의 협동 플레이가 가능하며 팀워크와 개개인의 실력이 모두 요구되는 하드코어한 경험을 제공한다. 플레이 전 확인해야 할 포인트는 맵의 진행 흐름과 몬스터 배치, 아이템 드랍 로직으로, 이 정보가 없으면 난이도 조절이 어려운 점이다. 또한, 맵의 난이도는 초보자가 осво하기엔 다소 어려울 수 있어, 최소한의 RPG 경험과 디펜스 맵 플레이 경험이 있다면 더 즐겁게 플레이할 수 있다. 맵의 구조상, 중앙 통로의 중요도가 높아 이곳을 잘 방어하지 못하면 순식간에 전멸할 위험이 있으므로 주의가 필요하다. This StarCraft: Brood War RPG custom map, *Diablo2RPGv.Finalabiteasier*, pays homage to the systems and atmosphere of *Diablo 2* with its dungeon crawling and monster-hunting thrills in a defense-style RPG experience. Set in a vast desert tile set spanning 2048x2048, the map features numerous rooms and corridors that draw players in, each filled with unique monster groups and interactive objects. Players progress by leveling up, acquiring powerful items and skills along the way. The core gameplay revolves around survival defense, where waves of enemies and boss battles test endurance—players must manage limited resources to fend off relentless foes while growing stronger. The tight corridors between rooms make strategic positioning and resource management crucial. The map blends *Diablo*’s dark fantasy feel with *StarCraft*’s unit designs and visuals, creating a distinctive reinterpretation. Recommended for players familiar with RPG and defense mechanics, it supports up to six players in a cooperative mode that demands both teamwork and individual skill for a hardcore experience. Before playing, check the progression flow, monster placements, and item drop logic, as lacking this knowledge can make difficulty adjustment difficult. The map’s difficulty may be challenging for beginners, so some prior RPG and defense map experience will enhance enjoyment. Notably, the central corridor is vital—failing to defend it can lead to rapid team wipes, so caution is essential.
블러드 프레셔 레이스* 패스트 (Blood pressure race* fast)
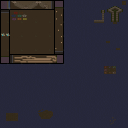
스타크래프트 브루드워 유즈맵 <바람의 나라>나 <리니지> 같은 고전 RPG의 전투 시스템을 모방한 듯한 Blood pressure race* fast는 이름 그대로 혈압을 솟구치게 만드는 스피디한 전투가 핵심인 맵입니다. 화면 가득 펼쳐진 넓은 평원과 곳곳에 배치된 자원 수집 지역, 그리고 중앙에 위치한 강력한 중간 보스가 인상적입니다. 플레이어는 시작 지점에서 출발해 맵 곳곳의 미네랄이나 베스핀 가스를 확보하면서 자원을 모으고, 동시에 적대적인 유닛들이 끊임없이 몰려오는 위협을 극복해야 합니다. 전투는 테란, 저그, 프로토스의 각 종족의 특성을 살린 유닛 구성으로 진행되며, 특히 중간 보스와의 전투는 긴장감을 높이는 하이라이트입니다. 맵의 배경은 황량한 사막 지형으로, 시야가 제한된 곳에서 벌어지는 전투는 플레이어의 전략과 순발력을 동시에 요구합니다. 초반에는 자원 확보가 관건이지만, 중반으로 접어들수록 방어와 공격의 균형을 맞추는 것이 관건이 됩니다. 예상 플레이 시간은 약 20~30분 정도로, 한 판에 몰입감 있게 즐길 수 있는 구조입니다. 초보자도 쉽게 접근할 수 있지만, 후반부로 갈수록 난이도가 급상승하는 만큼 꾸준한 연습이 필요합니다. 특히 중간 보스와의 전투에서는 팀원 간 협력이 무엇보다 중요합니다. 넓은 맵을 활용한 전투와 자원 관리, 그리고 중간 보스 caccia와 같은 강력한 적의 등장은 이 맵의 가장 큰 특징입니다. 플레이 전에는 각 종족의 유닛 구성과 자원 확보 전략을 미리 숙지하는 것이 좋습니다. 또한, 시야가 제한된 사막 지형에서 벌어지는 전투에서는 맵의 주요 자원 지역과 중간 보스 위치, 그리고 적의 침투 경로를 미리 파악해 두는 것이 필수입니다. 이 맵은 좁은 공간에서 벌어지는 전투보다는 넓은 평원과 복잡한 지형을 활용한 전략적 플레이가 요구됩니다. 특히 자원 확보와 방어 라인 구축을 동시에 진행해야 하는 만큼, 멀티태스킹 능력이 중요한 유즈맵입니다. 전투가 치열해질수록 혈압이 오르겠지만, 그 쾌감こそ가 이 맵의 진정한 매력입니다. 팀원 간의 호흡을 맞추는 재미도 쏠쏠하니, 친구들과 함께 플레이해 보세요. 초보자도 충분히 즐길 수 있지만, 숙련자들에게는 더 깊은 전략과 팀플레이의 묘미를 느낄 수 있는 맵입니다. This StarCraft: Brood War custom map, *Blood Pressure Race*, is a fast-paced, adrenaline-fueled battle where heart-pounding combat takes center stage—much like the classic RPG combat systems from games such as *The Land of Winds* or *Lineage*. The map features vast open plains stretching across the screen, scattered resource collection zones, and a powerful mid-boss lurking at the center. Players start at designated points, gathering minerals and vespene gas while fending off relentless waves of hostile units. Combat unfolds with unit compositions tailored to each race—Terran, Zerg, and Protoss—culminating in a high-stakes showdown against the mid-boss that cranks up the tension. Set against a desolate desert backdrop with limited visibility, the battles demand sharp strategy and quick reflexes. Early on, securing resources is key, but as the game progresses, balancing defense and offense becomes critical. A single match lasts about 20 to 30 minutes, offering an immersive experience in a compact format. While accessible to beginners, the difficulty spikes sharply in later stages, making consistent practice essential. Teamwork is especially vital during the mid-boss encounters. The map’s standout features include large-scale combat, resource management, and the appearance of formidable enemies like the mid-boss *Caccia*. Before playing, it’s wise to familiarize yourself with each race’s unit compositions and resource-gathering strategies. In the sand-blinded desert terrain, knowing the key resource zones, mid-boss locations, and enemy approach paths is crucial. Unlike cramped, close-quarters battles, this map rewards strategic play across wide-open plains and intricate terrain. With the need to juggle resource gathering and base defense simultaneously, multitasking skills are a must. As the fight intensifies, so does the thrill—but that’s exactly where the real appeal lies. Syncing up with teammates adds another layer of fun, so gather friends and jump in. While newcomers can enjoy it too, seasoned players will uncover deeper layers of strategy and teamwork.
크레이지 터렛 디펜스 2.3 (Crazy Turret Defense 2.3)
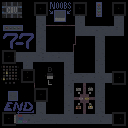
크레이지 터렛 디펜스 2.3는 스타크래프트 브루드워의 대표적인 디펜스형 유즈맵으로, 플레이어가 방어선을 구축하고 끊임없이 몰려드는 적들을 상대하는 재미에 집중한 작품이다. 맵은 중앙에 위치한 본진을 중심으로 적의 침공 루트가 체계적으로 배치되어 있으며, 터렛과 방어 건물의 강화 및 업그레이드가 가능한 구조로 설계되어 있다. 이미지에서 확인되는 붉은색과 파란색의 방어선은 각각의 플레이어가 관리하는 구역을 의미하는 것으로 보이며, 맵 곳곳에 scattered된 건물들은 적의 공격을 방어하거나 공격 지원을 위한 주요 포인트로 기능하는 듯하다. 게임은 레벨 개념이 도입되어 있으며, 각 레벨을 클리어할 때마다 적의 수가 증가하거나 공격력이 강해지는 방식으로 진행된다. 또한, 맵의 하단 중앙에 위치한 'Firebat = 10 Civs'라는 설명은 Firebat 유닛 10기를 시민으로 전환할 수 있는 특수 기능을 제공하는 것으로 추정된다. 맵의 개선 사항으로는 조명 효과 추가, Firebat 유닛의 시민 전환 기능 도입, 승리 레벨 수 조정, 적의 체력 증가 등이 포함되어 있어 밸런스와 재미를 동시에 고려한 수정이 이루어진 것으로 보인다. 이 맵은 디펜스 장르의 핵심인 전략적 방어와Resource 관리, 그리고 점진적인 난이도 상승을 즐기고자 하는 플레이어들에게 추천할 만한 작품이다. 특히 다인 플레이 시 팀워크와 전략적 협력이 중요한데, 각 플레이어의 구역 방어와 상호 지원 여부가 승패를 좌우할 수 있다. 미리 방어 건물의 배치와 업그레이드 계획을 세워두는 것이 성공의 열쇠가 될 것이다. Crazy Turret Defense 2.3 is a classic defense-style custom map in *StarCraft: Brood War*, where players focus on building defensive lines and battling endless waves of enemies. The map is designed around a central main base, with enemy attack routes systematically arranged around it. It features a structure that allows players to reinforce and upgrade turrets and defensive buildings. The red and blue defensive lines visible in the image likely represent zones managed by each player, while scattered buildings throughout the map serve as key points for defending against or supporting attacks. The game introduces a level system, where each cleared level increases the number or strength of enemies. The note "Firebat = 10 Civs" at the bottom center of the map suggests a special feature allowing players to convert 10 Firebat units into civilian workers. Improvements in this version include added lighting effects, the Firebat-to-civilian conversion feature, adjusted victory levels, and increased enemy health—changes made to enhance both balance and enjoyment. This map is ideal for players who enjoy strategic defense, resource management, and gradually increasing difficulty. Teamwork and strategic coordination are especially important in multiplayer, as the success of each player's defense and mutual support can determine victory. Planning defensive building placement and upgrades in advance is key to success.
프로텍트 BOB 메즈 (Protect BOB Mehz)
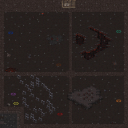
‘프로텍트 BOB 메즈(Protect BOB Mehz)’는 스타크래프트 브루드워의 유즈맵으로, ‘BOB’이라는 이름의 무력한 유닛을 외부 공격으로부터 보호하는 것이 주된 목표인 디펜스 장르의 맵이다. 맵의 전체적인 구조는 정글 타일셋을 기반으로 하며, 중앙에 위치한 BOB을 둘러싼 방어 지점이 여러 겹으로 배치되어 있다. 플레이어는 외부에서 끊임없이 몰려오는 적 유닛들을 방어해야 하며, 보호를 받는 BOB은 어떠한 공격도 행하지 않는 수동적인 역할을 맡는다. 맵의 특징은 방어선의 복잡성과 적의 공격 패턴에 있다. 적군은 일정 주기로 다수의 유닛을 보내며, 이 유닛들은 BOB을 공격하기 위해 방어선을 뚫고 들어오려고 시도한다. 플레이어는 방어선을 보강하고, 때로는 자원을 확보하여 추가 방어 구조물을 건설하거나 유닛을 생산할 수 있는 포인트를 확보해야 한다. 방어선의 형태는 복잡한 길목을 중심으로 구성되어 있으며, 좁은 통로와 넓은 개활지가 혼합되어 있어 전략적인 위치 선정이 중요하다. 이 맵은 단독 플레이가 가능한 싱글 플레이 모드와 다인 플레이가 가능한 멀티 플레이 모드로 나뉘며, 특히 6인 플레이 시 팀 간의 협력이 필수적이다. 추천 대상은 디펜스 장르를 선호하는 유저들로, 보호해야 할 대상이 명확하고 방어선의 설계가 흥미로운 맵을 즐기는 플레이어에게 적합하다. 플레이 전에는 방어선의 구조와 적의 공격 패턴을 숙지하는 것이 중요하며, 특히 복합적인 방어선의 경우 초기에 자원을 충분히 확보하여 방어력을 강화하는 것이 관건이다. 맵의 난이도는 방어선의 복잡성과 적의 공격 빈도에 따라 조절되며, 초보자도 쉽게 접근할 수 있지만 숙련자들에게는 전략적인 깊이를 제공한다. ‘Protect BOB Mehz’ is a *StarCraft: Brood War* custom map where the main objective is to defend a helpless unit named "BOB" from relentless enemy attacks in a defense-style gameplay. The map features a jungle-themed layout with multiple layers of defensive positions surrounding BOB at the center. Players must continuously fend off waves of incoming enemy units, while BOB itself remains passive and does not engage in combat. The map’s key features lie in its intricate defensive lines and enemy attack patterns. Enemies spawn in periodic waves, attempting to breach the defenses and reach BOB. Players must reinforce the lines, secure resources, and build additional defensive structures or spawn points for units. The layout consists of a mix of narrow corridors and open areas, making strategic positioning crucial. The map supports both single-player and multiplayer modes, including a 6-player cooperative mode where teamwork is essential. This map is ideal for players who enjoy defense-focused gameplay, particularly those who appreciate clear objectives and well-designed defensive layouts. Before playing, it’s important to study the defense structure and enemy attack patterns—especially in complex layouts—where securing sufficient resources early to strengthen defenses is key. While the difficulty varies based on defense complexity and attack frequency, the map remains accessible to beginners while offering strategic depth for experienced players.
포켓몬 RPG 퍼펙션 v3.3 (Pokemon RPG Perfection v3.3)
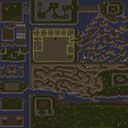
스타크래프트 브루드워의 유즈맵 중에서도 독특한 장르를 구현한 ‘포켓몬 RPG 퍼펙션 v3.3’은 7인용 RPG형 유닛맵으로, 플레이어 각자가 포켓몬 트레이너가 되어 적대적인 상대 트레이너들과 전투를 벌이는 구조로 설계되었다. 맵은 넓은 사막 타일셋을 기반으로 펼쳐지며, 각 플레이어는 출발 지점에서부터 맵 곳곳에 배치된 포켓몬 센터, 상점, 던전 등으로 이동하며 캐릭터를 육성하고 장비를 강화할 수 있다. 전투는 턴 방식이 아닌 실시간 전략적 교전으로 진행되며, 포켓몬의 스킬과 전략적 배치, 아이템 활용이 승패를 가르는 핵심 요소로 보인다. 맵 곳곳에 존재하는 길목과 덤불, 바위 등은 시야를 차단하거나 이동 경로를 제한하는 장애물로 기능하며, 이러한 요소들이 맵의 전략적 깊이를 더하는 것으로 추정된다. 특히 v3.3 업데이트에서 다수의 버그 수정과 밸런스 조정이 이루어졌다는 설명이 있어, 전투의 긴장감과 플레이의 안정성이 크게 향상되었을 것으로 예상된다. 또한, 맵의 규모가 8192x6144라는 넓은 해상도를 자랑하며, 타일셋이 사막으로 구성되어 있어 전체적인 분위기는 건조하고 모험적인 느낌을 연출한다. 이 맵은 포켓몬 팬 뿐만 아니라 스타크래프트 내의 RPG 장르를 즐기는 유저들에게도 매력적으로 다가갈 수 있으며, 특히 다인 플레이에서 발생하는 팀워크와 전략적 의사소통이 중요한 요소로 작용할 것으로 보인다. 플레이 전에는 맵의 주요 포인트(센터, 상점, 던전 위치)와 각 포켓몬의 스킬, 아이템의 효과를 숙지하는 것이 원활한 게임 진행에 도움이 될 것이다. 추가로, 맵의 난이도는 내장된 밸런스 조정 덕분에 초보자와 숙련자 모두 즐길 수 있도록 구성되었을 가능성이 높다. 단, 맵의 복잡한 구조와 다수의 플레이어 수를 고려할 때, 처음 플레이하는 유저는 맵의 주요 루트를 미리 파악하고 전략을 세우는 과정이 필요할 수 있다. Among the many custom maps of *StarCraft: Brood War*, *Pokémon RPG Perfection v3.3* stands out for its unique genre, offering a 7-player RPG-style unit map where each player takes on the role of a Pokémon trainer battling rival trainers. Set on a vast desert tileset, the map allows players to move from their starting point to various Pokémon Centers, shops, and dungeons scattered across the battlefield to train their characters and upgrade their equipment. Battles unfold in real-time rather than turn-based, with Pokémon skills, strategic positioning, and item usage serving as key factors in determining victory. Obstacles like narrow paths, thickets, and rocks block vision and restrict movement, adding depth to the map’s strategy. The v3.3 update reportedly includes numerous bug fixes and balance adjustments, likely enhancing both the tension of combat and the stability of gameplay. With a massive resolution of 8192x6144 and a desert-themed tileset, the map exudes a dry, adventurous atmosphere. While designed with Pokémon fans in mind, it also appeals to those who enjoy RPG genres in *StarCraft*, especially in multiplayer where teamwork and strategic communication play crucial roles. Before playing, familiarizing yourself with key locations (Centers, shops, dungeons) and Pokémon skills and item effects will ensure smoother gameplay. Thanks to built-in balance adjustments, the map is likely accessible to both beginners and experienced players, though newcomers may need to study the main routes and plan strategies in advance due to its complex structure and high player count.
최근 등록된 맵
새로 추가된 파일과 버전을 확인하세요.
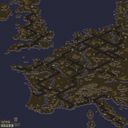
WW2 The European Campaign (제2차 세계대전 유럽 전역 캠페인)
스타크래프트 브루드워의 ‘WW2 The European Campaign(제2차 세계대전 유럽 전역 캠페인)’은 역사적 전투를 재현한 대규모 캠페인형 유즈맵으로, 플레이어가 제2차 세계대전 유럽 전선의 주요 전투를 차례대로 경험할 수 있도록 설계된 작품입니다. 맵은 황무지 타일셋을 기반으로 8192×8192의 넓은 공간을 활용해 각 전투 지역의 지형을 사실적으로 재현했으며, 초기 버전인 1.0 기준으로 제작되었습니다. 캠페인 형식답게 전투는 시나리오 단위로 진행되며, 각 전투에서 승리 조건을 달성하면 다음 전투로 넘어가는 구조를 갖추고 있습니다. 맵의 명칭과 파일명, 내부 제목이 모두 ‘WW2 The European Campaign’으로 일치해 식별이 용이하며, 한국어 환경에서도 정상적으로 표시됩니다. 플레이어는 단일 팀으로 참여해 총 5명의 플레이어가 한 팀을 이뤄 전투에 임하게 됩니다. 각 전투는 역사적 전투를 모티브로 삼은 만큼 맵 디자인에Sand of Time, Bocage, River Crossing 등 당시 유럽 전선의 주요 지형적 특징이 반영되어 있습니다. 예를 들어, bocage 지형은 당시 프랑스 북부 전선의 특징을 살려 맵 상단에 배치되어 있으며, 강이나 도시 지역은 공격로와 방어 거점으로 활용될 수 있도록 설계되었습니다. 그러나 내부 설명이나 승리 조건이 명시되어 있지 않아 구체적인 전투별 목표(예: 특정 건물을 파괴하거나 방어 지역을 확보하는지)는 추정하기 어렵습니다. 따라서 플레이 전 해당 맵의 커스텀 명령을 미리 확인하거나 제작자 노트를 참고하는 것이 바람직합니다. 이 맵의 가장 큰 장점은 넓은 맵 크기와 사실적인 지형 재현에 있습니다. 넓은 공간을 활용해 대규모 병력 이동과 기동전을 시뮬레이션할 수 있으며, bocage와 같은 지형적 특징은 당시의 전장 feel을 살려줍니다. 반면, 캠페인형 맵의 특성상 전투 간 전환 트리거가 복잡할 수 있어 초보자의 경우 진입 장벽이 높을 수 있습니다. 또한, 5인 팀 플레이를 전제로 한 만큼 밸런스 조절이 중요해 보이지만, 현재 제공된 정보만으로는 팀 구성(예: 테란/저그/프로토스 혼합 가능 여부)이나 난이도 조절 방식에 대해 명확히 알 수 없습니다. 역사적 전투를 체험하고자 하는 스타크래프트 팬이라면 한번 시도해 볼 만한 작품으로, 특히 유럽 전선 역사에 관심이 있는 플레이어에게 추천할 만합니다. 플레이 전 미리 전투별 목표와 승리 조건을 숙지하고, 팀원과의 협의가 원활히 이뤄질 수 있도록 준비하는 것이 중요합니다. StarCraft: Brood War’s *WW2 The European Campaign* is a massive campaign-style custom map that recreates historical battles, allowing players to experience key engagements from the European theater of World War II in sequence. The map is built on a wasteland tileset, utilizing a vast 8192×8192 space to realistically depict the terrain of each battle zone, and was originally created based on version 1.0. Following a true campaign structure, battles unfold in scenario units, with progress to the next mission upon meeting the victory conditions. The map’s name, filename, and internal title all match as *WW2 The European Campaign*, making it easy to identify and ensuring proper display in Korean environments. Players participate as a single team, with up to five members working together in each battle. Since each scenario is inspired by real historical battles, the map design incorporates key European battlefield features like the *Sand of Time*, *Bocage*, and *River Crossing*. For example, the bocage terrain, characteristic of northern France, is placed at the top of the map, while rivers and urban areas are designed as strategic routes or defensive strongpoints. However, the map lacks explicit internal descriptions or victory conditions, so the specific objectives for each battle—such as whether to destroy certain buildings or secure defensive zones—must be inferred. Players are advised to review the map’s custom commands or creator notes before playing to clarify these details. The map’s greatest strength lies in its expansive size and realistic terrain reproduction, enabling large-scale troop movements and maneuver warfare simulations. Features like bocage add to the authentic battlefield atmosphere. On the downside, the complexity of transition triggers between missions may pose a high entry barrier for beginners. Additionally, since the map is designed for five-player team coordination, balance adjustments are crucial, though the available information doesn’t clarify team composition (e.g., whether mixed races like Terran/Zerg/Protoss are allowed) or difficulty adjustment methods. Still, for StarCraft fans seeking a historical combat experience, this is a worthwhile title—especially for those interested in the European theater. Players should familiarize themselves with each mission’s objectives and victory conditions beforehand and ensure smooth coordination with teammates before diving in.
히딩크 벗기기 (Hiddink Unveiling)
히딩크 벗기기는 스타크래프트 브루드워의 유즈맵으로, 7명의 플레이어가 팀을 이루지 않고 각각 독립적으로 플레이하는 개성 강한 맵이다. 맵 중앙에는 거대한 히딩크 석상이 놓여 있으며, 플레이어는 이 석상을 둘러싼 미로를 통과하거나 주변 지역을 탐색하며 목표를 달성해야 한다. 맵의 공간 구성은 다소 복잡하게 설계되어 있어, 각 플레이어는 자신의 시작 위치와 이동 경로를 신중히 판단해야 한다. 맵의 핵심 메커니즘은 히딩크 석상을 둘러싼 장애물과 상호작용하는 방식으로 추정되며, 플레이어는 석상을 "벗기기" 위해 특정 조건을 만족해야 할 가능성이 높다. 맵 곳곳에는 숨겨진 아이템이나shortcut이 배치되어 있어, 숙련된 플레이어는 이를 활용해 빠르게 목표에 도달할 수 있다. 반면 초보자는 미로 탐색에 어려움을 겪을 수 있어, 맵의 난이도는 플레이어의 경험과 전략에 따라 크게 달라진다. 히딩크 벗기기는 다인 플레이를 전제로 한 맵이기 때문에, 각각의 플레이어는 독립적인 목표를 추구하면서도 간접적으로 경쟁 관계를 형성할 수 있다. 맵의 분위기는 다소 밝고 신나는 색상으로 구성되어 있으며, 플레이어의 진행 상황을 시각적으로 확인할 수 있는 UI 요소가 보이는 것으로 추정된다. 이 맵은 팀 전략보다는 개인의 판단력과 순발력이 중요한 요소로 작용할 가능성이 높아, 재미있는 도전 과제를 제공할 것으로 예상된다. 이 맵을 플레이하기 위해서는 미리 팀원들과의 전략 회의를 통해 각자의 역할을 분담하거나, 개별적인 탐색 루트를 정하는 것이 좋다. 또한, 맵 내부의 숨겨진 요소나 특정 지점의 상호작용 방법을 숙지하고 있어야 실수를 줄일 수 있을 것이다. 히딩크 벗기기는 스타크래프트 유즈맵의 특성을 살린 독특한 경험을 제공하며, 다인 플레이에서 발생할 수 있는 긴장감과 흥미로운 반전을 즐기고자 하는 플레이어에게 추천할 수 있는 맵이다. Hidingk Peel is a custom StarCraft: Brood War map where seven players compete independently without forming teams, each with their own unique playstyle. At the center of the map stands a massive Hiddink statue, and players must navigate the surrounding maze or explore nearby areas to achieve their objectives. The map's layout is somewhat complex, requiring players to carefully consider their starting positions and movement paths. The core mechanics likely revolve around interacting with obstacles around the Hiddink statue, with players needing to meet specific conditions to "peel" it. Scattered throughout the map are hidden items or shortcuts that skilled players can use to reach their goals quickly, while beginners may struggle with navigation, making the difficulty highly dependent on the player's experience and strategy. Designed for multiplayer, Hidingk Peel allows each player to pursue independent goals while indirectly competing with others. The map features bright and lively colors, and there appear to be UI elements that visually track player progress. Rather than relying on team strategy, the map emphasizes individual judgment and quick reflexes, offering an engaging challenge. To play effectively, it's advisable to coordinate with teammates beforehand to assign roles or plan individual routes. Familiarizing yourself with hidden elements or interaction points within the map will also help minimize mistakes. Hidingk Peel delivers a distinctive experience unique to StarCraft custom maps, making it a great choice for players looking to enjoy the tension and exciting twists that multiplayer can offer.
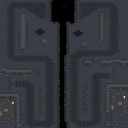
터렛 워즈 그리디우스7 (Turret Wars Gradius7)
스타크래프트 브루드워 유즈맵의 새로운 장르로 주목받는 ‘터렛 워즈 그리디우스7’ 리뷰입니다. 이 맵은 이름에서 알 수 있듯이 터렛(포탑)을 중심으로 한 디펜스와 공세형 전투가 조화를 이루는 유닛 생산 및 방어 전략 게임으로, 6명의 플레이어가 동시에 참여할 수 있는 대규모 팀플레이 구조를 갖추고 있습니다. 게임 화면은 우주 테마의 타일셋으로 꾸며져 있으며, 4096x3072라는 넓은 맵 크기를 자랑해 넓은 전투 공간과 다양한 전략 구사가 가능합니다. 게임 진행 방식은 그리디우스 시리즈의 특징을 일부 계승한 듯한 공중 유닛과 지상 유닛의 조합을 통해 맵을 점령하고, 상대방의 기지를 공격하는 방식으로 보입니다. 맵 중앙의 넓은 개활지와 주변의 협소한 통로, 그리고 각 플레이어의 시작 지점이 분리된 구조는 전장 내에서의 기동성과 방어 전략을 극대화하는 데 중점을 두고 있습니다. 특히 터렛을 통한 방어 라인과 광물 자원 수집, 그리고 유닛 생산 건물이 분리되어 있는 구조는Resource Management와 Build Order 선택이 승패를 좌우할 핵심 요소로 작용할 것입니다. 공격과 방어의 균형을 맞추면서도, 넓은 맵을 활용한 기습과 포위 전략이 가능하다는 점에서 숙련된 플레이어들에게는 전략적 깊이를 제공할 것으로 예상됩니다. 다만, 6인 동시 참여가 가능한 대규모 맵임에도 불구하고, 내부 설명이 ‘Turret Wars FUN!!!!!’로 매우 간결한 점은 플레이어들의 커스터마이징이나 추가적인 컨텐츠가 부족할 수 있음을 시사합니다. 따라서 이 맵을 플레이하기 전에는 맵의 승리 조건이나 세부적인 규칙, 그리고 제공되는 유닛과 건물의 종류를 미리 확인하는 것이 중요할 것입니다. 또한 넓은 맵 특성상 초보 플레이어보다는 중간 이상의 실력을 갖춘 플레이어들이 참여했을 때 더욱 재미를 느낄 수 있을 것으로 판단됩니다. 마지막으로, 맵의 인코딩이 cp949로 설정되어 있어 한글 표시가 원활히 지원된다는 점도 한국인 플레이어들에게는 큰 장점으로 작용할 것입니다. Turret Wars Gradius7 is a standout custom map in the StarCraft: Brood War universe, blending turret-based defense with offensive strategy in a genre that’s gaining traction among players. Designed for six players, the map features a sprawling 4096x3072 universe-themed battlefield, allowing for expansive combat and strategic depth. The gameplay revolves around controlling resources, building turret defenses, and producing units to attack and defend key positions. The map’s layout—featuring central open areas, narrow pathways, and separated starting zones—encourages dynamic maneuvers, such as flanking and siege tactics, while also requiring careful resource management and build order decisions. While the internal description is minimal, the potential for strategic variety is high, especially for experienced players who can leverage the large map to execute complex plans. Beginners might find the scale overwhelming, so reviewing the map’s specific unit and building roster, along with victory conditions, is advisable before diving in. The cp949 encoding ensures smooth Korean language support, making it accessible to Korean players. Overall, this map offers a fresh take on defense-oriented UMS maps, ideal for players seeking a mix of strategy and action in a team-based setting.
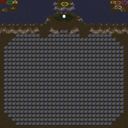
터널러즈 (Tunnelerz)
스타크래프트 브루드워의 재미있는 유즈맵 중 하나인 《터널러즈(Tunnelerz)》는 플레이어들이 ‘터널러’라는 캐릭터를 조종하며 끊임없이 몰려오는 ‘그럽’이라는 적을 피해 도망치는 동시에, 다른 플레이어들을 사냥하는 독특한 게임 플레이를 제공합니다. 맵의 배경은 사막 테마로 구성되어 있으며, 넓은 평원과 구불구불한 지형이 특징적입니다. 플레이어는 맵 중앙에서 시작해 시야가 제한된 어두운 터널을 따라 이동하면서 그럽의 추격을 피해야 하는데, 이 과정에서 맵 곳곳에 숨겨진 아이템이나 지형적 이점을 활용하는 전략이 필요합니다. 특히, 터널러는 맵에 존재하는 여러 갈래길과 지름길을 통해 상대방보다 먼저 목표 지점에 도달하거나, 다른 플레이어를 추격해 사냥하는 방식으로 점수를 획득할 수 있습니다. 맵의 핵심 메커니즘은 ‘추격과 회피’에 있으며, 이는 기존의 디펜스나 컴까기 장르와는 차별화된 플레이 경험을 제공합니다. 맵의 구조상 플레이어 간에 직접적인 전투보다는 지형과 시야를 활용한 심리전이 중요하며, 빠른 판단력과 유연한 플레이가 요구됩니다. 초보 플레이어의 경우 맵의 지형과 터널 시스템을 충분히 숙지하지 못해 그럽에게 쉽게 잡힐 수 있으므로, 최소 1~2판 정도의 연습이 필요합니다. 또한, 팀 플레이보다는 개인전이나 소수 인원이 어울리는 맵으로, 경쟁심과 전략적 선택이 게임의 재미를 좌우합니다. 이 맵은 특히 스타크래프트의 맵 제작 기술과 유즈맵의 창의성을 느낄 수 있는佳作로, 반복 플레이 시에도 새로운 전략을 시도해 볼 수 있는 재플레이성이 높습니다. 맵을 플레이하기 전에는 터널의 구조와 주요 루트를 미리 확인하고, 그럽의 이동 패턴을 예측하는 연습을 권장합니다. 또한, 키보드와 마우스 조작을 원활히 할 수 있도록 세팅을 미리 조정하는 것이 좋습니다. 이 맵은 혼자 플레이하는 재미보다는 다인 플레이에서 진정한 재미를 느낄 수 있으며, 특히 같은 방의 친구들과 실시간으로 경쟁하며 즐길 수 있는 재미가 있습니다. 맵의 전체적인 분위기는 어둡고 긴장감 있는 편이지만, 그만큼 몰입도가 높아 스타크래프트 유즈맵의 장점을 잘 살린 작품입니다. One of the fun custom maps in *StarCraft: Brood War*, *Tunnelerz* puts players in control of a "Tunneler" character, forcing them to flee from endless waves of enemies called "Grub" while also hunting down other players—a unique gameplay blend. Set in a desert theme, the map features wide plains and winding terrain. Players start in the map’s center and must navigate dimly lit tunnels with limited visibility to evade the Grub’s pursuit, using hidden items and terrain advantages strategically. Tunnelers can score points by reaching key locations first or chasing down opponents via the map’s multiple branches and shortcuts. The core mechanic revolves around "chasing and evasion," offering a fresh experience distinct from typical defense or melee maps. Rather than direct combat, the map emphasizes terrain and visibility control, demanding sharp decision-making and adaptable play. Beginners may struggle early on, as unfamiliarity with the tunnels and Grub’s patterns can lead to quick eliminations, so 1–2 practice matches are recommended. Designed more for solo or small-group play than team battles, the map thrives on competition and strategic choices. With its creative map design and replayability, *Tunnelerz* showcases the ingenuity of *StarCraft*’s custom map scene, encouraging players to experiment with new tactics over repeated plays. Before jumping in, study the tunnel layouts and key routes, and practice predicting the Grub’s movement patterns. Optimizing your keyboard and mouse settings beforehand will also help. While enjoyable solo, the map truly shines in multiplayer, especially when competing in real-time with friends in the same room. Its dark, tense atmosphere enhances immersion, making it a standout example of *StarCraft*’s custom map strengths.
트리키 바운드 (Tricky Bound)
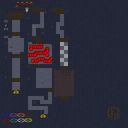
스타크래프트 브루드워의 유즈맵 'Tricky Bound'는 6인용 디펜스 장르로, 5단계의 레벨을 progressively하게 돌파하는 형식의 맵입니다. 화면 중앙에 배치된 거대한 보라색 크리스탈이 주요 방어 목표로, 플레이어는 이 목표를 보호하며 끊임없이 몰려오는 적들을 방어해야 합니다. 크리스탈 주변에는 방어 건물이 설치되지 않은 빈 공간이 넓게 펼쳐져 있으며, 맵 가장자리의 좁은 통로와 입구들이 주요 공격 루트가 됩니다. 각 레벨은 난이도가 점진적으로 상승하며, 적의 종류와 수가 증가합니다. 크리스탈 주변의 빈 공간은 플레이어의 전략적 배치와 움직임을 요구하며, 좁은 입구들은 방어선을 구축하기에 적합한 위치입니다. 맵의 디자인상으로는 방어 건물이 없는 빈 공간이 많아 초기 방어가 다소 취약해 보일 수 있으나, 좁은 통로와 입구들이 자연스럽게 방어 포인트를 제공합니다. 플레이어는 각 레벨의 보스를 격파하거나 일정 시간 동안 버티는 방식으로 승부를 겨루며, 레벨이 올라갈수록 더 강력한 적들과 패턴을 상대해야 합니다. 맵의 플레이 시간은 약 30분 내외로 예상되며, 난이도는 초보자부터 숙련자까지 폭넓은 유저가 즐길 수 있도록 조절되어 있습니다. 특히 디펜스 장르에 익숙한 유저라면 더욱 전략적으로 플레이할 수 있으며, 레벨을 클리어할 때마다 느껴지는 성취감이 큰 매력입니다. 그러나 크리스탈 주변의 넓은 빈 공간이 공격을 받기 쉬운 구조이므로, 초보자의 경우 방어 건물 배치와 유닛 관리에서 어려움을 느낄 수 있습니다. 따라서 적절한 유닛 조합과 건물 배치를 연습하는 것이 중요합니다. 이 맵은 디펜스와 서바이벌 요소를 결합한 유즈맵으로, 특히 레벨별로 변하는 적의 패턴과 보스전을 즐기고 싶은 유저들에게 추천합니다. 또한, 다인 멀티플레이 환경에서 팀워크와 협동이 중요한 요소로 작용할 수 있어, 팀 플레이를 선호하는 유저들에게도 적합합니다. 플레이 전에는 각 레벨의 패턴과 적의 종류를 잘 숙지하고, 방어 건물과 유닛의 효율적인 배치 방법을 미리 계획하는 것이 중요합니다. 또한, 크리스탈 주변의 넓은 공간을 최대한 활용하여 방어선을 구축하는 전략이 필요합니다. 이 맵은 기존 디펜스 맵과는 차별화된 레벨 시스템과 점진적 난이도 상승이 특징으로, 반복 플레이를 통해 더욱 전략적인 플레이가 가능하다는 장점이 있습니다. 다만, 넓은 공간과 좁은 입구 간의 밸런스가 다소 아쉬운 부분이 있어, 숙련된 플레이어는 더 효율적인 방어 전략을 구사할 수 있습니다. "Tricky Bound," a StarCraft: Brood War custom map, is a 6-player defense game where players progressively clear five levels. The main objective is protecting a massive purple crystal located at the center of the screen, fending off waves of relentless enemies. Surrounding the crystal is a vast open area without defensive structures, while narrow pathways and entrances at the map’s edges serve as the primary attack routes. Each level increases in difficulty, with more enemy types and greater numbers. The open space around the crystal demands strategic positioning and movement, while the narrow entrances are ideal for setting up defensive lines. Though the lack of defensive structures in the open area may seem weak at first glance, the confined paths naturally create strong defensive points. Players defeat bosses or survive for a set duration to progress, facing increasingly powerful enemies and more complex patterns as levels advance. The expected playtime is around 30 minutes, with difficulty adjusted to suit both beginners and experts. Those familiar with defense games will find it particularly engaging, as the sense of accomplishment upon clearing each level is a major draw. However, the wide open space around the crystal makes it vulnerable to attacks, so beginners may struggle with unit management and building placement. Practicing effective unit compositions and defensive setups is key. This map blends defense and survival elements, making it ideal for players who enjoy adapting to shifting enemy patterns and boss battles. It also thrives in multiplayer settings, where teamwork and coordination play crucial roles, appealing to those who prefer collaborative play. Before starting, study each level’s patterns and enemy types, plan efficient building and unit placements, and maximize the open space around the crystal to fortify defenses. What sets this map apart is its level-based system and gradual difficulty curve, encouraging repeated play for deeper strategic mastery. Still, the balance between open space and narrow entrances could be refined, allowing skilled players to optimize their defenses even further.
광산 질주 (The Amazing Mining Race)
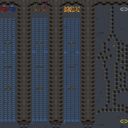
스타크래프트 브루드워의 유즈맵 중 하나로, 플레이어들이 광산 굴착 차량을 조종하며 장애물을 피해 결승선을 향해 질주하는 경주형 맵이다. 맵의 주요 특징은 중앙을 가로지르는 긴 굴착로와 곳곳에 배치된 다양한 장애물로, 이들을 피해가며 최대한 빠른 시간에 골인하는 것이 목표다. 이미지에서 확인되는 굴착 차량의 아이콘과 굴착로의 구조, 결승선 플래그를 통해 맵의 장르가 '레이싱' 또는 '경주'임을 쉽게 짐작할 수 있다. 굴착로 주변으로는 굴착 흔적이나 잔해가 scattered되어 있으며, 맵 상단과 하단에는 추가적인 경로나 지름길이 존재하는 것으로 보인다. 이 맵의 플레이 방식은 단순히 속도만으로 승부가 나는 것이 아니라, 장애물을 피하거나 파괴하는 타이밍과 경로 선택이 중요하다. 예를 들어 굴착로에 있는 바위나 잔해는 차량으로 밀어내거나 통과할 수 있으며, 일부 구간에서는 지름길을 통해 시간을 단축할 수 있다. 맵의 색상 대조가 뚜렷해 시야 확보가 용이하며, 특히 우주 타일셋을 사용해 광산 feel을 강조하고 있다. 플레이어는 각자 독립된 차량을 조종하며, 맵의 구조상 충돌이나 간섭은 발생하지 않는 것으로 추정된다. 이 맵은 6명의 플레이어가 동시에 참여할 수 있으며, 팀전보다는 개인전이 주를 이루는 것으로 보인다. 맵의 길이가 상당히 길고, 굴착로를 따라 일직선으로 진행하는 구간이 많기 때문에 플레이 시간은 10~20분 내외로 예상된다. 난이도는 장애물의 배치와 굴곡에 따라 달라질 수 있으나, 기본적으로는 진입 장벽이 낮은 편으로 보인다. 초보자도 쉽게 접근할 수 있지만, 숙련된 플레이어는 지름길을 활용하거나 장애물을 효율적으로 통과하는 전략을 구사할 수 있을 것이다. 주로 레이싱이나 경주형 유즈맵을 즐기는 플레이어들에게 적합하며, 특히 속도감과 전략적 요소 모두를 즐기고 싶은 유저들에게 추천할 만하다. 또한, 여러 명이 동시에 플레이할 수 있어 친목이나 대회용으로도 활용될 가능성이 높다. 맵을 플레이하기 전에는 자신의 차량 속도와 장애물 통과 능력, 지름길 위치를 숙지하는 것이 중요하다. 맵의 구조가 복잡하지 않지만, 속도감을 극대화하기 위해선 연습이 필요할 수 있다. This is a custom map from *StarCraft: Brood War* where players control mining vehicles, racing to the finish line while dodging obstacles. The map’s key features include a long central excavation path and various obstacles scattered throughout, requiring players to navigate quickly while avoiding hazards. The mining vehicle icons, excavation path structure, and finish line flags clearly indicate that the genre is a racing or speed-based challenge. The gameplay isn’t just about raw speed—timing obstacle avoidance or destruction and choosing the right path are crucial. Players can push aside rocks or debris blocking the excavation path, and some sections offer shortcuts to save time. The map’s sharp color contrast ensures good visibility, and its space-themed tileset enhances the mining atmosphere. Since each player controls their own vehicle and the layout prevents collisions or interference, races play out independently. The map supports up to six players, focusing primarily on individual competition rather than team play. Given its length and the many straight stretches along the excavation path, matches typically last between 10 to 20 minutes. While difficulty varies based on obstacle placement and turns, the map has a low entry barrier, making it accessible to beginners. Experienced players can optimize their runs by using shortcuts or navigating obstacles more efficiently. This map is ideal for fans of racing or speed-based custom maps, especially those who enjoy both fast-paced action and strategic elements. Its multiplayer design also makes it suitable for casual play or even tournaments. Before jumping in, players should familiarize themselves with their vehicle’s speed, obstacle-clearing ability, and shortcut locations. Though the layout is straightforward, mastering the race’s speed requires practice.
![더 클럽 (The Club) [v1.0] 맵 미리보기](https://cdn-star-data.huzy.net/thumbnail_afe78986c1064919a3f031bffe5d005a.jpg)
더 클럽 (The Club) [v1.0]
스타크래프트 브루드워의 독특한 유즈맵 〈더 클럽(The Club) [v1.0]〉은 기존 디펜스나 컴까기 장르와는 완전히 다른 콘셉트로 플레이어들에게 색다른 경험을 제공한다. 맵은 '클럽'이라는 주제로 꾸며져 있으며, 춤추는 무대, 조명 효과, 음악, 그리고 파티 분위기가 인상적이다. 내부 설명에서 언급된 '마약, 파이, 즐거운 시간' 등은 맵의 분위기를 짐작하게 하는데, 이는 단순히 전투나 방어가 아니라 일종의 '파티'나 '축제'를 즐기는 듯한 느낌을 강조한다. 맵 중앙에는 커다란 원형 무대가 있으며, 그 주변으로 관중석과 조명 시설이 배치되어 있어 실제 클럽의 구조를 모사한 듯한 디자인이 특징이다. 플레이어는 이 공간에서 살아남기 위해 전투를 벌이면서도, 동시에 파티의 분위기를 느낄 수 있도록 구성되어 있다. 전투는 주로 맵 중앙에서 벌어지며, 플레이어는 조명이나 음악 효과를 통해 전장의 분위기를 느낄 수 있을 것으로 추정된다. 맵의 구조상 여러 플레이어가 동시에 활동할 수 있는 넓은 공간이 있으며, 중앙 무대 주변에는 장애물이나 구조물이 배치되어 있어 전술적 움직임을 요구한다. 이 같은 독특한 설정 덕분에 〈더 클럽〉은 단순히 전투 위주의 맵이 아니라, 플레이어들에게 새로운 감각적 경험을 제공하는 유즈맵으로 자리매김할 수 있다. 특히 디펜스나 컴까기와는 달리, 맵의 분위기와 콘셉트가 플레이어의 플레이 스타일을 좌우할 가능성이 크다. 전투는 필수적이지만, 그 alongside 파티의 분위기를 즐기며 플레이할 수 있도록 설계된 점이 이 맵의 가장 큰 특징이다. 따라서 이 맵을 플레이할 때에는 단순히 전투에만 집중하기보다는, 맵의 분위기와 연출을 즐기며 플레이하는 것이 중요할 것으로 보인다. 또한 맵의 조명이나 음악 효과가 전투의 긴장감을 완화시키는 역할을 할 수 있어, 스트레스 해소용이나 친목 게임으로도 추천할 만하다. 다만, 전투가 메인 콘텐츠가 아닌 만큼, 전투의 난이도나 밸런스가 일반적인 디펜스나 컴까기 맵에 비해 상대적으로 낮을 가능성이 크므로, 전투 위주의 플레이를 선호하는 유저들에게는 적합하지 않을 수 있다. 따라서 〈더 클럽〉은 분위기와 콘셉트를 중시하는 유저들에게 추천할 만한 맵이며, 특히 파티나 축제와 같은 재미있는 콘셉트를 좋아하는 플레이어들에게 적합할 것이다. 또한 맵의 구조상 여러 플레이어가 동시에 활동할 수 있도록 설계되어 있어, 다인 플레이에서도 즐길 수 있는 요소들이 많다. 이 같은 특징으로 인해 〈더 클럽〉은 스타크래프트 브루드워의 유즈맵 중에서도 독특한 위치를 차지할 것으로 보인다. The Club [v1.0] is a unique StarCraft: Brood War custom map that offers players an entirely different experience from traditional defense or team-based maps. The map is themed around a 'club,' featuring a dance floor, lighting effects, music, and a party atmosphere. The internal description hints at a wild setting with mentions of 'drugs, pie, and a jolly good time,' suggesting that the map is designed not just for combat but also to evoke the feeling of attending a lively party or festival. The central stage is surrounded by seating areas and lighting rigs, mimicking the layout of a real club. Players are likely to engage in combat while immersed in the party vibe, with lighting and music enhancing the battlefield's atmosphere. The spacious design allows multiple players to move freely, while obstacles around the stage add tactical depth. What sets The Club apart is its blend of combat and sensory experience, making it more than just a battle-focused map. Unlike typical defense or team-based maps, The Club encourages players to enjoy the atmosphere alongside the gameplay. While combat remains essential, the map's unique setting and visual effects create a relaxing and fun environment, making it ideal for stress relief or casual gaming sessions. However, players seeking intense battles might find the combat mechanics less challenging compared to traditional maps. The Club excels in multiplayer scenarios, offering a fresh take on custom maps for those who appreciate unique themes and cooperative gameplay. Its distinctive concept ensures it stands out among StarCraft's vast library of user-created content.
타프핏 디펜스 7.0 (TarPit Defence 7.0)
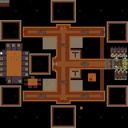
스타크래프트 브루드워의 유즈맵 장르 중에서도 디펜스 계열에 속하는 ‘타프핏 디펜스 7.0(TarPit Defence 7.0)’은 7명의 플레이어가 각자의 자원으로 방어선을 구축하고 끊임없이 몰려드는 적의 공격을 버텨내는 방식으로 진행된다. 맵의 중앙에는 거대한 ‘타프핏’이라는 이름의 함정이 위치해 있으며, 이 함정 주변으로 플레이어의 본진과 자원 채취 지역이 배치되어 있다. 맵은 황혼 타일셋을 기반으로 제작되어 어두운 톤의 배경과 붉은색 조명이 어우러진 분위기를 연출하며, 디자인적으로는 방어 건물과 길목이 조밀하게 배치되어 있어 전략적 플레이가 요구된다. 적의 공격은 소규모 웨이브 형태로 지속적으로 발생하며, 후반부로 갈수록 적의 숫자와 공격력이 증가하는 특징을 보인다. 플레이어는 초반 자원을 확보해 방어 건물을 배치하고, 자원 수급을 안정화하는 동시에 함정 주변의 길목을 효율적으로 차단해야 한다. 함정의 역할은 적의 진격을 지연시키는 동시에 플레이어의 방어력을 보조하는 것으로 추정된다. 맵의 핵심은 방어선의 구축과 자원 관리, 그리고 적의 웨이브 타이밍을 예측하는 데 있으며, 초보 플레이어는 방어 건물의 배치와 수리 비용 관리에 어려움을 느낄 수 있다. 추천 대상으로는 스타크래프트의 디펜스 장르에 익숙한 플레이어나, 방어와 자원 관리를 동시에 고려해야 하는 전략적 플레이를 선호하는 유저들에게 적합하다. 맵의 난이도는 7명의 플레이어가 협력해야 안정적으로 진행할 수 있을 정도로 높으며, 특히 후반 웨이브에서는 팀워크가 필수적이다. 플레이 전에는 방어 건물의 종류와 특성을 미리 숙지하고, 자원 수급 계획을 세우는 것이 중요하다. 또한, 함정의 위치와 범위, 그리고 적의 공격 패턴을 분석하는 것이 게임의 성패를 좌우할 수 있다. TarPit Defence 7.0 is a defense-style custom map in StarCraft: Brood War where seven players build their own defenses and hold out against waves of enemy attacks. The centerpiece of the map is a massive 'TarPit,' a trap designed to slow down incoming enemies, surrounded by player bases and resource areas. The map uses the Twilight tileset, featuring a dark ambiance with crimson lighting, creating an intense atmosphere that complements the strategic gameplay. Enemy waves continuously assault the players, with increasing numbers and firepower as the game progresses. Players must gather resources early on to construct defensive buildings, secure their income, and strategically block pathways around the TarPit. The trap likely serves to delay enemy advances while bolstering the players' defensive capabilities. The core mechanics revolve around base defense, resource management, and predicting enemy wave timings. Novice players may struggle with building placement and repair costs, making it essential to plan defenses carefully. This map is best suited for players familiar with StarCraft's defense genre or those who enjoy strategic gameplay balancing defense and resource management. The difficulty is high, requiring seven players to work together effectively, especially during late-game waves where teamwork becomes critical. Before playing, it's advisable to study the types and properties of defensive buildings, plan resource allocation, and analyze the trap's range and the enemy's attack patterns to maximize chances of survival.
맵 선택 가이드
태그는 맵의 핵심 특징을 빠르게 설명하지만 제작 버전마다 규칙이 다를 수 있습니다. 상세 설명에서 권장 인원, 난이도, 플레이 시간과 버전을 함께 확인한 뒤 다운로드하세요.