
다리 전투 스타크래프트 맵 모음
'다리 전투' 태그가 등록된 맵을 모았습니다. 장르 하나로 찾기 어려운 플레이 방식, 난이도와 특징을 중심으로 인기 맵과 최신 맵을 비교해 보세요.
- 등록 맵
- 4개
- 누적 다운로드
- 0
- 누적 조회
- 75
인기 맵
다운로드와 조회 반응이 높은 맵입니다.
Droht - 킬러 협곡 (Droht - Killer Gorge)
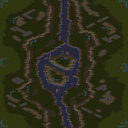
《Droht - Killer Gorge》는 스타크래프트: 브루드워의 대표적인 유즈맵 시리즈인 ‘Droht’의 최신작으로, 거대한 협곡 지형을 배경으로 펼쳐지는 밀리 맵이다. 맵 이름은 독일어로 ‘죽음’이란 뜻을 지닌 ‘Tod’에서 유래한 ‘Droht’ 시리즈의 전통을 잇고 있으며, ‘Killer Gorge’는 ‘살해자의 협곡’이라는 다소 과격한 제목이지만 사실상 맵의 지형을 묘사한 것에 가깝다. 맵의 전체 크기는 6144x6144로 매우 넓고, 협곡을 따라 중앙에 좁은 다리가 놓여 있어 병력의 교전이 자연스럽게 발생하는 구조를 가지고 있다. 협곡 양쪽에는 넓은 평지가 펼쳐져 있으며, 다리 주변은 지형이 복잡하여 시야 확보와 병력 운용이 중요한 요소가 된다. 특히 다리 위와 협곡 양쪽 언덕은 전략적 요충지로, здесь에서 전투가 벌어지면 맵의 승패가 갈릴 수 있다. 협곡 양쪽 끝에는 미네랄과 가스 멀티가 배치되어 있어 자원 확보 경쟁도 치열해진다. 플레이어는 6인으로 구성되며, 각각의 플레이어는 시작 위치에서 협곡을 건너 상대방의 본진을 향해 진격하거나, 협곡을 방어하며 자원을 확보하는 두 가지 선택을 할 수 있다. 맵의 특징은 지형이 복잡하여 시야가 제한되는 부분이 많다는 점으로, 이는 미니맵을 적극 활용하고, 정찰 유닛을 통한 정보 수집이 필수적임을 의미한다. 또한, 협곡 중앙의 다리나 언덕 지형은 진형 싸움에서 큰 영향을 미치므로, 맵에 익숙해지려면 여러 번 플레이를 통해 길목을 장악하는 법을 익혀야 한다. 맵의 분위기는 사막 지형답게 황량하고 웅장한 느낌이 강하며, 협곡의 협소한 공간과 넓은 평지가 어우러져 전략적 깊이를 더한다. 이 맵은 밀리 경기에 최적화되어 있으며, 특히 ‘Droht’ 시리즈 특유의 긴장감과 전략적 깊이를 즐기고 싶은 플레이어들에게 추천할 만한 작품이다. 다만, 넓은 맵 크기 때문에 초보자의 경우 자원 관리와 멀티 확보, 그리고 지형 이해에 시간이 걸릴 수 있으니, 먼저 싱글 플레이 모드나 연습 모드를 통해 맵에 익숙해지는 것이 좋다. 또한, 협곡을 건너는 도중 적의 기습을 받을 위험이 있으니, 항상 주변을 살피며 플레이하는 것이 중요하다. 《Droht - Killer Gorge》 is the latest installment in the "Droht" series of user-created maps for *StarCraft: Brood War*, set against the backdrop of a massive canyon terrain in a melee map. Following the tradition of the "Droht" series, whose name derives from the German word *"Tod"* meaning "death," *Killer Gorge* lives up to the name with its dramatic title, though it primarily reflects the map's dramatic canyon geography. The map spans a vast 6144x6144 size, featuring a narrow bridge running through the center of the gorge, which naturally funnels forces into combat. Flanking the gorge are wide open plains, while the area around the bridge is cluttered with complex terrain, making vision control and troop positioning crucial. The bridge itself and the hills on either side of the gorge serve as strategic chokepoints where battles can decide the outcome of the match. At both ends of the gorge, mineral and gas expansions are positioned, intensifying resource competition. The map is designed for six players, each facing a choice between charging across the gorge toward the opponent's base or defending the gorge while securing resources. A defining feature of the map is its complex terrain, which restricts visibility in many areas, making frequent use of the minimap and scouting units essential. The central bridge and elevated terrain also play a major role in formation battles, so mastering control of these key points requires repeated play. The atmosphere of the map, with its desert terrain, conveys a sense of desolation and grandeur, blending narrow canyon passages with vast open plains to add strategic depth. Optimized for melee matches, this map is highly recommended for players who enjoy the *Droht* series' signature tension and strategic complexity. However, due to its large size, beginners may struggle with resource management, expansion securing, and terrain understanding, so it's advisable to familiarize oneself with the map through single-player or practice modes first. Additionally, crossing the gorge carries the risk of ambushes, so constant vigilance is key to success.
브릿지 컨트롤 (Bridge Control)
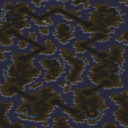
‘브릿지 컨트롤(Bridge Control)’은 스타크래프트: 브루드워의 밀리 맵으로, 좁은 다리 지형을 활용해 전투를 펼치는 독특한 전략이 특징이다. 맵 중앙에는 세로로 긴 다리가 놓여 있으며, 양측 진영에서 이 다리를 두고 치열한 공방전이 벌어질 수밖에 없다. 좁은 통로로 인해 유닛의 움직임이 제한되고, 스플래시 데미지를 입히는 유닛이나 원거리 공격이 эффектив한在这个时候, 플레이어는 다리 위에서 전투를 유리하게 이끌어갈 수 있는 전략을 구사해야 한다. 특히 테란의 시즈 탱크나 프로토스의 하이 템플러는 이 지형에서 강력한 위력을 발휘할 수 있으며, 저그의 뮤탈리스크와 같은 공중 유닛은 다리 위에서 상대를 교란시킬 수 있다. 맵의 핵심은 바로 ‘통제’에 있다. 다리 입구와 출구를 확보하고, 적의 진입로를 차단하거나 우회로를 통해 기습하는 등 다양한 전술이 요구된다. 또한, 맵의 균형 잡힌 구조 덕분에 양측의 초반 빌드도 중요해진다. 빠르게 병력을 생산해 다리 입구를 선점하는 플레이어가 유리한 고지를 점할 수 있으며, 상대방의 전략에 따라 카운터 빌드를 준비해야 한다. 초보 플레이어는 좁은 통로에서 벌어지는 전투에 익숙해지기 어려울 수 있지만, 다리 위에서 벌어지는 일대일 전투는 밀리 맵의 묘미를 느낄 수 있게 해준다. 또한, 팀플레이가 가능한 맵이므로, 팀원과의 호흡을 맞추어 다리_CONTROL을 확보하는 전략을 세워보는 것도 좋다. 이 맵은 좁은 지형에서의 전투 감각을 키우고, 전략적 사고력을 향상시키는 데 도움이 되는 훌륭한 연습용 맵으로 추천된다. 특히, 다리 위에서 벌어지는 전투는 스타크래프트의 기본기를 단단히 다질 수 있는 기회이기도 하다. 초보자와 숙련자 모두 즐길 수 있는 밸런스 좋은 맵이므로, 한 번쯤 플레이해 보는 것을 권장한다. 플레이 전에는 다리 주변의 지형과 자원 분포를 꼼꼼히 확인하고, 상대방의 전략에 따라 유연하게 대처할 준비를 갖추는 것이 중요하다. Bridge Control is a StarCraft: Brood War melee map that stands out for its strategic focus on narrow bridge combat. The map features a long central bridge connecting two bases, forcing players into direct confrontations in a confined space. This terrain restriction makes splash damage units like Siege Tanks or High Templars highly effective, while air units such as Mutalisks can disrupt opponents by hovering over the bridge. The core gameplay revolves around controlling key choke points on the bridge, whether by securing entry points, blocking enemy advances, or exploiting flanking routes. The balanced structure also emphasizes early-game builds, as quickly mobilizing forces to dominate the bridge can decide the match. For beginners, the tight spaces may pose a challenge, but the map offers a great opportunity to refine combat skills in close-quarters battles. It also supports team play, allowing coordinated strategies to secure bridge control. Bridge Control serves as an excellent training ground for improving tactical thinking and unit control in StarCraft’s melee format. Players are advised to study the terrain and resource distribution before matches, adapting their strategies to counter opponent tactics effectively.
죽음의 다리 II (The Bridge of Death II)
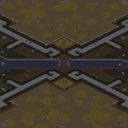
스타크래프트 브루드워의 대표적인 1:1 대결 유즈맵으로 유명한 《The Bridge of Death》 시리즈의 후속작인 《The Bridge of Death II》는 좁은 다리 하나를 두고 펼쳐지는 치열한 교전과 전략이 매력적인 맵입니다. 두 개의 도시가 단 하나의 다리로만 연결된 이 맵은 1:1뿐 아니라 2:2, 3:3 팀전, 그리고 FFA(자유-for-all)까지 다양한 게임 모드로 즐길 수 있도록 설계되었습니다. 맵의 핵심은 좁고 긴 다리 구조로, 플레이어는 이 좁은 통로를 지나 상대방의 본진으로 진격하거나 적의 공격을 방어해야 합니다. 좁은 길목에서 벌어지는 접전은 스타크래프트의 기본 전투력뿐 아니라 컨트롤과 판단력, 자원 관리 능력을 동시에 요구합니다. 특히 다리 중간중간에 위치한 좁은 공간은 입구막기 전술이 유용하게 활용될 수 있는 포인트로, 적절한 미네랄 관리와 병력 구성, 그리고 타이밍이 승패를 좌우합니다. 맵의 특성상 초반 자원 수급이 중요하며, 중립 건물을 활용한 추가 자원 확보 전략도 가능합니다. 또한, 맵 설정(Use map settings)을 통해 다양한 게임 옵션을 적용할 수 있어, 자신에게 맞는 규칙으로 플레이할 수 있습니다. 《The Bridge of Death II》는 좁은 공간에서 펼쳐지는 치열한 전투와 전략적 깊이가 조화를 이룬 맵으로, 스타크래프트의 몰입감을 극대화하고 싶다면 반드시 경험해볼 만한 유즈맵입니다. 특히 1:1 대전 경험이 풍부한 플레이어라면 이번 맵을 통해 새로운 전략과 전술을 습득할 수 있을 것입니다. 다만, 좁은 공간에서 벌어지는 전투는 피지컬과 컨트롤이 부족한 플레이어에게는 다소 어려울 수 있으니, 충분한 연습을 거친 후 도전하는 것이 좋습니다. 맵의 핵심은 좁은 다리에서의 싸움과 침착한 자원 관리라는 점을 기억하세요. 상대방이 다리를 건너는 타이밍을 노리거나, 다리 중간에서 미리 함정을 파두는 등 다양한 전술을 구사해 보세요. 이 맵은 단순히 공격과 방어의 반복이 아니라, 상대방을 심리적으로 압박하고 전략적 우위를 점하는 게임입니다. 《The Bridge of Death II》는 스타크래프트 유즈맵의 정수를 느낄 수 있는 작품으로, 밀리 초보부터 고수까지 모두에게 적합한 플레이 경험을 제공합니다. 좁은 공간에서 펼쳐지는 치열한 전투와 전략적 깊이를 즐기고 싶다면, 지금 바로 이 맵을 플레이해 보세요. *The Bridge of Death II*, the sequel to the famous *The Bridge of Death* series, a renowned 1v1 StarCraft: Brood War custom map, is a map where intense battles and strategic depth unfold across a narrow bridge. With two cities connected by a single bridge, this map supports not only 1v1 but also 2v2, 3v3 team matches, and even FFA (free-for-all) modes. The core of the map lies in its long, narrow bridge structure, where players must either advance to the opponent’s base or defend against incoming attacks. The tight corridors demand not just raw combat ability but also precise control, quick decision-making, and efficient resource management. Narrow choke points along the bridge offer prime opportunities for entrance-blocking tactics, where smart mineral management, troop composition, and timing can determine victory. Early resource gathering is crucial due to the map’s design, and players can also secure additional income by leveraging neutral buildings. The map settings allow for various gameplay options, letting players tailor the rules to their preferences. *The Bridge of Death II* perfectly balances intense close-quarters combat with deep strategy, making it a must-play custom map for maximizing StarCraft’s immersion. Even seasoned 1v1 players will find new strategies and tactics to master here. However, the cramped combat spaces may pose challenges for players with weaker mechanics or control, so practicing beforehand is highly recommended. At its heart, the map revolves around bridge battles and careful resource management. Try ambushing opponents as they cross, or setting up traps mid-bridge—this isn’t just a game of repeated offense and defense, but one where psychological pressure and strategic dominance come into play. Whether you're a beginner or a veteran, *The Bridge of Death II* delivers an experience that captures the essence of StarCraft custom maps. If you crave intense, strategic combat in tight spaces, dive into this map and play it now.
쿠와이 플랫폼 (Kwai Platforms)
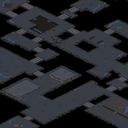
‘Kwai Platforms’는 6명의 플레이어가 한 팀으로 모여 전투를 펼치는 스타크래프트 브루드워 유즈맵이다. 우주 테마의 넓은 맵 중앙에는 수많은 다리 구조물이 복잡하게 얽혀 있으며, 이 다리들은 전투 중 주요 이동 경로이자 전투 공간으로 기능한다. 맵의 특징은 다리 사이의 좁은 통로와 높은 지대인데, 이는 전략적 위치 선점과 기동성을 요구한다. 플레이어는 각자의 시작 위치에서 자원을 확보하고, 다리 위를 오가며 적을 공격하거나 방어해야 한다. 좁은 길목에서 벌어지는 교전은 치밀한 컨트롤과 타이밍이 중요하며, 넓은 시야를 확보한 플레이어가 우위를 점할 수 있다. 맵의 디자인상으로는 중앙 다리 구조물이 전략적 요충지 역할을 할 것으로 보이며, 시작 지점에서 멀리 떨어진 곳까지 안전하게 이동하기 위해선 다리 위를 지나야 한다. 맵의 간단한 설명 ‘So many bridges...’가 말해주듯, 다리 구조가 맵의 핵심 요소로 작용해 전투의 흐름을 좌우할 것으로 예상된다. 초보자에게는 넓은 맵과 복잡한 지형이 진입 장벽으로 느껴질 수 있지만, 좁은 통로에서 벌어지는 전투는 초보자와 숙련자 모두에게 흥미로운 경험을 제공할 것이다. 이 맵은 팀워크와 공간 활용 능력을 동시에 요구하는 만큼, 동료와의 소통이 승패를 가를 수 있다. 플레이 전에 맵의 주요 길목과 각자의 시작 위치를 숙지하고, 다리 위에서의 전투에서 유리한 위치를 선점하는 전략을 준비하는 것이 중요하다. 또한, 좁은 공간에서 벌어지는 교전 시에는 유닛 컨트롤뿐 아니라 아군의 위치와 지형지물을 활용한 전술적 플레이가 필수적이다. ‘Kwai Platforms’는 단순히 전투를 벌이는 공간을 넘어, 지형과 공간을 전략적으로 활용하는 능력을 시험하는 맵으로 자리매김할 것이다. 이 맵을 즐기는 플레이어들은 좁은 길목에서의 치열한 전투와 넓은 시야를 확보하기 위한 움직임 사이에서 균형을 잡아야 한다. Kwai Platforms is a Brood War custom map designed for 6 players fighting as a single team. The map features a vast space with numerous bridge structures in the center, set against a space-themed backdrop. These bridges serve as critical pathways and combat zones, offering both strategic high ground and narrow choke points that demand precise unit control. Players must gather resources from their starting positions and navigate the bridges to engage enemies or establish defensive positions. The tight corridors and elevated platforms create intense, close-quarters battles where timing and positioning are key. Central bridge structures likely act as strategic strongholds, requiring players to traverse the map carefully to avoid ambushes or secure advantageous vantage points. The map's tagline, "So many bridges...", underscores the pivotal role these structures play in shaping the flow of combat. While the expansive terrain and intricate pathways may pose a challenge to beginners, the map’s design ensures engaging encounters in confined spaces for players of all skill levels. Success hinges on teamwork and spatial awareness, as communication and coordination become vital in navigating the bridges and securing key positions. Before diving in, players should familiarize themselves with the map’s pathways and starting points, focusing on controlling high ground and leveraging terrain during bridge-based skirmishes. Kwai Platforms transforms combat into a test of strategic spatial utilization, where players must balance narrow engagements with broader movements. Mastery of this map rewards not just combat prowess but also tactical adaptability in dynamic environments.
최근 등록된 맵
새로 추가된 파일과 버전을 확인하세요.
죽음의 다리 II (The Bridge of Death II)
스타크래프트 브루드워의 대표적인 1:1 대결 유즈맵으로 유명한 《The Bridge of Death》 시리즈의 후속작인 《The Bridge of Death II》는 좁은 다리 하나를 두고 펼쳐지는 치열한 교전과 전략이 매력적인 맵입니다. 두 개의 도시가 단 하나의 다리로만 연결된 이 맵은 1:1뿐 아니라 2:2, 3:3 팀전, 그리고 FFA(자유-for-all)까지 다양한 게임 모드로 즐길 수 있도록 설계되었습니다. 맵의 핵심은 좁고 긴 다리 구조로, 플레이어는 이 좁은 통로를 지나 상대방의 본진으로 진격하거나 적의 공격을 방어해야 합니다. 좁은 길목에서 벌어지는 접전은 스타크래프트의 기본 전투력뿐 아니라 컨트롤과 판단력, 자원 관리 능력을 동시에 요구합니다. 특히 다리 중간중간에 위치한 좁은 공간은 입구막기 전술이 유용하게 활용될 수 있는 포인트로, 적절한 미네랄 관리와 병력 구성, 그리고 타이밍이 승패를 좌우합니다. 맵의 특성상 초반 자원 수급이 중요하며, 중립 건물을 활용한 추가 자원 확보 전략도 가능합니다. 또한, 맵 설정(Use map settings)을 통해 다양한 게임 옵션을 적용할 수 있어, 자신에게 맞는 규칙으로 플레이할 수 있습니다. 《The Bridge of Death II》는 좁은 공간에서 펼쳐지는 치열한 전투와 전략적 깊이가 조화를 이룬 맵으로, 스타크래프트의 몰입감을 극대화하고 싶다면 반드시 경험해볼 만한 유즈맵입니다. 특히 1:1 대전 경험이 풍부한 플레이어라면 이번 맵을 통해 새로운 전략과 전술을 습득할 수 있을 것입니다. 다만, 좁은 공간에서 벌어지는 전투는 피지컬과 컨트롤이 부족한 플레이어에게는 다소 어려울 수 있으니, 충분한 연습을 거친 후 도전하는 것이 좋습니다. 맵의 핵심은 좁은 다리에서의 싸움과 침착한 자원 관리라는 점을 기억하세요. 상대방이 다리를 건너는 타이밍을 노리거나, 다리 중간에서 미리 함정을 파두는 등 다양한 전술을 구사해 보세요. 이 맵은 단순히 공격과 방어의 반복이 아니라, 상대방을 심리적으로 압박하고 전략적 우위를 점하는 게임입니다. 《The Bridge of Death II》는 스타크래프트 유즈맵의 정수를 느낄 수 있는 작품으로, 밀리 초보부터 고수까지 모두에게 적합한 플레이 경험을 제공합니다. 좁은 공간에서 펼쳐지는 치열한 전투와 전략적 깊이를 즐기고 싶다면, 지금 바로 이 맵을 플레이해 보세요. *The Bridge of Death II*, the sequel to the famous *The Bridge of Death* series, a renowned 1v1 StarCraft: Brood War custom map, is a map where intense battles and strategic depth unfold across a narrow bridge. With two cities connected by a single bridge, this map supports not only 1v1 but also 2v2, 3v3 team matches, and even FFA (free-for-all) modes. The core of the map lies in its long, narrow bridge structure, where players must either advance to the opponent’s base or defend against incoming attacks. The tight corridors demand not just raw combat ability but also precise control, quick decision-making, and efficient resource management. Narrow choke points along the bridge offer prime opportunities for entrance-blocking tactics, where smart mineral management, troop composition, and timing can determine victory. Early resource gathering is crucial due to the map’s design, and players can also secure additional income by leveraging neutral buildings. The map settings allow for various gameplay options, letting players tailor the rules to their preferences. *The Bridge of Death II* perfectly balances intense close-quarters combat with deep strategy, making it a must-play custom map for maximizing StarCraft’s immersion. Even seasoned 1v1 players will find new strategies and tactics to master here. However, the cramped combat spaces may pose challenges for players with weaker mechanics or control, so practicing beforehand is highly recommended. At its heart, the map revolves around bridge battles and careful resource management. Try ambushing opponents as they cross, or setting up traps mid-bridge—this isn’t just a game of repeated offense and defense, but one where psychological pressure and strategic dominance come into play. Whether you're a beginner or a veteran, *The Bridge of Death II* delivers an experience that captures the essence of StarCraft custom maps. If you crave intense, strategic combat in tight spaces, dive into this map and play it now.
쿠와이 플랫폼 (Kwai Platforms)
‘Kwai Platforms’는 6명의 플레이어가 한 팀으로 모여 전투를 펼치는 스타크래프트 브루드워 유즈맵이다. 우주 테마의 넓은 맵 중앙에는 수많은 다리 구조물이 복잡하게 얽혀 있으며, 이 다리들은 전투 중 주요 이동 경로이자 전투 공간으로 기능한다. 맵의 특징은 다리 사이의 좁은 통로와 높은 지대인데, 이는 전략적 위치 선점과 기동성을 요구한다. 플레이어는 각자의 시작 위치에서 자원을 확보하고, 다리 위를 오가며 적을 공격하거나 방어해야 한다. 좁은 길목에서 벌어지는 교전은 치밀한 컨트롤과 타이밍이 중요하며, 넓은 시야를 확보한 플레이어가 우위를 점할 수 있다. 맵의 디자인상으로는 중앙 다리 구조물이 전략적 요충지 역할을 할 것으로 보이며, 시작 지점에서 멀리 떨어진 곳까지 안전하게 이동하기 위해선 다리 위를 지나야 한다. 맵의 간단한 설명 ‘So many bridges...’가 말해주듯, 다리 구조가 맵의 핵심 요소로 작용해 전투의 흐름을 좌우할 것으로 예상된다. 초보자에게는 넓은 맵과 복잡한 지형이 진입 장벽으로 느껴질 수 있지만, 좁은 통로에서 벌어지는 전투는 초보자와 숙련자 모두에게 흥미로운 경험을 제공할 것이다. 이 맵은 팀워크와 공간 활용 능력을 동시에 요구하는 만큼, 동료와의 소통이 승패를 가를 수 있다. 플레이 전에 맵의 주요 길목과 각자의 시작 위치를 숙지하고, 다리 위에서의 전투에서 유리한 위치를 선점하는 전략을 준비하는 것이 중요하다. 또한, 좁은 공간에서 벌어지는 교전 시에는 유닛 컨트롤뿐 아니라 아군의 위치와 지형지물을 활용한 전술적 플레이가 필수적이다. ‘Kwai Platforms’는 단순히 전투를 벌이는 공간을 넘어, 지형과 공간을 전략적으로 활용하는 능력을 시험하는 맵으로 자리매김할 것이다. 이 맵을 즐기는 플레이어들은 좁은 길목에서의 치열한 전투와 넓은 시야를 확보하기 위한 움직임 사이에서 균형을 잡아야 한다. Kwai Platforms is a Brood War custom map designed for 6 players fighting as a single team. The map features a vast space with numerous bridge structures in the center, set against a space-themed backdrop. These bridges serve as critical pathways and combat zones, offering both strategic high ground and narrow choke points that demand precise unit control. Players must gather resources from their starting positions and navigate the bridges to engage enemies or establish defensive positions. The tight corridors and elevated platforms create intense, close-quarters battles where timing and positioning are key. Central bridge structures likely act as strategic strongholds, requiring players to traverse the map carefully to avoid ambushes or secure advantageous vantage points. The map's tagline, "So many bridges...", underscores the pivotal role these structures play in shaping the flow of combat. While the expansive terrain and intricate pathways may pose a challenge to beginners, the map’s design ensures engaging encounters in confined spaces for players of all skill levels. Success hinges on teamwork and spatial awareness, as communication and coordination become vital in navigating the bridges and securing key positions. Before diving in, players should familiarize themselves with the map’s pathways and starting points, focusing on controlling high ground and leveraging terrain during bridge-based skirmishes. Kwai Platforms transforms combat into a test of strategic spatial utilization, where players must balance narrow engagements with broader movements. Mastery of this map rewards not just combat prowess but also tactical adaptability in dynamic environments.
Droht - 킬러 협곡 (Droht - Killer Gorge)
《Droht - Killer Gorge》는 스타크래프트: 브루드워의 대표적인 유즈맵 시리즈인 ‘Droht’의 최신작으로, 거대한 협곡 지형을 배경으로 펼쳐지는 밀리 맵이다. 맵 이름은 독일어로 ‘죽음’이란 뜻을 지닌 ‘Tod’에서 유래한 ‘Droht’ 시리즈의 전통을 잇고 있으며, ‘Killer Gorge’는 ‘살해자의 협곡’이라는 다소 과격한 제목이지만 사실상 맵의 지형을 묘사한 것에 가깝다. 맵의 전체 크기는 6144x6144로 매우 넓고, 협곡을 따라 중앙에 좁은 다리가 놓여 있어 병력의 교전이 자연스럽게 발생하는 구조를 가지고 있다. 협곡 양쪽에는 넓은 평지가 펼쳐져 있으며, 다리 주변은 지형이 복잡하여 시야 확보와 병력 운용이 중요한 요소가 된다. 특히 다리 위와 협곡 양쪽 언덕은 전략적 요충지로, здесь에서 전투가 벌어지면 맵의 승패가 갈릴 수 있다. 협곡 양쪽 끝에는 미네랄과 가스 멀티가 배치되어 있어 자원 확보 경쟁도 치열해진다. 플레이어는 6인으로 구성되며, 각각의 플레이어는 시작 위치에서 협곡을 건너 상대방의 본진을 향해 진격하거나, 협곡을 방어하며 자원을 확보하는 두 가지 선택을 할 수 있다. 맵의 특징은 지형이 복잡하여 시야가 제한되는 부분이 많다는 점으로, 이는 미니맵을 적극 활용하고, 정찰 유닛을 통한 정보 수집이 필수적임을 의미한다. 또한, 협곡 중앙의 다리나 언덕 지형은 진형 싸움에서 큰 영향을 미치므로, 맵에 익숙해지려면 여러 번 플레이를 통해 길목을 장악하는 법을 익혀야 한다. 맵의 분위기는 사막 지형답게 황량하고 웅장한 느낌이 강하며, 협곡의 협소한 공간과 넓은 평지가 어우러져 전략적 깊이를 더한다. 이 맵은 밀리 경기에 최적화되어 있으며, 특히 ‘Droht’ 시리즈 특유의 긴장감과 전략적 깊이를 즐기고 싶은 플레이어들에게 추천할 만한 작품이다. 다만, 넓은 맵 크기 때문에 초보자의 경우 자원 관리와 멀티 확보, 그리고 지형 이해에 시간이 걸릴 수 있으니, 먼저 싱글 플레이 모드나 연습 모드를 통해 맵에 익숙해지는 것이 좋다. 또한, 협곡을 건너는 도중 적의 기습을 받을 위험이 있으니, 항상 주변을 살피며 플레이하는 것이 중요하다. 《Droht - Killer Gorge》 is the latest installment in the "Droht" series of user-created maps for *StarCraft: Brood War*, set against the backdrop of a massive canyon terrain in a melee map. Following the tradition of the "Droht" series, whose name derives from the German word *"Tod"* meaning "death," *Killer Gorge* lives up to the name with its dramatic title, though it primarily reflects the map's dramatic canyon geography. The map spans a vast 6144x6144 size, featuring a narrow bridge running through the center of the gorge, which naturally funnels forces into combat. Flanking the gorge are wide open plains, while the area around the bridge is cluttered with complex terrain, making vision control and troop positioning crucial. The bridge itself and the hills on either side of the gorge serve as strategic chokepoints where battles can decide the outcome of the match. At both ends of the gorge, mineral and gas expansions are positioned, intensifying resource competition. The map is designed for six players, each facing a choice between charging across the gorge toward the opponent's base or defending the gorge while securing resources. A defining feature of the map is its complex terrain, which restricts visibility in many areas, making frequent use of the minimap and scouting units essential. The central bridge and elevated terrain also play a major role in formation battles, so mastering control of these key points requires repeated play. The atmosphere of the map, with its desert terrain, conveys a sense of desolation and grandeur, blending narrow canyon passages with vast open plains to add strategic depth. Optimized for melee matches, this map is highly recommended for players who enjoy the *Droht* series' signature tension and strategic complexity. However, due to its large size, beginners may struggle with resource management, expansion securing, and terrain understanding, so it's advisable to familiarize oneself with the map through single-player or practice modes first. Additionally, crossing the gorge carries the risk of ambushes, so constant vigilance is key to success.
브릿지 컨트롤 (Bridge Control)
‘브릿지 컨트롤(Bridge Control)’은 스타크래프트: 브루드워의 밀리 맵으로, 좁은 다리 지형을 활용해 전투를 펼치는 독특한 전략이 특징이다. 맵 중앙에는 세로로 긴 다리가 놓여 있으며, 양측 진영에서 이 다리를 두고 치열한 공방전이 벌어질 수밖에 없다. 좁은 통로로 인해 유닛의 움직임이 제한되고, 스플래시 데미지를 입히는 유닛이나 원거리 공격이 эффектив한在这个时候, 플레이어는 다리 위에서 전투를 유리하게 이끌어갈 수 있는 전략을 구사해야 한다. 특히 테란의 시즈 탱크나 프로토스의 하이 템플러는 이 지형에서 강력한 위력을 발휘할 수 있으며, 저그의 뮤탈리스크와 같은 공중 유닛은 다리 위에서 상대를 교란시킬 수 있다. 맵의 핵심은 바로 ‘통제’에 있다. 다리 입구와 출구를 확보하고, 적의 진입로를 차단하거나 우회로를 통해 기습하는 등 다양한 전술이 요구된다. 또한, 맵의 균형 잡힌 구조 덕분에 양측의 초반 빌드도 중요해진다. 빠르게 병력을 생산해 다리 입구를 선점하는 플레이어가 유리한 고지를 점할 수 있으며, 상대방의 전략에 따라 카운터 빌드를 준비해야 한다. 초보 플레이어는 좁은 통로에서 벌어지는 전투에 익숙해지기 어려울 수 있지만, 다리 위에서 벌어지는 일대일 전투는 밀리 맵의 묘미를 느낄 수 있게 해준다. 또한, 팀플레이가 가능한 맵이므로, 팀원과의 호흡을 맞추어 다리_CONTROL을 확보하는 전략을 세워보는 것도 좋다. 이 맵은 좁은 지형에서의 전투 감각을 키우고, 전략적 사고력을 향상시키는 데 도움이 되는 훌륭한 연습용 맵으로 추천된다. 특히, 다리 위에서 벌어지는 전투는 스타크래프트의 기본기를 단단히 다질 수 있는 기회이기도 하다. 초보자와 숙련자 모두 즐길 수 있는 밸런스 좋은 맵이므로, 한 번쯤 플레이해 보는 것을 권장한다. 플레이 전에는 다리 주변의 지형과 자원 분포를 꼼꼼히 확인하고, 상대방의 전략에 따라 유연하게 대처할 준비를 갖추는 것이 중요하다. Bridge Control is a StarCraft: Brood War melee map that stands out for its strategic focus on narrow bridge combat. The map features a long central bridge connecting two bases, forcing players into direct confrontations in a confined space. This terrain restriction makes splash damage units like Siege Tanks or High Templars highly effective, while air units such as Mutalisks can disrupt opponents by hovering over the bridge. The core gameplay revolves around controlling key choke points on the bridge, whether by securing entry points, blocking enemy advances, or exploiting flanking routes. The balanced structure also emphasizes early-game builds, as quickly mobilizing forces to dominate the bridge can decide the match. For beginners, the tight spaces may pose a challenge, but the map offers a great opportunity to refine combat skills in close-quarters battles. It also supports team play, allowing coordinated strategies to secure bridge control. Bridge Control serves as an excellent training ground for improving tactical thinking and unit control in StarCraft’s melee format. Players are advised to study the terrain and resource distribution before matches, adapting their strategies to counter opponent tactics effectively.
맵 선택 가이드
태그는 맵의 핵심 특징을 빠르게 설명하지만 제작 버전마다 규칙이 다를 수 있습니다. 상세 설명에서 권장 인원, 난이도, 플레이 시간과 버전을 함께 확인한 뒤 다운로드하세요.