
난이도 하드 스타크래프트 맵 모음
'난이도 하드' 태그가 등록된 맵을 모았습니다. 장르 하나로 찾기 어려운 플레이 방식, 난이도와 특징을 중심으로 인기 맵과 최신 맵을 비교해 보세요.
- 등록 맵
- 10개
- 누적 다운로드
- 1
- 누적 조회
- 494
인기 맵
다운로드와 조회 반응이 높은 맵입니다.
![7:1 컴까기 기독교 버전5[hard] 맵 미리보기](https://cdn-star-data.huzy.net/thumbnail_11b9e08b221e4bea99a48aec3b9506d7.jpg)
7:1 컴까기 기독교 버전5[hard]
7:1 컴까기 기독교 버전5는 스타크래프트: 브루드워의 유즈맵으로, 7명의 플레이어가 하나의 팀으로 뭉쳐서 끊임없이 몰려오는 적군Wave를 상대로 건물을 지어 방어하는 디펜스 장르의 맵이다. 맵 제목에서 알 수 있듯 7:1의 불균형한 구도에서 시작하며, 특히 [hard]라는 난이도 표기는 일반적인 방어전과는 차별화된 높은 난이도를 암시한다. 내부 설명에 따르면 기존 버전의 건물 건설 오류를 수정하고, 난이도를 3에서 5까지 단계적으로 높인 버전으로, 특히 5버전에서는 적팀의 시야가 확장되어 플레이어의 위치를 더 쉽게 파악할 수 있도록 조정되었다고 한다. 맵의 구조는 중앙에 플레이어의 건물을 건설할 수 있는 공간이 배치되어 있으며, 그 주위를 둘러싼 외곽 지역에는 적군의 Spawn Point가 여러 곳에 분포해 있다. 건물을 지어 방어선을 구축하는 classic 디펜스 요소 외에도, 기독교적 요소나 스토리성이 내재되어 있는지는 명확하지 않지만, 제목과 버전명에서 유추할 수 있는 '기독교'라는 키워드는 맵의 테마나 배경 설정에 영향을 미쳤을 가능성이 있다. 플레이어는 제한된 자원과 시간 속에서 건물을 건설하고 업그레이드하며, 끊임없이 밀려오는 적군을 상대해야 한다. 맵의 레이아웃은 중앙의 건물을 중심으로 방어선을 형성할 수 있도록 설계되어 있으며, 외곽의 Spawn Point를 통제하는 것이 핵심 전략이 된다. 난이도가 [hard]로 표기된 만큼, 초보자가 쉽게 클리어하기 어려운 구조로 보이며, 숙련된 플레이어에게는 전략적 깊이와 긴장감을 제공할 것으로 예상된다. 특히 7:1이라는 불리한 구도에서 승리를 거두기 위해서는 빠른 건물 건설과 효율적인 자원 관리, 그리고 적군의 패턴을 읽는 능력이 요구된다. 추천 대상은 디펜스 장르에 익숙한 플레이어이며, 특히 7:1의 극한 상황에서의 전략 수립과 대처 능력을 테스트하고 싶은 유저에게 적합하다. 플레이 전에는 건물 건설 위치와 Spawn Point의 분포를 미리 파악하고, 각 버전의 난이도 차이를 고려해 자신에게 맞는 난이도를 선택하는 것이 중요하다. 또한, 맵의 설명에 언급된 제작자의 연락처를 참고한다면, 버그 리포트나 추가적인 정보를 얻을 수 있을 것으로 보인다. 7:1 Compkagi Christian Version 5 is a StarCraft: Brood War user-made map where a team of 7 players defends against endless waves of enemy units in a defense genre map. The title '7:1' indicates an unbalanced starting situation, and the [hard] difficulty suggests a significantly higher challenge compared to typical defense maps. According to the internal description, this version fixes construction bugs from previous versions, adjusts the difficulty to a higher level (from 3 to 5), and enhances enemy visibility to make player locations easier to track. The map layout features a central area for building player structures, surrounded by outer regions where multiple enemy spawn points are located. Beyond the classic defense mechanics of constructing and upgrading buildings, the map may incorporate Christian themes or narrative elements, though this is not explicitly confirmed. Players must strategically build defenses with limited resources and time, countering relentless enemy waves. The design allows for central building placement to form defensive lines, with control over outer spawn points being crucial. The [hard] difficulty implies a steep learning curve, making it less suitable for beginners, while offering strategic depth and tension for experienced players. The extreme 7:1 scenario demands quick construction, efficient resource management, and the ability to predict enemy patterns. This map is recommended for players familiar with defense genre maps, particularly those seeking to test their strategic prowess in high-difficulty, unbalanced situations. Before playing, it is advisable to study the building placement spots and spawn point distribution, and to choose a difficulty level that matches the player's skill. The creator's contact information mentioned in the map description may also be useful for reporting bugs or seeking additional insights.
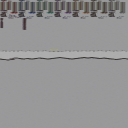
하이드라리스크 어택 20,001 HARD! (Hydralisk Attack 20,001 HARD!)
스타크래프트 브루드워 유즈맵 〈하이드라리스크 어택 20,001 HARD!〉는 방어와 생존에 중점을 둔 난이도 높은 디펜스 장르의 맵으로, 플레이어는 끊임없이 몰려오는 저글링과 히드라리스크 무리를 상대로 본진을 지켜내야 한다. 맵은 2048x8192의 가로로 긴 구조로, 왼쪽 끝의 본진을 중심으로 오른쪽에서 끊임없이 적 유닛이 생성되어 공격해 온다. 적의 공격 패턴은 일정하지만 수가 많아지고, 후반부로 갈수록 히드라리스크 비중이 높아져 방어 난이도가 급격히 상승한다. 본진 앞에는 방어 건물과 미네랄 멀티가 배치되어 있어 자원 수급과 방어 전략의 균형을 맞추어야 하며, 맵의 가로 길이가 길어 시야 확보와 유닛 배치에 신경을 써야 한다. 특히 'HARD!'라는 제목처럼 난이도가 매우 높게 설정되어 있어 초보자는 물론 중수players도 전략과 컨트롤을 요구받는다. 적의 공격 타이밍과 유닛 조합을 예측하는 능력이 핵심이며, 방어 건물과 유닛을 효율적으로 배치해 자원을 절약하면서도 공격을 방어해야 한다. 추천 대상은 디펜스 맵을 즐기며 도전 정신을 불태우고 싶은 플레이어들로, 손재주와 전략적 사고를 동시에 요구하는 맵이다. 플레이 전에는 맵의 가로 길이를 고려해 본진 주변 방어선의 구축과 멀티 테라인의 확보를 우선적으로 계획해야 한다. 또한, 후반부의 히드라리스크 웨이브를 대비해 히드라리스크에 강한 유닛이나 방어 건물을 준비하는 것이 중요하다. 맵 특성상 긴 플레이 시간이 예상되므로 충분한 시간과 집중력을 필요로 한다. Hydralisk Attack 20,001 HARD! is a high-difficulty defense-focused custom map in StarCraft: Brood War where players must protect their base against relentless waves of Zerg units, primarily Zerglings and Hydralisk. The map features a long horizontal layout measuring 2048x8192, with the player's starting base located at the far left and enemy spawn points positioned far to the right. Waves of enemies continuously march toward the player's base, increasing in number and difficulty as the game progresses, with Hydralisks becoming more prevalent in later stages. The base includes defensive structures and mineral patches to manage resources effectively. The extended length of the map demands careful attention to unit positioning and vision control. Given the 'HARD!' designation, the difficulty is exceptionally high, requiring advanced strategies and precise execution even from experienced players. Timing and predicting enemy attack patterns are crucial, as is balancing resource management with effective defense. The recommended player base includes those who enjoy defense maps and seek a challenging experience that tests both dexterity and strategic thinking. Before playing, it is advisable to plan the initial defensive setup and secure multi-line expansions early. Preparing countermeasures specifically for Hydralisk waves is also essential due to the map's escalating difficulty. The extended gameplay duration necessitates sustained focus and time investment.
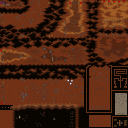
Impossible Crazy
《Impossible Crazy》는 스타크래프트: 브루드워의 유즈맵으로, 이름 그대로 도저히 불가능해 보이는 극한의 디펜스 경험을 제공하는 맵입니다. 맵 제목에서도 느껴지듯, ‘Impossible’이란 단어는 단순히 과장된 표현이 아니라, 실제로 플레이어에게 끊임없는 압박과 도전을 안겨주는 구조에 걸맞습니다. 맵은 4096x4096의 거대한 황혼 타일셋으로 제작되어 있으며, 화면 가득 펼쳐지는 적의 물량과 끊임없는 공격을 버텨내야 하는 디펜스 장르의 정수를 맛볼 수 있습니다. 내부 설명에 ‘Hard Map Do Your Best.. Enjoy =)’라고 적힌 것에서 알 수 있듯이, 제작자는 플레이어에게 도전 정신을 불어넣고자 한 의도가 뚜렷합니다. 이 맵은 5명의 플레이어가 한 팀을 이루어 방어전을 펼치는 구조로 보입니다. 맵 중앙에는 플레이어의 기지가 위치하고 있으며, 주변으로 무수히 많은 적의 기지가 배치되어 있습니다. 적들은 끊임없이 생산되어 공격해 오며, 플레이어는 이들을 상대로 방어선을 구축하고 자원을 관리해야 합니다. 맵의 특징은 압도적인 적의 물량과 빠른 웨이브 텀으로, 일반적인 디펜스 맵보다 훨씬 더 높은 집중력과 전략이 요구됩니다. 또한, 맵의 크기가 크기 때문에 시야 확보와 자원 채취 위치의 선택이 매우 중요합니다. 제어 센터나 방어 건물의 배치, 그리고 업그레이드 전략도 승리를 좌우하는 핵심 요소입니다. 이 맵은 디펜스 장르의 유즈맵 중에서도 난이도가 상당히 높은 편으로, 초보 플레이어보다는 중급 이상의 실력을 가진 플레이어에게 추천됩니다. 특히, 팀워크가 중요한 맵이므로 팀원과의 소통과 협력이 필수적입니다. 또한, 끊임없이 몰려오는 적들을 상대해야 하므로,fficient한 자원 관리와 방어 건물의 배치, 그리고 빠른 판단력이 요구됩니다. 맵의 제목에서 느껴지는 ‘불가능’이라는 단어는 단순히 장식용이 아니라, 실제로 플레이어에게 극한의 도전을 제시하는 맵임을 명심해야 합니다. 만약 디펜스 장르의 맵 중에서도 가장 어려운 축에 속하는 경험을 원한다면, 《Impossible Crazy》는 최적의 선택이 될 것입니다. 플레이 전 반드시 확인해야 할 포인트는 다음과 같습니다. 첫째, 방어 건물의 배치와 업그레이드 우선순위를 신중히 결정해야 합니다. 둘째, 자원 채취 위치를 효율적으로 선택하여 자원을 지속적으로 확보해야 합니다. 셋째, 팀원과의 원활한 소통을 통해 방어 전략을 공유하고, 각자의 역할을 чет히 분담해야 합니다. 넷째, 끊임없이 몰려오는 적의 공격을 예상하고, 미리 대비책을 마련해 두어야 합니다. 마지막으로, 맵의 크기가 크기 때문에 시야 확보를 위해 정찰을 게을리하지 않아야 합니다. 이러한 포인트들을 염두에 두고 플레이한다면, 《Impossible Crazy》는 스타크래프트 유즈맵의 진정한 정수를 경험할 수 있는 소중한 기회가 될 것입니다. 《Impossible Crazy》 is a custom map for *StarCraft: Brood War* that delivers an extreme defense experience that seems impossible at first glance. As the name suggests, the word "Impossible" isn’t just an exaggeration—it accurately reflects the relentless pressure and challenges the map imposes on players. Designed with a massive 4096x4096 Twilight tileset, the map immerses players in a full-screen spectacle of overwhelming enemy waves and nonstop assaults, capturing the essence of the defense genre. The internal description, which reads "Hard Map Do Your Best.. Enjoy =)," clearly reveals the creator’s intent to inspire players to push their limits. The map appears to be structured for a team of five players working together in a defensive battle. The players' base is located at the center of the map, surrounded by countless enemy bases that continuously spawn and launch attacks. Players must build defenses, manage resources, and hold the line against the endless onslaught. What sets this map apart is the sheer scale of enemy forces and the rapid wave intervals, demanding far greater focus and strategy than typical defense maps. The large map size also makes vision control and strategic resource gathering crucial. Decisions on building placement, defensive structures, and upgrade priorities can determine victory or defeat. Among custom defense maps, 《Impossible Crazy》 ranks among the most difficult, making it suitable for intermediate to advanced players rather than beginners. Teamwork is essential, so communication and coordination with teammates are vital. The constant enemy waves require efficient resource management, smart defensive positioning, and quick decision-making. The word "Impossible" in the title isn’t just for show—it reflects the map’s true challenge. If you’re looking for one of the hardest defense experiences in custom maps, 《Impossible Crazy》 is the perfect choice. Before playing, keep these key points in mind. First, carefully plan your defensive structure placements and upgrade priorities. Second, choose resource gathering locations wisely to maintain a steady income. Third, communicate effectively with your team to share strategies and clearly assign roles. Fourth, anticipate incoming enemy waves and prepare countermeasures in advance. Finally, don’t neglect scouting due to the map’s size—vision control is critical. By keeping these tips in mind, 《Impossible Crazy》 offers a rewarding opportunity to experience the true essence of *StarCraft* custom maps.
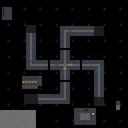
나치 디펜스3: 노 뉴비 픽스 (Nazi Defense3 - No n00b fixes)
스타크래프트 브루드워의 유즈맵 <Nazi Defense3 - No n00b fixes>는 디펜스 장르의 유저 제작 맵으로, 제목과 설명에서 느껴지듯 상대적으로 과격한 소재와 높은 난이도를 자랑하는 작품이다. 맵 내부 구조는 중앙에 위치한 주요 진영을 중심으로 적의Wave가 끊임없이 몰려오는 형태로 구성되어 있으며, 방어건물을 배치하고 유닛을 조합하여 침략을 막아내는 것이 주된 목표로 보인다. 이미지에서 확인되는 방어선과 자원 지역은 플레이어가 전략을 세우며 건물을 짓고 유닛을 생산할 공간을 제공하며, 맵의 끝부분에는 적의 기지가 위치하고 있는 것으로 추정된다. 이 맵의 특징은 단연 '난이도'다. 내부 설명에서 'Hard Version'이라는 표현이 등장하는 점, 맵 제목에 'No n00b fixes'라는 문구가 포함된 점, 그리고 'Kill all the jews!!!'라는 다소 자극적인 문구로 미루어볼 때, 초보자나 가볍게 플레이하려는 유저에게는 권장되지 않는 맵으로 판단된다. 방어선을 구축하는 동시에 끊임없이 쏟아지는 적의 공격을 버텨내야 하므로, 플레이어는 빠른 판단력과 전략 수립 능력을 요구받는다. 또한, 맵에서 확인되는 폭발 이펙트와 다수의 유닛 배치 구역은 전투가 치열할 것이라는 점을 암시하며, 이는 디펜스 맵의 긴장감을 배가시키는 요소로 작용할 것이다. 추천 대상은 고난이도 디펜스 맵에 익숙한 플레이어나, 전략적 플레이를 즐기는 유저들이다. 맵의 구조상으로는 1인 플레이가 주가 될 것으로 보이며, 방어선 구축과 자원 관리, 유닛 컨트롤에 대한 기본적인 이해가 필수적이다. 플레이 전에 맵의 초기 배치와 주요 진영의 위치를 미리 확인하여, 어떤 전략을 사용할 것인지 미리 계획해두는 것이 좋다. 또한, 맵의 난이도가 높으므로, 초반에는 방어 우선 순위를 신중히 설정하고, 자원 수급과 유닛 생산의 밸런스를 맞추는 데 주력해야 한다. 이 맵을 플레이하기 전에는 맵 에디터나 유즈맵 제작자의 노트, 또는 커뮤니티 후기를 참고하여 맵의 진행 방식과 숨겨진 요소(예: 숨겨진 자원, 특수 유닛, 이벤트 발생 조건 등)를 미리 숙지하는 것이 좋다. 디펜스 맵의 특성상, 미처 예상치 못한 적의 공격 패턴이나 맵의 숨겨진 트리거가 플레이를 좌우할 수 있기 때문이다. 또한, 맵의 과격한 소재로 인해 불쾌감을 느낄 수 있는 유저는 플레이를 자제하는 것이 바람직하다. StarCraft: Brood War's user-made map *Nazi Defense3 - No n00b fixes* is a custom defense-style map that, as its title and description suggest, features relatively extreme subject matter and a high difficulty level. The map’s layout centers around a main base, with waves of enemies continuously assaulting it, and the core objective appears to be constructing defenses and coordinating units to fend off the relentless invasions. The visible defensive lines and resource areas provide space for players to erect buildings and produce units, while the far end of the map likely houses the enemy’s base. The map’s defining trait is its difficulty. Clues in the description—such as the term "Hard Version" in the internal briefing, the inclusion of "No n00b fixes" in the title, and the provocative phrase "Kill all the jews!!!"—indicate that this is not a map suited for beginners or casual players. Success demands quick decision-making and strategic planning, as players must not only fortify their defenses but also endure waves of relentless enemy attacks. The frequent explosion effects and densely packed unit deployment zones further imply intense combat, amplifying the map’s defensive tension. This map is best suited for experienced defense-map players or those who enjoy strategic gameplay. The structure suggests that single-player mode is the primary focus, requiring a solid grasp of base-building, resource management, and unit control. Before playing, it’s advisable to study the initial layout and key base locations to plan an effective strategy. Given the map’s high difficulty, early gameplay should prioritize defense carefully, balancing resource gathering with unit production to maintain stability. Before attempting this map, reviewing the map editor notes, the creator’s comments, or community feedback is highly recommended to understand its mechanics and uncover hidden elements—such as concealed resources, special units, or event triggers. In defense maps, unexpected enemy attack patterns or hidden triggers can drastically alter the outcome. Additionally, players who may find the map’s content offensive should refrain from playing it.
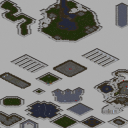
Impossible Hard Times
‘Impossible Hard Times’는 스타크래프트: 브루드워에서 즐기는 유즈맵으로, 플레이어가 끊임없는 공격을 버텨내며 살아남는 디펜스 장르의 تحدI(도전)형 맵이다. 맵은 8192x8192의 거대한 평면 공간으로 구성되어 있으며, 중앙에 위치한 본진을 중심으로 적의 다채로운 유닛들이 끊임없이 쏟아져 나온다. 맵의 이름은 ‘가능한 어려운 시간’이라는 뜻으로, 이름 그대로 극한의 난이도를 자랑하는 디펜스임이 한눈에 느껴진다. 본진 주변에는 방어 건물 설치 공간이 마련되어 있으며, 일부 지역은 지형적 요철이 있어 전략적인 배치와 유닛 운용이 요구된다. 맵 상단과 좌우측에는 추가적인 방어선으로 활용할 수 있는 고지대가 배치되어 있어, 후방에서 reinforcements(증원군)을 관리하거나 다수의 적을 상대할 때 유리한 위치를 차지할 수 있다. 플레이어는 초반부터 중반까지는 비교적 소규모의 적을 상대하지만, 시간이 흐를수록 적의 규모와 종류가 점점 다양해지고 강해지며, 심지어는 공중 유닛이나 특수 유닛도 등장하는 등 종합적인 대비를 요구한다. 맵의 난이도는 플레이어의 자원 관리, 유닛 생산 타이밍, 방어선 구축 능력에 따라 크게 좌우되며, 특히 후반부로 갈수록 적의 조합과 패턴을 예측하고 대응하는 것이 중요하다. 이 맵은 초보자보다는 중급 이상의 실력을 갖춘 플레이어에게 적합하며, 특히 디펜스 장르를 즐기는 유저들에게 도전 의식을 불어넣어 줄 것이다. 또한, 맵 자체가 제공하는 난이도와 긴 플레이타임으로 인해 한 판 한 판이 긴장감 넘치는 경험을 선사한다. 방어선 구축 시 유닛의 배치와 자원 밸런스를 carefully(신중히) 고려해야 하며, 적의 공격을 예측하는 안목도 필요하다는 점을 유념하자. 만약 여러분이 디펜스 맵의 진수를 느끼고 싶다면, 정답은 ‘Impossible Hard Times’를 선택하는 것이다. Impossible Hard Times is a custom map for StarCraft: Brood War, offering players a challenging defense experience where they must withstand relentless enemy waves. The map spans a massive 8192x8192 grid, centered around a player’s main base that comes under constant siege. The title, translating to ‘Impossible Hard Times,’ hints at its punishing difficulty, which becomes evident as waves progressively escalate in scale and complexity. The main base area is surrounded by designated spots for defensive structures, while elevated terrain provides strategic vantage points for reinforcements or multi-front engagements. As time progresses, enemies diversify in composition, introducing air units, special types, and more formidable ground forces, demanding adaptable tactics. Resource management, production timing, and defensive positioning are critical, especially in later stages where predicting enemy patterns becomes essential. This map is tailored for intermediate to advanced players seeking a deep dive into the defense genre, offering intense, drawn-out matches that test both mechanical skill and strategic foresight. Success hinges on meticulous unit placement and resource allocation, with a clear focus on anticipating and countering evolving threats. For those craving a true test of their defense mastery, Impossible Hard Times delivers an unforgettable challenge.
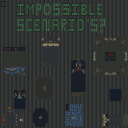
불가능한 시나리오 New (Impossible Scenarios New)
스타크래프트 브루드워의 유즈맵 장인들에게 익숙한 ‘Impossible Scenarios New’는 6명의 플레이어가 참여하는 컴까기 스타일의 디펜스 맵으로, 이름 그대로 ‘불가능한 시나리오’라는 컨셉을 전면에 내세운 전략성이 돋보이는 작품이다. 맵의 배경은 설원과 얼음으로 뒤덮인 차가운 분위기로, 군단의 심장 시절부터 사랑받아 온 타일셋을 사용하여 시각적 몰입감을 높였다. 맵 왼쪽과 오른쪽의 시작 지점에서 펼쳐지는 전투는 각 플레이어가 고유한 방어 라인을 구축하고, 끊임없이 몰려오는 적군을 상대해야 한다는 점에서 전략적 깊이가 요구된다. 특히, 중앙의 넓은 평지와 협소한 통로들이 복합적으로 얽힌 지형은 각 플레이어의 판단력과 자원 관리를 시험하는 핵심 요소로 작용한다. 전투는 주로 저글링, 히드라리스크, 울트라리스크 등 저그 유닛 위주로 진행되며, 때로는 다수의 테란 유닛과 프로토스 유닛도 등장해 변칙적인 전술을 요구한다. 맵의 이름에서 짐작할 수 있듯, 난이도는 결코 만만치 않은데, 초반의 소규모 전투에서도 치밀한 컨트롤과 자원 배분이 필수적이며, 후반으로 갈수록 쏟아지는 적군의 폭주 같은 공격은 플레이어의 멘탈까지 시험한다. 이 맵은 단순히 적을 죽이는 것이 아니라, 끊임없이 변하는 전장 속에서 살아남기 위한 전략적 사고와 팀워크가 절실히 요구되는 만큼, 혼자서는 해결하기 어려운 시나리오가 다수 배치되어 있다. 초보 플레이어보다는 적어도 ‘보통’ 이상의 실력을 갖춘 유저들에게 추천되며, 특히 팀플레이를 중시하는 플레이어들에게는 최고의 선택지 중 하나가 될 수 있다. 맵을 플레이하기 전에는 개별 유닛의 특성과 스킬 사용법을 숙지하는 것이 중요하며, 시작 시 주어지는 초기 자원과 건물을 최대한 효율적으로 활용하는 것이 관건이다. 또한, 중반 이후에는 중앙 지역을 두고 벌어지는 전투가 승패를 좌우할 가능성이 높으므로, 이 지역의 통제권을 놓고 벌어지는 공방전에 집중할 필요가 있다. This UMS-style defense map, Impossible Scenarios New, is a staple among StarCraft Brood War custom map enthusiasts, offering a challenging 6-player team comp-style experience framed around ‘impossible scenarios.’ Set against a frozen, snowy backdrop using the classic Winter tile set, the map immerses players in a strategic battle of attrition. Players begin on the left and right flanks, tasked with constructing and defending their bases while fending off relentless waves of enemy units. The terrain features a mix of open fields and narrow choke points, forcing players to make critical decisions about positioning, resource allocation, and unit composition. Combat primarily revolves around Zerg units like Zerglings, Hydralisks, and Ultralisks, though Terran and Protoss forces occasionally appear, adding unpredictability to the strategy. As the name suggests, the difficulty is unforgiving; early skirmishes demand precise micro-management and economic foresight, while later stages feature overwhelming enemy waves that test both skill and composure. The scenarios are designed to overwhelm lone players, emphasizing teamwork and adaptability. This map is best suited for players with at least intermediate skill levels, particularly those who thrive in team-based challenges. Before diving in, familiarize yourself with unit synergies and special abilities, and prioritize efficient use of starting resources and structures. Mid-to-late game control of the central battlefield often decides victory, so securing this area early is key to success.
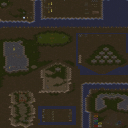
임파서블 나루토 (Impossible Naruto)
스타크래프트 브루드워의 유즈맵 중 하나인 〈Impossible Naruto〉는 이름에서 느껴지듯 어려운 도전 과제를 중심으로 구성된 맵이다. 맵은 넓은 사막 지형을 배경으로 펼쳐지며, 플레이어는 각자 독립된 미션을 수행하거나 공동 목표를 향해 협력해야 한다. 이미지에서는 중앙에 거대한 구조물이 보이며, 주변으로는 산책로나 방어 시설로 추정되는 구간들이 배치되어 있다. 맵의 전체적인 분위기는 긴장감을 조성하며, 플레이어는 끊임없이 변하는 조건 속에서 전략을 세워야 한다. 맵의 제목과 설명에서 'Impossible'이라는 단어가 강조되는 만큼, 난이도가 상당히 높을 것으로 예상되며, 이는 게임의 몰입감을 크게 높이는 요소로 작용한다. 또한, 플레이 인원이 6명으로 설정되어 있어 팀 플레이가 강제되는 구조로 보이며, 각 플레이어의 역할 분담이 필수적일 가능성이 크다. 맵의 구조상으로는 디펜스와 서바이벌 요소가 혼합되어 있을 것으로 추정되며, 특히 방어와 생존을 동시에 요구하는 구조가 예상된다. 이 맵은 주로 숙련된 플레이어나 도전 정신을 가진 유저들에게 추천되며, 초보자는 난이도 조절이나 튜토리얼 맵을 먼저 경험한 뒤 도전하는 것이 바람직할 것이다. 맵을 플레이하기 전에는 맵의 규칙과 승리 조건을 반드시 확인해야 하며, 특히 팀 간의 협력이 원활하지 않을 경우 난이도가 배가될 수 있음을 유념해야 한다. 또한, 맵의 특성상 빠른 적응력이 요구되므로, 맵의 구조와 주요 지점을 미리 숙지하는 것이 중요하다. 〈Impossible Naruto〉는 단순히 재미를 넘어서, 플레이어의 전략적 사고와 팀워크를Test할 수 있는 도전적인 콘텐츠로 자리매김할 가능성이 크다. Impossible Naruto, a custom map from StarCraft: Brood War, is designed around a series of difficult challenges, as suggested by its name. The map unfolds across a vast desert landscape, where players either tackle individual objectives or work together toward shared goals. In the image, a massive central structure dominates the scene, surrounded by what appear to be pathways and defensive installations. The overall atmosphere is tense, forcing players to constantly adapt their strategies to shifting conditions. Given the emphasis on "Impossible" in the title and description, the difficulty is expected to be high, significantly enhancing the game's immersive appeal. With a player count set at six, the map likely enforces teamwork, making the division of roles essential. The structure seems to blend defense and survival elements, particularly requiring players to balance both simultaneously. This map is best suited for experienced players or those seeking a challenge, while beginners should first adjust the difficulty or try tutorial maps before attempting it. Before playing, it's crucial to review the map's rules and victory conditions, as poor team coordination can drastically increase the challenge. Quick adaptability is key, so familiarizing yourself with the layout and key areas beforehand is highly recommended. Impossible Naruto isn’t just about fun—it’s a demanding experience that tests strategic thinking and teamwork, positioning itself as a challenging and rewarding piece of content.
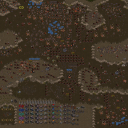
스페셜 포스 하이퍼 하드 (Special Force Hyper Hard)
이 맵은 스타크래프트 브루드워의 유즈맵으로, ‘스페셜 포스 하이퍼 하드(HYPER HARD)’라는 제목 그대로 극한의 난이도를 자랑하는 컴까기(컴퓨터 상대 유즈맵) 장르에 속한다. 맵의 중앙에는 넓은 사막 지형이 펼쳐져 있으며, 플레이어는 좌측 하단에 위치한 기지에서 시작해 우측 상단으로 이동하는 목표를 달성해야 한다. 맵 곳곳에는 다수의 적 기지(저글링, 마린, 파이어뱃, 시즈 탱크, 골리앗 등)가 배치되어 있으며, 이들을 모두 파괴해야만 다음 페이즈로 진행할 수 있도록 구성되어 있다. 특히 적의 방어선은 플레이어의 실력과 전략에 따라 전혀 다른 패턴으로 전개되기 때문에, 초보자는 물론 숙련자까지도 긴장감을 놓칠 수 없는 구조로 설계되었다. 플레이 방식은 크게 세 가지로 나뉘는데, 첫 번째는 적의 공격을 방어하면서 전진하는 ‘방어형’, 두 번째는 적의 기지를 빠르게 파괴해 길을 뚫는 ‘공격형’, 세 번째는 후방에서 지원 병력을 보충하는 ‘지원형’이다. 맵의 난이도를 ‘하이퍼 하드’라고 명명한 만큼, 적의 수는 일반 컴까기보다 훨씬 많고 유닛의 조합도 복잡해진다. 특히 후반부로 갈수록 적의 공격력이 급격히 증가하므로, 자원 관리와 유닛의 업그레이드를 얼마나 잘하느냐가 관건이다. 또한 맵의 중앙에 위치한 ‘보급로’ 지역은 적의 공격을 받기 쉬우므로, 이 곳을 안전하게 통과하는 것이 클리어의 열쇠가 된다. 이 맵은 6인 플레이를 지원하며, 주로 단독 플레이(1vs컴퓨터 6팀) 형태로 진행된다. 플레이 시간은 개인의 실력에 따라 30분에서 1시간 이상까지 소요될 수 있으며, 난이도가 극히 높기 때문에 초보자에게는 추천하지 않는다. 숙련자라면 자신의 전략을 최대한 활용해 적의 공격을 버티며 전진하는 재미를 느낄 수 있을 것이다. 또한, 맵의 디자인이 사막 테마로 통일되어 있어 시각적으로도 몰입감을 높이는 장점이 있다. 다만, 적의 배치 패턴이 랜덤에 가깝기 때문에, 매 플레이마다 새로운 전략을 짜야 한다는 점에서 반복 플레이의 재미를 더한다. 이 맵을 플레이하기 전에는 반드시 유닛의 조합과 업그레이드, 그리고 적의 공격 패턴을 숙지해야 한다. 특히, 후반부에 등장하는 시즈 탱크와 골리앗의 조합은 방어하기 어려운 만큼, 미리 대비책을 마련해두는 것이 중요하다. 또한, 맵의 중앙에 위치한 ‘보급로’를 안전하게 통과하기 위한 유닛 조합과 컨트롤 연습도 필수적이다. 이 맵은 단순한 컴까기가 아니라, 전략과 컨트롤의 종합 선물 세트로, 스타크래프트의 정수를 느낄 수 있는 작품이라 할 수 있다. This StarCraft: Brood War custom map, titled ‘SPECIAL FORCE$ HYPER HARD’, is a challenging computer-killing (UMS) game designed for hardcore players. The map features a vast desert terrain centered around a player’s starting base in the bottom-left corner, with the objective of advancing toward the top-right corner while destroying enemy bases along the way. Enemy outposts, densely packed with units like Zerglings, Marines, Firebats, Siege Tanks, and Goliaths, create a formidable challenge that tests both strategy and execution. The gameplay revolves around three core strategies: defensive play to withstand enemy waves, aggressive assaults to dismantle enemy bases quickly, and supportive reinforcement by securing the ‘supply route’ in the map’s center. The ‘HYPER HARD’ difficulty is evident in the sheer number and complexity of enemy units, especially in later stages where attacks escalate rapidly. Resource management and unit upgrades become critical factors, while the supply route—a high-risk zone—demands careful navigation to avoid being overwhelmed. Designed for solo play (1vs6 teams), this map supports up to 6 players but is best enjoyed by experienced players due to its punishing difficulty. Playtime varies between 30 minutes to over an hour, depending on skill level. The desert-themed design enhances immersion, and the randomized enemy placements ensure each playthrough feels fresh, requiring adaptable strategies. Preparation is key: mastering unit compositions, understanding enemy attack patterns, and practicing safe passage through the supply route are essential for success. SPECIAL FORCE$ HYPER HARD isn’t just a computer-killing map—it’s a comprehensive test of StarCraft’s strategic depth and mechanical skill.
![7:1 컴까기 기독교 버전4[hard] 맵 미리보기](https://cdn-star-data.huzy.net/thumbnail_522d9660a4c9459a8c6ae8b0242469aa.jpg)
7:1 컴까기 기독교 버전4[hard]
‘7:1 컴까기 기독교 버전4[hard]’는 스타크래프트 브루드워의 대표적인 디펜스 장르 유즈맵으로, 7명의 플레이어가 한 팀을 이루어 끊임없이 몰려드는 적들을 상대로 요새를 지켜내는PuS-80%의 압도적 수적 열세 속에서 전략과 협력이 빛을 발하는 이 맵은 단순한 디펜스가 아니라, 일종의 ‘컴퓨터 상대 끝장내기’(컴까기)로 분류된다. 맵의 구조는 중앙에 위치한 요새를 중심으로 방사형으로 배치된 건물과 유닛 생산 시설, 그리고 방어 타워가 특징적이다. 플레이어들은 초반에 자원 수급과 방어선 구축에 집중해야 하며, 시간이 지날수록 적의 공격 패턴이 강화되면서 난이도가 급격히 상승하는 구조로 되어 있다. 특히 ‘[hard]’ 태그가 붙은 버전은 기존 3번 버전의 약점을 보완하고 난이도를 대폭 상승시킨 만큼, 초보 플레이어에게는 쉽지 않은 도전이 될 수 있다. 맵의 핵심은 ‘협동’과 ‘타이밍’에 있다. 7명의 플레이어가 각자 맡은 구역의 방어와 자원 관리를 동시에 수행해야 하며, 한 명이라도 실수하면 전체가 무너질 수 있다. 또한 적의 공격 루트가 맵 곳곳에 산재해 있어, 방어선 구축 시 각 구역의 중요도를 신중히 판단해야 한다. 맵의 디자인상으로는 중앙 요새가 가장 취약한 지점으로 보이며, 이 부분을 보강하기 위해 추가적인 방어 타워나 유닛 생산 시설을 배치하는 전략이 필요하다. 맵의 전체적인 분위기는 기독교색 테마로 꾸며져 있으며, 이는 맵의 배경 이미지나 건물 디자인에서 확인할 수 있다. 다만, 게임 플레이 자체는 디펜스 장르의 기본 틀을 따르며, 종교적 요소는 장식에 가깝다. 이 맵을 추천하는 대상은 우선 스타크래프트의 디펜스 장르를 즐기는 플레이어들이다. 특히 7:1이라는 극한의 수적 열세를 극복하고자 하는 도전精神이 있는 유저들에게 적합하며, 팀 플레이를 경험해 보고 싶은 유저들에게도 좋은 선택지가 될 수 있다. 또한 협동 플레이를 통해 타인과 소통하며 전략을 짜는 재미를 느끼고자 하는 경우에도 추천할 만하다. 단, 난이도가 상당히 높기 때문에 초보자는 ‘[easy]’나 ‘[normal]’ 버전부터 도전해 보는 것이 좋으며, 팀원 간의 원활한 소통과 역할 분담이 성공의 열쇠임을 명심해야 한다. 플레이 전에는 맵의 구조와 각 구역의 중요도를 충분히 숙지하고, 가능한 한 빠른 판단을 내릴 수 있도록 연습하는 것이 중요하다. ‘7:1 Computer-Killer Christian Version 4 [Hard]’ is a standout defense-style custom map in *StarCraft: Brood War*, where seven players team up to defend a fortress against endless waves of enemies. Despite being outnumbered by a crushing 80%, strategy and teamwork shine in this map, which is less of a traditional defense and more of an all-out "computer-killer" challenge. The map features a central fortress surrounded by radial buildings, unit production facilities, and defensive towers. Players must focus on resource gathering and fortifying defenses early on, as the enemy’s attack patterns intensify over time, sharply increasing the difficulty. The [Hard] version significantly raises the stakes by addressing weaknesses from the previous third version, making it a tough challenge even for experienced players. Teamwork and timing are crucial—each of the seven players must manage their assigned zones while defending and collecting resources simultaneously. A single mistake can collapse the entire team’s efforts. The enemy’s attack routes are scattered across the map, so players must carefully assess the importance of each defensive zone when setting up their lines. The central fortress appears to be the most vulnerable point, requiring additional defensive towers or production facilities to reinforce it. The map adopts a Christian-themed aesthetic, visible in its background imagery and building designs, though this serves more as decoration than impacting gameplay. It follows the core mechanics of a defense genre map without deeper religious influence. This map is ideal for players who enjoy *StarCraft*’s defense-style custom maps, especially those seeking the thrill of overcoming extreme odds in a 7:1 battle. It’s also a great choice for those looking to experience teamwork or refine their cooperative strategy. However, its high difficulty means beginners should start with the [Easy] or [Normal] versions. Clear communication and well-defined roles among teammates are essential for success. Before playing, familiarize yourself with the map’s layout and the importance of each zone, and practice making quick, decisive choices during the game.
히드라리스크 어택 20001 하드 2 (Hydralisk Attack 20,001 HARD 2)
히드라리스크 어택 20001 하드 2는 스타크래프트 브루드워의 디펜스 장르 유즈맵으로, 플레이어는 끊임없이 몰려드는 히드라리스크 무리를 상대로 기지를 방어해야 한다. 내부 맵 제목과 설명에서 확인할 수 있듯이 'Defense your base !!HARDMade by : ckhyam'이라는 강조 문구는 이 맵의 핵심 목표와 난이도를 직관적으로 전달한다. 맵의 구조는 좌우로 긴 격자형 배치로, 중앙 하단에 위치한 본진을 중심으로 적 유닛들이 다수Wave로 공격해오는 방식으로 진행된다. 적의 공격 패턴은 일정 주기로 강화되며, 후반부로 갈수록 히드라리스크 외에 다른 공중/지상 유닛들이 혼합되어 등장하여 방어의 난이도가 점진적으로 상승한다. 특히 맵의 길이가 매우 길고(2048 x 8192) 타일 단위가 크기(64 x 256) 때문에 시야 확보와 유닛 관리에서 strategic한 선택이 요구된다. 방어에 성공한 후에는 후속 Wave가 곧바로 시작되는 경우가 많으므로, 자원 관리와 유닛 배치 최적화가 필수적이다. 이 맵은 초보자보다는 적어도 기본적인 스타크래프트 운영과 유닛 컨트롤에 익숙한 플레이어에게 적합하며, 특히 히드라리스크의 빠른 이동속도와 넓은 맵 공간을 고려한 방어 전략 수립이 관건이다. 플레이 전에는 본진 주변의 방어 건물(예: 벙커, 터렛) 배치와 시야 확보를 위한 스캔 사용 타이밍을 사전에 계획해야 하며, 초반 자원 수급을 안정적으로 확보하는 것이 중요하다. 또한, 적의 공격 타이밍과 패턴을 숙지하여 유닛 조합을 유연하게 변화시키는 것이 지속적인 플레이의 열쇠가 된다. 이 맵은 디펜스 장르 내에서도 '컴까기' 유형에 가까운 하위 장르로 분류되며, 지속적인 적 웨이브 처리를 요구하는 구조적 특징을 지닌다. Hydralisk Attack 20001 Hard 2 is a StarCraft: Brood War defense-style custom map where players must defend their base against relentless waves of Hydralisks. As indicated in the in-game title and description, the emphasized phrase "Defense your base !!HARDMade by: ckhyam" immediately conveys the map's core objective and high difficulty. The map features a horizontally elongated grid layout, with the player's main base positioned at the bottom center. Enemies attack in large waves from multiple directions, with their composition intensifying at set intervals. As the game progresses, the enemy forces expand beyond Hydralisks to include mixed air and ground units, steadily increasing the challenge. The map's vast dimensions (2048 x 8192) and large tile size (64 x 256) demand strategic foresight in vision control and unit management. After successfully fending off a wave, the next often begins immediately, making resource management and optimized unit positioning critical. This map is better suited for players already familiar with basic StarCraft operations and unit control rather than complete beginners. Success hinges on developing a defense strategy that accounts for the Hydralisks' speed and the expansive battlefield. Before starting, players should plan the placement of defensive structures (e.g., bunkers, turrets) around the main base and time scan usage to secure vision. Stable early-game resource gathering is essential, and adapting unit compositions in response to enemy attack patterns is key to sustained play. Classified as a "compilation" subgenre within the defense genre, this map requires continuous processing of enemy waves due to its structural design.
최근 등록된 맵
새로 추가된 파일과 버전을 확인하세요.
나치 디펜스3: 노 뉴비 픽스 (Nazi Defense3 - No n00b fixes)
스타크래프트 브루드워의 유즈맵 <Nazi Defense3 - No n00b fixes>는 디펜스 장르의 유저 제작 맵으로, 제목과 설명에서 느껴지듯 상대적으로 과격한 소재와 높은 난이도를 자랑하는 작품이다. 맵 내부 구조는 중앙에 위치한 주요 진영을 중심으로 적의Wave가 끊임없이 몰려오는 형태로 구성되어 있으며, 방어건물을 배치하고 유닛을 조합하여 침략을 막아내는 것이 주된 목표로 보인다. 이미지에서 확인되는 방어선과 자원 지역은 플레이어가 전략을 세우며 건물을 짓고 유닛을 생산할 공간을 제공하며, 맵의 끝부분에는 적의 기지가 위치하고 있는 것으로 추정된다. 이 맵의 특징은 단연 '난이도'다. 내부 설명에서 'Hard Version'이라는 표현이 등장하는 점, 맵 제목에 'No n00b fixes'라는 문구가 포함된 점, 그리고 'Kill all the jews!!!'라는 다소 자극적인 문구로 미루어볼 때, 초보자나 가볍게 플레이하려는 유저에게는 권장되지 않는 맵으로 판단된다. 방어선을 구축하는 동시에 끊임없이 쏟아지는 적의 공격을 버텨내야 하므로, 플레이어는 빠른 판단력과 전략 수립 능력을 요구받는다. 또한, 맵에서 확인되는 폭발 이펙트와 다수의 유닛 배치 구역은 전투가 치열할 것이라는 점을 암시하며, 이는 디펜스 맵의 긴장감을 배가시키는 요소로 작용할 것이다. 추천 대상은 고난이도 디펜스 맵에 익숙한 플레이어나, 전략적 플레이를 즐기는 유저들이다. 맵의 구조상으로는 1인 플레이가 주가 될 것으로 보이며, 방어선 구축과 자원 관리, 유닛 컨트롤에 대한 기본적인 이해가 필수적이다. 플레이 전에 맵의 초기 배치와 주요 진영의 위치를 미리 확인하여, 어떤 전략을 사용할 것인지 미리 계획해두는 것이 좋다. 또한, 맵의 난이도가 높으므로, 초반에는 방어 우선 순위를 신중히 설정하고, 자원 수급과 유닛 생산의 밸런스를 맞추는 데 주력해야 한다. 이 맵을 플레이하기 전에는 맵 에디터나 유즈맵 제작자의 노트, 또는 커뮤니티 후기를 참고하여 맵의 진행 방식과 숨겨진 요소(예: 숨겨진 자원, 특수 유닛, 이벤트 발생 조건 등)를 미리 숙지하는 것이 좋다. 디펜스 맵의 특성상, 미처 예상치 못한 적의 공격 패턴이나 맵의 숨겨진 트리거가 플레이를 좌우할 수 있기 때문이다. 또한, 맵의 과격한 소재로 인해 불쾌감을 느낄 수 있는 유저는 플레이를 자제하는 것이 바람직하다. StarCraft: Brood War's user-made map *Nazi Defense3 - No n00b fixes* is a custom defense-style map that, as its title and description suggest, features relatively extreme subject matter and a high difficulty level. The map’s layout centers around a main base, with waves of enemies continuously assaulting it, and the core objective appears to be constructing defenses and coordinating units to fend off the relentless invasions. The visible defensive lines and resource areas provide space for players to erect buildings and produce units, while the far end of the map likely houses the enemy’s base. The map’s defining trait is its difficulty. Clues in the description—such as the term "Hard Version" in the internal briefing, the inclusion of "No n00b fixes" in the title, and the provocative phrase "Kill all the jews!!!"—indicate that this is not a map suited for beginners or casual players. Success demands quick decision-making and strategic planning, as players must not only fortify their defenses but also endure waves of relentless enemy attacks. The frequent explosion effects and densely packed unit deployment zones further imply intense combat, amplifying the map’s defensive tension. This map is best suited for experienced defense-map players or those who enjoy strategic gameplay. The structure suggests that single-player mode is the primary focus, requiring a solid grasp of base-building, resource management, and unit control. Before playing, it’s advisable to study the initial layout and key base locations to plan an effective strategy. Given the map’s high difficulty, early gameplay should prioritize defense carefully, balancing resource gathering with unit production to maintain stability. Before attempting this map, reviewing the map editor notes, the creator’s comments, or community feedback is highly recommended to understand its mechanics and uncover hidden elements—such as concealed resources, special units, or event triggers. In defense maps, unexpected enemy attack patterns or hidden triggers can drastically alter the outcome. Additionally, players who may find the map’s content offensive should refrain from playing it.
임파서블 나루토 (Impossible Naruto)
스타크래프트 브루드워의 유즈맵 중 하나인 〈Impossible Naruto〉는 이름에서 느껴지듯 어려운 도전 과제를 중심으로 구성된 맵이다. 맵은 넓은 사막 지형을 배경으로 펼쳐지며, 플레이어는 각자 독립된 미션을 수행하거나 공동 목표를 향해 협력해야 한다. 이미지에서는 중앙에 거대한 구조물이 보이며, 주변으로는 산책로나 방어 시설로 추정되는 구간들이 배치되어 있다. 맵의 전체적인 분위기는 긴장감을 조성하며, 플레이어는 끊임없이 변하는 조건 속에서 전략을 세워야 한다. 맵의 제목과 설명에서 'Impossible'이라는 단어가 강조되는 만큼, 난이도가 상당히 높을 것으로 예상되며, 이는 게임의 몰입감을 크게 높이는 요소로 작용한다. 또한, 플레이 인원이 6명으로 설정되어 있어 팀 플레이가 강제되는 구조로 보이며, 각 플레이어의 역할 분담이 필수적일 가능성이 크다. 맵의 구조상으로는 디펜스와 서바이벌 요소가 혼합되어 있을 것으로 추정되며, 특히 방어와 생존을 동시에 요구하는 구조가 예상된다. 이 맵은 주로 숙련된 플레이어나 도전 정신을 가진 유저들에게 추천되며, 초보자는 난이도 조절이나 튜토리얼 맵을 먼저 경험한 뒤 도전하는 것이 바람직할 것이다. 맵을 플레이하기 전에는 맵의 규칙과 승리 조건을 반드시 확인해야 하며, 특히 팀 간의 협력이 원활하지 않을 경우 난이도가 배가될 수 있음을 유념해야 한다. 또한, 맵의 특성상 빠른 적응력이 요구되므로, 맵의 구조와 주요 지점을 미리 숙지하는 것이 중요하다. 〈Impossible Naruto〉는 단순히 재미를 넘어서, 플레이어의 전략적 사고와 팀워크를Test할 수 있는 도전적인 콘텐츠로 자리매김할 가능성이 크다. Impossible Naruto, a custom map from StarCraft: Brood War, is designed around a series of difficult challenges, as suggested by its name. The map unfolds across a vast desert landscape, where players either tackle individual objectives or work together toward shared goals. In the image, a massive central structure dominates the scene, surrounded by what appear to be pathways and defensive installations. The overall atmosphere is tense, forcing players to constantly adapt their strategies to shifting conditions. Given the emphasis on "Impossible" in the title and description, the difficulty is expected to be high, significantly enhancing the game's immersive appeal. With a player count set at six, the map likely enforces teamwork, making the division of roles essential. The structure seems to blend defense and survival elements, particularly requiring players to balance both simultaneously. This map is best suited for experienced players or those seeking a challenge, while beginners should first adjust the difficulty or try tutorial maps before attempting it. Before playing, it's crucial to review the map's rules and victory conditions, as poor team coordination can drastically increase the challenge. Quick adaptability is key, so familiarizing yourself with the layout and key areas beforehand is highly recommended. Impossible Naruto isn’t just about fun—it’s a demanding experience that tests strategic thinking and teamwork, positioning itself as a challenging and rewarding piece of content.
불가능한 시나리오 New (Impossible Scenarios New)
스타크래프트 브루드워의 유즈맵 장인들에게 익숙한 ‘Impossible Scenarios New’는 6명의 플레이어가 참여하는 컴까기 스타일의 디펜스 맵으로, 이름 그대로 ‘불가능한 시나리오’라는 컨셉을 전면에 내세운 전략성이 돋보이는 작품이다. 맵의 배경은 설원과 얼음으로 뒤덮인 차가운 분위기로, 군단의 심장 시절부터 사랑받아 온 타일셋을 사용하여 시각적 몰입감을 높였다. 맵 왼쪽과 오른쪽의 시작 지점에서 펼쳐지는 전투는 각 플레이어가 고유한 방어 라인을 구축하고, 끊임없이 몰려오는 적군을 상대해야 한다는 점에서 전략적 깊이가 요구된다. 특히, 중앙의 넓은 평지와 협소한 통로들이 복합적으로 얽힌 지형은 각 플레이어의 판단력과 자원 관리를 시험하는 핵심 요소로 작용한다. 전투는 주로 저글링, 히드라리스크, 울트라리스크 등 저그 유닛 위주로 진행되며, 때로는 다수의 테란 유닛과 프로토스 유닛도 등장해 변칙적인 전술을 요구한다. 맵의 이름에서 짐작할 수 있듯, 난이도는 결코 만만치 않은데, 초반의 소규모 전투에서도 치밀한 컨트롤과 자원 배분이 필수적이며, 후반으로 갈수록 쏟아지는 적군의 폭주 같은 공격은 플레이어의 멘탈까지 시험한다. 이 맵은 단순히 적을 죽이는 것이 아니라, 끊임없이 변하는 전장 속에서 살아남기 위한 전략적 사고와 팀워크가 절실히 요구되는 만큼, 혼자서는 해결하기 어려운 시나리오가 다수 배치되어 있다. 초보 플레이어보다는 적어도 ‘보통’ 이상의 실력을 갖춘 유저들에게 추천되며, 특히 팀플레이를 중시하는 플레이어들에게는 최고의 선택지 중 하나가 될 수 있다. 맵을 플레이하기 전에는 개별 유닛의 특성과 스킬 사용법을 숙지하는 것이 중요하며, 시작 시 주어지는 초기 자원과 건물을 최대한 효율적으로 활용하는 것이 관건이다. 또한, 중반 이후에는 중앙 지역을 두고 벌어지는 전투가 승패를 좌우할 가능성이 높으므로, 이 지역의 통제권을 놓고 벌어지는 공방전에 집중할 필요가 있다. This UMS-style defense map, Impossible Scenarios New, is a staple among StarCraft Brood War custom map enthusiasts, offering a challenging 6-player team comp-style experience framed around ‘impossible scenarios.’ Set against a frozen, snowy backdrop using the classic Winter tile set, the map immerses players in a strategic battle of attrition. Players begin on the left and right flanks, tasked with constructing and defending their bases while fending off relentless waves of enemy units. The terrain features a mix of open fields and narrow choke points, forcing players to make critical decisions about positioning, resource allocation, and unit composition. Combat primarily revolves around Zerg units like Zerglings, Hydralisks, and Ultralisks, though Terran and Protoss forces occasionally appear, adding unpredictability to the strategy. As the name suggests, the difficulty is unforgiving; early skirmishes demand precise micro-management and economic foresight, while later stages feature overwhelming enemy waves that test both skill and composure. The scenarios are designed to overwhelm lone players, emphasizing teamwork and adaptability. This map is best suited for players with at least intermediate skill levels, particularly those who thrive in team-based challenges. Before diving in, familiarize yourself with unit synergies and special abilities, and prioritize efficient use of starting resources and structures. Mid-to-late game control of the central battlefield often decides victory, so securing this area early is key to success.
Impossible Hard Times
‘Impossible Hard Times’는 스타크래프트: 브루드워에서 즐기는 유즈맵으로, 플레이어가 끊임없는 공격을 버텨내며 살아남는 디펜스 장르의 تحدI(도전)형 맵이다. 맵은 8192x8192의 거대한 평면 공간으로 구성되어 있으며, 중앙에 위치한 본진을 중심으로 적의 다채로운 유닛들이 끊임없이 쏟아져 나온다. 맵의 이름은 ‘가능한 어려운 시간’이라는 뜻으로, 이름 그대로 극한의 난이도를 자랑하는 디펜스임이 한눈에 느껴진다. 본진 주변에는 방어 건물 설치 공간이 마련되어 있으며, 일부 지역은 지형적 요철이 있어 전략적인 배치와 유닛 운용이 요구된다. 맵 상단과 좌우측에는 추가적인 방어선으로 활용할 수 있는 고지대가 배치되어 있어, 후방에서 reinforcements(증원군)을 관리하거나 다수의 적을 상대할 때 유리한 위치를 차지할 수 있다. 플레이어는 초반부터 중반까지는 비교적 소규모의 적을 상대하지만, 시간이 흐를수록 적의 규모와 종류가 점점 다양해지고 강해지며, 심지어는 공중 유닛이나 특수 유닛도 등장하는 등 종합적인 대비를 요구한다. 맵의 난이도는 플레이어의 자원 관리, 유닛 생산 타이밍, 방어선 구축 능력에 따라 크게 좌우되며, 특히 후반부로 갈수록 적의 조합과 패턴을 예측하고 대응하는 것이 중요하다. 이 맵은 초보자보다는 중급 이상의 실력을 갖춘 플레이어에게 적합하며, 특히 디펜스 장르를 즐기는 유저들에게 도전 의식을 불어넣어 줄 것이다. 또한, 맵 자체가 제공하는 난이도와 긴 플레이타임으로 인해 한 판 한 판이 긴장감 넘치는 경험을 선사한다. 방어선 구축 시 유닛의 배치와 자원 밸런스를 carefully(신중히) 고려해야 하며, 적의 공격을 예측하는 안목도 필요하다는 점을 유념하자. 만약 여러분이 디펜스 맵의 진수를 느끼고 싶다면, 정답은 ‘Impossible Hard Times’를 선택하는 것이다. Impossible Hard Times is a custom map for StarCraft: Brood War, offering players a challenging defense experience where they must withstand relentless enemy waves. The map spans a massive 8192x8192 grid, centered around a player’s main base that comes under constant siege. The title, translating to ‘Impossible Hard Times,’ hints at its punishing difficulty, which becomes evident as waves progressively escalate in scale and complexity. The main base area is surrounded by designated spots for defensive structures, while elevated terrain provides strategic vantage points for reinforcements or multi-front engagements. As time progresses, enemies diversify in composition, introducing air units, special types, and more formidable ground forces, demanding adaptable tactics. Resource management, production timing, and defensive positioning are critical, especially in later stages where predicting enemy patterns becomes essential. This map is tailored for intermediate to advanced players seeking a deep dive into the defense genre, offering intense, drawn-out matches that test both mechanical skill and strategic foresight. Success hinges on meticulous unit placement and resource allocation, with a clear focus on anticipating and countering evolving threats. For those craving a true test of their defense mastery, Impossible Hard Times delivers an unforgettable challenge.
Impossible Crazy
《Impossible Crazy》는 스타크래프트: 브루드워의 유즈맵으로, 이름 그대로 도저히 불가능해 보이는 극한의 디펜스 경험을 제공하는 맵입니다. 맵 제목에서도 느껴지듯, ‘Impossible’이란 단어는 단순히 과장된 표현이 아니라, 실제로 플레이어에게 끊임없는 압박과 도전을 안겨주는 구조에 걸맞습니다. 맵은 4096x4096의 거대한 황혼 타일셋으로 제작되어 있으며, 화면 가득 펼쳐지는 적의 물량과 끊임없는 공격을 버텨내야 하는 디펜스 장르의 정수를 맛볼 수 있습니다. 내부 설명에 ‘Hard Map Do Your Best.. Enjoy =)’라고 적힌 것에서 알 수 있듯이, 제작자는 플레이어에게 도전 정신을 불어넣고자 한 의도가 뚜렷합니다. 이 맵은 5명의 플레이어가 한 팀을 이루어 방어전을 펼치는 구조로 보입니다. 맵 중앙에는 플레이어의 기지가 위치하고 있으며, 주변으로 무수히 많은 적의 기지가 배치되어 있습니다. 적들은 끊임없이 생산되어 공격해 오며, 플레이어는 이들을 상대로 방어선을 구축하고 자원을 관리해야 합니다. 맵의 특징은 압도적인 적의 물량과 빠른 웨이브 텀으로, 일반적인 디펜스 맵보다 훨씬 더 높은 집중력과 전략이 요구됩니다. 또한, 맵의 크기가 크기 때문에 시야 확보와 자원 채취 위치의 선택이 매우 중요합니다. 제어 센터나 방어 건물의 배치, 그리고 업그레이드 전략도 승리를 좌우하는 핵심 요소입니다. 이 맵은 디펜스 장르의 유즈맵 중에서도 난이도가 상당히 높은 편으로, 초보 플레이어보다는 중급 이상의 실력을 가진 플레이어에게 추천됩니다. 특히, 팀워크가 중요한 맵이므로 팀원과의 소통과 협력이 필수적입니다. 또한, 끊임없이 몰려오는 적들을 상대해야 하므로,fficient한 자원 관리와 방어 건물의 배치, 그리고 빠른 판단력이 요구됩니다. 맵의 제목에서 느껴지는 ‘불가능’이라는 단어는 단순히 장식용이 아니라, 실제로 플레이어에게 극한의 도전을 제시하는 맵임을 명심해야 합니다. 만약 디펜스 장르의 맵 중에서도 가장 어려운 축에 속하는 경험을 원한다면, 《Impossible Crazy》는 최적의 선택이 될 것입니다. 플레이 전 반드시 확인해야 할 포인트는 다음과 같습니다. 첫째, 방어 건물의 배치와 업그레이드 우선순위를 신중히 결정해야 합니다. 둘째, 자원 채취 위치를 효율적으로 선택하여 자원을 지속적으로 확보해야 합니다. 셋째, 팀원과의 원활한 소통을 통해 방어 전략을 공유하고, 각자의 역할을 чет히 분담해야 합니다. 넷째, 끊임없이 몰려오는 적의 공격을 예상하고, 미리 대비책을 마련해 두어야 합니다. 마지막으로, 맵의 크기가 크기 때문에 시야 확보를 위해 정찰을 게을리하지 않아야 합니다. 이러한 포인트들을 염두에 두고 플레이한다면, 《Impossible Crazy》는 스타크래프트 유즈맵의 진정한 정수를 경험할 수 있는 소중한 기회가 될 것입니다. 《Impossible Crazy》 is a custom map for *StarCraft: Brood War* that delivers an extreme defense experience that seems impossible at first glance. As the name suggests, the word "Impossible" isn’t just an exaggeration—it accurately reflects the relentless pressure and challenges the map imposes on players. Designed with a massive 4096x4096 Twilight tileset, the map immerses players in a full-screen spectacle of overwhelming enemy waves and nonstop assaults, capturing the essence of the defense genre. The internal description, which reads "Hard Map Do Your Best.. Enjoy =)," clearly reveals the creator’s intent to inspire players to push their limits. The map appears to be structured for a team of five players working together in a defensive battle. The players' base is located at the center of the map, surrounded by countless enemy bases that continuously spawn and launch attacks. Players must build defenses, manage resources, and hold the line against the endless onslaught. What sets this map apart is the sheer scale of enemy forces and the rapid wave intervals, demanding far greater focus and strategy than typical defense maps. The large map size also makes vision control and strategic resource gathering crucial. Decisions on building placement, defensive structures, and upgrade priorities can determine victory or defeat. Among custom defense maps, 《Impossible Crazy》 ranks among the most difficult, making it suitable for intermediate to advanced players rather than beginners. Teamwork is essential, so communication and coordination with teammates are vital. The constant enemy waves require efficient resource management, smart defensive positioning, and quick decision-making. The word "Impossible" in the title isn’t just for show—it reflects the map’s true challenge. If you’re looking for one of the hardest defense experiences in custom maps, 《Impossible Crazy》 is the perfect choice. Before playing, keep these key points in mind. First, carefully plan your defensive structure placements and upgrade priorities. Second, choose resource gathering locations wisely to maintain a steady income. Third, communicate effectively with your team to share strategies and clearly assign roles. Fourth, anticipate incoming enemy waves and prepare countermeasures in advance. Finally, don’t neglect scouting due to the map’s size—vision control is critical. By keeping these tips in mind, 《Impossible Crazy》 offers a rewarding opportunity to experience the true essence of *StarCraft* custom maps.
하이드라리스크 어택 20,001 HARD! (Hydralisk Attack 20,001 HARD!)
스타크래프트 브루드워 유즈맵 〈하이드라리스크 어택 20,001 HARD!〉는 방어와 생존에 중점을 둔 난이도 높은 디펜스 장르의 맵으로, 플레이어는 끊임없이 몰려오는 저글링과 히드라리스크 무리를 상대로 본진을 지켜내야 한다. 맵은 2048x8192의 가로로 긴 구조로, 왼쪽 끝의 본진을 중심으로 오른쪽에서 끊임없이 적 유닛이 생성되어 공격해 온다. 적의 공격 패턴은 일정하지만 수가 많아지고, 후반부로 갈수록 히드라리스크 비중이 높아져 방어 난이도가 급격히 상승한다. 본진 앞에는 방어 건물과 미네랄 멀티가 배치되어 있어 자원 수급과 방어 전략의 균형을 맞추어야 하며, 맵의 가로 길이가 길어 시야 확보와 유닛 배치에 신경을 써야 한다. 특히 'HARD!'라는 제목처럼 난이도가 매우 높게 설정되어 있어 초보자는 물론 중수players도 전략과 컨트롤을 요구받는다. 적의 공격 타이밍과 유닛 조합을 예측하는 능력이 핵심이며, 방어 건물과 유닛을 효율적으로 배치해 자원을 절약하면서도 공격을 방어해야 한다. 추천 대상은 디펜스 맵을 즐기며 도전 정신을 불태우고 싶은 플레이어들로, 손재주와 전략적 사고를 동시에 요구하는 맵이다. 플레이 전에는 맵의 가로 길이를 고려해 본진 주변 방어선의 구축과 멀티 테라인의 확보를 우선적으로 계획해야 한다. 또한, 후반부의 히드라리스크 웨이브를 대비해 히드라리스크에 강한 유닛이나 방어 건물을 준비하는 것이 중요하다. 맵 특성상 긴 플레이 시간이 예상되므로 충분한 시간과 집중력을 필요로 한다. Hydralisk Attack 20,001 HARD! is a high-difficulty defense-focused custom map in StarCraft: Brood War where players must protect their base against relentless waves of Zerg units, primarily Zerglings and Hydralisk. The map features a long horizontal layout measuring 2048x8192, with the player's starting base located at the far left and enemy spawn points positioned far to the right. Waves of enemies continuously march toward the player's base, increasing in number and difficulty as the game progresses, with Hydralisks becoming more prevalent in later stages. The base includes defensive structures and mineral patches to manage resources effectively. The extended length of the map demands careful attention to unit positioning and vision control. Given the 'HARD!' designation, the difficulty is exceptionally high, requiring advanced strategies and precise execution even from experienced players. Timing and predicting enemy attack patterns are crucial, as is balancing resource management with effective defense. The recommended player base includes those who enjoy defense maps and seek a challenging experience that tests both dexterity and strategic thinking. Before playing, it is advisable to plan the initial defensive setup and secure multi-line expansions early. Preparing countermeasures specifically for Hydralisk waves is also essential due to the map's escalating difficulty. The extended gameplay duration necessitates sustained focus and time investment.
스페셜 포스 하이퍼 하드 (Special Force Hyper Hard)
이 맵은 스타크래프트 브루드워의 유즈맵으로, ‘스페셜 포스 하이퍼 하드(HYPER HARD)’라는 제목 그대로 극한의 난이도를 자랑하는 컴까기(컴퓨터 상대 유즈맵) 장르에 속한다. 맵의 중앙에는 넓은 사막 지형이 펼쳐져 있으며, 플레이어는 좌측 하단에 위치한 기지에서 시작해 우측 상단으로 이동하는 목표를 달성해야 한다. 맵 곳곳에는 다수의 적 기지(저글링, 마린, 파이어뱃, 시즈 탱크, 골리앗 등)가 배치되어 있으며, 이들을 모두 파괴해야만 다음 페이즈로 진행할 수 있도록 구성되어 있다. 특히 적의 방어선은 플레이어의 실력과 전략에 따라 전혀 다른 패턴으로 전개되기 때문에, 초보자는 물론 숙련자까지도 긴장감을 놓칠 수 없는 구조로 설계되었다. 플레이 방식은 크게 세 가지로 나뉘는데, 첫 번째는 적의 공격을 방어하면서 전진하는 ‘방어형’, 두 번째는 적의 기지를 빠르게 파괴해 길을 뚫는 ‘공격형’, 세 번째는 후방에서 지원 병력을 보충하는 ‘지원형’이다. 맵의 난이도를 ‘하이퍼 하드’라고 명명한 만큼, 적의 수는 일반 컴까기보다 훨씬 많고 유닛의 조합도 복잡해진다. 특히 후반부로 갈수록 적의 공격력이 급격히 증가하므로, 자원 관리와 유닛의 업그레이드를 얼마나 잘하느냐가 관건이다. 또한 맵의 중앙에 위치한 ‘보급로’ 지역은 적의 공격을 받기 쉬우므로, 이 곳을 안전하게 통과하는 것이 클리어의 열쇠가 된다. 이 맵은 6인 플레이를 지원하며, 주로 단독 플레이(1vs컴퓨터 6팀) 형태로 진행된다. 플레이 시간은 개인의 실력에 따라 30분에서 1시간 이상까지 소요될 수 있으며, 난이도가 극히 높기 때문에 초보자에게는 추천하지 않는다. 숙련자라면 자신의 전략을 최대한 활용해 적의 공격을 버티며 전진하는 재미를 느낄 수 있을 것이다. 또한, 맵의 디자인이 사막 테마로 통일되어 있어 시각적으로도 몰입감을 높이는 장점이 있다. 다만, 적의 배치 패턴이 랜덤에 가깝기 때문에, 매 플레이마다 새로운 전략을 짜야 한다는 점에서 반복 플레이의 재미를 더한다. 이 맵을 플레이하기 전에는 반드시 유닛의 조합과 업그레이드, 그리고 적의 공격 패턴을 숙지해야 한다. 특히, 후반부에 등장하는 시즈 탱크와 골리앗의 조합은 방어하기 어려운 만큼, 미리 대비책을 마련해두는 것이 중요하다. 또한, 맵의 중앙에 위치한 ‘보급로’를 안전하게 통과하기 위한 유닛 조합과 컨트롤 연습도 필수적이다. 이 맵은 단순한 컴까기가 아니라, 전략과 컨트롤의 종합 선물 세트로, 스타크래프트의 정수를 느낄 수 있는 작품이라 할 수 있다. This StarCraft: Brood War custom map, titled ‘SPECIAL FORCE$ HYPER HARD’, is a challenging computer-killing (UMS) game designed for hardcore players. The map features a vast desert terrain centered around a player’s starting base in the bottom-left corner, with the objective of advancing toward the top-right corner while destroying enemy bases along the way. Enemy outposts, densely packed with units like Zerglings, Marines, Firebats, Siege Tanks, and Goliaths, create a formidable challenge that tests both strategy and execution. The gameplay revolves around three core strategies: defensive play to withstand enemy waves, aggressive assaults to dismantle enemy bases quickly, and supportive reinforcement by securing the ‘supply route’ in the map’s center. The ‘HYPER HARD’ difficulty is evident in the sheer number and complexity of enemy units, especially in later stages where attacks escalate rapidly. Resource management and unit upgrades become critical factors, while the supply route—a high-risk zone—demands careful navigation to avoid being overwhelmed. Designed for solo play (1vs6 teams), this map supports up to 6 players but is best enjoyed by experienced players due to its punishing difficulty. Playtime varies between 30 minutes to over an hour, depending on skill level. The desert-themed design enhances immersion, and the randomized enemy placements ensure each playthrough feels fresh, requiring adaptable strategies. Preparation is key: mastering unit compositions, understanding enemy attack patterns, and practicing safe passage through the supply route are essential for success. SPECIAL FORCE$ HYPER HARD isn’t just a computer-killing map—it’s a comprehensive test of StarCraft’s strategic depth and mechanical skill.
히드라리스크 어택 20001 하드 2 (Hydralisk Attack 20,001 HARD 2)
히드라리스크 어택 20001 하드 2는 스타크래프트 브루드워의 디펜스 장르 유즈맵으로, 플레이어는 끊임없이 몰려드는 히드라리스크 무리를 상대로 기지를 방어해야 한다. 내부 맵 제목과 설명에서 확인할 수 있듯이 'Defense your base !!HARDMade by : ckhyam'이라는 강조 문구는 이 맵의 핵심 목표와 난이도를 직관적으로 전달한다. 맵의 구조는 좌우로 긴 격자형 배치로, 중앙 하단에 위치한 본진을 중심으로 적 유닛들이 다수Wave로 공격해오는 방식으로 진행된다. 적의 공격 패턴은 일정 주기로 강화되며, 후반부로 갈수록 히드라리스크 외에 다른 공중/지상 유닛들이 혼합되어 등장하여 방어의 난이도가 점진적으로 상승한다. 특히 맵의 길이가 매우 길고(2048 x 8192) 타일 단위가 크기(64 x 256) 때문에 시야 확보와 유닛 관리에서 strategic한 선택이 요구된다. 방어에 성공한 후에는 후속 Wave가 곧바로 시작되는 경우가 많으므로, 자원 관리와 유닛 배치 최적화가 필수적이다. 이 맵은 초보자보다는 적어도 기본적인 스타크래프트 운영과 유닛 컨트롤에 익숙한 플레이어에게 적합하며, 특히 히드라리스크의 빠른 이동속도와 넓은 맵 공간을 고려한 방어 전략 수립이 관건이다. 플레이 전에는 본진 주변의 방어 건물(예: 벙커, 터렛) 배치와 시야 확보를 위한 스캔 사용 타이밍을 사전에 계획해야 하며, 초반 자원 수급을 안정적으로 확보하는 것이 중요하다. 또한, 적의 공격 타이밍과 패턴을 숙지하여 유닛 조합을 유연하게 변화시키는 것이 지속적인 플레이의 열쇠가 된다. 이 맵은 디펜스 장르 내에서도 '컴까기' 유형에 가까운 하위 장르로 분류되며, 지속적인 적 웨이브 처리를 요구하는 구조적 특징을 지닌다. Hydralisk Attack 20001 Hard 2 is a StarCraft: Brood War defense-style custom map where players must defend their base against relentless waves of Hydralisks. As indicated in the in-game title and description, the emphasized phrase "Defense your base !!HARDMade by: ckhyam" immediately conveys the map's core objective and high difficulty. The map features a horizontally elongated grid layout, with the player's main base positioned at the bottom center. Enemies attack in large waves from multiple directions, with their composition intensifying at set intervals. As the game progresses, the enemy forces expand beyond Hydralisks to include mixed air and ground units, steadily increasing the challenge. The map's vast dimensions (2048 x 8192) and large tile size (64 x 256) demand strategic foresight in vision control and unit management. After successfully fending off a wave, the next often begins immediately, making resource management and optimized unit positioning critical. This map is better suited for players already familiar with basic StarCraft operations and unit control rather than complete beginners. Success hinges on developing a defense strategy that accounts for the Hydralisks' speed and the expansive battlefield. Before starting, players should plan the placement of defensive structures (e.g., bunkers, turrets) around the main base and time scan usage to secure vision. Stable early-game resource gathering is essential, and adapting unit compositions in response to enemy attack patterns is key to sustained play. Classified as a "compilation" subgenre within the defense genre, this map requires continuous processing of enemy waves due to its structural design.
맵 선택 가이드
태그는 맵의 핵심 특징을 빠르게 설명하지만 제작 버전마다 규칙이 다를 수 있습니다. 상세 설명에서 권장 인원, 난이도, 플레이 시간과 버전을 함께 확인한 뒤 다운로드하세요.