
난이도 어려움 스타크래프트 맵 모음
'난이도 어려움' 태그가 등록된 맵을 모았습니다. 장르 하나로 찾기 어려운 플레이 방식, 난이도와 특징을 중심으로 인기 맵과 최신 맵을 비교해 보세요.
- 등록 맵
- 8개
- 누적 다운로드
- 1
- 누적 조회
- 182
인기 맵
다운로드와 조회 반응이 높은 맵입니다.
뉴 히드라리스크 어택 20k 하드 (New Hydralisk Attack 20k Hard)
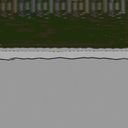
‘뉴 히드라리스크 어택 20k 하드’는 스타크래프트 브루드워의 유즈맵으로, 디펜스 장르에 속하는 하드코어한 방어형 맵이다. 맵의 구조는 긴 직선 형태로 펼쳐져 있으며, 오른쪽 끝에서 끊임없이 몰려드는 히드라리스크 무리를 왼쪽 기지에서 저지하는 것이 핵심이다. 기지 앞에는 방어진이 촘촘히 배치되어 있어, 플레이어는 자원 관리와 방어 건물의 배치, 업그레이드를 통해 끊임없이 쏟아지는 적을 상대해야 한다. 특히 하드 난이도답게 적의 수가 매우 많고, 스폰 주기도 빨라 지속적인 집중을 요구하는 것이 특징이다. 맵의 배경은 어두운 톤으로, 긴장감을 고조시키며, 방어선이 무너지면 곧바로 게임 오버로 이어지는 긴박한 상황이 연출된다. 방어 건물로 사용할 수 있는 유닛은 제한되어 있으며, 자원 수급도 제한적이기 때문에 효율적인 플레이가 요구된다. 하드 난이도답게 초보자는 클리어하기 어려우며, 숙련된 플레이어라도 몇 번의 시도와 전략 수정이 필요할 정도로 난이도가 높다. 전체적으로는 ‘컴까기’와 ‘디펜스’의 조합으로, 방어와 자원 관리의 밸런스를 맞추는 것이 관건인 맵으로 평가할 수 있다. 추천 대상은 스타크래프트의 방어와 전략적 플레이를 좋아하는 유저들이며, 특히 긴장감 넘치는 플레이를 즐기는 유저들에게 적합하다. 플레이 전에는 방어 건물의 배치와 업그레이드 우선순위를 미리 계획하고, 자원 관리에 유의할 필요가 있다. 또한, 게임 시작 직후 첫-wave를 어떻게 넘기느냐가 이후의 진행을 좌우하는 중요한 포인트가 된다. This StarCraft: Brood War custom map, 'New Hydralisk Attack 20k Hard,' falls under the defense genre, offering a challenging hard-core defensive gameplay experience. The map features a long, linear structure where the player must defend their base on the left side against an endless stream of Hydralisks spawning from the right. The defense line is densely packed with structures, requiring players to manage resources, strategically place defensive buildings, and prioritize upgrades to withstand the relentless enemy waves. The hard difficulty ensures a high enemy count with rapid spawn intervals, demanding constant focus and adaptability. The dark-toned background enhances the intense atmosphere, with failure leading to an immediate game over. Limited unit options for defense and restricted resource income add to the challenge, making efficient resource and upgrade management crucial. The high difficulty makes it inaccessible for beginners, and even experienced players may need multiple attempts and strategic adjustments. The map blends elements of 'computer-killing' and 'defense,' emphasizing the balance between defense and resource management. It is recommended for players who enjoy strategic defense mechanics and high-pressure gameplay. Before playing, planning defensive structure placement, prioritizing upgrades, and managing resources are essential. The initial wave often sets the tone for the rest of the game, making it a critical moment to handle effectively.
5vs3 인세인 컴까기 패스트빌드 (5vs3 InsaneComp w/FastBuild)
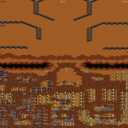
스타크래프트 브루드워의 대형 디펜스 유즈맵인 <5vs3 InsaneComp w/FastBuild>는 5명의 플레이어가 3명의 인공지능 ‘인세인 컴’을 상대로 자원을 최대한 빠르게 확보하고 방어선을 구축하는 것이 핵심인 컴까기 형식의 맵이다. 맵 중앙에는 넓은 평원과 요충지가 배치되어 있으며, 플레이어는 시작 지점에서 빠르게 멀티를 확보하면서 Mineral Field를 확보하고 Creep Growth를 관리해야 한다. 인공지능의 공격은 초반부터 강력하게 들어오며, 특히 FastBuild 옵션 덕분에 건물을 빠르게 짓고 방어 건물을 배치하는 것이 중요하다. 맵의 특이한 점은 황혼 타일셋을 기반으로 한 어두운 분위기와 넓은 시야가 제공되는 구조로, 플레이어는 맵 곳곳의 Mineral Cluster를 안전하게 확보해야 한다. 방어선의 경우, 초반에는 Mineral Line Protect를 위해 Zergling Rush에 대비해야 하고, 중반 이후에는 Siege Tank과 Guardian을 활용한 멀티 공격을 방어하는 전략이 필요하다. 인공지능의 난이도는 ‘인세인’으로 설정되어 있어 초보자는 적응하기 어려우며, 숙련된 플레이어라도 빠른 판단력과 자원 관리가 요구된다. 추천 대상은 스타크래프트 디펜스 유즈맵을 즐기며, 빠른 빌드와 방어 전략을 연마하고 싶은 유저들이다. 플레이 전에는 Mineral Line의 배치와 Choke Point의 위치를 반드시 숙지해야 하며, FastBuild 옵션을 활용해 초반 자원 확보 속도를 높이는 것이 중요하다. 맵의 넓은 크기 덕분에 전략적 깊이가 풍부하며, multiple Rush 방어와 멀티 테란 운영이 승리 여부를 가른다. 특히 인공지능의 Mineral Line 파괴 시도를 신속히 대응하지 않으면 자원 부족으로 인한 패배를 맞이할 수 있으니 주의가 필요하다. This StarCraft: Brood War custom defense map, *5vs3 InsaneComp w/FastBuild*, pits five players against three AI "Insane Comp" opponents in a race to secure resources and build defenses as quickly as possible. The map features a central open plain and key strategic points, where players must establish their first expansion rapidly, secure Mineral Fields, and manage Creep Growth. The AI launches aggressive attacks from the start, making FastBuild essential for quickly constructing buildings and setting up defensive structures. The map’s unique dark atmosphere, based on a twilight tileset, offers expansive visibility, allowing players to safely secure Mineral Clusters scattered across the battlefield. Early-game defense requires preparing for Zergling rushes to protect Mineral Lines, while mid-to-late game strategies revolve around countering multi-pronged attacks with Siege Tanks and Guardians. The AI’s difficulty is set to "Insane," making it challenging for beginners, though even experienced players must rely on quick decision-making and efficient resource management. Ideal for those who enjoy StarCraft defense custom maps, this map sharpens fast build orders and defensive tactics. Before playing, players should thoroughly understand Mineral Line placements and Choke Point locations, and leveraging the FastBuild option to accelerate early resource gathering is crucial. The map’s large scale provides deep strategic layers, where success hinges on defending against multiple rushes and managing multi-base Terran operations. Failing to quickly counter the AI’s attempts to destroy Mineral Lines can lead to crippling resource shortages and defeat, so constant vigilance is required.
로드 오브 더 링 SD CPU RH (LotR - SD CPU RH 1.42ver)
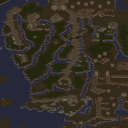
스타크래프트 브루드워의 ‘로드 오브 더 링’ 시리즈로 유명한 ‘LotR - SD CPU RH 1.42ver’는 디펜스 장르의 유즈맵으로, 초월적인 규모의 맵과 섬세한 진행 구조로 플레이어들에게 긴장감을 선사한다. 맵은 거대한 사막 지형 위에 펼쳐져 있으며, 중앙을 가로지르는 거대한 강이 맵의 주요한 방어 경계 역할을 한다. 강 양쪽에는 플레이어 본진에 이르는 좁은 길목이 존재하며, 이 길목을 따라 끊임없이 몰려오는 적 유닛을 막아내야 한다. 강 자체는 일종의 자연 장벽 역할을 하지만, 적 유닛은 다리를 건너거나 수영을 통해 본진으로 접근할 수 있어 방어 포인트를 신중히 배치해야 한다. 맵의 특징 중 하나는 맵 중앙에 위치한 거대한 ‘모르도르’ 구역으로, 이곳은 적의 핵심 거점으로 추정되며 방어하기 가장 어려운 지점으로 보인다. 플레이어는 본진 방어뿐만 아니라, 중앙을 가로지르는 다리를 차단하거나 보조 건물을 건설해 적의 공격을 지연시킬 수 있는 전략적 선택지가 주어진다. 또한, 맵 곳곳에 흩어져 있는 자원 지대는 초기 건물 건설과 방어 병력의 유지에 필수적이지만, 자원 채취가 제한적일 가능성이 있어 자원 관리도 중요하다. 이 맵은 특히 컴퓨터 상대 유즈맵으로 설계되어 있어, AI의 공격 패턴과 난이도 조절이 핵심 요소로 보인다. 플레이어는 초반 빠른 건물 건설과 방어 병력 확보를 통해 AI의 첫 공격을 막아내야 하며, 중반부터는 중앙 거점을 확보하거나 다리를 차단하는 전략을 구사해야 한다. 맵의 긴장감은 적의 끊임없는 공격과 제한된 자원으로 인한 압박감에서 비롯되며, 이를 해결하기 위한 전략적 사고가 요구된다. 초보 플레이어의 경우 적의 공격 패턴을 학습하며 방어 라인을 구축하는 데 집중해야 하며, 숙련된 플레이어는 중앙 거점 공략과 다리 차단 같은 고급 전략을 활용해 게임을 유리하게 이끌어나갈 수 있다. 이 맵은 디펜스 장르의 정점을 보여주는 동시에, 전략적 깊이를 더하고자 노력한 흔적이 엿보인다. 특히 ‘반지의 제왕’ 테마와 잘 어울리는 맵 디자인과 사운드 효과가 immersion을 높이는 요소로 작용한다. 플레이 전에는 맵의 주요 방어 포인트와 자원 위치를 미리 숙지하고, AI의 공격 패턴을 예상하는 연습이 필요하다. 또한, 팀 플레이를 지원하는 구조는 아니지만, 멀티플레이 환경에서 팀원 간의 협력이 필수적일 수 있어 팀 전략도 고려해볼 만하다. This Starcraft: Brood War custom map, 'LotR - SD CPU RH 1.42ver,' falls under the defense genre, offering players a large-scale and immersive experience inspired by the 'Lord of the Rings' universe. The map unfolds across a vast desert terrain, with a massive river running through the center, serving as a natural barrier. Narrow paths on either side of the river lead to each player's main base, where enemies continuously spawn and advance toward the player's defenses. The river itself acts as a defensive line, but enemies can cross via bridges or swim directly, requiring strategic placement of defensive units and structures. A notable feature is the central 'Mordor' zone, likely the enemy's core stronghold, which appears to be the most challenging area to defend. Players must balance base defense with resource management, as scattered resource nodes are crucial but limited. Designed as a CPU-only custom map, the AI's attack patterns and difficulty levels play a critical role in gameplay. Early-game success hinges on rapid base expansion and securing defensive units, while mid-game strategies involve controlling the central zone or blocking key bridges. The map's tension stems from relentless enemy waves and resource scarcity, demanding strategic foresight. Novice players should focus on learning AI attack patterns and establishing solid defensive lines, while experienced players can leverage advanced tactics like central zone control or bridge blocking. The map excels in blending the 'Lord of the Rings' theme with strategic depth, enhanced by thematic design and sound effects. Before playing, familiarizing oneself with key defensive points and resource locations is essential. Although not explicitly designed for team play, multiplayer scenarios may benefit from coordinated strategies among teammates.
임파서블 롱게이션 하드 (Impossible Longation Hard)
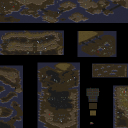
스타크래프트 브루드워의 유즈맵 ‘Impossible Longation Hard’는 5명의 플레이어가 한 팀으로 참여하는 디펜스 장르의 유즈맵으로, 내부 설명과 파일명상 ‘Impossible Lng.scx’로 분류된다. 맵은 황무지 타일셋을 기반으로 8192x8192의 넓은 공간에 펼쳐져 있으며, 맵 제목과 설명에서 ‘Longation’이라는 단어는 ‘장기전’ 또는 ‘확장’을 의미하는 것으로 추정된다. 맵 설명에 ‘Impossible Scenarios’라는 문구가 포함되어 있어 난이도가 매우 높다는 것을 암시하며, ‘Edited by ZhugeLiangII’라는 이름도 맵의 수정 이력을 보여준다. 플레이어는 맵 중앙의 시작 지점에서 출발해 적의 끊임없는 공격을 방어하며, 맵 구조상 방어선을 구축하고 자원을 효율적으로 관리하는 것이 중요할 것으로 보인다. 맵의 넓은 공간은 방어선을 넓게 펼칠 수 있도록 설계되어 있으며, 플레이어 간 협력이 필수적일 것으로 예상된다. 맵의 난이도가 ‘Hard’로 명시되어 있어 초보자는 물론 숙련자도 어려움을 느낄 수 있으며, 방어 전략과 자원 관리에 대한 깊은 이해가 요구된다. 이 맵은 디펜스 장르의 핵심을 잘 구현하고 있으며, 특히 방어와 자원 관리, 팀워크가 강조되는 구조로 보인다. 추천 대상은 디펜스 장르를 좋아하는 플레이어이며, 넓고 복잡한 맵 구조 때문에 전략적 사고와 팀워크가 중요한 맵이다. 플레이 전에는 맵의 시작 지점과 주요 방어 루트, 자원 위치 등을 미리 확인하고 팀원과의 전략 수립이 필요하다. 또한, 맵이 ‘Hard’ 난이도로 설정되어 있어 충분한 연습과 경험이 요구된다. This StarCraft: Brood War custom map, Impossible Longation Hard, is a defense-style UMS (Use Map Settings) game designed for a team of five players. The map, built on a 8192x8192 wasteland tileset, suggests a long-term or expansion-focused gameplay as implied by the term 'Longation' in its name and description. The phrase 'Impossible Scenarios' in the internal description hints at an extremely high difficulty level, further reinforced by the 'Hard' in the title. Players start at a central location and must defend against relentless enemy waves while managing resources and expanding their base. The wide map layout allows for strategic defensive positioning, but requires strong teamwork and coordination to succeed. The map is best suited for players who enjoy defense-oriented games and are prepared for a challenging experience that demands both tactical planning and efficient resource management. Before playing, it's recommended to familiarize yourself with the starting area, key defensive paths, and resource locations. Due to its high difficulty, players should be prepared for a steep learning curve and the need for strategic team play to overcome the challenges.
나루토: 구미의 유산 (Naruto Legacy of the Kyuubi)
스타크래프트 브루드워의 유즈맵 ‘나루토: 구미의 유산(Naruto Legacy of the Kyuubi)’은 나루토의 세계관을 배경으로 한 컴까기 스타일 디펜스 맵입니다. 이 맵은 제작자 MA-Dragon이 처음부터 직접 제작한 전투형 맵으로, 프리퀄 격인 DBZ 전투맵과는 차별화된 어려운 난이도가 특징입니다. 플레이어는 나루토와 동료들이 구미의 힘을 제어하는 과정에서 벌어지는 전투를 경험할 수 있으며, 각 캐릭터의 고유 스킬과 연계 플레이가 필수적인 구조로 설계되었습니다. 맵의 전체적인 흐름은 적의 끊임없는 웨이브를 막아내는 디펜스 형식으로 진행되며, 중앙의 방어 거점 주변에 배치된 길목을 유닛이 통과하지 못하도록 차단하는 방식으로 구성되어 있습니다. 적의 공격 패턴은 단순하지 않으며, 특정 시점마다 강력한 보스급 유닛이 등장하거나 다수의 유닛이 한꺼번에 몰려오는 등 전략적 대비를 요구합니다. 또한, 플레이어는 각 캐릭터의 능력치를 성장시키는 시스템이 있을 것으로 추정되어, 전투를 반복하며 점차 강해지는 재미를 느낄 수 있습니다. 이 맵은 6인용으로 설계되었으며, 팀 구성은 1팀으로 고정되어 모든 플레이어가 협력하여 적을 방어해야 합니다. 맵의 배경은 사막 타일셋을 사용하여 나루토 세계의 분위기를 연출하며, 넓은 맵 크기와 다채로운 지형 요소가 전투의 흥미를 더합니다. 다만, 맵 설명에 따르면 DBZ보다 훨씬 어려운 난이도로 구성되어 있어 초보 플레이어는 접근성이 떨어질 수 있습니다. 하지만 나루토 팬이거나 전투형 디펜스를 즐기는 유저에게는 그만큼 짜릿한 도전 과제가 될 것입니다. 플레이 전 미리 확인해야 할 사항으로는 각 캐릭터의 스킬 사용법과 연계 방식, 적의 웨이브 패턴, 그리고 방어 거점의 위치와 취약점입니다. 또한, 맵의 어려운 난이도를 고려해 초반 방어선을 sturdy하게 구축하는 것이 중요합니다. 맵의 진행 방식은 대체로 일방형이지만, 후반부로 갈수록 변수가 많아지므로 전략의 유연성이 요구됩니다. 이 맵을 즐기기 위해서는 나루토 세계관에 대한 기본적인 이해와 디펜스 게임에 대한 숙련도가 권장됩니다. 이 맵은 나루토 팬이라면 한번쯤 도전해 볼 만한 가치가 있으며, 특히 전투형 디펜스를 좋아하는 유저들에게는 새로운 경험을 선사할 것입니다. 다만, 난이도가 높다는 점을 감안해 충분한 연습과 전략 수립이 필요합니다. 맵의 완성도와 개성 있는 디자인이 인상적이므로, 배포된 버전을 다운로드해 직접 플레이해 보는 것을 추천합니다. The *StarCraft: Brood War* custom map *Naruto: Legacy of the Kyuubi* is a team-based defense map set in the *Naruto* universe. Created entirely from scratch by the mapper MA-Dragon, this combat-focused map stands out for its significantly higher difficulty compared to DBZ-style battle maps. Players experience the struggle of Naruto and his allies as they attempt to control the Kyuubi’s power, featuring a design where mastering each character’s unique skills and combos is essential. The gameplay follows a defense format, with players blocking endless enemy waves by sealing off pathways around the central stronghold. The enemy’s attacks are far from predictable—powerful boss units appear at set intervals, and waves of multiple units surge in simultaneously, demanding careful strategic planning. There’s also an implied progression system where characters grow stronger through repeated battles, adding a rewarding sense of power over time. Designed for six players, the map enforces a single-team setup where all participants must cooperate to defend against the onslaught. The desert-themed tileset immerses players in the *Naruto* aesthetic, while the expansive map and varied terrain keep the battles dynamic. However, the difficulty is notably steeper than DBZ maps, which may deter casual players. For *Naruto* fans or those who enjoy high-stakes defense games, it offers a thrilling challenge. Before playing, it’s crucial to study character skill interactions, enemy wave patterns, and the layout of the defense stronghold—especially its weak points. Given the map’s punishing difficulty, reinforcing the initial defense line early is key. While the progression is largely linear, later stages introduce more variables, requiring adaptable strategies. A basic understanding of the *Naruto* lore and experience with defense games are highly recommended. For *Naruto* enthusiasts, this map is worth trying, particularly for players who love intense combat defense experiences. Just be prepared for its steep learning curve—success depends on practice and solid preparation. The map’s polished design and distinctive style make it well worth downloading and experiencing firsthand.
메이즈 디펜스 7.65 (Maze Defense 7.65)
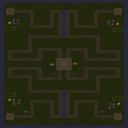
《메이즈 디펜스 7.65》는 스타크래프트: 브루드워의 유즈맵 장르 중 디펜스에 속하며, 복잡한 미로를 통과하는 적군을 중앙 기지까지 도달하지 못하게 방어하는 것이 핵심인 맵입니다. 내부 맵 설명에서 확인되는 ‘CenterMastered’라는 목표는 중앙에 위치한 주요 건물을 보호하는 방식으로 진행됩니다. 맵의 특징은 ‘고스트 12기’라는 강력한 적군 유닛을 시작부터 상대해야 한다는 점으로, 초반 방어가 치열할 수밖에 없습니다. 또한 ‘1500 Hunter’PRO’라는 설명은 플레이어가 강력한 유닛을 보유할 수 있는 가능성을 내포하고 있어, 전략적 자원 관리와 유닛 운용이 중요한 포인트로 작용합니다. 맵의 구조는 사막 타일셋을 기반으로 4096x4096의 넓은 맵 크기를 자랑하며, 미로 형태의 길목을 방어하는 방식으로 설계되었습니다. 적군은 미로를 따라 중앙으로 진격하기 때문에, 플레이어는 지형을 활용한 방어선 구축과 효율적인 자원 배분이 필요합니다. 특히 ‘no noobs’ 버전은 초보자 배제용으로 난이도가 높아졌음을 시사하며, 숙련된 플레이어에게 더 적합한 맵으로 보입니다. 내부 설명의 ‘not 4 but 12 ghost's’는 적군의 수가 예상을 넘어설 수 있음을 강조하며, 다수의 적군을 상대로 한 다중 방어 전략이 요구됩니다. 이 맵은 디펜스 장르의 전형적인 특징을 따르지만, 미로와 고스트라는 독특한 요소로 인해 다른 디펜스 맵과는 차별화됩니다. 플레이어는 적군의 이동 경로를 예측하고,CentralMastered를 보호하기 위한 최적의 방어선을 구축해야 합니다. 또한, ‘Hunter’PRO 유닛의 존재는 후반부 전투에서 강력한 화력을 제공할 수 있음을示唆합니다. 추천 대상은 디펜스 장르를 선호하는 플레이어이며, 특히 전략적 사고와 자원 관리에 자신이 있는 유저에게 적합할 것으로 보입니다. 플레이 전에는 맵의 미로 구조와 주요 방어 지점을 숙지하는 것이 중요하며, 초반 적군의 공격 패턴을 분석하는 것이 성공의 열쇠가 될 것입니다. Maze Defense 7.65 is a custom defense map in StarCraft: Brood War where players must prevent enemy units from reaching the central objective, referred to as 'CenterMastered.' The map stands out due to its maze-like terrain and the requirement to defend against a formidable early-game threat—12 Ghost units—that players must confront from the start. The internal description also hints at the presence of a powerful 'Hunter'PRO unit, suggesting that strategic resource management and unit utilization are critical for success. The map spans a large 4096x4096 area with a desert tileset, featuring a maze-like path that forces enemies to navigate through narrow corridors toward the center. Players must establish defensive lines, utilizing the terrain to their advantage while efficiently managing resources. The 'no noobs' version implies a higher difficulty level, making it more suitable for experienced players who can adapt to the unpredictable movement of the Ghost units and the map's complex layout. While it follows the traditional defense genre, Maze Defense 7.65 differentiates itself with its maze mechanics and the emphasis on early-game defense against multiple Ghost units. Players need to predict enemy paths, fortify key positions, and leverage the 'Hunter'PRO unit for late-game firepower. This map is ideal for those who enjoy strategic depth and resource management in defense scenarios. Before playing, it is advisable to study the maze layout and identify critical defense points, as understanding enemy movement patterns early on will significantly improve the chances of success.
썬크 10웨이 펑킹 하드 (SuNkD10WaY FUCKING HARD)
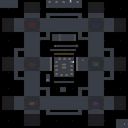
스타크래프트 브루드워의 하드코어 디펜스 장르 유즈맵인 ‘SuNkD10WaY FUCKING!!!!HARD’는 플레이어에게 끊임없는 압박과 전략적 도전을 요구하는 강렬한 경험을 제공한다. 맵의 구조는 6명의 플레이어가 각자 고립된 기지에서 시작하며, 주변에서 끊임없이 몰려드는 적군 웨이브를 상대해야 하는 ‘컴퓨터 상대 디펜스’ 형식으로 구성되어 있다. 맵 중앙에는 거대한 적군 기지 구조물이 자리 잡고 있으며, 이곳에서 끊임없이 생산되는 저글링, 히드라리스크, 뮤탈리스크, 울트라리스크 등 다양한 유닛들이 플레이어의 기지를 향해 끊임없이 공격해 온다. 플레이어는 제한된 자원과 건물을 활용해 방어선을 구축하고, 때로는 반격도 시도해야 한다. 특히 ‘FUCKING!!!!HARD’라는 제목이 시사하듯 난이도는 매우 높으며, 초보자는 물론 숙련자도 긴장감을 놓칠 수 없게 설계되어 있다. 맵의 특징은 맵 중앙의 거대한 적군 기지 구조물이 눈에 띄는데, 이곳을 파괴하거나 약화시키면 적군의 생산 능력이 급격히 떨어지는 등의 전략적 요소가 포함되어 있는 것으로 보인다. 또한 맵의 가장자리에는 ‘LEAVE NOW IF U ARE A NOOB’이라는 메시지가 인상적으로, 플레이어에게 도전 의식을 불러일으킨다. 이 맵은 단순히 방어만 하는 것이 아니라, 때로는 적극적인 반격을 통해 적의 생산 시설을 파괴하거나 자원을 확보하는 등 다층적인 전략을 요구한다. 초반에는 방어에 집중하되, 중반 이후에는 반격을 고려해 자원 관리를 철저히 해야 한다. 또한, 맵의 이름과 메시지에서 느껴지는 과격한 표현은 플레이어의 도전 정신을 자극하는 요소로 작용한다. 이 맵은 하드코어 디펜스 유저들에게는 최고의 선택이 될 수 있으며, 반복 플레이를 통해 점차 적응해 나갈 수 있는 구조로 설계되어 있다. 다만, 난이도가 매우 높기 때문에 처음 플레이하는 유저는 실패를 거듭할 가능성이 높으므로, 충분한 연습과 전략 수립이 필요하다. StarCraft: Brood War’s hardcore defense genre custom map, *SuNkD10WaY FUCKING!!!!HARD*, delivers an intense experience that demands relentless pressure and strategic challenges from players. The map’s structure places six players in isolated starting bases, forcing them to defend against endless waves of enemy units in a "computer opponent defense" format. At the center of the map lies a massive enemy base structure, constantly spawning waves of zerglings, hydralisks, mutalisks, ultralisks, and other units that relentlessly assault each player’s base. Players must build defenses with limited resources and structures while occasionally launching counterattacks. As the title *FUCKING!!!!HARD* suggests, the difficulty is extreme, designed to keep even seasoned players on edge. The map’s standout feature is the central enemy base structure—destroying or weakening it significantly reduces enemy production, adding a strategic layer to gameplay. A bold message along the map’s edge, *"LEAVE NOW IF U ARE A NOOB,"* further fuels the player’s competitive spirit. This map isn’t just about holding the line; it requires multilayered strategies, such as proactive counterattacks to destroy enemy production facilities or secure resources. Early on, defense is key, but mid-game calls for calculated counteroffensives and meticulous resource management. The map’s aggressive name and messaging serve as motivational triggers, pushing players to rise to the challenge. For hardcore defense enthusiasts, this is a top-tier choice, structured to allow gradual adaptation through repeated play. However, given its extreme difficulty, newcomers will likely face repeated failures without thorough practice and strategic planning.
9999의 발키리잡아라 (Valkyrie Hunting 9999)
‘9999의 발키리잡아라’는 스타크래프트 브루드워에서 제공하는 유즈맵으로, 플레이어들이 발키리를 잡는 전투를 펼치는 디펜스형 맵이다. 맵의 목표는 맵 중앙에 등장하는 발키리 유닛을 제한된 시간 안에 제거하는 것이며, 난이도는 제작자의 설명대로 ‘상당히 어려움’으로 설정되어 있다. 맵 전체는 정글 타일셋으로 이루어져 있으며, 넓은 공간과 복잡한 지형이 특징이다. 발키리는 지속적으로 이동하거나 공격을 가하며 플레이어의 병력을 소모시키기 때문에, 효율적인 자원 관리와 전략 구사가 필수적이다. 맵의 이름과 설명에서 알 수 있듯이, 발키리 제거라는 단순한 목표와는 달리 난이도가 높아져서 도전적인 경험을 제공한다. 특히 발키리의 패턴을 숙지하고, 병력 조합 및 배치에 신경을 써야만 성공할 수 있다. 제작자 주석에 따르면 이 맵은 심심할 때 만들기 시작한 것으로 보이며, 커스텀 게임에서 즐기기에 적합한 유즈맵으로 보인다. 초보 플레이어는 발키리의 공격 패턴과 맵 구조를 충분히 숙지한 후 참여하는 것이 좋으며, 충분한 연습을 통해 클리어 확률을 높일 수 있을 것이다. 디펜스 장르 특성상 맵의 밸런스와 난이도 조절이 핵심인데, 제작자는 이를 ‘상당히 어려움’으로 명시해 과도한 난이도를 설정했을 가능성이 있다. 따라서 플레이어는 맵의 특성과 발키리의 행동을 분석하여 전략을 세우는 것이 중요하다. 이 맵은 발키리 제거라는 명확한 목표와 함께, 전략적 사고와 적응력을 요구하는 디펜스 게임으로 즐길 수 있으며, 특히 도전적인 유저들에게 추천할 만하다. 맵을 플레이하기 전에는 발키리의 이동 경로와 공격 범위를 미리 확인하고, 병력 생산 및 업그레이드 타이밍을 조율하는 데 중점을 두는 것이 좋다. ‘Catch the Valkyries’ in StarCraft: Brood War is a custom defense map where players engage in combat to hunt down Valkyries. The objective is to eliminate the Valkyries that appear in the center of the map within a limited time, with the difficulty set to "very hard" as described by the creator. The entire map features a jungle tileset, characterized by its vast open spaces and intricate terrain. Since Valkyries continuously move or attack to deplete players' forces, efficient resource management and strategic execution are essential. Despite the straightforward goal of eliminating Valkyries, the difficulty is heightened by their patterns, requiring players to master the Valkyries' behavior, troop compositions, and positioning to succeed. According to the creator’s notes, the map was likely made during a spare moment and seems well-suited for casual custom games. Beginners should familiarize themselves with the Valkyries' attack patterns and map layout before attempting, as practice will significantly improve their chances of clearing the map. As a defense genre map, balancing difficulty is key, and the creator’s "very hard" classification may indicate an intentionally high challenge. Players should analyze the map’s mechanics and Valkyries’ behavior to devise effective strategies. With its clear objective and emphasis on strategic thinking and adaptability, this map offers an engaging defense experience, especially recommended for those seeking a challenge. Before playing, it’s wise to study the Valkyries’ movement paths and attack ranges and focus on coordinating troop production and upgrade timing.
최근 등록된 맵
새로 추가된 파일과 버전을 확인하세요.
뉴 히드라리스크 어택 20k 하드 (New Hydralisk Attack 20k Hard)
‘뉴 히드라리스크 어택 20k 하드’는 스타크래프트 브루드워의 유즈맵으로, 디펜스 장르에 속하는 하드코어한 방어형 맵이다. 맵의 구조는 긴 직선 형태로 펼쳐져 있으며, 오른쪽 끝에서 끊임없이 몰려드는 히드라리스크 무리를 왼쪽 기지에서 저지하는 것이 핵심이다. 기지 앞에는 방어진이 촘촘히 배치되어 있어, 플레이어는 자원 관리와 방어 건물의 배치, 업그레이드를 통해 끊임없이 쏟아지는 적을 상대해야 한다. 특히 하드 난이도답게 적의 수가 매우 많고, 스폰 주기도 빨라 지속적인 집중을 요구하는 것이 특징이다. 맵의 배경은 어두운 톤으로, 긴장감을 고조시키며, 방어선이 무너지면 곧바로 게임 오버로 이어지는 긴박한 상황이 연출된다. 방어 건물로 사용할 수 있는 유닛은 제한되어 있으며, 자원 수급도 제한적이기 때문에 효율적인 플레이가 요구된다. 하드 난이도답게 초보자는 클리어하기 어려우며, 숙련된 플레이어라도 몇 번의 시도와 전략 수정이 필요할 정도로 난이도가 높다. 전체적으로는 ‘컴까기’와 ‘디펜스’의 조합으로, 방어와 자원 관리의 밸런스를 맞추는 것이 관건인 맵으로 평가할 수 있다. 추천 대상은 스타크래프트의 방어와 전략적 플레이를 좋아하는 유저들이며, 특히 긴장감 넘치는 플레이를 즐기는 유저들에게 적합하다. 플레이 전에는 방어 건물의 배치와 업그레이드 우선순위를 미리 계획하고, 자원 관리에 유의할 필요가 있다. 또한, 게임 시작 직후 첫-wave를 어떻게 넘기느냐가 이후의 진행을 좌우하는 중요한 포인트가 된다. This StarCraft: Brood War custom map, 'New Hydralisk Attack 20k Hard,' falls under the defense genre, offering a challenging hard-core defensive gameplay experience. The map features a long, linear structure where the player must defend their base on the left side against an endless stream of Hydralisks spawning from the right. The defense line is densely packed with structures, requiring players to manage resources, strategically place defensive buildings, and prioritize upgrades to withstand the relentless enemy waves. The hard difficulty ensures a high enemy count with rapid spawn intervals, demanding constant focus and adaptability. The dark-toned background enhances the intense atmosphere, with failure leading to an immediate game over. Limited unit options for defense and restricted resource income add to the challenge, making efficient resource and upgrade management crucial. The high difficulty makes it inaccessible for beginners, and even experienced players may need multiple attempts and strategic adjustments. The map blends elements of 'computer-killing' and 'defense,' emphasizing the balance between defense and resource management. It is recommended for players who enjoy strategic defense mechanics and high-pressure gameplay. Before playing, planning defensive structure placement, prioritizing upgrades, and managing resources are essential. The initial wave often sets the tone for the rest of the game, making it a critical moment to handle effectively.
9999의 발키리잡아라 (Valkyrie Hunting 9999)
‘9999의 발키리잡아라’는 스타크래프트 브루드워에서 제공하는 유즈맵으로, 플레이어들이 발키리를 잡는 전투를 펼치는 디펜스형 맵이다. 맵의 목표는 맵 중앙에 등장하는 발키리 유닛을 제한된 시간 안에 제거하는 것이며, 난이도는 제작자의 설명대로 ‘상당히 어려움’으로 설정되어 있다. 맵 전체는 정글 타일셋으로 이루어져 있으며, 넓은 공간과 복잡한 지형이 특징이다. 발키리는 지속적으로 이동하거나 공격을 가하며 플레이어의 병력을 소모시키기 때문에, 효율적인 자원 관리와 전략 구사가 필수적이다. 맵의 이름과 설명에서 알 수 있듯이, 발키리 제거라는 단순한 목표와는 달리 난이도가 높아져서 도전적인 경험을 제공한다. 특히 발키리의 패턴을 숙지하고, 병력 조합 및 배치에 신경을 써야만 성공할 수 있다. 제작자 주석에 따르면 이 맵은 심심할 때 만들기 시작한 것으로 보이며, 커스텀 게임에서 즐기기에 적합한 유즈맵으로 보인다. 초보 플레이어는 발키리의 공격 패턴과 맵 구조를 충분히 숙지한 후 참여하는 것이 좋으며, 충분한 연습을 통해 클리어 확률을 높일 수 있을 것이다. 디펜스 장르 특성상 맵의 밸런스와 난이도 조절이 핵심인데, 제작자는 이를 ‘상당히 어려움’으로 명시해 과도한 난이도를 설정했을 가능성이 있다. 따라서 플레이어는 맵의 특성과 발키리의 행동을 분석하여 전략을 세우는 것이 중요하다. 이 맵은 발키리 제거라는 명확한 목표와 함께, 전략적 사고와 적응력을 요구하는 디펜스 게임으로 즐길 수 있으며, 특히 도전적인 유저들에게 추천할 만하다. 맵을 플레이하기 전에는 발키리의 이동 경로와 공격 범위를 미리 확인하고, 병력 생산 및 업그레이드 타이밍을 조율하는 데 중점을 두는 것이 좋다. ‘Catch the Valkyries’ in StarCraft: Brood War is a custom defense map where players engage in combat to hunt down Valkyries. The objective is to eliminate the Valkyries that appear in the center of the map within a limited time, with the difficulty set to "very hard" as described by the creator. The entire map features a jungle tileset, characterized by its vast open spaces and intricate terrain. Since Valkyries continuously move or attack to deplete players' forces, efficient resource management and strategic execution are essential. Despite the straightforward goal of eliminating Valkyries, the difficulty is heightened by their patterns, requiring players to master the Valkyries' behavior, troop compositions, and positioning to succeed. According to the creator’s notes, the map was likely made during a spare moment and seems well-suited for casual custom games. Beginners should familiarize themselves with the Valkyries' attack patterns and map layout before attempting, as practice will significantly improve their chances of clearing the map. As a defense genre map, balancing difficulty is key, and the creator’s "very hard" classification may indicate an intentionally high challenge. Players should analyze the map’s mechanics and Valkyries’ behavior to devise effective strategies. With its clear objective and emphasis on strategic thinking and adaptability, this map offers an engaging defense experience, especially recommended for those seeking a challenge. Before playing, it’s wise to study the Valkyries’ movement paths and attack ranges and focus on coordinating troop production and upgrade timing.
썬크 10웨이 펑킹 하드 (SuNkD10WaY FUCKING HARD)
스타크래프트 브루드워의 하드코어 디펜스 장르 유즈맵인 ‘SuNkD10WaY FUCKING!!!!HARD’는 플레이어에게 끊임없는 압박과 전략적 도전을 요구하는 강렬한 경험을 제공한다. 맵의 구조는 6명의 플레이어가 각자 고립된 기지에서 시작하며, 주변에서 끊임없이 몰려드는 적군 웨이브를 상대해야 하는 ‘컴퓨터 상대 디펜스’ 형식으로 구성되어 있다. 맵 중앙에는 거대한 적군 기지 구조물이 자리 잡고 있으며, 이곳에서 끊임없이 생산되는 저글링, 히드라리스크, 뮤탈리스크, 울트라리스크 등 다양한 유닛들이 플레이어의 기지를 향해 끊임없이 공격해 온다. 플레이어는 제한된 자원과 건물을 활용해 방어선을 구축하고, 때로는 반격도 시도해야 한다. 특히 ‘FUCKING!!!!HARD’라는 제목이 시사하듯 난이도는 매우 높으며, 초보자는 물론 숙련자도 긴장감을 놓칠 수 없게 설계되어 있다. 맵의 특징은 맵 중앙의 거대한 적군 기지 구조물이 눈에 띄는데, 이곳을 파괴하거나 약화시키면 적군의 생산 능력이 급격히 떨어지는 등의 전략적 요소가 포함되어 있는 것으로 보인다. 또한 맵의 가장자리에는 ‘LEAVE NOW IF U ARE A NOOB’이라는 메시지가 인상적으로, 플레이어에게 도전 의식을 불러일으킨다. 이 맵은 단순히 방어만 하는 것이 아니라, 때로는 적극적인 반격을 통해 적의 생산 시설을 파괴하거나 자원을 확보하는 등 다층적인 전략을 요구한다. 초반에는 방어에 집중하되, 중반 이후에는 반격을 고려해 자원 관리를 철저히 해야 한다. 또한, 맵의 이름과 메시지에서 느껴지는 과격한 표현은 플레이어의 도전 정신을 자극하는 요소로 작용한다. 이 맵은 하드코어 디펜스 유저들에게는 최고의 선택이 될 수 있으며, 반복 플레이를 통해 점차 적응해 나갈 수 있는 구조로 설계되어 있다. 다만, 난이도가 매우 높기 때문에 처음 플레이하는 유저는 실패를 거듭할 가능성이 높으므로, 충분한 연습과 전략 수립이 필요하다. StarCraft: Brood War’s hardcore defense genre custom map, *SuNkD10WaY FUCKING!!!!HARD*, delivers an intense experience that demands relentless pressure and strategic challenges from players. The map’s structure places six players in isolated starting bases, forcing them to defend against endless waves of enemy units in a "computer opponent defense" format. At the center of the map lies a massive enemy base structure, constantly spawning waves of zerglings, hydralisks, mutalisks, ultralisks, and other units that relentlessly assault each player’s base. Players must build defenses with limited resources and structures while occasionally launching counterattacks. As the title *FUCKING!!!!HARD* suggests, the difficulty is extreme, designed to keep even seasoned players on edge. The map’s standout feature is the central enemy base structure—destroying or weakening it significantly reduces enemy production, adding a strategic layer to gameplay. A bold message along the map’s edge, *"LEAVE NOW IF U ARE A NOOB,"* further fuels the player’s competitive spirit. This map isn’t just about holding the line; it requires multilayered strategies, such as proactive counterattacks to destroy enemy production facilities or secure resources. Early on, defense is key, but mid-game calls for calculated counteroffensives and meticulous resource management. The map’s aggressive name and messaging serve as motivational triggers, pushing players to rise to the challenge. For hardcore defense enthusiasts, this is a top-tier choice, structured to allow gradual adaptation through repeated play. However, given its extreme difficulty, newcomers will likely face repeated failures without thorough practice and strategic planning.
나루토: 구미의 유산 (Naruto Legacy of the Kyuubi)
스타크래프트 브루드워의 유즈맵 ‘나루토: 구미의 유산(Naruto Legacy of the Kyuubi)’은 나루토의 세계관을 배경으로 한 컴까기 스타일 디펜스 맵입니다. 이 맵은 제작자 MA-Dragon이 처음부터 직접 제작한 전투형 맵으로, 프리퀄 격인 DBZ 전투맵과는 차별화된 어려운 난이도가 특징입니다. 플레이어는 나루토와 동료들이 구미의 힘을 제어하는 과정에서 벌어지는 전투를 경험할 수 있으며, 각 캐릭터의 고유 스킬과 연계 플레이가 필수적인 구조로 설계되었습니다. 맵의 전체적인 흐름은 적의 끊임없는 웨이브를 막아내는 디펜스 형식으로 진행되며, 중앙의 방어 거점 주변에 배치된 길목을 유닛이 통과하지 못하도록 차단하는 방식으로 구성되어 있습니다. 적의 공격 패턴은 단순하지 않으며, 특정 시점마다 강력한 보스급 유닛이 등장하거나 다수의 유닛이 한꺼번에 몰려오는 등 전략적 대비를 요구합니다. 또한, 플레이어는 각 캐릭터의 능력치를 성장시키는 시스템이 있을 것으로 추정되어, 전투를 반복하며 점차 강해지는 재미를 느낄 수 있습니다. 이 맵은 6인용으로 설계되었으며, 팀 구성은 1팀으로 고정되어 모든 플레이어가 협력하여 적을 방어해야 합니다. 맵의 배경은 사막 타일셋을 사용하여 나루토 세계의 분위기를 연출하며, 넓은 맵 크기와 다채로운 지형 요소가 전투의 흥미를 더합니다. 다만, 맵 설명에 따르면 DBZ보다 훨씬 어려운 난이도로 구성되어 있어 초보 플레이어는 접근성이 떨어질 수 있습니다. 하지만 나루토 팬이거나 전투형 디펜스를 즐기는 유저에게는 그만큼 짜릿한 도전 과제가 될 것입니다. 플레이 전 미리 확인해야 할 사항으로는 각 캐릭터의 스킬 사용법과 연계 방식, 적의 웨이브 패턴, 그리고 방어 거점의 위치와 취약점입니다. 또한, 맵의 어려운 난이도를 고려해 초반 방어선을 sturdy하게 구축하는 것이 중요합니다. 맵의 진행 방식은 대체로 일방형이지만, 후반부로 갈수록 변수가 많아지므로 전략의 유연성이 요구됩니다. 이 맵을 즐기기 위해서는 나루토 세계관에 대한 기본적인 이해와 디펜스 게임에 대한 숙련도가 권장됩니다. 이 맵은 나루토 팬이라면 한번쯤 도전해 볼 만한 가치가 있으며, 특히 전투형 디펜스를 좋아하는 유저들에게는 새로운 경험을 선사할 것입니다. 다만, 난이도가 높다는 점을 감안해 충분한 연습과 전략 수립이 필요합니다. 맵의 완성도와 개성 있는 디자인이 인상적이므로, 배포된 버전을 다운로드해 직접 플레이해 보는 것을 추천합니다. The *StarCraft: Brood War* custom map *Naruto: Legacy of the Kyuubi* is a team-based defense map set in the *Naruto* universe. Created entirely from scratch by the mapper MA-Dragon, this combat-focused map stands out for its significantly higher difficulty compared to DBZ-style battle maps. Players experience the struggle of Naruto and his allies as they attempt to control the Kyuubi’s power, featuring a design where mastering each character’s unique skills and combos is essential. The gameplay follows a defense format, with players blocking endless enemy waves by sealing off pathways around the central stronghold. The enemy’s attacks are far from predictable—powerful boss units appear at set intervals, and waves of multiple units surge in simultaneously, demanding careful strategic planning. There’s also an implied progression system where characters grow stronger through repeated battles, adding a rewarding sense of power over time. Designed for six players, the map enforces a single-team setup where all participants must cooperate to defend against the onslaught. The desert-themed tileset immerses players in the *Naruto* aesthetic, while the expansive map and varied terrain keep the battles dynamic. However, the difficulty is notably steeper than DBZ maps, which may deter casual players. For *Naruto* fans or those who enjoy high-stakes defense games, it offers a thrilling challenge. Before playing, it’s crucial to study character skill interactions, enemy wave patterns, and the layout of the defense stronghold—especially its weak points. Given the map’s punishing difficulty, reinforcing the initial defense line early is key. While the progression is largely linear, later stages introduce more variables, requiring adaptable strategies. A basic understanding of the *Naruto* lore and experience with defense games are highly recommended. For *Naruto* enthusiasts, this map is worth trying, particularly for players who love intense combat defense experiences. Just be prepared for its steep learning curve—success depends on practice and solid preparation. The map’s polished design and distinctive style make it well worth downloading and experiencing firsthand.
메이즈 디펜스 7.65 (Maze Defense 7.65)
《메이즈 디펜스 7.65》는 스타크래프트: 브루드워의 유즈맵 장르 중 디펜스에 속하며, 복잡한 미로를 통과하는 적군을 중앙 기지까지 도달하지 못하게 방어하는 것이 핵심인 맵입니다. 내부 맵 설명에서 확인되는 ‘CenterMastered’라는 목표는 중앙에 위치한 주요 건물을 보호하는 방식으로 진행됩니다. 맵의 특징은 ‘고스트 12기’라는 강력한 적군 유닛을 시작부터 상대해야 한다는 점으로, 초반 방어가 치열할 수밖에 없습니다. 또한 ‘1500 Hunter’PRO’라는 설명은 플레이어가 강력한 유닛을 보유할 수 있는 가능성을 내포하고 있어, 전략적 자원 관리와 유닛 운용이 중요한 포인트로 작용합니다. 맵의 구조는 사막 타일셋을 기반으로 4096x4096의 넓은 맵 크기를 자랑하며, 미로 형태의 길목을 방어하는 방식으로 설계되었습니다. 적군은 미로를 따라 중앙으로 진격하기 때문에, 플레이어는 지형을 활용한 방어선 구축과 효율적인 자원 배분이 필요합니다. 특히 ‘no noobs’ 버전은 초보자 배제용으로 난이도가 높아졌음을 시사하며, 숙련된 플레이어에게 더 적합한 맵으로 보입니다. 내부 설명의 ‘not 4 but 12 ghost's’는 적군의 수가 예상을 넘어설 수 있음을 강조하며, 다수의 적군을 상대로 한 다중 방어 전략이 요구됩니다. 이 맵은 디펜스 장르의 전형적인 특징을 따르지만, 미로와 고스트라는 독특한 요소로 인해 다른 디펜스 맵과는 차별화됩니다. 플레이어는 적군의 이동 경로를 예측하고,CentralMastered를 보호하기 위한 최적의 방어선을 구축해야 합니다. 또한, ‘Hunter’PRO 유닛의 존재는 후반부 전투에서 강력한 화력을 제공할 수 있음을示唆합니다. 추천 대상은 디펜스 장르를 선호하는 플레이어이며, 특히 전략적 사고와 자원 관리에 자신이 있는 유저에게 적합할 것으로 보입니다. 플레이 전에는 맵의 미로 구조와 주요 방어 지점을 숙지하는 것이 중요하며, 초반 적군의 공격 패턴을 분석하는 것이 성공의 열쇠가 될 것입니다. Maze Defense 7.65 is a custom defense map in StarCraft: Brood War where players must prevent enemy units from reaching the central objective, referred to as 'CenterMastered.' The map stands out due to its maze-like terrain and the requirement to defend against a formidable early-game threat—12 Ghost units—that players must confront from the start. The internal description also hints at the presence of a powerful 'Hunter'PRO unit, suggesting that strategic resource management and unit utilization are critical for success. The map spans a large 4096x4096 area with a desert tileset, featuring a maze-like path that forces enemies to navigate through narrow corridors toward the center. Players must establish defensive lines, utilizing the terrain to their advantage while efficiently managing resources. The 'no noobs' version implies a higher difficulty level, making it more suitable for experienced players who can adapt to the unpredictable movement of the Ghost units and the map's complex layout. While it follows the traditional defense genre, Maze Defense 7.65 differentiates itself with its maze mechanics and the emphasis on early-game defense against multiple Ghost units. Players need to predict enemy paths, fortify key positions, and leverage the 'Hunter'PRO unit for late-game firepower. This map is ideal for those who enjoy strategic depth and resource management in defense scenarios. Before playing, it is advisable to study the maze layout and identify critical defense points, as understanding enemy movement patterns early on will significantly improve the chances of success.
임파서블 롱게이션 하드 (Impossible Longation Hard)
스타크래프트 브루드워의 유즈맵 ‘Impossible Longation Hard’는 5명의 플레이어가 한 팀으로 참여하는 디펜스 장르의 유즈맵으로, 내부 설명과 파일명상 ‘Impossible Lng.scx’로 분류된다. 맵은 황무지 타일셋을 기반으로 8192x8192의 넓은 공간에 펼쳐져 있으며, 맵 제목과 설명에서 ‘Longation’이라는 단어는 ‘장기전’ 또는 ‘확장’을 의미하는 것으로 추정된다. 맵 설명에 ‘Impossible Scenarios’라는 문구가 포함되어 있어 난이도가 매우 높다는 것을 암시하며, ‘Edited by ZhugeLiangII’라는 이름도 맵의 수정 이력을 보여준다. 플레이어는 맵 중앙의 시작 지점에서 출발해 적의 끊임없는 공격을 방어하며, 맵 구조상 방어선을 구축하고 자원을 효율적으로 관리하는 것이 중요할 것으로 보인다. 맵의 넓은 공간은 방어선을 넓게 펼칠 수 있도록 설계되어 있으며, 플레이어 간 협력이 필수적일 것으로 예상된다. 맵의 난이도가 ‘Hard’로 명시되어 있어 초보자는 물론 숙련자도 어려움을 느낄 수 있으며, 방어 전략과 자원 관리에 대한 깊은 이해가 요구된다. 이 맵은 디펜스 장르의 핵심을 잘 구현하고 있으며, 특히 방어와 자원 관리, 팀워크가 강조되는 구조로 보인다. 추천 대상은 디펜스 장르를 좋아하는 플레이어이며, 넓고 복잡한 맵 구조 때문에 전략적 사고와 팀워크가 중요한 맵이다. 플레이 전에는 맵의 시작 지점과 주요 방어 루트, 자원 위치 등을 미리 확인하고 팀원과의 전략 수립이 필요하다. 또한, 맵이 ‘Hard’ 난이도로 설정되어 있어 충분한 연습과 경험이 요구된다. This StarCraft: Brood War custom map, Impossible Longation Hard, is a defense-style UMS (Use Map Settings) game designed for a team of five players. The map, built on a 8192x8192 wasteland tileset, suggests a long-term or expansion-focused gameplay as implied by the term 'Longation' in its name and description. The phrase 'Impossible Scenarios' in the internal description hints at an extremely high difficulty level, further reinforced by the 'Hard' in the title. Players start at a central location and must defend against relentless enemy waves while managing resources and expanding their base. The wide map layout allows for strategic defensive positioning, but requires strong teamwork and coordination to succeed. The map is best suited for players who enjoy defense-oriented games and are prepared for a challenging experience that demands both tactical planning and efficient resource management. Before playing, it's recommended to familiarize yourself with the starting area, key defensive paths, and resource locations. Due to its high difficulty, players should be prepared for a steep learning curve and the need for strategic team play to overcome the challenges.
5vs3 인세인 컴까기 패스트빌드 (5vs3 InsaneComp w/FastBuild)
스타크래프트 브루드워의 대형 디펜스 유즈맵인 <5vs3 InsaneComp w/FastBuild>는 5명의 플레이어가 3명의 인공지능 ‘인세인 컴’을 상대로 자원을 최대한 빠르게 확보하고 방어선을 구축하는 것이 핵심인 컴까기 형식의 맵이다. 맵 중앙에는 넓은 평원과 요충지가 배치되어 있으며, 플레이어는 시작 지점에서 빠르게 멀티를 확보하면서 Mineral Field를 확보하고 Creep Growth를 관리해야 한다. 인공지능의 공격은 초반부터 강력하게 들어오며, 특히 FastBuild 옵션 덕분에 건물을 빠르게 짓고 방어 건물을 배치하는 것이 중요하다. 맵의 특이한 점은 황혼 타일셋을 기반으로 한 어두운 분위기와 넓은 시야가 제공되는 구조로, 플레이어는 맵 곳곳의 Mineral Cluster를 안전하게 확보해야 한다. 방어선의 경우, 초반에는 Mineral Line Protect를 위해 Zergling Rush에 대비해야 하고, 중반 이후에는 Siege Tank과 Guardian을 활용한 멀티 공격을 방어하는 전략이 필요하다. 인공지능의 난이도는 ‘인세인’으로 설정되어 있어 초보자는 적응하기 어려우며, 숙련된 플레이어라도 빠른 판단력과 자원 관리가 요구된다. 추천 대상은 스타크래프트 디펜스 유즈맵을 즐기며, 빠른 빌드와 방어 전략을 연마하고 싶은 유저들이다. 플레이 전에는 Mineral Line의 배치와 Choke Point의 위치를 반드시 숙지해야 하며, FastBuild 옵션을 활용해 초반 자원 확보 속도를 높이는 것이 중요하다. 맵의 넓은 크기 덕분에 전략적 깊이가 풍부하며, multiple Rush 방어와 멀티 테란 운영이 승리 여부를 가른다. 특히 인공지능의 Mineral Line 파괴 시도를 신속히 대응하지 않으면 자원 부족으로 인한 패배를 맞이할 수 있으니 주의가 필요하다. This StarCraft: Brood War custom defense map, *5vs3 InsaneComp w/FastBuild*, pits five players against three AI "Insane Comp" opponents in a race to secure resources and build defenses as quickly as possible. The map features a central open plain and key strategic points, where players must establish their first expansion rapidly, secure Mineral Fields, and manage Creep Growth. The AI launches aggressive attacks from the start, making FastBuild essential for quickly constructing buildings and setting up defensive structures. The map’s unique dark atmosphere, based on a twilight tileset, offers expansive visibility, allowing players to safely secure Mineral Clusters scattered across the battlefield. Early-game defense requires preparing for Zergling rushes to protect Mineral Lines, while mid-to-late game strategies revolve around countering multi-pronged attacks with Siege Tanks and Guardians. The AI’s difficulty is set to "Insane," making it challenging for beginners, though even experienced players must rely on quick decision-making and efficient resource management. Ideal for those who enjoy StarCraft defense custom maps, this map sharpens fast build orders and defensive tactics. Before playing, players should thoroughly understand Mineral Line placements and Choke Point locations, and leveraging the FastBuild option to accelerate early resource gathering is crucial. The map’s large scale provides deep strategic layers, where success hinges on defending against multiple rushes and managing multi-base Terran operations. Failing to quickly counter the AI’s attempts to destroy Mineral Lines can lead to crippling resource shortages and defeat, so constant vigilance is required.
로드 오브 더 링 SD CPU RH (LotR - SD CPU RH 1.42ver)
스타크래프트 브루드워의 ‘로드 오브 더 링’ 시리즈로 유명한 ‘LotR - SD CPU RH 1.42ver’는 디펜스 장르의 유즈맵으로, 초월적인 규모의 맵과 섬세한 진행 구조로 플레이어들에게 긴장감을 선사한다. 맵은 거대한 사막 지형 위에 펼쳐져 있으며, 중앙을 가로지르는 거대한 강이 맵의 주요한 방어 경계 역할을 한다. 강 양쪽에는 플레이어 본진에 이르는 좁은 길목이 존재하며, 이 길목을 따라 끊임없이 몰려오는 적 유닛을 막아내야 한다. 강 자체는 일종의 자연 장벽 역할을 하지만, 적 유닛은 다리를 건너거나 수영을 통해 본진으로 접근할 수 있어 방어 포인트를 신중히 배치해야 한다. 맵의 특징 중 하나는 맵 중앙에 위치한 거대한 ‘모르도르’ 구역으로, 이곳은 적의 핵심 거점으로 추정되며 방어하기 가장 어려운 지점으로 보인다. 플레이어는 본진 방어뿐만 아니라, 중앙을 가로지르는 다리를 차단하거나 보조 건물을 건설해 적의 공격을 지연시킬 수 있는 전략적 선택지가 주어진다. 또한, 맵 곳곳에 흩어져 있는 자원 지대는 초기 건물 건설과 방어 병력의 유지에 필수적이지만, 자원 채취가 제한적일 가능성이 있어 자원 관리도 중요하다. 이 맵은 특히 컴퓨터 상대 유즈맵으로 설계되어 있어, AI의 공격 패턴과 난이도 조절이 핵심 요소로 보인다. 플레이어는 초반 빠른 건물 건설과 방어 병력 확보를 통해 AI의 첫 공격을 막아내야 하며, 중반부터는 중앙 거점을 확보하거나 다리를 차단하는 전략을 구사해야 한다. 맵의 긴장감은 적의 끊임없는 공격과 제한된 자원으로 인한 압박감에서 비롯되며, 이를 해결하기 위한 전략적 사고가 요구된다. 초보 플레이어의 경우 적의 공격 패턴을 학습하며 방어 라인을 구축하는 데 집중해야 하며, 숙련된 플레이어는 중앙 거점 공략과 다리 차단 같은 고급 전략을 활용해 게임을 유리하게 이끌어나갈 수 있다. 이 맵은 디펜스 장르의 정점을 보여주는 동시에, 전략적 깊이를 더하고자 노력한 흔적이 엿보인다. 특히 ‘반지의 제왕’ 테마와 잘 어울리는 맵 디자인과 사운드 효과가 immersion을 높이는 요소로 작용한다. 플레이 전에는 맵의 주요 방어 포인트와 자원 위치를 미리 숙지하고, AI의 공격 패턴을 예상하는 연습이 필요하다. 또한, 팀 플레이를 지원하는 구조는 아니지만, 멀티플레이 환경에서 팀원 간의 협력이 필수적일 수 있어 팀 전략도 고려해볼 만하다. This Starcraft: Brood War custom map, 'LotR - SD CPU RH 1.42ver,' falls under the defense genre, offering players a large-scale and immersive experience inspired by the 'Lord of the Rings' universe. The map unfolds across a vast desert terrain, with a massive river running through the center, serving as a natural barrier. Narrow paths on either side of the river lead to each player's main base, where enemies continuously spawn and advance toward the player's defenses. The river itself acts as a defensive line, but enemies can cross via bridges or swim directly, requiring strategic placement of defensive units and structures. A notable feature is the central 'Mordor' zone, likely the enemy's core stronghold, which appears to be the most challenging area to defend. Players must balance base defense with resource management, as scattered resource nodes are crucial but limited. Designed as a CPU-only custom map, the AI's attack patterns and difficulty levels play a critical role in gameplay. Early-game success hinges on rapid base expansion and securing defensive units, while mid-game strategies involve controlling the central zone or blocking key bridges. The map's tension stems from relentless enemy waves and resource scarcity, demanding strategic foresight. Novice players should focus on learning AI attack patterns and establishing solid defensive lines, while experienced players can leverage advanced tactics like central zone control or bridge blocking. The map excels in blending the 'Lord of the Rings' theme with strategic depth, enhanced by thematic design and sound effects. Before playing, familiarizing oneself with key defensive points and resource locations is essential. Although not explicitly designed for team play, multiplayer scenarios may benefit from coordinated strategies among teammates.
맵 선택 가이드
태그는 맵의 핵심 특징을 빠르게 설명하지만 제작 버전마다 규칙이 다를 수 있습니다. 상세 설명에서 권장 인원, 난이도, 플레이 시간과 버전을 함께 확인한 뒤 다운로드하세요.