
난이도 상승 스타크래프트 맵 모음
'난이도 상승' 태그가 등록된 맵을 모았습니다. 장르 하나로 찾기 어려운 플레이 방식, 난이도와 특징을 중심으로 인기 맵과 최신 맵을 비교해 보세요.
- 등록 맵
- 10개
- 누적 다운로드
- 1
- 누적 조회
- 423
인기 맵
다운로드와 조회 반응이 높은 맵입니다.
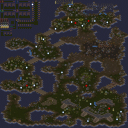
Impossible Continuum 3.2o
‘Impossible Continuum 3.2o’는 스타크래프트 브루드워의 유즈맵으로, ‘Impossible Longation’의 후속작이자 bushwack과 hahaha666에 의해 만들어진 컴까기 장르의 맵이다. 맵은 4096x4096 크기의 거대한 사막 타일셋을 바탕으로 구성되어 있으며, 5명의 플레이어가 동시에 참여할 수 있다. 게임의 핵심은 ‘Impossible’이라는 이름에서 짐작할 수 있듯이, 끊임없이 쏟아지는 적의 공격을 방어하며 마지막까지 살아남는 ‘컴퓨터 상대 디펜스’ 형식이다. 맵의 구조는 중앙을 가로지르는 좁은 통로와 그 주변의 넓은 평지로 나뉘며, 플레이어는 각자 할당된 위치에 건물을 건설하고 병력을 양성해 적의 공격을 막아내야 한다. 적의 유닛은 끊임없이 몰려오며, 그 수와 종류는 시간이 지날수록 점점 강력해진다. 특히 후반부로 갈수록 고급 유닛과 다수의 조합된 공격이 빈번해지므로, efficient한 자원 관리와 전략적 터렛 배치, 그리고 순간적인 판단력이 요구된다. 맵의 난이도는 ‘보통’ 정도로, 초보자도 쉽게 접근할 수 있지만 숙련자라면 더 높은 점수를 노릴 수 있는 구조로 설계되어 있다. 플레이어는 시작 시 기본 자원과 건물 몇 개를 제공받지만, 추가 자원은 주로 미네랄과 가스를 채취해 확보해야 한다. 또한, 맵 곳곳에 배치된 보너스 자원 지역을 활용하면 더 빠르게 병력을 양성할 수 있다. 방어 건물로는 주로 테란의 포톤 캐논이나 프로토스의 포톤 캐논에 해당하는 ‘디펜스 타워’를 사용할 수 있으며, 필요에 따라 추가 병력을 생산하거나 업그레이드를 진행할 수 있다. 맵의 분위기는 사막의 황량한 풍경과 적의 끊임없는 공격으로 긴장감이 지속되며, 플레이어는 자신의 생존과 더불어 다른 플레이어와의 경쟁도 고려해야 한다. 이 맵의 가장 큰 특징은 ‘Impossible’이라는 타이틀에 걸맞게, 적의 공격이 매우 치열하다는 점이다. 초반에는 저글링과 히드라리스크가 주를 이루지만, 중반 이후로는 뮤탈리스크, 울트라리스크, 그리고 캐리어까지 등장한다. 이러한 적의 조합을 efficiently 방어하기 위해서는 맵의 지형과 보너스 자원의 위치를 정확히 파악하고, 각 플레이어 간의 협력이 필수적이다. 또한, 맵의 후반부에는 갑자기 쏟아지는 적의 대군에 대처할 수 있는 ‘최후의 방어선’을 구축하는 것이 관건이다. 이러한 요소들이 결합되어 ‘Impossible Continuum 3.2o’는 단순한 디펜스 맵을 넘어, 전략과 집중력, 그리고 순간적인 판단력이 요구되는 고난이도의 유즈맵으로 자리매김하고 있다. 이 맵은 초보자에게는 다소 어려울 수 있지만, 디펜스 장르에 익숙한 플레이어라면 재미있게 즐길 수 있는 맵이다. 또한, 맵의 구조와 적의 공격 패턴이 일정하지 않기 때문에, 매 판마다 새로운 전략을 시도해 볼 수 있어 반복 플레이에도 지루하지 않다. 특히, 팀 플레이를 통해 다른 플레이어와의 협력을 연습할 수 있는 점도 큰 장점 중 하나다. 그러나 맵의 난이도가 높기 때문에, 초보자라면 먼저 쉬운 디펜스 맵으로 연습을 한 후 도전하는 것이 좋다. ‘Impossible Continuum 3.2o’는 디펜스 유즈맵을 좋아하는 플레이어들에게 강력히 추천할 만한 맵이다. 'Impossible Continuum 3.2o' is a user-created custom map for *StarCraft: Brood War*, serving as the sequel to *Impossible Longation*. Developed by bushwack and hahaha666, it belongs to the "compete against AI" genre. The map features a massive 4096x4096 desert tileset and supports up to five players simultaneously. As the name suggests, the core gameplay revolves around defending against relentless enemy waves in a "computer opponent defense" format until the last player remains. The map is divided into a narrow central corridor flanked by wide open areas. Players must build structures and train units in their assigned positions to fend off continuous enemy assaults. The enemy's forces grow increasingly stronger over time, both in number and unit composition. By the late game, high-tier units and coordinated attacks become frequent, demanding efficient resource management, strategic turret placement, and quick decision-making. While the difficulty is set to "normal," making it accessible for beginners, experienced players can aim for higher scores with its well-designed structure. Upon starting, players receive basic resources and a few buildings, but additional minerals and gas must be gathered through mining. Utilizing bonus resource spots scattered across the map can accelerate unit production. For defense, players can deploy 'defense towers' similar to Terran photon cannons or Protoss shield batteries, with options to produce extra units or research upgrades as needed. The map’s atmosphere—set against a barren desert backdrop under constant enemy pressure—creates a tense experience where players must balance survival with competition against others. What truly embodies the "Impossible" in its title is the map’s intense enemy onslaught. Early waves consist mainly of zerglings and hydralisks, but later stages introduce mutalisks, ultralisks, and even carriers. To defend effectively, players must master the terrain, leverage bonus resources, and coordinate closely with teammates. A critical challenge arises in the late game, where sudden massive enemy waves test the strength of the players' final defensive lines. These elements elevate 'Impossible Continuum 3.2o' beyond a simple defense map, transforming it into a high-stakes custom game that demands strategy, focus, and sharp reflexes. While the map may pose a challenge for beginners, it offers an engaging experience for those familiar with the defense genre. Its dynamic structure and unpredictable enemy patterns allow for fresh strategies with each playthrough, preventing monotony. The emphasis on teamwork also provides valuable practice in coordination with other players. However, due to its high difficulty, newcomers are advised to hone their skills on easier defense maps first. Overall, 'Impossible Continuum 3.2o' comes highly recommended for fans of the defense genre seeking a demanding and rewarding custom map.
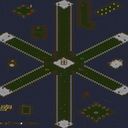
스타 포톤 디펜스 V 4.3 (Star Photon Defense V 4.3)
‘스타 포톤 디펜스 V 4.3(Star Photon Defense V 4.3)’은 스타크래프트 브루드워의 대표적인 디펜스 유즈맵으로, 포톤 캐논을 중심으로 한 전략적 방어 플레이를 경험할 수 있는 맵이다. 맵 중앙에는 거대한 포톤 캐논을 건설할 수 있는 공간이 마련되어 있으며, 적의 끊임없는 공격을 효과적으로 저지하기 위해 포톤 캐논뿐만 아니라 보조 건물과 유닛들을 적시에 배치해야 한다. 맵의 가장 큰 특징은 ‘포트리스’와 같은 입체적인 구조물로, 중앙 요새를 중심으로 방어선을 구축하는 동시에 적의 공세를 분산시키는 전략이 요구된다. 특히 버전 4.3에서는 난이도가 한층 높아졌으며, 새로운 유닛과 금지 목록이 추가되어 플레이어의 적응력을 테스트한다. 플레이어는 시작과 동시에 제한된 자원으로 빠르게 방어 체계를 구축해야 하며, 적의 공격 패턴에 따라 포톤 캐논의 배치와 업그레이드 타이밍을 신중히 결정해야 한다. 맵의 링 모양 구조는 입구를 좁혀서 방어 효율을 높이는 동시에, 적의 다중 루트를 고려한 전략적 포지셔닝이 필요하다는 점에서 디펜스 맵의 정수를 담고 있다. 또한, 맵의 난이도 상승으로 인해 초보 플레이어보다는 어느 정도의 전략적 사고와 경험이 있는 유저에게 더 어울리는 편이다. 맵의 진행은 끊임없는 적의 웨이브를 막아내며 생존하는 방식으로, 플레이어의 집중력과 자원 관리 능력을 동시에 요구한다. 이 맵은 특히 포톤 캐논을 중심으로 한 방어 전략을 연마하고자 하는 유저들에게 추천되며, 디펜스 맵의 묘미인 ‘최후의 방어선’을 지키며 승리하는 성취감을 느낄 수 있다. 또한, 팀플레이가 가능한 구조로 되어 있어 친구들과 함께 협력하여 더 어려운 난이도를 공략할 수도 있다. 맵의 볼륨이 크고 구조가 복잡할 수 있으므로, 플레이 전 맵의 주요 포인트를 숙지하고 각 입구에 대한 방어 전략을 미리 준비하는 것이 중요하다. 포톤 캐논의 업그레이드와 보조 유닛의 활용 여부가 승패를 가를 수 있는 핵심 포인트이므로, 이를 염두에 두고 플레이를 시작하는 것이 좋다. ‘Star Photon Defense V 4.3’ is a renowned defense custom map in *StarCraft: Brood War*, offering players a chance to experience strategic defensive gameplay centered around Photon Cannons. At the center of the map lies a large space where players can construct Photon Cannons, requiring timely placement of auxiliary buildings and units to effectively counter relentless enemy assaults. The map’s standout feature is its three-dimensional structures, similar to those in *Fortress*, which demand players to build defensive lines around the central fortress while simultaneously dispersing enemy forces. Version 4.3 introduces heightened difficulty with new units and banned units, testing players’ adaptability. From the start, players must quickly establish a defense system with limited resources, carefully deciding when to deploy Photon Cannons and upgrade them based on enemy attack patterns. The map’s ring-like structure enhances defensive efficiency by narrowing entry points, but it also necessitates strategic positioning to account for multiple enemy routes—a hallmark of top-tier defense maps. Due to its increased difficulty, the map is better suited for players with some strategic thinking and experience rather than beginners. The gameplay revolves around surviving wave after wave of enemy attacks, demanding both sharp focus and efficient resource management. This map is especially recommended for players looking to refine their Photon Cannon-based defense strategies, offering the thrill of holding the ‘last line of defense’ to achieve victory. It also supports team play, allowing friends to collaborate and tackle even greater challenges. Given its large scale and complex structure, familiarizing yourself with key map points and preparing defensive strategies for each entrance beforehand is crucial. The upgrade of Photon Cannons and the effective use of auxiliary units can determine victory or defeat, so keeping these factors in mind before starting is essential.
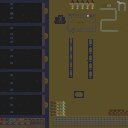
2제곱디팬스 (2Squared Defense)
스타크래프트 브루드워의 대표적인 컴퓨팅 디펜스 유즈맵인 〈2제곱디팬스〉는 플레이어가 적의 끊임없는 공격을 방어하는 동시에 성장형 메커니즘을 통해 성을 강화하는 전략성이 돋보이는 맵입니다. 맵 중앙에 위치한 플레이어 기지와 주위에서 끊임없이 몰려드는 적 유닛을 상대로 방어선을 구축해야 하는데, 기본 베이스를 지키면서 동시에 미네랄과 가스를 확보해 방어 건물을 지속적으로 업그레이드하고 보충할 수 있습니다. 맵의 특징은 ‘2제곱’이라는 이름에서 알 수 있듯, 적의 공격 패턴이 단계적으로 강화되면서 난이도가 기하급수적으로 상승한다는 점입니다. 초반에는 약한 저글링과 히드라리스크가 주를 이루지만, 후반으로 갈수록 울트라리스크, 디바우러,甚至 공중 유닛까지 동원되는 혼종 부대가 등장해 방어가 increasingly 어려워집니다. 특히 맵의 왼쪽과 오른쪽에서 동시에 공격을 펼치는 패턴이 자주 등장하는데, 이 때문에 멀티태스킹 능력이 필수적입니다. 또한, 맵에 배치된 방어 건물 슬롯과 자원 분포가 전략적 선택을 요구하는 요소로 작용합니다. 방어 건물의 종류와 배치 위치를 잘못 선택하면 적의 공격을 버티지 못하고 금방 무너질 수 있으며, 반대로 효율적인 배치와 업그레이드는 후반까지 버틸 수 있는 튼튼한 성을 구축할 수 있습니다. 플레이어는 초반 자원 관리와 건물 배치 타이밍을 잘 잡아야 하며, 후반으로 갈수록 공격 패턴을 예측하고 방어선을 재구축하는 능력이 중요해집니다. 〈2제곱디팜스〉는 초보 플레이어에게는 다소 어려운 진입 장벽이 있지만, 적절한 전략과 꾸준한 연습을 통해 점차 숙련도를 높일 수 있는 맵입니다. 특히 팀 플레이가 가능하다는 점도 특징으로, 팀원 간의 역할 분담과 실시간 커뮤니케이션이 승패를 좌우할 수 있습니다. 이 맵을 즐기는 유저들에게는 방어 전략의 깊이를 느낄 수 있는 매력이 있으며, 적절한 난이도 조절과 흥미로운 성장 메커니즘이 특징입니다. 추천 대상은 전략 게임과 디펜스 장르를 선호하는 플레이어이며, 특히 ‘컴퓨터 상대 디펜스’ 유형의 맵을 즐기는 유저들에게 적합합니다. 플레이 전에는 기본 방어 건물의 종류와 특성을 숙지하고, 자원 관리와 건물 배치의 중요성을 인지하는 것이 좋습니다. 또한, 후반으로 갈수록 예측하기 어려운 적의 공격 패턴에 대비해 유연한 전략 수립이 필요합니다. StarCraft: Brood War’s classic computing defense custom map, 〈2제곱디팬스〉, challenges players to defend their base against relentless enemy waves while growing stronger through an upgrade system. The map centers around a player’s main base, surrounded by waves of Zerg units that escalate in difficulty exponentially—starting with basic Zerglings and Hydralisks before culminating in Ultralisks, Devourers, and even mixed air units. The name ‘2제곱디팜스’ hints at the geometric difficulty increase, where each phase of the attack grows more complex and destructive. Players must manage resources efficiently to build and upgrade defensive structures, with limited slots forcing strategic placement decisions. Left and right flanks often face simultaneous assaults, demanding multitasking and adaptability. The map’s appeal lies in its blend of resource management, defensive architecture, and escalating challenge, making it a test of both foresight and quick decision-making. While the learning curve is steep for beginners, mastery rewards players with a satisfying sense of progression and resilience. Team play is supported, allowing coordinated defenses and shared responsibilities. Ideal for fans of strategy and defense genres, this map rewards preparation—understanding defensive structures, resource allocation, and adaptive tactics are key to survival. Players should familiarize themselves with building types and enemy patterns early on to maximize their chances in later, unpredictable assaults.
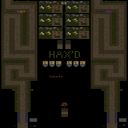
스폰 디펜스 HAX'D (Spawn Defense HAX'D)
스타크래프트 브루드워의 유즈맵인 <스폰 디펜스 HAX'D (Spawn Defense HAX'D)>는 이름에서부터 느껴지는듯한 난이도 상승과 버그 수정을 기반으로 만들어진 컴까기 디펜스 맵이다. 맵의 핵심은 초반에 주어지는 적은 수의 기지를 지키며 끊임없이 몰려오는 저그 웨이브를 방어하는 것이며, 맵 곳곳에 배치된 방어 시설과 플레이어의 전략적 선택이 승패를 좌우한다. 내부 설명에서도 '공공 출시를 위해 버그를 수정하고 난이도를 높였다'고 언급되어 있어, 기존의 스폰 디펜스 시리즈에 비해 더 도전적인 플레이가 가능하도록 설계되었음을 알 수 있다. 사막 타일셋을 기반으로 한 광활한 맵은 시야를 제한하는 요소 없이 넓은 전장을 제공하며, 플레이어는 중앙의 주요 거점을 중심으로 방어선을 구축하거나, 외곽의 보조 거점을 활용해 기동전을 펼칠 수 있다. 맵의 구조상 초반 자원 수급이 제한적이기 때문에, 플레이어는 빠르게 mineral line을 확보하고 방어 시설을 최적 배치하는 것이 중요하다. 또한, 'handicap'이라는 표현이 내부 설명에 포함되어 있어, 플레이어 간 균형을 맞추기 위한 다양한 밸런스 조절 기능이 내장되어 있을 가능성이 높다. 맵의 난이도는 기본적으로 '보통' 수준으로 설정되어 있지만, 버그 수정과 난이도 상승으로 인해 초보자는 어려움을 느낄 수 있으며, 숙련된 플레이어에게는 적절한 난이도를 제공할 것으로 예상된다. 추천 대상은 방어와 전략적 플레이에 익숙한 유저이며, 특히 스폰 디펜스 시리즈의 팬이라면 새로운 도전을 즐길 수 있을 것이다. 플레이 전 반드시 확인해야 할 포인트는 초기 자원의Configurable한 배치 여부와 방어 시설의 건설 가능 지역, 그리고 플레이어 간 협력 여부이다. 또한, 맵의 광활한 크기로 인해 미니맵을 적극 활용하지 않으면 주요 거점의 방어 타이밍을 놓칠 수 있다. 맵의 특성상 긴 플레이 시간을 요구할 수 있으며, 공략을 공유하거나 스크린샷을 남기는 등 전략적 접근이 권장된다. StarCraft: Brood War's custom map <Spawn Defense HAX'D> is a command-based defense map designed around increased difficulty and bug fixes, as suggested by its name. The core gameplay involves defending a small number of starting bases from relentless Zerg waves while leveraging strategically placed defensive structures and player choices to determine victory. The internal description even notes that "bugs were fixed and difficulty raised for public release," indicating it was intentionally designed to be more challenging than previous entries in the Spawn Defense series. The vast desert-themed map provides a wide battlefield without visibility-limiting elements, allowing players to either establish defensive lines around central key points or use outer auxiliary bases for mobile tactics. Due to the map's structure, early resource gathering is limited, making it crucial to secure mineral lines quickly and optimally place defensive structures. The inclusion of terms like "handicap" in the internal description suggests built-in balance adjustments to equalize player advantages. While the default difficulty is set to "normal," the bug fixes and increased challenge may prove difficult for beginners, though experienced players should find it appropriately balanced. It’s best suited for users familiar with defense and strategic play, particularly fans of the Spawn Defense series looking for a fresh challenge. Before playing, check the configurable initial resource placement, available construction zones for defensive structures, and whether teamwork is required. The map’s large scale demands active use of the minimap to avoid missing critical defense timings. Given its nature, expect longer play sessions, and consider sharing strategies or screenshots for better tactical approaches.
레벨 디펜스 울트라 (Level Defense ULTRA)
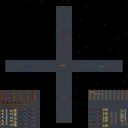
스타크래프트 브루드워의 디펜스 장르 유즈맵인 ‘레벨 디펜스 울트라(Level Defense ULTRA)’는 이름 그대로 강력한 적의 물량을 끊임없이 방어해야 하는 도전적인 플레이가 특징이다. 맵의 중앙에 위치한 플레이어 기지 주변으로 좁은 길목이 이어지며, 이 좁은 통로를 통해 수많은 적 유닛이 끊임없이 밀려온다. 방어선을 무너뜨리지 않고 버텨야 하는 이 게임은 단순하면서도 긴장감 넘치는 진행이 인상적이다. 특히 맵의 구조상 플레이어는 좁은 통로에서 집중 공격을 감행하는 적들을 상대해야 하며, 효율적인 유닛 관리와 배치 전략이 필수적이다. 적의 공격 패턴은 단계별로 변화하며, 후반부로 갈수록 난이도가 급격히 상승하는 구조를 갖추고 있어 플레이어의 집중력과 판단력을 끊임없이 요구한다. 맵의 배경은 우주 타일셋으로 깔끔하게 구성되어 있으며, 어두운 색감 덕분에 적의 움직임이 더 도드라져 보인다. 추천 대상은 디펜스 게임을 즐기는 유저들이며, 특히 좁은 통로에서 벌어지는 긴장감 넘치는 전투를 경험하고 싶어 하는 플레이어에게 적합하다. 플레이 전에는 자신의 방어 전략을 미리 세워두는 것이 중요하며, 특히 후반부에서 쏟아지는 적의 물량을 어떻게 상대할지에 대한 대비가 필요하다. 맵을 플레이할 때는 미네랄과 가스를 충분히 확보하여 유닛 생산과 업그레이드에 투자하는 것이 핵심 포인트다. 또한, 좁은 길목에서 벌어지는 전투에서는 빠른 반응과 정확한 컨트롤이 승패를 가를 수 있으니, 연습을 통해 실력을 쌓는 것이 좋다. 이 맵은 디펜스 유즈맵의 классиックな 재미를 느낄 수 있도록 설계되어 있으며, 반복 플레이를 통해 자신의 전략을 개선할 수 있는 매력이 있다. StarCraft: Brood War’s defense-genre custom map, *Level Defense ULTRA*, lives up to its name with a relentless challenge: defending your base against overwhelming enemy waves. The map funnels endless swarms of units through narrow corridors leading to your central starting position. The core gameplay—holding the line without breaking—is simple yet intensely gripping. Due to the map’s layout, players must face concentrated enemy assaults in tight choke points, making efficient unit management and strategic positioning essential. Enemy attack patterns evolve in stages, and difficulty spikes sharply as the game progresses, demanding constant focus and quick decision-making. The space-themed tileset is cleanly designed, and its dark color palette makes enemy movements stand out even more. This map is ideal for fans of defense games, especially those seeking the thrill of high-tension battles in narrow passages. Before playing, it’s crucial to plan your defense strategy, particularly preparing for the late-game surge of enemy forces. Securing ample minerals and gas to invest in unit production and upgrades is key. In the tight corridors, split-second reactions and precise control can decide victory or defeat, so practicing your micro is highly recommended. Designed to capture the classic fun of defense custom maps, *Level Defense ULTRA* offers replay value by letting players refine their strategies through repeated plays.
방어하기 - 물량판유닛추가 (Defense - Mass Unit Addition)
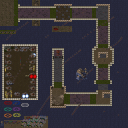
‘방어하기 -물량판유닛추가-’는 스타크래프트: 브루드워의 대표적인 디펜스 유즈맵으로, 플레이어는 끊임없이 몰려오는 적의 물량 유닛을 방어하는 것이 목표다. 맵은 사막 테마의 広大한 평지에 세워졌으며, 중앙에 위치한 본진을 중심으로 네 방향에서 적들이 끊임없이 출현한다. 플레이어는 본진 주변의 방어 건물이나 유닛을 배치하거나, 직접 유닛을 컨트롤하여 적의 공격을 저지해야 한다. 특히 ‘물량판유닛추가’라는 제목에서 알 수 있듯, 적의 물량이 기존 디펜스 맵보다 훨씬 많고 지속적으로 쏟아지므로, 단순한 방어 건물의 배치만으로는 버티기 어려운 구조다. 플레이어는 방어 건물의 업그레이드, 유닛의 선택과 배치, 그리고 순간적인 컨트롤 능력을 발휘해야만 승리를 쟁취할 수 있다. 맵의 난이도는 적의 물량이 점차 증가하는 방식으로 조절되며, 후반부로 갈수록 적의 숫자와 종류가 다양해져 전략적인 대처가 요구된다. 초보 플레이어는 기본적인 방어 건물의 활용법과 유닛의 컨트롤에 익숙해져야 하며, 숙련된 플레이어는 효율적인Resource 관리와 다각적인 방어 전략을 구사해야 한다. 추천 대상은 디펜스 장르의 기본기를 익히고자 하는 초보자부터, 강력한 컨트롤과 전략을 뽐내고 싶은 숙련자까지 폭넓게 활용할 수 있는 맵이다. 플레이 전에는 본진 주변의 방어 건물 배치 공간과 적의 출현 경로를 면밀히 확인하고, 자신의 플레이 스타일에 맞는 방어 전략을 미리 세워두는 것이 중요하다. 또한, 적의 물량이 지속적으로 증가하므로, 초반에는 안정적인 방어에 집중하고, 중반 이후에는 공격형 유닛을 적극 활용하여 적을 제압하는 플레이가 필요하다. 맵의 분위기는 사막의 황량한 아름다움을 배경으로, 끊임없는 전투의 긴장감이 조성되어 있으며, 특히 밤 시간대에는 시야가 제한되어 더욱 어려운 전투가 펼쳐진다. ‘방어하기 -물량판유닛추가-’는 단순한 디펜스 유즈맵을 넘어, 전략과 컨트롤의 조합을 요구하는 흥미로운 경험을 제공한다. "Defense - Massive Unit Rush -" is a classic defense custom map in *StarCraft: Brood War*, where players must defend against an endless wave of enemy units. The map is set on a vast desert plain, with the player's main base at the center and enemy spawns occurring from all four directions. Players can either place defensive structures or units around their base or control their own units directly to fend off attacks. As the title "Massive Unit Rush" suggests, the enemy's sheer numbers far exceed those in typical defense maps, making it difficult to survive with just basic structure placements. Success requires upgrading defenses, strategically selecting and positioning units, and executing precise micro-management. The difficulty scales as enemy waves grow stronger, with late-game waves featuring a mix of unit types that demand varied counter-strategies. Beginners should focus on mastering basic defensive structures and unit control, while advanced players will need efficient resource management and flexible defensive tactics. This map caters to a wide range of players, from those learning defense fundamentals to skilled players looking to showcase their control and strategy. Before playing, it's crucial to study the defensive structure placement areas and enemy spawn paths, then prepare a defense strategy tailored to your playstyle. Since enemy waves continuously escalate, early-game survival is key, while mid-to-late game calls for aggressive unit usage to overwhelm opponents. The map's atmosphere—set against a desolate desert backdrop—creates a tense battle environment, with visibility further limited at night, adding to the challenge. "Defense - Massive Unit Rush -" isn't just another defense custom map; it offers a compelling experience that blends strategy and execution in a high-stakes setting.
썬켄 디펜스-6웨이 (Sunken Defense-6 Way)
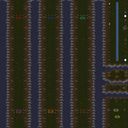
‘썬켄 디펜스-6웨이-- MV’는 스타크래프트 브루드워의 대표적인 디펜스형 유즈맵으로, 총 30단계에 이르는 끊임없는 적의 침공을 방어하는 짜릿한 긴장감을 느낄 수 있는 맵이다. 6인용 맵으로 설계된 이 맵은 중앙에 위치한 방어 건물을 surrounded by multiple paths where enemy units spawn and advance toward the player's command center. 맵의 특징은 6방향에서 동시에 적이 몰려드는 구조로, 각각의 길에서 나오는 적군을 효율적으로 방어하지 않으면 순식간에 전선이 무너질 수 있다. 방어 건물의 위치와 자원 관리, 그리고 적의 웨이브 패턴을 예측하는 것이 승리의 핵심이다. 이 맵은 2002년 Heavyarms1987에 의해 처음 제작되었으며, 이후 7차례에 걸쳐 업데이트를 거치며 디자인과 밸런스가 점차 개선되었다. 사막 타일셋을 활용한 맵의 분위기는 건조한 사막 지형에서 펼쳐지는 혈투를 연상시키며, 시각적으로도 긴장감을 더한다. 플레이어는 각 레벨마다 주어지는 제한된 자원으로 최적의 방어선을 구축해야 하며, 적의 공격 패턴이 반복되면서도 조금씩 변형되어 나오는 점에서 전략적 깊이가 느껴진다. 초보자의 경우 방어 건물의 배치와 자원 사용에 익숙해지는 데 시간이 걸리지만, 점차 패턴을 익혀가며 안정적인 방어 루틴을 확보할 수 있다. ‘썬켄 디펜스-6웨이-- MV’는 디펜스 장르의 정석을 보여주는 맵으로, 끊임없는 도전과 성취감을 주는 구조가 특징이다. 특히 팀 플레이보다는 개인 플레이에 중점을 두고 있으며, 혼자서도 충분히 즐길 수 있도록 설계되어 있다. 맵의 난이도는 점차 상승하는 적의 공격력으로 조절되며, 후반부로 갈수록 집중력과 전략이 요구된다. 이 맵을 즐기기 위해서는 방어 건물의 특성과 적의 웨이브 타이밍을 정확히 파악하는 것이 중요하다. 또한, 자원의 효율적인 사용과 건물의 업그레이드가 승패를 좌우할 수 있으므로, 꾸준한 연습을 통해 실력을 쌓을 필요가 있다. 전체적인 플레이 시간은 약 30분~1시간 내외로 예상되며, 각 레벨의 성공 여부에 따라 전체 플레이 시간은 변동될 수 있다. 이 맵은 디펜스 유즈맵에 익숙한 플레이어는 물론, 새로운 장르에 도전해보고 싶은 유저에게도 추천할 만한佳作이다. 'Sunken Defense - 6-Way -- MV' is a classic defense-style custom map in StarCraft: Brood War, offering thrilling tension as players fend off relentless enemy waves across 30 stages. Designed as a 6-player map, it features a central defensive structure surrounded by multiple paths where enemies spawn and advance toward the player's command center. The map’s defining trait is its six-directional layout, where waves of enemies simultaneously attack from all sides—failing to efficiently defend any path can cause the frontline to collapse instantly. Success hinges on smart positioning of defensive buildings, resource management, and predicting enemy wave patterns. Originally created in 2002 by Heavyarms1987, the map has undergone seven major updates, refining its design and balance over time. The desert-themed tileset enhances the atmosphere, evoking intense battles unfolding in arid terrain and adding to the visual tension. Each level provides limited resources, forcing players to build the most effective defensive lines possible. While enemy attack patterns repeat, they subtly evolve, adding strategic depth to the gameplay. Beginners may struggle at first with building placement and resource allocation, but as they learn the patterns, they can establish stable defense routines. 'Sunken Defense - 6-Way -- MV' exemplifies the essence of the defense genre, delivering a structure that constantly challenges players and rewards their progress. Unlike team-based maps, it focuses on solo play, allowing individuals to fully enjoy the experience on their own. The difficulty steadily increases with the strength of enemy waves, demanding sharper focus and strategy in later stages. Mastery requires a deep understanding of defensive structures and wave timings, as well as efficient resource use and building upgrades—key factors that determine victory or defeat. With a total playtime of roughly 30 minutes to an hour, though varying based on level success, this map is a masterpiece worth trying for both seasoned defense-map veterans and newcomers eager to explore the genre.
고지라 VS 미국 (Godzilla attacks U.S.A.)
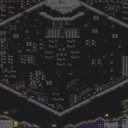
이 맵은 스타크래프트 브루드워의 유즈맵으로,_TITLE_ 고지라, 메카고지라, 모스라 등 유명 괴수들이 미국을 침공하는 재난 재현형 디펜스 맵이다. 8명의 플레이어가 하나의 팀을 이루어 미국 각지의 도시와 군사 기지를 수비하며, 맵 중앙에서 끊임없이 몰려드는 적 유닛과 건물물을 파괴하는 것이 목적이다. 맵의 배경은 황무지 타일셋으로 이루어져 있으며, 지형은 도시 지역과 산악 지역으로 나뉘어 있어 방어 거점을 마련하기에 적합하다. 특히 맵 상단과 하단에 위치한 주요 거점들은 방어 라인을 구축할 수 있도록 배치되어 있으며, 중앙의 넓은 평야 지역은 적의 주력 부대가 접근하는 주요 루트로 보인다. 맵의 진행은 맵 중앙에서 적 유닛이 끊임없이 소환되며, 플레이어는 이를 막아내야 하는 방식으로 이루어진다. 적 유닛의 종류는 다양하여 초반에는 일반 저글링과 질럿이, 중반 이후에는 하이템플러와 다크 아칸, 그리고 후반에는 울트라리스크와 디파일러가 등장하는 등 난이도가 점차 상승하는 구조로 추정된다. 맵의 승리 조건은 맵 상단과 하단에 위치한 주요 건물을 일정 시간 동안 방어하는 것으로 보이며, 패배 조건은 모든 방어 건물이 파괴되거나 플레이어의 유닛이 전멸하는 경우로 추정된다. 이 맵은 괴수와 재난을 테마로 한 독특한 스킨과 together with the U.S. Army의 조합으로 흥미로운 플레이 경험을 제공하며, 팀 플레이를 통해 전략과 협동이 요구되는 것이 특징이다. 특히 초보와 숙련자 모두 disfrutar de la experiencia gracias a la progresión de dificultad que se ajusta según el progreso del equipo. 맵을 플레이하기 전에 반드시 팀원 간의 전략적 협의가 필요하며, 방어 라인의 구축과 자원 관리가 중요할 것으로 예상된다. 또한, 맵의 특성상 긴 플레이 시간이 예상되므로 충분한 시간을 확보하고 플레이할 것을 권장한다. This map is a custom defense map for *StarCraft: Brood War*, titled *TITLE*, where famous monsters like Godzilla, Mechagodzilla, and Mothra invade the United States in a disaster recreation-style defense game. Eight players form a team to defend cities and military bases across the country, with the goal of destroying waves of enemy units and structures that continuously spawn from the map’s center. The map features a wasteland tile set, with terrain divided into urban and mountainous regions, making it ideal for setting up defensive positions. Key strongholds are strategically placed at the top and bottom of the map, allowing players to establish defensive lines, while the central open plains serve as the primary route for enemy forces to approach. The gameplay revolves around waves of enemy units spawning from the map’s center, which players must fend off. The difficulty escalates as the game progresses—early waves feature basic units like Zerglings and Zealots, mid-game introduces High Templars and Dark Archons, and later waves escalate to Ultralisks and Defilers. The victory condition appears to be defending the main buildings at the top and bottom of the map for a set duration, while defeat occurs if all defensive structures are destroyed or the player’s units are wiped out. With its unique theme blending monsters and disasters alongside the U.S. Army, the map offers an engaging experience that emphasizes teamwork and strategy. Both beginners and experienced players can enjoy the game thanks to its adaptive difficulty progression. Before playing, teams should coordinate strategies, as establishing strong defensive lines and managing resources are crucial. Given the map’s nature, expect a long playtime, so it’s recommended to set aside sufficient time for the experience.
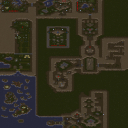
임파서블 유포리아 (Impossible Euphoria)
스타크래프트 브루드워의 유즈맵 ‘Impossible Euphoria’는 사막 타일셋을 배경으로 펼쳐지는 컴까기 형식의 디펜스 맵이다. 맵의 메인 테마는 끊임없는 웨이브의 적군 공격으로부터 핵심 건물을 방어하는 것이며, 맵 중앙에 위치한 본진 건물을 중심으로 사방에서 몰려드는 적을 상대하게 된다. 적군은 초반부터 강력한 저글링과 히드라리스크, 후반에는 뮤탈리스크와 울트라리스크까지 조합되어 등장하며, 맵 곳곳에 배치된 미네랄과 가스 멀티를 확보해 자원 수급을 원활히 해야 한다. 방어에 성공해도 일정 턴이 지나면 ‘Impossible’ 모드가 발동되어 적군의 공격력이 급증하는 패턴이 반복되므로, 플레이어는 자원을 효율적으로 관리하고 방어 타워나 유닛 생산 건물을 적절히 배치해야 한다. 맵의 볼륨은 상당히 크며, 넓은 사막 지형이 펼쳐져 있어 시야 확보와 진형 관리가 중요하다. 적군의 공격 패턴은 예측 가능한 수준이지만, 맵의 난이도가 상승할수록 유닛의 조합과 스킬 사용 타이밍이 관건이 된다. 초보자는 방어 타워를 적극 활용하는 전략을, 숙련자는 자원 수급과 멀티 확보를 중시하는 플레이가 필요하다. 맵을 플레이하기 전에는 맵 에디터로 확인 가능한 주요 건물이 파괴되지 않도록 보호하는 법과, 각 턴별로 등장하는 적군의 조합을 숙지하는 것이 중요하다. 또한, 맵의 난이도 상승 요소를 고려해 자원 관리와 타워 배치에 신경을 써야 한다. 이 맵은 장기전과Resource Management를 요구하는 컴까기 유저들에게 적합하며, 특히 디펜스와 멀티 플레이에 대한 이해도가 높은 플레이어에게 추천할 만하다. Impossible Euphoria is a defense-style UMS map set in the desert tileset of StarCraft: Brood War. The core gameplay revolves around defending the central base from relentless waves of enemy units, which escalate in difficulty as the game progresses. Players must secure mineral and gas expansions scattered across the map to maintain resource flow while countering attacks that start with basic units like Zerglings and Hydralisks and later escalate to Mutalisks and Ultralisk compositions. The map features a large, open desert terrain with strategic chokepoints where defensive towers or player-built structures can be placed to mitigate damage. A unique mechanic called the ‘Impossible’ mode periodically intensifies enemy aggression, forcing players to adapt their strategies dynamically. The challenge lies in balancing resource management, expansion timing, and unit production to survive the escalating waves. Novice players may benefit from prioritizing defensive towers, while advanced players should focus on optimizing resource income and multi-tasking across expansions. Before playing, it's crucial to identify key structures vulnerable to destruction and familiarize oneself with the evolving enemy unit compositions each turn. This map is ideal for fans of long-duration defense and resource management mechanics, particularly those with experience in UMS-style StarCraft custom maps.
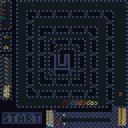
터렛 스파이럴 지옥 (Amazing Turret Spiral Hell)
‘Amazing Turret Spiral Hell’은 스타크래프트: 브루드워의 디펜스 장르 유즈맵으로, 플레이어는 끊임없이 밀려오는 적의 웨이브를 상대로 터렛과 방어 건물을 배치해가며 터렛 스피럴Hell을 구축해야 한다. 맵 이름은 ‘터렛 디펜스 32 레벨 v2’ 파일명으로도 알려져 있으며, ‘Amazing Turret Defense Shadow Spiral Hell’이라는 내부 타이틀이 붙어 있다. 2048×2048 크기의 거대한 맵은 화산 타일셋을 기반으로 하며, 64×64 단위의 넓은 공간이 펼쳐진다. 맵의 특징은 중앙에서부터 시작되는 ‘스파이럴’ 형태의 적 웨이브가 마치 나선형으로 퍼져나가듯 끊임없이 공격해 온다는 점으로, 방어 구조물을 촘촘히 배치하지 않으면 순식간에 뚫리고 만다. 특히 ‘32 레벨’이란 제목처럼 난이도가 단계적으로 높아지며, 후반부로 갈수록 적의 공격 패턴과 수가 급격히 증가해 전략적 사고와 빠른 판단력이 요구된다. 맵의 분위기는 어둡고 파괴적인 화산 지형 덕분에 긴장감이 배가되며, 방어에 실패하면 ‘지옥’이란 이름에 걸맞게 순식간에 밀려드는 적의 물량에 압도당하는 경험을 선사한다. 초보 플레이어는 초반 구조물의 배치와 자원 관리에 어려움을 느낄 수 있지만, 익숙해지면 각 레벨의 패턴을 익히고 효율적인 터렛 조합을 구축하는 재미가 쏠쏠하다. 특히 ‘+50’ 이상의 고단계 레벨에서는 적의 공격력이 폭발적으로 증가하기 때문에, 자원 관리와 방어선의 재구축 타이밍이 승패를 좌우한다. 이 맵은 디펜스 장르의 정수를 담은 동시에, 레벨 디자인과 난이도 상승 구조가 매우 잘 짜여 있어 반복 플레이를 유도하는 매력이 있다. 또한 넓은 맵 공간과 복잡한 웨이브 패턴 덕분에 전략적 깊이도 깊어, 단순히 방어만 하는 것이 아니라 ‘어떻게 하면 적은 최소한의 자원으로 상대할 수 있을까’를 끊임없이 고민하게 만든다. 추천 대상은 디펜스 장르를 люби하는 플레이어이며, 특히 난이도 상승이 매력적인 고난이도 맵을 선호하는 유저들에게 적합하다. 플레이 전 준비 사항으로는 각 레벨의 적 패턴을 미리 숙지하고, 자원 수급과 방어 건물의 효율적인 배치를 연습하는 것이 중요하다. 또한, 팀 플레이가 가능하다면 협력하여 방어선을 구축하는 전략을 세우는 것도 좋은 방법이다. 맵의 난이도는 레벨이 올라갈수록 급격히 높아지기 때문에, 초반 레벨에서 기본기를 다지는 것이 중요하다. 이 맵을 즐기기 위해서는 ‘내가 어디까지 버틸 수 있을까’를 끊임없이 스스로에게 묻는 긴장감이 핵심이며, 그 과정 자체가 중독성을 자아낸다. 마지막으로, 맵의 분위기와 긴장감 있는 연출 덕분에 디펜스 장르의 새로운 경험을 원한다면 반드시 시도해 볼 만한 작품이다. 'Amazing Turret Spiral Hell' is a defense-style custom map in *StarCraft: Brood War*, where players must place turrets and defensive structures to fend off relentless waves of enemies, gradually building a "Turret Spiral Hell." The map is also known under the filename 'Turret Defense 32 Level v2' and carries an internal title, 'Amazing Turret Defense Shadow Spiral Hell.' Spanning a massive 2048×2048 grid with a volcanic tileset, the layout offers vast 64×64-unit spaces. The defining feature is the spiral-shaped enemy waves that emanate outward from the center, relentlessly attacking in a widening spiral pattern. Without tightly packed defensive structures, the waves quickly overwhelm the player. As suggested by the "32 Level" title, difficulty escalates progressively, with enemy attack patterns and numbers surging dramatically in later stages, demanding sharp strategic thinking and quick decision-making. The map’s dark, destructive volcanic terrain amplifies the tension, and failing to defend results in an overwhelming enemy horde that lives up to its "hellish" name. While beginners may struggle with early structure placement and resource management, mastering the game reveals the satisfaction of learning each level’s patterns and optimizing turret combinations. At higher levels—especially beyond '+50'—enemy power spikes so intensely that resource efficiency and timely reconstruction of defenses become critical to survival. This map encapsulates the essence of the defense genre while offering meticulously designed level progression and difficulty scaling that naturally encourage repeated play. The expansive map and intricate wave patterns add strategic depth, pushing players to not just defend, but to constantly refine their approach for maximum efficiency with minimal resources. It’s a perfect fit for fans of the defense genre, particularly those who enjoy maps with escalating difficulty. To prepare, study each level’s enemy patterns in advance, practice efficient resource gathering, and hone your placement of defensive buildings. If playing with a team, coordinating to build layered defenses can be a game-changer. Since difficulty ramps up sharply, mastering the early levels is crucial. The core thrill lies in pushing your limits—constantly asking yourself, "How long can I hold out?"—and the addictive tension makes the challenge deeply engaging. If you're looking for a fresh defense experience with gripping atmosphere and escalating stakes, this is a must-try.
최근 등록된 맵
새로 추가된 파일과 버전을 확인하세요.
터렛 스파이럴 지옥 (Amazing Turret Spiral Hell)
‘Amazing Turret Spiral Hell’은 스타크래프트: 브루드워의 디펜스 장르 유즈맵으로, 플레이어는 끊임없이 밀려오는 적의 웨이브를 상대로 터렛과 방어 건물을 배치해가며 터렛 스피럴Hell을 구축해야 한다. 맵 이름은 ‘터렛 디펜스 32 레벨 v2’ 파일명으로도 알려져 있으며, ‘Amazing Turret Defense Shadow Spiral Hell’이라는 내부 타이틀이 붙어 있다. 2048×2048 크기의 거대한 맵은 화산 타일셋을 기반으로 하며, 64×64 단위의 넓은 공간이 펼쳐진다. 맵의 특징은 중앙에서부터 시작되는 ‘스파이럴’ 형태의 적 웨이브가 마치 나선형으로 퍼져나가듯 끊임없이 공격해 온다는 점으로, 방어 구조물을 촘촘히 배치하지 않으면 순식간에 뚫리고 만다. 특히 ‘32 레벨’이란 제목처럼 난이도가 단계적으로 높아지며, 후반부로 갈수록 적의 공격 패턴과 수가 급격히 증가해 전략적 사고와 빠른 판단력이 요구된다. 맵의 분위기는 어둡고 파괴적인 화산 지형 덕분에 긴장감이 배가되며, 방어에 실패하면 ‘지옥’이란 이름에 걸맞게 순식간에 밀려드는 적의 물량에 압도당하는 경험을 선사한다. 초보 플레이어는 초반 구조물의 배치와 자원 관리에 어려움을 느낄 수 있지만, 익숙해지면 각 레벨의 패턴을 익히고 효율적인 터렛 조합을 구축하는 재미가 쏠쏠하다. 특히 ‘+50’ 이상의 고단계 레벨에서는 적의 공격력이 폭발적으로 증가하기 때문에, 자원 관리와 방어선의 재구축 타이밍이 승패를 좌우한다. 이 맵은 디펜스 장르의 정수를 담은 동시에, 레벨 디자인과 난이도 상승 구조가 매우 잘 짜여 있어 반복 플레이를 유도하는 매력이 있다. 또한 넓은 맵 공간과 복잡한 웨이브 패턴 덕분에 전략적 깊이도 깊어, 단순히 방어만 하는 것이 아니라 ‘어떻게 하면 적은 최소한의 자원으로 상대할 수 있을까’를 끊임없이 고민하게 만든다. 추천 대상은 디펜스 장르를 люби하는 플레이어이며, 특히 난이도 상승이 매력적인 고난이도 맵을 선호하는 유저들에게 적합하다. 플레이 전 준비 사항으로는 각 레벨의 적 패턴을 미리 숙지하고, 자원 수급과 방어 건물의 효율적인 배치를 연습하는 것이 중요하다. 또한, 팀 플레이가 가능하다면 협력하여 방어선을 구축하는 전략을 세우는 것도 좋은 방법이다. 맵의 난이도는 레벨이 올라갈수록 급격히 높아지기 때문에, 초반 레벨에서 기본기를 다지는 것이 중요하다. 이 맵을 즐기기 위해서는 ‘내가 어디까지 버틸 수 있을까’를 끊임없이 스스로에게 묻는 긴장감이 핵심이며, 그 과정 자체가 중독성을 자아낸다. 마지막으로, 맵의 분위기와 긴장감 있는 연출 덕분에 디펜스 장르의 새로운 경험을 원한다면 반드시 시도해 볼 만한 작품이다. 'Amazing Turret Spiral Hell' is a defense-style custom map in *StarCraft: Brood War*, where players must place turrets and defensive structures to fend off relentless waves of enemies, gradually building a "Turret Spiral Hell." The map is also known under the filename 'Turret Defense 32 Level v2' and carries an internal title, 'Amazing Turret Defense Shadow Spiral Hell.' Spanning a massive 2048×2048 grid with a volcanic tileset, the layout offers vast 64×64-unit spaces. The defining feature is the spiral-shaped enemy waves that emanate outward from the center, relentlessly attacking in a widening spiral pattern. Without tightly packed defensive structures, the waves quickly overwhelm the player. As suggested by the "32 Level" title, difficulty escalates progressively, with enemy attack patterns and numbers surging dramatically in later stages, demanding sharp strategic thinking and quick decision-making. The map’s dark, destructive volcanic terrain amplifies the tension, and failing to defend results in an overwhelming enemy horde that lives up to its "hellish" name. While beginners may struggle with early structure placement and resource management, mastering the game reveals the satisfaction of learning each level’s patterns and optimizing turret combinations. At higher levels—especially beyond '+50'—enemy power spikes so intensely that resource efficiency and timely reconstruction of defenses become critical to survival. This map encapsulates the essence of the defense genre while offering meticulously designed level progression and difficulty scaling that naturally encourage repeated play. The expansive map and intricate wave patterns add strategic depth, pushing players to not just defend, but to constantly refine their approach for maximum efficiency with minimal resources. It’s a perfect fit for fans of the defense genre, particularly those who enjoy maps with escalating difficulty. To prepare, study each level’s enemy patterns in advance, practice efficient resource gathering, and hone your placement of defensive buildings. If playing with a team, coordinating to build layered defenses can be a game-changer. Since difficulty ramps up sharply, mastering the early levels is crucial. The core thrill lies in pushing your limits—constantly asking yourself, "How long can I hold out?"—and the addictive tension makes the challenge deeply engaging. If you're looking for a fresh defense experience with gripping atmosphere and escalating stakes, this is a must-try.
스타 포톤 디펜스 V 4.3 (Star Photon Defense V 4.3)
‘스타 포톤 디펜스 V 4.3(Star Photon Defense V 4.3)’은 스타크래프트 브루드워의 대표적인 디펜스 유즈맵으로, 포톤 캐논을 중심으로 한 전략적 방어 플레이를 경험할 수 있는 맵이다. 맵 중앙에는 거대한 포톤 캐논을 건설할 수 있는 공간이 마련되어 있으며, 적의 끊임없는 공격을 효과적으로 저지하기 위해 포톤 캐논뿐만 아니라 보조 건물과 유닛들을 적시에 배치해야 한다. 맵의 가장 큰 특징은 ‘포트리스’와 같은 입체적인 구조물로, 중앙 요새를 중심으로 방어선을 구축하는 동시에 적의 공세를 분산시키는 전략이 요구된다. 특히 버전 4.3에서는 난이도가 한층 높아졌으며, 새로운 유닛과 금지 목록이 추가되어 플레이어의 적응력을 테스트한다. 플레이어는 시작과 동시에 제한된 자원으로 빠르게 방어 체계를 구축해야 하며, 적의 공격 패턴에 따라 포톤 캐논의 배치와 업그레이드 타이밍을 신중히 결정해야 한다. 맵의 링 모양 구조는 입구를 좁혀서 방어 효율을 높이는 동시에, 적의 다중 루트를 고려한 전략적 포지셔닝이 필요하다는 점에서 디펜스 맵의 정수를 담고 있다. 또한, 맵의 난이도 상승으로 인해 초보 플레이어보다는 어느 정도의 전략적 사고와 경험이 있는 유저에게 더 어울리는 편이다. 맵의 진행은 끊임없는 적의 웨이브를 막아내며 생존하는 방식으로, 플레이어의 집중력과 자원 관리 능력을 동시에 요구한다. 이 맵은 특히 포톤 캐논을 중심으로 한 방어 전략을 연마하고자 하는 유저들에게 추천되며, 디펜스 맵의 묘미인 ‘최후의 방어선’을 지키며 승리하는 성취감을 느낄 수 있다. 또한, 팀플레이가 가능한 구조로 되어 있어 친구들과 함께 협력하여 더 어려운 난이도를 공략할 수도 있다. 맵의 볼륨이 크고 구조가 복잡할 수 있으므로, 플레이 전 맵의 주요 포인트를 숙지하고 각 입구에 대한 방어 전략을 미리 준비하는 것이 중요하다. 포톤 캐논의 업그레이드와 보조 유닛의 활용 여부가 승패를 가를 수 있는 핵심 포인트이므로, 이를 염두에 두고 플레이를 시작하는 것이 좋다. ‘Star Photon Defense V 4.3’ is a renowned defense custom map in *StarCraft: Brood War*, offering players a chance to experience strategic defensive gameplay centered around Photon Cannons. At the center of the map lies a large space where players can construct Photon Cannons, requiring timely placement of auxiliary buildings and units to effectively counter relentless enemy assaults. The map’s standout feature is its three-dimensional structures, similar to those in *Fortress*, which demand players to build defensive lines around the central fortress while simultaneously dispersing enemy forces. Version 4.3 introduces heightened difficulty with new units and banned units, testing players’ adaptability. From the start, players must quickly establish a defense system with limited resources, carefully deciding when to deploy Photon Cannons and upgrade them based on enemy attack patterns. The map’s ring-like structure enhances defensive efficiency by narrowing entry points, but it also necessitates strategic positioning to account for multiple enemy routes—a hallmark of top-tier defense maps. Due to its increased difficulty, the map is better suited for players with some strategic thinking and experience rather than beginners. The gameplay revolves around surviving wave after wave of enemy attacks, demanding both sharp focus and efficient resource management. This map is especially recommended for players looking to refine their Photon Cannon-based defense strategies, offering the thrill of holding the ‘last line of defense’ to achieve victory. It also supports team play, allowing friends to collaborate and tackle even greater challenges. Given its large scale and complex structure, familiarizing yourself with key map points and preparing defensive strategies for each entrance beforehand is crucial. The upgrade of Photon Cannons and the effective use of auxiliary units can determine victory or defeat, so keeping these factors in mind before starting is essential.
스폰 디펜스 HAX'D (Spawn Defense HAX'D)
스타크래프트 브루드워의 유즈맵인 <스폰 디펜스 HAX'D (Spawn Defense HAX'D)>는 이름에서부터 느껴지는듯한 난이도 상승과 버그 수정을 기반으로 만들어진 컴까기 디펜스 맵이다. 맵의 핵심은 초반에 주어지는 적은 수의 기지를 지키며 끊임없이 몰려오는 저그 웨이브를 방어하는 것이며, 맵 곳곳에 배치된 방어 시설과 플레이어의 전략적 선택이 승패를 좌우한다. 내부 설명에서도 '공공 출시를 위해 버그를 수정하고 난이도를 높였다'고 언급되어 있어, 기존의 스폰 디펜스 시리즈에 비해 더 도전적인 플레이가 가능하도록 설계되었음을 알 수 있다. 사막 타일셋을 기반으로 한 광활한 맵은 시야를 제한하는 요소 없이 넓은 전장을 제공하며, 플레이어는 중앙의 주요 거점을 중심으로 방어선을 구축하거나, 외곽의 보조 거점을 활용해 기동전을 펼칠 수 있다. 맵의 구조상 초반 자원 수급이 제한적이기 때문에, 플레이어는 빠르게 mineral line을 확보하고 방어 시설을 최적 배치하는 것이 중요하다. 또한, 'handicap'이라는 표현이 내부 설명에 포함되어 있어, 플레이어 간 균형을 맞추기 위한 다양한 밸런스 조절 기능이 내장되어 있을 가능성이 높다. 맵의 난이도는 기본적으로 '보통' 수준으로 설정되어 있지만, 버그 수정과 난이도 상승으로 인해 초보자는 어려움을 느낄 수 있으며, 숙련된 플레이어에게는 적절한 난이도를 제공할 것으로 예상된다. 추천 대상은 방어와 전략적 플레이에 익숙한 유저이며, 특히 스폰 디펜스 시리즈의 팬이라면 새로운 도전을 즐길 수 있을 것이다. 플레이 전 반드시 확인해야 할 포인트는 초기 자원의Configurable한 배치 여부와 방어 시설의 건설 가능 지역, 그리고 플레이어 간 협력 여부이다. 또한, 맵의 광활한 크기로 인해 미니맵을 적극 활용하지 않으면 주요 거점의 방어 타이밍을 놓칠 수 있다. 맵의 특성상 긴 플레이 시간을 요구할 수 있으며, 공략을 공유하거나 스크린샷을 남기는 등 전략적 접근이 권장된다. StarCraft: Brood War's custom map <Spawn Defense HAX'D> is a command-based defense map designed around increased difficulty and bug fixes, as suggested by its name. The core gameplay involves defending a small number of starting bases from relentless Zerg waves while leveraging strategically placed defensive structures and player choices to determine victory. The internal description even notes that "bugs were fixed and difficulty raised for public release," indicating it was intentionally designed to be more challenging than previous entries in the Spawn Defense series. The vast desert-themed map provides a wide battlefield without visibility-limiting elements, allowing players to either establish defensive lines around central key points or use outer auxiliary bases for mobile tactics. Due to the map's structure, early resource gathering is limited, making it crucial to secure mineral lines quickly and optimally place defensive structures. The inclusion of terms like "handicap" in the internal description suggests built-in balance adjustments to equalize player advantages. While the default difficulty is set to "normal," the bug fixes and increased challenge may prove difficult for beginners, though experienced players should find it appropriately balanced. It’s best suited for users familiar with defense and strategic play, particularly fans of the Spawn Defense series looking for a fresh challenge. Before playing, check the configurable initial resource placement, available construction zones for defensive structures, and whether teamwork is required. The map’s large scale demands active use of the minimap to avoid missing critical defense timings. Given its nature, expect longer play sessions, and consider sharing strategies or screenshots for better tactical approaches.
썬켄 디펜스-6웨이 (Sunken Defense-6 Way)
‘썬켄 디펜스-6웨이-- MV’는 스타크래프트 브루드워의 대표적인 디펜스형 유즈맵으로, 총 30단계에 이르는 끊임없는 적의 침공을 방어하는 짜릿한 긴장감을 느낄 수 있는 맵이다. 6인용 맵으로 설계된 이 맵은 중앙에 위치한 방어 건물을 surrounded by multiple paths where enemy units spawn and advance toward the player's command center. 맵의 특징은 6방향에서 동시에 적이 몰려드는 구조로, 각각의 길에서 나오는 적군을 효율적으로 방어하지 않으면 순식간에 전선이 무너질 수 있다. 방어 건물의 위치와 자원 관리, 그리고 적의 웨이브 패턴을 예측하는 것이 승리의 핵심이다. 이 맵은 2002년 Heavyarms1987에 의해 처음 제작되었으며, 이후 7차례에 걸쳐 업데이트를 거치며 디자인과 밸런스가 점차 개선되었다. 사막 타일셋을 활용한 맵의 분위기는 건조한 사막 지형에서 펼쳐지는 혈투를 연상시키며, 시각적으로도 긴장감을 더한다. 플레이어는 각 레벨마다 주어지는 제한된 자원으로 최적의 방어선을 구축해야 하며, 적의 공격 패턴이 반복되면서도 조금씩 변형되어 나오는 점에서 전략적 깊이가 느껴진다. 초보자의 경우 방어 건물의 배치와 자원 사용에 익숙해지는 데 시간이 걸리지만, 점차 패턴을 익혀가며 안정적인 방어 루틴을 확보할 수 있다. ‘썬켄 디펜스-6웨이-- MV’는 디펜스 장르의 정석을 보여주는 맵으로, 끊임없는 도전과 성취감을 주는 구조가 특징이다. 특히 팀 플레이보다는 개인 플레이에 중점을 두고 있으며, 혼자서도 충분히 즐길 수 있도록 설계되어 있다. 맵의 난이도는 점차 상승하는 적의 공격력으로 조절되며, 후반부로 갈수록 집중력과 전략이 요구된다. 이 맵을 즐기기 위해서는 방어 건물의 특성과 적의 웨이브 타이밍을 정확히 파악하는 것이 중요하다. 또한, 자원의 효율적인 사용과 건물의 업그레이드가 승패를 좌우할 수 있으므로, 꾸준한 연습을 통해 실력을 쌓을 필요가 있다. 전체적인 플레이 시간은 약 30분~1시간 내외로 예상되며, 각 레벨의 성공 여부에 따라 전체 플레이 시간은 변동될 수 있다. 이 맵은 디펜스 유즈맵에 익숙한 플레이어는 물론, 새로운 장르에 도전해보고 싶은 유저에게도 추천할 만한佳作이다. 'Sunken Defense - 6-Way -- MV' is a classic defense-style custom map in StarCraft: Brood War, offering thrilling tension as players fend off relentless enemy waves across 30 stages. Designed as a 6-player map, it features a central defensive structure surrounded by multiple paths where enemies spawn and advance toward the player's command center. The map’s defining trait is its six-directional layout, where waves of enemies simultaneously attack from all sides—failing to efficiently defend any path can cause the frontline to collapse instantly. Success hinges on smart positioning of defensive buildings, resource management, and predicting enemy wave patterns. Originally created in 2002 by Heavyarms1987, the map has undergone seven major updates, refining its design and balance over time. The desert-themed tileset enhances the atmosphere, evoking intense battles unfolding in arid terrain and adding to the visual tension. Each level provides limited resources, forcing players to build the most effective defensive lines possible. While enemy attack patterns repeat, they subtly evolve, adding strategic depth to the gameplay. Beginners may struggle at first with building placement and resource allocation, but as they learn the patterns, they can establish stable defense routines. 'Sunken Defense - 6-Way -- MV' exemplifies the essence of the defense genre, delivering a structure that constantly challenges players and rewards their progress. Unlike team-based maps, it focuses on solo play, allowing individuals to fully enjoy the experience on their own. The difficulty steadily increases with the strength of enemy waves, demanding sharper focus and strategy in later stages. Mastery requires a deep understanding of defensive structures and wave timings, as well as efficient resource use and building upgrades—key factors that determine victory or defeat. With a total playtime of roughly 30 minutes to an hour, though varying based on level success, this map is a masterpiece worth trying for both seasoned defense-map veterans and newcomers eager to explore the genre.
레벨 디펜스 울트라 (Level Defense ULTRA)
스타크래프트 브루드워의 디펜스 장르 유즈맵인 ‘레벨 디펜스 울트라(Level Defense ULTRA)’는 이름 그대로 강력한 적의 물량을 끊임없이 방어해야 하는 도전적인 플레이가 특징이다. 맵의 중앙에 위치한 플레이어 기지 주변으로 좁은 길목이 이어지며, 이 좁은 통로를 통해 수많은 적 유닛이 끊임없이 밀려온다. 방어선을 무너뜨리지 않고 버텨야 하는 이 게임은 단순하면서도 긴장감 넘치는 진행이 인상적이다. 특히 맵의 구조상 플레이어는 좁은 통로에서 집중 공격을 감행하는 적들을 상대해야 하며, 효율적인 유닛 관리와 배치 전략이 필수적이다. 적의 공격 패턴은 단계별로 변화하며, 후반부로 갈수록 난이도가 급격히 상승하는 구조를 갖추고 있어 플레이어의 집중력과 판단력을 끊임없이 요구한다. 맵의 배경은 우주 타일셋으로 깔끔하게 구성되어 있으며, 어두운 색감 덕분에 적의 움직임이 더 도드라져 보인다. 추천 대상은 디펜스 게임을 즐기는 유저들이며, 특히 좁은 통로에서 벌어지는 긴장감 넘치는 전투를 경험하고 싶어 하는 플레이어에게 적합하다. 플레이 전에는 자신의 방어 전략을 미리 세워두는 것이 중요하며, 특히 후반부에서 쏟아지는 적의 물량을 어떻게 상대할지에 대한 대비가 필요하다. 맵을 플레이할 때는 미네랄과 가스를 충분히 확보하여 유닛 생산과 업그레이드에 투자하는 것이 핵심 포인트다. 또한, 좁은 길목에서 벌어지는 전투에서는 빠른 반응과 정확한 컨트롤이 승패를 가를 수 있으니, 연습을 통해 실력을 쌓는 것이 좋다. 이 맵은 디펜스 유즈맵의 классиックな 재미를 느낄 수 있도록 설계되어 있으며, 반복 플레이를 통해 자신의 전략을 개선할 수 있는 매력이 있다. StarCraft: Brood War’s defense-genre custom map, *Level Defense ULTRA*, lives up to its name with a relentless challenge: defending your base against overwhelming enemy waves. The map funnels endless swarms of units through narrow corridors leading to your central starting position. The core gameplay—holding the line without breaking—is simple yet intensely gripping. Due to the map’s layout, players must face concentrated enemy assaults in tight choke points, making efficient unit management and strategic positioning essential. Enemy attack patterns evolve in stages, and difficulty spikes sharply as the game progresses, demanding constant focus and quick decision-making. The space-themed tileset is cleanly designed, and its dark color palette makes enemy movements stand out even more. This map is ideal for fans of defense games, especially those seeking the thrill of high-tension battles in narrow passages. Before playing, it’s crucial to plan your defense strategy, particularly preparing for the late-game surge of enemy forces. Securing ample minerals and gas to invest in unit production and upgrades is key. In the tight corridors, split-second reactions and precise control can decide victory or defeat, so practicing your micro is highly recommended. Designed to capture the classic fun of defense custom maps, *Level Defense ULTRA* offers replay value by letting players refine their strategies through repeated plays.
2제곱디팬스 (2Squared Defense)
스타크래프트 브루드워의 대표적인 컴퓨팅 디펜스 유즈맵인 〈2제곱디팬스〉는 플레이어가 적의 끊임없는 공격을 방어하는 동시에 성장형 메커니즘을 통해 성을 강화하는 전략성이 돋보이는 맵입니다. 맵 중앙에 위치한 플레이어 기지와 주위에서 끊임없이 몰려드는 적 유닛을 상대로 방어선을 구축해야 하는데, 기본 베이스를 지키면서 동시에 미네랄과 가스를 확보해 방어 건물을 지속적으로 업그레이드하고 보충할 수 있습니다. 맵의 특징은 ‘2제곱’이라는 이름에서 알 수 있듯, 적의 공격 패턴이 단계적으로 강화되면서 난이도가 기하급수적으로 상승한다는 점입니다. 초반에는 약한 저글링과 히드라리스크가 주를 이루지만, 후반으로 갈수록 울트라리스크, 디바우러,甚至 공중 유닛까지 동원되는 혼종 부대가 등장해 방어가 increasingly 어려워집니다. 특히 맵의 왼쪽과 오른쪽에서 동시에 공격을 펼치는 패턴이 자주 등장하는데, 이 때문에 멀티태스킹 능력이 필수적입니다. 또한, 맵에 배치된 방어 건물 슬롯과 자원 분포가 전략적 선택을 요구하는 요소로 작용합니다. 방어 건물의 종류와 배치 위치를 잘못 선택하면 적의 공격을 버티지 못하고 금방 무너질 수 있으며, 반대로 효율적인 배치와 업그레이드는 후반까지 버틸 수 있는 튼튼한 성을 구축할 수 있습니다. 플레이어는 초반 자원 관리와 건물 배치 타이밍을 잘 잡아야 하며, 후반으로 갈수록 공격 패턴을 예측하고 방어선을 재구축하는 능력이 중요해집니다. 〈2제곱디팜스〉는 초보 플레이어에게는 다소 어려운 진입 장벽이 있지만, 적절한 전략과 꾸준한 연습을 통해 점차 숙련도를 높일 수 있는 맵입니다. 특히 팀 플레이가 가능하다는 점도 특징으로, 팀원 간의 역할 분담과 실시간 커뮤니케이션이 승패를 좌우할 수 있습니다. 이 맵을 즐기는 유저들에게는 방어 전략의 깊이를 느낄 수 있는 매력이 있으며, 적절한 난이도 조절과 흥미로운 성장 메커니즘이 특징입니다. 추천 대상은 전략 게임과 디펜스 장르를 선호하는 플레이어이며, 특히 ‘컴퓨터 상대 디펜스’ 유형의 맵을 즐기는 유저들에게 적합합니다. 플레이 전에는 기본 방어 건물의 종류와 특성을 숙지하고, 자원 관리와 건물 배치의 중요성을 인지하는 것이 좋습니다. 또한, 후반으로 갈수록 예측하기 어려운 적의 공격 패턴에 대비해 유연한 전략 수립이 필요합니다. StarCraft: Brood War’s classic computing defense custom map, 〈2제곱디팬스〉, challenges players to defend their base against relentless enemy waves while growing stronger through an upgrade system. The map centers around a player’s main base, surrounded by waves of Zerg units that escalate in difficulty exponentially—starting with basic Zerglings and Hydralisks before culminating in Ultralisks, Devourers, and even mixed air units. The name ‘2제곱디팜스’ hints at the geometric difficulty increase, where each phase of the attack grows more complex and destructive. Players must manage resources efficiently to build and upgrade defensive structures, with limited slots forcing strategic placement decisions. Left and right flanks often face simultaneous assaults, demanding multitasking and adaptability. The map’s appeal lies in its blend of resource management, defensive architecture, and escalating challenge, making it a test of both foresight and quick decision-making. While the learning curve is steep for beginners, mastery rewards players with a satisfying sense of progression and resilience. Team play is supported, allowing coordinated defenses and shared responsibilities. Ideal for fans of strategy and defense genres, this map rewards preparation—understanding defensive structures, resource allocation, and adaptive tactics are key to survival. Players should familiarize themselves with building types and enemy patterns early on to maximize their chances in later, unpredictable assaults.
Impossible Continuum 3.2o
‘Impossible Continuum 3.2o’는 스타크래프트 브루드워의 유즈맵으로, ‘Impossible Longation’의 후속작이자 bushwack과 hahaha666에 의해 만들어진 컴까기 장르의 맵이다. 맵은 4096x4096 크기의 거대한 사막 타일셋을 바탕으로 구성되어 있으며, 5명의 플레이어가 동시에 참여할 수 있다. 게임의 핵심은 ‘Impossible’이라는 이름에서 짐작할 수 있듯이, 끊임없이 쏟아지는 적의 공격을 방어하며 마지막까지 살아남는 ‘컴퓨터 상대 디펜스’ 형식이다. 맵의 구조는 중앙을 가로지르는 좁은 통로와 그 주변의 넓은 평지로 나뉘며, 플레이어는 각자 할당된 위치에 건물을 건설하고 병력을 양성해 적의 공격을 막아내야 한다. 적의 유닛은 끊임없이 몰려오며, 그 수와 종류는 시간이 지날수록 점점 강력해진다. 특히 후반부로 갈수록 고급 유닛과 다수의 조합된 공격이 빈번해지므로, efficient한 자원 관리와 전략적 터렛 배치, 그리고 순간적인 판단력이 요구된다. 맵의 난이도는 ‘보통’ 정도로, 초보자도 쉽게 접근할 수 있지만 숙련자라면 더 높은 점수를 노릴 수 있는 구조로 설계되어 있다. 플레이어는 시작 시 기본 자원과 건물 몇 개를 제공받지만, 추가 자원은 주로 미네랄과 가스를 채취해 확보해야 한다. 또한, 맵 곳곳에 배치된 보너스 자원 지역을 활용하면 더 빠르게 병력을 양성할 수 있다. 방어 건물로는 주로 테란의 포톤 캐논이나 프로토스의 포톤 캐논에 해당하는 ‘디펜스 타워’를 사용할 수 있으며, 필요에 따라 추가 병력을 생산하거나 업그레이드를 진행할 수 있다. 맵의 분위기는 사막의 황량한 풍경과 적의 끊임없는 공격으로 긴장감이 지속되며, 플레이어는 자신의 생존과 더불어 다른 플레이어와의 경쟁도 고려해야 한다. 이 맵의 가장 큰 특징은 ‘Impossible’이라는 타이틀에 걸맞게, 적의 공격이 매우 치열하다는 점이다. 초반에는 저글링과 히드라리스크가 주를 이루지만, 중반 이후로는 뮤탈리스크, 울트라리스크, 그리고 캐리어까지 등장한다. 이러한 적의 조합을 efficiently 방어하기 위해서는 맵의 지형과 보너스 자원의 위치를 정확히 파악하고, 각 플레이어 간의 협력이 필수적이다. 또한, 맵의 후반부에는 갑자기 쏟아지는 적의 대군에 대처할 수 있는 ‘최후의 방어선’을 구축하는 것이 관건이다. 이러한 요소들이 결합되어 ‘Impossible Continuum 3.2o’는 단순한 디펜스 맵을 넘어, 전략과 집중력, 그리고 순간적인 판단력이 요구되는 고난이도의 유즈맵으로 자리매김하고 있다. 이 맵은 초보자에게는 다소 어려울 수 있지만, 디펜스 장르에 익숙한 플레이어라면 재미있게 즐길 수 있는 맵이다. 또한, 맵의 구조와 적의 공격 패턴이 일정하지 않기 때문에, 매 판마다 새로운 전략을 시도해 볼 수 있어 반복 플레이에도 지루하지 않다. 특히, 팀 플레이를 통해 다른 플레이어와의 협력을 연습할 수 있는 점도 큰 장점 중 하나다. 그러나 맵의 난이도가 높기 때문에, 초보자라면 먼저 쉬운 디펜스 맵으로 연습을 한 후 도전하는 것이 좋다. ‘Impossible Continuum 3.2o’는 디펜스 유즈맵을 좋아하는 플레이어들에게 강력히 추천할 만한 맵이다. 'Impossible Continuum 3.2o' is a user-created custom map for *StarCraft: Brood War*, serving as the sequel to *Impossible Longation*. Developed by bushwack and hahaha666, it belongs to the "compete against AI" genre. The map features a massive 4096x4096 desert tileset and supports up to five players simultaneously. As the name suggests, the core gameplay revolves around defending against relentless enemy waves in a "computer opponent defense" format until the last player remains. The map is divided into a narrow central corridor flanked by wide open areas. Players must build structures and train units in their assigned positions to fend off continuous enemy assaults. The enemy's forces grow increasingly stronger over time, both in number and unit composition. By the late game, high-tier units and coordinated attacks become frequent, demanding efficient resource management, strategic turret placement, and quick decision-making. While the difficulty is set to "normal," making it accessible for beginners, experienced players can aim for higher scores with its well-designed structure. Upon starting, players receive basic resources and a few buildings, but additional minerals and gas must be gathered through mining. Utilizing bonus resource spots scattered across the map can accelerate unit production. For defense, players can deploy 'defense towers' similar to Terran photon cannons or Protoss shield batteries, with options to produce extra units or research upgrades as needed. The map’s atmosphere—set against a barren desert backdrop under constant enemy pressure—creates a tense experience where players must balance survival with competition against others. What truly embodies the "Impossible" in its title is the map’s intense enemy onslaught. Early waves consist mainly of zerglings and hydralisks, but later stages introduce mutalisks, ultralisks, and even carriers. To defend effectively, players must master the terrain, leverage bonus resources, and coordinate closely with teammates. A critical challenge arises in the late game, where sudden massive enemy waves test the strength of the players' final defensive lines. These elements elevate 'Impossible Continuum 3.2o' beyond a simple defense map, transforming it into a high-stakes custom game that demands strategy, focus, and sharp reflexes. While the map may pose a challenge for beginners, it offers an engaging experience for those familiar with the defense genre. Its dynamic structure and unpredictable enemy patterns allow for fresh strategies with each playthrough, preventing monotony. The emphasis on teamwork also provides valuable practice in coordination with other players. However, due to its high difficulty, newcomers are advised to hone their skills on easier defense maps first. Overall, 'Impossible Continuum 3.2o' comes highly recommended for fans of the defense genre seeking a demanding and rewarding custom map.
임파서블 유포리아 (Impossible Euphoria)
스타크래프트 브루드워의 유즈맵 ‘Impossible Euphoria’는 사막 타일셋을 배경으로 펼쳐지는 컴까기 형식의 디펜스 맵이다. 맵의 메인 테마는 끊임없는 웨이브의 적군 공격으로부터 핵심 건물을 방어하는 것이며, 맵 중앙에 위치한 본진 건물을 중심으로 사방에서 몰려드는 적을 상대하게 된다. 적군은 초반부터 강력한 저글링과 히드라리스크, 후반에는 뮤탈리스크와 울트라리스크까지 조합되어 등장하며, 맵 곳곳에 배치된 미네랄과 가스 멀티를 확보해 자원 수급을 원활히 해야 한다. 방어에 성공해도 일정 턴이 지나면 ‘Impossible’ 모드가 발동되어 적군의 공격력이 급증하는 패턴이 반복되므로, 플레이어는 자원을 효율적으로 관리하고 방어 타워나 유닛 생산 건물을 적절히 배치해야 한다. 맵의 볼륨은 상당히 크며, 넓은 사막 지형이 펼쳐져 있어 시야 확보와 진형 관리가 중요하다. 적군의 공격 패턴은 예측 가능한 수준이지만, 맵의 난이도가 상승할수록 유닛의 조합과 스킬 사용 타이밍이 관건이 된다. 초보자는 방어 타워를 적극 활용하는 전략을, 숙련자는 자원 수급과 멀티 확보를 중시하는 플레이가 필요하다. 맵을 플레이하기 전에는 맵 에디터로 확인 가능한 주요 건물이 파괴되지 않도록 보호하는 법과, 각 턴별로 등장하는 적군의 조합을 숙지하는 것이 중요하다. 또한, 맵의 난이도 상승 요소를 고려해 자원 관리와 타워 배치에 신경을 써야 한다. 이 맵은 장기전과Resource Management를 요구하는 컴까기 유저들에게 적합하며, 특히 디펜스와 멀티 플레이에 대한 이해도가 높은 플레이어에게 추천할 만하다. Impossible Euphoria is a defense-style UMS map set in the desert tileset of StarCraft: Brood War. The core gameplay revolves around defending the central base from relentless waves of enemy units, which escalate in difficulty as the game progresses. Players must secure mineral and gas expansions scattered across the map to maintain resource flow while countering attacks that start with basic units like Zerglings and Hydralisks and later escalate to Mutalisks and Ultralisk compositions. The map features a large, open desert terrain with strategic chokepoints where defensive towers or player-built structures can be placed to mitigate damage. A unique mechanic called the ‘Impossible’ mode periodically intensifies enemy aggression, forcing players to adapt their strategies dynamically. The challenge lies in balancing resource management, expansion timing, and unit production to survive the escalating waves. Novice players may benefit from prioritizing defensive towers, while advanced players should focus on optimizing resource income and multi-tasking across expansions. Before playing, it's crucial to identify key structures vulnerable to destruction and familiarize oneself with the evolving enemy unit compositions each turn. This map is ideal for fans of long-duration defense and resource management mechanics, particularly those with experience in UMS-style StarCraft custom maps.
맵 선택 가이드
태그는 맵의 핵심 특징을 빠르게 설명하지만 제작 버전마다 규칙이 다를 수 있습니다. 상세 설명에서 권장 인원, 난이도, 플레이 시간과 버전을 함께 확인한 뒤 다운로드하세요.