
난이도 변동 스타크래프트 맵 모음
'난이도 변동' 태그가 등록된 맵을 모았습니다. 장르 하나로 찾기 어려운 플레이 방식, 난이도와 특징을 중심으로 인기 맵과 최신 맵을 비교해 보세요.
- 등록 맵
- 2개
- 누적 다운로드
- 0
- 누적 조회
- 71
인기 맵
다운로드와 조회 반응이 높은 맵입니다.
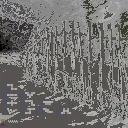
드렁크 바운더 2 (Drunken Bounder 2)
스타크래프트 브루드워의 유즈맵 <드렁크 바운더 2 (Drunken Bounder 2)>는 파괴와 도전으로 가득한 ‘컴퓨터 상대 디펜스’ 장르의 대표적인 작품으로, 플레이어는 끊임없이 몰려오는 적군 유닛을 상대로 자신의 기지를 방어해야 한다. 맵은 중앙에 위치한 기지 주변으로 다양한 방향에서 적군이 쏟아져 들어오며, 플레이어는 제한된 자원으로 건물을 짓고 병력을 양성해가며 전선을 유지해야 한다. 맵의 특징은 맵 곳곳에 배치된 ‘바운더’라고 불리는 장애물이나 특수 구조물이 있는데, 이 요소들은 적의 진격을 방해하거나 플레이어의 방어선을 강화하는 역할을 한다. 특히, 바운더는 파괴 가능한 구조물로, 전략적으로 활용하면 적의 공세를 분산시킬 수 있으며, 때로는 이를 적극적으로 활용해 역공을 펼쳐야 하는 상황도 발생한다. 이 맵은 기본적인 디펜스 구도를 갖추고 있지만, ‘드렁크’라는 이름에서 암시하듯 다소 난해하고 예측 불가능한 진행이 특징이다. 적군의 스폰 타이밍이나 종류가 랜덤하게 변동되면서 플레이어는 매 순간 전략을 유연하게 바꿔야 하며, 이는 초보 플레이어에게는 다소 어려울 수 있지만 숙련된 유저에게는 끊임없는 도전과 재미를 제공한다. 또한, 맵의 규모가 상당히 크고 구조가 복잡하여, 초반에는 적의 공격을 방어하는 데 집중해야 하지만, 중반 이후에는 자원과 병력의 관리가 핵심 포인트가 된다. 특히, 바운더를 적절히 관리하지 않으면 적군이 예상치 못한 루트로 침투할 수 있어, 미니맵을 주시하며 전황을 파악하는 것이 중요하다. 이 맵은 5인 플레이를 지원하며, 각 플레이어는 독립된 기지를 보유하고 있지만, 중앙 지역을 공유하는 구조로 인해 간접적인 경쟁 관계가 형성된다. 이러한 구조는 팀플레이보다는 개인전 성향이 강하지만, 때로는 협력이나 견제가 필요할 때도 있다. 추천 대상은 디펜스 유즈맵을 즐기며 전략적 사고와 빠른 대처 능력을 키우고 싶은 게이머들에게 적합하며, 특히 ‘랜덤 디펜스’나 ‘컴퓨터 상대 유즈맵’을 선호하는 플레이어라면 큰 재미를 느낄 수 있을 것이다. 플레이 전에는 맵의 구조와 바운더의 위치를 숙지하는 것이 필수이며, 특히 바운더의 파괴 가능 여부와 효과를 미리 확인해두는 것이 좋다. Drunken Bounder 2 is a classic UMS (Use Map Settings) defense map in StarCraft: Brood War, where players must defend their base against relentless waves of enemy units. The map features a central base surrounded by multiple entry points for enemy forces, requiring players to construct buildings, train units, and manage resources efficiently. A key element of the map is the 'Bounder' structures scattered across the terrain—these can be destroyed or strategically utilized to block enemy advances or redirect their attacks. What sets Drunken Bounder 2 apart is its unpredictable and challenging gameplay. The spawn timing and types of enemy units vary randomly, forcing players to adapt their strategies on the fly. While this may pose difficulties for beginners, experienced players will appreciate the depth and replayability it offers. The map’s large scale and complex layout demand constant vigilance, especially through the minimap, to monitor enemy movements and prevent unexpected infiltrations. The 'drunken' aspect hints at the chaotic yet thrilling nature of the gameplay. Designed for up to 5 players, each with their own base but sharing a central area, the map leans more toward individual competition rather than team play. However, indirect cooperation or interference with opponents can sometimes become necessary. This map is ideal for players who enjoy defense-based UMS maps, particularly those who favor random defense mechanics or computer-based challenges. Before diving in, it’s crucial to familiarize yourself with the map layout and the functions of the Bounders to maximize your defensive strategy.
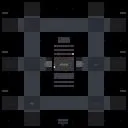
Perfect Stacked Defense 10-Way
《Perfect Stacked Defense 10-Way》는 스타크래프트 브루드워에서 만나볼 수 있는 대표적인 디펜스 장르의 유즈맵으로, 10개의 서로 다른 스테이지를 거쳐가는 구조가 특징이다. 맵 중앙에 위치한 본진을 중심으로 적의 물량이 끊임없이 몰려오며, 플레이어는 방어선을 구축하고 전략적으로 유닛을 배치해 살아남아야 한다. 각 스테이지마다 등장하는 적의 종류와 패턴이 조금씩 달라지기 때문에 매번 새로운 전략을 짜야 한다는 점이 흥미를 더한다. 특히 10개의 스테이지가 모두 끝난 후에는 최종 보스가 등장하는데, 이 보스는 기존의 적과는 차원이 다른 난이도를 자랑하므로 신중한 준비가 필요하다. 디펜스 장르 특유의 긴장감과 더불어, 맵의 디자인도 매우 깔끔하게 되어 있다. 본진 주변의 좁은 통로와 다수의 언덕 지형이 조화를 이루어 방어하기 쉬운 곳과 어려운 곳을 자연스럽게 구분해준다. 또한, 각 스테이지마다 주어지는 제한 시간이나 특정 조건(예: 특정 유닛만 사용 가능)이 있는지는 맵 설명에서 확인할 수 없지만, 플레이어의 실력과 판단력이 중요하다는 점에서 충분히 매력적이다. 초보자는 기본적인 방어 전략을 익히는 데 집중하고, 고수라면 최적의 유닛 배치와 자원 관리, 기지 확장 전략을 구사해볼 수 있다. 이 맵을 추천하는 대상은 디펜스 장르를 즐기는 모든 플레이어다. 특히 3~6명의 플레이어가 동시에 참여할 수 있는 구조이기 때문에 친구들과 협동하거나 경쟁하며 즐길 수 있다는 점이 장점이다. 다만, 각 스테이지의 난이도가 일정하지 않고 최종 보스가 매우 강력하므로, 처음 플레이할 때는 체력 관리와 자원 수급에 신경 쓰는 것이 좋다. 맵의 전체적인 밸런스는 비교적 안정적이지만, 일부 스테이지에서는 특정 유닛이 지나치게 강하거나 약할 수 있으므로, 자신의 플레이 스타일에 맞는 유닛을 적극 활용해야 한다. 마지막으로, 맵의 버전이 v1.16이며, 제작자나 배포자에 대한 정보도 내부 설명에 포함되어 있으니 참고하면 좋다. Perfect Stacked Defense 10-Way is a popular defense-style custom map in StarCraft: Brood War, featuring a unique structure where players progress through 10 distinct stages. The game revolves around protecting the main base in the center of the map while waves of enemies continuously attack. Each stage introduces new enemy types and patterns, requiring players to adapt their strategies dynamically. The final stage culminates in a boss battle that demands meticulous preparation due to its extreme difficulty. The map boasts a clean and intuitive design, with narrow pathways and elevated terrain around the base that naturally guide enemy movements. While the map description does not explicitly mention stage-specific time limits or unit restrictions, the gameplay emphasizes player skill and strategic planning. Beginners can focus on mastering basic defense tactics, while advanced players can experiment with optimal unit placement, resource management, and base expansion strategies. This map is highly recommended for fans of the defense genre, especially those who enjoy playing with 3 to 6 participants. The collaborative or competitive multiplayer experience adds to its appeal, though players should be mindful of varying stage difficulties and the powerful final boss. While the overall balance is stable, some stages may favor certain unit types over others, so adapting to the map’s demands is key. Additionally, the map is currently on version v1.16, and details about the creator and distributor are included in the internal description for reference.
최근 등록된 맵
새로 추가된 파일과 버전을 확인하세요.
Perfect Stacked Defense 10-Way
《Perfect Stacked Defense 10-Way》는 스타크래프트 브루드워에서 만나볼 수 있는 대표적인 디펜스 장르의 유즈맵으로, 10개의 서로 다른 스테이지를 거쳐가는 구조가 특징이다. 맵 중앙에 위치한 본진을 중심으로 적의 물량이 끊임없이 몰려오며, 플레이어는 방어선을 구축하고 전략적으로 유닛을 배치해 살아남아야 한다. 각 스테이지마다 등장하는 적의 종류와 패턴이 조금씩 달라지기 때문에 매번 새로운 전략을 짜야 한다는 점이 흥미를 더한다. 특히 10개의 스테이지가 모두 끝난 후에는 최종 보스가 등장하는데, 이 보스는 기존의 적과는 차원이 다른 난이도를 자랑하므로 신중한 준비가 필요하다. 디펜스 장르 특유의 긴장감과 더불어, 맵의 디자인도 매우 깔끔하게 되어 있다. 본진 주변의 좁은 통로와 다수의 언덕 지형이 조화를 이루어 방어하기 쉬운 곳과 어려운 곳을 자연스럽게 구분해준다. 또한, 각 스테이지마다 주어지는 제한 시간이나 특정 조건(예: 특정 유닛만 사용 가능)이 있는지는 맵 설명에서 확인할 수 없지만, 플레이어의 실력과 판단력이 중요하다는 점에서 충분히 매력적이다. 초보자는 기본적인 방어 전략을 익히는 데 집중하고, 고수라면 최적의 유닛 배치와 자원 관리, 기지 확장 전략을 구사해볼 수 있다. 이 맵을 추천하는 대상은 디펜스 장르를 즐기는 모든 플레이어다. 특히 3~6명의 플레이어가 동시에 참여할 수 있는 구조이기 때문에 친구들과 협동하거나 경쟁하며 즐길 수 있다는 점이 장점이다. 다만, 각 스테이지의 난이도가 일정하지 않고 최종 보스가 매우 강력하므로, 처음 플레이할 때는 체력 관리와 자원 수급에 신경 쓰는 것이 좋다. 맵의 전체적인 밸런스는 비교적 안정적이지만, 일부 스테이지에서는 특정 유닛이 지나치게 강하거나 약할 수 있으므로, 자신의 플레이 스타일에 맞는 유닛을 적극 활용해야 한다. 마지막으로, 맵의 버전이 v1.16이며, 제작자나 배포자에 대한 정보도 내부 설명에 포함되어 있으니 참고하면 좋다. Perfect Stacked Defense 10-Way is a popular defense-style custom map in StarCraft: Brood War, featuring a unique structure where players progress through 10 distinct stages. The game revolves around protecting the main base in the center of the map while waves of enemies continuously attack. Each stage introduces new enemy types and patterns, requiring players to adapt their strategies dynamically. The final stage culminates in a boss battle that demands meticulous preparation due to its extreme difficulty. The map boasts a clean and intuitive design, with narrow pathways and elevated terrain around the base that naturally guide enemy movements. While the map description does not explicitly mention stage-specific time limits or unit restrictions, the gameplay emphasizes player skill and strategic planning. Beginners can focus on mastering basic defense tactics, while advanced players can experiment with optimal unit placement, resource management, and base expansion strategies. This map is highly recommended for fans of the defense genre, especially those who enjoy playing with 3 to 6 participants. The collaborative or competitive multiplayer experience adds to its appeal, though players should be mindful of varying stage difficulties and the powerful final boss. While the overall balance is stable, some stages may favor certain unit types over others, so adapting to the map’s demands is key. Additionally, the map is currently on version v1.16, and details about the creator and distributor are included in the internal description for reference.
드렁크 바운더 2 (Drunken Bounder 2)
스타크래프트 브루드워의 유즈맵 <드렁크 바운더 2 (Drunken Bounder 2)>는 파괴와 도전으로 가득한 ‘컴퓨터 상대 디펜스’ 장르의 대표적인 작품으로, 플레이어는 끊임없이 몰려오는 적군 유닛을 상대로 자신의 기지를 방어해야 한다. 맵은 중앙에 위치한 기지 주변으로 다양한 방향에서 적군이 쏟아져 들어오며, 플레이어는 제한된 자원으로 건물을 짓고 병력을 양성해가며 전선을 유지해야 한다. 맵의 특징은 맵 곳곳에 배치된 ‘바운더’라고 불리는 장애물이나 특수 구조물이 있는데, 이 요소들은 적의 진격을 방해하거나 플레이어의 방어선을 강화하는 역할을 한다. 특히, 바운더는 파괴 가능한 구조물로, 전략적으로 활용하면 적의 공세를 분산시킬 수 있으며, 때로는 이를 적극적으로 활용해 역공을 펼쳐야 하는 상황도 발생한다. 이 맵은 기본적인 디펜스 구도를 갖추고 있지만, ‘드렁크’라는 이름에서 암시하듯 다소 난해하고 예측 불가능한 진행이 특징이다. 적군의 스폰 타이밍이나 종류가 랜덤하게 변동되면서 플레이어는 매 순간 전략을 유연하게 바꿔야 하며, 이는 초보 플레이어에게는 다소 어려울 수 있지만 숙련된 유저에게는 끊임없는 도전과 재미를 제공한다. 또한, 맵의 규모가 상당히 크고 구조가 복잡하여, 초반에는 적의 공격을 방어하는 데 집중해야 하지만, 중반 이후에는 자원과 병력의 관리가 핵심 포인트가 된다. 특히, 바운더를 적절히 관리하지 않으면 적군이 예상치 못한 루트로 침투할 수 있어, 미니맵을 주시하며 전황을 파악하는 것이 중요하다. 이 맵은 5인 플레이를 지원하며, 각 플레이어는 독립된 기지를 보유하고 있지만, 중앙 지역을 공유하는 구조로 인해 간접적인 경쟁 관계가 형성된다. 이러한 구조는 팀플레이보다는 개인전 성향이 강하지만, 때로는 협력이나 견제가 필요할 때도 있다. 추천 대상은 디펜스 유즈맵을 즐기며 전략적 사고와 빠른 대처 능력을 키우고 싶은 게이머들에게 적합하며, 특히 ‘랜덤 디펜스’나 ‘컴퓨터 상대 유즈맵’을 선호하는 플레이어라면 큰 재미를 느낄 수 있을 것이다. 플레이 전에는 맵의 구조와 바운더의 위치를 숙지하는 것이 필수이며, 특히 바운더의 파괴 가능 여부와 효과를 미리 확인해두는 것이 좋다. Drunken Bounder 2 is a classic UMS (Use Map Settings) defense map in StarCraft: Brood War, where players must defend their base against relentless waves of enemy units. The map features a central base surrounded by multiple entry points for enemy forces, requiring players to construct buildings, train units, and manage resources efficiently. A key element of the map is the 'Bounder' structures scattered across the terrain—these can be destroyed or strategically utilized to block enemy advances or redirect their attacks. What sets Drunken Bounder 2 apart is its unpredictable and challenging gameplay. The spawn timing and types of enemy units vary randomly, forcing players to adapt their strategies on the fly. While this may pose difficulties for beginners, experienced players will appreciate the depth and replayability it offers. The map’s large scale and complex layout demand constant vigilance, especially through the minimap, to monitor enemy movements and prevent unexpected infiltrations. The 'drunken' aspect hints at the chaotic yet thrilling nature of the gameplay. Designed for up to 5 players, each with their own base but sharing a central area, the map leans more toward individual competition rather than team play. However, indirect cooperation or interference with opponents can sometimes become necessary. This map is ideal for players who enjoy defense-based UMS maps, particularly those who favor random defense mechanics or computer-based challenges. Before diving in, it’s crucial to familiarize yourself with the map layout and the functions of the Bounders to maximize your defensive strategy.
맵 선택 가이드
태그는 맵의 핵심 특징을 빠르게 설명하지만 제작 버전마다 규칙이 다를 수 있습니다. 상세 설명에서 권장 인원, 난이도, 플레이 시간과 버전을 함께 확인한 뒤 다운로드하세요.