
난이도 높음 스타크래프트 맵 모음
'난이도 높음' 태그가 등록된 맵을 모았습니다. 장르 하나로 찾기 어려운 플레이 방식, 난이도와 특징을 중심으로 인기 맵과 최신 맵을 비교해 보세요.
- 등록 맵
- 29개
- 누적 다운로드
- 43
- 누적 조회
- 1,756
인기 맵
다운로드와 조회 반응이 높은 맵입니다.
레벨컴까기 V1.9.3 Hard!! (Level Compakagi V1.9.3 Hard!!)
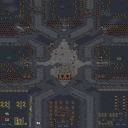
‘레벨컴까기 V1.9.3 Hard!!’는 스타크래프트: 브루드워의 유즈맵으로, 이름에서 알 수 있듯 컴퓨터가 생산해내는 각종 유닛을 상대로 방어전을 펼치는 컴까기 장르의 맵이다. 맵 제목에 ‘Hard!!’가 포함된 만큼 난이도가 상당히 높으며, 플레이어는 방어선을 구축하고 끊임없이 밀려오는 적의 공세를 막아내야 한다. 맵의 구조는 중앙에 플레이어가 배치되는 공간이 있고, 그 주변으로 다수의 출구가 배치되어 있어 적 유닛이 끊임없이 등장한다. 방어선을 구축할 수 있는 공간이 제한적이면서도 밀집되어 있어 전략적인 배치와 자원 관리가 중요하다. 특히 타일셋이 우주로 설정되어 있어 어두운 배경과 조명이 대비되는 시각적 효과가 인상적이다. 유닛의 종류와 스폰 타이밍이 복잡하게 조절되어 있어 초보자가 쉽게 클리어하기 어려운 구조로 설계되었다. 방어에 성공하면 레벨이 올라가며, 더 강력한 적들이 등장하는 식으로 진행된다. 맵의 난이도가 매우 높기 때문에 초보보다는 숙련된 플레이어에게 추천되며, 방어선 구축과 자원 관리, 타이밍 감각을 키우기에 좋은 맵이다. 플레이 전에는 반드시 방어에 사용할 유닛의 종류와 배치 위치를 미리 계획하고, 각 레벨별로 등장하는 적의 패턴을 숙지하는 것이 중요하다. 또한, 자원의 효율적인 사용과 동시에 다수의 적을 상대할 수 있는 다각적인 전략을 준비해야 한다. 맵의 분위기는Dark하고 긴장감이 넘치며, 성공했을 때의 성취감 또한 크기 때문에 반복해서 플레이하고 싶어지는 매력이 있다. ‘Level Clear V1.9.3 Hard!!’ is a StarCraft: Brood War custom map where, as the name suggests, players engage in a defense-focused battle against waves of enemy units spawned by the computer. As indicated by the ‘Hard!!’ in the title, the difficulty is quite high, requiring players to build and maintain defensive lines while fending off relentless enemy assaults. The map features a central area where players start, surrounded by multiple exits through which enemy units continuously emerge. The limited yet densely packed space for setting up defenses demands strategic unit placement and resource management. The space-themed tileset enhances the map’s visual impact with its dark background and contrasting lighting. The variety of enemy units and their spawn timings are meticulously balanced, making it difficult for beginners to clear without prior preparation. Successfully defending raises the level, introducing stronger enemies as the game progresses. Given its high difficulty, this map is best suited for experienced players looking to hone their defensive strategies, resource allocation, and timing skills. Before playing, it’s crucial to plan which units to use for defense and where to position them, as well as to study the enemy patterns for each level. Efficient resource use and versatile strategies are essential to handle the overwhelming number of enemies. The map’s dark, tense atmosphere and the sense of accomplishment upon victory make it highly replayable.
임파서블 크레그미 아쿠아 (Impossible Kregmy Aqua v1.1)
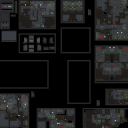
스타크래프트 브루드워의 유즈맵 ‘Impossible Kregmy Aqua v1.1’은 우주 테마를 배경으로 한 디펜스 장르의 유즈맵으로, 6명의 플레이어가 각자 기지를 방어하며 적의 공격을 버텨내야 하는 컴까기 형식을 갖추고 있다. 맵의 전체적인 구조는 중앙 광장과 같은 넓은 공간을 중심으로 각 플레이어의 기지가 배치되어 있으며, 기지 주변에는 방어 건물과 자원 채취 지역이 배치되어 있다. 맵의 이름은 ‘Kregmy’라는 단어와 ‘Aqua’라는 단어가 결합된 형태로, ‘Kregmy’는 제작자 Flemy의 닉네임에서, ‘Aqua’는 물 또는 우주를 연상시키는 테마에서 유래했을 것으로 추정된다. 맵의 제목에 포함된 ‘Impossible’이라는 단어가 시사하듯, 난이도는 상당히 높은 편으로 보이며, 플레이어는 제한된 자원과 지속적인 적의 공격을 효율적으로 방어해야만 생존할 수 있는 구조로 설계되어 있다. 플레이 방식은 기본적으로 컴까기(컴퓨터 상대 유즈맵)로, 플레이어는 각자의 기지에서 자원을 채취하고 방어 건물을 건설하여 적의 공격을 방어하는 동시에, 공격 유닛을 생산해 적 기지를 공격하는 형태로 진행된다. 맵의 중앙에는 넓은 평지가 펼쳐져 있으며, 각 기지 주변에는 높은 언덕과 좁은 통로가 있어 방어 라인을 구축하기 용이하다. 또한, 맵 곳곳에 배치된 자원 지역은 플레이어가 자원을 안정적으로 확보할 수 있도록 돕지만, 적의 공격에 노출되어 있어 신중한 자원 관리가 요구된다. 맵의 디자인상으로는 우주 테마에 걸맞게 어두운 배경과 푸른빛의 액체 같은 질감이 느껴지는 타일셋이 사용되어, 우주 공간의 분위기를 잘 살리고 있다. 이 맵을 추천하는 대상은 스타크래프트 브루드워의 유즈맵을 즐겨 플레이하는 유저, 특히 디펜스 장르에 익숙한 플레이어와 컴까기 형식을 선호하는 유저들이다. 난이도가 높기 때문에 초보자는 다소 어려움을 느낄 수 있지만, 방어 전략과 자원 관리, 유닛 생산의 밸런스를 carefully 다룰 수 있다면 충분히 도전해 볼 만한 가치가 있다. 플레이 전에는 맵의 초기 배치와 방어 건물의 위치, 자원 지역의 분포를 꼼꼼히 확인하고, 적의 공격 패턴을 예측하는 연습을 하는 것이 중요하다. 또한, 맵의 제작자 Discord 채널로 피드백을 남길 수 있어, 개선점을 제안하거나 다른 플레이어들과의 교류도 가능하다. 이 맵은 단순히 방어만 하는 것이 아니라, 공격과 방어의 균형을 맞추며 적 기지를 파괴하는 전략적 요소가 강하기 때문에, 한 번의 실수로 게임이 끝날 수 있는 긴장감을 느낄 수 있다. 맵의 디자인과 난이도가 조화를 이룬 만큼, 숙련된 플레이어들에게는 매우 흥미로운 경험을 제공할 것이다. *Impossible Kregmy Aqua v1.1* is a defense-style custom map in *StarCraft: Brood War* set in a space-themed universe. Six players each defend their own base against waves of enemy attacks in a tower-defense format. The map features a central plaza-like open space with player bases arranged around it, each surrounded by defensive structures and resource-gathering zones. The name combines "Kregmy," likely derived from the creator Flemy’s nickname, and "Aqua," evoking imagery of water or outer space. As the title suggests, the difficulty is exceptionally high. Players must manage limited resources and withstand relentless enemy assaults to survive, with the map designed to test both defensive strategy and efficient unit production. Gameplay follows a tower-defense structure where players gather resources, construct defenses, and launch counterattacks from their bases. The central area is a vast plain, while each base is bordered by elevated terrain and narrow pathways, ideal for setting up choke points. Scattered resource nodes across the map ensure steady income but are exposed to enemy raids, requiring careful resource management. The tile set features dark backgrounds with a fluid, blue-tinged texture, perfectly capturing the essence of a cosmic battlefield. This map is best suited for *Brood War* custom map enthusiasts, particularly those who enjoy tower-defense mechanics and prefer playing against AI opponents. While the high difficulty may overwhelm beginners, experienced players who can balance resource management, unit production, and defense strategies will find it a rewarding challenge. Before playing, it’s crucial to study the initial base layout, defensive building placements, and resource node distribution, as well as to anticipate enemy attack patterns. Players can also leave feedback or engage with others through the map creator’s Discord channel. The map emphasizes strategic balance between offense and defense, where a single mistake can lead to defeat, offering a tense, high-stakes experience. Its well-crafted design and challenging difficulty make it a compelling choice for seasoned players seeking a fresh and demanding challenge.
IMpossible SCenarios 2004
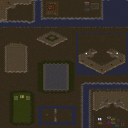
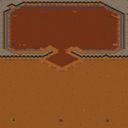
스타크래프트 브루드워의 유즈맵 중 하나로, 'IMpossible SCenarios 2004'는 플레이어들에게 다양한 전략과 대결을 제공하는 맵입니다. 맵의 제목에서 엿볼 수 있듯, 초월적인 난이도를 자랑하는 시나리오형 유즈맵으로 추정됩니다. 이미지 상으로는 넓은 사막 지형이 펼쳐져 있으며, 중앙에 위치한 대형 건물이 눈에 띕니다. 맵의 구조상 다수의 플레이어가 각자의 기지를 건설하고 자원을 채취하는 동시에, 적대적인 유닛이나 구조물과의 전투를 피할 수 없도록 배치되어 있는 것으로 보입니다. 이러한 구조는 플레이어들에게 끊임없는 긴장감과 전략적 선택을 요구할 것입니다. 이 맵은 특히 다중 플레이어 간의 경쟁적 요소와 자원 관리, 방어 전략이 강조되는 컴까기(컴퓨터 상대 유즈맵) 장르에 속한다고 볼 수 있습니다. 맵의 복잡한 구조와 다양한 유닛 배치로 인해 초보 플레이어보다는 중급 이상의 실력을 가진 유저들에게 적합할 것으로 보입니다. 또한, 맵의 제작자 'dudaks-1004'가 제공한 설명이 간단하다는 점에서, 플레이어는 맵의 규칙과 승리 조건을 직접 파악하거나 커뮤니티를 통해 정보를 얻어야 할 필요가 있을 수 있습니다. 플레이 전에는 맵의 승리 조건과 내부 트리거, 특수 규칙을 사전에 확인하는 것이 중요합니다. 맵의 제목에서 'IMpossible'이라는 단어가 포함된 점으로 미루어보아, 일반적인 유즈맵과는 차별화된 난이도와 복잡한 진행이 예상됩니다. 따라서, 이 맵을 플레이하기 전에는 충분한 전략 수립과 팀원 간의 협의가 필요할 것입니다. 또한, 맵의 해상도가 4096x4096으로 매우 크기 때문에, 로딩 시간이 다소 길어질 수 있으니 사양에 주의가 필요합니다. 이 맵은 특히 전략적 사고와 팀워크를 중시하는 플레이어들에게 추천됩니다. 복잡한 구조와 다양한 전술을 요구하는 만큼, 한 번의 플레이로 모든 전략을 파악하기 어려울 수 있으니, 반복적인 플레이를 통해 맵의 특성과 자신만의 전략을 개발하는 것이 중요할 것입니다. 또한, 맵의 제작 의도와 시나리오적 요소를 고려할 때, 단순히 승리만을 목표로 하기보다는 게임 자체의 재미와 도전 정신을 즐기는 플레이 스타일이 어울릴 것입니다. "IMpossible SCenarios 2004" is a custom map from *StarCraft: Brood War* that offers players a wide range of strategies and intense battles. As suggested by its title, it appears to be an exceptionally challenging scenario-based custom map. The map features a vast desert landscape with a large central building standing out. Structurally, it seems designed to force players to build their bases and gather resources while inevitably engaging in combat with hostile units or structures, creating constant tension and demanding strategic decision-making. This map falls into the "compkagi" (computer opponent custom map) genre, emphasizing competitive multiplayer elements, resource management, and defensive strategies. Due to its complex layout and varied unit placements, it’s likely better suited for intermediate to advanced players rather than beginners. Additionally, since the map creator "dudaks-1004" provided minimal instructions, players may need to figure out the rules and victory conditions on their own or seek information from the community. Before playing, it’s crucial to check the map’s victory conditions, internal triggers, and special rules. The inclusion of "IMpossible" in the title hints at a difficulty and complexity that sets it apart from typical custom maps. Therefore, thorough strategy planning and coordination with teammates are essential before attempting this map. Keep in mind that the map’s resolution is 4096x4096, which is quite large, so loading times may be longer depending on your system specs. This map is especially recommended for players who value strategic thinking and teamwork. Given its intricate design and the variety of tactics required, it may be difficult to grasp all strategies in a single playthrough—repeated sessions are key to understanding the map’s nuances and developing your own approach. Considering the creator’s intent and the map’s scenario-like elements, it’s best to focus not just on winning but on enjoying the challenge and the fun of the game itself.
9999 다크 아칸 (9999 Dark Archon)
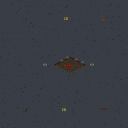
스타크래프트 브루드워의 유즈맵 '9999 Dark Archon'은 다크 아칸이란 강력한 유닛을 중심으로 펼쳐지는 대체로 어려운 전투를 요구하는 디펜스형 맵입니다. 맵 중앙에 위치한 거대한 다크 아칸은 플레이어의 주요 병력으로 활용되며, 끊임없이 몰려오는 적군을 상대로 버텨내야 합니다. 지형은 대부분 평평한 우주 공간으로 구성되어 있으며, 곳곳에 배치된 미네랄과 가스 멀티는 자원 확보를 위한 중요한 포인트가 됩니다. 맵의 특징은 다크 아칸의 마인드 컨트롤과Feedback 능력으로 인해 상대방의 고급 유닛을 빼앗아 활용할 수 있다는 점입니다. 이를 통해 플레이어는 전략적 우위를 점할 수 있지만, 반대로 잘못 사용하면 자원을 낭비하거나 적군에게 기회를 줄 수 있어 신중한 플레이가 요구됩니다. 초반에는 소수의 유닛으로 버티며 자원을 확보하는 것이 중요하며, 다크 아칸을 적극 활용해 적의 강력한 유닛을 빼앗아 역전 기회를 노려야 합니다. 맵의 분위기는 어둡고 긴장감 넘치는 우주 공간으로, 플레이어에게 지속적인 압박과 전략적 선택을 요구합니다. 이 맵은 다크 아칸의 활용과 자원 관리에 익숙한 플레이어에게 적합하며, 특히 다크 아칸의 능력을 최대한 활용하고자 하는 플레이어에게 추천할 만한 작품입니다. 플레이 전에는 다크 아칸의 스킬 활용법과 맵의 주요 자원 위치를 숙지하는 것이 좋습니다. 또한, 적군의 진형과 공격 패턴을 빠르게 파악해 대응하는 것이 승리의 열쇠가 될 것입니다. 이 맵은 유즈맵의 классикс적 요소와 전략적 깊이를 결합한佳作로, 스타크래프트의 팬이라면 반드시 한 번쯤 도전해 볼 만한 가치가 있습니다. 특히, 다크 아칸의 매력을 느껴보고 싶은 플레이어에게는 최적의 선택이 될 것입니다. 맵의 난이도는 대체로 어려우며, 초보 플레이어는 충분한 연습과 전략 수립이 필요할 것입니다. 하지만 꾸준한 연습을 통해 실력을 키운다면, 이 맵의 매력에 푹 빠질 수 있을 것입니다. 마지막으로, 맵의 긴장감 넘치는 분위기와 전략적 깊이는 스타크래프트 유즈맵의 새로운 기준을 제시한다는 점에서 높은 평가를 받을 만합니다. 이 맵을 통해 플레이어는 다크 아칸의 진정한 능력을 느낄 수 있을 것입니다. *StarCraft: Brood War*'s custom map *9999 Dark Archon* is a defense-focused map centered around the powerful Dark Archon unit, demanding challenging battles. The massive Dark Archon at the map's center serves as the player's main force, requiring them to withstand relentless waves of enemies. The terrain consists mostly of flat space, with minerals and gas geysers scattered throughout—key points for resource gathering. The map's standout feature is the Dark Archon's Mind Control and Feedback abilities, allowing players to hijack enemy high-tier units for their own use. This can grant a strategic advantage, but misuse risks wasting resources or handing opportunities to the opponent, so careful play is essential. Early on, securing resources while holding off with a small force is crucial, and leveraging the Dark Archon to seize enemy units offers chances for comebacks. The map's atmosphere is dark and tense, set in a vast expanse of space, demanding constant pressure and strategic decisions from the player. It suits those familiar with Dark Archon mechanics and resource management, especially players eager to maximize the unit's potential. Before playing, it's wise to study the Dark Archon's abilities and the map's key resource locations. Quickly identifying enemy formations and attack patterns is also vital for victory. Blending classic custom map elements with deep strategy, this work stands as a masterpiece worth trying for any *StarCraft* fan. For players seeking to experience the Dark Archon's allure firsthand, it's an ideal choice. The difficulty is high overall, so beginners should practice and plan carefully. Yet with consistent effort, players can grow to appreciate the map's charm. Finally, its gripping atmosphere and strategic depth set new standards for *StarCraft* custom maps, earning high praise. Through this map, players can truly grasp the Dark Archon's full potential.
OMFG 더 울트라리스크 (OMFG The Ultralisk)
스타크래프트 브루드워의 유즈맵으로 유명한 〈OMFG THE ULTRALISKS〉는 플레이어가 울트라리스크 무리를 지휘하며 끊임없이 몰려드는 적들을 상대로 생존을 다투는 디펜스 장르의 맵이다. 맵의 이름과 설명에서 드러나듯, 이 맵은 〈OMFG THE ZERGLINGS Did Ya?〉의 후속작으로, 전작의 빠른 템포와 공격적인 스타일을 한층 강화한 난이도를 자랑한다. 맵의 구조는 비교적 단순하지만, 적의 끊임없는 웨이브와 다양한 유닛 조합이 플레이어의 전략적 선택과 자원 관리를 끊임없이 요구한다. 중앙에 위치한Resource Area(자원 지역)는 플레이어가 기본 자원 확보를 위한 초석이 되며, 이 지역을 지키며 확장하는 것이 안정적인 방어의 핵심이다. 울트라리스크는 강력한 체력과 공격력을 보유하고 있지만, 개체당 비용이 크기 때문에 효율적인 생산과 배치 전략이 필수적이다. 특히 지형의 활용과Resource Area 주변의 방어 시설 구축이 승패를 가르는 주요 요소가 된다. 이 맵은 초보자보다는 중간 이상의 실력을 갖춘 플레이어에게 적합하며, 방어와 자원 관리뿐만 아니라 적의 패턴을 예측하고 대응하는 능력이 요구된다. 한정된 공간과 끊임없는 압박 속에서 전략적 유연성을 발휘해야만 승리를 거둘 수 있다. 또한, 팀플레이가 가능한 맵 구조로, 팀원 간의 협력이 승리의 열쇠가 될 수 있다. 맵을 처음 플레이하는 경우,Resource Area를 중심으로한 방어선을 구축하고 울트라리스크 생산 라인을 안정화하는 데 초점을 맞추는 것이 좋다. 또한, 적의 공격을 예측하여 보조 방어 시설(예: 포토캐논, 성큰 콜로니)을 적시에 배치하는 것도 중요하다. 이 맵의 가장 큰魅力은 끊임없는 긴장감과 도전 정신으로, 한 번 플레이하면 여러 번 다시 도전하고 싶어지는 매력이 있다. 초보자라면 난이도 조절을 위해Resource Area의 방어선을 강화하고, 울트라리스크를 집중적으로 양성하는 전략을 추천한다. 반면, 숙련자라면Resource Area의 안정적 확보와 함께 적의 약점을 공략하는 공격적인 플레이를 시도해 볼 수 있다. 이 맵의 핵심은 '생존'과 '확장'의 균형이며, 그 균형을 잡는 순간 승리를 향해 한 걸음 더 나아갈 수 있을 것이다. The StarCraft: Brood War custom map known for its intensity, *OMFG THE ULTRALISKS*, is a defense-style map where players command swarms of Ultralisk to survive endless waves of enemies. As the name and description suggest, this is a sequel to *OMFG THE ZERGLINGS Did Ya?*, refining the fast-paced, aggressive gameplay of its predecessor into an even more demanding challenge. While the map’s structure is straightforward, the constant enemy waves and varied unit compositions force players to continually refine their strategies and resource management. The central Resource Area serves as the foundation for securing basic resources, and defending and expanding this zone is key to stable defense. Though Ultralisks boast incredible durability and firepower, their high production cost demands careful planning and efficient deployment. Terrain control and strategic defenses around the Resource Area often decide victory or defeat. This map is best suited for intermediate to advanced players, requiring not just strong defense and resource handling but also the ability to predict and counter enemy patterns. Victory comes from adaptability in tight spaces under relentless pressure. The map also supports team play, making cooperation among teammates a potential game-changer. First-time players should focus on establishing a defensive perimeter around the Resource Area and stabilizing Ultralisk production. Predicting enemy attacks and placing auxiliary defenses—such as Photon Cannons or Sunken Colonies—at the right time is also crucial. What makes this map so compelling is its unrelenting tension and challenge; once played, it’s hard to resist returning for another round. Beginners may want to ease into the difficulty by reinforcing the Resource Area’s defenses and prioritizing Ultralisk production. Experienced players, meanwhile, can aim for a more aggressive playstyle—securing resources while exploiting enemy weaknesses. At its core, *OMFG THE ULTRALISKS* is about balancing survival and expansion, and finding that balance is the surest path to victory.
익스트림 바운드 익스트림 (Extreme Bound Extreme)
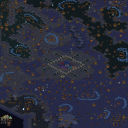
‘익스트림 바운드 익스트림(Extreme Bound Extreme)’은 스타크래프트: 브루드워의 유즈맵으로, 6명의 플레이어가 동시에 전투를 펼치는 대규모 디펜스 타입의 맵이다. 맵의 중심부에는 거대한 중앙 건물이 위치해 있으며, 여기에서 적의 공격이 끊임없이 쏟아져 나온다. 플레이어는 시작 지점에서 끊임없이 밀려오는 적 유닛들을 방어하거나, 때로는 공격적인 플레이를 통해 중앙 건물을 보호하는 동시에 상대방을 압박하는 전략을 구사해야 한다. 맵의 이름은 ‘익스트림’이란 단어에서 알 수 있듯이, 난이도가 높고 플레이어 간의 경쟁이 치열한 편으로 추정된다. 특히, 맵의 구조상 중앙 건물이 집중 공격을 받기 쉬운 구조로 보이며, 이를 보호하기 위한 팀워크와 빠른 판단력이 요구된다. 또한, 맵 곳곳에 배치된 자원과 방어 건물은 플레이어의 전략적 선택에 따라 유연하게 활용될 수 있도록 설계되어 있어, 초보 플레이어는 물론 숙련자까지도 다양한 플레이 스타일을 즐길 수 있을 것으로 보인다. 맵의 전체적인 분위기는 전쟁터를 연상시키며, 황무지 타일셋을 활용한 어두운 색감으로 긴장감을 고조시킨다. 플레이 전에는 팀원 간의 호흡을 맞추는 연습을 권장하며, 특히 중앙 건물을 사수하는 데 중점을 둔 전략을 준비하는 것이 중요하다. 또한, 적의 공격 패턴에 따라 방어线을 유동적으로 조정할 수 있는 유연성이 필요하다. 맵의 난이도는 높지만, 그만큼 성취감을 느낄 수 있는 구조로 설계되어 있어, 도전 정신을 가진 플레이어들에게 적합한 맵이라 할 수 있다. Extreme Bound Extreme is a UMS (User-Made Scenario) map for StarCraft: Brood War, designed for 6 players to engage in large-scale defense battles. The map features a massive central building at its heart, from which enemies continuously spawn. Players must defend this structure while strategizing to either fend off relentless waves or launch counterattacks against opponents. The name ‘Extreme Bound Extreme’ suggests a high-difficulty experience with intense player competition. The map’s layout appears to prioritize the central building, making it vulnerable to concentrated attacks, thus demanding strong teamwork and quick decision-making. Scattered resources and defensive structures allow for flexible strategies, appealing to both beginners and veterans. The overall aesthetic, with its wasteland tileset and dark color palette, evokes a war-torn battlefield. Before playing, it’s advisable to practice team coordination, focusing on strategies to protect the central building. Players should also prepare to adapt their defenses based on enemy attack patterns. While challenging, the map offers a rewarding experience, making it ideal for those seeking a competitive challenge.
크래시 RPG 인사네 버전!! (Crash RPG InSaNe Version!!)
《크래시 RPG 인사네 버전!!》은 스타크래프트: 브루드워의 유즈맵으로, 5인용 RPG 장르의 맵이다. 화산 테마의 배경 위에 펼쳐진 넓은 맵은 플레이어들이 각기 다른 역할을 맡아 광물을 채취하고, 건물을 건설하며, 몬스터와 전투를 벌이는 등 전략적인 플레이가 요구된다. 맵 중앙에는 거대한 건물이 있으며, 주변은 다양한 지형과 자원이 분포되어 있어Resource Management와 Positioning이 중요한 요소로 작용한다. 맵의 이름은 'InSaNe'라는 접미사로 보아 난이도가 매우 높을 것으로 추정되며, 내부 설명에서도 'DarkestElementUpgrade'와 같은 강력한 요소들이 추가된 것으로 확인된다. 플레이어들은 초반 자원을 확보해 병력을 키운 뒤, 중앙 건물이나 적대적 지역을 공격해 teritorial control을 유지해야 한다. 맵의 구조상 초반 러시와 후기 방어전이 균형을 이룰 수 있도록 설계된 것으로 보이며, 특히 팀 플레이가 필수적인 맵으로 추정된다. 초보자보다는 중급 이상의 플레이어들에게 적합할 것이며, 협동과 전략적 판단력이 빛을 발하는 맵으로 보인다. 맵의 해상도와 타일 크기가 크고 세밀한 디자인으로 복잡한 전투와 자원 관리에서 긴장감을 유발한다. 또한, 맵의 전체적인 분위기는 어둡고 강렬한 색감을 띄며, 'Made InSaNe By: KrAzY-cLoWn'이라는 제작자의 개성이 반영된 작품이다. 플레이 전에는 팀 구성과 역할 분배를 철저히 논의하고, 초반 자원 확보와 건물 배치 전략을 미리 준비하는 것이 중요하다. 맵의 난이도가 높다는 점에서, 지속적인 연습과 경험이 필요할 것으로 보인다. Crash RPG InSaNe Version!! is a Starcraft: Brood War custom map designed for 5 players, featuring an RPG genre. Set against a volcanic-themed background, the expansive map challenges players to gather resources, construct buildings, and engage in combat with monsters, requiring strategic thinking and adaptability. The central building and surrounding terrain are rich in resources, making resource management and positioning critical factors. The 'InSaNe' suffix in the title suggests an extremely high difficulty level, further emphasized by internal descriptions mentioning powerful upgrades like 'DarkestElementUpgrade'. Players must secure initial resources to build armies, then strategically attack central structures or enemy-controlled areas to maintain territorial dominance. The map's design balances early-game rushes with late-game defensive play, likely favoring mid to advanced players who excel in cooperation and strategic decision-making. The high resolution and detailed tile design contribute to intense gameplay, with a dark and intense color palette reflecting the creator's 'KrAzY-cLoWn' signature style. Before playing, thorough team role assignment and early-game resource strategies are essential, especially given the map's reputedly high difficulty and need for continuous practice and experience.
S.I.C.K Bound
스타크래프트 브루드워의 유즈맵 〈S.I.C.K Bound〉는 6명의 플레이어가 공동으로 적을 상대로 전투를 펼치는 대규모 디펜스 장르의 유즈맵입니다. 내부 맵 제목과 설명에서 확인되는 'S.I.C.K'는 Serial Insane Clown Killer의 약자로, 마치 공포 영화의 살인마를 연상시키는 분위기의 맵이지만 실제 플레이 스타일은 전형적인 컴퓨터 상대 디펜스입니다. 100개의 목숨과 6/10의 난이도 설정이 인상적인데, 이는 비교적 높은 난이도를 유도하면서도 플레이어가 지속적으로 적을 상대해야 한다는 점을 강조합니다. 내부 맵 설명에 언급된 'Clan xPBx Productions'는 제작자 그룹으로 보이며, 맵 자체가 시리즈물의 일부로 개발되었을 가능성을 시사합니다. 맵의 구조는 4096x4096의 넓은 황무지 타일셋으로 구성되어 있으며, 중앙에 위치한 플레이어 기지와 외곽을 둘러싼 다양한 적 웨이브가 특징입니다. 디펜스 장르답게 플레이어는 끊임없이 밀려오는 적을 상대로 방어선을 구축하고, 자원 관리와 유닛 생산을 적절히 조율해야 합니다. 특히 6명의 플레이어가 협력하여 살아남아야 한다는 점에서 전략적 협력이 요구되며, 개별 플레이어의 실력이 전체 팀의 성패를 좌우할 수 있습니다. 이 맵을 추천하는 대상은 대규모 디펜스 유즈맵을 선호하는 플레이어와 팀플레이 경험을 쌓고 싶은 유저입니다. 난이도가 높은 편이기 때문에 초보자는 먼저 쉬운 디펜스 맵을 경험한 후 도전하는 것이 좋습니다. 또한, 지속적인 적 웨이브를 상대해야 하므로 자원 관리와 유닛 배치에 대한 이해가 필수적입니다. 맵의 넓은 공간을 활용한 전략적 배치와 다채로운 적의 패턴이 이 맵의 핵심 볼거리입니다. 플레이 전에는 맵의 목표와 승리 조건을 명확히 확인하고, 팀원과의 소통을 충분히 준비하는 것이 중요합니다. 한국어 유즈맵 커뮤니티에서 디펜스 장르는 오랜 인기를 누리고 있으며, 〈S.I.C.K Bound〉는 그 tradition을 계승하면서도 6인 협동이라는 새로운 도전을 제시합니다. 특히 'Serial Insane Clown Killer'라는 독특한 컨셉은 플레이어의 몰입도를 높이는 요소로 작용할 수 있습니다. 다만, 난이도가 높기 때문에 실패 시의 좌절감이 클 수 있으므로 적당한 난이도 조절이 필요할 수도 있습니다. S.I.C.K Bound is a custom map from StarCraft: Brood War where six players team up to defend against waves of enemies in a large-scale defense genre map. The name "S.I.C.K" stands for Serial Insane Clown Killer, evoking the atmosphere of a horror movie slasher, but the actual gameplay follows a classic computer-defense style. The map stands out with its 100 lives and a difficulty setting of 6/10, pushing players to balance high challenge with the need to continuously fend off enemies. The internal description credits "Clan xPBx Productions" as the creator, suggesting this map may be part of a series. The layout spans a vast 4096x4096 wasteland tileset, centered around the players' base with enemy waves attacking from the perimeter. As a defense map, players must build and reinforce defenses, manage resources, and coordinate unit production against relentless assaults. Cooperation among the six players is essential, and individual skill directly impacts the team's success or failure. This map is ideal for players who enjoy large-scale defense custom maps and those looking to improve their teamwork experience. Due to its high difficulty, beginners are advised to try easier defense maps first. Success depends on mastering resource management and strategic unit placement, as waves of enemies continuously test your defenses. The map’s wide open spaces allow for creative positioning, and the varied enemy patterns make each playthrough engaging. Before playing, it’s important to clearly understand the map’s objectives and victory conditions and to prepare thorough communication with your team. In the Korean custom map community, defense maps have long been popular, and S.I.C.K Bound carries on that tradition while introducing the new challenge of six-player coordination. The unique Serial Insane Clown Killer concept enhances player immersion, though the high difficulty may lead to frustration after repeated failures, so adjusting the challenge level may be necessary.
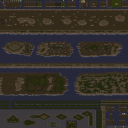
DBZ 올 사가 EE5 Dark-Lurker (DBZ All Sagas EE5 Dark-Lurker)
DBZ All Sagas EE5 Dark-Lurker는 드래곤볼 Z의 전설적인 모든 사가를 아우르는 방대한 규모의 유즈맵으로, 플레이어들에게 전설의 전투와 스토리를 재현할 수 있는 기회를 제공합니다. 이 맵은 특히 드래곤볼 팬들에게는 흥미로운 요소로 가득 차 있으며, 원작의 각 에피소드별 전투를 체험할 수 있도록 설계되었습니다. 맵의 규모는 8192x8192라는 거대한 크기를 자랑하며, 사막 타일셋을 활용한 배경은 드래곤볼의 광활한 행성들을 연상시키기에 충분합니다. 맵의 구조는 사가별로 나뉘어 진행되는 형태로, 각 사가마다 고유한 전투와 تحديات이 준비되어 있어 플레이어는 원작의 긴장감을 느낄 수 있습니다. 다만, 맵의 난이도가 매우 높고 초보자가 쉽게 осво하기 어렵다는 점에서, 경험이 있는 플레이어들에게 더욱 적합하다는 평가를 받고 있습니다. 맵의 진행은 주로 전투와 자원 관리, 그리고 전략적 포지셔닝이 중요하며, 드래곤볼의 iconic 캐릭터들과의 전투를 통해 플레이어는 원작의 드라마틱한 순간들을 재현할 수 있습니다. 이 맵을 플레이하기 위해서는 드래곤볼의 스토리와 캐릭터들에 대한 깊은 이해가 필요하며, 특히 원작의 전투 스타일을 반영한 맵의 특징을 잘 파악하고 있어야 합니다. 또한, 맵의 복잡한 구조와 다양한 전투 시나리오를 고려할 때, 플레이 타임은 약 60분에서 90분 정도로 예상되며, 6명의 플레이어가 참여할 수 있도록 설계되어 있습니다. 이 맵은 드래곤볼 팬이라면 누구나 한 번쯤 도전해 볼 만한 가치가 있으며, 특히 원작의 전투를 직접 체험해 보고 싶은 유저들에게Strongly recommended합니다. 그러나 맵의 난이도가 높다는 점을 고려해, 초보 플레이어는 먼저 쉬운 버전이나 튜토리얼을 찾아본 후 도전하는 것이 좋습니다. 맵의 스킨을 비롯해 드래곤볼의 분위기를 잘 살리고 있는 디자인 요소들도 이 맵의 매력을 더합니다. DBZ All Sagas EE5 Dark-Lurker is a massive UMS map that encapsulates all legendary sagas of Dragon Ball Z, offering players the chance to relive iconic battles and stories from the series. The map spans an impressive 8192x8192 grid, utilizing a desert tileset that evokes the vast landscapes of the Dragon Ball universe. Structured around distinct sagas, each segment of the game presents unique challenges and battles that mirror the tension and excitement of the original series. However, the map is designed with extreme difficulty in mind, making it unsuitable for beginners. Players should be familiar with the Dragon Ball lore and combat mechanics to fully appreciate the experience. Gameplay revolves around strategic positioning, resource management, and intense combat, with players engaging in battles against iconic characters from the series. Due to its complex structure and variety of scenarios, the estimated playtime ranges from 60 to 90 minutes, with support for up to 6 players. This map is highly recommended for Dragon Ball fans seeking to immerse themselves in the series' epic battles. Players unfamiliar with the series' combat styles or the map's mechanics are advised to practice on easier versions or tutorials before attempting this challenge. The attention to detail in the skins and atmospheric design further enhances the immersive experience this map offers.
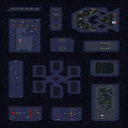
불가능한 시나리오: 티어 (ImpossibleScenariosTear)
이 맵은 스타크래프트: 브루드워의 유즈맵 중 하나로, ImpossibleScenariosTear라는 제목에서 알 수 있듯이 난이도가 매우 높은 특수 시나리오 맵으로 추정된다. 맵의 전체적인 분위기는 어두운 밤하늘과 붉은 빛을 띄는 건물로 구성되어 있으며, 중앙에 거대한 구조물이 자리 잡고 있는 독특한 디자인이 특징이다. 맵의 구조상 방어적인 요소가 강하게 느껴지며, 플레이어는 제한된 자원으로 적의 끊임없는 공격을 버텨내야 하는 디펜스 형식의 플레이가 예상된다. 맵의 중앙 구조물 주변으로는 여러 개의 건물이 흩어져 있어, 방어선을 구축하고 전략적으로 자원을 관리해야만 생존할 수 있을 것으로 보인다. 또한, 맵의 전체적인 색감과 조명이 어두운 터라 시야 확보가 어려울 수 있으며, 이는 플레이어에게 추가적인 도전 과제를 제공할 가능성이 크다. 이 맵은 초보자보다는 경험이 있는 플레이어들에게 적합하며, 디펜스 맵 특유의 긴장감과 전략적 깊이를 즐길 수 있는 구조로 설계된 것으로 보인다. 맵의 난이도가 매우 높다는 점과 특수한 조건 하에서 진행해야 한다는 점에서, 플레이어는 사전에 충분한 준비를 하고 임해야 할 것이다. 맵의 구성상으로는 다수의 적 유닛이 끊임없이 생성되어 공격해 오는 형식으로 추정되며, 이를 효과적으로 방어하기 위해서는 건물을 조합한 방어선 구축과 자원 관리가 필수적일 것이다. 또한, 맵의 크기가 매우 크고 구조가 복잡하다는 점에서, 플레이어는 맵의 전체적인 흐름을 빠르게 파악하고 대응할 수 있는 능력이 요구된다. 이 맵을 플레이할 때는 특정한 승리 조건이나 스토리가 존재하지 않을 가능성이 높으며, 오로지 적의 공격을 방어하고 중앙 구조물을 보호하는 것이 목표일 것으로 보인다. 플레이 전에는 맵의 구조를 숙지하고, 각 건물의 역할과 특징을 미리 확인하는 것이 중요하다. 또한, 맵의 특성상 다수의 적 유닛을 상대해야 하므로,fficient한 유닛 조합과 방어 전략을 미리 계획해 두는 것이 생존의 열쇠가 될 것이다. This map is a special scenario map in *StarCraft: Brood War*'s custom maps, likely featuring extremely high difficulty, as suggested by its title, *ImpossibleScenariosTear*. The overall atmosphere is dark, with a night sky and buildings bathed in a reddish glow, and its standout feature is a massive central structure. The map’s layout feels heavily defensive, requiring players to endure relentless enemy attacks with limited resources in a defense-style format. Scattered around the central structure are numerous buildings, meaning players must build defensive lines and manage resources strategically to survive. The map’s dim lighting and color palette may also restrict visibility, adding another layer of challenge for players. This map seems better suited for experienced players rather than beginners, offering the tension and strategic depth typical of defense maps. Given its extreme difficulty and unique conditions, players will need thorough preparation before attempting it. The map likely features waves of enemy units continuously spawning and attacking, demanding well-planned building combinations and resource management to hold off the assaults. Additionally, the map’s vast size and complex layout require players to quickly grasp its flow and adapt their strategies on the fly. There may not be a specific victory condition or storyline—just the goal of defending against enemy waves and protecting the central structure. Before playing, it’s crucial to study the map layout, understand each building’s role, and plan efficient unit compositions and defense strategies to maximize survival chances.
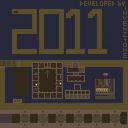
LiNG DeFeNSe.HardCunt
‘LiNG DeFeNSe.HardCunt’는 스타크래프트 브루드워에서 즐길 수 있는 디펜스 장르의 유즈맵으로, 맵 제목과 설명만 봐도 난이도가 상당히 높을 것임을 짐작할 수 있다. 맵 내부에는 여러 개의Sector(섹터)로 나뉜 방어 지점이 있고, 각 Sector마다 새로운 조합과 아이디어가 반영되어 있어 플레이어에게 끊임없는 전략적 도전을 제공한다. 특히 ‘NEW COMBOS! NEW SECTOR! NEW IDEAS :P’라는 설명은 제작자가 단순히 방어만 있는 것이 아니라, 다양한 조합과Sector를 통해 디펜스를 더욱 흥미롭게 만들고자 한 의도가 엿보인다. 맵의 배경은 황무지 타일셋을 사용해 황량한 분위기를 연출하며, 4096x4096의 넓은 맵 크기는 다양한 Sector와 장애물을 배치할 수 있는 공간을 제공한다. 하지만Sector가 많고 조합이 복잡해질수록 초보 플레이어에게는 진입장벽이 될 수 있어, 이 맵을 제대로 즐기기 위해서는 방어 유닛의 상성 관계와 Sector별 전략을 숙지하고 있어야 한다. 또한,Sector 간 이동 경로가 명확하지 않을 수 있어, 맵을 미리 숙지하거나 Sector별 방어 전략을 정리해 두는 것이 좋다. 이 맵은 방어에 중점을 둔 디펜스 장르지만, Sector별로 새로운 아이디어가 반영되어 있어 반복 플레이를 하더라도 질리지 않는 구조를 가지고 있다. 특히,Sector가 추가되면서 방어 포지션을 자주 바꿔야 하고, 다양한 유닛 조합을 조율해야 하므로 전략적 깊이가 느껴진다. 이 맵은 디펜스를 즐기는 플레이어라면 필수적으로 도전해 볼 만한 작품으로,Sector별로 숨겨진 전략을 발견하는 재미가 쏠쏠하다. 하지만Sector 간의 연결성이 약하거나 방어 루트가 복잡해질 경우, 플레이어가 길을 잃거나 방어 타이밍을 놓칠 위험이 있으므로Sector별로 명확한 목표와 루트를 설정하는 것이 중요하다. 또한,Sector가 많고 넓을수록 자원 관리와 유닛 배치에 더 많은 신경을 써야 하므로,Resources와 유닛 생산에 대한 계획이 필수적이다.Sector를 중심으로 한 디펜스 맵은 단순히 방어만 하는 것이 아니라,Sector별로 다른 전략을 요구하므로, 플레이어의 적응력과 전략적 사고력이 요구된다.Sector가 추가되면서 방어 루트가 복잡해지고,Sector 간의 연계가 중요해지므로Sector별로 충분한 연습을 한 후 도전하는 것이 좋다.Sector가 많고 조합이 복잡한 만큼Sector별로 효율적인 방어 전략을 세워야 하며,Sector 간의 이동 경로를 미리 숙지하고Sector별로 필요한 유닛을 미리 준비하는 것이 성공의 열쇠다. This UMS defense map, *LiNG DeFeNSe.HardCunt*, in *StarCraft: Brood War* delivers an intense challenge just from its name and description. The map is divided into multiple sectors, each featuring new unit combinations and innovative mechanics that constantly push players to adapt their strategies. The tagline *"NEW COMBOS! NEW SECTOR! NEW IDEAS :P"* hints that the creator didn’t just make a straightforward defense—it’s packed with fresh twists to keep the gameplay engaging. The map’s barren, desolate tile set sets a bleak tone, and its massive 4096x4096 size allows for a sprawling layout with plenty of sectors and obstacles. However, the sheer number of sectors and their complex combinations can be overwhelming for beginners, making it essential to understand unit matchups and sector-specific tactics before diving in. The lack of clear pathways between sectors means players should either memorize the layout or jot down strategies for each area to avoid getting lost or missing critical defense windows. While it’s a defense-focused map, the frequent addition of new sectors and mechanics keeps the experience fresh, preventing repetition from feeling stale. Players must constantly adjust their positions and fine-tune unit compositions, adding layers of depth to the strategy. For defense enthusiasts, it’s a must-try, offering plenty of hidden tactics to uncover across its sectors. Still, weak connections between sectors or convoluted routes can lead to confusion or missed defenses, so setting clear objectives and pathways for each area is crucial. The map’s scale also demands careful resource management and unit production planning—more sectors mean more ground to cover and more units to coordinate. A defense map built around sectors isn’t just about holding the line; it forces players to tailor their approach to each zone, testing adaptability and strategic thinking. With sectors expanding and routes growing more intricate, mastering inter-sector coordination is key. Thorough practice in each sector before tackling the whole map is highly recommended. Efficient defense strategies tailored to each zone—and prepping the right units in advance—are the keys to success.
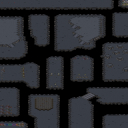
임파서블 프랙틱컬리 (Impossible Practically)
스타크래프트 브루드워의 유즈맵 <임파서블 프랙틱컬리(Impossible Practically)>는 6명의 플레이어가 협동으로 진행하는 디펜스 장르의 유즈맵이다. 맵은 우주 테마의 넓은 공간에 배치되어 있으며, 중앙에 위치한 본진을 중심으로 적의 끊임없는 공격을 방어하는 구조로 구성되어 보인다. 맵의 이름에서 알 수 있듯이 난이도가 상당히 높은 것으로 추정되며, 플레이어는 제한된 리소스를 효율적으로 활용하며 최대한 오랫동안 생존을 유지해야 한다. 내부 맵 설명이 'Work together yo.'라는 점으로 미루어 보아, 팀워크가 매우 중요한 요소로 작용할 것으로 보인다. 맵의 디자인상으로는 적의 진형이 여러 방향으로 퍼져 있어 전방위적인 방어가 요구되며, 중앙 본진 주변의 지형은 비교적 평탄한 것으로 확인된다. 또한 적의 공격 패턴이 지속적으로 변화할 가능성이 있어 전략적인 대처가 필수적일 것이다. 이러한 요소들은 이 맵이 초보 플레이어보다는 숙련된 플레이어에게 더 적합할 수 있음을 시사한다. 플레이 전에는 맵의 세부적인 방어 포인트와 보급 경로, 그리고 적의 공격 주기나 패턴을 파악하는 것이 중요하다. 특히 방어 건물이나 유닛의 배치 위치에 따라 난이도가 크게 달라질 수 있으므로, 사전 준비를 철저히 하는 것이 좋다. 협동 플레이가 핵심인 만큼, 팀원 간의 실시간 의사소통도 성공의 열쇠가 될 것이다. 이 맵은 협동 디펜스라는 장르의 특성을 잘 살려낸 작품으로, 팀워크와 전략적 사고를 동시에 요구하는 재미있는 플레이 경험을 제공할 것으로 기대된다. StarCraft: Brood War's custom map *Impossible Practically* is a 6-player cooperative defense-style map where players must work together to survive endless waves of enemy attacks. Set in a vast space-themed arena, the map centers around a main base that must be defended at all costs. As the name suggests, the difficulty is extremely high, forcing players to manage limited resources wisely while enduring as long as possible. The in-game description, *"Work together yo,"* hints that teamwork is absolutely essential. The enemy forces spread out in multiple directions, requiring all-around defense, and the terrain around the main base is mostly flat, leaving little cover. Additionally, the enemy’s attack patterns may shift dynamically, making adaptability a must. These factors suggest the map is better suited for experienced players rather than beginners. Before jumping in, it’s crucial to study key defensive points, supply routes, and the enemy’s attack cycles or patterns. Since the placement of defensive structures and units can drastically alter difficulty, thorough preparation is key. Effective real-time communication between teammates will also be vital, as cooperation is the heart of this mode. *Impossible Practically* excels at delivering the cooperative defense genre, blending teamwork and strategic thinking into an engaging and challenging experience.
최근 등록된 맵
새로 추가된 파일과 버전을 확인하세요.
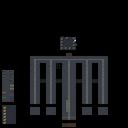
-터렛- M 디펜스 v6 (Turret M Defense v6)
이 맵은 스타크래프트: 브루드워의 디펜스 장르 유즈맵으로, 플레이어는 적의 공격을 끊임없이 방어하는 데 집중하게 된다. 맵 중앙에 위치한 본진 주변으로 터렛과 방어 건물이 배치되어 있으며, 각 웨이브마다 몰려오는 적 유닛을 효과적으로 저지해야 한다. 적의 공격 패턴은 점점 강해지므로, 초반에는 비교적 쉬운 편이지만 후반으로 갈수록 난이도가 급격히 상승한다. 맵의 구조는 대칭형으로, 플레이어는 본진을 지키며 방어 건물을 강화하고 자원을 관리하는 동시에 적의 공격을 막아내야 한다. 맵의 디자인과 배치된 방어 건물을 최대한 활용하여 전략을 세워야 하는데, 특히 터렛의 배치와 업그레이드가 핵심이다. 맵의 너비가 넓고 세밀한 조정이 필요한 만큼, 초보자는 공략을 익히기 어려울 수 있으며, 숙련된 플레이어에게 더 적합한 맵으로 보인다. 적의 공격 타이밍과 공격 유닛의 종류를 잘 파악하는 것이 성공의 관건이며, 이를 위해 맵의 지형과 방어 건물의 위치를 면밀히 분석해야 한다. 전체적으로 이 맵은 디펜스 장르의 정수를 느낄 수 있는 작품으로, 방어에 대한 집중력과 전략적 사고가 요구된다. 특히 'Very Hard! Experts Only!'라는 설명에서 알 수 있듯, 난이도가 상당히 높으므로 충분한 준비와 연습이 필요하다. 플레이어는 방어 건물의 배치와 업그레이드, 자원 관리, 그리고 적의 공격 패턴에 대한 이해를 바탕으로 끊임없는 도전을 즐길 수 있을 것이다. 이 맵은 디펜스 장르에 익숙한 플레이어라면 한번쯤 도전해 볼 만한 가치가 있다. 또한 맵의 디자인과 구조가 세밀하게 짜여 있어, 단순히 방어만 하는 것이 아니라 전략적 깊이도 느낄 수 있다. 이 맵을 즐기기 위해서는 방어 건물의 특성과 적의 공격 패턴을 숙지하는 것이 중요하며, 이를 바탕으로 스스로의 전략을 발전시켜 나갈 수 있다. 특히 맵의 너비가 넓고 복잡한 구조를 가지고 있어, 초보자는 입문용으로 적합하지 않을 수 있다. 반면, 디펜스 장르에 익숙하고 난이도가 높은 맵을 선호하는 플레이어에게는 최고의 선택지가 될 것이다. 맵을 플레이하기 전에는 방어 건물의 배치와 업그레이드 경로를 미리 계획해 두는 것이 좋다. 또한 적의 공격이 시작되는 지점과 공격 유닛의 종류를 미리 확인하여, 그에 맞는 대비를 해두는 것이 중요하다. 이 맵은 단순히 방어만 하는 것이 아니라, 전략적 사고와 집중력을 요구하는만큼, 플레이어의 실력에 따라 난이도가 크게 달라질 수 있다. 따라서 이 맵을 즐기기 위해서는 충분한 연습과 전략 수립이 필수적이다. This map is a defense genre custom map in *StarCraft: Brood War*, where players focus on continuously defending against enemy attacks. Defense structures like turrets and buildings are placed around the main base in the center of the map, and players must effectively block waves of enemy units that approach with each attack. While the difficulty is relatively low at the start, the enemy’s attack patterns grow stronger, causing the challenge to escalate sharply as the game progresses. The map is symmetrical, requiring players to protect their base, upgrade defensive structures, manage resources, and fend off attacks simultaneously. To succeed, players must strategize by maximizing the map’s design and the placement of defensive buildings, with turret positioning and upgrades being particularly crucial. The map’s wide layout and the need for precise adjustments make it difficult for beginners to grasp, making it more suited for experienced players. Mastering the timing of enemy attacks and recognizing the types of units they send is key to victory, which requires careful analysis of the terrain and defensive structure placements. Overall, this map embodies the essence of the defense genre, demanding sharp focus and strategic thinking. Given the high difficulty indicated by its description as "Very Hard! Experts Only!," thorough preparation and practice are essential. Players can enjoy the challenge by leveraging their understanding of defensive structures, upgrades, resource management, and enemy attack patterns. This map is worth trying for those familiar with the defense genre. Its meticulously designed layout and structure offer not just defense but also deep strategic elements. To fully enjoy this map, players should study the traits of defensive buildings and enemy attack patterns, allowing them to develop and refine their own strategies. The map’s wide and complex layout makes it unsuitable for beginners, but for those who enjoy high-difficulty defense maps, it’s an excellent choice. Before playing, it’s wise to plan defensive structure placements and upgrade paths in advance. Identifying where enemy attacks originate and the types of units they deploy is also critical for preparation. Since this map requires more than just defense—demanding strategic thinking and focus—the difficulty can vary greatly depending on the player’s skill. As such, sufficient practice and strategy development are essential to fully enjoy it.
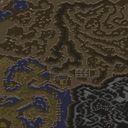
스나이퍼즈 RPG 코리아 Z2e (Snipers RPG Korea Z2e)
‘스나이퍼즈 RPG Korean Z2e’는 스타크래프트: 브루드워의 유즈맵으로, 플레이어들이 스나이퍼라는 직업으로 RPG 스타일의 전투를 펼치는 컴까기 장르의 맵이다. 맵의 이름은 ‘Snipers Rpg Korean z2e’라는 원본 파일명과 내부 맵 제목에서 확인할 수 있으며, ‘Korean’이라는 표기는 한글 번역 버전임을 나타낸다. 내부 설명에 따르면 제작자 Haroh와 Kai[Dz]가 초기 버전을 만들었고, Kai[Dz]가 난이도를 높였으며, DarthNemesis와 psycoblaster가 번역을 담당했다는 사실이 기록되어 있다. 맵의 배경은 황무지 타일셋을 사용한 것으로 보이며, 타일 단위는 192x192로 구성되어 있어 넓은 평야와 산악 지형이 어우러진 환경을 제공한다. 맵의 해상도는 6144x6144로 매우 크며, 6명의 플레이어가 동시에 진행할 수 있도록 설계된 것으로 추정된다. 맵의 제목에 ‘RPG’라는 키워드가 포함되어 있지만, 실제로는 전투와 스킬을 중심으로 한 액션 RPG에 가까운 게임플레이를 제공할 가능성이 크다. 맵의 구조는 중앙에 위치한 주요 전투 지역과 주변의 안전한 구역으로 나뉘며, 플레이어는 스나이퍼의 스킬을 활용해 적을 처치하거나 목표를 달성해야 한다. 맵의 난이도는 내부 설명에 따로 명시되지 않았지만, ‘Made harder’라는 문구와 ‘Final version’이라는 표기, 그리고 제작자 Kai[Dz]의 개입으로 보아 비교적 어려운 난이도로 설계되었을 것으로 추정된다. 추천 대상은 스타크래프트의 유즈맵을 즐기며 RPG 스타일의 전투를 선호하는 플레이어들이며, 특히 팀 플레이보다는 개별 스킬과 전략을 중시하는 플레이어들에게 어울릴 것으로 보인다. 플레이 전에는 맵의 목표와 스킬 시스템, 그리고 팀 구성 여부를 미리 확인하는 것이 중요할 것이다. 또한, 맵의 크기가 매우 크고 복잡한 구조를 가지고 있으므로, 초보자는 난이도에 주의해야 할 필요가 있다. 맵의 제목이 다소 복잡하고 영문과 한글이 혼용되어 있어, 자연스러운 검색 가능성을 높이기 위해서는 제목의 정리가 필요해 보인다. ‘Snipers RPG Korean Z2e’ is a custom map for *StarCraft: Brood War* where players engage in RPG-style combat as snipers in a team-based elimination genre. The map’s name can be found in the original file name and internal title as ‘Snipers Rpg Korean z2e,’ with the ‘Korean’ indicating it’s a Korean-translated version. According to its internal description, the map was initially created by the creators Haroh and Kai[Dz], with Kai[Dz] later increasing the difficulty, while DarthNemesis and psycoblaster handled the translation. The map uses a wasteland tileset with a unit size of 192x192, offering a mix of vast plains and mountainous terrain. With a massive resolution of 6144x6144, it’s designed to accommodate up to six players simultaneously. Although the title includes the term ‘RPG,’ the gameplay leans more toward action RPG-style combat focused on battles and skills. The map is structured with a central combat zone surrounded by safer areas, where players must use their sniper skills to defeat enemies or complete objectives. While the difficulty isn’t explicitly stated in the description, phrases like ‘Made harder’ and ‘Final version,’ along with Kai[Dz]’s involvement, suggest it’s designed to be relatively challenging. The recommended audience includes *StarCraft* custom map enthusiasts who enjoy RPG-style combat, particularly those who prefer individual skill and strategy over team-based play. Before playing, it’s important to check the map’s objectives, skill system, and whether team play is required. Given its large size and complex layout, beginners should be cautious of the difficulty. The map’s title is somewhat convoluted, mixing English and Korean, so tidying it up could improve searchability.
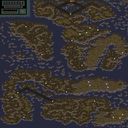
스나이퍼 RPG 임파서블 2 (Snipers Rpg Impossible --2--)
™Snipers Rpg Impossible --2--는 스타크래프트 브루드워의 유즈맵으로, 7명의 플레이어가 참여하는 RPG 장르의 맵입니다. 내부 맵 제목과 설명을 바탕으로Manual Shooting [a + left click]이라는 조작법이 사용되며, 수동으로 공격을 조준해 적을 처치하는 방식으로 진행되는RPG(역할 수행 게임)형식으로 추정됩니다. 맵의 배경은 황무지 타일셋을 사용했으며, 6144x6144의 넓은 맵 크기를 자랑합니다. 맵의 이름에서 'Impossible'이라는 표현이 포함되어 있어 난이도가 매우 높을 것으로 예상되며, 'Snipers'라는 제목에서 알 수 있듯이 저격수 캐릭터를 중심으로 전투가 전개될 가능성이 큽니다. 이 맵은 수동 조준 시스템을 채택하고 있어 플레이어의 실력과 반응 속도가 중요하며, 넓은 맵을 활용한 전략적인 전투와 길찾기 요소가 포함되어 있을 것으로 보입니다. 또한,Manual Shooting이라는 조작법은 일반적인 스타크래프트의 자동 공격과 달리, 플레이어가 직접 공격 대상을 지정해야 하므로 전투의 몰입감이 높고, RPG 장르에 걸맞는 플레이 경험을 제공할 것으로 예상됩니다. 다만, 7명의 플레이어가 참여하는 만큼 팀 간의 조율이나 전략적 협력이 필요할 수 있으며, 넓은 맵에서는 개별 플레이어의 실력이 승패를 좌우할 가능성이 큽니다. 초보자보다는 중급 이상의 플레이어에게 적합한 맵으로 보이며, 특히 저격수 캐릭터를 활용한 전투를 즐기는 플레이어에게 추천할 만합니다. 플레이 전 반드시 확인해야 할 점은 조준 시스템과 맵의 구조입니다.Manual Shooting 시스템에 익숙하지 않은 경우, 미리 연습을 통해 적응하는 것이 중요하며, 넓은 맵에서는 위치 선정과 시야 확보가 전투의 승패를 좌우할 수 있습니다. 또한, 맵의 디자인과 장애물, 함정 요소 등을 미리 확인해 두면 보다 전략적인 플레이가 가능할 것입니다. 만약 팀 플레이가 요구된다면, 팀원 간의 역할 분담과 전략 수립을 사전에 준비하는 것이 좋습니다. 이 맵은 단순히 적을 처치하는 것뿐만 아니라, 넓은 맵을 활용한 탐험과 전략적 사고가 요구되는 RPG 장르의 유즈맵으로, 플레이어의 몰입감을 높이는 요소들이 다수 포함되어 있습니다. ™Snipers Rpg Impossible --2-- is a StarCraft: Brood War custom map featuring an RPG genre where seven players participate. Based on the internal map title and description, the gameplay appears to use a Manual Shooting system [a + left click], where players manually aim and eliminate enemies, resembling an RPG (role-playing game) format. The map employs a wasteland tileset and boasts a massive size of 6144x6144. Given the inclusion of "Impossible" in the title, the difficulty is expected to be extremely high, and the focus on "Snipers" suggests that gameplay will revolve around sniper characters. This map adopts a manual aiming system, making player skill and reaction speed crucial. It likely incorporates strategic combat and navigation elements across the vast map. Unlike StarCraft's typical auto-attack mechanics, the Manual Shooting system requires players to directly target enemies, enhancing immersion and delivering an RPG-style experience. However, with seven players participating, team coordination and strategic planning may be necessary. On such a large map, individual performance could heavily influence the outcome, suggesting this map is better suited for intermediate to advanced players rather than beginners. It is particularly recommended for those who enjoy combat centered around sniper characters. Before playing, it's essential to familiarize yourself with the aiming system and map layout. If you're unfamiliar with the Manual Shooting system, practicing beforehand is highly recommended. On a large map, positioning and visibility are key to victory, so scouting and securing advantageous spots is critical. Understanding the map design, obstacles, and trap elements will also allow for more strategic gameplay. If teamwork is required, pre-planning role assignments and strategies with teammates is advisable. This map goes beyond simply defeating enemies—it's an RPG custom map that demands exploration and strategic thinking across its expansive terrain, offering numerous elements to enhance player immersion.
S.I.C.K Bound
스타크래프트 브루드워의 유즈맵 〈S.I.C.K Bound〉는 6명의 플레이어가 공동으로 적을 상대로 전투를 펼치는 대규모 디펜스 장르의 유즈맵입니다. 내부 맵 제목과 설명에서 확인되는 'S.I.C.K'는 Serial Insane Clown Killer의 약자로, 마치 공포 영화의 살인마를 연상시키는 분위기의 맵이지만 실제 플레이 스타일은 전형적인 컴퓨터 상대 디펜스입니다. 100개의 목숨과 6/10의 난이도 설정이 인상적인데, 이는 비교적 높은 난이도를 유도하면서도 플레이어가 지속적으로 적을 상대해야 한다는 점을 강조합니다. 내부 맵 설명에 언급된 'Clan xPBx Productions'는 제작자 그룹으로 보이며, 맵 자체가 시리즈물의 일부로 개발되었을 가능성을 시사합니다. 맵의 구조는 4096x4096의 넓은 황무지 타일셋으로 구성되어 있으며, 중앙에 위치한 플레이어 기지와 외곽을 둘러싼 다양한 적 웨이브가 특징입니다. 디펜스 장르답게 플레이어는 끊임없이 밀려오는 적을 상대로 방어선을 구축하고, 자원 관리와 유닛 생산을 적절히 조율해야 합니다. 특히 6명의 플레이어가 협력하여 살아남아야 한다는 점에서 전략적 협력이 요구되며, 개별 플레이어의 실력이 전체 팀의 성패를 좌우할 수 있습니다. 이 맵을 추천하는 대상은 대규모 디펜스 유즈맵을 선호하는 플레이어와 팀플레이 경험을 쌓고 싶은 유저입니다. 난이도가 높은 편이기 때문에 초보자는 먼저 쉬운 디펜스 맵을 경험한 후 도전하는 것이 좋습니다. 또한, 지속적인 적 웨이브를 상대해야 하므로 자원 관리와 유닛 배치에 대한 이해가 필수적입니다. 맵의 넓은 공간을 활용한 전략적 배치와 다채로운 적의 패턴이 이 맵의 핵심 볼거리입니다. 플레이 전에는 맵의 목표와 승리 조건을 명확히 확인하고, 팀원과의 소통을 충분히 준비하는 것이 중요합니다. 한국어 유즈맵 커뮤니티에서 디펜스 장르는 오랜 인기를 누리고 있으며, 〈S.I.C.K Bound〉는 그 tradition을 계승하면서도 6인 협동이라는 새로운 도전을 제시합니다. 특히 'Serial Insane Clown Killer'라는 독특한 컨셉은 플레이어의 몰입도를 높이는 요소로 작용할 수 있습니다. 다만, 난이도가 높기 때문에 실패 시의 좌절감이 클 수 있으므로 적당한 난이도 조절이 필요할 수도 있습니다. S.I.C.K Bound is a custom map from StarCraft: Brood War where six players team up to defend against waves of enemies in a large-scale defense genre map. The name "S.I.C.K" stands for Serial Insane Clown Killer, evoking the atmosphere of a horror movie slasher, but the actual gameplay follows a classic computer-defense style. The map stands out with its 100 lives and a difficulty setting of 6/10, pushing players to balance high challenge with the need to continuously fend off enemies. The internal description credits "Clan xPBx Productions" as the creator, suggesting this map may be part of a series. The layout spans a vast 4096x4096 wasteland tileset, centered around the players' base with enemy waves attacking from the perimeter. As a defense map, players must build and reinforce defenses, manage resources, and coordinate unit production against relentless assaults. Cooperation among the six players is essential, and individual skill directly impacts the team's success or failure. This map is ideal for players who enjoy large-scale defense custom maps and those looking to improve their teamwork experience. Due to its high difficulty, beginners are advised to try easier defense maps first. Success depends on mastering resource management and strategic unit placement, as waves of enemies continuously test your defenses. The map’s wide open spaces allow for creative positioning, and the varied enemy patterns make each playthrough engaging. Before playing, it’s important to clearly understand the map’s objectives and victory conditions and to prepare thorough communication with your team. In the Korean custom map community, defense maps have long been popular, and S.I.C.K Bound carries on that tradition while introducing the new challenge of six-player coordination. The unique Serial Insane Clown Killer concept enhances player immersion, though the high difficulty may lead to frustration after repeated failures, so adjusting the challenge level may be necessary.
OMFG 더 울트라리스크 (OMFG The Ultralisk)
스타크래프트 브루드워의 유즈맵으로 유명한 〈OMFG THE ULTRALISKS〉는 플레이어가 울트라리스크 무리를 지휘하며 끊임없이 몰려드는 적들을 상대로 생존을 다투는 디펜스 장르의 맵이다. 맵의 이름과 설명에서 드러나듯, 이 맵은 〈OMFG THE ZERGLINGS Did Ya?〉의 후속작으로, 전작의 빠른 템포와 공격적인 스타일을 한층 강화한 난이도를 자랑한다. 맵의 구조는 비교적 단순하지만, 적의 끊임없는 웨이브와 다양한 유닛 조합이 플레이어의 전략적 선택과 자원 관리를 끊임없이 요구한다. 중앙에 위치한Resource Area(자원 지역)는 플레이어가 기본 자원 확보를 위한 초석이 되며, 이 지역을 지키며 확장하는 것이 안정적인 방어의 핵심이다. 울트라리스크는 강력한 체력과 공격력을 보유하고 있지만, 개체당 비용이 크기 때문에 효율적인 생산과 배치 전략이 필수적이다. 특히 지형의 활용과Resource Area 주변의 방어 시설 구축이 승패를 가르는 주요 요소가 된다. 이 맵은 초보자보다는 중간 이상의 실력을 갖춘 플레이어에게 적합하며, 방어와 자원 관리뿐만 아니라 적의 패턴을 예측하고 대응하는 능력이 요구된다. 한정된 공간과 끊임없는 압박 속에서 전략적 유연성을 발휘해야만 승리를 거둘 수 있다. 또한, 팀플레이가 가능한 맵 구조로, 팀원 간의 협력이 승리의 열쇠가 될 수 있다. 맵을 처음 플레이하는 경우,Resource Area를 중심으로한 방어선을 구축하고 울트라리스크 생산 라인을 안정화하는 데 초점을 맞추는 것이 좋다. 또한, 적의 공격을 예측하여 보조 방어 시설(예: 포토캐논, 성큰 콜로니)을 적시에 배치하는 것도 중요하다. 이 맵의 가장 큰魅力은 끊임없는 긴장감과 도전 정신으로, 한 번 플레이하면 여러 번 다시 도전하고 싶어지는 매력이 있다. 초보자라면 난이도 조절을 위해Resource Area의 방어선을 강화하고, 울트라리스크를 집중적으로 양성하는 전략을 추천한다. 반면, 숙련자라면Resource Area의 안정적 확보와 함께 적의 약점을 공략하는 공격적인 플레이를 시도해 볼 수 있다. 이 맵의 핵심은 '생존'과 '확장'의 균형이며, 그 균형을 잡는 순간 승리를 향해 한 걸음 더 나아갈 수 있을 것이다. The StarCraft: Brood War custom map known for its intensity, *OMFG THE ULTRALISKS*, is a defense-style map where players command swarms of Ultralisk to survive endless waves of enemies. As the name and description suggest, this is a sequel to *OMFG THE ZERGLINGS Did Ya?*, refining the fast-paced, aggressive gameplay of its predecessor into an even more demanding challenge. While the map’s structure is straightforward, the constant enemy waves and varied unit compositions force players to continually refine their strategies and resource management. The central Resource Area serves as the foundation for securing basic resources, and defending and expanding this zone is key to stable defense. Though Ultralisks boast incredible durability and firepower, their high production cost demands careful planning and efficient deployment. Terrain control and strategic defenses around the Resource Area often decide victory or defeat. This map is best suited for intermediate to advanced players, requiring not just strong defense and resource handling but also the ability to predict and counter enemy patterns. Victory comes from adaptability in tight spaces under relentless pressure. The map also supports team play, making cooperation among teammates a potential game-changer. First-time players should focus on establishing a defensive perimeter around the Resource Area and stabilizing Ultralisk production. Predicting enemy attacks and placing auxiliary defenses—such as Photon Cannons or Sunken Colonies—at the right time is also crucial. What makes this map so compelling is its unrelenting tension and challenge; once played, it’s hard to resist returning for another round. Beginners may want to ease into the difficulty by reinforcing the Resource Area’s defenses and prioritizing Ultralisk production. Experienced players, meanwhile, can aim for a more aggressive playstyle—securing resources while exploiting enemy weaknesses. At its core, *OMFG THE ULTRALISKS* is about balancing survival and expansion, and finding that balance is the surest path to victory.
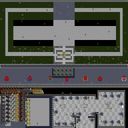
네버 엔딩 디펜스 (Never Ending Defense)
스타크래프트 브루드워 유즈맵, '네버 엔딩 디펜스 (Never Ending Defense)'는 제목부터 압도적인 도전 의식을 불러일으키는 전형적인 웨이브 디펜스 장르의 맵입니다. 맵 내부 설명인 '-100 Levels Can You Beat This???' 문구에서 알 수 있듯이, 이 맵은 최소 100단계에 달하는 엄청난 수의 적 웨이브를 막아내야 하는 극한의 방어전을 약속합니다. 7명의 플레이어가 협력하여 끊임없이 몰려오는 적들을 저지하는 것이 주된 목표이며, 맵 이미지와 구조를 통해 그 플레이 방식과 특징을 상세히 파악할 수 있습니다. 맵의 전체적인 구조는 크게 세 구역으로 나뉘어 플레이어에게 다양한 전략적 선택지를 제공합니다. 먼저, 맵 상단에는 적 유닛들이 이동할 것으로 추정되는 넓은 경로가 펼쳐져 있습니다. 녹색 잔디와 회색 포장도로가 어우러진 이 길은 중앙의 복잡한 구조물과 연결되어 있으며, 적들이 다양한 경로를 통해 진입할 수 있음을 암시합니다. 플레이어들은 이 경로를 따라 적들을 효과적으로 저지해야 할 것입니다. 맵 중앙 하단에는 푸른색 방어벽과 함께 여러 개의 붉은색 수정 또는 오브젝트들이 배치되어 있습니다. 이 구역은 플레이어의 핵심 방어선 또는 자원/업그레이드 거점으로 보이며, 초기에 제공되는 것으로 추정되는 녹색 유닛들이 이곳에 모여 있어 플레이어들이 방어선을 구축하고 병력을 관리하는 주요 지점이 될 것으로 예상됩니다. 이 붉은 수정들은 아마도 특정 유닛 생산, 업그레이드, 혹은 특수 능력 활성화에 필요한 자원 역할을 할 것으로 추정됩니다. 맵의 하단 우측에는 바둑판처럼 정렬된 넓은 공간에 다수의 프로토스 파일런과 캐논이 빼곡히 들어서 있습니다. 이는 이 맵이 단순한 유닛 디펜스를 넘어 '타워 디펜스'의 요소를 강력하게 포함하고 있음을 명확히 보여줍니다. 플레이어들은 이 공간에 다양한 방어 건물을 전략적으로 배치하여 적 유닛의 진격을 막아야 할 것입니다. 파일런과 캐논 외에도 여러 종류의 프로토스 유닛들이 배치되어 있어, 플레이어들이 저글링, 히드라, 질럿, 드라군 등 다양한 유닛을 생산하거나 소환하여 방어에 활용할 수 있을 것으로 보입니다. 각 유닛이나 건물은 고유한 공격 방식과 방어 특성을 가질 것이므로, 적의 종류와 웨이브 구성에 맞춰 최적의 방어 라인을 구축하는 것이 중요할 것입니다. 맵의 하단 좌측은 맵에서 가장 시각적으로 압도적인 부분으로, 셀 수 없이 많은 저그, 프로토스, 테란 유닛들이 밀집해 있습니다. 이 구역은 적 웨이브가 생성되는 스폰 지점 또는 대기 구역으로 추정되며, 엄청난 규모의 적들이 플레이어들을 향해 끊임없이 몰려올 것임을 예고합니다. 다양한 종족의 유닛들이 섞여 있다는 것은 플레이어들이 다채로운 적의 공격 방식에 대비해야 함을 의미하며, 각 종족의 특성을 고려한 방어 전략이 필수적일 것입니다. 예를 들어, 공중 유닛과 지상 유닛, 경장갑과 중장갑 유닛에 효과적인 방어 타워와 유닛 조합을 찾아야 할 것입니다. '네버 엔딩 디펜스'는 7인 협동 플레이를 기반으로 하므로, 팀원 간의 긴밀한 소통과 역할 분담이 성공적인 플레이의 핵심입니다. 누가 어떤 방어 구역을 맡을지, 어떤 유닛과 건물을 우선적으로 업그레이드할지, 그리고 자원을 어떻게 효율적으로 분배할지에 대한 전략적인 논의가 필요합니다. 100단계 이상의 웨이브를 버텨내야 하는 만큼, 초반부터 후반까지 이어지는 장기적인 관점에서의 계획이 중요합니다. 난이도는 'Can You Beat This???'라는 문구에서 짐작할 수 있듯이 상당히 높을 것으로 예상되며, 오랜 시간 집중력을 유지하며 플레이할 수 있는 끈기와 도전 정신이 요구됩니다. 스타크래프트 브루드워 유즈맵 중에서도 특히 긴 플레이 타임과 높은 난이도의 타워 디펜스 맵을 선호하는 플레이어들에게 이 맵은 최고의 선택이 될 수 있습니다. 친구들과 함께 한계를 시험하고 싶거나, 전략적인 방어선 구축의 재미를 만끽하고 싶은 분들에게 강력히 추천합니다. Never Ending Defense is a StarCraft Brood War UMS map that, right from its title, evokes a sense of overwhelming challenge. As suggested by the internal map description, "-100 Levels Can You Beat This???", this map promises an ultimate defensive battle where players must withstand an immense number of enemy waves, at least 100 stages worth. The primary objective for 7 players is to cooperate and fend off relentless waves of enemies. Through analysis of the map image and its structure, we can gain a detailed understanding of its gameplay and features. The overall map structure is broadly divided into three main zones, offering players various strategic options. Firstly, in the upper part of the map, there's a wide path presumed to be for enemy units. This path, a blend of green grassy areas and grey paved roads, connects to a complex central structure, implying that enemies can enter through multiple routes. Players will need to effectively intercept enemies along this path. In the lower-central part of the map, several red crystals or objects are arranged alongside blue defensive walls. This area appears to be the core defensive line or a resource/upgrade hub for players. A cluster of green units, likely starting units, are gathered here, suggesting it will be a key point for players to establish defenses and manage their forces. These red crystals are probably resources needed for specific unit production, upgrades, or activating special abilities. The lower-right section of the map features a large, grid-like area densely packed with numerous Protoss Pylons and Cannons. This clearly indicates that the map strongly incorporates "Tower Defense" elements, going beyond simple unit defense. Players will need to strategically place various defensive structures in this space to halt the advance of enemy units. In addition to Pylons and Cannons, various types of Protoss units are visible, suggesting that players can produce or summon diverse units like Zerglings, Hydralisks, Zealots, and Dragoons to aid their defense. Since each unit or structure likely possesses unique attack methods and defensive characteristics, constructing an optimal defensive line tailored to the enemy types and wave compositions will be crucial. The lower-left section of the map is visually the most striking, with countless Zerg, Protoss, and Terran units densely clustered together. This area is presumed to be the spawn point or staging area for enemy waves, signaling that an overwhelming force of enemies will continuously pour towards the players. The presence of mixed-race units means players must prepare for diverse enemy attack styles, making defense strategies that consider each race's characteristics essential. For instance, players will need to find effective combinations of defensive towers and units against air and ground units, as well as light and heavy armored units. As 'Never Ending Defense' is based on 7-player cooperative gameplay, close communication and role division among teammates are key to successful play. Strategic discussions will be necessary regarding who covers which defensive sector, which units and structures to prioritize for upgrades, and how to efficiently distribute resources. Given the need to withstand over 100 waves, a long-term perspective and planning from early to late game are crucial. The difficulty is expected to be quite high, as hinted by the phrase "Can You Beat This???", requiring persistence and a challenging spirit to maintain focus for extended periods. For players who particularly enjoy long playtimes and high-difficulty tower defense maps among StarCraft Brood War UMS maps, this map could be an excellent choice. It is highly recommended for those who wish to test their limits with friends or indulge in the fun of strategic defensive line construction.
Neo Nexus v1.5Ao
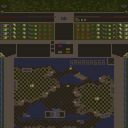
스타크래프트: 브루드워의 유즈맵 중 하나인 〈Neo Nexus v1.5Ao〉는 8명의 플레이어가 전투를 펼치는 대규모 디펜스형 맵으로, 사막 테마의 넓은 맵 중앙에 위치한 넥서스를 중심으로 적의 공격을 방어하는 구조를 갖추고 있다. 맵의 가장 큰 특징은 중앙 넥서스를 보호하는 동시에 외곽의 기지들을 보강하고, 지속적으로 쏟아지는 적 웨이브를 상대해야 한다는 점이다. 넥서스를 중심으로 배치된 방어시설과 자원 채취 지역이 일종의 전략적 요충지가 되며, 플레이어는 자원 확보와 방어력 강화 사이에서 균형을 잡아야 한다. 맵의 인게임 설명은 다소 난해한 문구로 되어 있지만, 전체적인 디자인과 배치로 보아 다수의 플레이어가 협력해 적을 상대하는 팀 디펜스 형식임을 유추할 수 있다. 사막 타일셋을 사용한 맵 디자인은 건조한 분위기를 연출하며, 넓은 시야를 확보할 수 있도록 설계되어 있어 전략적 판단이 중요한 요소로 작용할 것으로 보인다. 방어선 구축, 자원 관리, 적 웨이브 타이밍 파훼 등 다층적인 전략적 요소가 요구되는 맵으로, 경험 많은 플레이어들이라면 흥미로운 도전 과제가 될 것이다. 초보자에게는 다소 어려운 난이도를 가질 수 있으나, 팀원과의 협력이 필수적이므로 소통과 역할 분담을 중시하는 플레이 스타일이 요구된다. 맵을 플레이하기 전에는 중앙 넥서스의 중요성, 외곽 기지들의 배치, 주요 방어 루트 등을 미리 숙지하고, 팀원과의 전략 공유가 원활히 이뤄질 수 있도록 준비하는 것이 중요하다. 또한, 지속적인 적의 공격이 예상되므로 자원 확보와 방어 시설 업그레이드 타이밍을 잘 조율해야 한다. 맵의 난이도를 결정짓는 요소는 적의 웨이브 패턴과 방어 시설의 배치 효율성일 것이며, 이를 파악하는 데 시간이 어느 정도 소요될 수 있다. 전체적으로 〈Neo Nexus v1.5Ao〉는 대규모 팀 디펜스 유즈맵으로서 전략성과 몰입감을 동시에 제공하는 작품으로, 협력 플레이를 즐기는 스타크래프트 팬들에게Strongly recommended된다고 할 수 있다. 특히 사막 테마의 독특한 분위기와 넓은 맵 구조는 시각적 즐거움 또한 considerable하다. Neo Nexus v1.5Ao, a custom map in StarCraft: Brood War, is a large-scale defense-type map where eight players engage in combat. The map features a desert theme with a vast central area centered around a Nexus that players must defend against enemy attacks while also reinforcing outer bases and countering continuous enemy waves. The Nexus is surrounded by defensive structures and resource-gathering zones, creating strategic chokepoints that require players to balance resource collection and base fortification. The in-game description may be somewhat cryptic, but the overall design and layout suggest a team-based defense format where multiple players cooperate to fend off waves of enemies. The desert tile set gives the map a dry, arid atmosphere while providing expansive visibility, making strategic decision-making crucial. The map demands multilayered strategy, including base construction, resource management, and timing the counterattacks against enemy waves, making it an engaging challenge for experienced players. While it may be difficult for beginners, teamwork is essential, requiring strong communication and role distribution. Before playing, it’s important to understand the Nexus’s significance, the layout of outer bases, and key defensive routes, as well as sharing strategies with teammates. Since enemies continuously attack, players must carefully coordinate resource gathering and defense upgrades. The difficulty hinges on recognizing enemy wave patterns and optimizing defensive placements, which may take time to master. Overall, Neo Nexus v1.5Ao stands out as a team-based defense custom map that blends strategy and immersion, making it highly recommended for StarCraft fans who enjoy cooperative play. The unique desert theme and expansive map structure also provide considerable visual appeal.
미니타운 디펜스 인사네! (Mini Town Defense Insane!)
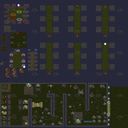
‘미니타운 디펜스 인사네!’는 스타크래프트 브루드워의 대표적인 디펜스 장르 유즈맵으로, 좁은 미니맵과 조밀한 길목이 특징적인 맵이다. 맵의 전체적인 구조는 중앙을 가로지르는 좁은 통로를 중심으로 건물과 자원 기지가 배치되어 있으며, 적의 공격 경로가 제한적이어서 방어 전략을 세우기 용이하다. 미니맵 상단에는Resource Vespene Geyser가 배치되어 있어 가스 채취가 필수적이며, 플레이어는 이 자원을 확보해 업그레이드와 유닛 생산에 활용해야 한다. 맵의 주요 특징 중 하나는 ‘Insane’이라는 명칭에 걸맞게 난이도가 상당히 높다는 점으로, 초반부터 강력한 적의 웨이브가 밀려오며 지속적인 대비를 요구한다. 방어선은 주로 서플라이 디팟과 터렛으로 구성되며, 플레이어는 이를 효율적으로 배치해 적의 공격을 방어해야 한다. 특히, 좁은 길목에서 벌이는 전투는 미니맵을 적극 활용한 시야 관리와 빠른 반응이 중요하며, 자원 관리와 업그레이드 타이밍이 승패를 좌우한다. 추천 대상은 디펜스 장르를 선호하는 플레이어이며, 특히 좁은 길목에서 벌어지는 긴장감 넘치는 전투와 지속적인 전략 수립을 즐기는 유저에게 적합하다. 플레이 전에는 맵의 좁은 통로와 자원 배치, 적의 공격 패턴을 미리 숙지하고, 방어 건물의 배치와 업그레이드 우선순위를 carefully하게 계획해야 한다. 또한, 미니맵을 적극 활용해 적의 움직임을 사전에 파악하는 것이 필수적이다. 이 맵은 디펜스 장르의 핵심을 잘 담아내어, 전략과 집중력을 요구하는 플레이 경험을 제공한다. 멀티플레이 환경에서 함께 플레이할 경우 팀원과의 원활한 소통도 승리의 열쇠가 될 수 있다. “Mini Town Defense Insane!” is a classic defense genre custom map in StarCraft: Brood War, featuring a cramped mini-map and tightly packed pathways. The map’s overall layout centers around a narrow corridor that cuts through the middle, with buildings and resource bases strategically placed along it. Since enemy attack routes are limited, it’s easier to plan a solid defense strategy. At the top of the mini-map, a Resource Vespene Geyser is positioned, making gas harvesting essential—players must secure this resource to fuel upgrades and unit production. One of the map’s standout features is its difficulty, reflected in its “Insane” name—powerful enemy waves surge in from the start, demanding constant preparation. The defensive line typically consists of Supply Depots and Turrets, which players must arrange efficiently to fend off attacks. Battles in the narrow passages hinge on sharp mini-map awareness and quick reactions, while resource management and upgrade timing can make or break your success. This map is ideal for players who enjoy defense genre maps, especially those who thrive on high-stakes combat in tight spaces and enjoy continuously adapting their strategies. Before playing, study the narrow corridors, resource placements, and enemy attack patterns, and carefully plan where to position defensive structures and which upgrades to prioritize. Making full use of the mini-map to anticipate enemy movements is critical. “Mini Town Defense Insane!” captures the essence of the defense genre, delivering a gameplay experience that demands strategy and focus. In multiplayer, smooth communication with teammates can also be a key factor in securing victory.
맵 선택 가이드
태그는 맵의 핵심 특징을 빠르게 설명하지만 제작 버전마다 규칙이 다를 수 있습니다. 상세 설명에서 권장 인원, 난이도, 플레이 시간과 버전을 함께 확인한 뒤 다운로드하세요.