
난이도 높은 스타크래프트 맵 모음
'난이도 높은' 태그가 등록된 맵을 모았습니다. 장르 하나로 찾기 어려운 플레이 방식, 난이도와 특징을 중심으로 인기 맵과 최신 맵을 비교해 보세요.
- 등록 맵
- 7개
- 누적 다운로드
- 372
- 누적 조회
- 2,600
인기 맵
다운로드와 조회 반응이 높은 맵입니다.
2021신고추컴까기2.5
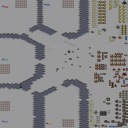
2021신고추컴까기2.5는 스타크래프트 브루드워 유즈맵의 대표적인 컴까기 장르 맵으로, 이름에서부터 느껴지듯 ‘신고추’와 ‘컴까기’가 조합된 난이도 높은 디펜스 게임이다. 맵은 4096x4096의 넓은 크기를 자랑하며, 플랫폼 타일셋을 기반으로 깔끔한 시야를 제공한다. 플레이어는 미네랄만 확보한 채 끊임없이 몰려오는 적을 상대로 방어선을 구축해야 하며, particularly 2021년 4월 14일에 제작된 버전은 ‘빡세고 힘들고 상당히 더 어려워졌다’는 제작자의 코멘트가 압권이다. 맵 구조는 중앙에서 뻗어나가는 다수의 경로와 좁은 통로를 활용한 전략적 방어가 요구되며, 초반에 자원 확보가 늦어지면 순식간에 밀릴 수 있어 자원 관리와 유닛 배치 타이밍이 매우 중요하다. 특히 적의 공격 루트가 다변화되어 있어 한 곳에만 집중하면 쉽게 무너질 수 있으므로, 맵의 다양한 입구와 통로를 미리 파악하고 유연한 대처가 필수적이다. 또한, 적 유닛의 조합이 시시각각 변하는 만큼, 초반에는 기본 유닛으로 버티며 중반부터는 조합을 맞춰 대응해야 한다. 맵을 처음 플레이하는 유저라면 난이도에 당황할 수 있지만, 익숙해지면 전략적 깊이가 impressive한 편이다. 특히 컴퓨터 상대로 플레이하는 경우, 제작자의 ‘더 어려워졌다’는 말이 결코 빈말이 아님을 느낄 수 있을 것이다. 추천 대상은 스타크래프트 유즈맵을 즐기며 도전 정신을 가지고 있는 플레이어들로, 난이도를 즐기는 유저들에게는 그만큼의 성취감을 선사할 것이다. 플레이 전에는 맵의 입구와 주요 통로를 미리 살펴보며, 초반 자원 확보와 유닛 조합을 어떻게 할지 전략을 세우는 것이 중요하다. 또한, 맵의 난이도가 예상보다 높을 수 있으므로 여유를 가지고 도전하는 것이 좋다. 제작자의 노력이 느껴지는 만큼, 한 번 성공하면 뿌듯한 보람을 느낄 수 있는 맵이다. 추가로, 맵의 어려운 난이도를 극복하기 위해 커뮤니티 팁이나 공략을 참고하는 것도 좋은 방법이다. 다만, 너무 공략에 의존하지 않고 직접 경험을 쌓는 것이 더 큰 재미를 느낄 수 있는 방법일 것이다. 2021신고추컴까기2.5는 단순한 디펜스가 아닌, 전략과 인내심이 요구되는 진정한 ‘컴까기’의 진수를 느낄 수 있는 맵으로, 스타크래프트 유즈맵 팬이라면 반드시 도전해볼 가치가 있다. *2021신고추컴까기2.5* is a standout defense-focused custom map in *StarCraft: Brood War*, blending the punishing mechanics of *"compkkaegi"* (AI defense) with the relentless challenge of *"singochu"* waves. The map sprawls across a massive 4096x4096 grid, using a clean, platform-based tileset that ensures clear visibility. Players start with only mineral resources and must construct a defense line against endless enemy waves—so much so that the April 14, 2021 version’s creator bluntly described it as *"brutal, exhausting, and significantly harder."* The layout demands strategic foresight, featuring multiple branching paths and narrow chokepoints that force players to adapt their defenses. A slow start in resource gathering can spell instant defeat, making resource management and precise unit deployment critical. The enemy’s attacks are unpredictable, shifting across various entry points; overcommitting to one area will quickly lead to collapse. Players must scout the map’s diverse entrances and remain flexible, adjusting their strategies on the fly. Enemy unit compositions evolve dynamically, so early survival relies on basic defenses, while mid-game success hinges on adapting to their changing threats. Newcomers may find the difficulty overwhelming at first, but once mastered, the map reveals impressive depth. Playing against the AI, in particular, underscores the creator’s claim that this version is no joke—it’s genuinely punishing. This map is ideal for *StarCraft* custom map enthusiasts seeking a real challenge, offering a rewarding sense of accomplishment upon victory. Before diving in, study the entry points and key pathways, plan your early resource collection, and decide on your unit compositions. Given its steep difficulty, approach it with patience—rushing in will likely backfire. The creator’s effort shines through, and clearing it provides a deeply satisfying payoff. For those struggling, community tips and guides can help, but relying too heavily on them may dull the experience. The true joy lies in learning through trial and error. *2021신고추컴까기2.5* isn’t just another defense map—it’s a test of strategy, patience, and resilience, making it a must-try for any *StarCraft* custom map fan.
젠전 매트릭스 (The Experts Matrix)
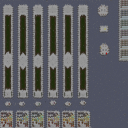
스타크래프트 브루드워의 〈젠전 매트릭스〉는 40단계에 달하는 난이도 높은 방어형 RPG 유즈맵으로, 플레이어가 외계인과 같은 적을 상대로 자신의 방어선을 구축하고 유지해야 한다. 맵 중앙에 위치한 본진과 주위에 배치된 방어 시설은 철저히 설계되어 있으며, 각 단계는 점점 복잡해지는 적의 공격 패턴과 지형을 극복해야만 클리어할 수 있다. 특히 맵의_NAME_ 부분에서 확인되는 ‘Let no one pass your defences. This game is harder than most, only expert players will be able to pass all 40 levels’라는 설명은 제작자의 의도를 명확히 드러내며, 초보자는 물론 숙련자도 쉽지 않은 도전 과제를 제공한다는 점에서 주목할 만하다. 방어선 구축에서부터 시작해 적의 끊임없는 공세를 막아내는 전략적 플레이가 핵심인데, 맵 곳곳에 흩어져 있는 자원과 아이템을 효율적으로 확보하며 방어 포인트를 강화하는 것이 관건이다. 맵의 타일셋과 디자인은 플랫폼 기반으로 깔끔하게 정리되어 있어 시야를 가리는 요소 없이 전략적 판단에 집중할 수 있도록 배려되어 있다. 또한, 8192×4096이라는 넓은 해상도는 넓은 시야에서 전황을 파악하고 방어선을 관리할 수 있게 해준다. 이 맵은 단순히 방어만 하는 것이 아니라, 각 단계의 목표를 달성하기 위한 조건과 비밀 통로, 또는 숨겨진 자원 지대 등이 존재할 가능성이 높아 반복 플레이를 유도한다. 특히 40단계에 걸친 긴 여정은 플레이어의 끈기와 전략적 사고력을 시험하며, 한 번 클리어한 후에도 더 빠른Clear, 효율적인 자원 활용, 또는 새로운 전략의 개발을 모색하게 만든다. 초보자보다는 전략적 사고와 손빠르기가 요구되는 이 맵은, 스타크래프트의 기본을 익힌 후 도전하고 싶은 유저들에게 훌륭한 연습 기회가 될 것이다. 또한 방어형 맵의 매력을 즐기는 플레이어들에게는 새로운 재미를 제공할 것으로 보인다. 맵을 시작하기 전 방어 시설의 배치와 적의 공격 패턴을 숙지하는 것이 클리어의 첫걸음임을 기억하자. StarCraft: Brood War’s *Zen Matrix* is a high-difficulty defensive RPG custom map consisting of 40 stages, where players must build and maintain their defenses against alien-like enemies. The main base at the center of the map and the surrounding defensive structures are meticulously designed, with each stage requiring players to overcome increasingly complex enemy attack patterns and terrain to progress. The map’s tagline—*“Let no one pass your defenses. This game is harder than most; only expert players will be able to pass all 40 levels”*—clearly conveys the creator’s intent, presenting a formidable challenge that pushes even seasoned players to their limits. The core of the experience lies in strategically constructing defenses and repelling relentless enemy assaults, with success hinging on efficiently securing scattered resources and items while reinforcing key defensive points. The map’s clean, platform-based tile set and design eliminate visual obstructions, allowing players to focus solely on strategic decision-making. Additionally, its massive 8192×4096 resolution ensures a wide field of view, making it easier to monitor the battlefield and manage defensive lines. Beyond mere defense, *Zen Matrix* incorporates hidden objectives, secret passages, and potential resource-rich areas within each stage, encouraging repeated playthroughs. The grueling 40-stage journey tests a player’s endurance and tactical thinking, and even after clearing the map, it motivates further attempts—whether for faster clears, optimized resource use, or the development of new strategies. While this map demands strong strategic thinking and quick reflexes—making it unsuitable for beginners—it serves as an excellent training ground for users looking to refine their StarCraft fundamentals. For players who enjoy defensive maps, it also promises fresh excitement. Before starting, it’s crucial to familiarize yourself with the defensive layouts and enemy attack patterns to take the first step toward victory.
임파서블 시나리오: 섀도우 (Impossible Scenarios Shadow)
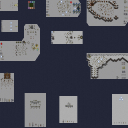
스타크래프트: 브루드워의 유즈맵 ‘임파서블 시나리오: 섀도우(Impossible Scenarios Shadow)’는 기존에 익숙한 미션이나 디펜스를 넘어서는 극한의 난이도와 전략적 깊이를 자랑하는 컴까기(컴퓨터 상대 유즈맵) 장르의 걸작으로 평가된다. 맵의 구조는 크게 세 구역으로 나뉘어지는데, 중앙의 좁은 다리 형태의 통로와 양측의 넓은 개활지, 그리고 각 구역의 구석진 곳에 배치된 방어 타워 및 자원 지점으로 구성되어 있다. 이미지에서 확인되는 바와 같이, 좁은 통로는 적의 물량을 효과적으로 분산시킬 수 있는 구조로 설계되어 있으며, 개활지는 광역 스킬이나 다수의 유닛을 동원할 수 있는 공간을 제공한다. 플레이어는 시작 시점에서부터 끊임없이 밀어붙이는 적의 공격을 방어해야 하며, 맵 곳곳에 흩어져 있는 미네랄과 가스를 확보해 유닛을 지속적으로 생산하고 업그레이드해야 한다. 방어선의 중요성은 시각적으로도 두드러지는데, 통로 양쪽에 배치된 방어 타워와 시즈 탱크, 골리앗 등이 적의 공격을 차단하는 핵심 역할을 맡고 있다. 특히, 통로의 중앙에는 강력한 방어 시설이 집중되어 있어, 플레이어는 이 부분을 최대한 활용해 적의 공격을 지연시키며 자원을 확보하는 전략을 세워야 한다. 맵의 난이도는 이미 제목에서부터 드러나듯이 ‘임파서블’이지만, 초보 플레이어라도 방어 라인을 체계적으로 구축하고 자원 관리에 주의를 기울이면 안정적으로 진행할 수 있다. 반면, 경험이 많은 플레이어라면 더욱 공격적인 전략을 구사해 적의 기지를 빠르게 파괴하는 ‘올인’ 전략을 시도해 볼 수도 있다. 추천하는 플레이 방식은 방어 라인을 sturdy(튼튼하게) 구축한 후, 서서히 확장해 나가는 ‘안정형’ 플레이로, 특히 초반 자원 확보와 유닛 업그레이드에 중점을 두는 것이 중요하다. 이 맵은 혼자서 컴퓨터 상대를 상대해야 하는 싱글 플레이에 최적화되어 있으며, 멀티 플레이어 모드에서도 팀 플레이를 요구하는 경우가 많으므로, 혼자서 도전하는 경우 난이도 조절을 위해 ‘쉬움’ 또는 ‘보통’ 난이도로 설정하고 시작하는 것이 좋다. 맵의 볼륨이 크고 복잡한 만큼, 첫 플레이 시에는 맵 구조를 충분히 숙지한 후 임하는 것이 바람직하다. 또한, 맵 곳곳에 숨겨진 보너스 자원이나 특수 아이템이 있을 가능성이 있으니, 탐색을 게을리하지 말고 적극적으로 활용하도록 하자. 이 맵의 가장 큰 매력은 ‘도전 정신’을 자극한다는 점으로, 아무리 어려운 상황에서도 포기하지 않고 공략법을 찾는 재미가 쏠쏠하다. 특히, 적의 공격을 버티면서도 반격의 기회를 엿보는 플레이의 묘미를 즐길 수 있는 맵이다. StarCraft: Brood War's custom map "Impossible Scenarios: Shadow" stands out as a masterpiece in the computer-vs-player genre, offering extreme difficulty and deep strategic gameplay that goes far beyond familiar missions or defenses. The map is divided into three main areas: a narrow bridge-like central passage, wide open spaces on both sides, and defensive towers along with resource points tucked into the corners of each section. As seen in the image, the narrow passage is designed to effectively disperse enemy forces, while the open areas provide space for deploying area-of-effect skills or large groups of units. From the very start, players must defend against relentless enemy attacks while securing scattered mineral and gas deposits to continuously produce and upgrade units. The importance of the defense line is visually striking, with defensive towers, siege tanks, and goliaths positioned on both sides of the passage playing a crucial role in blocking enemy advances. The central area of the passage features particularly strong defensive structures, allowing players to delay enemy attacks and secure resources by leveraging this section strategically. Though the map's difficulty is evident even in its title—"Impossible"—even beginner players can progress steadily by systematically building defenses and carefully managing resources. More experienced players, on the other hand, can attempt an aggressive "all-in" strategy, aiming to destroy the enemy base quickly. The recommended playstyle is a "stable" approach, where players first establish a sturdy defense line and then gradually expand, with a strong emphasis on early resource gathering and unit upgrades. Since this map is optimized for single-player against the computer, those attempting it in multiplayer mode—where team play is often required—should start on "Easy" or "Normal" difficulty to adjust the challenge. Given the map's size and complexity, it's wise to fully familiarize yourself with its layout before diving in. Be sure to explore thoroughly, as hidden bonus resources or special items may be scattered throughout. The map's greatest appeal lies in its ability to inspire a sense of challenge, rewarding players who persist in finding solutions even in the toughest situations. It offers a thrilling experience where you can relish the subtleties of enduring enemy assaults while searching for the perfect moment to strike back.
OMFG 더 저글링스 2 페어 2.0 (OMFG THE ZERGLINGS 2 FAIR 2.0)
OMFG 더 저글링스 2 페어 2.0(OMFG THE ZERGLINGS 2 FAIR 2.0)은 스타크래프트 브루드워의 대표적인 컴까기 유즈맵으로, 저글링만으로 수많은 적군을 상대해야 하는 극한의 난이도를 자랑하는 맵이다. 기존 OMFG 시리즈의 후속작으로, 원작보다 더 균형 잡힌 난이도로 재편성되어 보다 오랫동안 즐길 수 있도록 설계되었다고 전해진다. 맵은 넓은 필드에 사방에서 몰려드는 적군 부대들을 상대로 저글링을 끊임없이 생산하고 관리해야 하며, 자원 관리와 병력 운용에 대한 전략적 선택이 필수다. 초반부터 끊임없이 쏟아지는 저글링 웨이브를 버텨내고, 중후반에는 대규모 전투를 조율해야 하는 등 플레이어의 집중력과 판단력이 요구되는 구조로 구성되어 있다. 특히, 적의 공격 패턴과 타이밍을 예측하는 능력이 victoria를 결정짓는 핵심 요소로 보인다. 이 맵은 초보자가 접근하기에는 너무 어려운 난이도를 지닌 만큼, 브루드워의 기본 메커니즘과 맵리딩 능력을 충분히 숙지한 플레이어에게 추천된다. 또한, 맵의 균형이 잘 잡혔다는 평가를 받기 때문에 경쟁적인 플레이를 즐기는 유저들에게도 인기가 있다. 다만, 게임의 특성상 끊임없는 반복 플레이를 요구하기 때문에 피로도가 높은 편이며, 이를 해결하기 위한 적절한 휴식과 전략적 휴식도 중요하다. 한 마디로, OMFG 더 저글링스 2 페어 2.0은 스타크래프트의 핵심인 메카닉과 전략을 극한으로 시험하는 유즈맵으로, 진정한 브루드워 마스터를 꿈꾸는 유저들에게 도전 과제를 제공한다. OMFG THE ZERGLINGS 2 FAIR 2.0 is a legendary UMS map in StarCraft: Brood War, where players must survive endless waves of enemy units using only Zerglings. This sequel refines its predecessor's design to offer a more balanced and engaging challenge, making it a long-lasting favorite among competitive players. The map features wide-open terrain where enemy forces relentlessly push from all directions, forcing players to manage resources efficiently and deploy Zerglings strategically. Early gameplay revolves around surviving constant Zergling waves, while later stages require coordinating large-scale battles against increasingly tough enemies. Success hinges on the player's ability to predict enemy attack patterns and adapt their tactics. Due to its high difficulty, this map is best suited for experienced players familiar with Brood War's mechanics and map reading. While the balanced design appeals to competitive gamers, the repetitive nature can be taxing, so proper pacing and strategic breaks are essential. In summary, OMFG THE ZERGLINGS 2 FAIR 2.0 pushes players to their limits with StarCraft's core mechanics, offering a true test of skill for those aiming to master Brood War.
불가능한 시나리오 아쉬 월드 (Impossible Scenarios Ash World)
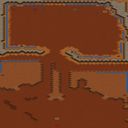
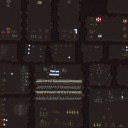
스타크래프트 브루드워의 유즈맵으로, Impossible Scenarios Ash World는 플레이어를 다양한 시나리오와 상황에 빠뜨려 플레이어의 전략과 반응력을 테스트하는 게임입니다. 맵의 세계관은 아쉬 월드(Ash World)로, 플레이어는 다양한 상황을 만나며 게임을 진행합니다. 맵의 난이도는 높은 편이며, 플레이어의 전략과 반응력에 따라 게임이 진행됩니다. 맵의 장르는 컴퓨터 상대 유즈맵으로, 플레이어는 컴퓨터와의 전투를 통해 게임을 승리해야 합니다. 맵의 플레이 인원은 6명으로, 팀 수는 없습니다. 예상 플레이 시간은 없으며, 난이도도 없습니다. 버전은 v1.0이며, 태그도 없습니다. 맵 해시는 eb54f15bd13cf71c이며, 맵 크기는 4096 x 4096입니다. 전체 해상도는 4096 x 4096이며, 타일 단위는 128 x 128입니다. 타일셋은 정글이며, 인코딩은 cp949입니다. 같은 그룹/다른 버전 후보는 없습니다. Impossible Scenarios Ash World is a user-made map for Starcraft: Brood War. It is a game that tests players' strategies and reaction times by putting them in various scenarios and situations. The map's world is Ash World, and players must navigate through different situations to win the game. The map's difficulty is high, and players' strategies and reaction times will determine the outcome of the game. The map's genre is Computer-against-player (UMS), and players must fight against the computer to win the game. The map's player count is 6, and the team count is 0. The expected play time is unknown, and the difficulty level is also unknown. The version is v1.0, and the tags are empty. The map's hash is eb54f15bd13cf71c, and the map size is 4096 x 4096. The total resolution is 4096 x 4096, and the tile unit is 128 x 128. The tile set is Jungle, and the encoding is cp949. There are no candidates for the same group/different version.
7 vs 1 인세인 컴 (7 vs 1 insane comp)
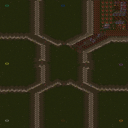
스타크래프트 브루드워의 디펜스 장르 유즈맵인 〈7 vs 1 insane comp〉는 7명의 플레이어가 한 팀으로 뭉쳐 단일 컴퓨터를 상대로 방어전을 펼치는 구조로, 난이도와 밸런스가 극한으로 조정된 플레이 경험을 제공한다. 맵은 사막 타일셋으로 구성되어 있으며, 중앙에 위치한 플레이어 기지 주변으로 다수의 적 기지가 배치되어 있다. 적군은 멀티컴퓨터 시스템으로 구동되어 플레이어의 공격 패턴에 따라 가변적으로 대응하며, 특정 지역 공격과 멀티 지역 확장을 통해 지속적인 압박을 가한다. 내부 맵 설명에서 언급된 100% 한글화 수정과 2003년 3월 28일 버전 정보는 구형 유즈맵의 특성을 엿보이게 하지만, 맵 자체는 현대에도 충분히 재밌는 플레이가 가능하다. 플레이어는 제한된 리소스와 자원 관리 속에서 방어선을 구축해야 하며, 적군의 다중 공격 루트를 예측하고 방어시설을 효율적으로 배치하는 전략이 요구된다. 맵의 핵심은 '필요 없는 모든 것을 제거'라는 컨셉에 맞게 불필요한 요소 없이 공격과 방어가 순수하게 맞물려 돌아가도록 설계되어 있다. 7 대 1이라는 비대칭적인 구도에서 오는 긴장감과, 적군이 끊임없이 전진하는 멀티컴퓨터의 공격 패턴은 초보자는 물론이고 숙련자들도 긴장감을 놓칠 수 없게 만든다. 특히 적군의 공격 루트가 랜덤하게 변동되는 듯한 움직임은 플레이어의 대처 능력을 끊임없이 시험한다. 이 맵은 디펜스 장르의 기본 틀을 유지하면서도, 극한의 난이도와 단순하면서도 깊은 전략적 요소를 결합해 유즈맵의 진수를 보여준다. 방어에 특화된 플레이어는 물론, 공격적인 플레이 스타일을 선호하는 유저들도 한 번쯤 도전해볼 만한 가치가 있는 작품이다. 다만, 맵의 난이도가 높아 초보자에게는 다소 버겁게 느껴질 수 있으며, 적군의 공격 패턴을 숙지하기까지 시간이 필요하다는 점을 감안해야 한다. 플레이 전에는 맵의 구조와 적군의 공격 루트를 미리 파악해 두는 것이 좋다. The Brood War Defense genre custom map *7 vs 1 Insane Comp* in StarCraft: Brood War pits seven players against a single AI opponent in a cooperative defense, offering an extreme challenge with meticulously balanced difficulty. The map features a desert tileset, with multiple enemy bases surrounding the players' central starting position. The enemy is controlled by a multi-computer system that dynamically adapts to the players' strategies, applying constant pressure through targeted attacks and aggressive multi-expansion. While the map’s internal description mentions a 100% Korean localization patch and a version from March 28, 2003—hinting at its vintage roots—it remains a thoroughly engaging experience even by modern standards. Players must construct defenses under tight resource constraints, predicting enemy attack routes and strategically placing defensive structures. The map’s core design strips away unnecessary elements, focusing purely on the interplay between offense and defense. The asymmetrical 7v1 setup creates intense pressure, while the AI’s relentless, forward-moving attack patterns keep both beginners and veterans on edge. The enemy’s seemingly randomized attack routes continuously test the players’ adaptability. This map exemplifies the essence of custom Defense maps by blending extreme difficulty with streamlined yet deep strategic gameplay. It’s a worthwhile challenge not only for defensive specialists but also for players who prefer aggressive playstyles. However, its high difficulty may overwhelm newcomers, and mastering the AI’s attack patterns requires time. Before jumping in, it’s best to study the map layout and familiarize yourself with the enemy’s attack routes.
아트릭스 디펜스 (Atrix Defense)
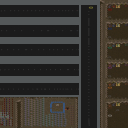
스타크래프트 브루드워의 유즈맵 '아트릭스 디펜스(Atrix Defense)'는 디펜스 장르의 대표적인 맵으로, 플레이어들이 끊임없이 몰려오는 적을 방어하면서 스테이지를 통과하는 구조를 갖추고 있다. 21개의 레벨을 보유하고 있으며, 각 레벨마다 보스가 등장해 플레이어의 능력을 시험한다. 맵은 총 6명의 플레이어가 참여할 수 있도록 설계되어 있으며, 한 전투에서 최대 20번의 목숨(life)을 사용할 수 있다. 내부 맵 설명에 따르면 '심지어 모디파이드 버전보다 어렵다'고 언급될 만큼 난이도가 높은 편으로, 초보자는 물론 숙련자도 신중히 접근해야 하는 도전적인 콘텐츠다. 맵의 타일셋은 황무지로 구성되어 있으며, 4096x4096의 넓은 공간에서 펼쳐지는 전투는 시각적으로도 웅장함을 자아낸다. 주요 특징으로는 레벨별 보스 전투와 제한된 생명 수를 꼽을 수 있는데, 이는 플레이어의 전략적 사고와 자원 관리를 요구한다. 또한, 맵의 난이도 상승 패턴이 명확히 드러나 있어, 단계적인 적응이 필요하다. 추천 대상은 디펜스 장르를 선호하는 플레이어이며, 특히 난이도를 즐기는 유저들에게 적합하다. 플레이 전에는 레벨별 보스 패턴과 맵의 주요 경로, 리스폰 위치 등을 숙지하는 것이 중요하다. 무엇보다도, 생명 수 관리가 핵심이며, 무리한 공격을 자제하고 방어 타워를 효율적으로 배치하는 전략이 필수적이다. 이 맵은 디펜스 장르의 깊이를 느낄 수 있는 작품으로, 반복 플레이를 통해 점차 숙련도를 높일 수 있는 장점이 있다. Atrix Defense is a popular StarCraft: Brood War custom map in the defense genre, where players must withstand waves of enemies to progress through 21 challenging levels. Each level culminates in a boss battle, adding an extra layer of difficulty. Designed for up to six players, the map allows for 20 lives per run, with the internal description emphasizing its difficulty as even harder than modified versions. The 4096x4096 terrain, set in a barren wasteland, provides ample space for strategic planning and tower placement. The core mechanics revolve around life management, boss encounters, and resource allocation, making it a test of both skill and adaptability. This map is best suited for players who enjoy high-stakes defense scenarios and are prepared for a steep learning curve. Prior to playing, familiarizing yourself with each level's boss patterns and map layout is crucial, as efficient tower placement and disciplined attacks are key to survival. Atrix Defense stands out for its depth and replayability, offering a rewarding experience for those willing to master its challenges.
최근 등록된 맵
새로 추가된 파일과 버전을 확인하세요.
OMFG 더 저글링스 2 페어 2.0 (OMFG THE ZERGLINGS 2 FAIR 2.0)
OMFG 더 저글링스 2 페어 2.0(OMFG THE ZERGLINGS 2 FAIR 2.0)은 스타크래프트 브루드워의 대표적인 컴까기 유즈맵으로, 저글링만으로 수많은 적군을 상대해야 하는 극한의 난이도를 자랑하는 맵이다. 기존 OMFG 시리즈의 후속작으로, 원작보다 더 균형 잡힌 난이도로 재편성되어 보다 오랫동안 즐길 수 있도록 설계되었다고 전해진다. 맵은 넓은 필드에 사방에서 몰려드는 적군 부대들을 상대로 저글링을 끊임없이 생산하고 관리해야 하며, 자원 관리와 병력 운용에 대한 전략적 선택이 필수다. 초반부터 끊임없이 쏟아지는 저글링 웨이브를 버텨내고, 중후반에는 대규모 전투를 조율해야 하는 등 플레이어의 집중력과 판단력이 요구되는 구조로 구성되어 있다. 특히, 적의 공격 패턴과 타이밍을 예측하는 능력이 victoria를 결정짓는 핵심 요소로 보인다. 이 맵은 초보자가 접근하기에는 너무 어려운 난이도를 지닌 만큼, 브루드워의 기본 메커니즘과 맵리딩 능력을 충분히 숙지한 플레이어에게 추천된다. 또한, 맵의 균형이 잘 잡혔다는 평가를 받기 때문에 경쟁적인 플레이를 즐기는 유저들에게도 인기가 있다. 다만, 게임의 특성상 끊임없는 반복 플레이를 요구하기 때문에 피로도가 높은 편이며, 이를 해결하기 위한 적절한 휴식과 전략적 휴식도 중요하다. 한 마디로, OMFG 더 저글링스 2 페어 2.0은 스타크래프트의 핵심인 메카닉과 전략을 극한으로 시험하는 유즈맵으로, 진정한 브루드워 마스터를 꿈꾸는 유저들에게 도전 과제를 제공한다. OMFG THE ZERGLINGS 2 FAIR 2.0 is a legendary UMS map in StarCraft: Brood War, where players must survive endless waves of enemy units using only Zerglings. This sequel refines its predecessor's design to offer a more balanced and engaging challenge, making it a long-lasting favorite among competitive players. The map features wide-open terrain where enemy forces relentlessly push from all directions, forcing players to manage resources efficiently and deploy Zerglings strategically. Early gameplay revolves around surviving constant Zergling waves, while later stages require coordinating large-scale battles against increasingly tough enemies. Success hinges on the player's ability to predict enemy attack patterns and adapt their tactics. Due to its high difficulty, this map is best suited for experienced players familiar with Brood War's mechanics and map reading. While the balanced design appeals to competitive gamers, the repetitive nature can be taxing, so proper pacing and strategic breaks are essential. In summary, OMFG THE ZERGLINGS 2 FAIR 2.0 pushes players to their limits with StarCraft's core mechanics, offering a true test of skill for those aiming to master Brood War.
불가능한 시나리오 아쉬 월드 (Impossible Scenarios Ash World)
스타크래프트 브루드워의 유즈맵으로, Impossible Scenarios Ash World는 플레이어를 다양한 시나리오와 상황에 빠뜨려 플레이어의 전략과 반응력을 테스트하는 게임입니다. 맵의 세계관은 아쉬 월드(Ash World)로, 플레이어는 다양한 상황을 만나며 게임을 진행합니다. 맵의 난이도는 높은 편이며, 플레이어의 전략과 반응력에 따라 게임이 진행됩니다. 맵의 장르는 컴퓨터 상대 유즈맵으로, 플레이어는 컴퓨터와의 전투를 통해 게임을 승리해야 합니다. 맵의 플레이 인원은 6명으로, 팀 수는 없습니다. 예상 플레이 시간은 없으며, 난이도도 없습니다. 버전은 v1.0이며, 태그도 없습니다. 맵 해시는 eb54f15bd13cf71c이며, 맵 크기는 4096 x 4096입니다. 전체 해상도는 4096 x 4096이며, 타일 단위는 128 x 128입니다. 타일셋은 정글이며, 인코딩은 cp949입니다. 같은 그룹/다른 버전 후보는 없습니다. Impossible Scenarios Ash World is a user-made map for Starcraft: Brood War. It is a game that tests players' strategies and reaction times by putting them in various scenarios and situations. The map's world is Ash World, and players must navigate through different situations to win the game. The map's difficulty is high, and players' strategies and reaction times will determine the outcome of the game. The map's genre is Computer-against-player (UMS), and players must fight against the computer to win the game. The map's player count is 6, and the team count is 0. The expected play time is unknown, and the difficulty level is also unknown. The version is v1.0, and the tags are empty. The map's hash is eb54f15bd13cf71c, and the map size is 4096 x 4096. The total resolution is 4096 x 4096, and the tile unit is 128 x 128. The tile set is Jungle, and the encoding is cp949. There are no candidates for the same group/different version.
임파서블 시나리오: 섀도우 (Impossible Scenarios Shadow)
스타크래프트: 브루드워의 유즈맵 ‘임파서블 시나리오: 섀도우(Impossible Scenarios Shadow)’는 기존에 익숙한 미션이나 디펜스를 넘어서는 극한의 난이도와 전략적 깊이를 자랑하는 컴까기(컴퓨터 상대 유즈맵) 장르의 걸작으로 평가된다. 맵의 구조는 크게 세 구역으로 나뉘어지는데, 중앙의 좁은 다리 형태의 통로와 양측의 넓은 개활지, 그리고 각 구역의 구석진 곳에 배치된 방어 타워 및 자원 지점으로 구성되어 있다. 이미지에서 확인되는 바와 같이, 좁은 통로는 적의 물량을 효과적으로 분산시킬 수 있는 구조로 설계되어 있으며, 개활지는 광역 스킬이나 다수의 유닛을 동원할 수 있는 공간을 제공한다. 플레이어는 시작 시점에서부터 끊임없이 밀어붙이는 적의 공격을 방어해야 하며, 맵 곳곳에 흩어져 있는 미네랄과 가스를 확보해 유닛을 지속적으로 생산하고 업그레이드해야 한다. 방어선의 중요성은 시각적으로도 두드러지는데, 통로 양쪽에 배치된 방어 타워와 시즈 탱크, 골리앗 등이 적의 공격을 차단하는 핵심 역할을 맡고 있다. 특히, 통로의 중앙에는 강력한 방어 시설이 집중되어 있어, 플레이어는 이 부분을 최대한 활용해 적의 공격을 지연시키며 자원을 확보하는 전략을 세워야 한다. 맵의 난이도는 이미 제목에서부터 드러나듯이 ‘임파서블’이지만, 초보 플레이어라도 방어 라인을 체계적으로 구축하고 자원 관리에 주의를 기울이면 안정적으로 진행할 수 있다. 반면, 경험이 많은 플레이어라면 더욱 공격적인 전략을 구사해 적의 기지를 빠르게 파괴하는 ‘올인’ 전략을 시도해 볼 수도 있다. 추천하는 플레이 방식은 방어 라인을 sturdy(튼튼하게) 구축한 후, 서서히 확장해 나가는 ‘안정형’ 플레이로, 특히 초반 자원 확보와 유닛 업그레이드에 중점을 두는 것이 중요하다. 이 맵은 혼자서 컴퓨터 상대를 상대해야 하는 싱글 플레이에 최적화되어 있으며, 멀티 플레이어 모드에서도 팀 플레이를 요구하는 경우가 많으므로, 혼자서 도전하는 경우 난이도 조절을 위해 ‘쉬움’ 또는 ‘보통’ 난이도로 설정하고 시작하는 것이 좋다. 맵의 볼륨이 크고 복잡한 만큼, 첫 플레이 시에는 맵 구조를 충분히 숙지한 후 임하는 것이 바람직하다. 또한, 맵 곳곳에 숨겨진 보너스 자원이나 특수 아이템이 있을 가능성이 있으니, 탐색을 게을리하지 말고 적극적으로 활용하도록 하자. 이 맵의 가장 큰 매력은 ‘도전 정신’을 자극한다는 점으로, 아무리 어려운 상황에서도 포기하지 않고 공략법을 찾는 재미가 쏠쏠하다. 특히, 적의 공격을 버티면서도 반격의 기회를 엿보는 플레이의 묘미를 즐길 수 있는 맵이다. StarCraft: Brood War's custom map "Impossible Scenarios: Shadow" stands out as a masterpiece in the computer-vs-player genre, offering extreme difficulty and deep strategic gameplay that goes far beyond familiar missions or defenses. The map is divided into three main areas: a narrow bridge-like central passage, wide open spaces on both sides, and defensive towers along with resource points tucked into the corners of each section. As seen in the image, the narrow passage is designed to effectively disperse enemy forces, while the open areas provide space for deploying area-of-effect skills or large groups of units. From the very start, players must defend against relentless enemy attacks while securing scattered mineral and gas deposits to continuously produce and upgrade units. The importance of the defense line is visually striking, with defensive towers, siege tanks, and goliaths positioned on both sides of the passage playing a crucial role in blocking enemy advances. The central area of the passage features particularly strong defensive structures, allowing players to delay enemy attacks and secure resources by leveraging this section strategically. Though the map's difficulty is evident even in its title—"Impossible"—even beginner players can progress steadily by systematically building defenses and carefully managing resources. More experienced players, on the other hand, can attempt an aggressive "all-in" strategy, aiming to destroy the enemy base quickly. The recommended playstyle is a "stable" approach, where players first establish a sturdy defense line and then gradually expand, with a strong emphasis on early resource gathering and unit upgrades. Since this map is optimized for single-player against the computer, those attempting it in multiplayer mode—where team play is often required—should start on "Easy" or "Normal" difficulty to adjust the challenge. Given the map's size and complexity, it's wise to fully familiarize yourself with its layout before diving in. Be sure to explore thoroughly, as hidden bonus resources or special items may be scattered throughout. The map's greatest appeal lies in its ability to inspire a sense of challenge, rewarding players who persist in finding solutions even in the toughest situations. It offers a thrilling experience where you can relish the subtleties of enduring enemy assaults while searching for the perfect moment to strike back.
아트릭스 디펜스 (Atrix Defense)
스타크래프트 브루드워의 유즈맵 '아트릭스 디펜스(Atrix Defense)'는 디펜스 장르의 대표적인 맵으로, 플레이어들이 끊임없이 몰려오는 적을 방어하면서 스테이지를 통과하는 구조를 갖추고 있다. 21개의 레벨을 보유하고 있으며, 각 레벨마다 보스가 등장해 플레이어의 능력을 시험한다. 맵은 총 6명의 플레이어가 참여할 수 있도록 설계되어 있으며, 한 전투에서 최대 20번의 목숨(life)을 사용할 수 있다. 내부 맵 설명에 따르면 '심지어 모디파이드 버전보다 어렵다'고 언급될 만큼 난이도가 높은 편으로, 초보자는 물론 숙련자도 신중히 접근해야 하는 도전적인 콘텐츠다. 맵의 타일셋은 황무지로 구성되어 있으며, 4096x4096의 넓은 공간에서 펼쳐지는 전투는 시각적으로도 웅장함을 자아낸다. 주요 특징으로는 레벨별 보스 전투와 제한된 생명 수를 꼽을 수 있는데, 이는 플레이어의 전략적 사고와 자원 관리를 요구한다. 또한, 맵의 난이도 상승 패턴이 명확히 드러나 있어, 단계적인 적응이 필요하다. 추천 대상은 디펜스 장르를 선호하는 플레이어이며, 특히 난이도를 즐기는 유저들에게 적합하다. 플레이 전에는 레벨별 보스 패턴과 맵의 주요 경로, 리스폰 위치 등을 숙지하는 것이 중요하다. 무엇보다도, 생명 수 관리가 핵심이며, 무리한 공격을 자제하고 방어 타워를 효율적으로 배치하는 전략이 필수적이다. 이 맵은 디펜스 장르의 깊이를 느낄 수 있는 작품으로, 반복 플레이를 통해 점차 숙련도를 높일 수 있는 장점이 있다. Atrix Defense is a popular StarCraft: Brood War custom map in the defense genre, where players must withstand waves of enemies to progress through 21 challenging levels. Each level culminates in a boss battle, adding an extra layer of difficulty. Designed for up to six players, the map allows for 20 lives per run, with the internal description emphasizing its difficulty as even harder than modified versions. The 4096x4096 terrain, set in a barren wasteland, provides ample space for strategic planning and tower placement. The core mechanics revolve around life management, boss encounters, and resource allocation, making it a test of both skill and adaptability. This map is best suited for players who enjoy high-stakes defense scenarios and are prepared for a steep learning curve. Prior to playing, familiarizing yourself with each level's boss patterns and map layout is crucial, as efficient tower placement and disciplined attacks are key to survival. Atrix Defense stands out for its depth and replayability, offering a rewarding experience for those willing to master its challenges.
7 vs 1 인세인 컴 (7 vs 1 insane comp)
스타크래프트 브루드워의 디펜스 장르 유즈맵인 〈7 vs 1 insane comp〉는 7명의 플레이어가 한 팀으로 뭉쳐 단일 컴퓨터를 상대로 방어전을 펼치는 구조로, 난이도와 밸런스가 극한으로 조정된 플레이 경험을 제공한다. 맵은 사막 타일셋으로 구성되어 있으며, 중앙에 위치한 플레이어 기지 주변으로 다수의 적 기지가 배치되어 있다. 적군은 멀티컴퓨터 시스템으로 구동되어 플레이어의 공격 패턴에 따라 가변적으로 대응하며, 특정 지역 공격과 멀티 지역 확장을 통해 지속적인 압박을 가한다. 내부 맵 설명에서 언급된 100% 한글화 수정과 2003년 3월 28일 버전 정보는 구형 유즈맵의 특성을 엿보이게 하지만, 맵 자체는 현대에도 충분히 재밌는 플레이가 가능하다. 플레이어는 제한된 리소스와 자원 관리 속에서 방어선을 구축해야 하며, 적군의 다중 공격 루트를 예측하고 방어시설을 효율적으로 배치하는 전략이 요구된다. 맵의 핵심은 '필요 없는 모든 것을 제거'라는 컨셉에 맞게 불필요한 요소 없이 공격과 방어가 순수하게 맞물려 돌아가도록 설계되어 있다. 7 대 1이라는 비대칭적인 구도에서 오는 긴장감과, 적군이 끊임없이 전진하는 멀티컴퓨터의 공격 패턴은 초보자는 물론이고 숙련자들도 긴장감을 놓칠 수 없게 만든다. 특히 적군의 공격 루트가 랜덤하게 변동되는 듯한 움직임은 플레이어의 대처 능력을 끊임없이 시험한다. 이 맵은 디펜스 장르의 기본 틀을 유지하면서도, 극한의 난이도와 단순하면서도 깊은 전략적 요소를 결합해 유즈맵의 진수를 보여준다. 방어에 특화된 플레이어는 물론, 공격적인 플레이 스타일을 선호하는 유저들도 한 번쯤 도전해볼 만한 가치가 있는 작품이다. 다만, 맵의 난이도가 높아 초보자에게는 다소 버겁게 느껴질 수 있으며, 적군의 공격 패턴을 숙지하기까지 시간이 필요하다는 점을 감안해야 한다. 플레이 전에는 맵의 구조와 적군의 공격 루트를 미리 파악해 두는 것이 좋다. The Brood War Defense genre custom map *7 vs 1 Insane Comp* in StarCraft: Brood War pits seven players against a single AI opponent in a cooperative defense, offering an extreme challenge with meticulously balanced difficulty. The map features a desert tileset, with multiple enemy bases surrounding the players' central starting position. The enemy is controlled by a multi-computer system that dynamically adapts to the players' strategies, applying constant pressure through targeted attacks and aggressive multi-expansion. While the map’s internal description mentions a 100% Korean localization patch and a version from March 28, 2003—hinting at its vintage roots—it remains a thoroughly engaging experience even by modern standards. Players must construct defenses under tight resource constraints, predicting enemy attack routes and strategically placing defensive structures. The map’s core design strips away unnecessary elements, focusing purely on the interplay between offense and defense. The asymmetrical 7v1 setup creates intense pressure, while the AI’s relentless, forward-moving attack patterns keep both beginners and veterans on edge. The enemy’s seemingly randomized attack routes continuously test the players’ adaptability. This map exemplifies the essence of custom Defense maps by blending extreme difficulty with streamlined yet deep strategic gameplay. It’s a worthwhile challenge not only for defensive specialists but also for players who prefer aggressive playstyles. However, its high difficulty may overwhelm newcomers, and mastering the AI’s attack patterns requires time. Before jumping in, it’s best to study the map layout and familiarize yourself with the enemy’s attack routes.
젠전 매트릭스 (The Experts Matrix)
스타크래프트 브루드워의 〈젠전 매트릭스〉는 40단계에 달하는 난이도 높은 방어형 RPG 유즈맵으로, 플레이어가 외계인과 같은 적을 상대로 자신의 방어선을 구축하고 유지해야 한다. 맵 중앙에 위치한 본진과 주위에 배치된 방어 시설은 철저히 설계되어 있으며, 각 단계는 점점 복잡해지는 적의 공격 패턴과 지형을 극복해야만 클리어할 수 있다. 특히 맵의_NAME_ 부분에서 확인되는 ‘Let no one pass your defences. This game is harder than most, only expert players will be able to pass all 40 levels’라는 설명은 제작자의 의도를 명확히 드러내며, 초보자는 물론 숙련자도 쉽지 않은 도전 과제를 제공한다는 점에서 주목할 만하다. 방어선 구축에서부터 시작해 적의 끊임없는 공세를 막아내는 전략적 플레이가 핵심인데, 맵 곳곳에 흩어져 있는 자원과 아이템을 효율적으로 확보하며 방어 포인트를 강화하는 것이 관건이다. 맵의 타일셋과 디자인은 플랫폼 기반으로 깔끔하게 정리되어 있어 시야를 가리는 요소 없이 전략적 판단에 집중할 수 있도록 배려되어 있다. 또한, 8192×4096이라는 넓은 해상도는 넓은 시야에서 전황을 파악하고 방어선을 관리할 수 있게 해준다. 이 맵은 단순히 방어만 하는 것이 아니라, 각 단계의 목표를 달성하기 위한 조건과 비밀 통로, 또는 숨겨진 자원 지대 등이 존재할 가능성이 높아 반복 플레이를 유도한다. 특히 40단계에 걸친 긴 여정은 플레이어의 끈기와 전략적 사고력을 시험하며, 한 번 클리어한 후에도 더 빠른Clear, 효율적인 자원 활용, 또는 새로운 전략의 개발을 모색하게 만든다. 초보자보다는 전략적 사고와 손빠르기가 요구되는 이 맵은, 스타크래프트의 기본을 익힌 후 도전하고 싶은 유저들에게 훌륭한 연습 기회가 될 것이다. 또한 방어형 맵의 매력을 즐기는 플레이어들에게는 새로운 재미를 제공할 것으로 보인다. 맵을 시작하기 전 방어 시설의 배치와 적의 공격 패턴을 숙지하는 것이 클리어의 첫걸음임을 기억하자. StarCraft: Brood War’s *Zen Matrix* is a high-difficulty defensive RPG custom map consisting of 40 stages, where players must build and maintain their defenses against alien-like enemies. The main base at the center of the map and the surrounding defensive structures are meticulously designed, with each stage requiring players to overcome increasingly complex enemy attack patterns and terrain to progress. The map’s tagline—*“Let no one pass your defenses. This game is harder than most; only expert players will be able to pass all 40 levels”*—clearly conveys the creator’s intent, presenting a formidable challenge that pushes even seasoned players to their limits. The core of the experience lies in strategically constructing defenses and repelling relentless enemy assaults, with success hinging on efficiently securing scattered resources and items while reinforcing key defensive points. The map’s clean, platform-based tile set and design eliminate visual obstructions, allowing players to focus solely on strategic decision-making. Additionally, its massive 8192×4096 resolution ensures a wide field of view, making it easier to monitor the battlefield and manage defensive lines. Beyond mere defense, *Zen Matrix* incorporates hidden objectives, secret passages, and potential resource-rich areas within each stage, encouraging repeated playthroughs. The grueling 40-stage journey tests a player’s endurance and tactical thinking, and even after clearing the map, it motivates further attempts—whether for faster clears, optimized resource use, or the development of new strategies. While this map demands strong strategic thinking and quick reflexes—making it unsuitable for beginners—it serves as an excellent training ground for users looking to refine their StarCraft fundamentals. For players who enjoy defensive maps, it also promises fresh excitement. Before starting, it’s crucial to familiarize yourself with the defensive layouts and enemy attack patterns to take the first step toward victory.
2021신고추컴까기2.5
2021신고추컴까기2.5는 스타크래프트 브루드워 유즈맵의 대표적인 컴까기 장르 맵으로, 이름에서부터 느껴지듯 ‘신고추’와 ‘컴까기’가 조합된 난이도 높은 디펜스 게임이다. 맵은 4096x4096의 넓은 크기를 자랑하며, 플랫폼 타일셋을 기반으로 깔끔한 시야를 제공한다. 플레이어는 미네랄만 확보한 채 끊임없이 몰려오는 적을 상대로 방어선을 구축해야 하며, particularly 2021년 4월 14일에 제작된 버전은 ‘빡세고 힘들고 상당히 더 어려워졌다’는 제작자의 코멘트가 압권이다. 맵 구조는 중앙에서 뻗어나가는 다수의 경로와 좁은 통로를 활용한 전략적 방어가 요구되며, 초반에 자원 확보가 늦어지면 순식간에 밀릴 수 있어 자원 관리와 유닛 배치 타이밍이 매우 중요하다. 특히 적의 공격 루트가 다변화되어 있어 한 곳에만 집중하면 쉽게 무너질 수 있으므로, 맵의 다양한 입구와 통로를 미리 파악하고 유연한 대처가 필수적이다. 또한, 적 유닛의 조합이 시시각각 변하는 만큼, 초반에는 기본 유닛으로 버티며 중반부터는 조합을 맞춰 대응해야 한다. 맵을 처음 플레이하는 유저라면 난이도에 당황할 수 있지만, 익숙해지면 전략적 깊이가 impressive한 편이다. 특히 컴퓨터 상대로 플레이하는 경우, 제작자의 ‘더 어려워졌다’는 말이 결코 빈말이 아님을 느낄 수 있을 것이다. 추천 대상은 스타크래프트 유즈맵을 즐기며 도전 정신을 가지고 있는 플레이어들로, 난이도를 즐기는 유저들에게는 그만큼의 성취감을 선사할 것이다. 플레이 전에는 맵의 입구와 주요 통로를 미리 살펴보며, 초반 자원 확보와 유닛 조합을 어떻게 할지 전략을 세우는 것이 중요하다. 또한, 맵의 난이도가 예상보다 높을 수 있으므로 여유를 가지고 도전하는 것이 좋다. 제작자의 노력이 느껴지는 만큼, 한 번 성공하면 뿌듯한 보람을 느낄 수 있는 맵이다. 추가로, 맵의 어려운 난이도를 극복하기 위해 커뮤니티 팁이나 공략을 참고하는 것도 좋은 방법이다. 다만, 너무 공략에 의존하지 않고 직접 경험을 쌓는 것이 더 큰 재미를 느낄 수 있는 방법일 것이다. 2021신고추컴까기2.5는 단순한 디펜스가 아닌, 전략과 인내심이 요구되는 진정한 ‘컴까기’의 진수를 느낄 수 있는 맵으로, 스타크래프트 유즈맵 팬이라면 반드시 도전해볼 가치가 있다. *2021신고추컴까기2.5* is a standout defense-focused custom map in *StarCraft: Brood War*, blending the punishing mechanics of *"compkkaegi"* (AI defense) with the relentless challenge of *"singochu"* waves. The map sprawls across a massive 4096x4096 grid, using a clean, platform-based tileset that ensures clear visibility. Players start with only mineral resources and must construct a defense line against endless enemy waves—so much so that the April 14, 2021 version’s creator bluntly described it as *"brutal, exhausting, and significantly harder."* The layout demands strategic foresight, featuring multiple branching paths and narrow chokepoints that force players to adapt their defenses. A slow start in resource gathering can spell instant defeat, making resource management and precise unit deployment critical. The enemy’s attacks are unpredictable, shifting across various entry points; overcommitting to one area will quickly lead to collapse. Players must scout the map’s diverse entrances and remain flexible, adjusting their strategies on the fly. Enemy unit compositions evolve dynamically, so early survival relies on basic defenses, while mid-game success hinges on adapting to their changing threats. Newcomers may find the difficulty overwhelming at first, but once mastered, the map reveals impressive depth. Playing against the AI, in particular, underscores the creator’s claim that this version is no joke—it’s genuinely punishing. This map is ideal for *StarCraft* custom map enthusiasts seeking a real challenge, offering a rewarding sense of accomplishment upon victory. Before diving in, study the entry points and key pathways, plan your early resource collection, and decide on your unit compositions. Given its steep difficulty, approach it with patience—rushing in will likely backfire. The creator’s effort shines through, and clearing it provides a deeply satisfying payoff. For those struggling, community tips and guides can help, but relying too heavily on them may dull the experience. The true joy lies in learning through trial and error. *2021신고추컴까기2.5* isn’t just another defense map—it’s a test of strategy, patience, and resilience, making it a must-try for any *StarCraft* custom map fan.
맵 선택 가이드
태그는 맵의 핵심 특징을 빠르게 설명하지만 제작 버전마다 규칙이 다를 수 있습니다. 상세 설명에서 권장 인원, 난이도, 플레이 시간과 버전을 함께 확인한 뒤 다운로드하세요.