
극한 난이도 스타크래프트 맵 모음
'극한 난이도' 태그가 등록된 맵을 모았습니다. 장르 하나로 찾기 어려운 플레이 방식, 난이도와 특징을 중심으로 인기 맵과 최신 맵을 비교해 보세요.
- 등록 맵
- 13개
- 누적 다운로드
- 0
- 누적 조회
- 336
인기 맵
다운로드와 조회 반응이 높은 맵입니다.
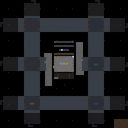
썬큰D 10웨이 임파서블 (SunkenD 10Way Impossible)
썬큰D 10웨이 임파서블(SunkenD 10Way Impossible)은 스타크래프트: 브루드워의 대표적인 컴까기 유즈맵으로, ‘썬커’(Sunken Colony)라는 방어 건물을 중심으로 한 디펜스 장르의 최고 난이도 버전이다. 맵 제목에 ‘10Way’가 포함된 것처럼 중앙에서 뻗어나오는 10개의 길로 저그와 프로토스, 테란의 혼합 병력이 끊임없이 몰려온다. 특히 ‘Impossible’이라는 이름이 무색하지 않게, 심지어 미드 난이도조차도 최상급의 전략과 컨트롤을 요구하는 극한의 디펜스 구도를 자랑한다. 내부 설명에 ‘25 levels’라고 명시된 것처럼 한 맵 안에서 25단계에 걸쳐 점점 강화되는 적군을 상대하며, ‘Brought to you by www.sc-maps.com’은 이 맵이 유명 맵 제작 커뮤니티에서 배포되었음을 시사한다. ‘Even MidImpossibleBackwash wont kill you’라는 문구는 이 맵이 얼마나 어려운지를 강조하는 동시에, 백워시(Bwash)나 미드(Mid) 정도의 난이도조차도 이 맵에서는 통하지 않는다는 메시지를 전달한다. 이 맵의 핵심은 방어 건물이자 ‘썬커’인 만큼, 어떻게 효율적으로 건물을 배치하고 자원을 관리하느냐가 승패를 가른다. 플레이어는 제한된 공간에서 가능한 한 많은 수의 썬커와 스포어 콜로니를 건설해야 하며, 각 길에서 쏟아지는 적군을 막기 위해 미네랄과 가스 관리에 주의를 기울여야 한다. 특히 10개의 길은 각각 다른 공격 패턴과 병력 구성을 가지고 있어, 각 단계마다 전략을 다르게 세워야 한다. 예를 들어 저글링이 우글거리는 초반에는 방어 건물의 수를 늘리고, 후반으로 갈수록 프로토스의 캐리어나 테란의 고스트와 같은 강력한 유닛을 상대해야 한다. 맵의 전체적인 분위기는 어둠과 공포를 연상시키는 어두운 색감과 붉은 빛의 공격 포인트가 인상적이며, 이러한 시각적 요소는 플레이어에게 긴장감을 더해준다. 이 맵은 컴까기 유즈맵의 정석을 보여주며, 특히 ‘10Way’라는 다중 길 디자인과 25단계에 걸친 점진적 난이도 상승은 플레이어의 집중력을 끊임없이 요구한다. 초보자의 경우 적군의 패턴을 익히고 방어 건물을 효율적으로 배치하는 데 시간이 걸릴 수 있지만, 숙련된 플레이어에게는 끊임없는 전략적 도전과 긴장감을 제공한다. 또한, 이 맵은 멀티플레이보다는 싱글플레이에 특화되어 있으며, 한 명의 플레이어가 모든 길을 관리해야 한다는 점에서 전략적 사고와 멀티태스킹 능력을 동시에 시험한다. 추천 대상은 디펜스 장르의 최고 난이도를 경험하고자 하는 스타크래프트 팬, 특히 컴까기 유즈맵에 익숙한 플레이어들이다. 이 맵을 플레이하기 전에는 썬커와 스포어 콜로니의 배치 방식, 각 적군의 특성과 약점, 그리고 자원 관리 전략을 충분히 숙지하는 것이 좋다. 또한, 맵의 어두운 분위기에 익숙해지기 위해 밝은 화면으로 플레이하는 것도 고려해볼 만하다. This StarCraft: Brood War custom map, SunkenD 10Way Impossible, stands out as one of the most challenging defense-oriented UMS (User-Made Scenario) maps, centered around the strategic use of Sunken Colonies. The title '10Way' hints at its core mechanic—10 distinct paths through which waves of mixed Zerg, Protoss, and Terran forces relentlessly assault the player’s base. The term 'Impossible' in the name is not an exaggeration; even the 'Mid' level poses extreme difficulty, demanding top-tier micromanagement and macro-strategies. The internal description notes '25 levels,' indicating a progressive difficulty curve where enemies grow stronger with each stage, while the credit to www.sc-maps.com situates it within a well-known custom map community. The phrase 'Even MidImpossibleBackwash wont kill you' underlines the map’s punishing nature, suggesting that standard mid-tier strategies like those used in maps like Backwash or Mid will fail here. The heart of the gameplay lies in the Sunken Colonies, which players must strategically place to fend off relentless attacks. Resource management is critical, as players must balance mineral and gas income to construct and upgrade defenses efficiently. Each of the 10 paths features unique attack patterns and unit compositions, forcing players to adapt their strategies dynamically. Early stages may focus on overwhelming low-tier units like Zerglings, but later stages introduce powerful enemies such as Protoss Carriers or Terran Ghosts, requiring precise unit control and defensive positioning. The map’s dark, foreboding color palette and glowing attack indicators enhance the tense atmosphere, keeping players on edge throughout. SunkenD 10Way Impossible exemplifies the pinnacle of defense UMS maps, with its multi-path design and 25-stage difficulty curve offering unparalleled strategic depth. While beginners may struggle with enemy patterns and optimal building placement, experienced players will find a thrilling challenge that tests both tactical foresight and multitasking skills. Designed primarily for single-player, the map demands full attention as players manage all paths simultaneously. It is best suited for StarCraft fans seeking the ultimate test in custom map defense scenarios, particularly those familiar with comp-stomping UMS maps. Before diving in, players should study the strengths and weaknesses of each enemy type, master Sunken Colony and Spore Colony placements, and refine their resource management strategies. Playing on a brighter screen setting can also help mitigate the map’s oppressive visual tone.
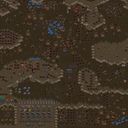
스페셜 포스 익스트림 (Special Force EXTRHARD)
스타크래프트 브루드워의 유즈맵 중에서도 손에 땀을 쥐게 만드는 난이도를 자랑하는 ‘$PECIALFORCE$EXTRHARD’는 이름 그대로 극한의 난이도를 구현한 컴까기 맵이다. 맵의 배경을 보면 사막 지형이 펼쳐져 있으며, 곳곳에 배치된 건물과 지형지물이 플레이어의 전략을 끊임없이 시험한다. 맵 제목에서부터 느껴지듯이 이 맵은 초보자에게는 결코 녹록치 않은 난이도를 자랑하는 만큼, ‘EXTRHARD’라는 수식어는 결코 허명이 아니다. 맵의 구조는 비교적 간소한 편이지만, 적절한 건물 배치와 방어선의 구축이 필수적이며, 시간이 지날수록 쏟아지는 적의 물량은 플레이어의 손길을 바쁘게 만든다. 특히 맵의 중앙에 위치한 요충지에서는 방어와 공격의 균형이 중요해지며, 한순간의 판단ミス가 게임의 승패를 가르는 분수령이 된다. 맵의 제한 시간은 따로 표시되지 않지만, 끊임없는 적의 공격으로 인해 플레이어는 항상 긴장감을 유지해야 한다. 이 맵은 주로 1인 플레이를 상정하고 제작되었지만, 팀 플레이로도 충분히 즐길 수 있는 구조를 갖추고 있어, 친구들과의 협동 플레이도 흥미진진하다. 초보자는 물론이고 숙련자조차도 매번 새로운 전략을 짜야 하는 이 맵은, 스타크래프트 유즈맵의 진수를 보여주는 작품으로 손꼽힌다. 플레이 전에는 반드시 적의 공격 패턴과 맵의 주요 방어 지점을 숙지하고, 건물을 효율적으로 배치하는 연습을 하는 것이 중요하다. 또한, Mineral과 Gas의 관리 역시 결코 소홀히 할 수 없으므로, 자원 관리의 중요성을 overlooked하지 않도록 주의해야 한다. StarCraft: Brood War's custom map '$PECIALFORCE$EXTRHARD' stands out even among the most challenging user-made maps with its extreme difficulty, perfectly matching its name as a hardcore defense map. The map's setting features a desert terrain, where scattered buildings and terrain obstacles continuously test the player's strategy. As the name suggests, this map is far from easy for beginners, making the 'EXTRHARD' label anything but an exaggeration. While the map's structure is relatively simple, proper building placement and defensive line construction are essential, and the relentless enemy waves keep players on their toes. The central strategic location demands a balance between defense and offense, where even a single misstep can decide the game's outcome. Although no time limit is displayed, the constant enemy assaults ensure players remain in a state of high tension throughout. Designed primarily for solo play, the map also offers a compelling structure for team play, making cooperative matches with friends just as engaging. Whether you're a beginner or a veteran, this map demands fresh strategies every time, showcasing the essence of StarCraft custom maps. Before playing, it's crucial to study enemy attack patterns and key defensive points, while practicing efficient building placement. Additionally, resource management—especially for Minerals and Vespene Gas—cannot be overlooked, so always pay close attention to resource efficiency.
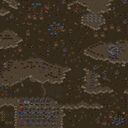
§pêciàl Forçês Extrëmé XXX
§pêciàl Forçês Extrëmé는 스타크래프트 브루드워의 유즈맵으로, 초월적인 난이도를 자랑하는 컴까기(컴퓨터 상대 유즈맵) 장르에 속한다. 맵 제목에서부터 느껴지듯 특수부대원들이 극한의 환경에서 살아남아야 하는 긴장감 넘치는 플레이가 특징이다. 맵 전체가 사막 지형으로 구성되어 있으며, 초반부터 강력한 컴퓨터 유닛들이 끊임없이 공격해오는 구조로 되어 있어 플레이어는 방어와 자원 관리, 그리고 전략적 선택을 동시에 고려해야 한다. 특히 맵 중앙에 위치한 주요 거점을 중심으로 한 방어선이 형성되어 있으며, 이곳을 지키느냐 무너뜨리느냐에 따라 게임의 향방이 크게 갈린다. 맵의 디자인과 배치된 유닛들은 모두 극한의 전투를 연상시키도록 구성되어 있어, 마치 특수부대원처럼 신속하고 치밀한 대응력을 요구한다. 2인 이상의 팀 플레이가 권장되며, 초보자는 난이도를 낮춰서라도 충분한 연습이 필요할 정도로 몰입감이 높은 작품이다. 플레이어는 자원 채취와 방어선 구축, 그리고 때로는 후퇴와 재정비까지 다양한 전략을 유연하게 구사해야만 한다. 맵의 전체적인 밸런스는 초중반의 압박감이 매우 강렬하지만, 후반부로 갈수록 플레이어의 전략적 깊이가 빛을 발하게 되는 구조로 설계되어 있다. 맵의 상세한 트리거나 승리 조건은 공개되지 않았지만, 방어와 생존을 중점으로 한 플레이 경험이 주를 이룬다. 특히 맵의 이름과 제목에서 느껴지는 ‘극한’이라는 키워드가 플레이어의 긴장감을 한층 더 높이는 요소로 작용한다. 이 맵을 즐기기 위해서는 스타크래프트의 기본적인 조작은 물론이고, 컴퓨터의 패턴을 읽는 안목과 빠른 판단력이 요구된다. 또한, 맵의 특성상 지속적인 업데이트와 수정이 이루어진 흔적이 보이며, 여러 제작자에 의해 개선된 흔적이 맵 내부에 남아 있어 제작자들의 열정을 느낄 수 있다. 이처럼 §pêciàl Forçês Extrëmé는 단순한 디펜스 게임을 넘어, 스타크래프트 유즈맵의 진수를 보여주는 작품으로, 플레이어에게 끊임없는 도전과 성취감을 선사할 것이다. §pêciàl Forçês Extrëmé is a StarCraft: Brood War custom map that falls under the "compkagi" (computer opponent custom map) genre, renowned for its overwhelming difficulty. As the map's title suggests, players must navigate intense gameplay where elite forces fight to survive in extreme conditions. The entire map is set in a desert terrain, and from the very beginning, players face relentless assaults from powerful computer-controlled units, forcing them to balance defense, resource management, and strategic decision-making. A key defensive line is centered around a major outpost in the middle of the map, and whether this position is held or lost can drastically alter the outcome of the game. The map's design and unit placements are all structured to evoke intense combat, demanding quick and precise responses from players, much like elite special forces. Team play with two or more players is recommended, and even beginners should practice extensively, even on reduced difficulty, due to the map's high level of immersion. Players must flexibly employ various strategies, including resource gathering, fortifying defenses, and sometimes retreating and reorganizing. While the early and mid-game are dominated by intense pressure, the late game is designed to highlight the player's strategic depth. The map's detailed strategies and victory conditions remain undisclosed, but the experience revolves around defense and survival. The word "extreme" in the map's name and title further amplifies the tension, making every moment feel critical. To fully enjoy §pêciàl Forçês Extrëmé, players need not only a solid grasp of StarCraft's basic mechanics but also the ability to read the computer's patterns and make swift decisions. Additionally, the map shows signs of continuous updates and refinements, with traces of improvements made by multiple creators, reflecting the dedication of its developers. More than just a defense game, §pêciàl Forçês Extrëmé showcases the essence of StarCraft custom maps, offering players endless challenges and a deep sense of accomplishment.
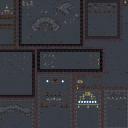
임파서블 L337-K v2 (Impossible L337-K v2)
《Impossible L337-K v2》는 스타크래프트: 브루드워의 하드코어 디펜스 유즈맵으로, 총 9단계의 극한 난이도를 자랑하는 컴까기 형식의 플레이가 특징이다. 맵의 핵심은 ‘불가능’이라는 이름에 걸맞게 각 레벨이 플레이어에게 끊임없는 압박과 치밀한 전략을 요구한다는 점이다. 특히 4인 플레이를 전제로 설계된 이 맵은 중앙의 넓은 공터를 surrounded하는 듯한 적의 배치와 끊임없이 쏟아지는 웨이브를 통해 압도적인 몰입감을 선사한다. 이미지 상에서 확인되는 바와 같이, 각 레벨은 맵의 일부 구역을 점유하는 형태를 띄며, 플레이어는 제한된 자원으로 적의 끊임없는 공격을 방어해야 한다. 맵의 배경은 우주 테마로 설정되어 있어, 어두운 밤하늘과 별빛이 어우러진 시각적 분위기가 플레이어의 긴장감을 한층 높인다. 맵의 제작자 ILikeKillAndYouCreated는 ‘Extra Hard’라는 설명을 통해 난이도의 극단을 강조했는데, 이는 단순히 적의 수가 많은 것이 아니라 각 레벨의 배치와 트리거가 플레이어의 실수조차 용납하지 않는 구조로 설계되었음을 시사한다. 초보 플레이어는 레벨 1~3에서 기본적인 디펜스 메커니즘을 익힐 수 있지만, 레벨 4를 기점으로 적의 공격 패턴이 복잡해지며 레벨 7부터는 사실상 ‘극한의 난이도’라는 타이틀에 걸맞게 플레이어가 전략을 재구축해야 한다. 추천하는 플레이 방식은 팀 플레이로, 각 플레이어가 맡은 구역을 효율적으로 방어하면서도 중앙의 주요據點을 보호하는 것이 핵심이다. 특히 맵의 중앙에 위치한 넓은 공터는 레벨 5 이후부터는 적의 주요 공격 경로가 되므로, 이곳을 사수하는 것이 승리의 열쇠가 된다. 플레이 전 반드시 확인해야 할 사항은 각 레벨의 적 배치와 승리 조건으로, 맵 설명에 언급된 ‘9단계’가 시각적·구조적으로 맵 내에 어떻게 배치되어 있는지 확인할 필요가 있다. 또한, 우주 테마의 어두운 배경과 대비되는 밝은 색상의 적 기지 배치에 주의를 기울여야 하는데, 이는 게임 진행 중 시야를 가리는 요소가 될 수 있기 때문이다. 맵의 인코딩은 cp949로 설정되어 있어 한글 입력이 원활하며, 타일셋은 우주 테마에 맞게 설계되어 시각적 일관성을 유지하고 있다. 이 맵은 ‘불가능’이라는 이름에 걸맞게 결코 쉬운 난이도를 제공하지 않지만, 그만큼의 성취감을 느끼고자 하는 숙련된 플레이어들에게 strong 추천할 만한 작품이다. 특히 디펜스와 컴까기 장르에 관심이 있는 유저라면, 이 맵을 통해 자신의 실력을 시험해 볼 수 있을 것이다. 《Impossible L337-K v2》 is a hardcore defense-style custom map for StarCraft: Brood War, featuring nine brutally difficult stages designed for a 4-player team survival experience. The map lives up to its name by demanding relentless focus, precision, and adaptability from players as they face wave after wave of enemy assaults. Structurally, each level occupies a distinct section of the map, with players starting in isolated zones surrounded by terrain that funnels enemies toward critical choke points. The cosmic-themed background—complete with a starry night sky—enhances the sense of isolation and urgency, creating a visually immersive experience that heightens tension throughout gameplay. According to internal metadata notes by the creator ILikeKillAndYouCreated, the difficulty escalates sharply after Level 3, with early levels serving as a tutorial for basic defense mechanics, while later stages introduce complex enemy patterns and overwhelming numbers that require dynamic strategy shifts. Players are advised to coordinate closely in team play, as the central open area becomes a high-priority target for enemy attacks starting around Level 5; securing this zone is often the difference between victory and defeat. Before diving in, it's crucial to study the enemy placement and victory conditions for each stage, as the map's layout and triggers are unforgiving of mistakes. The cp949 encoding ensures Korean text support, and the space-themed tileset maintains visual coherence across all nine levels. While not for the faint of heart, this map offers an unparalleled challenge for seasoned StarCraft players who seek to test their defensive prowess and strategic depth in a compact yet punishing environment.
어마어징 터렛 스피럴 헬 (Amazing Turret Spiral Hell)
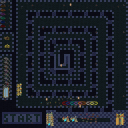
스타크래프트 브루드워의 디펜스 장르 유즈맵인 <Amazing Turret Spiral Hell>은 ‘어마어마한 터렛과 소용돌이 같은 난이도’로 이름 붙여진 만큼, 플레이어에게 끊임없는 긴장감을 선사하는 극한의 방어전략을 요구하는 맵이다. 맵의 전체적인 구조는 중앙에 위치한 기지 주변을 거대한 소용돌이 형태로 터렛들이 배치되어 있으며, 끊임없이 몰려드는 적 유닛들을 상대로 방어선을 유지해야 한다. 맵의 이름에서 ‘Spiral Hell’이라는 부분이 시사하듯, 소용돌이 형태의 터렛 배치는 단순히 시각적인 장관이 아니라 방어 난이도를 극한으로 끌어올리는 핵심 요소다. 플레이어는 초기 자원으로 터렛을 건설하고, 일정 주기마다 등장하는 적 웨이브를 상대로 방어선을 구축해야 하며, 때로는 소용돌이 안쪽에서 emerging되는 적들에게도 대응해야 한다. 맵의 특징 중 하나는 ‘Impossible clear’라는 설명에서 느껴지듯, 완전한 클리어가 불가능하도록 설계된 점으로, 플레이어는 어떻게든 최대한 오래 버티는 ‘서바이벌’에 초점을 맞추어야 한다. 터렛의 배치와 적 웨이브의 패턴은 무작위성이 높기 때문에, 반복 플레이를 통해 경험치를 쌓고 방어 전략을 최적화하는 재미가 있다. 특히 화산 타일셋을 활용한 붉은색과 검은색의 대조적인 색감은 맵의 분위기를 더욱 불타오르게 하며, ‘지옥’이라는 테마를 시각적으로 잘 구현하고 있다. 이 맵은 디펜스 장르에 익숙한 플레이어라면 누구나 한 번쯤 도전해볼 만한 극한의 난이도를 자랑하지만, 반대로 초보자는 적응하기 어려울 수 있어 적정 난이도와 플레이 스타일을 충분히 숙지한 후 도전하는 것이 좋다. 맵의 핵심은 ‘터렛 관리’와 ‘자원 관리’로, 적절한 타이밍에 터렛을 업그레이드하고, 소용돌이 안쪽에서 emerging되는 적들에게도 대처할 수 있는 전략적 안목이 요구된다. 또한, 소용돌이 형태의 터렛 배치가 방어 라인을 복잡하게 만들기 때문에, 맵을 처음 플레이할 때는 맵의 구조를 충분히 숙지하고 시작하는 것이 중요하다. 이 맵은 디펜스 유즈맵의 정점을 목표로 삼은 듯한 난이도와 디자인으로, 플레이어에게 끊임없는 도전과 성취감을 제공할 것이다. Amazing Turret Spiral Hell is a StarCraft: Brood War defense custom map that delivers relentless tension through its namesake 'Amazing Turret' and 'Spiral Hell' mechanics. The map features a central base surrounded by a spiral arrangement of turrets, forcing players to maintain a defensive line against waves of enemy units. The spiral turret layout isn't just visually stunning—it dramatically increases the difficulty by creating a maze-like defense challenge. Players must construct turrets with initial resources and continuously adapt to enemy waves that emerge in unpredictable patterns, including those spawning from the spiral's interior. As hinted by the description 'Impossible clear,' the map is designed to be nearly unbeatable, emphasizing survival over traditional victory conditions. The high randomness in turret placement and enemy spawns encourages repeated plays to refine strategies and improve endurance. The volcanic tileset, with its striking contrast of red and black, enhances the map's fiery, hellish theme, immersing players in a challenging yet visually captivating experience. While the extreme difficulty makes it ideal for seasoned defense map enthusiasts, beginners may struggle without prior experience or adaptation. The core mechanics revolve around turret and resource management, requiring strategic foresight to upgrade turrets at the right time and counter emerging threats from the spiral's depths. The spiral layout complicates defense lines, so first-time players should familiarize themselves with the map's structure before diving in. With its relentless pace and expertly designed challenge, Amazing Turret Spiral Hell stands as a pinnacle of defense custom maps, offering players a thrilling test of skill and perseverance.
임파서블 에볼라 (Impossible Ebola)
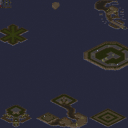
스타크래프트 브루드워의 유즈맵 중 하나로, 'Impossible Ebola'는Nombre 6명의 플레이어가 동시에 도전하는 디펜스 장르의 맵입니다. 내부 설명에 'Impossible Challenges'라는 문구가 포함되어 있듯이, 맵의 핵심은 극한의 난이도를 자랑하는 다수의 방어 미션을 클리어하는 것입니다. 맵의 배경은 사막 타일셋으로 구성되어 있으며, 중앙에 위치한 방어 기지에서 적의 끊임없는 공세를 버텨내며 모든 챌린지를 완료해야 합니다. 맵의 구조는 중앙 방어 기지와 이를 둘러싼 외곽 지역으로 나뉘며, 외곽 지역에는 방어 시설과 자원 채취 포인트가 배치되어 있어 자원을 확보하며 방어전을 펼칠 수 있도록 설계되었습니다. 플레이어는 초반부터 적의 다양한 유닛 조합에 대응해야 하며, 방어 기지의 건물을 보호하는 동시에 자원을 확보하는 전략적 균형이 요구됩니다. 맵의 난이도는 매우 높을 것으로 추정되며,特に 초보 플레이어보다는 경험이 풍부한 플레이어에게 적합할 것입니다. 또한, 맵의 이름은 '에볼라'라는 단어와 결합되어 있으므로, 적의 공세가 감염병과 같은 급속한 확산을 연상시키는 패턴으로 진행될 가능성이 높아 보입니다. 맵을 플레이하기 전에 방어 기지의 건물을 최대한 강화하고, 자원 관리 전략을 세우는 것이 중요합니다. 또한, 적의 유닛 조합에 따라 방어 타워와 병력의 조합을 유동적으로 변경해야 합니다. 맵의 전체적인 분위기는 긴장감과 도전정신이 느껴지며, 특히 디펜스 장르를 좋아하는 플레이어들에게 추천할 만한 작품입니다. 다만, 극한의 난이도로 인해 실패가 잦을 수 있으므로, 꾸준한 연습과 전략 수정이 필요할 것입니다. 맵의 제작자 'The_Desacrator'는 폴란드 출신으로, 그의 다른 작품들도 마찬가지로 도전적인 콘텐츠로 알려져 있습니다. 맵의 구조와 디자인, 그리고 극한의 난이도는 플레이어들에게 끊임없는 도전과 성취감을 제공할 것입니다. Impossible Ebola is a custom map for StarCraft: Brood War, designed as a defense-style game where up to 6 players simultaneously tackle a series of extremely challenging missions. The map's core concept revolves around overcoming 'Impossible Challenges,' as hinted in its internal description. Set against a desert tileset, the map features a central base where players must hold off relentless enemy waves while completing all objectives. The layout consists of a core defensive zone surrounded by outer regions containing resource points and defensive structures, allowing players to gather resources while fending off attacks. From the start, players face diverse enemy unit compositions, requiring both strategic resource management and base defense. The difficulty is expected to be exceptionally high, making it more suitable for experienced players rather than beginners. The name 'Ebola' suggests that enemy attacks may escalate rapidly, mirroring the spread of an infectious disease. Before playing, it's crucial to reinforce the base structures and plan resource acquisition carefully. Adaptability is key, as players must adjust tower placements and unit compositions based on enemy tactics. The map exudes a tense and challenging atmosphere, ideal for defense genre enthusiasts. However, due to its extreme difficulty, frequent failures may occur, necessitating persistent practice and strategy refinement. The creator, 'The_Desacrator,' is known for his challenging content, and this map aligns with his signature style of pushing players to their limits. The structure, design, and high-stakes gameplay ensure a rewarding yet demanding experience for players seeking a true test of skill.
불가능한 시나리오: 레드 (Imposible Scenarios Red)
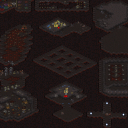
스타크래프트 브루드워의 유즈맵 중 하나인 《Imposible Scenarios Red》는 이름 그대로 '불가능한 시나리오'를 테마로 삼은 디펜스형 맵이다. 맵 전체가 어두운 색조로 칠해져 있으며, 중앙에 위치한Resource Deposit(자원 광맥) 주변으로 여러 개의 진영이 배치되어 있다. 플레이어는 각 진영의 건물을 지키면서 끊임없이 몰려드는 적군 유닛을 상대해야 한다. 맵의 오른쪽 상단과 왼쪽 하단에는 각각의 플레이어 기지가 있으며, 중앙 Resource Deposit를 둘러싼 언덕 지형이 주요 방어 거점이 된다. 적군은 주로 오른쪽에서 끊임없이 생성되어 플레이어의 건물을 공격해 오며, 플레이어는 방어타워를 건설하거나 유닛을 배치하여 이를 저지해야 한다. 이 맵의 가장 큰 특징은 '불가능'이라는 이름에 걸맞게 극한의 난이도를 자랑한다는 점이다. 적군의 유닛 생산 속도가 매우 빠르며, 초기 방어만 소홀히 해도 순식간에 건물이 파괴되는 상황이 벌어질 수 있다. 따라서 초반 자원 관리와 방어 타워 배치 전략이 매우 중요하다. 또한, Resource Deposit 주변의 언덕 지형은 시야를 가리며 적군의 접근을 어렵게 만들기 때문에, 맵의 지형을 잘 활용하는 플레이가 필수적이다. 맵의 분위기는 어둡고 칙칙한 색감으로 조성되어 있어 긴장감을 높이는 데 한몫을 한다. 이 맵은 주로 1인 플레이를 상정하고 제작되었지만, 멀티플레이어 모드에서도 충분히 즐길 수 있다. 그러나 공격 패턴과 방어 전략이 복잡해질수록 초보자에게는 다소 어려울 수 있으므로, 적응 기간을 거치는 것이 좋다. 특히,Resource Deposit 주변의 언덕 지형을 활용한 방어 라인을 구축하는 것이 핵심 포인트다. 또한, 적군의 유닛이 끊임없이 쏟아져 나오기 때문에 자원 관리와 건물을 보호하는 데 신경을 써야 한다. 맵의 난이도가 높기 때문에, 성공적인 플레이를 위해서는 충분한 연습과 전략 수립이 요구된다. 이 맵은 '불가능한 시나리오'라는 이름답게 도전적인 재미를 제공하며, 디펜스 장르의 유즈맵 중에서 손꼽히는 난이도를 자랑한다.Resource Deposit를 지키며 적군을 방어하는 재미와 긴장감, 그리고 극한의 난이도까지, 이 맵은 디펜스 유즈맵을 좋아하는 플레이어들에게Strongly 추천할 만한 작품이다. 특히Resource Deposit 주변의 언덕을 활용한 방어 전략을 세우는 것이 이 맵의 재미이자 핵심 포인트다.Resource Deposit를 지키며 끊임없이 몰려드는 적군을 상대하는 이 맵의 긴장감은 다른 어떤 디펜스 맵에서도 쉽게 찾을 수 없는 경험을 제공할 것이다. 《Impossible Scenarios Red》 is a defense-style custom map in *StarCraft: Brood War*, themed around "impossible scenarios" as its name suggests. The entire map is painted in dark tones, with multiple player bases positioned around the Resource Deposit at the center. Players must defend their buildings against relentless waves of enemy units. Each player has their base in the top-right and bottom-left corners, while the hilly terrain surrounding the central Resource Deposit serves as the primary defensive stronghold. The enemy primarily spawns from the right side, continuously attacking the player’s structures, which must be held off by constructing defensive towers or deploying units. The map’s greatest feature is its extreme difficulty, fitting its name. Enemy unit production is extremely fast, and neglecting early defenses can lead to buildings being destroyed in an instant. Thus, early resource management and strategic tower placement are crucial. The hilly terrain around the Resource Deposit also blocks vision and hinders enemy approaches, making terrain utilization essential. The map’s dark, gloomy color palette enhances the tense atmosphere. Designed primarily for single-player, the map can also be enjoyed in multiplayer, though its complex attack patterns and defense strategies may prove challenging for beginners, who should take time to adapt. The key to success lies in establishing defensive lines using the hilly terrain around the Resource Deposit. With enemies continuously pouring in, players must also carefully manage resources and protect their buildings. Due to its high difficulty, mastering the map requires ample practice and strategic planning. True to its "impossible scenarios" title, the map delivers a challenging yet rewarding experience, standing out as one of the toughest defense custom maps. The thrill of defending the Resource Deposit, the intense pressure of endless waves, and the extreme difficulty make it a must-play for fans of the genre. The core appeal—and challenge—lies in devising defense strategies that leverage the surrounding hills, offering an unparalleled tension that’s hard to find in other defense maps.
마운트 임파서블 (Mount Impossible)
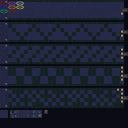
스타크래프트 브루드워의 유즈맵 ‘Mount Impossible 1.7.1’을 소개한다. 이 맵은 이름에서도 느껴지듯, 플레이어들에게 끊임없는 도전과 극한의 난이도를 제공하는 디펜스 장르의 유즈맵이다. 맵의 전체적인 구조는 고지대와 협곡, 그리고 좁은 통로로 나뉘어져 있으며, 중앙에 위치한 기지 주변으로 적의 공격로가 집중되어 있다. 맵의 배경은 화산 테마로 설정되어 있어, 붉은 색조의 타일과 용암 지형이 플레이어의 긴장감을 한층 높여준다. 맵의 이름에서부터 느낄 수 있듯, 이 맵은 단순한 디펜스가 아니라, 각 플레이어가 마주치게 되는 ‘불가능’으로 느껴질 정도의 극한의 방어전을 펼치게 된다. 플레이 방식은 1인용 또는 다인용으로 구성되어 있으며, 각 플레이어는 자신의 기지를 지키며 끊임없이 몰려오는 적의 웨이브를 상대해야 한다. 맵에서는 주로 저글링, 히드라리스크, 울트라리스크, 디파일러 등 저그의 공세와 occasional한 프로토스나 테란의 공격이 포함된다. 플레이어는 기지의 입구에 방어 건물을 건설하고, 미네랄과 가스를 확보하여 유닛을 생산하거나 업그레이드할 수 있다. 또한, 맵 곳곳에 숨겨진 보급품이나 아이템들이 배치되어 있어, 이를 확보하면 일시적으로 방어력을 강화하거나 유닛의 성능을 일시적으로 향상시킬 수 있다. 맵의 난이도는 매우 높게 설정되어 있으며, 특히 후반부로 갈수록 적의 공세가 점점 더 강력해지고 빈번해진다. 때문에 플레이어는 끊임없이 전략을 수정하고, 방어 라인을 재구축해야만 살아남을 수 있다. 이 맵은 초보 플레이어보다는 어느 정도 스타크래프트에 익숙한 유저들에게 추천된다. 맵의 구조와 적의 패턴을 빠르게 파악하고, 방어 전략을 유연하게 변경할 수 있는 능력이 요구된다. 또한, 팀 플레이보다는 개인 플레이에 더 초점이 맞춰져 있어, Solo 플레이를 선호하는 유저들에게 적합하다. 맵의 분위기와 긴장감은 플레이어에게 끊임없는 도전 의식을 자극하며, 한 번 클리어한 후에도 다시 도전하고 싶게 만드는 매력이 있다. 또한, 맵의 디자인과 그래픽적 요소도 뛰어나, 스타크래프트의 고전적인 분위기를 느낄 수 있어 팬들에게는 더욱 매력적으로 다가올 것이다. 이 맵을 플레이하기 전에는 기지 방어의 기본 전략을 숙지하고, 각 유닛의 특성과 상성을 잘 이해하고 있어야 한다. 또한, 맵 곳곳의 아이템 위치를 미리 파악해 두면, 긴급 상황에서 큰 도움이 될 수 있다. 마지막으로, 맵의 난이도가 매우 높기 때문에, 체력 관리와 자원 관리에 신경을 써야 한다. 이러한 요소들을 고려한다면, ‘Mount Impossible 1.7.1’을 플레이하는 즐거움을 maksimal로 느낄 수 있을 것이다. StarCraft: Brood War's custom map *Mount Impossible 1.7.1* introduces a relentless challenge with extreme difficulty in the defense genre. As the name suggests, the map pushes players to their limits with a layout featuring high ground, canyons, and narrow passages, all funneling enemy attacks toward the central base. Set against a volcanic theme, the map’s red-toned tiles and lava terrain heighten the tension, reinforcing the sense that this is no ordinary defense—it’s a battle against the "impossible." The gameplay supports both single-player and multiplayer modes, where each player must defend their base against endless waves of enemies. The assaults primarily consist of Zerg units like Zerglings, Hydralisks, Ultralisks, and Defilers, with occasional Protoss or Terran forces adding variety. Players construct defensive structures at key entry points, gather minerals and gas to produce and upgrade units, and scavenge hidden supplies or power-ups scattered across the map to temporarily boost defenses or unit performance. The difficulty escalates dramatically in later stages, with enemy attacks growing stronger and more frequent, forcing players to adapt their strategies and rebuild defenses on the fly to survive. This map is best suited for players already familiar with StarCraft rather than beginners. Success requires quickly grasping the map’s layout and enemy patterns while remaining flexible enough to adjust strategies as needed. The focus leans toward solo play rather than team coordination, making it ideal for those who prefer going it alone. The intense atmosphere and mounting pressure create a compelling challenge that invites repeated attempts even after clearing it. The map’s design and visuals also excel, evoking the classic feel of StarCraft that will appeal to longtime fans. Before diving in, players should master core base defense strategies, understand unit matchups, and memorize item locations for critical moments. Given the map’s punishing difficulty, maintaining health and resource efficiency is crucial. With these factors in mind, *Mount Impossible 1.7.1* delivers a uniquely thrilling experience that maximizes the joy of overcoming an unforgiving challenge.
프로텍트 더 퀸 투ough AS HELL (Protect The Queen TOUGH AS HELL)
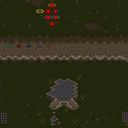
스타크래프트 브루드워의 고난이도 유즈맵 ‘프로텍트 더 퀸 투ough AS HELL’은 말 그대로 ‘여왕을 보호하라’는 미션을 극한의 난이도로 재탄생시킨 작품이다. 내부 맵 설명에서 ‘HARD’라고 명시된 이 버전은 제작자 Holykaos가 만든 원작의 극한 난이도 버전으로, TyDyeDragon이 추가로 난이도를 조정했다는 설명이 붙어 있어 플레이어들에게 도전 정신을 자극한다. 맵은 사막 테마의 넓은 평야를 배경으로 하며, 중앙의 여왕 유닛을 중심으로 적의 끊임없는 공격이 펼쳐진다. 플레이어는 각자의 시작 지점에서 출발해 방어선을 구축하고, 여왕을 보호하는 동시에 적을 섬멸하는 전략적 선택을 강요받는다. 맵의 핵심은 방어와 공격의 균형을 맞추는 데 있다. 여왕 주변에 배치된 방어 건물과 유닛을 보호하면서도, 중앙으로 몰려드는 적의 물량을 효과적으로 대응해야 한다. 맵 상단에는 적의 대규모 웨이브가 끊임없이 등장하며, 플레이어는 이를 예측하고 방어 자원을 효율적으로 배분해야 한다. 특히, 맵의 지형이 비교적 평탄한 편이라 유닛의 기동성과 배치 전략이 중요하다. 초보자와 숙련자 모두 도전할 수 있지만, 난이도가 상당히 높기 때문에 초심자는 원본 버전이나 다른 난이도 버전으로 연습을 권장한다. 추천 대상으로는 스타크래프트의 전략적 깊이를 즐기고자 하는 플레이어, 혹은 유즈맵의 난이도 도전을 즐기는 유저들이 적합하다. 방어와 공격의 균형을 맞추는 재미와 함께, 여왕을 지켜내는 성취감을 느낄 수 있는 맵이다. 플레이 전에는 방어 건물의 배치와 유닛의 생산 순서를 미리 계획하는 것이 중요하며, 적의 공격 패턴을 분석하는 데 시간을 투자하는 것이 좋다. 또한, 맵의 극한 난이도를 극복하기 위해 팀원과의 협력이 필수적이므로, 파티 플레이를 준비하는 것이 좋다. StarCraft: Brood War’s high-difficulty custom map *Protect the Queen: Too Hard AS HELL* is literally a rebirth of the mission “Protect the Queen” pushed to extreme difficulty. The internal map description explicitly labels this version as “HARD,” a creation by the mapper Holykaos that represents the ultimate challenge of the original, with TyDyeDragon further adjusting the difficulty to push players to their limits. Set against a vast desert plain, the map centers on the Queen unit, which faces relentless assaults from enemies. Players begin at their respective starting points, forced to construct defensive lines while simultaneously protecting the Queen and wiping out the opposing forces. The heart of the challenge lies in balancing defense and offense. Players must safeguard defensive structures and units surrounding the Queen while effectively countering the swarms of enemies converging on the center. At the top of the map, massive enemy waves appear continuously, requiring players to anticipate threats and allocate resources wisely. The terrain is relatively flat, placing a premium on unit mobility and strategic positioning. While accessible to both beginners and veterans, the difficulty is steep enough that newcomers are advised to practice on the original or lower-difficulty versions first. Ideal for players who relish StarCraft’s strategic depth or those seeking a stiff challenge from custom maps, this title delivers satisfaction in balancing defense and offense while achieving the thrill of protecting the Queen. Before jumping in, it’s crucial to plan defensive building placements and unit production orders, and investing time in analyzing enemy attack patterns is highly recommended. Overcoming the map’s extreme difficulty also demands strong teamwork, so preparing for a party play session is essential.
§pêciàl Forçês Extrëmé eXpErTs
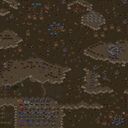
§pêciàl Forçês Extrëmé eXpErTs는 스타크래프트 브루드워의 유즈맵으로, 특수부대와 극한의 적대 세력을 무대로 펼치는 디펜스 장르의 맵이다. 맵 제목부터 보여주듯 난이도가 상당히 높은 편으로, 플레이어는 방어선을 구축하며 끊임없이 몰려오는 적의 공격을 막아내야 한다. 화면 가득 펼쳐진 사막 지형 위에 요새와 방어 건물이 배치되어 있으며, 적들은 지상군과 공중 유닛을 조합해 공격해 온다. 특히 사막이라는 배경은 맵의 분위기를 한층 더 극한적으로 연출하며, 황량한 지형이 주는 긴장감을 상승시킨다. 내부 메타데이터를 살펴보면 제작자와 수정자에 대한 기록이 남아 있어, 꽤 오랜 기간 동안 다양한 제작자들에 의해 개선되고 발전해 왔음을 알 수 있다. 이 맵의 가장 큰 특징은 ‘극한의 전문가’를 위한 난이도로 설계되었다는 점으로, 초보자보다는 경험 많은 플레이어에게 적합하다는 점을 명심해야 한다. 맵 구조는 중앙에 위치한 요새를 중심으로 방어 건물이 배치되어 있으며, 적의 공격 루트는 사방에서 뻗어나오는 형태를 보인다. 이 때문에 방어선을 구축할 때 각 방향의 균형을 carefully 고려해야 하며, 소수의 방어 건물로도 효과적으로 대처할 수 있도록 전략을 세우는 것이 중요하다. 또한, 맵의 해상도와 타일셋을 고려할 때, 세밀한 시야 조절과 빠른 반응이 요구되는 디자인임을 알 수 있다. 플레이 전 반드시 확인해야 할 요소는 방어 건물의 배치와 각 루트의 공격 패턴으로, 이 부분을 숙지하지 않으면 금방 무너질 수 있다. 추천하는 플레이어는 디펜스 장르를 즐기며, 특히 어려운 난이도에서 전략적 깊이를 추구하는 플레이어들이다. 이 맵을 통해 극한의 방어戦略을 경험하고 싶은 유즈맵爱好者들에게 큰 매력을 느낄 수 있을 것이다. Special Forces Extrëmé eXpErTs is a custom map in StarCraft: Brood War, set in a defense genre where elite units face off against extreme hostile forces. As the map's title suggests, the difficulty is quite high, requiring players to build and maintain defensive lines while fending off relentless enemy waves. The map features a vast desert terrain filled with fortresses and defensive structures, while enemies attack with combined ground and air units. The desert setting enhances the map's intense atmosphere, amplifying the tension with its barren landscape. Examining the internal metadata reveals records of creators and modifiers, indicating the map has been refined and improved by various developers over a long period. Its defining feature is its design for "extreme experts," making it suitable for experienced players rather than beginners. The layout centers around a central fortress with defensive structures arranged around it, while enemy attack routes radiate outward in all directions. This demands careful consideration of balance when building defenses, and strategic placement of even a few structures can effectively counter attacks. Given the map's resolution and tileset, it also requires precise vision control and quick reactions. Before playing, it's crucial to study defensive structure placements and enemy attack patterns—neglecting these will lead to quick collapse. Recommended players are those who enjoy defense maps, especially those seeking strategic depth in high difficulty. Fans of custom maps looking to experience intense defensive strategies will find this map highly appealing.
Impossible Nirvana Fixed
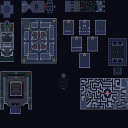
《Impossible Nirvana Fixed》는 스타크래프트 브루드워의 유즈맵으로,Hard와 같이 난이도가 극한에 달하는 컴까기(컴퓨터 상대 키우기) 장르의 대표적인 작품 중 하나다. 이 맵은 ‘Impossible’이라는 제목에서 알 수 있듯이 일반적인 플레이어의 예상 범위를 아득히 뛰어넘는 극한의 난이도를 자랑하며, 플레이어는 제한된 자원과 전략 속에서 살아남아 적의 넥서스를 파괴해야 한다. 맵의 전체적인 구조는 중앙에 위치한 플레이어 기지와 사방에서 끊임없이 몰려오는 저그 군단으로 구성되어 있으며, 곳곳에 배치된 방어 시설과Resource distribution을 활용해 최대한의 효율로 자원을 확보하고 병력을 성장시키는 것이 핵심이다. 이 맵의 가장 큰 특징은 ‘Fixed’라는 이름에 걸맞게 이전 버전에서 지적된 밸런스 문제나 버그를 개선한 정식 수정판이라는 점이다. 맵 곳곳에 배치된Trigger(트리거) 시스템은 적의 공격 패턴,Resource distribution, 방어 시설의 배치 등을 세밀하게 조율하여 플레이어의 실수를 극한까지 압박한다. 특히 초반Resource gathering부터 시작해 중반의 공격 타이밍, 후반의 방어 라인 구축까지 모든 단계에서 플레이어의 판단력과 적응력이 요구된다. 방어 시설의 경우, 포톤 캐논과 시즈 탱크가 혼합된 방어선이 곳곳에 배치되어 있으며, 때로는 적의 공격 패턴을 예측해 일정 시간마다 자동으로 공격을 가하는 트리거가 작동하기도 한다. 이러한 요소들은 단순히 ‘컴퓨터를 이기는’ 수준을 넘어, ‘이기는 것이 불가능해 보이는’ 경험을 플레이어에게 선사한다. 추천 대상은无疑는 스타크래프트의 기본 메커니즘을 숙지한 중급 이상의 플레이어이며, 특히Hard 모드나 극한의 난이도를 즐기는 유저들에게 적합하다. 초보자의 경우, 맵의 구조와 적의 공격 패턴을 충분히 숙지한 뒤 도전하는 것이 바람직하며, Resource management와Build order(빌드 오더)에 대한 기본적인 이해가 필수적이다. 또한, 이 맵은 5명의 플레이어와 1개의 팀으로 구성되어 있어, 혼자서는 해결할 수 없는 극한의 압박을 경험할 수 있다. 맵을 플레이하기 전에는 반드시Resource distribution과 방어 시설의 위치를 숙지하고, 트리거가 작동하는 시점을 예상하는 훈련을 하는 것이 좋다. 한 번의 실수가 모든 것을 무너뜨릴 수 있는 만큼, 집중력과 끈기가 요구되는 작품이다. Impossible Nirvana Fixed is a classic UMS (Use Map Settings) custom map for StarCraft: Brood War, renowned as one of the most challenging computer-killing (competing against AI) maps in the genre. The name itself, 'Impossible,' hints at the extreme difficulty level, pushing players to their limits with limited resources and relentless enemy forces. The map’s overall structure features a player base at the center, surrounded by waves of Zerg units approaching from all directions. Scattered throughout the map are defensive structures andResource distribution points, which players must utilize efficiently to expand their forces and survive. A key feature of this map is the 'Fixed' designation, indicating it is an official update addressing balance issues and bugs from previous versions. The map employs a sophisticatedTrigger system that finely tunes enemy attack patterns,Resource distribution, and defensive structure placements to maximize pressure on the player. From the initialResource gathering phase to the mid-game attack timing and late-game defensive line construction, every stage demands sharp decision-making and adaptability from the player. Defensive lines include a mix of Photon Cannons and Siege Tanks, while some triggers activate automated attacks at specific intervals, further testing the player’s strategic depth. These elements create an experience that goes beyond mere 'beating the AI,' offering a challenge that feels nearly impossible to overcome. This map is highly recommended for intermediate to advanced players who are familiar with StarCraft’s core mechanics, especially those who enjoyHard modes or extreme challenges. Beginners should first study the map’s structure and enemy attack patterns before attempting a playthrough, asResource management andBuild order knowledge are essential. The map is designed for 5 players in a single team, providing an experience where the pressure is insurmountable without coordination. Before playing, players should memorizeResource distribution points and defensive structure locations, and anticipate when triggers will activate. A single mistake can lead to total defeat, making focus and perseverance critical traits for success.
§pêciàl Forçês Extrëmé XXX
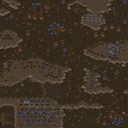
§pêciàl Forçês Extrëmé XXX는 스타크래프트 브루드워의 유즈맵으로, 컴까기 장르에 속하는 맵이다. 맵 제목에서 느껴지듯 극한의 난이도를 자랑하는 이 맵은 플레이어가 컴퓨터-controlled 적군과 맞서 싸우는 전투형 구조로 구성되어 있다. 맵 중앙에는 넓은 평지가 펼쳐져 있으며, 주변으로는 사막 타일셋의 넓은 평원과 요새가 배치되어 있어 방어와 공격의 균형을 맞추기 어렵다. 맵 이미지에서 확인되는 다수의 부대 건물과 생산 시설들은 플레이어가 끊임없이 자원을 확보하고 유닛을 생산해야 한다는 점을 강조한다. 또한, 맵 곳곳에 흩어져 있는 오브젝트와 건물이 전투의 흐름을 방해하거나 전략적 요충지를 제공할 가능성이 높다. 이 맵은 6명의 플레이어가 참여할 수 있으며, 각 플레이어는 개별적으로 컴퓨터를 상대해야 한다. 맵의 난이도는 매우 높을 것으로 추정되며, 극한의 조건에서 승리하기 위해서는 뛰어난 전략과 빠른 판단력이 요구된다. 맵의 배경은 사막으로 설정되어 있어 시야 확보와 기동성이 중요한 요소로 작용할 것이다. 또한, 맵의 크기가 3072x3072로 상당히 크기 때문에 자원 관리와 부대 운영이 더욱 복잡해질 가능성이 있다. §pêciàl Forçês Extrëmé XXX는 극한의 난이도와 전략적 깊이를 추구하는 컴까기 유즈맵을 찾는 플레이어들에게 강추할 만한 작품이다. 특히, 컴퓨터와의 치열한 전투를 즐기며 전략적 사고를 발휘하고 싶은 유저라면 이 맵을 통해 뛰어난 경험을 얻을 수 있을 것이다. 다만, 난이도가 매우 높으므로 초보 플레이어는 접근하기 전에 충분한 연습이 필요할 것이다. Special Forces Extreme XXX is a StarCraft: Brood War custom map belonging to the "comp stomp" genre, where players face off against computer-controlled enemies in a battle-focused structure. As the name suggests, this map boasts an extreme level of difficulty, featuring a central expanse of open terrain surrounded by vast desert plains and fortresses that make balancing defense and offense a daunting task. The numerous squad buildings and production facilities scattered across the map highlight the need for players to continuously secure resources and churn out units. The map supports up to six players, each battling the AI individually. Given its extreme difficulty, victory demands sharp strategy and rapid decision-making. Set in a desert environment, visibility and mobility play crucial roles, while the massive 3072x3072 map size adds further complexity to resource management and unit operations. For players seeking a custom map that pushes extreme difficulty and strategic depth, Special Forces Extreme XXX is highly recommended. Those who enjoy intense AI battles and want to test their strategic thinking will find this map a rewarding experience. However, due to its punishing difficulty, beginners should practice extensively before attempting it.
최근 등록된 맵
새로 추가된 파일과 버전을 확인하세요.
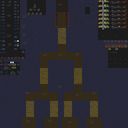
트리 디펜스 프릭킨 하드 (Tree Defense Fricken HARD)
스타크래프트 브루드워의 유즈맵 장인들에게 단연 주목받는 디펜스 맵 'Tree Defense Fricken HARD'는 이름 그대로 극한의 난이도를 자랑하는 트리 디펜스 유형으로, 플레이어는 끊임없이 몰려오는 적 공세를 방어하며 나무를 성장시켜야 한다. 맵은 넓은 황무지 타일셋을 배경으로 펼쳐지며, 중앙에는 거대한 나무가 자리 잡고 있어 이를 보호하는 동시에 성장시켜야 하는 것이 핵심 목표로 보인다. 적_COLOR1_이나 적_COLOR2_ 유닛들이 끊임없이 스폰되어 나무 주변을 공격해 오며, 플레이어는 제한된 자원과 유닛으로 이를 저지해야 한다. 특히 'Fricken HARD'라는 제목에서 짐작할 수 있듯, 난이도는 매우 높게 설계되어 있어 초보자는もちろん, 숙련자조차도 전략과 타이밍을 carefully 하게 조율해야만 살아남을 수 있을 정도다. 나무의 성장 단계에 따라 방어 능력과 보상이 달라지는 구조로, 초기에는 약한 유닛으로 버티며 중반에는 강력한 방어 타워를 건설하고, 후기로 갈수록 적의 공세가 거세지는 패턴이 반복된다. 맵의 디자인 특성상, 플레이어는 항상 적의 스폰 위치를 주시하며 자원을 효율적으로 배분해야 하고, 나무의 성장 속도를 끌어올리기 위한 추가적인 전략이 요구된다. 이 맵은 단순히 방어뿐만 아니라 자원 관리와 성장 관리까지 종합적으로 요구하는 종합 전략 게임으로, 디펜스 유즈맵의 진수를 느낄 수 있는 작품이다. 추천 대상은 디펜스와 전략 게임을 좋아하는 플레이어로, 특히 극한의 난이도를 즐기는 유저라면 한 번 도전해 볼 만한 가치가 있다. 플레이 전에는 나무의 성장 단계와 적의 스폰 패턴을 미리 숙지하고, 초반 자원 관리와 방어 타워의 배치에 신경 쓰는 것이 중요하다. 또한, 맵의 넓고 복잡한 구조상 미니맵을 적극 활용해 적의 움직임을 실시간으로 파악하는 것이 필수적이다. 이 맵을 플레이하면서 얻은 전략적 감각은 다른 디펜스 유즈맵에서도 큰 도움이 될 것이다. StarCraft: Brood War's custom map masterpiece, *Tree Defense Fricken HARD*, is a defense-type map renowned for its extreme difficulty. As the name suggests, it’s a tree defense game where players must fend off relentless enemy waves while nurturing a growing tree. Set against a vast wasteland tileset, the map features a massive tree at its center that players must both protect and help grow. Enemies—spawned continuously by enemy_COLOR1_ and enemy_COLOR2_—swarm the area around the tree, forcing players to hold them off with limited resources and units. As the title *Fricken HARD* implies, the difficulty is punishing; even experienced players must carefully coordinate strategies and timing to survive. The tree’s growth stages directly influence defensive capabilities and rewards, creating a cycle where early waves are endured with weak units, mid-game calls for constructing powerful towers, and late-game escalates with increasingly intense enemy assaults. Due to the map’s design, players must constantly monitor spawn points, allocate resources wisely, and employ additional strategies to accelerate the tree’s growth. This isn’t just a defense challenge—it’s a comprehensive strategy game demanding resource management, growth optimization, and tactical foresight. For fans of defense and strategy games, especially those seeking brutal difficulty, it’s a must-try. Before playing, study the tree’s growth phases and enemy spawn patterns, and prioritize early resource management and tower placement. Given the map’s sprawling and intricate layout, using the minimap to track enemy movements in real time is essential. Mastering this map will sharpen your strategic instincts for other defense-style custom maps.
§pêciàl Forçês Extrëmé eXpErTs
§pêciàl Forçês Extrëmé eXpErTs는 스타크래프트 브루드워의 유즈맵으로, 특수부대와 극한의 적대 세력을 무대로 펼치는 디펜스 장르의 맵이다. 맵 제목부터 보여주듯 난이도가 상당히 높은 편으로, 플레이어는 방어선을 구축하며 끊임없이 몰려오는 적의 공격을 막아내야 한다. 화면 가득 펼쳐진 사막 지형 위에 요새와 방어 건물이 배치되어 있으며, 적들은 지상군과 공중 유닛을 조합해 공격해 온다. 특히 사막이라는 배경은 맵의 분위기를 한층 더 극한적으로 연출하며, 황량한 지형이 주는 긴장감을 상승시킨다. 내부 메타데이터를 살펴보면 제작자와 수정자에 대한 기록이 남아 있어, 꽤 오랜 기간 동안 다양한 제작자들에 의해 개선되고 발전해 왔음을 알 수 있다. 이 맵의 가장 큰 특징은 ‘극한의 전문가’를 위한 난이도로 설계되었다는 점으로, 초보자보다는 경험 많은 플레이어에게 적합하다는 점을 명심해야 한다. 맵 구조는 중앙에 위치한 요새를 중심으로 방어 건물이 배치되어 있으며, 적의 공격 루트는 사방에서 뻗어나오는 형태를 보인다. 이 때문에 방어선을 구축할 때 각 방향의 균형을 carefully 고려해야 하며, 소수의 방어 건물로도 효과적으로 대처할 수 있도록 전략을 세우는 것이 중요하다. 또한, 맵의 해상도와 타일셋을 고려할 때, 세밀한 시야 조절과 빠른 반응이 요구되는 디자인임을 알 수 있다. 플레이 전 반드시 확인해야 할 요소는 방어 건물의 배치와 각 루트의 공격 패턴으로, 이 부분을 숙지하지 않으면 금방 무너질 수 있다. 추천하는 플레이어는 디펜스 장르를 즐기며, 특히 어려운 난이도에서 전략적 깊이를 추구하는 플레이어들이다. 이 맵을 통해 극한의 방어戦略을 경험하고 싶은 유즈맵爱好者들에게 큰 매력을 느낄 수 있을 것이다. Special Forces Extrëmé eXpErTs is a custom map in StarCraft: Brood War, set in a defense genre where elite units face off against extreme hostile forces. As the map's title suggests, the difficulty is quite high, requiring players to build and maintain defensive lines while fending off relentless enemy waves. The map features a vast desert terrain filled with fortresses and defensive structures, while enemies attack with combined ground and air units. The desert setting enhances the map's intense atmosphere, amplifying the tension with its barren landscape. Examining the internal metadata reveals records of creators and modifiers, indicating the map has been refined and improved by various developers over a long period. Its defining feature is its design for "extreme experts," making it suitable for experienced players rather than beginners. The layout centers around a central fortress with defensive structures arranged around it, while enemy attack routes radiate outward in all directions. This demands careful consideration of balance when building defenses, and strategic placement of even a few structures can effectively counter attacks. Given the map's resolution and tileset, it also requires precise vision control and quick reactions. Before playing, it's crucial to study defensive structure placements and enemy attack patterns—neglecting these will lead to quick collapse. Recommended players are those who enjoy defense maps, especially those seeking strategic depth in high difficulty. Fans of custom maps looking to experience intense defensive strategies will find this map highly appealing.
썬큰D 10웨이 임파서블 (SunkenD 10Way Impossible)
썬큰D 10웨이 임파서블(SunkenD 10Way Impossible)은 스타크래프트: 브루드워의 대표적인 컴까기 유즈맵으로, ‘썬커’(Sunken Colony)라는 방어 건물을 중심으로 한 디펜스 장르의 최고 난이도 버전이다. 맵 제목에 ‘10Way’가 포함된 것처럼 중앙에서 뻗어나오는 10개의 길로 저그와 프로토스, 테란의 혼합 병력이 끊임없이 몰려온다. 특히 ‘Impossible’이라는 이름이 무색하지 않게, 심지어 미드 난이도조차도 최상급의 전략과 컨트롤을 요구하는 극한의 디펜스 구도를 자랑한다. 내부 설명에 ‘25 levels’라고 명시된 것처럼 한 맵 안에서 25단계에 걸쳐 점점 강화되는 적군을 상대하며, ‘Brought to you by www.sc-maps.com’은 이 맵이 유명 맵 제작 커뮤니티에서 배포되었음을 시사한다. ‘Even MidImpossibleBackwash wont kill you’라는 문구는 이 맵이 얼마나 어려운지를 강조하는 동시에, 백워시(Bwash)나 미드(Mid) 정도의 난이도조차도 이 맵에서는 통하지 않는다는 메시지를 전달한다. 이 맵의 핵심은 방어 건물이자 ‘썬커’인 만큼, 어떻게 효율적으로 건물을 배치하고 자원을 관리하느냐가 승패를 가른다. 플레이어는 제한된 공간에서 가능한 한 많은 수의 썬커와 스포어 콜로니를 건설해야 하며, 각 길에서 쏟아지는 적군을 막기 위해 미네랄과 가스 관리에 주의를 기울여야 한다. 특히 10개의 길은 각각 다른 공격 패턴과 병력 구성을 가지고 있어, 각 단계마다 전략을 다르게 세워야 한다. 예를 들어 저글링이 우글거리는 초반에는 방어 건물의 수를 늘리고, 후반으로 갈수록 프로토스의 캐리어나 테란의 고스트와 같은 강력한 유닛을 상대해야 한다. 맵의 전체적인 분위기는 어둠과 공포를 연상시키는 어두운 색감과 붉은 빛의 공격 포인트가 인상적이며, 이러한 시각적 요소는 플레이어에게 긴장감을 더해준다. 이 맵은 컴까기 유즈맵의 정석을 보여주며, 특히 ‘10Way’라는 다중 길 디자인과 25단계에 걸친 점진적 난이도 상승은 플레이어의 집중력을 끊임없이 요구한다. 초보자의 경우 적군의 패턴을 익히고 방어 건물을 효율적으로 배치하는 데 시간이 걸릴 수 있지만, 숙련된 플레이어에게는 끊임없는 전략적 도전과 긴장감을 제공한다. 또한, 이 맵은 멀티플레이보다는 싱글플레이에 특화되어 있으며, 한 명의 플레이어가 모든 길을 관리해야 한다는 점에서 전략적 사고와 멀티태스킹 능력을 동시에 시험한다. 추천 대상은 디펜스 장르의 최고 난이도를 경험하고자 하는 스타크래프트 팬, 특히 컴까기 유즈맵에 익숙한 플레이어들이다. 이 맵을 플레이하기 전에는 썬커와 스포어 콜로니의 배치 방식, 각 적군의 특성과 약점, 그리고 자원 관리 전략을 충분히 숙지하는 것이 좋다. 또한, 맵의 어두운 분위기에 익숙해지기 위해 밝은 화면으로 플레이하는 것도 고려해볼 만하다. This StarCraft: Brood War custom map, SunkenD 10Way Impossible, stands out as one of the most challenging defense-oriented UMS (User-Made Scenario) maps, centered around the strategic use of Sunken Colonies. The title '10Way' hints at its core mechanic—10 distinct paths through which waves of mixed Zerg, Protoss, and Terran forces relentlessly assault the player’s base. The term 'Impossible' in the name is not an exaggeration; even the 'Mid' level poses extreme difficulty, demanding top-tier micromanagement and macro-strategies. The internal description notes '25 levels,' indicating a progressive difficulty curve where enemies grow stronger with each stage, while the credit to www.sc-maps.com situates it within a well-known custom map community. The phrase 'Even MidImpossibleBackwash wont kill you' underlines the map’s punishing nature, suggesting that standard mid-tier strategies like those used in maps like Backwash or Mid will fail here. The heart of the gameplay lies in the Sunken Colonies, which players must strategically place to fend off relentless attacks. Resource management is critical, as players must balance mineral and gas income to construct and upgrade defenses efficiently. Each of the 10 paths features unique attack patterns and unit compositions, forcing players to adapt their strategies dynamically. Early stages may focus on overwhelming low-tier units like Zerglings, but later stages introduce powerful enemies such as Protoss Carriers or Terran Ghosts, requiring precise unit control and defensive positioning. The map’s dark, foreboding color palette and glowing attack indicators enhance the tense atmosphere, keeping players on edge throughout. SunkenD 10Way Impossible exemplifies the pinnacle of defense UMS maps, with its multi-path design and 25-stage difficulty curve offering unparalleled strategic depth. While beginners may struggle with enemy patterns and optimal building placement, experienced players will find a thrilling challenge that tests both tactical foresight and multitasking skills. Designed primarily for single-player, the map demands full attention as players manage all paths simultaneously. It is best suited for StarCraft fans seeking the ultimate test in custom map defense scenarios, particularly those familiar with comp-stomping UMS maps. Before diving in, players should study the strengths and weaknesses of each enemy type, master Sunken Colony and Spore Colony placements, and refine their resource management strategies. Playing on a brighter screen setting can also help mitigate the map’s oppressive visual tone.
§pêciàl Forçês Extrëmé XXX
§pêciàl Forçês Extrëmé XXX는 스타크래프트 브루드워의 유즈맵으로, 컴까기 장르에 속하는 맵이다. 맵 제목에서 느껴지듯 극한의 난이도를 자랑하는 이 맵은 플레이어가 컴퓨터-controlled 적군과 맞서 싸우는 전투형 구조로 구성되어 있다. 맵 중앙에는 넓은 평지가 펼쳐져 있으며, 주변으로는 사막 타일셋의 넓은 평원과 요새가 배치되어 있어 방어와 공격의 균형을 맞추기 어렵다. 맵 이미지에서 확인되는 다수의 부대 건물과 생산 시설들은 플레이어가 끊임없이 자원을 확보하고 유닛을 생산해야 한다는 점을 강조한다. 또한, 맵 곳곳에 흩어져 있는 오브젝트와 건물이 전투의 흐름을 방해하거나 전략적 요충지를 제공할 가능성이 높다. 이 맵은 6명의 플레이어가 참여할 수 있으며, 각 플레이어는 개별적으로 컴퓨터를 상대해야 한다. 맵의 난이도는 매우 높을 것으로 추정되며, 극한의 조건에서 승리하기 위해서는 뛰어난 전략과 빠른 판단력이 요구된다. 맵의 배경은 사막으로 설정되어 있어 시야 확보와 기동성이 중요한 요소로 작용할 것이다. 또한, 맵의 크기가 3072x3072로 상당히 크기 때문에 자원 관리와 부대 운영이 더욱 복잡해질 가능성이 있다. §pêciàl Forçês Extrëmé XXX는 극한의 난이도와 전략적 깊이를 추구하는 컴까기 유즈맵을 찾는 플레이어들에게 강추할 만한 작품이다. 특히, 컴퓨터와의 치열한 전투를 즐기며 전략적 사고를 발휘하고 싶은 유저라면 이 맵을 통해 뛰어난 경험을 얻을 수 있을 것이다. 다만, 난이도가 매우 높으므로 초보 플레이어는 접근하기 전에 충분한 연습이 필요할 것이다. Special Forces Extreme XXX is a StarCraft: Brood War custom map belonging to the "comp stomp" genre, where players face off against computer-controlled enemies in a battle-focused structure. As the name suggests, this map boasts an extreme level of difficulty, featuring a central expanse of open terrain surrounded by vast desert plains and fortresses that make balancing defense and offense a daunting task. The numerous squad buildings and production facilities scattered across the map highlight the need for players to continuously secure resources and churn out units. The map supports up to six players, each battling the AI individually. Given its extreme difficulty, victory demands sharp strategy and rapid decision-making. Set in a desert environment, visibility and mobility play crucial roles, while the massive 3072x3072 map size adds further complexity to resource management and unit operations. For players seeking a custom map that pushes extreme difficulty and strategic depth, Special Forces Extreme XXX is highly recommended. Those who enjoy intense AI battles and want to test their strategic thinking will find this map a rewarding experience. However, due to its punishing difficulty, beginners should practice extensively before attempting it.
§pêciàl Forçês Extrëmé XXX
§pêciàl Forçês Extrëmé는 스타크래프트 브루드워의 유즈맵으로, 초월적인 난이도를 자랑하는 컴까기(컴퓨터 상대 유즈맵) 장르에 속한다. 맵 제목에서부터 느껴지듯 특수부대원들이 극한의 환경에서 살아남아야 하는 긴장감 넘치는 플레이가 특징이다. 맵 전체가 사막 지형으로 구성되어 있으며, 초반부터 강력한 컴퓨터 유닛들이 끊임없이 공격해오는 구조로 되어 있어 플레이어는 방어와 자원 관리, 그리고 전략적 선택을 동시에 고려해야 한다. 특히 맵 중앙에 위치한 주요 거점을 중심으로 한 방어선이 형성되어 있으며, 이곳을 지키느냐 무너뜨리느냐에 따라 게임의 향방이 크게 갈린다. 맵의 디자인과 배치된 유닛들은 모두 극한의 전투를 연상시키도록 구성되어 있어, 마치 특수부대원처럼 신속하고 치밀한 대응력을 요구한다. 2인 이상의 팀 플레이가 권장되며, 초보자는 난이도를 낮춰서라도 충분한 연습이 필요할 정도로 몰입감이 높은 작품이다. 플레이어는 자원 채취와 방어선 구축, 그리고 때로는 후퇴와 재정비까지 다양한 전략을 유연하게 구사해야만 한다. 맵의 전체적인 밸런스는 초중반의 압박감이 매우 강렬하지만, 후반부로 갈수록 플레이어의 전략적 깊이가 빛을 발하게 되는 구조로 설계되어 있다. 맵의 상세한 트리거나 승리 조건은 공개되지 않았지만, 방어와 생존을 중점으로 한 플레이 경험이 주를 이룬다. 특히 맵의 이름과 제목에서 느껴지는 ‘극한’이라는 키워드가 플레이어의 긴장감을 한층 더 높이는 요소로 작용한다. 이 맵을 즐기기 위해서는 스타크래프트의 기본적인 조작은 물론이고, 컴퓨터의 패턴을 읽는 안목과 빠른 판단력이 요구된다. 또한, 맵의 특성상 지속적인 업데이트와 수정이 이루어진 흔적이 보이며, 여러 제작자에 의해 개선된 흔적이 맵 내부에 남아 있어 제작자들의 열정을 느낄 수 있다. 이처럼 §pêciàl Forçês Extrëmé는 단순한 디펜스 게임을 넘어, 스타크래프트 유즈맵의 진수를 보여주는 작품으로, 플레이어에게 끊임없는 도전과 성취감을 선사할 것이다. §pêciàl Forçês Extrëmé is a StarCraft: Brood War custom map that falls under the "compkagi" (computer opponent custom map) genre, renowned for its overwhelming difficulty. As the map's title suggests, players must navigate intense gameplay where elite forces fight to survive in extreme conditions. The entire map is set in a desert terrain, and from the very beginning, players face relentless assaults from powerful computer-controlled units, forcing them to balance defense, resource management, and strategic decision-making. A key defensive line is centered around a major outpost in the middle of the map, and whether this position is held or lost can drastically alter the outcome of the game. The map's design and unit placements are all structured to evoke intense combat, demanding quick and precise responses from players, much like elite special forces. Team play with two or more players is recommended, and even beginners should practice extensively, even on reduced difficulty, due to the map's high level of immersion. Players must flexibly employ various strategies, including resource gathering, fortifying defenses, and sometimes retreating and reorganizing. While the early and mid-game are dominated by intense pressure, the late game is designed to highlight the player's strategic depth. The map's detailed strategies and victory conditions remain undisclosed, but the experience revolves around defense and survival. The word "extreme" in the map's name and title further amplifies the tension, making every moment feel critical. To fully enjoy §pêciàl Forçês Extrëmé, players need not only a solid grasp of StarCraft's basic mechanics but also the ability to read the computer's patterns and make swift decisions. Additionally, the map shows signs of continuous updates and refinements, with traces of improvements made by multiple creators, reflecting the dedication of its developers. More than just a defense game, §pêciàl Forçês Extrëmé showcases the essence of StarCraft custom maps, offering players endless challenges and a deep sense of accomplishment.
스페셜 포스 익스트림 (Special Force EXTRHARD)
스타크래프트 브루드워의 유즈맵 중에서도 손에 땀을 쥐게 만드는 난이도를 자랑하는 ‘$PECIALFORCE$EXTRHARD’는 이름 그대로 극한의 난이도를 구현한 컴까기 맵이다. 맵의 배경을 보면 사막 지형이 펼쳐져 있으며, 곳곳에 배치된 건물과 지형지물이 플레이어의 전략을 끊임없이 시험한다. 맵 제목에서부터 느껴지듯이 이 맵은 초보자에게는 결코 녹록치 않은 난이도를 자랑하는 만큼, ‘EXTRHARD’라는 수식어는 결코 허명이 아니다. 맵의 구조는 비교적 간소한 편이지만, 적절한 건물 배치와 방어선의 구축이 필수적이며, 시간이 지날수록 쏟아지는 적의 물량은 플레이어의 손길을 바쁘게 만든다. 특히 맵의 중앙에 위치한 요충지에서는 방어와 공격의 균형이 중요해지며, 한순간의 판단ミス가 게임의 승패를 가르는 분수령이 된다. 맵의 제한 시간은 따로 표시되지 않지만, 끊임없는 적의 공격으로 인해 플레이어는 항상 긴장감을 유지해야 한다. 이 맵은 주로 1인 플레이를 상정하고 제작되었지만, 팀 플레이로도 충분히 즐길 수 있는 구조를 갖추고 있어, 친구들과의 협동 플레이도 흥미진진하다. 초보자는 물론이고 숙련자조차도 매번 새로운 전략을 짜야 하는 이 맵은, 스타크래프트 유즈맵의 진수를 보여주는 작품으로 손꼽힌다. 플레이 전에는 반드시 적의 공격 패턴과 맵의 주요 방어 지점을 숙지하고, 건물을 효율적으로 배치하는 연습을 하는 것이 중요하다. 또한, Mineral과 Gas의 관리 역시 결코 소홀히 할 수 없으므로, 자원 관리의 중요성을 overlooked하지 않도록 주의해야 한다. StarCraft: Brood War's custom map '$PECIALFORCE$EXTRHARD' stands out even among the most challenging user-made maps with its extreme difficulty, perfectly matching its name as a hardcore defense map. The map's setting features a desert terrain, where scattered buildings and terrain obstacles continuously test the player's strategy. As the name suggests, this map is far from easy for beginners, making the 'EXTRHARD' label anything but an exaggeration. While the map's structure is relatively simple, proper building placement and defensive line construction are essential, and the relentless enemy waves keep players on their toes. The central strategic location demands a balance between defense and offense, where even a single misstep can decide the game's outcome. Although no time limit is displayed, the constant enemy assaults ensure players remain in a state of high tension throughout. Designed primarily for solo play, the map also offers a compelling structure for team play, making cooperative matches with friends just as engaging. Whether you're a beginner or a veteran, this map demands fresh strategies every time, showcasing the essence of StarCraft custom maps. Before playing, it's crucial to study enemy attack patterns and key defensive points, while practicing efficient building placement. Additionally, resource management—especially for Minerals and Vespene Gas—cannot be overlooked, so always pay close attention to resource efficiency.
프로텍트 더 퀸 투ough AS HELL (Protect The Queen TOUGH AS HELL)
스타크래프트 브루드워의 고난이도 유즈맵 ‘프로텍트 더 퀸 투ough AS HELL’은 말 그대로 ‘여왕을 보호하라’는 미션을 극한의 난이도로 재탄생시킨 작품이다. 내부 맵 설명에서 ‘HARD’라고 명시된 이 버전은 제작자 Holykaos가 만든 원작의 극한 난이도 버전으로, TyDyeDragon이 추가로 난이도를 조정했다는 설명이 붙어 있어 플레이어들에게 도전 정신을 자극한다. 맵은 사막 테마의 넓은 평야를 배경으로 하며, 중앙의 여왕 유닛을 중심으로 적의 끊임없는 공격이 펼쳐진다. 플레이어는 각자의 시작 지점에서 출발해 방어선을 구축하고, 여왕을 보호하는 동시에 적을 섬멸하는 전략적 선택을 강요받는다. 맵의 핵심은 방어와 공격의 균형을 맞추는 데 있다. 여왕 주변에 배치된 방어 건물과 유닛을 보호하면서도, 중앙으로 몰려드는 적의 물량을 효과적으로 대응해야 한다. 맵 상단에는 적의 대규모 웨이브가 끊임없이 등장하며, 플레이어는 이를 예측하고 방어 자원을 효율적으로 배분해야 한다. 특히, 맵의 지형이 비교적 평탄한 편이라 유닛의 기동성과 배치 전략이 중요하다. 초보자와 숙련자 모두 도전할 수 있지만, 난이도가 상당히 높기 때문에 초심자는 원본 버전이나 다른 난이도 버전으로 연습을 권장한다. 추천 대상으로는 스타크래프트의 전략적 깊이를 즐기고자 하는 플레이어, 혹은 유즈맵의 난이도 도전을 즐기는 유저들이 적합하다. 방어와 공격의 균형을 맞추는 재미와 함께, 여왕을 지켜내는 성취감을 느낄 수 있는 맵이다. 플레이 전에는 방어 건물의 배치와 유닛의 생산 순서를 미리 계획하는 것이 중요하며, 적의 공격 패턴을 분석하는 데 시간을 투자하는 것이 좋다. 또한, 맵의 극한 난이도를 극복하기 위해 팀원과의 협력이 필수적이므로, 파티 플레이를 준비하는 것이 좋다. StarCraft: Brood War’s high-difficulty custom map *Protect the Queen: Too Hard AS HELL* is literally a rebirth of the mission “Protect the Queen” pushed to extreme difficulty. The internal map description explicitly labels this version as “HARD,” a creation by the mapper Holykaos that represents the ultimate challenge of the original, with TyDyeDragon further adjusting the difficulty to push players to their limits. Set against a vast desert plain, the map centers on the Queen unit, which faces relentless assaults from enemies. Players begin at their respective starting points, forced to construct defensive lines while simultaneously protecting the Queen and wiping out the opposing forces. The heart of the challenge lies in balancing defense and offense. Players must safeguard defensive structures and units surrounding the Queen while effectively countering the swarms of enemies converging on the center. At the top of the map, massive enemy waves appear continuously, requiring players to anticipate threats and allocate resources wisely. The terrain is relatively flat, placing a premium on unit mobility and strategic positioning. While accessible to both beginners and veterans, the difficulty is steep enough that newcomers are advised to practice on the original or lower-difficulty versions first. Ideal for players who relish StarCraft’s strategic depth or those seeking a stiff challenge from custom maps, this title delivers satisfaction in balancing defense and offense while achieving the thrill of protecting the Queen. Before jumping in, it’s crucial to plan defensive building placements and unit production orders, and investing time in analyzing enemy attack patterns is highly recommended. Overcoming the map’s extreme difficulty also demands strong teamwork, so preparing for a party play session is essential.
마운트 임파서블 (Mount Impossible)
스타크래프트 브루드워의 유즈맵 ‘Mount Impossible 1.7.1’을 소개한다. 이 맵은 이름에서도 느껴지듯, 플레이어들에게 끊임없는 도전과 극한의 난이도를 제공하는 디펜스 장르의 유즈맵이다. 맵의 전체적인 구조는 고지대와 협곡, 그리고 좁은 통로로 나뉘어져 있으며, 중앙에 위치한 기지 주변으로 적의 공격로가 집중되어 있다. 맵의 배경은 화산 테마로 설정되어 있어, 붉은 색조의 타일과 용암 지형이 플레이어의 긴장감을 한층 높여준다. 맵의 이름에서부터 느낄 수 있듯, 이 맵은 단순한 디펜스가 아니라, 각 플레이어가 마주치게 되는 ‘불가능’으로 느껴질 정도의 극한의 방어전을 펼치게 된다. 플레이 방식은 1인용 또는 다인용으로 구성되어 있으며, 각 플레이어는 자신의 기지를 지키며 끊임없이 몰려오는 적의 웨이브를 상대해야 한다. 맵에서는 주로 저글링, 히드라리스크, 울트라리스크, 디파일러 등 저그의 공세와 occasional한 프로토스나 테란의 공격이 포함된다. 플레이어는 기지의 입구에 방어 건물을 건설하고, 미네랄과 가스를 확보하여 유닛을 생산하거나 업그레이드할 수 있다. 또한, 맵 곳곳에 숨겨진 보급품이나 아이템들이 배치되어 있어, 이를 확보하면 일시적으로 방어력을 강화하거나 유닛의 성능을 일시적으로 향상시킬 수 있다. 맵의 난이도는 매우 높게 설정되어 있으며, 특히 후반부로 갈수록 적의 공세가 점점 더 강력해지고 빈번해진다. 때문에 플레이어는 끊임없이 전략을 수정하고, 방어 라인을 재구축해야만 살아남을 수 있다. 이 맵은 초보 플레이어보다는 어느 정도 스타크래프트에 익숙한 유저들에게 추천된다. 맵의 구조와 적의 패턴을 빠르게 파악하고, 방어 전략을 유연하게 변경할 수 있는 능력이 요구된다. 또한, 팀 플레이보다는 개인 플레이에 더 초점이 맞춰져 있어, Solo 플레이를 선호하는 유저들에게 적합하다. 맵의 분위기와 긴장감은 플레이어에게 끊임없는 도전 의식을 자극하며, 한 번 클리어한 후에도 다시 도전하고 싶게 만드는 매력이 있다. 또한, 맵의 디자인과 그래픽적 요소도 뛰어나, 스타크래프트의 고전적인 분위기를 느낄 수 있어 팬들에게는 더욱 매력적으로 다가올 것이다. 이 맵을 플레이하기 전에는 기지 방어의 기본 전략을 숙지하고, 각 유닛의 특성과 상성을 잘 이해하고 있어야 한다. 또한, 맵 곳곳의 아이템 위치를 미리 파악해 두면, 긴급 상황에서 큰 도움이 될 수 있다. 마지막으로, 맵의 난이도가 매우 높기 때문에, 체력 관리와 자원 관리에 신경을 써야 한다. 이러한 요소들을 고려한다면, ‘Mount Impossible 1.7.1’을 플레이하는 즐거움을 maksimal로 느낄 수 있을 것이다. StarCraft: Brood War's custom map *Mount Impossible 1.7.1* introduces a relentless challenge with extreme difficulty in the defense genre. As the name suggests, the map pushes players to their limits with a layout featuring high ground, canyons, and narrow passages, all funneling enemy attacks toward the central base. Set against a volcanic theme, the map’s red-toned tiles and lava terrain heighten the tension, reinforcing the sense that this is no ordinary defense—it’s a battle against the "impossible." The gameplay supports both single-player and multiplayer modes, where each player must defend their base against endless waves of enemies. The assaults primarily consist of Zerg units like Zerglings, Hydralisks, Ultralisks, and Defilers, with occasional Protoss or Terran forces adding variety. Players construct defensive structures at key entry points, gather minerals and gas to produce and upgrade units, and scavenge hidden supplies or power-ups scattered across the map to temporarily boost defenses or unit performance. The difficulty escalates dramatically in later stages, with enemy attacks growing stronger and more frequent, forcing players to adapt their strategies and rebuild defenses on the fly to survive. This map is best suited for players already familiar with StarCraft rather than beginners. Success requires quickly grasping the map’s layout and enemy patterns while remaining flexible enough to adjust strategies as needed. The focus leans toward solo play rather than team coordination, making it ideal for those who prefer going it alone. The intense atmosphere and mounting pressure create a compelling challenge that invites repeated attempts even after clearing it. The map’s design and visuals also excel, evoking the classic feel of StarCraft that will appeal to longtime fans. Before diving in, players should master core base defense strategies, understand unit matchups, and memorize item locations for critical moments. Given the map’s punishing difficulty, maintaining health and resource efficiency is crucial. With these factors in mind, *Mount Impossible 1.7.1* delivers a uniquely thrilling experience that maximizes the joy of overcoming an unforgiving challenge.
맵 선택 가이드
태그는 맵의 핵심 특징을 빠르게 설명하지만 제작 버전마다 규칙이 다를 수 있습니다. 상세 설명에서 권장 인원, 난이도, 플레이 시간과 버전을 함께 확인한 뒤 다운로드하세요.