
극악 난이도 스타크래프트 맵 모음
'극악 난이도' 태그가 등록된 맵을 모았습니다. 장르 하나로 찾기 어려운 플레이 방식, 난이도와 특징을 중심으로 인기 맵과 최신 맵을 비교해 보세요.
- 등록 맵
- 3개
- 누적 다운로드
- 5
- 누적 조회
- 573
인기 맵
다운로드와 조회 반응이 높은 맵입니다.
레벨컴까기 후반극악 1.61 (Level Compakgi Hardcore v1.61)
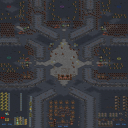
스타크래프트 브루드워의 대표적인 유즈맵 장르 중 하나인 ‘컴까기’로 유명한 맵, ‘레벨컴까기후반극악 1.61 (255업)’은 난이도가 매우 높은 디펜스 유형으로, 플레이어는 끊임없이 밀려오는 적군을 방어하면서 레벨을 올리며 진행하는 구조를 갖추고 있다. 맵은 넓은 우주 타일셋을 배경으로 펼쳐지며, 중앙에 위치한 본진을 중심으로 여러 곳에서 적의 공격이 끊임없이 발생한다. 특히 255업을 달성해야 하는 목표는 초보자와 숙련자 모두에게 도전적인 요소로 작용하는데, 고레벨 단계로 갈수록 적의 공격 패턴이 복잡해지고 소모전으로 변모하는 특징을 보인다. 맵의 특성은 기본적으로 컴퓨터 상대 디펜스로, 플레이어는 건물을 건설하고 유닛을 배치하여 방어선을 구축해야 하며, 일부 구간에서는 랜덤한 요소나 운빨이 요구되는 경우가 있다. 맵의 밀집된 구조와 빠른 공격 템포는 집중력을 요하며, 한 번의 실수가 패배로 이어질 수 있어 전략적 사고와 실시간 대응 능력이 중요하다. 초보자보다는 중급 이상의 플레이어에게 적합하며, 지속적인 레벨 업을 위한 자원 관리와 방어 전략 수립이 핵심이다. 또한, 맵의 타일셋과 분위기가 우주 배경으로 조성되어 있어 시원한 느낌을 주는 동시에, 디자인상으로는 적의 공격 루트가 비교적 명확하게 배치되어 있어 공략법을 익히면 난이도를 낮출 수 있다. 이 맵을 즐기기 위해서는 사전 공략이나Tip을 숙지하는 것이 좋으며, 다운로드 후에는 맵의 로딩 화면에서 제공되는 정보를 참고하는 것이 좋다. 주어진 목표를 달성하는 과정에서 발생하는 긴장감과 성취감은 이 맵의 가장 큰 매력으로, 스타크래프트 유즈맵의Classic한 재미를 느낄 수 있는 작품이다. 255업을 달성하기 위해선 적어도 30분 이상의 플레이 시간이 필요하며, 난이도 조절을 위해 플레이어는 자신의 실력에 맞는 레벨을 선택할 필요가 있다. 맵의 구조상으로는 중앙 본진 외에 보조 건물을 배치할 수 있는 공간이 제한적으로 존재하며, 이는 방어선을 강화하는 전략을 제한하는 요소로 작용하기도 한다. 하지만 이러한 제한이 오히려 플레이어의 창의성을 자극하며, 다양한 빌드와 전술을 시도해 볼 수 있는 기회를 제공한다. 이 맵을 통해 스타크래프트의 유즈맵 장르에 익숙해지면서 동시에 전략적 사고를 키울 수 있을 것이다. "Level Compakgi Hardcore v1.61 (255 Up)" is a highly challenging defense-style custom map within the popular Brood War community, renowned for its intense wave-based gameplay where players must fend off relentless enemy attacks while leveling up. Set against a cosmic backdrop with a vast tile layout, the map features a central base that players must defend while managing resources and unit production. As players progress through levels, the enemy waves become increasingly complex, shifting from straightforward assaults to sophisticated multi-pronged attacks that demand strategic foresight and adaptability. The core gameplay revolves around constructing defenses, positioning units effectively, and making critical decisions under pressure, as even minor mistakes can lead to defeat. While the map is technically a computer-based defense scenario, its high difficulty curve and reliance on precise execution make it more suited for intermediate to advanced players seeking a tough challenge. The compact layout and rapid attack cycles emphasize quick reflexes and tactical planning, while the space-themed tile set enhances immersion. Players are advised to familiarize themselves with common strategies or consult community guides to optimize their approach. Achieving the 255-level goal typically requires around 30 minutes of focused playtime, and the map offers a rewarding sense of accomplishment upon completion. Despite limited auxiliary building space, this constraint encourages creative problem-solving and experimentation with different build orders. Overall, this map exemplifies the depth and creativity of Brood War's custom maps, offering both a test of skill and an engaging experience for enthusiasts of the genre.
썬큰D 10웨이 13.1 임파서블 (SunkenD 10Way 13.1 Impossible)
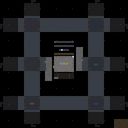
‘썬큰D 10웨이 13.1 임파서블’은 스타크래프트 브루드워의 유즈맵 시리즈 중에서도 손꼽히는 난이도와 긴장감을 자랑하는 디펜스 장르의 정점이라 할 수 있다. 맵의 핵심은 이름에서 짐작할 수 있듯 10방향으로 펼쳐진 입구에서 끊임없이 몰려드는 적들을 방어하는 것이며, 특히 ‘13.1’ 버전은 시리즈 내에서도 난이도가 ‘Even MidImpossible’로 표기될 정도로 극악의 난이도를 자랑한다. 맵은 우주 타일셋을 기반으로 하며, 중앙에 위치한 본진 건물을 중심으로 10개의 주요 입구가 방사형으로 배치되어 있다. 각 입구는 좁고 복잡한 통로를 거쳐 방어 타워가 설치 가능한 지점으로 이어지며, 방어 포인트를 놓치지 않고 최대한 효율적으로 배치해야만 살아남을 수 있는 구조로 설계되어 있다. 적들은 초반에는 약한 저글링과 히드라리스크로 시작하지만, 시간이 지날수록 스커지, 뮤탈리스크, 울트라리스크 등 고급 유닛들이 쏟아져 들어오며 플레이어의 대처 능력을 끊임없이 시험한다. 방어에 성공하려면 초반 자원 관리와 타워 배치 전략이 무엇보다 중요하며, 한 번의 실수가 모든 방어선을 무너뜨릴 수 있다. 맵의 특징 중 하나는 ‘10웨이’라는 이름에 걸맞게 모든 입구에서 동시다발적으로 공격이 들어오기 때문에 멀티태스킹 능력이 필수라는 점이다. 또한, 맵의 크기가 4096x4096으로 매우 크고 복잡한 구조를 가지고 있어, 초보자들은 난이도를 낮춰 연습 모드로 플레이하는 것이 좋겠다. 이 맵은 디펜스 유즈맵의 진수를 경험하고자 하는 숙련자들에게 강력히 추천하며, 특히 ‘임파서블’ 난이도에서 얻는 성취감은 상당한 가치를 지닌다. 플레이 전에는 본진과 주요 방어 포인트의 위치를 숙지하고, 자원과 유닛 생산을 효율적으로 관리할 수 있는 전략을 미리 세워두는 것이 중요하다. 한 번의 실수로 모든 노력이 물거품이 될 수 있기 때문이다. 이 맵은 스타크래프트 유즈맵의 역사에서 빼놓을 수 없는 명작으로, 디펜스 장르의 팬이라면 반드시 플레이해 볼 가치가 있다. This map, ‘SunkenD 10Way 13.1 Impossible,’ stands as one of the most challenging and intense defense-style custom maps in the StarCraft: Brood War modding community. The core gameplay revolves around defending your base from relentless waves of enemies approaching from 10 distinct directions, a concept reflected in both the title and the map’s design. The ‘13.1’ version is notably labeled as ‘Even MidImpossible,’ indicating an extreme difficulty tier that pushes even experienced players to their limits. The map utilizes a space-themed tileset, with your main base centrally located and connected to 10 radial entry points via narrow, maze-like corridors. Each entry point leads to strategic defensive positions where towers can be placed, requiring careful planning and resource management to maximize efficiency. While the early waves consist of weaker units like Zerglings and Hydralisks, the challenge escalates rapidly as time progresses, introducing advanced units such as Scourges, Mutalisks, and Ultralisks. Success hinges on early-game resource allocation and optimal tower placement, as even a single misstep can lead to a cascading failure across defensive lines. The ‘10Way’ aspect means enemies attack from all directions simultaneously, making multitasking a critical skill. The map’s massive 4096x4096 size and intricate layout demand thorough preparation, especially for newcomers who may benefit from practicing on lower difficulty settings first. This map is a must-play for defense genre enthusiasts seeking the ultimate challenge, particularly at the ‘Impossible’ difficulty level, where the sense of achievement is unparalleled. Before diving in, players should familiarize themselves with the base layout and key defensive points, ensuring they have a solid strategy for resource management and unit production. A single oversight can spell disaster, making every decision crucial in this unforgiving yet rewarding experience. ‘SunkenD 10Way 13.1 Impossible’ is a legendary custom map in the StarCraft modding scene, offering an unmatched test of skill and strategy for defense genre fans.
세계 최악의 컴까기 (The Worst Compkki)
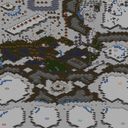
‘세계 최악의 컴까기’는 스타크래프트 브루드워 유즈맵의 대표적인 컴퓨터 상대 디펜스 장르로, 그 이름에서부터 느껴지듯 극악의 난이도를 자랑하는 맵이다. 맵 구조는 중앙에 위치한 본진을 중심으로 광활한 방어 지역이 펼쳐지며, 곳곳에 배치된 방어 건물과 병력 생산 시설이 플레이어의 생존을 시험한다. 맵 상단과 하단에는 각각의 시작 지점이 존재하며, 이 곳에서부터 끊임없이 몰려오는 적군을 상대로 방어선을 구축해야 한다. particularly, 맵의 가장 큰 특징은 방어 건물의 배치와 자원 수급의 불리함에 있다. 광물과 가스가 중앙 본진에 집중되어 있어 초반 자원 확보가 원활하지 않으며, 방어 건물의 위치가 플레이어의 전략적 선택을 강제한다. 또한, 적군의 병력 구성과 공격 패턴이 끊임없이 변화하여 플레이어는 지속적인 대비를 요구받는다. 이 맵은 초보자보다는 경험이 있는 유저를 대상으로 하며, 특히 디펜스 게임의 기본기를 충실히 다진 플레이어에게 추천할 만하다. 방어 건물의 효율적인 배치와 자원 관리가 승패를 좌우하므로, 맵을 플레이하기 전에는 기본 전략을 숙지하고 다양한 시나리오를 연습해 보는 것이 중요하다. 맵의 극악 난이도는 플레이어의 실력을 한 단계 끌어올리는 데 도움이 될 것이다. 무엇보다도, 이 맵은 단순히 방어만을 요구하지 않으며, 적군의 공격을 유도하고 반격하는 전략적 요소가 포함되어 있어 디펜스 게임의 깊이를 느낄 수 있다. 게임을 마스터하기 위해서는 맵의 구조를 정확히 이해하고, 각 공격 타이밍에 맞춘 방어 및 반격 계획을 수립하는 것이 필수적이다. 이처럼 ‘세계 최악의 컴까기’는 디펜스 유즈맵의 진수를 보여주는 동시에, 플레이어의 실력을 시험하는 도전 과제의 장으로 자리매김하고 있다. "World's Worst AI Defense" is a representative defense genre map in *StarCraft: Brood War* custom maps where players battle against computer opponents, boasting an extreme difficulty that lives up to its name. The map centers around a main base surrounded by vast defensive zones, with defensive structures and production facilities scattered throughout to test the player's survival skills. Each side—top and bottom—has its own starting point, from which waves of enemies continuously assault, requiring players to build and maintain a strong defense line. A key feature of the map is the restrictive placement of defensive buildings and the disadvantageous resource distribution. Minerals and Vespene Gas are concentrated near the central main base, making early resource collection difficult, while the positioning of defensive structures forces players to make strategic choices. Additionally, the enemy's constantly shifting unit compositions and attack patterns demand continuous adaptation from the player. This map is aimed at experienced players rather than beginners, making it especially suitable for those who have honed their defensive gameplay fundamentals. Efficient placement of defensive buildings and resource management are critical to victory, so it's important to study basic strategies and practice various scenarios before playing. The map's brutal difficulty helps elevate a player's skill level, but it also incorporates strategic elements beyond simple defense—such as luring and counterattacking enemy forces—allowing players to experience the depth of defense games. Mastering this map requires a deep understanding of its layout and the ability to devise defense and counterattack plans tailored to each enemy assault timing. In this way, "World's Worst AI Defense" not only showcases the essence of defense custom maps but also stands as a challenging test of a player's skill.
최근 등록된 맵
새로 추가된 파일과 버전을 확인하세요.
세계 최악의 컴까기 (The Worst Compkki)
‘세계 최악의 컴까기’는 스타크래프트 브루드워 유즈맵의 대표적인 컴퓨터 상대 디펜스 장르로, 그 이름에서부터 느껴지듯 극악의 난이도를 자랑하는 맵이다. 맵 구조는 중앙에 위치한 본진을 중심으로 광활한 방어 지역이 펼쳐지며, 곳곳에 배치된 방어 건물과 병력 생산 시설이 플레이어의 생존을 시험한다. 맵 상단과 하단에는 각각의 시작 지점이 존재하며, 이 곳에서부터 끊임없이 몰려오는 적군을 상대로 방어선을 구축해야 한다. particularly, 맵의 가장 큰 특징은 방어 건물의 배치와 자원 수급의 불리함에 있다. 광물과 가스가 중앙 본진에 집중되어 있어 초반 자원 확보가 원활하지 않으며, 방어 건물의 위치가 플레이어의 전략적 선택을 강제한다. 또한, 적군의 병력 구성과 공격 패턴이 끊임없이 변화하여 플레이어는 지속적인 대비를 요구받는다. 이 맵은 초보자보다는 경험이 있는 유저를 대상으로 하며, 특히 디펜스 게임의 기본기를 충실히 다진 플레이어에게 추천할 만하다. 방어 건물의 효율적인 배치와 자원 관리가 승패를 좌우하므로, 맵을 플레이하기 전에는 기본 전략을 숙지하고 다양한 시나리오를 연습해 보는 것이 중요하다. 맵의 극악 난이도는 플레이어의 실력을 한 단계 끌어올리는 데 도움이 될 것이다. 무엇보다도, 이 맵은 단순히 방어만을 요구하지 않으며, 적군의 공격을 유도하고 반격하는 전략적 요소가 포함되어 있어 디펜스 게임의 깊이를 느낄 수 있다. 게임을 마스터하기 위해서는 맵의 구조를 정확히 이해하고, 각 공격 타이밍에 맞춘 방어 및 반격 계획을 수립하는 것이 필수적이다. 이처럼 ‘세계 최악의 컴까기’는 디펜스 유즈맵의 진수를 보여주는 동시에, 플레이어의 실력을 시험하는 도전 과제의 장으로 자리매김하고 있다. "World's Worst AI Defense" is a representative defense genre map in *StarCraft: Brood War* custom maps where players battle against computer opponents, boasting an extreme difficulty that lives up to its name. The map centers around a main base surrounded by vast defensive zones, with defensive structures and production facilities scattered throughout to test the player's survival skills. Each side—top and bottom—has its own starting point, from which waves of enemies continuously assault, requiring players to build and maintain a strong defense line. A key feature of the map is the restrictive placement of defensive buildings and the disadvantageous resource distribution. Minerals and Vespene Gas are concentrated near the central main base, making early resource collection difficult, while the positioning of defensive structures forces players to make strategic choices. Additionally, the enemy's constantly shifting unit compositions and attack patterns demand continuous adaptation from the player. This map is aimed at experienced players rather than beginners, making it especially suitable for those who have honed their defensive gameplay fundamentals. Efficient placement of defensive buildings and resource management are critical to victory, so it's important to study basic strategies and practice various scenarios before playing. The map's brutal difficulty helps elevate a player's skill level, but it also incorporates strategic elements beyond simple defense—such as luring and counterattacking enemy forces—allowing players to experience the depth of defense games. Mastering this map requires a deep understanding of its layout and the ability to devise defense and counterattack plans tailored to each enemy assault timing. In this way, "World's Worst AI Defense" not only showcases the essence of defense custom maps but also stands as a challenging test of a player's skill.
썬큰D 10웨이 13.1 임파서블 (SunkenD 10Way 13.1 Impossible)
‘썬큰D 10웨이 13.1 임파서블’은 스타크래프트 브루드워의 유즈맵 시리즈 중에서도 손꼽히는 난이도와 긴장감을 자랑하는 디펜스 장르의 정점이라 할 수 있다. 맵의 핵심은 이름에서 짐작할 수 있듯 10방향으로 펼쳐진 입구에서 끊임없이 몰려드는 적들을 방어하는 것이며, 특히 ‘13.1’ 버전은 시리즈 내에서도 난이도가 ‘Even MidImpossible’로 표기될 정도로 극악의 난이도를 자랑한다. 맵은 우주 타일셋을 기반으로 하며, 중앙에 위치한 본진 건물을 중심으로 10개의 주요 입구가 방사형으로 배치되어 있다. 각 입구는 좁고 복잡한 통로를 거쳐 방어 타워가 설치 가능한 지점으로 이어지며, 방어 포인트를 놓치지 않고 최대한 효율적으로 배치해야만 살아남을 수 있는 구조로 설계되어 있다. 적들은 초반에는 약한 저글링과 히드라리스크로 시작하지만, 시간이 지날수록 스커지, 뮤탈리스크, 울트라리스크 등 고급 유닛들이 쏟아져 들어오며 플레이어의 대처 능력을 끊임없이 시험한다. 방어에 성공하려면 초반 자원 관리와 타워 배치 전략이 무엇보다 중요하며, 한 번의 실수가 모든 방어선을 무너뜨릴 수 있다. 맵의 특징 중 하나는 ‘10웨이’라는 이름에 걸맞게 모든 입구에서 동시다발적으로 공격이 들어오기 때문에 멀티태스킹 능력이 필수라는 점이다. 또한, 맵의 크기가 4096x4096으로 매우 크고 복잡한 구조를 가지고 있어, 초보자들은 난이도를 낮춰 연습 모드로 플레이하는 것이 좋겠다. 이 맵은 디펜스 유즈맵의 진수를 경험하고자 하는 숙련자들에게 강력히 추천하며, 특히 ‘임파서블’ 난이도에서 얻는 성취감은 상당한 가치를 지닌다. 플레이 전에는 본진과 주요 방어 포인트의 위치를 숙지하고, 자원과 유닛 생산을 효율적으로 관리할 수 있는 전략을 미리 세워두는 것이 중요하다. 한 번의 실수로 모든 노력이 물거품이 될 수 있기 때문이다. 이 맵은 스타크래프트 유즈맵의 역사에서 빼놓을 수 없는 명작으로, 디펜스 장르의 팬이라면 반드시 플레이해 볼 가치가 있다. This map, ‘SunkenD 10Way 13.1 Impossible,’ stands as one of the most challenging and intense defense-style custom maps in the StarCraft: Brood War modding community. The core gameplay revolves around defending your base from relentless waves of enemies approaching from 10 distinct directions, a concept reflected in both the title and the map’s design. The ‘13.1’ version is notably labeled as ‘Even MidImpossible,’ indicating an extreme difficulty tier that pushes even experienced players to their limits. The map utilizes a space-themed tileset, with your main base centrally located and connected to 10 radial entry points via narrow, maze-like corridors. Each entry point leads to strategic defensive positions where towers can be placed, requiring careful planning and resource management to maximize efficiency. While the early waves consist of weaker units like Zerglings and Hydralisks, the challenge escalates rapidly as time progresses, introducing advanced units such as Scourges, Mutalisks, and Ultralisks. Success hinges on early-game resource allocation and optimal tower placement, as even a single misstep can lead to a cascading failure across defensive lines. The ‘10Way’ aspect means enemies attack from all directions simultaneously, making multitasking a critical skill. The map’s massive 4096x4096 size and intricate layout demand thorough preparation, especially for newcomers who may benefit from practicing on lower difficulty settings first. This map is a must-play for defense genre enthusiasts seeking the ultimate challenge, particularly at the ‘Impossible’ difficulty level, where the sense of achievement is unparalleled. Before diving in, players should familiarize themselves with the base layout and key defensive points, ensuring they have a solid strategy for resource management and unit production. A single oversight can spell disaster, making every decision crucial in this unforgiving yet rewarding experience. ‘SunkenD 10Way 13.1 Impossible’ is a legendary custom map in the StarCraft modding scene, offering an unmatched test of skill and strategy for defense genre fans.
레벨컴까기 후반극악 1.61 (Level Compakgi Hardcore v1.61)
스타크래프트 브루드워의 대표적인 유즈맵 장르 중 하나인 ‘컴까기’로 유명한 맵, ‘레벨컴까기후반극악 1.61 (255업)’은 난이도가 매우 높은 디펜스 유형으로, 플레이어는 끊임없이 밀려오는 적군을 방어하면서 레벨을 올리며 진행하는 구조를 갖추고 있다. 맵은 넓은 우주 타일셋을 배경으로 펼쳐지며, 중앙에 위치한 본진을 중심으로 여러 곳에서 적의 공격이 끊임없이 발생한다. 특히 255업을 달성해야 하는 목표는 초보자와 숙련자 모두에게 도전적인 요소로 작용하는데, 고레벨 단계로 갈수록 적의 공격 패턴이 복잡해지고 소모전으로 변모하는 특징을 보인다. 맵의 특성은 기본적으로 컴퓨터 상대 디펜스로, 플레이어는 건물을 건설하고 유닛을 배치하여 방어선을 구축해야 하며, 일부 구간에서는 랜덤한 요소나 운빨이 요구되는 경우가 있다. 맵의 밀집된 구조와 빠른 공격 템포는 집중력을 요하며, 한 번의 실수가 패배로 이어질 수 있어 전략적 사고와 실시간 대응 능력이 중요하다. 초보자보다는 중급 이상의 플레이어에게 적합하며, 지속적인 레벨 업을 위한 자원 관리와 방어 전략 수립이 핵심이다. 또한, 맵의 타일셋과 분위기가 우주 배경으로 조성되어 있어 시원한 느낌을 주는 동시에, 디자인상으로는 적의 공격 루트가 비교적 명확하게 배치되어 있어 공략법을 익히면 난이도를 낮출 수 있다. 이 맵을 즐기기 위해서는 사전 공략이나Tip을 숙지하는 것이 좋으며, 다운로드 후에는 맵의 로딩 화면에서 제공되는 정보를 참고하는 것이 좋다. 주어진 목표를 달성하는 과정에서 발생하는 긴장감과 성취감은 이 맵의 가장 큰 매력으로, 스타크래프트 유즈맵의Classic한 재미를 느낄 수 있는 작품이다. 255업을 달성하기 위해선 적어도 30분 이상의 플레이 시간이 필요하며, 난이도 조절을 위해 플레이어는 자신의 실력에 맞는 레벨을 선택할 필요가 있다. 맵의 구조상으로는 중앙 본진 외에 보조 건물을 배치할 수 있는 공간이 제한적으로 존재하며, 이는 방어선을 강화하는 전략을 제한하는 요소로 작용하기도 한다. 하지만 이러한 제한이 오히려 플레이어의 창의성을 자극하며, 다양한 빌드와 전술을 시도해 볼 수 있는 기회를 제공한다. 이 맵을 통해 스타크래프트의 유즈맵 장르에 익숙해지면서 동시에 전략적 사고를 키울 수 있을 것이다. "Level Compakgi Hardcore v1.61 (255 Up)" is a highly challenging defense-style custom map within the popular Brood War community, renowned for its intense wave-based gameplay where players must fend off relentless enemy attacks while leveling up. Set against a cosmic backdrop with a vast tile layout, the map features a central base that players must defend while managing resources and unit production. As players progress through levels, the enemy waves become increasingly complex, shifting from straightforward assaults to sophisticated multi-pronged attacks that demand strategic foresight and adaptability. The core gameplay revolves around constructing defenses, positioning units effectively, and making critical decisions under pressure, as even minor mistakes can lead to defeat. While the map is technically a computer-based defense scenario, its high difficulty curve and reliance on precise execution make it more suited for intermediate to advanced players seeking a tough challenge. The compact layout and rapid attack cycles emphasize quick reflexes and tactical planning, while the space-themed tile set enhances immersion. Players are advised to familiarize themselves with common strategies or consult community guides to optimize their approach. Achieving the 255-level goal typically requires around 30 minutes of focused playtime, and the map offers a rewarding sense of accomplishment upon completion. Despite limited auxiliary building space, this constraint encourages creative problem-solving and experimentation with different build orders. Overall, this map exemplifies the depth and creativity of Brood War's custom maps, offering both a test of skill and an engaging experience for enthusiasts of the genre.
맵 선택 가이드
태그는 맵의 핵심 특징을 빠르게 설명하지만 제작 버전마다 규칙이 다를 수 있습니다. 상세 설명에서 권장 인원, 난이도, 플레이 시간과 버전을 함께 확인한 뒤 다운로드하세요.