
구조 임무 스타크래프트 맵 모음
'구조 임무' 태그가 등록된 맵을 모았습니다. 장르 하나로 찾기 어려운 플레이 방식, 난이도와 특징을 중심으로 인기 맵과 최신 맵을 비교해 보세요.
- 등록 맵
- 2개
- 누적 다운로드
- 0
- 누적 조회
- 34
인기 맵
다운로드와 조회 반응이 높은 맵입니다.
에피소드 III: 테이커의 추락
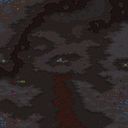
에피소드 III: 테이커의 추락은 스타크래프트 브루드워의 유즈맵으로, 단일 플레이어를 대상으로 하는 구조 임무 형식의 맵이다. 내부 맵 설명에서 확인되는 ‘구조 임무’라는 키워드는 이 맵이 정해진 목표를 달성하는 데 집중된 플레이 스타일을 지녔을 가능성이 높음을 시사한다. 맵의 전체적인 분위기는 정글 타일셋을 활용해 어두운 녹색과 갈색 톤으로 구성되어 있으며, 중앙에 위치한 커다란 구조물을 중심으로 다양한 지형이 배치되어 있는 것으로 보인다. 이 구조물을 둘러싼 광활한 공간은 플레이어가 이동하거나 자원을 확보하는 데 사용할 수 있는 넓은 지역을 제공할 것으로 추정된다. 맵의 규모가 4096x4096으로 상당히 크고, 타일 단위가 128x128로 설정되어 있어 세밀한 지형 디자인과 넓은 시야를 확보할 수 있도록 설계되었음을 알 수 있다. 플레이어는 맵 중앙의 주요 구조물을 중심으로 자원 수집, 방어, 또는 임무 수행을 해야 할 것으로 보이며, 맵의 이름 ‘테이커의 추락’은 아마도 스토리나 목표와 연관된 네이밍으로, 플레이어에게 특정 임무를 부여하고 그 과정에서 발생하는 사건이나 도전을 다루는 구조 임무일 가능성이 높다. 이 맵은 단일 플레이어용으로 제작되었으므로, 타임어택이나 목표 달성형 플레이가 주가 될 것으로 예상되며, 플레이어는 맵을 탐험하며 자원을 확보하고 적절한 전략을 세워야 할 것이다. 특히 구조 임무라는 특징상, 맵을 한 번 플레이한 후에는 재플레이어에 대한 재미를 높이기 위해 맵의 배치나 목표가 변동될 가능성이 있으며, 이는 플레이어가 계속해서 새로운 전략을 시도해 볼 수 있는 동기를 제공할 것이다. 또한 맵의 크기와 타일셋을 고려할 때, 플레이어는 넓은 시야를 바탕으로 맵을 정찰하고 자원을 확보하는 능력을 키워야 할 필요가 있을 것이다. 이 맵은 구조 임무라는 특성상 초보자보다는 어느 정도의 스타크래프트 경험이 있는 플레이어에게 더 적합할 것으로 보이며, 넓은 맵을 활용한 전략적 사고와 자원 관리가 요구될 것이다. 맵을 플레이하기 전에는 맵의 전체적인 배치와 주요 자원 위치를 파악하는 것이 중요하며, 목표가 무엇인지 명확히 이해한 후 플레이를 시작하는 것이 좋다. 또한 맵의 규모가 크기 때문에, 빠른 이동이나 시야 확보를 위한 유닛의 활용이 필수적일 것으로 예상된다. 이 맵은 구조 임무라는 특성상, 플레이어의 목표 달성을 위한 전략적 사고와 신중한 자원 관리가 핵심 요소로 작용할 것이다. 특히 맵의 이름과 내부 설명에서 느껴지는 분위기는 다소 어두운 스토리나 긴장감을 동반할 가능성이 있으며, 이는 플레이어에게 더 몰입감 있는 경험을 제공할 수 있을 것이다. Episode III: Fall of the Taker is a *StarCraft: Brood War* custom map designed for single-player structured missions. The term "structured mission" mentioned in the internal map description suggests that this map likely emphasizes a playstyle focused on achieving predefined objectives. The overall atmosphere of the map is built around a jungle tileset, featuring dark green and brown tones, with a large central structure surrounded by diverse terrain. The vast open space surrounding this structure appears to provide ample room for movement and resource gathering. With a map size of 4096x4096 and a tile unit of 128x128, the design allows for intricate terrain details and broad visibility. Players are expected to engage in resource collection, defense, or mission execution centered around the main structure in the middle of the map. The name "Fall of the Taker" likely ties into the map’s story or objectives, implying a structured mission where players are assigned specific tasks and face challenges throughout the process. As a single-player map, time-attack or goal-oriented gameplay is likely the primary focus, requiring players to explore the map, secure resources, and devise appropriate strategies. Given its structured mission format, the map’s layout or objectives may change after each playthrough to enhance replayability, encouraging players to experiment with new strategies. Considering the map’s scale and tileset, players will need to develop scouting and resource management skills to leverage the wide field of view effectively. Due to its structured mission nature, this map may be better suited for players with some *StarCraft* experience rather than beginners, as it demands strategic thinking and resource management over a large area. Before playing, it’s important to familiarize yourself with the overall layout and key resource locations, as well as clearly understand the objectives. Given the map’s size, efficient unit movement and visibility control will likely be essential. The structured mission format means that strategic planning and careful resource management are crucial for success. The somber atmosphere conveyed by the map’s name and internal descriptions may also enhance immersion by adding a sense of tension or narrative depth to the experience.
S.W.A.T.
‘S.W.A.T.’는 스타크래프트 브루드워의 유즈맵으로, 과학 연구소 내부로 진입해 갇힌 인원들을 구조하는 것이 핵심 목표인 액션·서바이벌 장르의 맵이다. 게임 시작 시 플레이어는 연구소 외곽에서 출발하며, 곳곳에 배치된 적과 함정을 돌파하거나 우회해야 한다. 맵은 연구소 내부와 외부로 나뉘어 있으며, 내부에는 인원이 갇힌 구역이 있어 구조 작전이 필수적이다. 방어형 구조물의 배치와 좁은 통로, 다수의 적 유닛이 플레이어의 진행을 방해하는 구조로 되어 있어 전략적 판단과 빠른 반응이 요구된다. 특히 연구소 내부에는 여러 개의 방이 있으며, 각 방마다 인원이 갇혀 있으므로 신속한 구조와 동시에 안전 확보가 중요하다. 맵 곳곳에 숨겨진 자원이나 보급품이 배치되어 있을 가능성이 있으며, 이를 활용해 진행을 더 수월하게 만들 수 있다. 플레이 방식은 largely AOS와 디펜스 요소의 혼합으로 보이며, 적을 처치하는 동시에 구조 대상을 보호해야 하는 이중 과제가 주어진다. 추천 대상은 전략적 사고와 실시간 반응력이 필요하기 때문에, 미션형 유즈맵을 즐기는 중수 이상의 플레이어에게 적합하다. 플레이 전에는 맵의 주요 통로와 구조물 배치, 적 유닛의 배치 패턴을 미리 숙지하는 것이 중요하며, 팀플레이 시에는 역할 분담을 통한 효율적인 진행이 필요하다. 맵의 난이도는 구조 대상의 수와 적의 배치 밀도에 따라 달라질 수 있으며, 초보자의 경우 팀원과의 협력과 전략 수립이 필수적이다. S.W.A.T.는 단순히 적을 섬멸하는 것이 아니라, 구조 임무를 완수하는 데 중점을 둔 유즈맵으로, 전략과Action의 균형이 핵심인 경험을 제공한다. S.W.A.T. is a StarCraft: Brood War custom map that blends action and survival genres. Players must infiltrate a science lab, navigate through enemy-infested areas, and rescue trapped personnel. The map is divided into interior and exterior zones of the lab, with the interior containing rooms where hostages are held. Strategic planning and quick reflexes are essential due to narrow passages, defensive structures, and numerous enemy units blocking progress. Each room in the lab may contain hidden resources or supplies that can aid in progression. The gameplay combines elements of AOS and defense, requiring players to both eliminate enemies and protect rescue targets simultaneously. This map is recommended for intermediate or advanced players who enjoy mission-based custom maps, as it demands tactical thinking and real-time decision-making. Before playing, it's advisable to study the map's key pathways, structure placements, and enemy unit patterns. In team play, effective role division is crucial for efficient progression. The difficulty of S.W.A.T. varies depending on the number of hostages and enemy density, making teamwork and strategic planning vital, especially for beginners. Unlike typical elimination-focused maps, S.W.A.T. emphasizes mission completion through a balance of strategy and action.
최근 등록된 맵
새로 추가된 파일과 버전을 확인하세요.
S.W.A.T.
‘S.W.A.T.’는 스타크래프트 브루드워의 유즈맵으로, 과학 연구소 내부로 진입해 갇힌 인원들을 구조하는 것이 핵심 목표인 액션·서바이벌 장르의 맵이다. 게임 시작 시 플레이어는 연구소 외곽에서 출발하며, 곳곳에 배치된 적과 함정을 돌파하거나 우회해야 한다. 맵은 연구소 내부와 외부로 나뉘어 있으며, 내부에는 인원이 갇힌 구역이 있어 구조 작전이 필수적이다. 방어형 구조물의 배치와 좁은 통로, 다수의 적 유닛이 플레이어의 진행을 방해하는 구조로 되어 있어 전략적 판단과 빠른 반응이 요구된다. 특히 연구소 내부에는 여러 개의 방이 있으며, 각 방마다 인원이 갇혀 있으므로 신속한 구조와 동시에 안전 확보가 중요하다. 맵 곳곳에 숨겨진 자원이나 보급품이 배치되어 있을 가능성이 있으며, 이를 활용해 진행을 더 수월하게 만들 수 있다. 플레이 방식은 largely AOS와 디펜스 요소의 혼합으로 보이며, 적을 처치하는 동시에 구조 대상을 보호해야 하는 이중 과제가 주어진다. 추천 대상은 전략적 사고와 실시간 반응력이 필요하기 때문에, 미션형 유즈맵을 즐기는 중수 이상의 플레이어에게 적합하다. 플레이 전에는 맵의 주요 통로와 구조물 배치, 적 유닛의 배치 패턴을 미리 숙지하는 것이 중요하며, 팀플레이 시에는 역할 분담을 통한 효율적인 진행이 필요하다. 맵의 난이도는 구조 대상의 수와 적의 배치 밀도에 따라 달라질 수 있으며, 초보자의 경우 팀원과의 협력과 전략 수립이 필수적이다. S.W.A.T.는 단순히 적을 섬멸하는 것이 아니라, 구조 임무를 완수하는 데 중점을 둔 유즈맵으로, 전략과Action의 균형이 핵심인 경험을 제공한다. S.W.A.T. is a StarCraft: Brood War custom map that blends action and survival genres. Players must infiltrate a science lab, navigate through enemy-infested areas, and rescue trapped personnel. The map is divided into interior and exterior zones of the lab, with the interior containing rooms where hostages are held. Strategic planning and quick reflexes are essential due to narrow passages, defensive structures, and numerous enemy units blocking progress. Each room in the lab may contain hidden resources or supplies that can aid in progression. The gameplay combines elements of AOS and defense, requiring players to both eliminate enemies and protect rescue targets simultaneously. This map is recommended for intermediate or advanced players who enjoy mission-based custom maps, as it demands tactical thinking and real-time decision-making. Before playing, it's advisable to study the map's key pathways, structure placements, and enemy unit patterns. In team play, effective role division is crucial for efficient progression. The difficulty of S.W.A.T. varies depending on the number of hostages and enemy density, making teamwork and strategic planning vital, especially for beginners. Unlike typical elimination-focused maps, S.W.A.T. emphasizes mission completion through a balance of strategy and action.
에피소드 III: 테이커의 추락
에피소드 III: 테이커의 추락은 스타크래프트 브루드워의 유즈맵으로, 단일 플레이어를 대상으로 하는 구조 임무 형식의 맵이다. 내부 맵 설명에서 확인되는 ‘구조 임무’라는 키워드는 이 맵이 정해진 목표를 달성하는 데 집중된 플레이 스타일을 지녔을 가능성이 높음을 시사한다. 맵의 전체적인 분위기는 정글 타일셋을 활용해 어두운 녹색과 갈색 톤으로 구성되어 있으며, 중앙에 위치한 커다란 구조물을 중심으로 다양한 지형이 배치되어 있는 것으로 보인다. 이 구조물을 둘러싼 광활한 공간은 플레이어가 이동하거나 자원을 확보하는 데 사용할 수 있는 넓은 지역을 제공할 것으로 추정된다. 맵의 규모가 4096x4096으로 상당히 크고, 타일 단위가 128x128로 설정되어 있어 세밀한 지형 디자인과 넓은 시야를 확보할 수 있도록 설계되었음을 알 수 있다. 플레이어는 맵 중앙의 주요 구조물을 중심으로 자원 수집, 방어, 또는 임무 수행을 해야 할 것으로 보이며, 맵의 이름 ‘테이커의 추락’은 아마도 스토리나 목표와 연관된 네이밍으로, 플레이어에게 특정 임무를 부여하고 그 과정에서 발생하는 사건이나 도전을 다루는 구조 임무일 가능성이 높다. 이 맵은 단일 플레이어용으로 제작되었으므로, 타임어택이나 목표 달성형 플레이가 주가 될 것으로 예상되며, 플레이어는 맵을 탐험하며 자원을 확보하고 적절한 전략을 세워야 할 것이다. 특히 구조 임무라는 특징상, 맵을 한 번 플레이한 후에는 재플레이어에 대한 재미를 높이기 위해 맵의 배치나 목표가 변동될 가능성이 있으며, 이는 플레이어가 계속해서 새로운 전략을 시도해 볼 수 있는 동기를 제공할 것이다. 또한 맵의 크기와 타일셋을 고려할 때, 플레이어는 넓은 시야를 바탕으로 맵을 정찰하고 자원을 확보하는 능력을 키워야 할 필요가 있을 것이다. 이 맵은 구조 임무라는 특성상 초보자보다는 어느 정도의 스타크래프트 경험이 있는 플레이어에게 더 적합할 것으로 보이며, 넓은 맵을 활용한 전략적 사고와 자원 관리가 요구될 것이다. 맵을 플레이하기 전에는 맵의 전체적인 배치와 주요 자원 위치를 파악하는 것이 중요하며, 목표가 무엇인지 명확히 이해한 후 플레이를 시작하는 것이 좋다. 또한 맵의 규모가 크기 때문에, 빠른 이동이나 시야 확보를 위한 유닛의 활용이 필수적일 것으로 예상된다. 이 맵은 구조 임무라는 특성상, 플레이어의 목표 달성을 위한 전략적 사고와 신중한 자원 관리가 핵심 요소로 작용할 것이다. 특히 맵의 이름과 내부 설명에서 느껴지는 분위기는 다소 어두운 스토리나 긴장감을 동반할 가능성이 있으며, 이는 플레이어에게 더 몰입감 있는 경험을 제공할 수 있을 것이다. Episode III: Fall of the Taker is a *StarCraft: Brood War* custom map designed for single-player structured missions. The term "structured mission" mentioned in the internal map description suggests that this map likely emphasizes a playstyle focused on achieving predefined objectives. The overall atmosphere of the map is built around a jungle tileset, featuring dark green and brown tones, with a large central structure surrounded by diverse terrain. The vast open space surrounding this structure appears to provide ample room for movement and resource gathering. With a map size of 4096x4096 and a tile unit of 128x128, the design allows for intricate terrain details and broad visibility. Players are expected to engage in resource collection, defense, or mission execution centered around the main structure in the middle of the map. The name "Fall of the Taker" likely ties into the map’s story or objectives, implying a structured mission where players are assigned specific tasks and face challenges throughout the process. As a single-player map, time-attack or goal-oriented gameplay is likely the primary focus, requiring players to explore the map, secure resources, and devise appropriate strategies. Given its structured mission format, the map’s layout or objectives may change after each playthrough to enhance replayability, encouraging players to experiment with new strategies. Considering the map’s scale and tileset, players will need to develop scouting and resource management skills to leverage the wide field of view effectively. Due to its structured mission nature, this map may be better suited for players with some *StarCraft* experience rather than beginners, as it demands strategic thinking and resource management over a large area. Before playing, it’s important to familiarize yourself with the overall layout and key resource locations, as well as clearly understand the objectives. Given the map’s size, efficient unit movement and visibility control will likely be essential. The structured mission format means that strategic planning and careful resource management are crucial for success. The somber atmosphere conveyed by the map’s name and internal descriptions may also enhance immersion by adding a sense of tension or narrative depth to the experience.
맵 선택 가이드
태그는 맵의 핵심 특징을 빠르게 설명하지만 제작 버전마다 규칙이 다를 수 있습니다. 상세 설명에서 권장 인원, 난이도, 플레이 시간과 버전을 함께 확인한 뒤 다운로드하세요.