
광물 채취 스타크래프트 맵 모음
'광물 채취' 태그가 등록된 맵을 모았습니다. 장르 하나로 찾기 어려운 플레이 방식, 난이도와 특징을 중심으로 인기 맵과 최신 맵을 비교해 보세요.
- 등록 맵
- 2개
- 누적 다운로드
- 0
- 누적 조회
- 50
인기 맵
다운로드와 조회 반응이 높은 맵입니다.
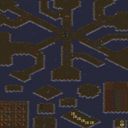
러커 D 18웨이 ~=FINAL=~ (Lurker D 18 Way ~=FINAL=~)
스타크래프트 브루드워의 유즈맵 중 하나로, 프로브를 조종해 광물을 채취하는 독특한 플레이 방식이 돋보이는 ‘러커 D 18 웨이 ~=FINAL=~’는 6인용 맵으로 구성되어 있다. 맵의 이름은 ‘러커’와 ‘D 18’이 조합되어 있으며, ‘웨이’라는 단어는 ‘길’이란 뜻으로, 플레이어가 다양한 경로를 통해 광물을 확보할 수 있도록 설계되었음을 시사한다. 특히 ‘FINAL’이라는 표기는 이 버전이 개발의 최종 단계에 도달했음을 강조하며, 프로브의 광물 채취와 30초 단위의 짧은 라운드가 특징적이다. 내부 설명에서 ‘Modified Version by TerrorMarine&Altarian’이 언급되며, 이 맵이 커뮤니티에 의해 개선된 버전임을 알 수 있다. 이 맵은 프로브를 조종해 광물을 채취하는 동시에, ‘30 Second Rounds’라는 설명에서 알 수 있듯이 짧은 시간 안에 최대한 많은 광물을 확보하는 것이 목표인 것으로 보인다. ‘Upgrades to 255’라는 문구는 광물 채취나 업그레이드 시스템이 최대 255단계까지 존재할 가능성을 시사하며, 이는 플레이어들에게 긴장감을 더하는 요소로 작용할 수 있다. 맵의 디자인상으로는 황무지 타일셋을 활용해 황량한 분위기를 연출하며, 넓은 공간을 활용한 광물 분배와 러커(Lurker)가 등장하는 등 전략적 요소가 포함된 것으로 추정된다. 플레이어는 프로브를 통해 광물을 확보하는 동시에, 맵 곳곳에 배치된 광물이나 추가 자원을 확보하기 위해 경쟁하거나 협력할 수 있다. 짧은 라운드와 최대 255단계의 업그레이드 시스템은 반복적인 플레이와 전략적 선택을 요구하며, 이는 초보자와 숙련자 모두에게 흥미로운 도전 과제를 제공할 수 있다. 특히 광물 채취가 메인 포인트인 만큼, 광물의 배치와 프로브의 이동 경로가 중요하며, 이는 맵을 여러 번 플레이하며 최적의 전략을 찾는 재미가 있다. 이 맵은 프로브를 조종하는 독특한 gameplay와 짧은 라운드, 높은 업그레이드 단계가 특징으로, 프로브를 조종하는 재미와 전략적 선택을 좋아하는 플레이어들에게 추천할 만하다. 또한, ‘FINAL’이라는 표기는 개발의 완료를 의미하므로, 안정적인 플레이가 가능한 버전으로 판단된다. 다만, 광물 채취에만 집중된 게임플레이이기 때문에, 다양한 전략적 요소를 선호하는 플레이어에게는 다소 아쉬울 수 있다. This Brood War custom map, ‘Lurker D 18 Way ~=FINAL=~’, stands out for its unique gameplay centered around controlling Probes to harvest minerals. Designed for 6 players, the map’s name hints at multiple pathways (D 18 Way) and features a ‘FINAL’ designation, suggesting this is a polished, finalized version. The description mentions modifications by TerrorMarine & Altarian, indicating community-driven improvements. The core mechanic revolves around harvesting minerals within 30-second rounds, with an upgrade system that potentially scales up to 255 stages. The use of the Terran wasteland tileset creates a barren, strategic environment, while the presence of Lurkers adds a layer of tactical depth. Players must navigate the map to secure minerals efficiently, balancing speed and resource management. The short rounds and high upgrade ceiling encourage repeated play, rewarding players who refine their strategies over time. The map’s design emphasizes mineral distribution and Probe mobility, making it ideal for those who enjoy resource-focused gameplay. While the mechanics are straightforward, the depth lies in optimizing Probe routes and upgrade investments. Recommended for fans of Probe-centric custom maps, this title offers a fresh take on mineral harvesting with its rapid rounds and extensive upgrade potential. However, players seeking complex multi-faction strategies may find the focus too narrow. Overall, it’s a solid choice for those looking to test their efficiency in a compact, high-stakes environment.
![광산에서 광물 캐기 1 (정식) (Mining Resource Gathering 1 [Official]) 맵 미리보기](https://cdn-star-data.huzy.net/thumbnail_bbfc16f136de4ed0a0f4927a08e0c1f8.jpg)
광산에서 광물 캐기 1 (정식) (Mining Resource Gathering 1 [Official])
‘광산에서광물캐기1[정식]’은 스타크래프트 브루드워 유즈맵의 대표적인 광물 채취형 맵으로, 제작자 Eregular가 제공한 정식 버전이다. 맵의 핵심은 이름 그대로 광산을 배경으로 광물을 캐고 방어하는 데에 있으며, 특히 6명의 플레이어가 손 4마리씩을 조작해 자원을 확보하고 적의 침입을 막아내는 구조로 구성되어 있다. 게임은 시작과 동시에 각 플레이어에게 주어지는 광물 채취 구역을 중심으로 진행되며, 맵 곳곳에 배치된 광물 광산에서 자원을 모아 건물을 짓고 유닛을 생산하는 전략적 요소가 강조된다. 맵의 특징 중 하나는 제작자가 언급한 것처럼 ‘치트를 좀더 쉬운 위치로 옮겼다’는 점으로, 치트키 사용이 용이해져 초보 유저도 쉽게 게임에 적응할 수 있도록 배려했다는 점이다. 또한, ‘정식버전’이라는 타이틀에서 알 수 있듯 다양한 버그의 수정과 밸런스 조정이 이루어진 안정적인 버전으로, 플레이어들이 게임을 즐기며 발생했던 오류를 최소화하도록 설계되었다. 플레이 방식은 크게 두 가지로 나뉜다. 첫째는 광물 채취로, 각 플레이어는 자신의 구역에서 광물을 캐내 자원을 확보한 뒤 병력을 양성하거나 방어 시설물을 구축해야 한다. 둘째는 방어전으로, 적의 공격을 막아내면서 동시에 자원 채취 경쟁에서 우위를 점하는 것이다. 맵의 디자인은 황무지 타일셋을 기반으로 하여 황량한 광산의 분위기를 잘 살렸고, 1024x1024 크기의 넓은 맵에 128x128 타일 단위가 적용되어 spacious한 공간감을 제공한다. 특히, 광물 광산이 맵 중앙과 주변에 골고루 분포되어 있어 플레이어 간의 자원 경쟁이 치열해지며, 이는 전략적 선택과 긴장감을 동시에 높이는 요소로 작용한다. 또한, 맵의 해상도가 4096x4096로 높게 설정되어 있어 그래픽적 디테일도 뛰어나며, 넓은 시야를 확보할 수 있어 전략적 판단이 요구되는 게임에 적합하다. 이 맵의 가장 큰 장점은 접근성과 재미의 균형이다. 초보자도 쉽게 따라 할 수 있도록 치트키가 간편한 위치에 배치되어 있으며, 동시에 자원 관리와 방어 전략을 고민해야 하는 깊은 재미가 있다. 또한, 제작자가 버그 수정에 많은 노력을 기울인 만큼 안정적인 플레이가 가능하다는 점도 장점으로 꼽힌다. 다만, 광물 채취와 방어가 동시에 요구되는 만큼 초보자의 경우 자원 관리와 병력 생산의 균형을 맞추는 데 어려움을 느낄 수 있으며, 플레이어 간의 협력이 없으면 자원 경쟁에서 밀려 탈락할 가능성이 크다는 점도 유념해야 한다. 이러한 특성 덕분에 이 맵은 스타크래프트 유즈맵의 정석 중 하나로 손꼽히며, 광물 채취와 방어 전략을 люби하는 플레이어들에게 높은 평가를 받고 있다. 특히, pc방이나 친구들과의 모임에서 즐기기 좋은 맵으로 추천할 만하다. 이 맵은 광물 채취와 방어 전략이 조화를 이룬 대표적인 유즈맵으로, 특히 자원 관리와 전략적 판단력이 요구되는 플레이어들에게 적합하다. 광산의 분위기를 살린 맵 디자인과 안정적인 정식 버전은 게임의 몰입도를 높이는 데 큰 역할을 한다. 또한, 초보자도 쉽게 접근할 수 있도록 치트키가 배치되어 있어 다양한 플레이어층이 즐길 수 있는 장점이 있다. 다만, 자원 경쟁이 치열한 만큼 팀플레이가 중요하며, 혼자서는 전략적 우위를 점하기 어려운 구조라는 점을 염두에 두고 플레이해야 한다. 광산에서광물캐기1[정식]은 스타크래프트 유즈맵의 고전 중 하나로, 광물 채취와 방어 전략을 люби하는 플레이어라면 반드시 한 번쯤 도전해 볼 만한 작품이다. ‘Mining Minerals 1 [Official]’ is a classic mineral-gathering custom map for *StarCraft: Brood War*, created by Eregular in its official release. As the name suggests, the core of the game revolves around mining minerals and defending them, with six players each controlling four hands to secure resources and fend off enemy invasions. The game begins with each player assigned a dedicated mining zone, and players gather resources from mineral deposits scattered across the map to construct buildings and produce units, emphasizing strategic depth. One standout feature is how the map simplifies cheating—Eregular moved the cheat keys to more accessible locations, making it easier for beginners to adapt. As an official version, it also includes numerous bug fixes and balance adjustments, ensuring a stable experience that minimizes errors players might encounter. The gameplay splits into two main modes: mineral mining and defense. In mining, players extract resources in their zones to fund unit production or defensive structures, while in defense, they repel enemy attacks while competing for resources. The map’s design uses a barren tile set to evoke a desolate mining atmosphere, with a spacious 1024x1024 grid divided into 128x128 tiles for a wide, open feel. Mineral deposits are evenly distributed across the center and edges, intensifying resource competition and adding strategic tension. With a high resolution of 4096x4096, the map offers rich graphical detail and a broad field of view, ideal for strategic decision-making. The map strikes a great balance between accessibility and fun. Cheat keys are conveniently placed for newcomers, yet the depth of resource management and defense strategies keeps experienced players engaged. The developer’s dedication to bug fixes ensures smooth gameplay, though beginners may struggle to balance resource gathering and unit production. Without cooperation, players risk falling behind in the resource race and getting eliminated. Thanks to these traits, *Mining Minerals 1 [Official]* is considered a quintessential custom map, especially beloved by players who enjoy resource management and defense tactics. Its immersive mining-themed design and polished official version enhance the gaming experience, while the easy-to-access cheat keys make it welcoming to all skill levels. However, the intense resource competition highlights the importance of teamwork, as solo players will find it difficult to gain a strategic advantage. A classic in the *StarCraft* custom map scene, this map is a must-try for anyone who appreciates mineral gathering and defensive strategy.
최근 등록된 맵
새로 추가된 파일과 버전을 확인하세요.
광산에서 광물 캐기 1 (정식) (Mining Resource Gathering 1 [Official])
‘광산에서광물캐기1[정식]’은 스타크래프트 브루드워 유즈맵의 대표적인 광물 채취형 맵으로, 제작자 Eregular가 제공한 정식 버전이다. 맵의 핵심은 이름 그대로 광산을 배경으로 광물을 캐고 방어하는 데에 있으며, 특히 6명의 플레이어가 손 4마리씩을 조작해 자원을 확보하고 적의 침입을 막아내는 구조로 구성되어 있다. 게임은 시작과 동시에 각 플레이어에게 주어지는 광물 채취 구역을 중심으로 진행되며, 맵 곳곳에 배치된 광물 광산에서 자원을 모아 건물을 짓고 유닛을 생산하는 전략적 요소가 강조된다. 맵의 특징 중 하나는 제작자가 언급한 것처럼 ‘치트를 좀더 쉬운 위치로 옮겼다’는 점으로, 치트키 사용이 용이해져 초보 유저도 쉽게 게임에 적응할 수 있도록 배려했다는 점이다. 또한, ‘정식버전’이라는 타이틀에서 알 수 있듯 다양한 버그의 수정과 밸런스 조정이 이루어진 안정적인 버전으로, 플레이어들이 게임을 즐기며 발생했던 오류를 최소화하도록 설계되었다. 플레이 방식은 크게 두 가지로 나뉜다. 첫째는 광물 채취로, 각 플레이어는 자신의 구역에서 광물을 캐내 자원을 확보한 뒤 병력을 양성하거나 방어 시설물을 구축해야 한다. 둘째는 방어전으로, 적의 공격을 막아내면서 동시에 자원 채취 경쟁에서 우위를 점하는 것이다. 맵의 디자인은 황무지 타일셋을 기반으로 하여 황량한 광산의 분위기를 잘 살렸고, 1024x1024 크기의 넓은 맵에 128x128 타일 단위가 적용되어 spacious한 공간감을 제공한다. 특히, 광물 광산이 맵 중앙과 주변에 골고루 분포되어 있어 플레이어 간의 자원 경쟁이 치열해지며, 이는 전략적 선택과 긴장감을 동시에 높이는 요소로 작용한다. 또한, 맵의 해상도가 4096x4096로 높게 설정되어 있어 그래픽적 디테일도 뛰어나며, 넓은 시야를 확보할 수 있어 전략적 판단이 요구되는 게임에 적합하다. 이 맵의 가장 큰 장점은 접근성과 재미의 균형이다. 초보자도 쉽게 따라 할 수 있도록 치트키가 간편한 위치에 배치되어 있으며, 동시에 자원 관리와 방어 전략을 고민해야 하는 깊은 재미가 있다. 또한, 제작자가 버그 수정에 많은 노력을 기울인 만큼 안정적인 플레이가 가능하다는 점도 장점으로 꼽힌다. 다만, 광물 채취와 방어가 동시에 요구되는 만큼 초보자의 경우 자원 관리와 병력 생산의 균형을 맞추는 데 어려움을 느낄 수 있으며, 플레이어 간의 협력이 없으면 자원 경쟁에서 밀려 탈락할 가능성이 크다는 점도 유념해야 한다. 이러한 특성 덕분에 이 맵은 스타크래프트 유즈맵의 정석 중 하나로 손꼽히며, 광물 채취와 방어 전략을 люби하는 플레이어들에게 높은 평가를 받고 있다. 특히, pc방이나 친구들과의 모임에서 즐기기 좋은 맵으로 추천할 만하다. 이 맵은 광물 채취와 방어 전략이 조화를 이룬 대표적인 유즈맵으로, 특히 자원 관리와 전략적 판단력이 요구되는 플레이어들에게 적합하다. 광산의 분위기를 살린 맵 디자인과 안정적인 정식 버전은 게임의 몰입도를 높이는 데 큰 역할을 한다. 또한, 초보자도 쉽게 접근할 수 있도록 치트키가 배치되어 있어 다양한 플레이어층이 즐길 수 있는 장점이 있다. 다만, 자원 경쟁이 치열한 만큼 팀플레이가 중요하며, 혼자서는 전략적 우위를 점하기 어려운 구조라는 점을 염두에 두고 플레이해야 한다. 광산에서광물캐기1[정식]은 스타크래프트 유즈맵의 고전 중 하나로, 광물 채취와 방어 전략을 люби하는 플레이어라면 반드시 한 번쯤 도전해 볼 만한 작품이다. ‘Mining Minerals 1 [Official]’ is a classic mineral-gathering custom map for *StarCraft: Brood War*, created by Eregular in its official release. As the name suggests, the core of the game revolves around mining minerals and defending them, with six players each controlling four hands to secure resources and fend off enemy invasions. The game begins with each player assigned a dedicated mining zone, and players gather resources from mineral deposits scattered across the map to construct buildings and produce units, emphasizing strategic depth. One standout feature is how the map simplifies cheating—Eregular moved the cheat keys to more accessible locations, making it easier for beginners to adapt. As an official version, it also includes numerous bug fixes and balance adjustments, ensuring a stable experience that minimizes errors players might encounter. The gameplay splits into two main modes: mineral mining and defense. In mining, players extract resources in their zones to fund unit production or defensive structures, while in defense, they repel enemy attacks while competing for resources. The map’s design uses a barren tile set to evoke a desolate mining atmosphere, with a spacious 1024x1024 grid divided into 128x128 tiles for a wide, open feel. Mineral deposits are evenly distributed across the center and edges, intensifying resource competition and adding strategic tension. With a high resolution of 4096x4096, the map offers rich graphical detail and a broad field of view, ideal for strategic decision-making. The map strikes a great balance between accessibility and fun. Cheat keys are conveniently placed for newcomers, yet the depth of resource management and defense strategies keeps experienced players engaged. The developer’s dedication to bug fixes ensures smooth gameplay, though beginners may struggle to balance resource gathering and unit production. Without cooperation, players risk falling behind in the resource race and getting eliminated. Thanks to these traits, *Mining Minerals 1 [Official]* is considered a quintessential custom map, especially beloved by players who enjoy resource management and defense tactics. Its immersive mining-themed design and polished official version enhance the gaming experience, while the easy-to-access cheat keys make it welcoming to all skill levels. However, the intense resource competition highlights the importance of teamwork, as solo players will find it difficult to gain a strategic advantage. A classic in the *StarCraft* custom map scene, this map is a must-try for anyone who appreciates mineral gathering and defensive strategy.
러커 D 18웨이 ~=FINAL=~ (Lurker D 18 Way ~=FINAL=~)
스타크래프트 브루드워의 유즈맵 중 하나로, 프로브를 조종해 광물을 채취하는 독특한 플레이 방식이 돋보이는 ‘러커 D 18 웨이 ~=FINAL=~’는 6인용 맵으로 구성되어 있다. 맵의 이름은 ‘러커’와 ‘D 18’이 조합되어 있으며, ‘웨이’라는 단어는 ‘길’이란 뜻으로, 플레이어가 다양한 경로를 통해 광물을 확보할 수 있도록 설계되었음을 시사한다. 특히 ‘FINAL’이라는 표기는 이 버전이 개발의 최종 단계에 도달했음을 강조하며, 프로브의 광물 채취와 30초 단위의 짧은 라운드가 특징적이다. 내부 설명에서 ‘Modified Version by TerrorMarine&Altarian’이 언급되며, 이 맵이 커뮤니티에 의해 개선된 버전임을 알 수 있다. 이 맵은 프로브를 조종해 광물을 채취하는 동시에, ‘30 Second Rounds’라는 설명에서 알 수 있듯이 짧은 시간 안에 최대한 많은 광물을 확보하는 것이 목표인 것으로 보인다. ‘Upgrades to 255’라는 문구는 광물 채취나 업그레이드 시스템이 최대 255단계까지 존재할 가능성을 시사하며, 이는 플레이어들에게 긴장감을 더하는 요소로 작용할 수 있다. 맵의 디자인상으로는 황무지 타일셋을 활용해 황량한 분위기를 연출하며, 넓은 공간을 활용한 광물 분배와 러커(Lurker)가 등장하는 등 전략적 요소가 포함된 것으로 추정된다. 플레이어는 프로브를 통해 광물을 확보하는 동시에, 맵 곳곳에 배치된 광물이나 추가 자원을 확보하기 위해 경쟁하거나 협력할 수 있다. 짧은 라운드와 최대 255단계의 업그레이드 시스템은 반복적인 플레이와 전략적 선택을 요구하며, 이는 초보자와 숙련자 모두에게 흥미로운 도전 과제를 제공할 수 있다. 특히 광물 채취가 메인 포인트인 만큼, 광물의 배치와 프로브의 이동 경로가 중요하며, 이는 맵을 여러 번 플레이하며 최적의 전략을 찾는 재미가 있다. 이 맵은 프로브를 조종하는 독특한 gameplay와 짧은 라운드, 높은 업그레이드 단계가 특징으로, 프로브를 조종하는 재미와 전략적 선택을 좋아하는 플레이어들에게 추천할 만하다. 또한, ‘FINAL’이라는 표기는 개발의 완료를 의미하므로, 안정적인 플레이가 가능한 버전으로 판단된다. 다만, 광물 채취에만 집중된 게임플레이이기 때문에, 다양한 전략적 요소를 선호하는 플레이어에게는 다소 아쉬울 수 있다. This Brood War custom map, ‘Lurker D 18 Way ~=FINAL=~’, stands out for its unique gameplay centered around controlling Probes to harvest minerals. Designed for 6 players, the map’s name hints at multiple pathways (D 18 Way) and features a ‘FINAL’ designation, suggesting this is a polished, finalized version. The description mentions modifications by TerrorMarine & Altarian, indicating community-driven improvements. The core mechanic revolves around harvesting minerals within 30-second rounds, with an upgrade system that potentially scales up to 255 stages. The use of the Terran wasteland tileset creates a barren, strategic environment, while the presence of Lurkers adds a layer of tactical depth. Players must navigate the map to secure minerals efficiently, balancing speed and resource management. The short rounds and high upgrade ceiling encourage repeated play, rewarding players who refine their strategies over time. The map’s design emphasizes mineral distribution and Probe mobility, making it ideal for those who enjoy resource-focused gameplay. While the mechanics are straightforward, the depth lies in optimizing Probe routes and upgrade investments. Recommended for fans of Probe-centric custom maps, this title offers a fresh take on mineral harvesting with its rapid rounds and extensive upgrade potential. However, players seeking complex multi-faction strategies may find the focus too narrow. Overall, it’s a solid choice for those looking to test their efficiency in a compact, high-stakes environment.
맵 선택 가이드
태그는 맵의 핵심 특징을 빠르게 설명하지만 제작 버전마다 규칙이 다를 수 있습니다. 상세 설명에서 권장 인원, 난이도, 플레이 시간과 버전을 함께 확인한 뒤 다운로드하세요.