
공중 유닛 스타크래프트 맵 모음
'공중 유닛' 태그가 등록된 맵을 모았습니다. 장르 하나로 찾기 어려운 플레이 방식, 난이도와 특징을 중심으로 인기 맵과 최신 맵을 비교해 보세요.
- 등록 맵
- 16개
- 누적 다운로드
- 0
- 누적 조회
- 545
인기 맵
다운로드와 조회 반응이 높은 맵입니다.
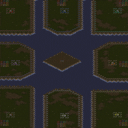
에어 워스 매스 v5.1 (Air Wars Mass v5.1)
스타크래프트 브루드워의 에어 워즈 매스 에어리얼 디펜스 맵 '에어 워스 매스 v5.1(Air Wars Mass v5.1)'은 공중 유닛을 주력으로 다루는 디펜스 장르의 유즈맵으로, 8명의 플레이어가 한 팀으로 뭉쳐서 끊임없이 밀려오는 적 공중 병력을 방어하는 구조를 갖추고 있다. 맵 중앙에 위치한 넓은 평원은 공중 유닛의 진격로를 제공하며, 가장자리에는 방어 건물이 배치되어 있어 플레이어는 이들을 조합해 최적의 방어 체계를 구축해야 한다. 특히, 맵의 지형이 대칭형으로 설계되어 있어 공중 유닛이 좌우 양쪽에서 동시에 공격해오는 특징이 있다. 맵 상단과 하단에는 자원 채취 지역이 배치되어 있어 초기 자원 수급이 원활하며, 이를 바탕으로 방어용 건물을 지속적으로 업그레이드하거나 추가 병력을 생산할 수 있다. 공중 유닛 간의 조합과 컨트롤이 필수적인 이 맵은 초보 플레이어에게는 다소 어렵게 느껴질 수 있지만, 팀워크와 전략적 배치가 중요하다는 점에서 숙련자들에게는 더할 나위 없이 재미있는 경험을 제공한다. 방어에 실패하면 공중 병력이 기지 내부로 침투해 건물을 파괴하거나 자원 채취를 방해할 수 있어, 긴장감과 더불어 실시간 전략적 사고가 요구된다. 맵의 디자인상 공중 유닛의 이동 경로가 비교적 명확하게 정해져 있지만, 적의 공격 패턴이 랜덤으로 변할 수 있어 항상 유연하게 대처해야 한다. 또한, 맵의 중앙부에 위치한 넓은 공간은 공중 유닛 간의 전투가 벌어지는 주요 전장인데, 이 공간에서 벌어지는 전투의 승패가 전체 게임의 흐름을 좌우할 가능성이 높다. 플레이 전에는 공중 유닛의 종류와 특성, 방어 건물의 배치 및 업그레이드 경로, 팀원 간의 역할 분담을 충분히 숙지하는 것이 중요하다. 특히, 자원 관리와 병력 생산 타이밍을 놓치지 않도록 주의해야 하며, 초반 방어선을 구축하는 단계에서 실수를 하게 되면 이후 회복이 힘들 수 있다. 에어 워스 매스 v5.1은 디펜스 장르의 정석을 따르면서도 공중 유닛의 전투에 특화된 독특한 재미를 제공하는 맵으로, 공중 유닛을 좋아하는 플레이어라면 반드시 경험해볼 가치가 있는 맵이라고 할 수 있다. 다만, 팀원 간의 호흡이 맞지 않거나 개인의 실력이 부족하면 상대적으로 어려운 난이도를 느낄 수 있으므로, 팀원과의 전략적인 소통이 필수적이다. StarCraft: Brood War's *Air Wars Mass* aerial defense custom map *Air Wars Mass v5.1* is a defense-style game where eight players team up to fend off endless waves of enemy air units. The map features a wide central plain that serves as the main path for aerial forces, with defensive structures placed along the edges, allowing players to build the best possible defense by combining them. The symmetrical terrain design ensures that air units attack from both sides simultaneously. Resource collection areas are located at the top and bottom of the map, enabling smooth early-game income so players can continuously upgrade defenses or produce additional forces. While this map demands strong air unit coordination and control—making it challenging for beginners—it offers seasoned players an unparalleled experience where teamwork and strategic positioning are key. Failure to defend properly allows enemy air units to penetrate the base, destroying buildings or disrupting resource gathering, creating high tension and requiring real-time strategic thinking. Though the map’s design clearly defines air unit movement paths, enemy attack patterns can shift randomly, so players must adapt quickly. The large central area serves as the primary battlefield, and victory or defeat in this zone often dictates the overall game’s flow. Before playing, it’s crucial to thoroughly understand air unit types and traits, defensive structure placement and upgrades, and team roles. Resource management and production timing are critical—mistakes in the early defense setup can be difficult to recover from. *Air Wars Mass v5.1* follows classic defense map principles while offering a unique focus on air combat, making it a must-try for players who love aerial battles. However, if team coordination is lacking or individual skill is insufficient, the difficulty can feel disproportionately high, so strategic communication among teammates is essential.
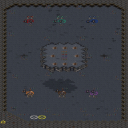
에어 이볼브드: 매스 어택 (AirEvolves: Mass Attack)
스타크래프트 브루드워의 유즈맵인 《에어 이볼브드: 매스 어택》은 다수의 플레이어가 동시에 공중 유닛을 조종하며 끊임없이 몰려드는 적을 방어하는 타워 디펜스 장르의 맵이다. 2048x2048 크기의 넓은 우주 타일셋 위에서 진행되며, 각 플레이어는 자신의 본진 중앙에 위치한 포탑을 중심으로 적의 공세를 저지해야 한다. 맵에는 세 가지 색상의 공중 유닛(빨강, 초록, 파랑)이 각각의 플레이어 진영을 향해 끊임없이 이동하는데, 이 유닛들은 개별로 조종할 수 있는 공격 유닛이 아니라 일종의 '자동 공격 포탑'으로 추정된다. 플레이어는 맵 곳곳에 배치된 인공지능 포탑과 업그레이드 가능한 방어 건물로 이 유닛들을 보호하고, 적의 공격을 차단해야 한다. 특히 맵 중앙에는 거대한 구조물이 자리 잡고 있는데, 이 구조물은 방어 거점 역할을 하며 파괴되지 않도록 관리해야 한다. 맵의 특징은 '2X 텔레포트' 시스템으로, 각 플레이어의 유닛이 맵 내 특정 위치로 즉각 이동할 수 있는 기능이 포함되어 있는 것으로 보인다. 이 시스템을 활용해 방어선을 재구축하거나 위기 상황에 대응할 수 있는 전략적 깊이가 있다. 또한 '매스 어택'이라는 제목답게 대량의 적 유닛이 끊임없이 몰려오는 난이도가 높아, 초보자는 입문하기 어려운 반면 숙련된 플레이어에게는 긴장감 넘치는 전략적 플레이를 요구한다. 게임의 재미는 개개인의 포탑 관리와 팀워크, 그리고 순간적인 판단력에 달려 있으며, 특히 맵의 넓은 공간을 활용한 위치 선정이 중요하다. 추천 대상은 타워 디펜스 장르에 익숙한 유저나 팀플레이를 선호하는 플레이어이며, 혼자서 플레이하기보다는 최소 2인 이상의 팀 플레이가 권장된다. 게임을 시작하기 전에는 각 플레이어의 시작 위치와 포탑 배치, 그리고 텔레포트 포인트의 위치를 숙지하는 것이 중요하다. 또한 맵 내의 리소스 관리와 업그레이드 타이밍을 신중히 계획해야 하며, 적의 공격 패턴을 예측하는 연습이 필요하다. 맵의 긴장감과 전략적 깊이를 높이 평가할 수 있는 유저라면 충분히 즐길 만한 작품이다. StarCraft: Brood War’s custom map *Air Evolved: Mass Attack* is a tower defense game where multiple players simultaneously control air units while defending against endless waves of enemies. The match takes place on a vast 2048x2048 space-themed tileset, with each player centered around a turret in their base that must repel enemy assaults. The map features three colors of air units (red, green, blue) continuously moving toward their respective player zones—these units act as automated "attack turrets" rather than manually controllable forces. Players must protect them using AI-controlled turrets and upgradeable defensive structures scattered across the map while blocking enemy advances. A massive central structure serves as a critical defensive hub that must be preserved at all costs. A standout feature is the "2X Teleport" system, allowing players to instantly relocate their units to key positions on the map. This adds strategic depth, enabling quick repositioning of defenses or rapid responses to threats. As the name *Mass Attack* suggests, the game throws overwhelming numbers of enemies at players, making it challenging for beginners but offering intense, skill-based strategy for veterans. The fun hinges on turret management, teamwork, and split-second decision-making, with map control and positioning playing crucial roles. This map is best suited for those familiar with tower defense games or who enjoy team play—solo efforts are discouraged, and teamwork with at least two players is highly recommended. Before starting, players should memorize starting positions, turret placements, and teleport points. Resource management, upgrade timing, and predicting enemy attack patterns are key to success. For those who appreciate high tension and deep strategy, *Air Evolved: Mass Attack* is a highly enjoyable experience.
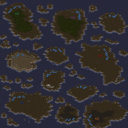
섬 점령 (Island Hop)
스타크래프트 브루드워의 유즈맵 ‘Island Hop’을 소개한다. 이 맵은 섬으로 나뉜 지형을 배경으로 한 공중전 중심의 디펜스형 유즈맵으로, 플레이어는 각자 섬에 배치된 기지에서 공중 유닛을 생산해 상대 섬을 점령하거나 파괴하는 목표를 달성해야 한다. 맵의 특징은 섬 간 이동이 제한적이고 공중 유닛의 역할을 극대화했다는 점이다. 맵 중앙에는 공중 유닛의 이동을 돕는 공중 통로가 있으며, 섬과 섬 사이는 좁은 다리나 공중 통로로만 연결되어 있어 전략적인 진영 구축과 병력 운용이 중요하다. 초반에는 소규모 병력으로 시작해 점차 공중 병력을 확충하는 방식으로 진행되며, 섬의 자원이나 건물을 차지하는 것도 승리에 영향을 미친다. 플레이어 수는 2~5명으로 제한되며, 공중 유닛의 생산과 관리, 섬 방어가 주요 플레이 포인트로 보인다. 추천 대상은 공중 유닛을 활용한 전략적 플레이를 즐기는 유저들이며, 섬 간의 이동과 공중 통로 활용을 숙지하는 것이 원활한 게임 진행에 도움이 된다. 특히 공중 유닛의 업그레이드와 생산 속도를 빠르게 파악하는 것이 승리의 열쇠가 될 것이다. 또한, 상대 섬의 기지를 파괴하는 동시에 자신의 섬을 방어하는 균형 잡힌 플레이가 요구된다. Island Hop is a unique UMS custom map in StarCraft: Brood War, set in a fragmented island terrain where players compete through aerial dominance. The core objective is to capture or destroy enemy islands by producing and deploying air units from your starting base. The map features restricted movement between islands, with narrow bridges or air corridors serving as the only pathways, forcing players to strategically position their forces. Central air corridors facilitate movement, while resource control and building placement on islands play crucial roles in securing victory. The recommended player count is 2 to 5, and the gameplay revolves around early-game air unit production, mid-game expansion, and late-game territorial control. Players should focus on upgrading air units and managing production timings to gain an advantage. Balancing offensive strikes with defensive preparations is essential, as neglecting either aspect often leads to defeat. This map is ideal for those who enjoy strategic air combat and tactical island management.
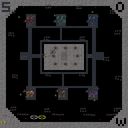
에어 이볼브스: 매스어택 (AirEvolves: MassAttack v2.1)
「AirEvolves-MassAttack v2.1」은 스타크래프트: 브루드워의 UMS 계열 유즈맵으로, 트리거를 적극 활용한 다중 텔레포트와 대규모 공격 연계가 특징인 전략 디펜스 맵이다. 맵 제목에서 알 수 있듯이 ‘Air’라는 이름에 걸맞게 공중 유닛의 이동과 공격 패턴이 핵심 메커니즘을 차지하며, ‘MassAttack’이 강조하는 바와 같이 다수의 유닛을 동시에 투입해 적을 압박하는 플레이가 요구된다. 중앙의 넓은 평야와 주변의 언덕, 그리고 복잡하게 배치된Pathing Blocker(이동 방해 블록)들은 플레이어가 공중 유닛의 기동력을 최대한 활용하도록 설계되어 있다. 특히, 미네랄과 가스가 중앙 지역 주변에 밀집되어 있어 초반 자원 확보 경쟁이 치열해지며, 이를 바탕으로 빠르게 다수의 전투기를 생산해 적 기지를 압박하는 것이 주된 전략이 된다. 이 맵의 가장 큰 특징은 ‘2X 텔레포트’ 시스템으로, 플레이어는 일정 시간마다 두 번의 즉각적인 위치 이동을 사용할 수 있다. 이 기능은 예상치 못한 공격을 퍼뜨리거나, 적의 공격을 회피하는 데 유용하며, 대규모 병력dispatch(파견) 시에도 전략적 이점을 제공한다. 또한, 맵 상단과 하단에 위치한 ‘MassAttack’ zona(구역)는 다수의 유닛을 한꺼번에 소환할 수 있는 특별한 지역으로, 이 곳에서 생산된 유닛들은 자동으로 전장에 배치되어 적을 압도하는 데 기여한다. 이처럼 맵은 단순 디펜스를 넘어, 유닛의 이동성과 생산 효율성을 극대화하는 ‘액션 디펜스’라는 새로운 장르로 분류할 수 있다. 플레이 난이도는 주로 적의 공격 패턴과 맵의 복잡한 지형에 좌우된다. 초보자의 경우, 자원 확보와 유닛 생산 타이밍을 맞추는 데 어려움을 겪을 수 있으며, 중급자 이상은 텔레포트와 MassAttack 구역을 얼마나 효과적으로 활용하느냐에 따라 승패가 갈린다. 맵의 난이도 설정은 없지만, 팀 플레이가 강제되는 구조는 아니며, 1대1부터 6인까지 다양한 인원으로 즐길 수 있다. 특히, 공중 유닛의 비중이 높아, 스타크래프트의 공중 유닛 밸런스를 숙지하고 있는 플레이어가 유리할 것으로 보인다. 맵을 시작하기 전에는 미네랄과 가스의 배치, MassAttack 구역의 위치, 텔레포트 쿨타임을 반드시 확인하고, 초반 자원 확보와 유닛 생산 타이밍을 철저히 계획해야 한다. 또한, 적의 기지 주변 언덕 지형과 공중 유닛의 이동 경로를 사전에 숙지해 두면 게임 중Unexpected(예상치 못한) 상황을 줄일 수 있을 것이다. 「AirEvolves-MassAttack v2.1」 is a UMS-style custom map for *StarCraft: Brood War*, featuring a strategic defense format that heavily utilizes triggers for multi-teleportation and coordinated large-scale attacks. As the name suggests, air units play a central role in movement and combat mechanics, while "MassAttack" emphasizes overwhelming the enemy with swarms of units deployed simultaneously. The wide central plains, surrounding hills, and intricately placed pathing blockers are designed to maximize the maneuverability of air units. Mineral and gas deposits are densely clustered around the central area, intensifying early-game resource competition, which players must leverage to quickly produce large numbers of fighters and pressure enemy bases. The map’s standout feature is its "2X Teleport" system, allowing players to perform two instant repositioning moves at regular intervals. This is invaluable for launching surprise attacks, evading enemy assaults, or strategically deploying forces during large-scale engagements. Additionally, the "MassAttack" zones located at the top and bottom of the map serve as special areas where multiple units can be summoned at once. Units spawned here are automatically deployed to the battlefield, overwhelming opponents through sheer numbers. Beyond simple defense, the map introduces a new subgenre—"action defense"—prioritizing unit mobility and production efficiency. Game difficulty hinges on enemy attack patterns and the map’s complex terrain. Beginners may struggle with balancing resource collection and unit production timing, while intermediate and advanced players will find victory hinging on efficient use of teleportation and MassAttack zones. Though the map lacks explicit difficulty settings, its structure doesn’t enforce team play, allowing matches from 1v1 to 6-player free-for-all. Given the prominence of air units, players familiar with *StarCraft*’s aerial unit balance will have a significant advantage. Before starting, it’s crucial to study mineral and gas layouts, MassAttack zone locations, and teleport cooldowns, then meticulously plan early-game resource gathering and unit production. Familiarizing yourself with the hill terrain near enemy bases and optimal air unit flight paths will also help minimize unexpected surprises during play.
Elements Of Anti-Air Defence (에어 디펜스 최종판)
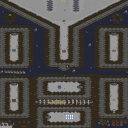
스타크래프트 브루드워의 유즈맵 《Elements Of Anti-Air Defence》는 공중 유닛 위주의 디펜스 장르로, 플레이어는 끊임없이 몰려드는 적 공중 병력으로부터 기지를 방어해야 한다. 맵은 중앙에 위치한 본진을 중심으로 네방향으로 확장된 구조로, 각 방향에 배치된 방어 건물과 유닛을 활용해 적을 차단하는 것이 핵심이다. 적의 공중 병력 구성은 랜덤으로 생성되며, 전투기와 폭격기, 수송선 등 다양한 유닛이 등장해 전략적인 대처가 요구된다. 방어 건물은 지상과 공중을 동시에 공격할 수 있는 시즈 탱크와 미사일 터렛이 주를 이루며, 플레이어는 자원을 모아 추가 방어선을 구축하거나 유닛을 강화할 수 있다. 맵의 특징은 적의 공격 패턴이 끊임없이 지속된다는 점으로, 초반 방어 실패는 곧 게임 오버로 이어질 수 있어 신속한 대응이 중요하다. 또한, 맵 곳곳에 배치된 보너스 자원 지역을 확보해 자원 수급을 원활히 하는 것이 필수적이다. 이 맵은 초보자보다는 전략적 사고와 빠른 판단력이 요구되는 만큼, 디펜스 장르에 익숙한 플레이어에게 특히 추천된다. 방어 건물의 배치와 유닛 관리, 자원 관리를 어떻게 조율하느냐에 따라 난이도가 크게 달라지므로, 플레이어의 숙련도에 따라 여러 번의 도전과 개선이 필요하다. 또한, 맵의 균형이 워낙에 정교하게 짜여 있어, 밸런스 붕괴 없이 지속적인 재미를 느낄 수 있도록 설계되었다. 특히, 적의 공중 병력이 랜덤으로 등장한다는 점은 매 플레이마다 다른 전략을 요구하므로, 반복 플레이해도 질리지 않는 매력이 있다. 다만, 방어 건물의 체력 관리와 자원 수급 타이밍을 놓치면 순식간에 무너질 수 있으니 주의가 필요하다. 이 맵은 디펜스 유즈맵 중에서도 손꼽히는 완성도로, 공중 유닛을 주력으로 삼는 디펜스 게임을 즐기고자 하는 플레이어에게 강력히 추천한다. Elements Of Anti-Air Defence is a UMS (User-Made Scenario) defense map in StarCraft: Brood War where players must protect their base from relentless waves of enemy air units. The map features a central starting position surrounded by four expansion directions, each equipped with defensive structures like missile turrets and siege tanks capable of targeting both ground and air units. The enemy air forces consist of a randomized mix of fighters, bombers, and dropships, requiring strategic adaptation to counter each wave effectively. A key feature is the continuous assault pattern, where failing to defend early can lead to an immediate game over, emphasizing quick decision-making and resource management. Designed for players with experience in defense maps, this scenario demands sharp strategic thinking, precise unit control, and efficient resource allocation to strengthen defenses. The map's balanced design ensures replayability, as the random nature of enemy compositions forces varied tactics across playthroughs. However, players must carefully manage turret health and resource timing to avoid collapse under pressure. With its polished balance and engaging mechanics, Elements Of Anti-Air Defence stands out as a top-tier air-focused defense experience, making it ideal for those seeking a challenging yet rewarding defense challenge in StarCraft's UMS scene.
터렛/캐논 워즈 (Turret/Cannon WARz)
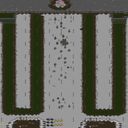
스타크래프트: 브루드워의 유즈맵 장르 중에서도 디펜스(Defense) 장르에 특화된 작품으로, ‘Turret/Cannon WARz’라는 제목 그대로 터렛과 캐논을 건설하여 적 공중 유닛의 공격을 방어하는 전략적 재미를 강조하는 맵이다. 플레이어는 맵 중앙 하단에 위치한 본진에서 시작하며, 좌우로 펼쳐진 넓은 길목을 따라 끊임없이 등장하는 적 공중 유닛을 터렛이나 캐논으로 요격해야 한다. 맵의 구조는 대칭형으로 설계되어 있으며, 적 유닛이 통과해야 하는 길목이 좁고 길게 이어지는 형태로 구성되어 있다. 이를 통해 방어 타워의 배치와 업그레이드 타이밍이 승패를 가르는 핵심 요소로 작용한다. 특히, 터렛과 캐논의 특성을 활용한 전략적 선택이 요구되며, 초반 자원 관리와 테크 트리의 확장이 중요한 역할을 한다. 맵의 분위기는 밀리전보다는 유즈맵 특유의 전략적 깊이가 강조된 디펜스 장르에 맞춰져 있으며, 팀플레이보다는 개인 또는 소수 인원이 방어 타워를 구축하고 공중 유닛을 상대로 버티는 플레이 스타일이 주를 이룬다. 또한, 맵의 난이도는 방어 타워의 배치와 업그레이드 여부에 따라 크게 달라질 수 있으므로, 초보자의 경우 난이도가 높게 느껴질 수 있지만, 적절한 전략과 타이밍을 익히면 점차 안정적인 방어가 가능해진다. 이 맵은 디펜스 장르에 대한Interest가 있는 플레이어뿐만 아니라, 스타크래프트의 전략적 요소를 즐기는 유저들에게도 훌륭한 선택지가 될 수 있다. 특히, 방어 타워의 배치와 공중 유닛의 패턴을 분석하는 재미가 있어 반복 플레이를 통해 숙련도를 높일 수 있는 장점이 있다. 플레이 전 준비해야 할 포인트는 방어 타워의 종류와 특징을 숙지하는 것이며, 자원 관리와 테크 트리의 확장을 신중히 계획하는 것이다. 또한, 맵의 구조를 미리 숙지하여 적 공중 유닛의 진입 경로를 예측하는 것도 필수적이다. This StarCraft: Brood War custom map, ‘Turret/Cannon WARz’, falls squarely into the Defense genre, challenging players to build turrets and cannons to intercept waves of enemy air units before they reach the end zone. The map features a symmetrical layout with a narrow, elongated pathway that enemy units must traverse, making tower placement and timing upgrades critical strategic decisions. Players begin at the bottom-center base and must balance resource management with tech tree progression to maximize their defensive capabilities. While the gameplay focuses on personal strategy rather than team coordination, the challenge lies in adapting to the increasing difficulty as air unit waves grow more frequent and aggressive. The map may prove difficult for newcomers to the Defense genre, but with practice, players can refine their tower placement and upgrade timing to secure steady victories. Ideal for fans of strategic tower defense mechanics and StarCraft’s tactical depth, ‘Turret/Cannon WARz’ offers a rewarding experience for those who enjoy analyzing air unit patterns and optimizing defensive setups. Before playing, familiarize yourself with the different tower types and their strengths, plan your resource allocation carefully, and study the map’s layout to anticipate enemy unit paths effectively.
터렛/캐논 워즈 V.5 (Turret/Cannon WARz V.5)
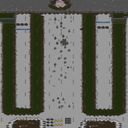
스타크래프트 브루드워의 인기 디펜스 유즈맵인 〈Turret/Cannon WARz V.5〉는 터렛과 캐논을 직접 건설하고 조작하여 공중 유닛의 공격을 막아내는 전략적인 디펜스 장르의 맵이다. 맵 중앙을 가로지르는 길을 따라 끊임없이 몰려오는 적 공중 유닛들을 저지하는 것이 주요 목표로, 플레이어는 제한된 자원으로 건물을 배치하고 업그레이드하여 방어선을 구축해야 한다. 맵의 구조는 시작 지점과 끝 지점을 잇는 일직선 길이 있으며, 양 옆으로 넓은 공간이 확보되어 있어 터렛이나 캐논을 배치할 수 있는 공간이 풍부하다. 특히 맵의 양 끝에 위치한 시작 지점과 끝 지점은 각각의 팀(또는 플레이어)이 건물을 건설할 수 있는 전용 구역으로 나뉘어 있어, 전략적인 위치 선정이 victory의 핵심으로 작용한다. 맵의 이름은 'Turret/Cannon WARz'로, 터렛과 캐논을 주력으로 사용한다는 점과 전쟁(War)을 연상시키는 전투적인 분위기가 돋보인다. V.5 버전은 이전 버전에서의 밸런스 조정과 UI 개선, 그리고 새로운 건물 배치 옵션 등이 추가되어 더 전략적인 플레이를 가능하게 한다. 이 맵은 초보부터 숙련자까지 모두 즐길 수 있도록 디자인되어 있지만, 특히 건물을 효율적으로 배치하고 업그레이드를 신중히 진행하는 능력이 중요하다. 플레이어는 맵의 중앙 길에 집중되는 공격을 효과적으로 방어하기 위해, 건물을 일직선으로만 배치하는 것이 아니라 좌우로 넓게 퍼뜨려 배치하는 전략을 사용해야 한다. 또한, 공중 유닛의 종류에 따라 효과적인 방어 건물의 조합이 달라지므로, 맵의 흐름을 잘 읽고 대처하는 능력이 필요하다. 맵의 분위기는 전쟁과 방어의 긴장감이 느껴지도록 디자인되어 있으며, 건물을 건설하는 소리와 공격 소리가 어우러져 immersive한 경험을 제공한다. 이 맵을 즐기기 위해서는 적어도 6명의 플레이어가 필요하며, 각 플레이어는 개별적으로 건물을 건설하고 관리할 수 있다. 추천되는 플레이 스타일은 방어 건물 간의 시너지를 극대화하기 위해 협력 플레이를 중시하는 것이다. 이 맵은 디펜스 장르에 익숙한 플레이어뿐만 아니라, 새로운 전략을 시도해 보고 싶은 유저들에게도 훌륭한 선택지가 될 것이다. 건물을 건설하고 업그레이드하는 재미와 함께, 끊임없이 몰려오는 적을 방어하는 짜릿한 긴장감까지 느낄 수 있는佳作 유즈맵이라 할 수 있다. 특히 건물을 배치할 수 있는 공간이 넓은 만큼, 창의적인 전략을 구상하고자 하는 플레이어들에게는 더없이 좋은 기회가 될 것이다. 마지막으로, 이 맵은 꾸준한 업데이트와 밸런스 조정을 통해 더 많은 플레이어들에게 사랑받고 있는 만큼, 앞으로도 많은 관심을 받을 만한 가치가 있다. Turret/Cannon WARz V.5 is a popular defense UMS map in StarCraft: Brood War where players construct and upgrade turrets and cannons to fend off waves of incoming air units. The core objective is to defend a central path from relentless enemy aerial assaults by strategically placing defensive structures within designated zones at the map's start and end points. The map features a straight-line path flanked by wide open spaces, allowing players to spread out their defenses across the battlefield. Version 5 introduces refined balance adjustments, enhanced UI elements, and additional building placement options, elevating the strategic depth of gameplay. While accessible to beginners, mastering turret and cannon placement, along with timely upgrades, becomes crucial for veteran players seeking optimal defense. Effective strategies involve scattering buildings not just in a straight line but across the sides to maximize coverage against diverse air unit types that dominate the central route. The immersive experience is heightened by the war-themed atmosphere, blending construction sounds with the intensity of incoming attacks. Designed for six players, the map encourages cooperative play where individual contributions to the defense line culminate in a collective victory. Recommended for fans of defense genres and those eager to experiment with unconventional tactics, Turret/Cannon WARz V.5 offers a thrilling blend of strategic planning, quick decision-making, and adrenaline-pumping action. Its broad building placement zones invite creative approaches, making it a standout choice for players looking to refine their defensive prowess. The map's ongoing updates and community-driven refinements further solidify its appeal, ensuring its continued relevance and popularity among StarCraft UMS enthusiasts.
에어 이볼브스 엘리트 (Air evolves Elite)
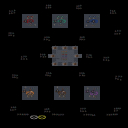
‘에어 이볼브스 엘리트(Air evolves Elite)’는 스타크래프트: 브루드워의 유즈맵으로, 공중 유닛에 특화된 전략을 펼치는 디펜스 장르의 맵입니다. 맵의 중앙에는 거대한 공중 유닛들이 소환되는 거점이 배치되어 있으며, 플레이어는 이 거점에서 쏟아지는 다수의 적 공중 유닛을 방어해야 합니다. 맵 상단과 하단에는 각각의 플레이어 본진이 위치해 있으며, 본진을 보호하면서 동시에 중앙의 거점에서 끊임없이 몰려오는 적을 상대해야 합니다. 맵의 구조는 비교적 간단하지만, 공중 유닛의 공격 패턴과 속도가 빨라져 난이도가 급격히 상승하는 특징이 있습니다. 특히 맵의 이름에서도 알 수 있듯이 ‘엘리트’ 버전은 일반 버전보다 더 강화된 공중 유닛들이 등장하기 때문에, 플레이어는 빠른 반응과 효율적인 유닛 관리 능력을 요구받습니다. 방어에 성공하면 보상으로 추가 자원이 주어지며, 이를 바탕으로 더 강력한 방어선을 구축할 수 있습니다. 이 맵은 공중 유닛을 좋아하는 플레이어나 디펜스 장르에 익숙한 유저들에게 특히 추천됩니다. 또한, 팀 플레이를 통해 협동하며 적을 방어하는 재미도 느낄 수 있습니다. 플레이 전에는 본진 보호와 중앙 거점의 유닛 관리 우선순위를 신중히 정하는 것이 중요합니다. 초보자의 경우 난이도가 다소 높을 수 있으니, 먼저 연습 모드나 쉬운 버전에서 실력을 쌓은 후 도전하는 것이 좋습니다. Air evolves Elite is a custom map for StarCraft: Brood War, falling under the defense genre with a focus on air units. The map features a central spawn point where numerous air units emerge, and players must defend against waves of incoming enemies. Each player's base is positioned at the top and bottom of the map, requiring them to protect their base while simultaneously managing the central spawn point. The layout is straightforward, but the game ramps up in difficulty due to the speed and attack patterns of the air units, especially in the 'Elite' version where units are stronger than in the standard version. Successfully defending grants additional resources, allowing players to strengthen their defenses further. This map is highly recommended for players who enjoy air unit-based strategies or defense genres. It also offers a fun cooperative experience when played with a team. Before playing, it’s crucial to prioritize base protection and efficient management of the central spawn point. Beginners may find the difficulty high, so practicing in an easier version or training mode is advisable.
9999 뮤탈리스크 (9999 Mutalisk)
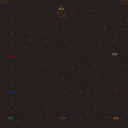
스타크래프트 유즈맵의 인기 장르 중 하나인 '컴까기' 장르에 속한 맵, 9999 Mutalisk는 플레이어가Mutalisk이라는 강력한 공중 유닛을 상대하는 미션을 중심으로 구성되어 있다. 맵의 주목적은 플레이어가Mutalisk을 사냥하는 것으로, 내부 맵 설명에서도 '3개의 머리를 가진 비행 괴물을 조심하라...Mutalisk을 처치하라!'라고 명시되어 있어 사냥atera와 생존 전략을 요구하는 디펜스 장르의 변형으로 볼 수 있다. 맵의 구조는 넓은 평야와Mutalisk의 등장 포인트를 중심으로 배치되어 있으며,Mutalisk은 플레이어의 기지나 주요 건물을 공격하는 패턴을 보인다.Mutalisk의 공격력은 강하지만, 플레이어는Mutalisk을 처치하거나 일정 시간 동안 살아남는 것이 목표로 추정된다.Mutalisk의 특성상 공중 유닛이므로 지상 유닛만으로 구성된 조합은 큰 효과를 보지 못할 가능성이 있어, 공중 공격이 가능한 유닛을 준비하거나Mutalisk의 이동 경로를 차단하는 전략이 필요할 것이다. 또한Mutalisk은 3마리 이상 등장할 가능성이 있어, 다수의Mutalisk을 상대할 수 있는 병력의 균형과 효율적인 자원 관리가 필수적이다. 이 맵은Mutalisk의 위협을 극복하는 동시에 자원을 확보하며Mutalisk을 사냥하는 흥미로운 전투와 전략을 제공할 것으로 보인다.Mutalisk의 처치 여부와 생존 여부가 승리 조건으로 보이며,Mutalisk의 등장 위치를 파악하고Mutalisk을 효율적으로 사냥할 수 있는 플레이어에게는 높은 도전 과제가 될 것이다.Mutalisk을 상대하는 플레이어는Mutalisk의 패턴을 숙지하고Mutalisk의 공격 시점을 예측하는 능력이 요구된다. 특히Mutalisk의 3마리 동시 등장은 플레이어에게 큰 압박을 줄 수 있어,Mutalisk의 공격을 방어하는 동시에Mutalisk을 사냥할 수 있는 다각적인 전략이 필요하다. 이 맵은Mutalisk의 위협을 극복하고Mutalisk을 사냥하는 재미와 긴장감을 동시에 느낄 수 있는 디펜스 장르의 변형으로,Mutalisk의 공격 패턴과Mutalisk을 사냥하는 전략을 중시하는 플레이어에게 추천된다.Mutalisk의 등장 시점과Mutalisk의 이동 경로를 분석하는 것이Mutalisk을 상대하는 데 중요한 포인트가 될 것이다. 또한Mutalisk의 공격을 방어하는 동시에Mutalisk을 사냥하는 다중 목표를 달성하기 위해Mutalisk의 공격 패턴을 분석하는 능력이 필요할 것이다.
에어 이볼브드 매스 어택 (AirEvolves-MassAttack v3.0)
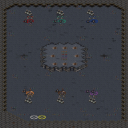
에어 이볼브드 매스 어택(AirEvolves-MassAttack v3.0)은 스타크래프트 브루드워의 유즈맵으로, 공중 유닛 중심의 전술을 활용하는 전략형 디펜스 장르에 속한다. 맵의 핵심은 '에어 이볼브'라는 2배 텔레포트 기능을 활용한 대규모 공중 공격과 방어 시스템에 있다. 플레이어는 초기 자원과 병력을 확보한 뒤, 공중 유닛을 집중 배치하여 적의 지상/공중 공격을 방어해야 한다. 맵 곳곳에 흩어져 있는 보급고나 자원 지대를 차지하여 자원을 확보하는 동시에, 공중 유닛의 업그레이드와 생산을 지속적으로 진행해야 한다. 특히 맵 중앙에 위치한 대규모 자원 지대는 필수적으로 확보해야 하며, 이곳을 방어하는 것이 게임의 승패를 좌우할 수 있다. 공중 유닛의 특성상 지상 유닛에 취약하므로, 방어 병력의 균형을 맞추는 것이 중요하다. 게임은 실시간으로 진행되며, 플레이어는 적의 공격을 저지하면서 동시에 반격을 감행해야 한다. 맵의 구조상 공중 유닛의 이동 경로가 제한적이므로, 이를 고려한 배치와 전략이 요구된다. 초보자는 공중 유닛의 기본적인 운용법과 방어 전술을 익히는 데 집중해야 하며, 숙련자는 자원 관리와 병력 조합을 최적화하여 더 높은 난이도에서도 안정적으로 승리할 수 있다. 맵의 특징인 2배 텔레포트 기능은 공중 유닛의 기동력을 극대화하므로, 이를 적극 활용한 전략 수립이 필수적이다. 또한, 맵 곳곳에 배치된 함정이나 보급고의 위치를 정확히 파악하여 자원과 병력을 효율적으로 배치해야 한다. 이 맵은 공중 유닛을 선호하는 플레이어에게 특히 추천되며, 전략적 사고와 빠른 판단력이 요구되는 플레이 스타일을 지향한다. 맵의 밸런스는 공중 유닛의 강세와 약점을 고려하여 설계되었으므로, 이를 충분히 숙지하고 플레이하는 것이 중요하다. 마지막으로, 맵의 난이도는 플레이어의 실력에 따라 크게 달라질 수 있으므로, 반복 플레이를 통해 전략을 다듬는 것이 좋다. AirEvolves-MassAttack v3.0 is a StarCraft: Brood War custom map that falls under the strategy defense genre, focusing on aerial unit tactics. The core mechanic revolves around the 'Air Evolves' feature, which enables 2x teleportation for large-scale aerial assaults and defensive operations. Players begin by securing initial resources and units, then strategically deploy air forces to fend off enemy ground and air attacks. The map features scattered resource depots and supply points, which must be captured to sustain unit production and upgrades. Central resource zones, particularly those in the mid-map, are critical and must be defended to avoid losing a decisive advantage. Air units, while powerful, are vulnerable to ground attacks, so balancing defensive units is essential. The game progresses in real-time, requiring players to both thwart enemy advances and launch counterattacks. The map's layout restricts air unit movement, demanding careful positioning and strategic foresight. Beginners should focus on mastering air unit control and basic defense tactics, while experienced players can optimize resource management and unit combinations for higher difficulty challenges. The 2x teleportation feature enhances air unit mobility, making it a key strategic element. Traps and supply points scattered across the map must be identified and utilized efficiently. This map is highly recommended for players who prefer air units, as it emphasizes strategic thinking and quick decision-making. The balance is designed with air unit strengths and weaknesses in mind, so understanding these dynamics is crucial. Due to varying difficulty, players are encouraged to refine their strategies through repeated gameplay.
엘드리치 레이크 (Eldritch Lake)
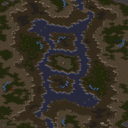
스타크래프트 브루드워의 ‘Eldritch Lake’는 이름 그대로 기묘한 분위기의 호수 맵으로, 넓은 수면과 수중 구조물이 어우러져 독특한 전투 감각을 제공하는 2인용 밀리 맵이다. 맵 중앙에 위치한 거대한 호수와 그 주변의 지형은 초반Resource gathering을 방해하지 않으면서도, 미네랄과 가스가 적절히 배치되어 빠른 확장과 주도권 경쟁을 유도한다. 수중 지역은 이동 불가 구역으로 추정되나, 지상 유닛의 접근을 제한하는 듯한 섬 지형이 곳곳에 배치되어 있어 스카웃이나 캐리어 같은 공중 유닛의 활용이 자연스럽게 강제된다. 또한, 맵의 외곽 테두리는 절벽으로 둘러싸여 있어 테란의Siege Tank나 프로토스의Corsair 같은 유닛의 활용 전략이 중요해진다. 맵의 분위기는 사막 타일셋을 기반으로 하지만, 푸른 수면과 초록색의 초목이 어우러져 신비로운 색감을 자아낸다. 초보 플레이어는Resource gathering에 주력하겠지만, 중급 이상은 초반부터 공중 유닛을 적극 활용해 상대의 확장을 방해하는 플레이를 권장한다. 맵의 밸런스는 2인용 밀리라는 점에서 동등한 자원 분배와 중앙 교전 지형의 균형이 잘 맞춰져 있으며, 특히Resource line이 짧은 편이 아니라서 Mineral Choke point를 둘러싼 치열한 초반戦闘가 예상된다. 플레이 전 확인해야 할 점은 수중 지역이 이동 불가 구역인지, 섬 지형이 공중 유닛의 비행 가능 여부다. 맵의 난이도는 동등한 2인용 밀리 맵으로, 초보부터 고수까지 모두 즐길 수 있지만, 공중 유닛의 활용이 필수적이라는 점에서 전략적 깊이가 있다. Eldritch Lake는 단순히Resource gathering을 위한 맵이 아니라, 지형과 유닛의 특성을 십분 활용한 전술적 선택이 빛을 발하는 공간이다. 호수와 초목이 어우러진 맵의 아름다움도 특징이지만, 그 이면의 전략적 깊이가 이 맵의 진정한 매력이다. 2인용 밀리 맵을 찾는 유저라면,Resource gathering과 공중 유닛의 활용을 중심으로 한 다양한 전략을 시도해 볼 수 있는 Eldritch Lake를 주목해 보자. Eldritch Lake is a unique 2-player Brood War melee map set on a mysterious lake surrounded by desert terrain. The central body of water and surrounding islands create a distinct battlefield where ground units must navigate carefully, while air units like Scouts or Carriers gain a natural advantage. The map’s borders are lined with cliffs, adding strategic depth by limiting the movement of Siege Tanks or Corsairs. Built on the desert tileset, the blue waters and lush greenery create an eerie yet visually striking atmosphere. Beginners may focus on resource gathering, but intermediate players should prioritize air unit control to disrupt enemy expansions. The balanced resource distribution and central conflict zones make this a fair and competitive map for two players. Before playing, verify whether the water areas are impassable and if islands allow air units to fly over them. While accessible to all skill levels, Eldritch Lake rewards players who master air unit tactics. Its blend of beautiful scenery and deep strategy makes it a standout choice for melee enthusiasts seeking a fresh challenge.
나무도굴단2 (Namu Doguldan 2)
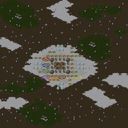
스타크래프트 브루드워의 유즈맵 ‘나무도굴단2’는 플레이어가 컴퓨터를 상대로 자원을 채취하고 방어전을 펼치는 컴까기 장르의 맵으로, 비행기 유닛이 포함된 특징을 가지고 있다. 맵은 넓은 평야와 조밀한 나무 지역으로 구성되어 있으며, 플레이어는 초반에 자원을 확보해 유닛을 생산하고, 중반부터는 방어와Resource Gathering을 병행해야 한다. 맵의 중앙과 외곽에는 높은 지형과 숲이 배치되어 있어 시야 확보와 진형 잡기가 중요한 요소로 작용한다. 특히 비행기 유닛이 제공되는 만큼 공중 유닛을 활용한 대처가 가능해 전략의 다양성이 늘어나며, 컴퓨터의 공격 패턴도 공중과 지상 혼합으로 예상된다. 1.05 버전으로 추정되는 이 맵은 제작자 Lejewk에 의해 제작되었으며, ‘Error도굴많이 해주세요’라는 메시지가 포함되어 있어 제작자의 유머 감각이 느껴진다. 플레이어는 초보자부터 숙련자까지 폭넓게 즐길 수 있지만, 방어 라인 구축과 자원 관리에서 전략적 사고가 요구된다. 맵을 플레이하기 전에는 비행기 유닛의 특성과 컴퓨터의 공격 패턴에 맞춰 빌드와 유닛 조합을 미리 준비하는 것이 중요하다. 초반 자원 확보와 방어 타워의 적절한 배치가 게임의 승패를 좌우할 수 있으며, 특히 숲 지형과 높은 지형을 활용한 우회 공격에 대응할 수 있는 대비를 갖추는 것이 필수적이다. 게임의 재미는 공중 유닛의 활용과 방어 전략의 균형을 맞추는 데 있으며, 이는 컴까기 장르의 핵심이기도 하다. 또한, 맵의 넓은 공간을 활용한 기동성과 다양한 유닛 조합을 시도해 볼 수 있어, 반복 플레이 시에도 새로운 전략을 시도해 볼 수 있는 장점이 있다. StarCraft: Brood War's custom map *Treasure Hunters 2* is a computer-vs-human resource-gathering and defense map with a unique feature: flying units are included. The map consists of wide open plains interspersed with dense forests, forcing players to secure early resources for unit production while balancing defense and gathering as the game progresses. High ground and trees are strategically placed in both the center and outer regions, making vision control and positioning crucial. With access to flying units, players can diversify their strategies, and the AI’s attacks are expected to mix air and ground approaches. Estimated to be version 1.05, the map was created by Lejewk, whose humor shines through in the message “Please make lots of errors” included in the file. Suitable for players of all skill levels, the challenge lies in building defensive lines and managing resources effectively. Before playing, it’s important to prepare builds and unit compositions tailored to the flying units and the AI’s attack patterns. Early resource collection and smart tower placement can determine victory or defeat, and players must be ready to counter flanking attacks using the terrain’s forests and high ground. The fun comes from balancing aerial unit use with defensive play—a core aspect of the comp-stomp genre. The map’s expansive layout also encourages experimentation with unit combinations and mobility, offering fresh strategies even after multiple playthroughs.
최근 등록된 맵
새로 추가된 파일과 버전을 확인하세요.
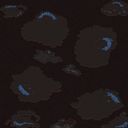
용암 섬 (Lava Islands)
Lava Islands는 정글 타일셋을 기반으로 한 1024x1024 크기의 맵으로, 중앙에 넓게 펼쳐진 lava 바다를 중심으로 설계되었다. 설명에 따르면 플레이어는 이 용암 해역 위에 공중 군대를 육성하여 적의 모든 건물을 파괴해야 victorious 할 수 있다. 이는 일반적인 밀리 맵의 목표인 적 건물 제거를 공중 유닛 위주로 수행한다는 점에서 특이하다. 4인용으로 구성되어 있으며, 팀 구분이 없어 각 플레이어는 개별적으로 자원을 채취하고 건물을 짓며 전투기를 생산해야 한다. 지형은 대부분 용암으로覆われ되어 있어 지상 유닛의 이동이 제한적이고, 공중 유닛이 주요 전투 수단이 된다. 따라서 초반에는 스카우트와 함께 가스를 확보하여 스타포트나 해당 종족의 공중 생산 시설을 빠르게 짓는 것이 승리의 열쇠가 된다. lava 지형은 시야를 차단하는 요소도 되어, 적의 위치를 예측하기 어렵고 갑작스러운 공중 공격이 빈번히 발생한다. 이런 특성 때문에 반응 속도와 빌드 순서가 중요한데, 미숙한 플레이어는 자원 낭비나 방심으로 인해 쉽게 패배할 수 있다. 맵의 난이도는 명확히 표기되지 않았으나, 공중 유닛 운영에 익숙하지 않은 초보자보다는 중간 이상의 실력을 가진 플레이어에게 더 적합하다고 추정된다. 플레이 전에는 자신이 선택한 종족의 공중 유닛 생산 시건물과 업그레이드 트리를 확인하고, lava 지형으로 인한 이동 제한을 고려한 빌드 순서를 계획하는 것이 좋다. 전반적으로 독특한 지형과 공중 중심의 전투 방식이 결합되어 색다른 밀리 경험을 제공하며, 전략적인 공중 운영을 좋아하는 유저에게 추천한다. Lava Islands is a map based on the jungle tileset with a size of 1024x1024, featuring a vast lava ocean at its center. According to the description, players must build an air force over this lava sea to destroy all enemy buildings and achieve victory. This differs from typical melee maps where the goal is to eliminate enemy structures, but here the focus is primarily on air units. Designed for four players with no team divisions, each participant must individually gather resources, construct buildings, and produce combat aircraft. The terrain is mostly covered in lava, restricting ground unit movement and making air units the main combat force. Consequently, early game strategy revolves around scouting and securing gas to quickly erect a starport or the respective race's air production facility, which is key to victory. The lava terrain also obscures vision, making enemy positions hard to predict and frequent sudden air attacks common. Due to these characteristics, reaction speed and build order are crucial; inexperienced players may easily lose due to wasted resources or lapses in concentration. Although the map's difficulty is not explicitly stated, it is estimated to be more suitable for players with intermediate or higher skill who are familiar with air unit operations, rather than complete beginners. Before playing, one should verify the air production buildings and upgrade trees of their chosen race and plan a build order that accounts for the movement restrictions imposed by the lava terrain. Overall, the unique terrain combined with air‑centric combat offers a distinctive melee experience, making it recommended for users who enjoy strategic air operations.
나무도굴단2 (Namu Doguldan 2)
스타크래프트 브루드워의 유즈맵 ‘나무도굴단2’는 플레이어가 컴퓨터를 상대로 자원을 채취하고 방어전을 펼치는 컴까기 장르의 맵으로, 비행기 유닛이 포함된 특징을 가지고 있다. 맵은 넓은 평야와 조밀한 나무 지역으로 구성되어 있으며, 플레이어는 초반에 자원을 확보해 유닛을 생산하고, 중반부터는 방어와Resource Gathering을 병행해야 한다. 맵의 중앙과 외곽에는 높은 지형과 숲이 배치되어 있어 시야 확보와 진형 잡기가 중요한 요소로 작용한다. 특히 비행기 유닛이 제공되는 만큼 공중 유닛을 활용한 대처가 가능해 전략의 다양성이 늘어나며, 컴퓨터의 공격 패턴도 공중과 지상 혼합으로 예상된다. 1.05 버전으로 추정되는 이 맵은 제작자 Lejewk에 의해 제작되었으며, ‘Error도굴많이 해주세요’라는 메시지가 포함되어 있어 제작자의 유머 감각이 느껴진다. 플레이어는 초보자부터 숙련자까지 폭넓게 즐길 수 있지만, 방어 라인 구축과 자원 관리에서 전략적 사고가 요구된다. 맵을 플레이하기 전에는 비행기 유닛의 특성과 컴퓨터의 공격 패턴에 맞춰 빌드와 유닛 조합을 미리 준비하는 것이 중요하다. 초반 자원 확보와 방어 타워의 적절한 배치가 게임의 승패를 좌우할 수 있으며, 특히 숲 지형과 높은 지형을 활용한 우회 공격에 대응할 수 있는 대비를 갖추는 것이 필수적이다. 게임의 재미는 공중 유닛의 활용과 방어 전략의 균형을 맞추는 데 있으며, 이는 컴까기 장르의 핵심이기도 하다. 또한, 맵의 넓은 공간을 활용한 기동성과 다양한 유닛 조합을 시도해 볼 수 있어, 반복 플레이 시에도 새로운 전략을 시도해 볼 수 있는 장점이 있다. StarCraft: Brood War's custom map *Treasure Hunters 2* is a computer-vs-human resource-gathering and defense map with a unique feature: flying units are included. The map consists of wide open plains interspersed with dense forests, forcing players to secure early resources for unit production while balancing defense and gathering as the game progresses. High ground and trees are strategically placed in both the center and outer regions, making vision control and positioning crucial. With access to flying units, players can diversify their strategies, and the AI’s attacks are expected to mix air and ground approaches. Estimated to be version 1.05, the map was created by Lejewk, whose humor shines through in the message “Please make lots of errors” included in the file. Suitable for players of all skill levels, the challenge lies in building defensive lines and managing resources effectively. Before playing, it’s important to prepare builds and unit compositions tailored to the flying units and the AI’s attack patterns. Early resource collection and smart tower placement can determine victory or defeat, and players must be ready to counter flanking attacks using the terrain’s forests and high ground. The fun comes from balancing aerial unit use with defensive play—a core aspect of the comp-stomp genre. The map’s expansive layout also encourages experimentation with unit combinations and mobility, offering fresh strategies even after multiple playthroughs.
터렛/캐논 워즈 (Turret/Cannon WARz)
스타크래프트: 브루드워의 유즈맵 장르 중에서도 디펜스(Defense) 장르에 특화된 작품으로, ‘Turret/Cannon WARz’라는 제목 그대로 터렛과 캐논을 건설하여 적 공중 유닛의 공격을 방어하는 전략적 재미를 강조하는 맵이다. 플레이어는 맵 중앙 하단에 위치한 본진에서 시작하며, 좌우로 펼쳐진 넓은 길목을 따라 끊임없이 등장하는 적 공중 유닛을 터렛이나 캐논으로 요격해야 한다. 맵의 구조는 대칭형으로 설계되어 있으며, 적 유닛이 통과해야 하는 길목이 좁고 길게 이어지는 형태로 구성되어 있다. 이를 통해 방어 타워의 배치와 업그레이드 타이밍이 승패를 가르는 핵심 요소로 작용한다. 특히, 터렛과 캐논의 특성을 활용한 전략적 선택이 요구되며, 초반 자원 관리와 테크 트리의 확장이 중요한 역할을 한다. 맵의 분위기는 밀리전보다는 유즈맵 특유의 전략적 깊이가 강조된 디펜스 장르에 맞춰져 있으며, 팀플레이보다는 개인 또는 소수 인원이 방어 타워를 구축하고 공중 유닛을 상대로 버티는 플레이 스타일이 주를 이룬다. 또한, 맵의 난이도는 방어 타워의 배치와 업그레이드 여부에 따라 크게 달라질 수 있으므로, 초보자의 경우 난이도가 높게 느껴질 수 있지만, 적절한 전략과 타이밍을 익히면 점차 안정적인 방어가 가능해진다. 이 맵은 디펜스 장르에 대한Interest가 있는 플레이어뿐만 아니라, 스타크래프트의 전략적 요소를 즐기는 유저들에게도 훌륭한 선택지가 될 수 있다. 특히, 방어 타워의 배치와 공중 유닛의 패턴을 분석하는 재미가 있어 반복 플레이를 통해 숙련도를 높일 수 있는 장점이 있다. 플레이 전 준비해야 할 포인트는 방어 타워의 종류와 특징을 숙지하는 것이며, 자원 관리와 테크 트리의 확장을 신중히 계획하는 것이다. 또한, 맵의 구조를 미리 숙지하여 적 공중 유닛의 진입 경로를 예측하는 것도 필수적이다. This StarCraft: Brood War custom map, ‘Turret/Cannon WARz’, falls squarely into the Defense genre, challenging players to build turrets and cannons to intercept waves of enemy air units before they reach the end zone. The map features a symmetrical layout with a narrow, elongated pathway that enemy units must traverse, making tower placement and timing upgrades critical strategic decisions. Players begin at the bottom-center base and must balance resource management with tech tree progression to maximize their defensive capabilities. While the gameplay focuses on personal strategy rather than team coordination, the challenge lies in adapting to the increasing difficulty as air unit waves grow more frequent and aggressive. The map may prove difficult for newcomers to the Defense genre, but with practice, players can refine their tower placement and upgrade timing to secure steady victories. Ideal for fans of strategic tower defense mechanics and StarCraft’s tactical depth, ‘Turret/Cannon WARz’ offers a rewarding experience for those who enjoy analyzing air unit patterns and optimizing defensive setups. Before playing, familiarize yourself with the different tower types and their strengths, plan your resource allocation carefully, and study the map’s layout to anticipate enemy unit paths effectively.
터렛/캐논 워즈 V.5 (Turret/Cannon WARz V.5)
스타크래프트 브루드워의 인기 디펜스 유즈맵인 〈Turret/Cannon WARz V.5〉는 터렛과 캐논을 직접 건설하고 조작하여 공중 유닛의 공격을 막아내는 전략적인 디펜스 장르의 맵이다. 맵 중앙을 가로지르는 길을 따라 끊임없이 몰려오는 적 공중 유닛들을 저지하는 것이 주요 목표로, 플레이어는 제한된 자원으로 건물을 배치하고 업그레이드하여 방어선을 구축해야 한다. 맵의 구조는 시작 지점과 끝 지점을 잇는 일직선 길이 있으며, 양 옆으로 넓은 공간이 확보되어 있어 터렛이나 캐논을 배치할 수 있는 공간이 풍부하다. 특히 맵의 양 끝에 위치한 시작 지점과 끝 지점은 각각의 팀(또는 플레이어)이 건물을 건설할 수 있는 전용 구역으로 나뉘어 있어, 전략적인 위치 선정이 victory의 핵심으로 작용한다. 맵의 이름은 'Turret/Cannon WARz'로, 터렛과 캐논을 주력으로 사용한다는 점과 전쟁(War)을 연상시키는 전투적인 분위기가 돋보인다. V.5 버전은 이전 버전에서의 밸런스 조정과 UI 개선, 그리고 새로운 건물 배치 옵션 등이 추가되어 더 전략적인 플레이를 가능하게 한다. 이 맵은 초보부터 숙련자까지 모두 즐길 수 있도록 디자인되어 있지만, 특히 건물을 효율적으로 배치하고 업그레이드를 신중히 진행하는 능력이 중요하다. 플레이어는 맵의 중앙 길에 집중되는 공격을 효과적으로 방어하기 위해, 건물을 일직선으로만 배치하는 것이 아니라 좌우로 넓게 퍼뜨려 배치하는 전략을 사용해야 한다. 또한, 공중 유닛의 종류에 따라 효과적인 방어 건물의 조합이 달라지므로, 맵의 흐름을 잘 읽고 대처하는 능력이 필요하다. 맵의 분위기는 전쟁과 방어의 긴장감이 느껴지도록 디자인되어 있으며, 건물을 건설하는 소리와 공격 소리가 어우러져 immersive한 경험을 제공한다. 이 맵을 즐기기 위해서는 적어도 6명의 플레이어가 필요하며, 각 플레이어는 개별적으로 건물을 건설하고 관리할 수 있다. 추천되는 플레이 스타일은 방어 건물 간의 시너지를 극대화하기 위해 협력 플레이를 중시하는 것이다. 이 맵은 디펜스 장르에 익숙한 플레이어뿐만 아니라, 새로운 전략을 시도해 보고 싶은 유저들에게도 훌륭한 선택지가 될 것이다. 건물을 건설하고 업그레이드하는 재미와 함께, 끊임없이 몰려오는 적을 방어하는 짜릿한 긴장감까지 느낄 수 있는佳作 유즈맵이라 할 수 있다. 특히 건물을 배치할 수 있는 공간이 넓은 만큼, 창의적인 전략을 구상하고자 하는 플레이어들에게는 더없이 좋은 기회가 될 것이다. 마지막으로, 이 맵은 꾸준한 업데이트와 밸런스 조정을 통해 더 많은 플레이어들에게 사랑받고 있는 만큼, 앞으로도 많은 관심을 받을 만한 가치가 있다. Turret/Cannon WARz V.5 is a popular defense UMS map in StarCraft: Brood War where players construct and upgrade turrets and cannons to fend off waves of incoming air units. The core objective is to defend a central path from relentless enemy aerial assaults by strategically placing defensive structures within designated zones at the map's start and end points. The map features a straight-line path flanked by wide open spaces, allowing players to spread out their defenses across the battlefield. Version 5 introduces refined balance adjustments, enhanced UI elements, and additional building placement options, elevating the strategic depth of gameplay. While accessible to beginners, mastering turret and cannon placement, along with timely upgrades, becomes crucial for veteran players seeking optimal defense. Effective strategies involve scattering buildings not just in a straight line but across the sides to maximize coverage against diverse air unit types that dominate the central route. The immersive experience is heightened by the war-themed atmosphere, blending construction sounds with the intensity of incoming attacks. Designed for six players, the map encourages cooperative play where individual contributions to the defense line culminate in a collective victory. Recommended for fans of defense genres and those eager to experiment with unconventional tactics, Turret/Cannon WARz V.5 offers a thrilling blend of strategic planning, quick decision-making, and adrenaline-pumping action. Its broad building placement zones invite creative approaches, making it a standout choice for players looking to refine their defensive prowess. The map's ongoing updates and community-driven refinements further solidify its appeal, ensuring its continued relevance and popularity among StarCraft UMS enthusiasts.
에어 이볼브스: 매스어택 (AirEvolves: MassAttack v2.1)
「AirEvolves-MassAttack v2.1」은 스타크래프트: 브루드워의 UMS 계열 유즈맵으로, 트리거를 적극 활용한 다중 텔레포트와 대규모 공격 연계가 특징인 전략 디펜스 맵이다. 맵 제목에서 알 수 있듯이 ‘Air’라는 이름에 걸맞게 공중 유닛의 이동과 공격 패턴이 핵심 메커니즘을 차지하며, ‘MassAttack’이 강조하는 바와 같이 다수의 유닛을 동시에 투입해 적을 압박하는 플레이가 요구된다. 중앙의 넓은 평야와 주변의 언덕, 그리고 복잡하게 배치된Pathing Blocker(이동 방해 블록)들은 플레이어가 공중 유닛의 기동력을 최대한 활용하도록 설계되어 있다. 특히, 미네랄과 가스가 중앙 지역 주변에 밀집되어 있어 초반 자원 확보 경쟁이 치열해지며, 이를 바탕으로 빠르게 다수의 전투기를 생산해 적 기지를 압박하는 것이 주된 전략이 된다. 이 맵의 가장 큰 특징은 ‘2X 텔레포트’ 시스템으로, 플레이어는 일정 시간마다 두 번의 즉각적인 위치 이동을 사용할 수 있다. 이 기능은 예상치 못한 공격을 퍼뜨리거나, 적의 공격을 회피하는 데 유용하며, 대규모 병력dispatch(파견) 시에도 전략적 이점을 제공한다. 또한, 맵 상단과 하단에 위치한 ‘MassAttack’ zona(구역)는 다수의 유닛을 한꺼번에 소환할 수 있는 특별한 지역으로, 이 곳에서 생산된 유닛들은 자동으로 전장에 배치되어 적을 압도하는 데 기여한다. 이처럼 맵은 단순 디펜스를 넘어, 유닛의 이동성과 생산 효율성을 극대화하는 ‘액션 디펜스’라는 새로운 장르로 분류할 수 있다. 플레이 난이도는 주로 적의 공격 패턴과 맵의 복잡한 지형에 좌우된다. 초보자의 경우, 자원 확보와 유닛 생산 타이밍을 맞추는 데 어려움을 겪을 수 있으며, 중급자 이상은 텔레포트와 MassAttack 구역을 얼마나 효과적으로 활용하느냐에 따라 승패가 갈린다. 맵의 난이도 설정은 없지만, 팀 플레이가 강제되는 구조는 아니며, 1대1부터 6인까지 다양한 인원으로 즐길 수 있다. 특히, 공중 유닛의 비중이 높아, 스타크래프트의 공중 유닛 밸런스를 숙지하고 있는 플레이어가 유리할 것으로 보인다. 맵을 시작하기 전에는 미네랄과 가스의 배치, MassAttack 구역의 위치, 텔레포트 쿨타임을 반드시 확인하고, 초반 자원 확보와 유닛 생산 타이밍을 철저히 계획해야 한다. 또한, 적의 기지 주변 언덕 지형과 공중 유닛의 이동 경로를 사전에 숙지해 두면 게임 중Unexpected(예상치 못한) 상황을 줄일 수 있을 것이다. 「AirEvolves-MassAttack v2.1」 is a UMS-style custom map for *StarCraft: Brood War*, featuring a strategic defense format that heavily utilizes triggers for multi-teleportation and coordinated large-scale attacks. As the name suggests, air units play a central role in movement and combat mechanics, while "MassAttack" emphasizes overwhelming the enemy with swarms of units deployed simultaneously. The wide central plains, surrounding hills, and intricately placed pathing blockers are designed to maximize the maneuverability of air units. Mineral and gas deposits are densely clustered around the central area, intensifying early-game resource competition, which players must leverage to quickly produce large numbers of fighters and pressure enemy bases. The map’s standout feature is its "2X Teleport" system, allowing players to perform two instant repositioning moves at regular intervals. This is invaluable for launching surprise attacks, evading enemy assaults, or strategically deploying forces during large-scale engagements. Additionally, the "MassAttack" zones located at the top and bottom of the map serve as special areas where multiple units can be summoned at once. Units spawned here are automatically deployed to the battlefield, overwhelming opponents through sheer numbers. Beyond simple defense, the map introduces a new subgenre—"action defense"—prioritizing unit mobility and production efficiency. Game difficulty hinges on enemy attack patterns and the map’s complex terrain. Beginners may struggle with balancing resource collection and unit production timing, while intermediate and advanced players will find victory hinging on efficient use of teleportation and MassAttack zones. Though the map lacks explicit difficulty settings, its structure doesn’t enforce team play, allowing matches from 1v1 to 6-player free-for-all. Given the prominence of air units, players familiar with *StarCraft*’s aerial unit balance will have a significant advantage. Before starting, it’s crucial to study mineral and gas layouts, MassAttack zone locations, and teleport cooldowns, then meticulously plan early-game resource gathering and unit production. Familiarizing yourself with the hill terrain near enemy bases and optimal air unit flight paths will also help minimize unexpected surprises during play.
Elements Of Anti-Air Defence (에어 디펜스 최종판)
스타크래프트 브루드워의 유즈맵 《Elements Of Anti-Air Defence》는 공중 유닛 위주의 디펜스 장르로, 플레이어는 끊임없이 몰려드는 적 공중 병력으로부터 기지를 방어해야 한다. 맵은 중앙에 위치한 본진을 중심으로 네방향으로 확장된 구조로, 각 방향에 배치된 방어 건물과 유닛을 활용해 적을 차단하는 것이 핵심이다. 적의 공중 병력 구성은 랜덤으로 생성되며, 전투기와 폭격기, 수송선 등 다양한 유닛이 등장해 전략적인 대처가 요구된다. 방어 건물은 지상과 공중을 동시에 공격할 수 있는 시즈 탱크와 미사일 터렛이 주를 이루며, 플레이어는 자원을 모아 추가 방어선을 구축하거나 유닛을 강화할 수 있다. 맵의 특징은 적의 공격 패턴이 끊임없이 지속된다는 점으로, 초반 방어 실패는 곧 게임 오버로 이어질 수 있어 신속한 대응이 중요하다. 또한, 맵 곳곳에 배치된 보너스 자원 지역을 확보해 자원 수급을 원활히 하는 것이 필수적이다. 이 맵은 초보자보다는 전략적 사고와 빠른 판단력이 요구되는 만큼, 디펜스 장르에 익숙한 플레이어에게 특히 추천된다. 방어 건물의 배치와 유닛 관리, 자원 관리를 어떻게 조율하느냐에 따라 난이도가 크게 달라지므로, 플레이어의 숙련도에 따라 여러 번의 도전과 개선이 필요하다. 또한, 맵의 균형이 워낙에 정교하게 짜여 있어, 밸런스 붕괴 없이 지속적인 재미를 느낄 수 있도록 설계되었다. 특히, 적의 공중 병력이 랜덤으로 등장한다는 점은 매 플레이마다 다른 전략을 요구하므로, 반복 플레이해도 질리지 않는 매력이 있다. 다만, 방어 건물의 체력 관리와 자원 수급 타이밍을 놓치면 순식간에 무너질 수 있으니 주의가 필요하다. 이 맵은 디펜스 유즈맵 중에서도 손꼽히는 완성도로, 공중 유닛을 주력으로 삼는 디펜스 게임을 즐기고자 하는 플레이어에게 강력히 추천한다. Elements Of Anti-Air Defence is a UMS (User-Made Scenario) defense map in StarCraft: Brood War where players must protect their base from relentless waves of enemy air units. The map features a central starting position surrounded by four expansion directions, each equipped with defensive structures like missile turrets and siege tanks capable of targeting both ground and air units. The enemy air forces consist of a randomized mix of fighters, bombers, and dropships, requiring strategic adaptation to counter each wave effectively. A key feature is the continuous assault pattern, where failing to defend early can lead to an immediate game over, emphasizing quick decision-making and resource management. Designed for players with experience in defense maps, this scenario demands sharp strategic thinking, precise unit control, and efficient resource allocation to strengthen defenses. The map's balanced design ensures replayability, as the random nature of enemy compositions forces varied tactics across playthroughs. However, players must carefully manage turret health and resource timing to avoid collapse under pressure. With its polished balance and engaging mechanics, Elements Of Anti-Air Defence stands out as a top-tier air-focused defense experience, making it ideal for those seeking a challenging yet rewarding defense challenge in StarCraft's UMS scene.
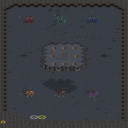
에어 이볼브즈 매스어택 (Air Evolves-MassAttack v2.1)
‘에어 이볼브즈 매스어택’은 스타크래프트 브루드워의 유즈맵으로, 플레이어들이 공중 유닛을 진화시키고 대규모 공격을 펼치는 전략적 재미를 제공하는 맵이다. 맵 상단과 하단에 위치한 두 개의 기지에서 시작하며, 중앙의 넓은 평야 지대를 사이에 두고 전투가 펼쳐진다. 맵은 우주 타일셋으로 구성되어 있어 우주 공간의 느낌을 살리면서도, 넓은 시야와 넓은 통로를 활용한 대규모 전투가 특징이다. 특히, 맵의 이름에서 유추할 수 있듯이 ‘에어 이볼브즈’는 공중 유닛의 진화와 확장을 중시하며, ‘매스어택’은 대규모 병력 동원과 공격을 의미한다. 플레이어는 초반에 자원을 확보하고 유닛을 생산한 뒤, 점차 강력한 공중 유닛으로 진화시키며 상대방을 압박하는 전략을 구사하게 된다. 맵의 가장 큰 특징은 ‘2X 텔레포트’ 기능과 ‘매스 어택’이 결합된 시스템이다. 텔레포트 기능을 통해 유닛을 빠르게 전장에 배치하거나 후퇴할 수 있으며, 대규모 공격을 펼치며 상대의 기지를 파괴하는 것이 주된 목표로 보인다. 맵의 중앙에는 넓은 평야가 펼쳐져 있어 대규모 병력 간의 전투가 빈번하게 발생할 것으로 추정된다. 또한, 맵의 구조상 기지 간의 거리가 멀지 않기 때문에 빠른 타이밍 공격이나 기습이 효과적일 수 있다. 플레이어는 자원 관리와 유닛 조합, 그리고 타이밍을 잘 조절하는 것이 중요하다. 초보자의 경우 대규모 전투에서 유닛이 쉽게 파괴될 수 있어 어려움을 느낄 수 있지만, 숙련된 플레이어는 효율적인 유닛 진화와 전략적 기동으로 승기를 잡을 수 있을 것이다. 맵의 밸런스가enstein의 공격 패턴과 플레이어 간의 상호작용에 따라 달라질 수 있으므로, 다양한 전략을 시도해 볼 필요가 있다. 이 맵은 특히 실시간 전략과 대규모 전투를 즐기는 플레이어들에게 적합하며, 공중 유닛의 진화와 확장을 중시하는 플레이 스타일을 선호하는 유저라면 재미있게 즐길 수 있을 것이다. 플레이 전 반드시 확인해야 할 사항으로는, 맵의 중앙 평야가 넓은 전투 공간으로 활용된다는 점과, 텔레포트 기능을 효율적으로 사용해야 한다는 점이다. 또한, 상대방의 전략에 따라 유닛 조합을 유연하게 변경하는 것이 중요하다. 초반 자원 확보와 유닛 생산 타이밍을 잘 조절하지 않으면 중반 이후 불리한 상황에 처할 수 있으므로, 신중한 플레이가 요구된다. 이 맵은 경쟁력 있는 유즈맵으로, 스타크래프트의 멀티플레이 문화에서 오랫동안 사랑받아 온 장르의 특징을 잘 담아내고 있다. Air Evolves-MassAttack v2.1 is a custom StarCraft: Brood War map that offers players strategic fun through evolving air units and launching large-scale attacks. The map features two bases located at the top and bottom, with a wide central plain serving as the battlefield. The space-themed tileset enhances the atmosphere of a vast battlefield, allowing for large-scale combat with ample visibility and open pathways. As suggested by the map's name, 'Air Evolves' focuses on the evolution and expansion of air units, while 'MassAttack' emphasizes the deployment and assault of large forces. Players begin by securing resources and producing units, gradually evolving into powerful air forces to overwhelm opponents. The map's standout feature is the combination of '2X Teleport' functionality and 'Mass Attack.' The teleport system enables rapid unit deployment or retreat, while the primary objective revolves around destroying the enemy base with large-scale assaults. The central plain provides ample space for frequent large-scale battles. Given the relatively short distance between bases, quick timing attacks or ambushes are likely to be effective. Players must balance resource management, unit composition, and timing. Beginners may struggle with large-scale battles where units are easily destroyed, but experienced players can gain the upper hand through efficient unit evolution and strategic maneuvering. The map's balance may vary depending on the attacking patterns of the computer opponent and player interactions, requiring experimentation with different strategies. This map is particularly suited for players who enjoy real-time strategy and large-scale combat, especially those who prefer a playstyle focused on air unit evolution and expansion. Before playing, it's essential to confirm that the central plain serves as a key battleground and that teleport functions are used effectively. Flexibility in unit composition based on the opponent's strategy is crucial. Poor initial resource gathering and unit production timing can lead to a disadvantage in the mid-game, so careful play is required. This map is a competitive custom map, embodying the enduring appeal of the multiplayer culture in StarCraft.
에어 워스 매스 v5.1 (Air Wars Mass v5.1)
스타크래프트 브루드워의 에어 워즈 매스 에어리얼 디펜스 맵 '에어 워스 매스 v5.1(Air Wars Mass v5.1)'은 공중 유닛을 주력으로 다루는 디펜스 장르의 유즈맵으로, 8명의 플레이어가 한 팀으로 뭉쳐서 끊임없이 밀려오는 적 공중 병력을 방어하는 구조를 갖추고 있다. 맵 중앙에 위치한 넓은 평원은 공중 유닛의 진격로를 제공하며, 가장자리에는 방어 건물이 배치되어 있어 플레이어는 이들을 조합해 최적의 방어 체계를 구축해야 한다. 특히, 맵의 지형이 대칭형으로 설계되어 있어 공중 유닛이 좌우 양쪽에서 동시에 공격해오는 특징이 있다. 맵 상단과 하단에는 자원 채취 지역이 배치되어 있어 초기 자원 수급이 원활하며, 이를 바탕으로 방어용 건물을 지속적으로 업그레이드하거나 추가 병력을 생산할 수 있다. 공중 유닛 간의 조합과 컨트롤이 필수적인 이 맵은 초보 플레이어에게는 다소 어렵게 느껴질 수 있지만, 팀워크와 전략적 배치가 중요하다는 점에서 숙련자들에게는 더할 나위 없이 재미있는 경험을 제공한다. 방어에 실패하면 공중 병력이 기지 내부로 침투해 건물을 파괴하거나 자원 채취를 방해할 수 있어, 긴장감과 더불어 실시간 전략적 사고가 요구된다. 맵의 디자인상 공중 유닛의 이동 경로가 비교적 명확하게 정해져 있지만, 적의 공격 패턴이 랜덤으로 변할 수 있어 항상 유연하게 대처해야 한다. 또한, 맵의 중앙부에 위치한 넓은 공간은 공중 유닛 간의 전투가 벌어지는 주요 전장인데, 이 공간에서 벌어지는 전투의 승패가 전체 게임의 흐름을 좌우할 가능성이 높다. 플레이 전에는 공중 유닛의 종류와 특성, 방어 건물의 배치 및 업그레이드 경로, 팀원 간의 역할 분담을 충분히 숙지하는 것이 중요하다. 특히, 자원 관리와 병력 생산 타이밍을 놓치지 않도록 주의해야 하며, 초반 방어선을 구축하는 단계에서 실수를 하게 되면 이후 회복이 힘들 수 있다. 에어 워스 매스 v5.1은 디펜스 장르의 정석을 따르면서도 공중 유닛의 전투에 특화된 독특한 재미를 제공하는 맵으로, 공중 유닛을 좋아하는 플레이어라면 반드시 경험해볼 가치가 있는 맵이라고 할 수 있다. 다만, 팀원 간의 호흡이 맞지 않거나 개인의 실력이 부족하면 상대적으로 어려운 난이도를 느낄 수 있으므로, 팀원과의 전략적인 소통이 필수적이다. StarCraft: Brood War's *Air Wars Mass* aerial defense custom map *Air Wars Mass v5.1* is a defense-style game where eight players team up to fend off endless waves of enemy air units. The map features a wide central plain that serves as the main path for aerial forces, with defensive structures placed along the edges, allowing players to build the best possible defense by combining them. The symmetrical terrain design ensures that air units attack from both sides simultaneously. Resource collection areas are located at the top and bottom of the map, enabling smooth early-game income so players can continuously upgrade defenses or produce additional forces. While this map demands strong air unit coordination and control—making it challenging for beginners—it offers seasoned players an unparalleled experience where teamwork and strategic positioning are key. Failure to defend properly allows enemy air units to penetrate the base, destroying buildings or disrupting resource gathering, creating high tension and requiring real-time strategic thinking. Though the map’s design clearly defines air unit movement paths, enemy attack patterns can shift randomly, so players must adapt quickly. The large central area serves as the primary battlefield, and victory or defeat in this zone often dictates the overall game’s flow. Before playing, it’s crucial to thoroughly understand air unit types and traits, defensive structure placement and upgrades, and team roles. Resource management and production timing are critical—mistakes in the early defense setup can be difficult to recover from. *Air Wars Mass v5.1* follows classic defense map principles while offering a unique focus on air combat, making it a must-try for players who love aerial battles. However, if team coordination is lacking or individual skill is insufficient, the difficulty can feel disproportionately high, so strategic communication among teammates is essential.
맵 선택 가이드
태그는 맵의 핵심 특징을 빠르게 설명하지만 제작 버전마다 규칙이 다를 수 있습니다. 상세 설명에서 권장 인원, 난이도, 플레이 시간과 버전을 함께 확인한 뒤 다운로드하세요.