
공식 맵 스타크래프트 맵 모음
'공식 맵' 태그가 등록된 맵을 모았습니다. 장르 하나로 찾기 어려운 플레이 방식, 난이도와 특징을 중심으로 인기 맵과 최신 맵을 비교해 보세요.
- 등록 맵
- 14개
- 누적 다운로드
- 4
- 누적 조회
- 1,480
인기 맵
다운로드와 조회 반응이 높은 맵입니다.
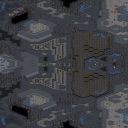
블리츠 Y 1.1 (Blitz Y 1.1)
스타크래프트 브루드워의 공식 대회용 맵으로 ASL Season17에 사용된 'Blitz Y 1.1'은 우주 배경의 넓은 맵에 시야 차단 효과가 적용된 특징을 지닌다. 맵의 전체적인 구조는 중앙에 위치한 광물 지대와 이를 둘러싼 세 개의 대형 베이스 지역으로 나뉘며, 각 베이스 간에는 좁은 길목과 넓은 평지가 조화롭게 배치되어 있다. 시야 차단 효과(Fog)는 초반 전략 선택과 멀티 테크 전략에 큰 영향을 주며, 맵의 symmetrical한 설계 덕분에 테란, 저그, 프로토스 간의 밸런스가 비교적 잘 맞춰져 있다. 특히 중앙 광물 지대는 빠른 멀티 테스팅과 방어 라인 구축이 가능한 위치에 있어, 초반부터 공격적인 플레이를 펼치거나 안정적인 플레이를 선택할 수 있는 유연성을 제공한다. 맵의 symmetrical한 구조는 대회용 맵답게 양측의 전력 구도가 대칭을 이루며, 이를 통해 양측이 동일한 전략적 기회를 가질 수 있도록 설계되었다고 추정된다. 플레이어는 맵의 특성을 고려하여 프로토스의 초반 방어력, 테란의 벙커링 전략, 저그의 확산 전략 among others among others among others among others among others among others를 상황에 맞게 선택할 수 있으며, 이러한 특징들은 ASL과 같은 공식 대회에서 승부처가 될 수 있는 요소들이다. 이 맵은 넓은 시야 차단과 symmetrical한 구조 덕분에 초보자보다는 중급 이상의 플레이어들에게 더 어울릴 것으로 보이며, 특히 멀티 테스팅과 전략적 깊이감을 즐기는 유저들에게 추천할 만하다. 플레이 전에는 시야 차단 효과가 게임 플레이에 미치는 영향을 충분히 고려하고, symmetrical한 구조를 활용한 빌드 오더와 전략 수립이 필요하다는 점을 미리 숙지하는 것이 중요하다. Blitz Y 1.1, used in ASL Season 17 as an official tournament map in StarCraft: Brood War, features a vast space-themed layout with fog-of-war effects. The map is divided into a central mineral field surrounded by three large base areas, with narrow passages and open plains strategically placed between them. The fog-of-war has a significant impact on early-game strategy and multi-base tech choices, while the symmetrical design ensures a balanced matchup among Terran, Zerg, and Protoss. The central mineral field allows for quick multi-base scouting and defensive line construction, offering players flexibility to adopt aggressive or stable playstyles from the start. Thanks to its symmetrical structure, typical of tournament maps, both sides have mirrored starting positions, ensuring equal strategic opportunities. Players must adapt their strategies—such as Protoss early-game defenses, Terran bunker rushes, or Zerg spread tactics—based on the map’s unique traits, making these elements decisive factors in high-level competitions like ASL. Due to its wide fog-of-war and symmetrical layout, the map is better suited for intermediate to advanced players, particularly those who enjoy multi-base scouting and strategic depth. Before playing, it’s crucial to understand how the fog-of-war affects gameplay and to prepare build orders and strategies that leverage the symmetrical structure.
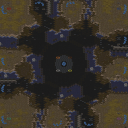
레트로 1.2 (Retro 1.2)
이 맵은 스타크래프트 브루드워의 공식 리그인 ASL XV에서 사용된 오리지널 밀리 맵으로, 황무지 타일셋을 기반으로 한 symmetrical(대칭) 구조가 특징이다. 맵의 중앙부는 비교적 평평한 평야 지대로, 초반 교전이나 멀티 확보가 용이하도록 설계되어 있다. 양측의 본진과 앞마당 지역은 비교적 평범한 배치이지만, 중립 건물과 미네랄 라인이 적절히 배치되어 있어 초반 전략 선택에 따라 게임의 흐름이 달라질 수 있다. 맵의 가장 큰 특징은 중앙 평야와 연결된 계단식 언덕 지대로, 이 지역을 장악하면 시야 확보와 병력 이동 경로 제어가 용이해진다. 또한, 맵의 모서리에는 미네랄 멀티가 배치되어 있어 자원 확보 경쟁이 치열할 것으로 예상된다. ASL 공식 맵답게 밸런스가 잘 잡혀 있으며, symmetrical 구조 덕분에 양측의 전략적 선택지가 넓고, 초반 러시, 테란 바이오닉, 프로토스 초월체 전략 등 다양한 빌드 오더가 시도될 수 있다. 초보 플레이어의 경우 symmetrical 맵의 특성을 이해하고, 중앙 언덕과 언덕 외곽의 시야를 적극 활용하는 것이 중요하다. 반면, 경험 많은 플레이어는 미네랄 멀티의 확보 타이밍과 중앙 언덕 장악을 통해 게임을 유리하게 끌고 갈 수 있을 것이다. 맵의 크기는 4096x4096으로, 넓은 필드에서 펼쳐지는 대규모 전투가 가능하며, 황무지 타일셋 덕분에 건물이 잘 눈에 띄어 전략적 판단이 수월하다. 이 맵은 symmetrical 밀리 맵을 선호하는 플레이어, ASL 공식 맵의 밸런스를 체험하고 싶은 플레이어, 그리고 symmetrical 맵의 특성을 활용한 다양한 전략을试みたい 플레이어에게 추천한다. 특히, 초반 멀티 확보와 중앙 시야 장악이 승패를 좌우할 가능성이 높으므로, 맵에 익숙해지는 과정이 필요하다. Retro 1.2 is an official ASL XV map designed for StarCraft: Brood War, featuring a symmetrical layout on the Waste tileset. The central plain is surrounded by a series of stepped hills that offer strategic advantages for controlling vision and troop movements. Neutral structures and mineral lines are strategically placed to encourage early-game scouting and resource competition. The map's balanced design allows for diverse strategies, including early rushes, Terran bio builds, and Protoss carrier-based tactics. Beginners should focus on securing vision control around the hills and central plain, while experienced players can leverage mineral expansions and strategic hill control to gain an advantage. The 4096x4096 size provides ample space for large-scale battles, and the Waste tileset ensures clear visibility of buildings for better decision-making. This map is ideal for players who prefer symmetrical multiplayer maps, those looking to experience ASL’s balanced official maps, or anyone eager to explore varied strategies in a symmetrical environment. Mastering early-game expansion and central vision control is key to success, as these elements often determine the outcome of the match.
![[4] Lost Temple - G2 맵 미리보기](https://cdn-star-data.huzy.net/thumbnail_e9a2fc9ae3b24244ab2e0ffc39e1317e.jpg)
[4] Lost Temple - G2
스타크래프트 브루드워의 유즈맵 [4] Lost Temple - G2는 2004년 gameTV 공식 맵을 기반으로 수정한 컴까기(컴퓨터 상대 유즈맵) 장르의 맵으로, 8명의 플레이어가 동시에 즐길 수 있는 대규모 전투가 특징입니다. 사막 타일셋으로 구축된 맵은 광활한 개방 지형과 곳곳에 숨은 자원 멀티, 그리고 중앙의 주요 전투 지점을 중심으로 구성되어 있어 전략적 깊이를 더합니다. 맵 곳곳에 배치된 입구와 좁은 통로는 적의 공격을 방어하거나 역습을 가할 수 있는 요충지가 되며, 특히 중앙의 성지 같은 공간은 전투를 승리로 이끄는 핵심 전략 포인트로 작용합니다. 플레이어는 시작 시 제공되는 자원으로 건물을 짓고 유닛을 생산하며, AI가 조종하는 컴퓨터 상대와 대결을 펼치게 됩니다. 맵의 지형적 특징상, 초반에는 안전하게 자원을 채취하며 병력을 모으는 것이 중요하며, 중반부터는 적의 기지를 공략하거나 방어선을 구축하는 등 다양한 전략을 구사할 수 있습니다. 특히 입구와 통로가 복잡하게 얽혀 있어, 상대방의 움직임을 예측하고 기습 공격을 계획하기에 적합한 구조로 설계되었습니다. 이 맵은 대규모 전투와 지속적인 압박을 요구하는 만큼, 게임의 난이도는 보통 이상으로 느껴질 수 있으며, 초보자보다는 중급 이상의 플레이어에게 더 적합하다고 볼 수 있습니다. 맵의 전체적인 밸런스는 8:8 전투를 기준으로 잡혀 있어, 팀 간의 협동과 개인의 판단력이 승패를 좌우할 것입니다. Lost Temple - G2는 스타크래프트 유즈맵의 classic한 감각을 느낄 수 있는 만큼, 과거의 명작을 재해석하고자 하는 유저들에게 추천할 만한 작품입니다. 플레이 전, 맵의 주요 자원 멀티 위치와 입구, 통로의 배치도를 숙지하는 것이 중요합니다. 또한, 초반 자원 관리와 유닛 생산 타이밍을 잡는 연습이 필수적이며, 중반 이후에는 적의 기지 구조와 방어 시설을 신속히 파악하여 공략 전략을 수립해야 합니다. 이 맵은 단순히 전투를 즐기는 것뿐만 아니라, 전략적 사고와Resource Management 능력을 키우는 데에도 도움이 될 것입니다. 사막의 황량한 분위기와 어울리는 간결한 디자인도 맵의 매력을 더합니다. StarsCraft: Brood War's custom map *Lost Temple - G2* is a modified computer-battle (versus AI) game based on the official 2004 gameTV map, designed for eight players to enjoy large-scale combat simultaneously. Built on a desert tileset, the map features vast open terrain, hidden resource expansions scattered throughout, and a central combat zone that adds strategic depth. Entrances and narrow corridors scattered across the map serve as key vantage points for defense or counterattacks, while the central sacred-like area acts as a pivotal strategic point that can decide the outcome of battles. Players begin with provided resources to construct buildings and produce units, then face off against AI-controlled opponents. Due to the terrain's layout, safely gathering resources and assembling forces early on is crucial, while mid-game allows for attacking enemy bases or fortifying defensive lines with diverse strategies. The intricate network of entrances and corridors makes it ideal for predicting opponent movements and planning ambushes. Given its emphasis on large-scale battles and sustained pressure, the map’s difficulty leans toward moderate to high, making it more suitable for intermediate to advanced players rather than beginners. Balanced for 8v8 combat, teamwork and individual decision-making will determine victory or defeat. *Lost Temple - G2* offers a classic *StarCraft* custom-map experience, making it a great choice for players looking to revisit a legendary title with a fresh twist. Before playing, it’s essential to memorize the locations of key resource expansions, entrances, and corridor layouts. Early resource management and precise unit-production timing are critical, while mid-to-late game requires quickly assessing enemy base structures and defenses to formulate attack strategies. Beyond pure combat enjoyment, the map also sharpens strategic thinking and resource-management skills. Its minimalist design complements the desolate desert atmosphere, enhancing the map’s overall appeal.
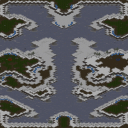
믿음의 선택 (Nobodys Faith)
스타크래프트 브루드워의 ‘Nobodys Faith’는 이름 그대로 ‘믿음’이라는 주제를 담은 2인용 밀리 맵으로, 플레이어에게 전략적 선택과 운신의 중요성을 강조하는 디자인으로 주목받고 있다. 맵의 전체적인 구조는 비교적 평범한 사각형 형태이지만, 중앙에 위치한 넓은 평지와 양측 멀티 지역 간의 접근성이 독특한 균형을 이루고 있다. 양쪽의 시작 지역은 각각의 기지 역할을 하며, 중앙의 넓은 평지는 전투와 자원 확보를 위한 주요 교전 공간으로 활용된다. 맵의 지형은 비교적 평탄하여 병력의 기동성과 컨트롤이 중요하며, 특히 초반 자원 채취와 멀티 확보가 승패를 가르는 관건으로 보인다. 맵의 분위기는 차가운 톤의 색감으로 통일되어 있으며, 멀리 보이는 산과 숲은 시각적 깊이를 더해준다. 이 맵의 특징은 ‘믿음’이라는 제목처럼 플레이어의 선택과 전략적 판단이 결과에 큰 영향을 미치도록 설계되어 있다는 점이다. 예를 들어, 중앙의 넓은 평지에서 벌이는 전투는 단순한 힘 싸움이 아니라, 적절한 타이밍과 병력 구성을 요구한다. 또한, 양측 멀티 지역 간의 거리와 지형적 특성은 자원 확보와 방어 라인의 구축에 있어 신중한 계획이 필요함을 강조한다. 이러한 구조는 초보자에게는 다소 어렵게 느껴질 수 있지만, 숙련된 플레이어에게는 전략적 깊이를 제공하는 매력적인 요소로 작용할 것이다. 추천 대상은 기본적인 스타크래프트 전략을 익히고자 하는 초보자보다는, 이미 기본기를 다진 플레이어들이 이 맵을 통해 전략적 사고와 컨트롤 능력을 한층 더 발전시킬 수 있을 것이다. 또한, 같은 팀이나 상대방을 가리지 않고Fair play를 중시하는 플레이어들에게도 어울릴 만한 맵으로 보인다. 플레이 전에는 중앙 평지의 병력 배치와 멀티 지역 간의 거리, 그리고 각 종족별 초반 빌드에 따른 대응 전략을 미리 숙지해두는 것이 좋다. 특히, 테란의 경우 초반 벙커링이나 마린 러시가, 프로토스의 경우 질럿 러시나 앞마당 테크가 효과적일 수 있으니, 상대 종족에 따라 유연하게 빌드를 조정해야 한다. 맵의 밸런스는 공식적인 분석 자료가 없으므로 정확한 판단은 어렵지만, 대체로 symmetrical(대칭)한 구조와 평탄한 지형은 밸런스를 유지하는 데 도움이 되는 것으로 보인다. 플레이어 간 실력이 비슷하다면, 후반까지 긴장감을 유지할 수 있는 흥미로운 대결이 펼쳐질 가능성이 높다. Nobodys Faith is a two-player StarCraft: Brood War melee map that embodies the theme of 'faith' through its strategic design and emphasis on player choices. The map features a relatively simple rectangular layout, but its wide central plain and balanced access to both sides' multi-regions create a unique dynamic. Each starting area functions as a main base, while the central plain serves as the primary battleground for combat and resource gathering. The terrain is mostly flat, making unit mobility and control crucial factors in gameplay. Early resource collection and multi-base expansion appear to be key determinants of victory. The map's color palette is cold-toned, with distant mountains and forests adding visual depth. The title 'Nobodys Faith' suggests that the map is designed to test players' strategic decisions and judgment, as outcomes heavily rely on these elements. For instance, battles on the central plain require more than brute force; they demand precise timing and unit composition. The distance and terrain between the two multi-regions also highlight the importance of careful planning in resource management and defense line setup. While this structure may pose challenges for beginners, it offers experienced players a deeper strategic experience. The map is recommended for players who have a solid grasp of basic StarCraft strategies and wish to refine their strategic thinking and control skills. It also suits players who value fair play, regardless of team or opponent. Before playing, it's advisable to familiarize yourself with unit placements on the central plain, the distance between multi-regions, and build orders for each race. For instance, Terran players might benefit from early bunker rushes or Marine rushes, while Protoss players could consider Zealot rushes or fast expansions. Although precise balance data isn't available, the symmetrical layout and flat terrain likely contribute to maintaining balance. If players have similar skill levels, the match can remain tense and engaging until the late game.
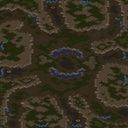
짐 레이너의 메모리 J 1.5 (Jim Raynor's Memory J 1.5)
짐 레이너의 메모리 J 1.5는 MBC게임 공식 맵으로 채택되었던 전설적인 밀리 맵이다. Sir.Lupin, 서창희, 엄세영 등 당대 최고 맵 메이커들이 공동 제작했으며, 파일명에 포함된 '(4)' 표기와 'ob(observer)' 접미사에서 알 수 있듯 4인용 관전자 버전으로 대회 운영에 최적화되어 있다. 사막 타일셋 기반의 128x128 대형 맵으로, 4개의 본진이 대각선 또는 십자 형태로 배치되어 1대1부터 4인 프리포올까지 다양한 구도가 가능하다. 각 본진은 넓은 평지와 자연스러운 램프 구조를 갖춰 초반 빌드 오더 수행이 안정적이며, 앞마당과 3멀티로 이어지는 확장 루트가 명확해 표준적인 밀리 운영이 그대로 통한다. 중앙 지역은 넓은 평야와 언덕, 미네랄 멀티가 혼재되어 중후반 대규모 교전과 견제 루트 확보에 중요한 역할을 한다. 종족별 밸런스는 저그의 드론 드랍이나 프로토스의 셔틀 견제, 테란의 드랍십 플레이 등 당대 메타를 고려해 설계되었으며, 본진 입구 너비와 언덕 배치가 종족 간 유불리를 최소화하는 방향으로 다듬어졌다. 관전자 트리거와 고정 시작 위치 설정이 포함되어 있어 대회 리플레이 분석이나 관전 모드 연습에 용이하다. 최신 패치 버전과의 호환성은 확인 필요하지만, 클래식 브루드워 밀리 감성을 느끼고 싶거나 과거 프로리그 맵을 연구하려는 유저에게 훌륭한 교재가 된다. 플레이 전 시작 위치 고정 여부와 관전자 슬롯 설정을 확인하면 보다 쾌적한 대전이 가능하다. Jim Raynor's Memory J 1.5 is a legendary melee map adopted as an MBCGame official map. Co-created by top-tier map makers of the era—Sir.Lupin, Seo Chang-hee, and Uhm Se-young—the '(4)' notation in the filename and the 'ob (observer)' suffix indicate a 4-player observer version optimized for tournament operation. Based on the Desert tileset, this large 128x128 map arranges four main bases in a diagonal or cross formation, allowing various matchups from 1v1 to 4-player FFA. Each main base features wide open ground and natural ramp structures for stable early build-order execution, while clear expansion paths to the natural and third bases support standard melee macro play. The central area mixes wide plains, high ground, and mineral-only expansions, playing a pivotal role in late-game engagements and harassment routes. Racial balance accounts for the meta of the time—Zerg drone drops, Protoss shuttle harassment, Terran dropship play—with main entrance widths and high-ground placements tuned to minimize racial advantages. Observer triggers and fixed start locations are included, making it useful for tournament replay analysis or observer mode practice. Compatibility with the latest patch versions should be verified, but it serves as excellent material for those wanting to experience classic Brood War melee or study past pro-league maps. Checking fixed start positions and observer slot settings before play will ensure a smoother match.
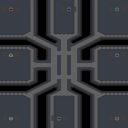
SCD 11 -- Space
SCD 11 -- Space는 스타크래프트 브루드워의 공식 유즈맵으로, SCD 리그 시즌 11에 맞춰 제작된 타워 디펜스 맵입니다. 우주 테마의 맵답게 검고 푸른 배경의 우주 공간 속에서 플레이어는 중앙에 위치한 방어 건물(아마도 넥서스나 커맨드 센터)을 보호하며 끊임없이 몰려오는 적군을 상대로 버텨야 합니다. 맵의 구조는 크게 세 부분으로 나뉘는데, 중앙의 요새 주변을 지키는 방어 타워들이 설치 가능한 구역, 적의 공세가 쏟아지는 하단과 좌우 측 입구, 그리고 요새를 보호하는 일종의 ‘성벽’ 역할을 하는 지형입니다. 입구는 총 세 곳으로, 각각의 입구는 좁고 길게 뻗어 있어 타워를 배치하기 좋은 구조를 하고 있습니다. 적군은 주로 입구에서부터 등장하며, 플레이어는 각 입구에 타워를 건설해 적의 전진을 저지해야 합니다. 맵의 특징 중 하나는 우주 테마답게 맵 곳곳에 소행성 지대나 운석 장식이 배치되어 있어 시야를 차단하거나 타워 배치의 제약을 주는 요소로 작용한다는 점입니다. 또한, 맵의 중앙 요새는 높은 체력을 보유하고 있지만, 방어 타워가 부족하면 순식간에 무너질 위험이 있어 신중한 타워 배치와 자원 관리가 중요합니다. 초보 플레이어의 경우 입구 수비에 중점을 두고, 자원 수입을 안정적으로 확보하는 것이 관건입니다. 반면, 숙련된 플레이어는 입구마다 다층 방어선을 구축하거나, 특정 입구에 특화된 타워 조합을 활용해 적을 효율적으로 섬멸하는 전략을 구사할 수 있습니다. 맵의 밸런스는 비교적 공정한 편으로, 낮은 난이도에서는 적은 수의 적군이 등장하지만, 어려움 모드로 갈수록 적의 물량이 증가하고, 때로는 다양한 유닛 조합을 사용하는 등 전략의 깊이를 요구합니다. 특히, 입구마다 일정량의 적군이 동시에 공격해 오기 때문에, 한 곳을 집중 방어하면 다른 곳이 취약해지는 경우가 많습니다. 따라서, 맵을 플레이하기 전에 각 입구의 지형과 소행성 분포를 숙지하고, 자원 수입과 타워 업그레이드 타이밍을 carefully 관리하는 것이 중요합니다. 이 맵은 주로 1인 플레이를 전제로 제작되었지만, 팀 플레이로 확장해 협력 디펜스를 즐기는 것도 가능할 것으로 보입니다. 타워 디펜스 장르를 좋아하는 유저라면, 우주 테마의 독특한 분위기와 전략적 깊이가 인상적인 이 맵을 즐겁게 플레이할 수 있을 것입니다. 다만, 맵의 복잡한 지형과 적의 다양한 공세 패턴을 숙지하기 전까지는 다소 어려움을 느낄 수 있으니, 초보자는 낮은 난이도에서 충분히 연습해 보는 것이 좋습니다. 맵의 플레이 시간은 약 30분 내외로 예상되며, 자원 관리와 타워 배치의 균형을 맞추는 것이 관건입니다.Play SCD 11 -- Space, a StarCraft: Brood War custom map designed for the SCD League Season 11, a tower defense game set in a cosmic theme. The map features a central fortress, likely a Nexus or Command Center, that players must defend from waves of enemy units approaching from three main entrances—bottom, left, and right. Each entrance is narrow and elongated, providing ideal spots for tower placements to maximize defense efficiency. The map's layout includes asteroid fields and rocky obstacles that partially obscure vision, adding a layer of tactical depth by forcing players to plan their tower placements carefully. The central fortress has high health but is vulnerable without proper tower coverage, making resource management and strategic tower construction critical. For beginners, prioritizing basic tower defenses at each entrance and securing a steady income is essential, while advanced players can experiment with layered defenses or specialized tower combinations. The map's balance is well-maintained, with lower difficulties featuring fewer enemy units and higher difficulties introducing more varied and numerous attacks. Players must balance defense across all entrances, as neglecting one can lead to a breakthrough. The map is designed primarily for single-player but can be adapted for team play, enhancing the collaborative aspect of tower defense. With a playtime of around 30 minutes, the challenge lies in mastering resource allocation and tower upgrades. While the map's complex terrain and diverse enemy patterns may pose a challenge initially, it offers a rewarding experience for fans of tower defense games, especially those drawn to its unique cosmic theme.
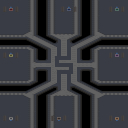
SCD 5 -- Space
SCD 5 -- Space는 스타크래프트 브루드워의 공식 유즈맵 시리즈로, SCD 리그 시즌 5를 위해 제작된 타워 디펜스 맵이다. 우주 배경의 넓은 맵에서 8명의 플레이어가 협동하여 적의 공격을 방어하는 구조로, 스타크래프트 디펜스(FMP) 스타일을 계승한 정석적인 디펜스 게임이다. 맵 중앙에는 50개의 미네랄이 층층이 쌓여 있으며, 방어선의 중요 포인트를 중심으로 타워를 건설하고 자원을 관리해야 한다. 맵 이름은 'Space'이지만 우주전투보다는 방어 초소와 요새를 구축하는 전략적 요소가 stronger emphasized되며, 맵 디자인은 표준 FMP(Fog of War Map) 스타일을 따르고 있어 익숙한 스타크래프트 유저라면 빠르게 적응할 수 있다. 맵의 크기는 4096x4096으로 상당히 넓지만, 방어 구조물이 집중된 중앙 구역을 중심으로 플레이가 진행되므로 전투는 비교적 조밀한 공간에서 이루어진다. 타워 디펜스라는 장르의 특징상, 초반 자원 관리와 적절한 타워 배치, 그리고 적의 공격 패턴을 읽는 능력이Victory의 핵심 요소이며, 8명이 모두 협동하지 않으면 어려움을 겪을 수 있다. 특히 미네랄이 층층이 쌓인 구조는 자원 확보뿐만 아니라 방어선의 시각적 가이드 역할도 하는데, 이를 잘 활용하면 효율적인 타워 배치를 계획할 수 있다. 맵의 난이도는 제작자나 리그 규정에 따라 조정될 가능성이 있지만, 기본적으로는 초보자가 осво하기 어려운 수준은 아니며, 디펜스 맵에 익숙한 플레이어에게는 흥미로운 전략적 도전을 제공한다. 맵을 플레이하기 전에는 타워 건설 가능 구역과 이동 불가 지역을 정확히 파악하는 것이 중요하며, 특히 적의 주요 공격 경로인 길목 주변은 사전에 방어선을 구축해두는 것이 좋다. 또한, 자원의 확보와 관리, 그리고 팀원 간의 의사소통이 Victory의 큰 부분을 차지하므로, 혼자가 아닌 팀 플레이를 전제로 한 맵임을 유념해야 한다. 맵의 배경은 우주이지만 실제 전투는 지상과 공중 유닛 위주로 이루어지며, 맵의 넓은 공간을 활용한 방어 전략보다는 타워의 효율성과 적절한 배치에 중점을 둔다. 맵의 전체적인 분위기는 깔끔한 구조와 함께 전략적 깊이를 제공하며, SCD 리그의 공식 맵답게 균형 잡힌 밸런스를 지향하고 있다. 이 맵은 디펜스 장르를 좋아하는 유저들에게는 필수 플레이 대상 중 하나로, 특히 다인용 협동 플레이를 즐기는 유저들에게 추천할 만한佳作이다. 플레이 전에는 맵의 주요 방어 포인트와 자원 분포를 먼저 숙지하고, 팀원과의 역할 분담을 확실히 하는 것이 Victory에 가까워지는 지름길이 될 것이다. SCD 5 -- Space is an official StarCraft: Brood War custom map series, designed as a tower defense game for SCD League Season 5. Set in a vast space-themed map, eight players collaborate to defend against enemy attacks, inheriting the classic StarCraft Defense (FMP) style. At the center of the map, 50 mineral patches are stacked in layers, requiring players to strategically build towers and manage resources around key defensive points. Despite its name, Space emphasizes base fortification and strategic outpost construction over space combat, following the standard FMP (Fog of War Map) design for easy adaptation by StarCraft players familiar with the genre. The map spans 4096x4096, but gameplay revolves around the densely packed central area where defensive structures are concentrated, ensuring tight and intense battles. As a tower defense map, victory hinges on efficient early resource management, strategic tower placement, and reading enemy attack patterns—especially since eight players must coordinate effectively to succeed. The layered mineral structure not only secures resources but also serves as a visual guide for defense, aiding in optimal tower positioning. While difficulty may vary by creator or league rules, the map remains accessible to beginners and offers engaging strategic challenges for experienced defense players. Before playing, it’s crucial to identify buildable and impassable areas, particularly pre-constructing defenses along enemy approach routes. Resource acquisition, management, and team communication are vital, reinforcing that this is a cooperative team-based map. Though set in space, combat primarily involves ground and air units, prioritizing tower efficiency and placement over spatial defense strategies. The map’s clean design and strategic depth reflect its balance, aiming for fairness as an official SCD League map. A must-play for defense genre fans, it’s especially recommended for those who enjoy multiplayer cooperative gameplay. To succeed, study key defense points and resource distribution beforehand, and clarify team roles to pave the way for victory.
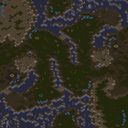
용의 입구 (Enter the Dragon)
스타크래프트 브루드워 유즈맵인 ‘(2)Enter the dragon’은 MBC 게임 공식 맵으로, 강렬한 사막 분위기의 타일셋과 간결한 구조가 특징인 디펜스 장르의 맵이다. 맵 중앙에는 넓은 평지가 펼쳐져 있으며, 그 주변을 따라 점핑 유닛이 이동할 수 있는 좁은 통로가 배치되어 있다. 플레이어는 맵 외곽에서 시작하며, 중앙으로 침투해 오는 적 유닛을 저지하는 방식으로 진행된다. 맵의 외곽과 중앙 사이의 좁은 길목은 전략적 요충지로, 유닛의 이동 경로를 제한하여 디펜스 포인트를 설정할 수 있도록 설계되었다. 또한, 맵 곳곳에 배치된 좁은 통로와 굴곡진 지형은 유닛의 진형을 흐트러뜨려 방어 라인의 중요성을 강조한다. 이 맵은 기본적인 유닛 컨트롤과 위치 선정이 핵심인 만큼, 초보 플레이어도 쉽게 접근할 수 있지만, 미세한 컨트롤과 타이밍이 요구되는 부분이 있어 ‘보통’ 수준의 난이도를 가진다. 특히 좁은 길목에서의 전투는 유닛의 종류와 숫자에 따라 승패가 갈릴 수 있으므로, 다양한 유닛 조합을 시도해보는 것이 좋다. 맵의 구조상, 방어 라인을 중앙에 두는 것보다 외곽에 배치하는 것이 효율적일 수 있으며, 좁은 통로를 최대한 활용하여 적 유닛을 한꺼번에 상대하는 전략이 효과적이다. 또한, 맵 내에 배치된 여러 개의 좁은 길목은 다중 방어 라인을 구축할 수 있는 기회를 제공한다. 이 맵은 8명의 플레이어가 동시에 참여할 수 있으며, 각 플레이어는 개별적으로 방어 임무를 수행하거나 팀을 이루어 협력할 수 있다. 맵의 전체적인 분위기는 사막의 황량한 beauty와 긴장감을 조성하며, 디펜스 장르의 정석을 느낄 수 있는 구조로 구성되어 있다. 만약 디펜스 장르의 맵을 찾고 있다면, 이 맵은 좁은 길목과 전략적 위치를 중심으로 한 재미있는 경험을 제공할 것이다. 특히 사막 타일셋의 활용도가 높아, 시각적 완성도도 뛰어나다. 다만, 좁은 길목이 너무 많아 유닛의 손실을 줄이기 위해 신중한 컨트롤이 요구되므로, 초보 플레이어는 연습 모드를 활용해 보는 것이 좋다. 또한, 맵 내에 배치된 지형적 특징을 잘 활용하여 방어 라인을 구축하는 것이 승리의 열쇠가 될 것이다. "(2)Enter the Dragon" is a *StarCraft: Brood War* custom map and an official MBC Game map, featuring a defense genre with a striking desert-themed tileset and a clean, straightforward layout. The map opens with a wide central plain surrounded by narrow pathways where jumping units can move. Players start on the outer edges and must defend against enemy units infiltrating from the center. The tight corridors between the outer edges and the central area serve as strategic chokepoints, restricting unit movement and forcing players to establish well-placed defensive lines. The map’s scattered narrow paths and rugged terrain disrupt unit formations, underscoring the importance of strong defensive positioning. While the map emphasizes basic unit control and positioning—making it accessible to beginners—it also demands precise micro-management and timing, placing it at an intermediate difficulty level. Battles in the narrow passages can hinge on unit composition and numbers, so experimenting with different unit combinations is recommended. Strategically, placing defensive lines closer to the outer edges tends to be more effective than clustering them near the center, and leveraging the narrow paths to engage enemies in concentrated groups can turn the tide of battle. The multiple chokepoints also allow for setting up layered defenses. The map supports up to eight players, who can either defend individually or coordinate in teams. Its overall atmosphere blends the desolate beauty of a desert with a tense, immersive feel, embodying the essence of the defense genre. If you're looking for a defense-focused map, this one delivers an engaging experience centered on strategic chokepoints and positioning. The desert tileset is used effectively, enhancing the map’s visual appeal. However, the abundance of narrow pathways means careful unit control is essential to minimize losses, so beginners may benefit from practicing in the map’s training mode. Mastering the map’s terrain features and using them to build strong defensive lines will be key to securing victory.
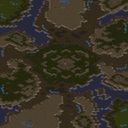
BWL - The Lost Temple
스타크래프트: 브루드워의 공식 래더 맵으로 유명한 ‘BWL - The Lost Temple’는 사막 테마의 넓은 평야와 중앙에 위치한 고대 신전 구조물이 특징적인 유즈맵입니다. 맵의 symmetrical(대칭) 구조는 양측 플레이어가 동일한 조건에서 시작할 수 있도록 설계되어 있으며, 주요 자원 지역인 미네랄 멀티와 가스 멀티가 중앙 신전 주변에 밀집되어 있어Resource Denial(자원 봉쇄)와 Micro Control(미세 컨트롤)이 중요한 전략적 선택지를 제공합니다. 맵의 지형은 비교적 평탄한 편이지만, 신전 내부와 외곽의 좁은 통로, 언덕 지형은 시야 확보와 병력 진형의 변화에 영향을 미치며, 이는 곧 전투의 승패를 가르는 요인으로 작용합니다. 특히, 4인 멀티플레이 환경에서 각 플레이어는 초기 본진과 멀티 지역을 확보하는 동시에 중앙 신전에서 벌어지는 전투에서 우위를 점하기 위해 끊임없이 자원 관리와 병력 구성을 고려해야 합니다. 이 맵은 초보자부터 숙련자까지 폭넓은 플레이어들에게 즐길 수 있도록 밸런스가 잘 잡혀 있으며, 특히 중앙 신전 주변의 좁은 길목에서 벌어지는 소규모 전투는 브루드워의 기본 메카닉인 컨트롤 능력을 자연스럽게 연습할 수 있는 기회를 제공합니다. 또한, symmetrical 구조 덕분에 양측의 실력이 비슷할 경우 긴장감 있는 접전으로 이어질 가능성이 높아, 경쟁심을 자극하는 요소로 작용합니다. 맵을 플레이하기 전에는 중앙 자원의 확보 가능성, 언덕 지형의 시야 장악력, 그리고 멀티 지역으로의 진출 타이밍을 신중히 판단해야 하며, 이는 곧 승리 가능성을 크게 좌우할 수 있습니다. 이 맵은 브루드워의 기본기를 다지기에 최적의 맵으로, 특히 팀플레이보다는 1vs1 또는 4인 자유 플레이에서 그 진가를 발휘합니다. BWL - The Lost Temple is a well-known official ladder map from StarCraft: Brood War, featuring a desert-themed wide plain and an ancient temple structure at the center. The map's symmetrical design ensures both players start under identical conditions, with major resource areas like mineral patches and gas geysers clustered around the central temple, creating strategic choices around resource denial and micro management. The terrain is relatively flat but includes narrow passages and elevated areas, influencing vision control and troop positioning, which often determine the outcome of battles. In a 4-player multiplayer setting, each player must secure their starting base and expansion while considering how to gain an advantage in the central temple battles through resource management and army composition. Designed for a broad range of players from beginners to experts, the map offers well-balanced gameplay, especially in small-scale skirmishes around the temple’s narrow paths, which naturally reinforce Brood War’s fundamental mechanics like unit control. The symmetrical layout also fosters tense, close matches when both sides are evenly matched, making it a great choice for competitive play. Before playing, it's crucial to assess the accessibility of central resources, the control of vision on elevated terrain, and the timing for expanding to multi bases, as these decisions significantly impact the chances of victory. This map is ideal for honing Brood War basics, particularly excelling in 1v1 or 4-player free-for-all modes rather than team play.
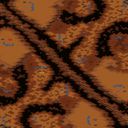
Parallel Lines 3 (평행선 3)
‘Parallel Lines 3’는 MBC 게임 공식 유즈맵으로, 8명의 플레이어가 동시에 경쟁하는 밀집형 맵 구조가 특징이다. 맵 이름은 ‘평행선’이라는 제목처럼 중앙에 긴 가로를 관통하는 직선형 통로가 주축을 이루며, 이 통로를 따라 양측에서 전투가 벌어지는 양상이 반복된다. 맵의 전체적인 구도는 ‘황혼’ 타일셋을 기반으로 하여, 황량한 황토색과 어두운 그늘로 이루어진 배경이 인상적이며, 좁고 긴 길이 플레이어 간의 충돌을 유도하는 형태로 설계되어 있다. 맵의 특징은 두 가지 주요 진영이 중앙 통로를 두고 대칭적으로 배치되어 있으며, 각 진영의 입구는 좁은 길목을 통해 연결되어 있어 소규모 전투가 지속적으로 발생한다는 점이다. 또한, 맵의 가장자리는 넓은 개활지로 펼쳐져 있어 자원 채취나 기지 확장이 필수적이지는 않지만, 중앙 통로에서의 전투가 승패를 좌우하는 경우가 많다. 맵의 난이도는 주로 중앙 통로에서 발생하는 전투의 강도에 따라 결정되며, 좁은 길목에서 벌어지는 소규모 교전과 다수의 유닛이 모여드는 대규모 전투가 번갈아 발생하는 구조로 인해 전략적인 움직임이 요구된다. 특히, 중앙 통로의 좁은 길목을 활용한 치고 빠지기 식의 전투가 승리의 열쇠가 된다. 이 맵은 8명이 동시에 플레이할 수 있도록 설계되어 있으며, 밀리전 스타일의 전투보다는 유즈맵의 전략적 요소를 강조하고 있다. 플레이어는 각자의 자원을 확보한 후, 중앙 통로로 진출하거나 방어 태세를 갖추어 상대방을 제압하는 방식으로 진행된다. 초보 플레이어의 경우 중앙 통로에서의 빠른 판단과 유닛 컨트롤이 중요하며, 숙련된 플레이어는 좁은 길목에서의 소규모 전투를 효율적으로 활용하여 상대방을 압박하는 전략을 구사할 수 있다. 맵의 밸런스는 중앙 통로의 구조적 특징상 양측의 전투력이 비슷하게 유지되도록 설계되었지만, 기지 배치나 자원 접근성에서 slight한 차이를 보일 수 있어 신중한 플레이가 필요하다. 이 맵은 MBC 게임 공식 유즈맵답게 MBC 게임 방송 프로그램에서 사용되었던 맵으로, 그 역사성과 함께 맵의 전략적 깊이를 즐기고자 하는 플레이어들에게 추천할 만하다. 특히, 유즈맵의 특성을 살려 다양한 전략과 전술을 구사할 수 있는 기회를 제공하며, 8인 동시 플레이의 긴장감과 재미가 돋보이는 맵이다. 플레이 전에는 맵의 중앙 통로와 양측 진영의 배치 구조를 숙지하고, 좁은 길목에서의 전투에서 유리한 위치를 선점하는 것이 중요하다. ‘Parallel Lines 3’ is an official MBC Game custom map where eight players compete simultaneously in a densely structured map. The map’s name, like the title "Parallel Lines," reflects its core feature—a long straight corridor running through the center, which serves as the main axis for repeated battles between opposing sides. The overall design is based on the ‘Twilight’ tileset, featuring a desolate, earth-toned background with dark shadows, and its narrow, elongated paths are structured to encourage frequent player collisions. The map is characterized by two symmetrical factions positioned on either side of the central corridor, with each side’s entrance connected by a narrow passage, leading to constant small-scale skirmishes. While the outer edges of the map open up into expansive open zones, resource gathering and base expansion aren’t strictly necessary, as control over the central corridor often determines the match’s outcome. The difficulty of the map primarily depends on the intensity of combat in the central corridor, where alternating small-scale fights in tight passages and large-scale clashes of multiple units demand strategic adaptability. Winning often hinges on effectively using the narrow passages in the central corridor for hit-and-run tactics. Designed for eight simultaneous players, the map emphasizes strategic elements of a custom map over the fast-paced combat of standard *StarCraft* matches. Players secure their own resources before advancing into the central corridor or fortifying their defenses to overpower opponents. Novice players should focus on quick decision-making and unit control in the corridor, while experienced players can leverage small-scale skirmishes in tight spaces to pressure their rivals. Due to the structural symmetry of the central corridor, the map is designed to maintain balanced combat power between both sides, though slight differences in base placement and resource access may require careful play. As an official MBC Game custom map, it was used in MBC Game’s broadcast programs, making it historically significant. It’s highly recommended for players seeking both strategic depth and the unique experience of an eight-player custom map, offering dynamic opportunities for varied strategies and tactics. The tension and excitement of simultaneous eight-player competition shine through its design. Before playing, it’s crucial to familiarize yourself with the central corridor and the layout of both sides’ bases, securing advantageous positions in the narrow passages before engaging in combat.
![[CPL] Fighting Spirit 1.3 OBS 맵 미리보기](https://cdn-star-data.huzy.net/thumbnail_53ea7dc421744eaa9f08172563b657d0.jpg)
[CPL] Fighting Spirit 1.3 OBS
스타크래프트: 브루드워의 고전 맵인 '[CPL] Fighting Spirit 1.3 OBS'는 8인용 밀리 맵으로, 사막 지형을 배경으로 한 symmetrical(대칭) 구조가 특징이다. 맵의 중앙에는 넓은 평야가 펼쳐져 있으며, 양쪽 멀티 지역은 각각의 기지에 인접해 있어 초반 자원 확보와 병력 이동이 용이하다. 맵의 가장 큰 특징은 양쪽 시작 지점의 균형과 중앙 평야의 넓은 시야로, 양측이 초반부터 치열한 전투를 벌일 수 있는 환경을 제공한다는 점이다. 맵의 테두리에는 불가시 지역이 배치되어 있어 시야가 제한되는 일도 없으며, 중앙 평야의 넓은 공간은 대규모 병력 교전의 무대가 된다. 또한, 맵의 symmetrical 구조는 양측의 전략적 선택지를 동등하게 만들어, 맵의 밸런스가 비교적 안정적으로 유지된다는 장점이 있다. 이 맵은 초보자와 숙련자 모두에게 적합한 밸런스를 지니며, 브루드워의 기본 전략인 테란의 벙커링, 저그의 러시, 프로토스의 캐논 러시 등 다양한 전술을 구사할 수 있는 공간을 제공한다. 특히, 중앙 평야의 넓은 시야는 시야 싸움과 병력Movements을 보다 전략적으로 이끌어낼 수 있게 해준다. 다만, symmetrical 구조가 초반부터의 교전을 유도하기 때문에, 조합의 균형이나 타이밍을 잘못 잡으면 쉽게 밀릴 수 있다는 점은 유념해야 한다. 이 맵은 과거 CPL(프로게이머 리그) 등에서 사용된 공식 맵으로, 브루드워 밀리의 기본기를 다지기 좋은 맵으로 꼽히며, symmetrical 구조의 맵을 선호하는 플레이어들에게는 최고의 선택지 중 하나로 손꼽힌다. 플레이 전에는 맵의 symmetrical 구조와 중앙의 넓은 시야를 충분히 숙지하고, 양측의 균형 잡힌 전략 구사를 연습하는 것이 중요하다. 또한, 멀티 지역과 본진의 배치도 신중히 고려해야 하며, 초반 자원 확보와 병력 생산 라인을 효율적으로 관리하는 것이 승리 열쇠가 될 것이다. [CPL] Fighting Spirit 1.3 OBS is a classic *Brood War* map, a symmetrical 8-player Melee map set in a desert terrain. The map features a wide central plain flanked by each side’s starting positions, with natural expansions adjacent to the bases, allowing for easy early resource gathering and troop movement. Its most notable trait is the balanced starting points and expansive sightlines across the central plain, fostering intense early-game battles. The map’s edges are bordered by fog of war, preventing unexpected sightlines, while the open central area serves as the stage for large-scale engagements. The symmetrical layout ensures equal strategic options for both sides, contributing to a stable balance. Suitable for both beginners and veterans, the map accommodates classic *Brood War* strategies like Terran bunker rushes, Zerg rushes, and Protoss cannon rushes. The wide sightlines in the central plain also enable more strategic scouting and troop movements. However, the symmetrical design encourages early clashes, meaning poor unit compositions or mistimed attacks can lead to quick defeats—players must remain cautious. Once used in official CPL (Cyberathlete Professional League) tournaments, it’s widely regarded as an excellent map for honing core *Brood War* skills and a top pick for fans of symmetrical designs. Before playing, it’s crucial to understand the symmetrical structure and central sightlines, practice balanced strategies for both sides, and carefully plan expansions and base layouts. Efficient early resource management and production lines are key to securing victory.
![PGT - 러시 아워 2.0 [06] (PGT - Rush Hour 2.0 [06]) 맵 미리보기](https://cdn-star-data.huzy.net/thumbnail_daf813a5783c48de88a2debe4b358d98.jpg)
PGT - 러시 아워 2.0 [06] (PGT - Rush Hour 2.0 [06])
스타크래프트 브루드워의 유즈맵 'PGT - Rush Hour 2.0 [06]'은 MBC게임 리그 공식 맵으로, 빠른 진행과 전략적 교전이 조화를 이루는 디펜스형 유즈맵이다. 맵은 넓은 평야와 중앙의 좁은 통로를 중심으로 구성되어 있으며, 플레이어는 이 통로를 통해 적의 침공을 방어하거나 공격을 펼치게 된다. 맵의 특징은 세로로 긴 형태와 좁은 길목인데, 이는 플레이어들이 자연스럽게 좁은 공간에서 전투를 벌이도록 유도하며, 전략적 선택과 순간적인 판단력을 요구한다. 내부 맵 설명에서 'MBCgame League Official Map'으로 명시된 것처럼, 과거 리그에서 사용된 공식 맵으로서의 품질을 엿볼 수 있다. 맵의 이름 'Rush Hour'는 통행량이 많은 시간대라는 의미로, 빠르게 몰아치는 공격과 방어의 긴장감을 상징한다. 맵의 구조상으로는 좁은 길목을 지키며 다수의 적군을 상대하는 '입구막기' 스타일의 디펜스가 주가 되며, 플레이어는 자원 관리보다는 실시간 전투와 위치 선정에 집중해야 한다. 맵의 전체적인 밸런스는 좁은 길목을 중심으로 한 교전 포인트가 명확해 전략적 플레이가 중요한데, 초보자의 경우 좁은 공간에서 벌어지는 다대다 전투에서 쉽게 무너질 수 있어 난이도 조절이 필요할 수 있다. 또한, 맵의 중앙 통로 양측에는 방어 건물이나 자원 수집 지역이 배치되어 있어, 단순히 방어만 하는 것이 아니라 자원 확보와 공격 타이밍도 고려해야 한다. 이러한 구조는 플레이어들에게 지속적인 압박과 순간적인 결단을 강요하며, 한 번의 실수가 전체 게임의 승패를 좌우할 수 있는 긴장감을 제공한다. 이 맵은 빠른 진행과 전략적 깊이를 동시에 추구하는 플레이어들에게 특히 추천되며, 팀플레이가 필수적인 만큼 동료와의 호흡도 중요하다. 플레이 전에는 맵의 좁은 길목과 중앙 통로의 중요성을 숙지하고, 각 포지션별로 역할을 분담하는 것이 게임의 성패를 가를 수 있는 핵심 포인트다. 또한, 자원보다는 전투 능력과 위치 선정이 더 중요하다는 점을 명심하고, 초반부터 적극적인 플레이를展开하는 것이 좋다. 특히, 좁은 공간에서 벌어지는 전투에서의 컨트롤 능력이 중요한 만큼, 마우스 sensitivity와 핫키 설정을 미리 점검하는 것도 필요하다. 이 맵은 과거 리그에서 사용된 만큼 맵의 밸런스와 전략적 깊이가 검증되었으므로, 다양한 전략을 시도해 보며 자신의 플레이 스타일을 발전시킬 수 있는 좋은 기회가 될 것이다. StarCraft: Brood War's custom map *PGT - Rush Hour 2.0 [06]* is a defense-style custom map used in MBC Game League matches, blending fast-paced action with strategic combat. The map is structured around wide open plains centered by a narrow central passage, where players must defend against enemy invasions or launch attacks through this choke point. Its defining traits—a tall, elongated layout and tight corridors—naturally funnel players into close-quarters battles, demanding sharp tactical decisions and split-second reactions. The map’s designation as an *MBC Game League Official Map* reflects its proven quality from past league play. The name *Rush Hour* evokes the chaos of peak traffic, symbolizing the intense back-and-forth of rapid assaults and defensive stands. Gameplay revolves around "chokepoint defense," where players must hold narrow passages against waves of enemies, shifting focus from resource management to real-time combat positioning. The map’s balance hinges on these clear engagement zones, making strategic play essential—though beginners may struggle in the chaotic, many-versus-many fights in confined spaces, so difficulty adjustment might be necessary. On either side of the central corridor lie defensive structures and resource collection points, forcing players to balance defense with resource gathering and attack timing. This setup constantly pressures players to make snap decisions, where a single mistake can swing the game’s outcome. The map excels for those seeking both speed and depth, with teamwork being critical; coordination with teammates is just as vital as individual skill. Before playing, understanding the importance of the choke points and central passage—and assigning roles based on positions—can determine victory or defeat. Combat prowess and positioning matter far more than resource control here, so aggressive early play is often advantageous. Since tight-space battles are central, fine-tuning mouse sensitivity and hotkey setups beforehand is a smart move. As a map vetted in league play, *Rush Hour 2.0* offers a balanced, strategically rich experience, making it a great opportunity to experiment with different tactics and refine your playstyle.
최근 등록된 맵
새로 추가된 파일과 버전을 확인하세요.
SCD 11 -- Space
SCD 11 -- Space는 스타크래프트 브루드워의 공식 유즈맵으로, SCD 리그 시즌 11에 맞춰 제작된 타워 디펜스 맵입니다. 우주 테마의 맵답게 검고 푸른 배경의 우주 공간 속에서 플레이어는 중앙에 위치한 방어 건물(아마도 넥서스나 커맨드 센터)을 보호하며 끊임없이 몰려오는 적군을 상대로 버텨야 합니다. 맵의 구조는 크게 세 부분으로 나뉘는데, 중앙의 요새 주변을 지키는 방어 타워들이 설치 가능한 구역, 적의 공세가 쏟아지는 하단과 좌우 측 입구, 그리고 요새를 보호하는 일종의 ‘성벽’ 역할을 하는 지형입니다. 입구는 총 세 곳으로, 각각의 입구는 좁고 길게 뻗어 있어 타워를 배치하기 좋은 구조를 하고 있습니다. 적군은 주로 입구에서부터 등장하며, 플레이어는 각 입구에 타워를 건설해 적의 전진을 저지해야 합니다. 맵의 특징 중 하나는 우주 테마답게 맵 곳곳에 소행성 지대나 운석 장식이 배치되어 있어 시야를 차단하거나 타워 배치의 제약을 주는 요소로 작용한다는 점입니다. 또한, 맵의 중앙 요새는 높은 체력을 보유하고 있지만, 방어 타워가 부족하면 순식간에 무너질 위험이 있어 신중한 타워 배치와 자원 관리가 중요합니다. 초보 플레이어의 경우 입구 수비에 중점을 두고, 자원 수입을 안정적으로 확보하는 것이 관건입니다. 반면, 숙련된 플레이어는 입구마다 다층 방어선을 구축하거나, 특정 입구에 특화된 타워 조합을 활용해 적을 효율적으로 섬멸하는 전략을 구사할 수 있습니다. 맵의 밸런스는 비교적 공정한 편으로, 낮은 난이도에서는 적은 수의 적군이 등장하지만, 어려움 모드로 갈수록 적의 물량이 증가하고, 때로는 다양한 유닛 조합을 사용하는 등 전략의 깊이를 요구합니다. 특히, 입구마다 일정량의 적군이 동시에 공격해 오기 때문에, 한 곳을 집중 방어하면 다른 곳이 취약해지는 경우가 많습니다. 따라서, 맵을 플레이하기 전에 각 입구의 지형과 소행성 분포를 숙지하고, 자원 수입과 타워 업그레이드 타이밍을 carefully 관리하는 것이 중요합니다. 이 맵은 주로 1인 플레이를 전제로 제작되었지만, 팀 플레이로 확장해 협력 디펜스를 즐기는 것도 가능할 것으로 보입니다. 타워 디펜스 장르를 좋아하는 유저라면, 우주 테마의 독특한 분위기와 전략적 깊이가 인상적인 이 맵을 즐겁게 플레이할 수 있을 것입니다. 다만, 맵의 복잡한 지형과 적의 다양한 공세 패턴을 숙지하기 전까지는 다소 어려움을 느낄 수 있으니, 초보자는 낮은 난이도에서 충분히 연습해 보는 것이 좋습니다. 맵의 플레이 시간은 약 30분 내외로 예상되며, 자원 관리와 타워 배치의 균형을 맞추는 것이 관건입니다.Play SCD 11 -- Space, a StarCraft: Brood War custom map designed for the SCD League Season 11, a tower defense game set in a cosmic theme. The map features a central fortress, likely a Nexus or Command Center, that players must defend from waves of enemy units approaching from three main entrances—bottom, left, and right. Each entrance is narrow and elongated, providing ideal spots for tower placements to maximize defense efficiency. The map's layout includes asteroid fields and rocky obstacles that partially obscure vision, adding a layer of tactical depth by forcing players to plan their tower placements carefully. The central fortress has high health but is vulnerable without proper tower coverage, making resource management and strategic tower construction critical. For beginners, prioritizing basic tower defenses at each entrance and securing a steady income is essential, while advanced players can experiment with layered defenses or specialized tower combinations. The map's balance is well-maintained, with lower difficulties featuring fewer enemy units and higher difficulties introducing more varied and numerous attacks. Players must balance defense across all entrances, as neglecting one can lead to a breakthrough. The map is designed primarily for single-player but can be adapted for team play, enhancing the collaborative aspect of tower defense. With a playtime of around 30 minutes, the challenge lies in mastering resource allocation and tower upgrades. While the map's complex terrain and diverse enemy patterns may pose a challenge initially, it offers a rewarding experience for fans of tower defense games, especially those drawn to its unique cosmic theme.
BWL - The Lost Temple
스타크래프트: 브루드워의 공식 래더 맵으로 유명한 ‘BWL - The Lost Temple’는 사막 테마의 넓은 평야와 중앙에 위치한 고대 신전 구조물이 특징적인 유즈맵입니다. 맵의 symmetrical(대칭) 구조는 양측 플레이어가 동일한 조건에서 시작할 수 있도록 설계되어 있으며, 주요 자원 지역인 미네랄 멀티와 가스 멀티가 중앙 신전 주변에 밀집되어 있어Resource Denial(자원 봉쇄)와 Micro Control(미세 컨트롤)이 중요한 전략적 선택지를 제공합니다. 맵의 지형은 비교적 평탄한 편이지만, 신전 내부와 외곽의 좁은 통로, 언덕 지형은 시야 확보와 병력 진형의 변화에 영향을 미치며, 이는 곧 전투의 승패를 가르는 요인으로 작용합니다. 특히, 4인 멀티플레이 환경에서 각 플레이어는 초기 본진과 멀티 지역을 확보하는 동시에 중앙 신전에서 벌어지는 전투에서 우위를 점하기 위해 끊임없이 자원 관리와 병력 구성을 고려해야 합니다. 이 맵은 초보자부터 숙련자까지 폭넓은 플레이어들에게 즐길 수 있도록 밸런스가 잘 잡혀 있으며, 특히 중앙 신전 주변의 좁은 길목에서 벌어지는 소규모 전투는 브루드워의 기본 메카닉인 컨트롤 능력을 자연스럽게 연습할 수 있는 기회를 제공합니다. 또한, symmetrical 구조 덕분에 양측의 실력이 비슷할 경우 긴장감 있는 접전으로 이어질 가능성이 높아, 경쟁심을 자극하는 요소로 작용합니다. 맵을 플레이하기 전에는 중앙 자원의 확보 가능성, 언덕 지형의 시야 장악력, 그리고 멀티 지역으로의 진출 타이밍을 신중히 판단해야 하며, 이는 곧 승리 가능성을 크게 좌우할 수 있습니다. 이 맵은 브루드워의 기본기를 다지기에 최적의 맵으로, 특히 팀플레이보다는 1vs1 또는 4인 자유 플레이에서 그 진가를 발휘합니다. BWL - The Lost Temple is a well-known official ladder map from StarCraft: Brood War, featuring a desert-themed wide plain and an ancient temple structure at the center. The map's symmetrical design ensures both players start under identical conditions, with major resource areas like mineral patches and gas geysers clustered around the central temple, creating strategic choices around resource denial and micro management. The terrain is relatively flat but includes narrow passages and elevated areas, influencing vision control and troop positioning, which often determine the outcome of battles. In a 4-player multiplayer setting, each player must secure their starting base and expansion while considering how to gain an advantage in the central temple battles through resource management and army composition. Designed for a broad range of players from beginners to experts, the map offers well-balanced gameplay, especially in small-scale skirmishes around the temple’s narrow paths, which naturally reinforce Brood War’s fundamental mechanics like unit control. The symmetrical layout also fosters tense, close matches when both sides are evenly matched, making it a great choice for competitive play. Before playing, it's crucial to assess the accessibility of central resources, the control of vision on elevated terrain, and the timing for expanding to multi bases, as these decisions significantly impact the chances of victory. This map is ideal for honing Brood War basics, particularly excelling in 1v1 or 4-player free-for-all modes rather than team play.
[4] Lost Temple - G2
스타크래프트 브루드워의 유즈맵 [4] Lost Temple - G2는 2004년 gameTV 공식 맵을 기반으로 수정한 컴까기(컴퓨터 상대 유즈맵) 장르의 맵으로, 8명의 플레이어가 동시에 즐길 수 있는 대규모 전투가 특징입니다. 사막 타일셋으로 구축된 맵은 광활한 개방 지형과 곳곳에 숨은 자원 멀티, 그리고 중앙의 주요 전투 지점을 중심으로 구성되어 있어 전략적 깊이를 더합니다. 맵 곳곳에 배치된 입구와 좁은 통로는 적의 공격을 방어하거나 역습을 가할 수 있는 요충지가 되며, 특히 중앙의 성지 같은 공간은 전투를 승리로 이끄는 핵심 전략 포인트로 작용합니다. 플레이어는 시작 시 제공되는 자원으로 건물을 짓고 유닛을 생산하며, AI가 조종하는 컴퓨터 상대와 대결을 펼치게 됩니다. 맵의 지형적 특징상, 초반에는 안전하게 자원을 채취하며 병력을 모으는 것이 중요하며, 중반부터는 적의 기지를 공략하거나 방어선을 구축하는 등 다양한 전략을 구사할 수 있습니다. 특히 입구와 통로가 복잡하게 얽혀 있어, 상대방의 움직임을 예측하고 기습 공격을 계획하기에 적합한 구조로 설계되었습니다. 이 맵은 대규모 전투와 지속적인 압박을 요구하는 만큼, 게임의 난이도는 보통 이상으로 느껴질 수 있으며, 초보자보다는 중급 이상의 플레이어에게 더 적합하다고 볼 수 있습니다. 맵의 전체적인 밸런스는 8:8 전투를 기준으로 잡혀 있어, 팀 간의 협동과 개인의 판단력이 승패를 좌우할 것입니다. Lost Temple - G2는 스타크래프트 유즈맵의 classic한 감각을 느낄 수 있는 만큼, 과거의 명작을 재해석하고자 하는 유저들에게 추천할 만한 작품입니다. 플레이 전, 맵의 주요 자원 멀티 위치와 입구, 통로의 배치도를 숙지하는 것이 중요합니다. 또한, 초반 자원 관리와 유닛 생산 타이밍을 잡는 연습이 필수적이며, 중반 이후에는 적의 기지 구조와 방어 시설을 신속히 파악하여 공략 전략을 수립해야 합니다. 이 맵은 단순히 전투를 즐기는 것뿐만 아니라, 전략적 사고와Resource Management 능력을 키우는 데에도 도움이 될 것입니다. 사막의 황량한 분위기와 어울리는 간결한 디자인도 맵의 매력을 더합니다. StarsCraft: Brood War's custom map *Lost Temple - G2* is a modified computer-battle (versus AI) game based on the official 2004 gameTV map, designed for eight players to enjoy large-scale combat simultaneously. Built on a desert tileset, the map features vast open terrain, hidden resource expansions scattered throughout, and a central combat zone that adds strategic depth. Entrances and narrow corridors scattered across the map serve as key vantage points for defense or counterattacks, while the central sacred-like area acts as a pivotal strategic point that can decide the outcome of battles. Players begin with provided resources to construct buildings and produce units, then face off against AI-controlled opponents. Due to the terrain's layout, safely gathering resources and assembling forces early on is crucial, while mid-game allows for attacking enemy bases or fortifying defensive lines with diverse strategies. The intricate network of entrances and corridors makes it ideal for predicting opponent movements and planning ambushes. Given its emphasis on large-scale battles and sustained pressure, the map’s difficulty leans toward moderate to high, making it more suitable for intermediate to advanced players rather than beginners. Balanced for 8v8 combat, teamwork and individual decision-making will determine victory or defeat. *Lost Temple - G2* offers a classic *StarCraft* custom-map experience, making it a great choice for players looking to revisit a legendary title with a fresh twist. Before playing, it’s essential to memorize the locations of key resource expansions, entrances, and corridor layouts. Early resource management and precise unit-production timing are critical, while mid-to-late game requires quickly assessing enemy base structures and defenses to formulate attack strategies. Beyond pure combat enjoyment, the map also sharpens strategic thinking and resource-management skills. Its minimalist design complements the desolate desert atmosphere, enhancing the map’s overall appeal.
Parallel Lines 3 (평행선 3)
‘Parallel Lines 3’는 MBC 게임 공식 유즈맵으로, 8명의 플레이어가 동시에 경쟁하는 밀집형 맵 구조가 특징이다. 맵 이름은 ‘평행선’이라는 제목처럼 중앙에 긴 가로를 관통하는 직선형 통로가 주축을 이루며, 이 통로를 따라 양측에서 전투가 벌어지는 양상이 반복된다. 맵의 전체적인 구도는 ‘황혼’ 타일셋을 기반으로 하여, 황량한 황토색과 어두운 그늘로 이루어진 배경이 인상적이며, 좁고 긴 길이 플레이어 간의 충돌을 유도하는 형태로 설계되어 있다. 맵의 특징은 두 가지 주요 진영이 중앙 통로를 두고 대칭적으로 배치되어 있으며, 각 진영의 입구는 좁은 길목을 통해 연결되어 있어 소규모 전투가 지속적으로 발생한다는 점이다. 또한, 맵의 가장자리는 넓은 개활지로 펼쳐져 있어 자원 채취나 기지 확장이 필수적이지는 않지만, 중앙 통로에서의 전투가 승패를 좌우하는 경우가 많다. 맵의 난이도는 주로 중앙 통로에서 발생하는 전투의 강도에 따라 결정되며, 좁은 길목에서 벌어지는 소규모 교전과 다수의 유닛이 모여드는 대규모 전투가 번갈아 발생하는 구조로 인해 전략적인 움직임이 요구된다. 특히, 중앙 통로의 좁은 길목을 활용한 치고 빠지기 식의 전투가 승리의 열쇠가 된다. 이 맵은 8명이 동시에 플레이할 수 있도록 설계되어 있으며, 밀리전 스타일의 전투보다는 유즈맵의 전략적 요소를 강조하고 있다. 플레이어는 각자의 자원을 확보한 후, 중앙 통로로 진출하거나 방어 태세를 갖추어 상대방을 제압하는 방식으로 진행된다. 초보 플레이어의 경우 중앙 통로에서의 빠른 판단과 유닛 컨트롤이 중요하며, 숙련된 플레이어는 좁은 길목에서의 소규모 전투를 효율적으로 활용하여 상대방을 압박하는 전략을 구사할 수 있다. 맵의 밸런스는 중앙 통로의 구조적 특징상 양측의 전투력이 비슷하게 유지되도록 설계되었지만, 기지 배치나 자원 접근성에서 slight한 차이를 보일 수 있어 신중한 플레이가 필요하다. 이 맵은 MBC 게임 공식 유즈맵답게 MBC 게임 방송 프로그램에서 사용되었던 맵으로, 그 역사성과 함께 맵의 전략적 깊이를 즐기고자 하는 플레이어들에게 추천할 만하다. 특히, 유즈맵의 특성을 살려 다양한 전략과 전술을 구사할 수 있는 기회를 제공하며, 8인 동시 플레이의 긴장감과 재미가 돋보이는 맵이다. 플레이 전에는 맵의 중앙 통로와 양측 진영의 배치 구조를 숙지하고, 좁은 길목에서의 전투에서 유리한 위치를 선점하는 것이 중요하다. ‘Parallel Lines 3’ is an official MBC Game custom map where eight players compete simultaneously in a densely structured map. The map’s name, like the title "Parallel Lines," reflects its core feature—a long straight corridor running through the center, which serves as the main axis for repeated battles between opposing sides. The overall design is based on the ‘Twilight’ tileset, featuring a desolate, earth-toned background with dark shadows, and its narrow, elongated paths are structured to encourage frequent player collisions. The map is characterized by two symmetrical factions positioned on either side of the central corridor, with each side’s entrance connected by a narrow passage, leading to constant small-scale skirmishes. While the outer edges of the map open up into expansive open zones, resource gathering and base expansion aren’t strictly necessary, as control over the central corridor often determines the match’s outcome. The difficulty of the map primarily depends on the intensity of combat in the central corridor, where alternating small-scale fights in tight passages and large-scale clashes of multiple units demand strategic adaptability. Winning often hinges on effectively using the narrow passages in the central corridor for hit-and-run tactics. Designed for eight simultaneous players, the map emphasizes strategic elements of a custom map over the fast-paced combat of standard *StarCraft* matches. Players secure their own resources before advancing into the central corridor or fortifying their defenses to overpower opponents. Novice players should focus on quick decision-making and unit control in the corridor, while experienced players can leverage small-scale skirmishes in tight spaces to pressure their rivals. Due to the structural symmetry of the central corridor, the map is designed to maintain balanced combat power between both sides, though slight differences in base placement and resource access may require careful play. As an official MBC Game custom map, it was used in MBC Game’s broadcast programs, making it historically significant. It’s highly recommended for players seeking both strategic depth and the unique experience of an eight-player custom map, offering dynamic opportunities for varied strategies and tactics. The tension and excitement of simultaneous eight-player competition shine through its design. Before playing, it’s crucial to familiarize yourself with the central corridor and the layout of both sides’ bases, securing advantageous positions in the narrow passages before engaging in combat.
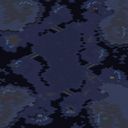
루나 (Luna)
루나(Luna)는 MBC게임 공식 맵으로 채택되었던 4인용 밀리 맵이다. 화산 타일셋을 기반으로 128x128 타일 크기의 표준적인 전장을 제공하며, 파일명과 내부 설명에 'Suggested Players: 4'가 명시되어 있어 2대2 팀 밀리 또는 4인 난전용으로 설계되었음을 알 수 있다. 제작자는 DrunkenBird이며 i_terran이 수정했다는 기록이 남아 있어 커뮤니티 검증 과정을 거쳤음을 짐작케 한다. 맵 구조는 네 개의 시작 지점이 대각선 또는 십자 형태로 배치되어 대칭성을 확보했으며, 중앙 지역을 두고 멀티 기지 확보와 병력 이동 경로가 자연스럽게 이어지도록 설계되었다. 본진 입구 너비와 멀티 간 거리, 고저 차이 등이 정석적인 밀리 밸런스에 맞춰져 있어 초반 러시 견제, 멀티 타이밍, 후반 인구수 싸움 등 표준적인 스타크래프트 브루드워 메타를 온전히 경험할 수 있다. 화산 지형 특유의 용암 지대가 시각적 긴장감을 주면서도 실제 빌드 오더나 병력 운용에는 큰 제약을 주지 않는다. 플레이 경험은 정석적인 빌드 오더 연습이나 팀원과의 호흡을 맞추기에 적합하다. 2대2 팀전에서는 파트너와의 연계 러시나 수비 분담이 승부를 가르는 경우가 많고, 4인 FFA에서는 외교와 타이밍 싸움이 핵심이다. 래더나 친선전 용도로 가볍게 즐기기에도 무리가 없으나, 최신 맵 풀에 비해 지형적 변수가 적어 고수 간 대결에서는 빌드 최적화 싸움이 치열해질 수 있다. v1.01 버전 기준으로 옵저버 슬롯(파일명의 ob 표기) 지원 여부도 확인해두면 대회 연습 시 유용하다. 추천 대상은 정석 밀리 감각을 익히고 싶은 입문자, 팀전 호흡을 맞춰보고 싶은 클랜원, 과거 공식 맵을 회고하고 싶은 올드 유저다. 플레이 전에는 시작 위치 고정 여부와 옵저버 설정, 브루드워 1.16.1 이상 버전에서 정상 구동되는지 점검하면 좋다. Luna is a four-player melee map that was adopted as an official MBCGame map. Built on the Volcano tileset with a standard 128x128 tile battlefield, the filename and internal description explicitly state 'Suggested Players: 4,' indicating it was designed for 2v2 team melee or four-player free-for-all. The creator is listed as DrunkenBird with a modification by i_terran, suggesting it went through community verification. The layout places four starting locations in a diagonal or cross formation to ensure symmetry, while the central area naturally connects expansion bases and army movement paths. Ramp widths, expansion distances, and elevation differences are tuned for standard melee balance, allowing players to experience the full Brood War meta: early rush defense, expansion timing, and late-game supply fights. The volcanic lava terrain adds visual tension without restricting build orders or unit control. Gameplay suits players wanting to practice standard build orders or coordinate with a partner. In 2v2, coordinated attacks and shared defense often decide the match, while 4-player FFA revolves around diplomacy and timing. It works well for ladder or casual games, though the lack of modern terrain gimmicks means high-level matches become intense build-optimization contests. The v1.01 version also hints at observer slot support (the 'ob' in the filename), useful for tournament practice. Recommended for beginners learning standard melee fundamentals, clan members practicing team coordination, and veterans revisiting classic official maps. Before playing, verify fixed starting positions, observer settings, and compatibility with Brood War 1.16.1 or later.
짐 레이너의 메모리 J 1.5 (Jim Raynor's Memory J 1.5)
짐 레이너의 메모리 J 1.5는 MBC게임 공식 맵으로 채택되었던 전설적인 밀리 맵이다. Sir.Lupin, 서창희, 엄세영 등 당대 최고 맵 메이커들이 공동 제작했으며, 파일명에 포함된 '(4)' 표기와 'ob(observer)' 접미사에서 알 수 있듯 4인용 관전자 버전으로 대회 운영에 최적화되어 있다. 사막 타일셋 기반의 128x128 대형 맵으로, 4개의 본진이 대각선 또는 십자 형태로 배치되어 1대1부터 4인 프리포올까지 다양한 구도가 가능하다. 각 본진은 넓은 평지와 자연스러운 램프 구조를 갖춰 초반 빌드 오더 수행이 안정적이며, 앞마당과 3멀티로 이어지는 확장 루트가 명확해 표준적인 밀리 운영이 그대로 통한다. 중앙 지역은 넓은 평야와 언덕, 미네랄 멀티가 혼재되어 중후반 대규모 교전과 견제 루트 확보에 중요한 역할을 한다. 종족별 밸런스는 저그의 드론 드랍이나 프로토스의 셔틀 견제, 테란의 드랍십 플레이 등 당대 메타를 고려해 설계되었으며, 본진 입구 너비와 언덕 배치가 종족 간 유불리를 최소화하는 방향으로 다듬어졌다. 관전자 트리거와 고정 시작 위치 설정이 포함되어 있어 대회 리플레이 분석이나 관전 모드 연습에 용이하다. 최신 패치 버전과의 호환성은 확인 필요하지만, 클래식 브루드워 밀리 감성을 느끼고 싶거나 과거 프로리그 맵을 연구하려는 유저에게 훌륭한 교재가 된다. 플레이 전 시작 위치 고정 여부와 관전자 슬롯 설정을 확인하면 보다 쾌적한 대전이 가능하다. Jim Raynor's Memory J 1.5 is a legendary melee map adopted as an MBCGame official map. Co-created by top-tier map makers of the era—Sir.Lupin, Seo Chang-hee, and Uhm Se-young—the '(4)' notation in the filename and the 'ob (observer)' suffix indicate a 4-player observer version optimized for tournament operation. Based on the Desert tileset, this large 128x128 map arranges four main bases in a diagonal or cross formation, allowing various matchups from 1v1 to 4-player FFA. Each main base features wide open ground and natural ramp structures for stable early build-order execution, while clear expansion paths to the natural and third bases support standard melee macro play. The central area mixes wide plains, high ground, and mineral-only expansions, playing a pivotal role in late-game engagements and harassment routes. Racial balance accounts for the meta of the time—Zerg drone drops, Protoss shuttle harassment, Terran dropship play—with main entrance widths and high-ground placements tuned to minimize racial advantages. Observer triggers and fixed start locations are included, making it useful for tournament replay analysis or observer mode practice. Compatibility with the latest patch versions should be verified, but it serves as excellent material for those wanting to experience classic Brood War melee or study past pro-league maps. Checking fixed start positions and observer slot settings before play will ensure a smoother match.
용의 입구 (Enter the Dragon)
스타크래프트 브루드워 유즈맵인 ‘(2)Enter the dragon’은 MBC 게임 공식 맵으로, 강렬한 사막 분위기의 타일셋과 간결한 구조가 특징인 디펜스 장르의 맵이다. 맵 중앙에는 넓은 평지가 펼쳐져 있으며, 그 주변을 따라 점핑 유닛이 이동할 수 있는 좁은 통로가 배치되어 있다. 플레이어는 맵 외곽에서 시작하며, 중앙으로 침투해 오는 적 유닛을 저지하는 방식으로 진행된다. 맵의 외곽과 중앙 사이의 좁은 길목은 전략적 요충지로, 유닛의 이동 경로를 제한하여 디펜스 포인트를 설정할 수 있도록 설계되었다. 또한, 맵 곳곳에 배치된 좁은 통로와 굴곡진 지형은 유닛의 진형을 흐트러뜨려 방어 라인의 중요성을 강조한다. 이 맵은 기본적인 유닛 컨트롤과 위치 선정이 핵심인 만큼, 초보 플레이어도 쉽게 접근할 수 있지만, 미세한 컨트롤과 타이밍이 요구되는 부분이 있어 ‘보통’ 수준의 난이도를 가진다. 특히 좁은 길목에서의 전투는 유닛의 종류와 숫자에 따라 승패가 갈릴 수 있으므로, 다양한 유닛 조합을 시도해보는 것이 좋다. 맵의 구조상, 방어 라인을 중앙에 두는 것보다 외곽에 배치하는 것이 효율적일 수 있으며, 좁은 통로를 최대한 활용하여 적 유닛을 한꺼번에 상대하는 전략이 효과적이다. 또한, 맵 내에 배치된 여러 개의 좁은 길목은 다중 방어 라인을 구축할 수 있는 기회를 제공한다. 이 맵은 8명의 플레이어가 동시에 참여할 수 있으며, 각 플레이어는 개별적으로 방어 임무를 수행하거나 팀을 이루어 협력할 수 있다. 맵의 전체적인 분위기는 사막의 황량한 beauty와 긴장감을 조성하며, 디펜스 장르의 정석을 느낄 수 있는 구조로 구성되어 있다. 만약 디펜스 장르의 맵을 찾고 있다면, 이 맵은 좁은 길목과 전략적 위치를 중심으로 한 재미있는 경험을 제공할 것이다. 특히 사막 타일셋의 활용도가 높아, 시각적 완성도도 뛰어나다. 다만, 좁은 길목이 너무 많아 유닛의 손실을 줄이기 위해 신중한 컨트롤이 요구되므로, 초보 플레이어는 연습 모드를 활용해 보는 것이 좋다. 또한, 맵 내에 배치된 지형적 특징을 잘 활용하여 방어 라인을 구축하는 것이 승리의 열쇠가 될 것이다. "(2)Enter the Dragon" is a *StarCraft: Brood War* custom map and an official MBC Game map, featuring a defense genre with a striking desert-themed tileset and a clean, straightforward layout. The map opens with a wide central plain surrounded by narrow pathways where jumping units can move. Players start on the outer edges and must defend against enemy units infiltrating from the center. The tight corridors between the outer edges and the central area serve as strategic chokepoints, restricting unit movement and forcing players to establish well-placed defensive lines. The map’s scattered narrow paths and rugged terrain disrupt unit formations, underscoring the importance of strong defensive positioning. While the map emphasizes basic unit control and positioning—making it accessible to beginners—it also demands precise micro-management and timing, placing it at an intermediate difficulty level. Battles in the narrow passages can hinge on unit composition and numbers, so experimenting with different unit combinations is recommended. Strategically, placing defensive lines closer to the outer edges tends to be more effective than clustering them near the center, and leveraging the narrow paths to engage enemies in concentrated groups can turn the tide of battle. The multiple chokepoints also allow for setting up layered defenses. The map supports up to eight players, who can either defend individually or coordinate in teams. Its overall atmosphere blends the desolate beauty of a desert with a tense, immersive feel, embodying the essence of the defense genre. If you're looking for a defense-focused map, this one delivers an engaging experience centered on strategic chokepoints and positioning. The desert tileset is used effectively, enhancing the map’s visual appeal. However, the abundance of narrow pathways means careful unit control is essential to minimize losses, so beginners may benefit from practicing in the map’s training mode. Mastering the map’s terrain features and using them to build strong defensive lines will be key to securing victory.
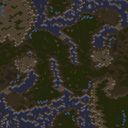
(2)Enter the dragon (드래곤의 문지기)
「Enter the dragon」은 MBC Game 공식 유즈맵으로, 2명의 플레이어가 중앙의 강력한 드래곤을 두고 각자 세력을 키우며 전투를 펼치는 전략형 대전 맵이다. 맵은 사막 타일셋을 기반으로 4096x3072 크기의 넓은 평야와 언덕 지형이 배치되어 있으며, 중앙에는 드래곤이 위치한 고지대가 존재한다. 각 플레이어는 시작 지점 주변의 자원으로 기지를 건설하고 유닛을 생산해 드래곤을 둘러싼 영역을 확장하거나 상대방의 자원을 차단하는 방식으로 대결을 진행한다. 이 맵의 핵심은 드래곤의 위치와 주변 자원 분포에 따라 전략이 크게 갈린다는 점이다. 드래곤은 일정 시간마다 부화하거나 사망하는 패턴을 가지고 있으며, 이를 두고 플레이어는 공격과 방어 사이에서 균형을 잡아야 한다. 맵 곳곳의 좁은 길목은 병력을 집중시켜 기습을 하기에 유리한 지형으로, 유닛의 조합과 컨트롤이 승패를 좌우할 수 있다. 또한, 맵의 넓은 평야는 대규모 전투를 가능케 하지만, 자원 밀집 지역은 초반Resource gathering and early-game unit production are critical to securing early advantages. 초보 플레이어는 중앙 high ground의 드래곤 주변을 둘러싼 언덕 지형에서 벌이는 전투에서 전략적 위치 우위를 활용하는 법을 익히는 것이 중요하다. 이 맵은 MBC Game 공식 맵인 만큼 균형 잡힌 밸런스와 안정적인 플레이 환경을 제공하며, 특히 드래곤을 두고 벌어지는 눈치 싸움이 긴장감을 더한다. 2인용 밀리형 대전 맵이지만, 드래곤의 AI 패턴과 맵의 넓은 시야 덕분에 혼자서도 충분히 즐길 수 있는 콘텐츠로도 손색이 없다. 다만, 자원 수급이 부족할 경우 중반 이후 공세가 약해질 수 있어, 자원 관리와 생산 라인의 확보가 중요하다.Dragon control and resource management are key to victory. 초중반에 드래곤을 둘러싼 언덕이나 좁은 통로에서 벌어지는 전투에서 우위를 점하는 플레이어가 전체적인 흐름을 장악하는 경우가 많다. 또한, 드래곤의 부화 주기나 사망 시의 보상 아이템(추정되는)을 노리는 플레이도 가능하다. 이 맵은 2인용 유즈맵이지만, 넓은 맵 크기와 strategic depth 덕분에 한 명의 플레이어가 양쪽을 번갈아 플레이해도 긴장감을 유지할 수 있는 구조로 설계되어 있다. "Enter the Dragon" is an official MBC Game custom map where two players compete by expanding their forces around a powerful central dragon. The map features a desert tileset with a 4096x3072 wide plain and hilly terrain, centered around a high ground where the dragon resides. Each player starts near resources to build their base, then produces units to either expand their control around the dragon or block the opponent’s access to resources. The core of the map lies in how the dragon’s position and surrounding resource distribution shape strategy. The dragon hatches or dies at set intervals, forcing players to balance offense and defense. Narrow pathways across the map allow for concentrated attacks and ambushes, where unit composition and player control often decide the outcome. The vast open fields enable large-scale battles, but resource-rich areas demand careful early-game management for a strong start. As an official MBC Game map, it offers balanced gameplay and a stable environment, with the dragon’s presence adding tension to the mind games between players. While designed as a 1v1 melee map, its wide vision and dragon AI make it enjoyable even for solo play. However, poor resource management can weaken mid-to-late-game offensives, so securing resources and production lines is crucial. Controlling the dragon and managing resources are key to victory, with players often dominating the flow of the game by controlling the hills or narrow passages around the dragon in the early stages. Players can also aim to exploit the dragon’s hatching or death cycles for potential rewards. Though a 1v1 custom map, its large scale and strategic depth allow a single player to alternate between sides while maintaining high tension.
맵 선택 가이드
태그는 맵의 핵심 특징을 빠르게 설명하지만 제작 버전마다 규칙이 다를 수 있습니다. 상세 설명에서 권장 인원, 난이도, 플레이 시간과 버전을 함께 확인한 뒤 다운로드하세요.