
공격형 디펜스 스타크래프트 맵 모음
'공격형 디펜스' 태그가 등록된 맵을 모았습니다. 장르 하나로 찾기 어려운 플레이 방식, 난이도와 특징을 중심으로 인기 맵과 최신 맵을 비교해 보세요.
- 등록 맵
- 11개
- 누적 다운로드
- 0
- 누적 조회
- 454
인기 맵
다운로드와 조회 반응이 높은 맵입니다.
Another Defense Stackv6
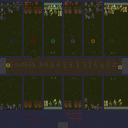
스타크래프트 브루드워의 <strong>Another Defense Stackv6</strong>는 디펜스 장르의 유즈맵으로, 플레이어는 각자의 진영을 지키며 적의 공격을 막아내는 동시에 상대방의 진영으로 진격하는 두 가지 목표를 동시에 추구하는 독특한 구조를 지닌다. 맵 중앙을 가로지르는 넓은 지상 통로가 양 진영을 연결하며, 이곳에서 전투가 벌어지는데, 바닥에 표시된 흰색 원으로 전장의 주요 거점과 진격로를 확인할 수 있다. 맵의 상단과 하단에는 각각의 진영이 있으며, 각 플레이어는 자신의 기지에서 시작해 적진으로 향하는 길목의 요새와 건물을 보호하거나 파괴해야 한다. 디펜스 요소는 물론, 상대방의 기지를 공격하는 공격형 디펜스로도 분류할 수 있는 이 맵은, 단순 방어뿐 아니라 적극적인 전술적 플레이가 요구된다. 전장의 중앙 통로 양측에는 고지대가 있어 시야 확보와 방어선의 구축이 용이하며, 적의 접근을 차단하기 위한 배치나 기습 공격 등이 승패를 좌우할 수 있다. 초보자도 쉽게 접근할 수 있는 기본적인 조작법을 요구하지만, 상대방을 제압하기 위한 전략적 선택과 타이밍은 숙련된 플레이어에게 더 큰 재미를 제공한다. 특히, 적의 공격을 방어하는 동시에 자신의 공격을 준비하는 균형 잡힌 플레이가 핵심으로, 초반에는 방어에 집중하되 중반 이후에는 전략적 전환이 필요하다. 맵의 배경은 사막 타일셋을 사용해 넓은 개활지를 연출하며, 시원한 전투감을 강조한다. 이 맵을 플레이하기 전에는 자신의 진영 방어 시설의 배치와 중앙 통로의 통행로 관리, 적과의 교전 시의 타이밍을 미리 숙지하는 것이 좋다. 또한, 상대방의 움직임을 예측하고 기습을 대비하는Alertness가 요구되므로, 초보자는 팀원과의 협동 플레이가 승리의 관건이 될 수 있다. 6인 이상의 플레이가 가능해 팀전으로도 즐길 수 있으며, 각 플레이어의 역량에 따라 게임의 흐름이 크게 달라지는 재미가 있다. 이 맵은 디펜스와 공격형 디펜스의 경계를 넘나드는 독특한 경험을 제공하며, 전략적 깊이와 빠른テンポ의 전투가 공존하는佳作라 할 수 있다. Another Defense Stackv6 is a StarCraft: Brood War custom map classified as a defense genre, offering a unique gameplay structure where players must simultaneously defend their own base and advance toward the enemy’s territory. The map features a wide ground passage running centrally between the two factions, serving as the primary battlefield where intense combat unfolds. White circular markers on the ground indicate key strategic points and advance routes. Each player starts in their respective base—located at the top and bottom of the map—and must either protect or destroy buildings and fortresses along the path leading to the enemy’s side. While the core gameplay revolves around defense, the map also functions as an offensive defense strategy, requiring players to balance between shielding their own zone and launching attacks. Elevated terrain on both sides of the central passage enhances visibility and strategic positioning, making it crucial to control choke points and execute timely assaults. Though the basic mechanics are accessible to beginners, experienced players gain greater satisfaction from tactical decision-making and precise timing. The balance between defense and offense shifts dynamically; early-game priorities lean toward fortification, while mid-to-late game demands decisive offensive maneuvers. The desert-themed tile set emphasizes the vast open battlefield, enhancing the visual and tactical depth of engagements. Before playing, it’s essential to familiarize yourself with base layout, choke point control, and enemy movement patterns. Anticipating ambushes and coordinating with teammates are vital, especially for newcomers, as teamwork significantly influences victory. With support for six or more players, this map excels in team-based play, where individual skill and collective strategy shape the outcome. Blending defensive tactics with aggressive counterplay, Another Defense Stackv6 delivers a compelling experience where strategy and fast-paced action converge, making it a standout custom map in the defense genre.
5:3 컴까기 헌터 초 255업 (5:3 Compkagi Hunter Final 255)
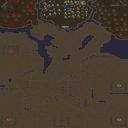
스타크래프트 브루드워의 5:3 컴까기 장르 유즈맵으로, ‘헌터초 255업’이라는 부제가 붙은 이 맵은 2006년 3월 13일에 제작된 AUDGNSWLWHS의 작품이다. 내부 맵 제목과 설명을 통해 확인할 수 있듯이, 5명의 플레이어가 3명의 컴퓨터를 상대로 컴까기(컴퓨터 상대 유즈맵) 형식으로 진행되는 구조로 추정된다. 타일셋은 사막으로 설정되어 있으며, 맵 크기는 4096x4096의 대규모로 제작되어 전체적인 분위기는 넓은 사막 지형이 펼쳐진 형태로 보인다. 맵 제목에 포함된 ‘[255]’는 버전 넘버링으로, 개발 과정에서 최종 완성 단계에 도달했음을 의미하는 것으로 추정된다. 제작자 메모에서 ‘어셀트 비밀이다’라는 표현이 포함되어 있어, 개발 당시에는 비공개 상태로 개발되었다가 이후 배포되었을 가능성이 있다. 이 맵은 5명의 플레이어가 각자 자신만의 진영을 구축하고, 3명의 컴퓨터가 지속적으로 공격을 가하는 방식으로 진행된다. 플레이어는 자원을 채취하고 건물을 건설하여 방어선을 구축하는 동시에, 컴퓨터의 공격을 방어하거나 역습을 가하는 전략을 세워야 한다. 맵의 구성상으로는 중앙에 넓은 공간이 있어 대규모 전투가 벌어질 가능성이 크며, 사막 타일셋의 특징상 시야가 넓고 개활지가 많아 전략적 움직임이 중요할 것으로 보인다. 맵의 제목에서 ‘헌터’라는 단어는 플레이어가 컴퓨터를 사냥하는 입장이라는 점을 강조하는 것으로, 방어뿐만 아니라 공격적 플레이도 요구되는 맵으로 예상된다. 이 맵을 플레이하기에 가장 적합한 대상은 스타크래프트의 컴까기 장르를 좋아하는 유저들로, 특히 5인 플레이가 가능한 환경에서 즐기고자 하는 플레이어에게 추천된다. 또한, 넓은 맵 크기와 사막 타일셋의 개활지 특성상 전략적 사고와 빠른 판단력이 요구되므로, 초보자보다는 적어도 기본적인 스타크래프트 운영 능력을 갖춘 유저가 플레이하는 것이 바람직할 것이다. 맵의 버전 넘버링과 제작 일자, 제작자 정보가 명시되어 있어, 구버전과의 차이점이나 제작 과정에 대한 интерес 있는 배경 스토리를 가진 맵으로도 볼 수 있다. 플레이 전에는 맵의 규모가 크고 개활지가 많다는 점을 고려하여, 초반 자원 관리와 건물을 배치하는 전략을 미리 세워두는 것이 중요하다. 또한, 컴퓨터의 공격 패턴을 예측하고 방어선을 효율적으로 구축하는 연습을 해두면 게임 진행이 훨씬 수월할 것이다. 5명의 플레이어가 원활하게 협력할 수 있도록 팀 간 의사소통도 필수적이며, 넓은 맵에서 발생할 수 있는 시야 문제와 자원 분포를 미리 숙지하고 있어야 한다. 이 맵은 단순히 방어만 하는 것이 아니라, 컴퓨터를 상대로 적극적인 공세를 펼치는 전략도 중요하므로, 공격과 방어의 균형을 잘 맞추는 플레이가 필요할 것이다. This StarCraft: Brood War custom map, titled '5:3 컴까기헌터초[255]업,' is a 5 versus 3 computer-killing (compkagi) UMS map created by AUDGNSWLWHS on March 13, 2006. The internal map name and description confirm its structure as a large-scale desert-themed map (4096x4096 tiles) where five players defend against three AI opponents. The '[255]' in the title suggests it was considered a finalized version during development, while the developer's note mentioning '어셀트 비밀이다' (Aselt secret) implies early versions were kept private before release. The gameplay revolves around five players establishing bases, gathering resources, and building defenses while fending off relentless AI assaults. The vast open desert terrain allows for large-scale battles, with the map's layout likely featuring choke points and expansion opportunities. The term '헌터' (Hunter) in the title underscores the offensive nature of the map, where players are expected not only to defend but also to counterattack and eliminate the AI opponents. Ideal for players who enjoy StarCraft's UMS compkagi genre, especially those seeking a 5-player competitive experience. The map's scale and open terrain demand strategic foresight, quick decision-making, and efficient resource management, making it more suitable for intermediate to advanced players. The desert tileset provides excellent visibility but also exposes players to long-range attacks, requiring careful positioning and defensive planning. Before playing, it's crucial to prepare a build order and base layout strategy to manage the expansive map effectively. Predicting AI attack patterns and establishing layered defenses will significantly improve performance. Since the map emphasizes both offense and defense, players should balance aggression with caution—coordinating with teammates to control key areas while pressuring AI structures. The map's scale and mechanics reward players who can adapt their strategies dynamically to the AI's evolving tactics.
심즈 온 베케이션 (Sims on Vacation Updated)
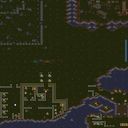
이 맵은 스타크래프트 브루드워의 유즈맵으로, 플레이어가 ‘심즈’ 역할을 맡아 휴가를 즐기며 진행하는 독특한 디펜스 및 서바이벌 장르의 맵이다. 내부 맵 설명에 따르면 ‘The sims are on vacation’라는 콘셉트를 기반으로, 1~2명의 플레이어가 필수이며 최대 7명까지 참여할 수 있도록 설계되었다. 맵은 사막 타일셋으로 구성되어 있으며, 거대한 4096x4096 크기의 넓은 공간에서 펼쳐진다. 맵의 주요 특징은 ‘휴가’라는 테마에 맞게 자연 경관과 건물, 수영장, 해변가 등 휴양지를 연상시키는 구조물이 배치되어 있다는 점이다. 플레이어는 각자 고유한 건물을 짓고 자원을 관리하며, 끊임없이 몰려오는 적 유닛(보이는 바로는 저글링, 히드라리스크 등)을 방어하는 방식으로 진행된다. 맵의 승패 조건이나 구체적인 게임 루프는 확인되지 않지만, ‘have fun’이라는 설명과 함께 플레이 경험을 중시하는 구성이 특징이다. 넓은 맵과 사막 배경은 휴양지라는 테마에 잘 어울리며, 디펜스 요소와 함께 전략적인 자원 관리와 공간 활용이 요구된다. 이 맵은 특히 휴가 테마를 좋아하는 유저나 디펜스 장르를 선호하는 플레이어에게 추천할 만하다. 단, 내부 설명에 ‘player 1 2 required’라는 문구가 포함된 점, 그리고 최대 7명까지 참여 가능하다는 점은 다소 혼동스러우며, 팀 구성이 필요한지에 대한 명확한 정보는 없다. 플레이 전에는 맵의 승리 조건, AI 난이도, 또는 추가적인 규칙을 확인하는 것이 좋다. This StarCraft: Brood War custom map offers a unique blend of defense and survival gameplay centered around the ‘The Sims on Vacation’ theme. Designed for 1 to 2 players (with a maximum capacity of 7), the map features a sprawling 4096x4096 desert-themed environment filled with vacation-inspired structures like beaches, pools, and buildings. Players must construct their own bases while managing resources to defend against waves of enemy units, primarily Zerglings and Hydralisks as observed. The map’s core mechanic revolves around balancing resource allocation and spatial strategy within a relaxing yet challenging vacation setting. While the exact victory conditions remain unclear, the emphasis on ‘having fun’ suggests a casual yet engaging experience. The desert tileset and thematic elements create an immersive atmosphere, making it ideal for players who enjoy defense-focused maps with a twist. However, the discrepancy between the required player count (1-2) and the maximum capacity (7) may cause confusion, so clarifying the team structure or additional rules before playing is advisable.
5v3 킬 4분 하드컴 (5v3 Kill4Min HardComp)
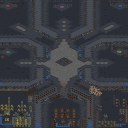
스타크래프트 브루드워의 유즈맵으로 유명한 《5v3 Kill4Min HardComp》는 5명의 플레이어가 3명의 컴퓨터를 상대로 펼치는 하드코어 디펜스 장르의 맵이다. 맵 제목에서 알 수 있듯이 4분 이내에 컴퓨터를 전멸시키는 것이 목표로, 극한의 속도와 전략이 요구되는 공격형 디펜스 맵으로 분류된다. 내부 설명에 'Insane CompKill 4 Min upgrade!Mine for Gas!'라는 문구가 포함되어 있어, 빠른 자원 채취와 효율적인 업그레이드, 그리고 치밀한 공격 타이밍이 승리의 ключ임을 유추할 수 있다. 맵의 구조는 중앙에 넓은 평야가 펼쳐져 있으며, 주변으로는 공격로가 좁고 복잡하게 배치되어 있어 컴퓨터의 공격을 방어하면서 동시에 신속히 자원을 확보해야 한다. 특히 4분의 제한 시간은 매우 촉박한 편으로, 초보자가 잡기에는 상당한 난이도를 자랑하며, 숙련된 플레이어라도 미세한 컨트롤과 타이밍이 요구된다. 플레이어는 초반에 자원을 빠르게 확보한 뒤, 업그레이드를 통해 유닛의 화력을 극대화시켜야 하며, 컴퓨터의 끊임없는 공격 패턴을 예측하고 방어선을 구축해야 한다. 맵의 특징상 다수의 유닛을 동원한 밀집 공격보다는 소수 정예 유닛을 통한 기습 공격이 더 효과적일 수 있으며, 자원 채취 속도와 업그레이드 우선순위가 승패를 좌우할 가능성이 크다. 이 맵을 즐기기 위해서는 빠른 판단력과 효율적인 자원 관리 능력이 필수적이며, 특히 컴퓨터의 공격 패턴을 숙지하고 대비하는 것이 중요하다. 초보자는 난이도에 적응하기 위해 연습 모드를 활용하는 것도 좋은 방법이다. 또한, 맵의 제한 시간이 짧기 때문에 팀원 간의 원활한 소통과 역할 분담이 필수적이며, 개개인의 실력이 맵의 성공 여부를 크게 좌우할 수 있다. 추천 대상은 빠른 속도감을 즐기는 플레이어나 디펜스 장르에 익숙한 숙련자이며, 초보자의 경우 난이도를 낮춘 버전이나 연습 모드를 먼저 시도해보는 것을 권장한다. 플레이 전에는 맵의 구조와 컴퓨터의 공격 패턴을 미리 숙지하고, 자원 채취와 업그레이드 우선순위를 충분히 계획하는 것이 중요하다. 특히, 4분의 제한 시간 내에 모든 컴퓨터를 전멸시키는 것이 목표이므로, 자원 채취와 공격 타이밍을 조율하는 데 주의를 기울여야 한다. 《5v3 Kill4Min HardComp》 is a famous custom map from *StarCraft: Brood War*, where five players face off against three computer opponents in a hardcore defense-style game. As the name suggests, the goal is to wipe out all three computers within four minutes, making it a fast-paced, high-stress attack-focused defense map. The internal description includes the phrase *"Insane CompKill 4 Min upgrade! Mine for Gas!"*, hinting that victory depends on rapid resource gathering, efficient upgrades, and precise timing. The map features a wide central plain surrounded by narrow, maze-like pathways where players must defend against relentless AI attacks while securing resources quickly. The four-minute time limit is extremely tight, posing a significant challenge for beginners and demanding fine-tuned control and timing even from experienced players. Players must secure resources early, maximize unit power through upgrades, and build defensive lines while predicting the AI’s attack patterns. Rather than relying on massed units, this map favors elite strikes with small groups, where resource collection speed and upgrade priorities often decide the outcome. Success requires quick decision-making, efficient resource management, and a deep understanding of the AI’s attack behaviors. Beginners may find practice mode helpful to adapt to the difficulty. Strong team communication and role distribution are also essential due to the short time limit, as individual skill heavily influences the map’s outcome. This map is best suited for players who enjoy fast-paced gameplay or have experience with defense-style games, while newcomers should try lower-difficulty versions or practice modes first. Before playing, it’s crucial to study the map layout and AI attack patterns, plan resource and upgrade priorities carefully, and carefully coordinate resource gathering with attack timing to ensure all three computers are eliminated within the four-minute window.
픽 유어 애택커! 3v3! V.4 (Pick your attacker! 3v3! V.4)
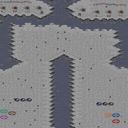
‘픽 유어 애택커! 3v3! V.4’는 스타크래프트 브루드워에서 즐기는 3:3 팀전 디펜스 유즈맵으로, 적 건물 파괴를 목표로 삼는 공격형 디펜스 장르에 속한다. 맵 중앙에 위치한 좁은 통로와 양측 기지 사이의 넓은 평지가 특징으로, 각 팀은 좁은 길목을 활용해 적의 공격을 방어하거나 반격할 기회를 노려야 한다. 맵 이미지를 보면 중앙 통로 양옆으로 넓은 평지가 펼쳐져 있어 지상 유닛의 기동성과 컨트롤이 중요한 역할을 할 것으로 추정된다. 또한, 통로 양측의 언덕과 협소한 지형은 시야 확보와 유닛 배치에 전략적 이점을 제공할 가능성이 높다. 플레이어는 팀원과 협력해 적의 기지를 공략하거나 방어 진지를 구축해야 하며, 좁은 통로와 넓은 평지의 조화는 유닛의 이동 경로를 제한하면서도 넓은 시야를 확보할 수 있도록 설계된 것으로 보인다. 맵 하단과 상단에 위치한 기지 주변의 방어 건물과 자원 분포는 초반Resource Management와 유닛 생산 타이밍이 승패를 좌우할 수 있음을 시사한다. 특히, 협소한 통로에서 벌어지는 교전은 컨트롤과 타이밍이 중요한 요소로 작용할 것이며, 넓은 평지에서의 기동전은 다수의 유닛을 효율적으로 운용할 수 있는 플레이어에게 유리하게 작용할 것이다. 이 맵은 경쟁력이 있는 유즈맵답게 밸런스 조절과 플레이어간 실력 격차를 고려한 디자인으로 보인다. 초보 플레이어의 경우 좁은 통로에서의 전투와 협동 플레이에 익숙해지는 데 시간이 필요할 것이며, 숙련된 플레이어는 넓은 시야와 기동성을 활용한 전략적 플레이가 가능할 것이다. ‘픽 유어 애택커! 3v3! V.4’는 팀워크와 전략적 사고가 요구되는 맵으로, 3대3 팀전의 짜릿함을 느끼고 싶다면 추천할 만한 작품이다. 특히, 중앙 통로와 넓은 평지의 조화가 주는 긴장감과 짜릿한 전투가 맵의 매력으로 느껴진다. 게임을 시작하기 전, 팀원과의 전략 회의와 유닛 구성을 미리 준비해 두는 것이 좋다. This 3v3 team-based defense custom map, titled ‘Pick your attacker! 3v3! V.4’, challenges players to destroy enemy buildings in a strategic StarCraft: Brood War environment. The map features a narrow central corridor flanked by wide open areas on both sides, creating a balanced mix of restricted movement and expansive maneuvering space. The central choke point forces players to focus on tight control and quick decision-making, while the surrounding flat terrain allows for broader unit positioning and flanking maneuvers. The layout suggests that teamwork and coordination are essential, as players must navigate the narrow passages to defend their base while also launching coordinated attacks. The distribution of resources and defensive structures near the bases implies that early-game resource management and unit production timing play critical roles in securing an advantage. Players skilled in micro-management will excel in the choke points, while those adept at army positioning and mobility will thrive in the open areas. Designed for competitive play, this map likely balances skill levels to ensure fair and engaging matches. Beginners may find the tight corridors and team coordination challenging, whereas experienced players can leverage the wide fields for strategic depth. The dynamic interplay between the narrow pathways and open spaces creates an intense and thrilling experience, making it ideal for team-based defense battles. Before diving in, reviewing team strategies and unit compositions will enhance the overall experience.
피카츄 핵폭격 (NUKE THE PIKACHU!!!)
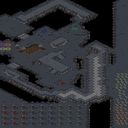
스타크래프트 브루드워의 유즈맵 계보에서 독특한 개성을 자랑하는 《NUKE THE PIKACHU!!!》는 8인용 디펜스형 맵으로, 플레이어들이 피카츄를 핵미사일로 파괴하는 목표를 달성하기 위해 협력하고 경쟁하는 구조로 설계되었다. 맵 중앙에 위치한 피카츄는 자동으로 움직이는 nemico(적)로, 플레이어들은 각자의 기지에서 핵무기를 생산하여 이를 제거해야 한다. 지형은 우주 테마의 넓은 평지 형태로, 타일셋과 배치로 보아 우주 공간을 연상시키는 배경이 돋보인다. 핵미사일은 특정 위치에 배치된 시설을 통해 생산되며, 피카츄는 맵을 자유롭게 이동하며 위협적인 공격을 가한다. 플레이어는 핵미사일을 조준하고 발사하는 동시에, 피카츄의 공격을 방어하거나 회피하는 전략을 세워야 한다. 맵의 핵심은 ‘공동 목표’와 ‘개인 경쟁’의 혼합으로, 모든 플레이어가 피카츄를 파괴하는 데 기여해야 하지만, 핵미사일을 가장 많이 발사한 플레이어가 최종 보너스를 받을 수 있는 Diseño(디자인)도 포함된 것으로 추정된다. 맵의 인포메이션 창에 표시된 ‘Auto-Arming SilosModifi’는 핵미사일 자동 생산 시스템을 의미하는 것으로 보이며, 이는 디펜스와 공격의 균형을 맞추는 데 중요한 역할을 할 것이다. 추천 플레이 방식은 ‘팀 플레이’와 ‘전략적 협력’으로, 피카츄의 이동 패턴을 예측하고 핵미사일을 효율적으로 배치하는 것이 승리의 열쇠다. 초보 플레이어는 핵미사일 생산의 기본 메커니즘을 익히고, 피카츄의 공격 타이밍을 관찰하는 데 집중해야 한다. 반면 숙련된 플레이어는 핵미사일 발사 타이밍을 조율하고, 피카츄의 위치를 예측하여 더 많은 피해를 입히는 전략을 구사할 수 있다. 맵의 난이도는 ‘보통’ 정도로 예상되며, 피카츄의 공격 패턴과 핵미사일의 생산 속도를 조절하는 설정이 포함되어 있을 가능성이 높다. 플레이 전에는 맵의 시야를 확보하기 위한 ‘시야 확장’이나 ‘레이더’ 기능이 활성화되어 있는지 확인하는 것이 좋다. 또한, 핵미사일의 발사 각도와 속도, 피카츄의 체력과 공격력에 대한 사전 정보가 제공된다면 전략 수립에 큰 도움이 될 것이다. 이 맵은 디펜스와 공격의 균형을 맞추는 재미와 함께, 플레이어 간의 협력과 경쟁이 동시에 작용하는 독특한 경험을 제공할 것이다. 특히 피카츄의 귀여운 외형과 핵무기의 파괴력 사이의 갭이 주는 재미가 인상적이다. 《NUKE THE PIKACHU!!!》 stands out in the legacy of *StarCraft: Brood War* custom maps as an 8-player defense-style map where players must work together—and compete—to destroy the Pikachu at the center using nuclear missiles. The Pikachu, acting as an automated enemy (*nemico*), roams freely across the spacious, sci-fi-themed battlefield, firing relentless attacks while players build and launch nukes from their bases. Missile production is handled via facilities placed at key locations, requiring players to balance offense and defense while dodging or countering Pikachu’s assaults. The map blends communal objectives with individual competition: while all players must contribute to Pikachu’s destruction, the one who fires the most missiles earns a bonus, as hinted by the "Diseño" system. The "Auto-Arming SilosModifi" in the info panel suggests an automated missile production setup, likely critical for maintaining equilibrium between defense and aggression. Success hinges on teamwork and foresight—predicting Pikachu’s movement patterns and strategically positioning nukes. Beginners should focus on mastering missile production and timing their launches against Pikachu’s attacks, while veterans can refine coordination, exploit Pikachu’s predictable routes, and maximize damage output. Designed with a moderate difficulty curve, the map likely includes adjustable settings for Pikachu’s aggression and missile cooldowns. Before diving in, check for active vision-expanding tools like radar or sight upgrades, as map awareness is key. Knowing missile trajectory, speed, Pikachu’s durability, and attack patterns will give players a significant strategic edge. The juxtaposition of Pikachu’s adorable design with the sheer destructive power of nuclear weapons creates a uniquely entertaining dynamic, offering both cooperative defense and cutthroat competition in equal measure.
러커 D 18웨이 v6.3 Final (Lurker D 18way v6.3 FiNaL)
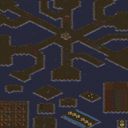
스타크래프트 브루드워의 유즈맵 중에서도 독특한 형식의 디펜스 게임으로 주목받는 〈Lurker D 18way v6.3 FiNaL〉은 다수의 러커가 동시 공격하는 이색적인 전투를 경험할 수 있는 맵이다. 맵의 이름은 러커(Lurker)를 중심으로 18방향의 공격을 펼치는 구조를 의미하며, v6.3 FiNaL 버전은 Vi3tboi818에 의해 최종 개선된 버전임을 시사한다. 내부 설명에 따르면 30초 간격으로 적이 지속적으로 생산되어 난이도가 급격히 상승하는 특징이 있으며, 255단계까지 업그레이드 가능한 시스템을 갖추고 있어 플레이어의 전략적 선택과 적응력이 중요한 포인트로 작용한다. 광물 채취를 위한 미네랄 채굴 유닛도 포함되어 있어 자원 관리와 방어 전략이 혼합된 플레이가 요구된다. 이 맵의 핵심은 러커의 다방향 공격 패턴에 대응하는 것이다. 러커는 지상 유닛을 공격할 수 있지만 공중 유닛에는 무력하다는 한계가 있어, 방어 라인을 구축할 때는 공중 유닛의 비중을 높이는 전략이 효과적이다. 또한 30초 간격으로 쏟아지는 적의 물량은 초반에는 상대적으로 여유롭게 느껴지지만, 후반부로 갈수록 플레이어의 방어선을 압박하는 요소로 변모한다. 255단계까지의 업그레이드는 공격력과 방어력을 극대화할 수 있지만, 너무 일찍 투자하기보다는 자원과 시간을 효율적으로 배분하는 것이 승리의 열쇠가 된다. 맵의 배경은 황무지 타일셋으로 구성되어 있으며, 넓은 시야와 평평한 지형이 러커의 공격 범위를 명확히 확인할 수 있도록 도와준다. 이 맵은 초보자보다는 중급 이상의 플레이어에게 적합하며, 특히 다양한 전략을 시도해보고 싶거나 러커의 특성을 활용한 전투를 즐기고 싶은 유저들에게 추천된다. 방어와 자원 관리의 밸런스를 맞추는 것이 관건이므로, 여러 번의 플레이를 통해 최적의 전략을 찾아가는 것이 좋다. 또한 6인용 맵으로 설계되어 있어 팀 플레이도 가능하다는 점에서, 동료와 협력하여 적의 공격을 버텨내는 재미도 느낄 수 있다. The StarCraft: Brood War custom map 〈Lurker D 18way v6.3 FiNaL〉 stands out as a unique defense game where players face relentless waves of enemies, primarily focusing on Lurkers that attack from 18 different directions. Developed by Vi3tboi818, this version (v6.3 FiNaL) introduces a challenging mechanic where enemy units spawn every 30 seconds, escalating difficulty as the game progresses. The map includes a mineral-mining unit system and allows upgrades up to 255 levels, adding depth to resource management and strategic planning. At its core, the map revolves around countering Lurkers, which excel in ground combat but are ineffective against air units. Players must balance their forces between ground and air defenses, adapting their strategy as the enemy's aggression intensifies. The map’s flat, open terrain, rendered in a barren tileset, provides clear visibility for positioning and attack patterns. While the first few waves may seem manageable, the pressure mounts significantly in later stages, demanding precision and foresight. This map is best suited for intermediate to advanced players who enjoy strategic depth and the challenge of optimizing both defense and resource allocation. The 6-player format also allows for team-based play, making it ideal for those who prefer cooperative strategies over solo challenges. Mastery requires experimentation, so players are encouraged to refine their tactics through repeated attempts to find the most effective approach against the relentless enemy assaults.
DOTD: Last Stand
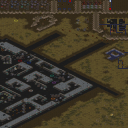
스타크래프트 브루드워의 유즈맵 'DOTD: Last Stand'는 '데드 인베이전'에서 영감을 받은 RPG 스타일의 생존 디펜스 맵이다. 맵의 중앙에 위치한 거대한 요새와 주변으로 넓게 펼쳐진 황무지 지형이 인상적이며, 플레이어는 끊임없이 몰려오는 적 무리 속에서 살아남아야 한다. 맵의 구조는 중앙 요새를 중심으로 방어선과 보급로를 형성할 수 있도록 설계되어 있으며, 지형 활용이 중요하다. 플레이어는 제한적인 자원으로 방어시설을 구축하고, 지속적으로 등장하는 적을 상대하며 생존을 모색해야 한다. 맵 곳곳에 배치된 자원과 보급 기지들은 전략적인 위치를 선점하는 데 유리한 환경을 제공한다. 적의 공세는 점차 강도가 높아지며, 후반부로 갈수록 어려운 전투가 예상된다. 맵의 분위기는 어두운 황무지와 폐허가 혼재된 디자인으로 인해 긴장감을 조성하며, 플레이어는 끊임없이 변하는 전황에 대응해야 한다. 초보자보다는 전략적 사고와 자원 관리가 필요한 중급자 이상에게 추천되는 맵이며, 혼자서 또는 소규모 팀으로도 즐길 수 있도록 구성되어 있다. 플레이 전에는 맵의 구조와 주요 방어 지점을 미리 파악하고, 자원 분배와 방어선의 구축 계획을 세워두는 것이 중요하다. 또한, 적의 공격 패턴을 분석하여 효율적인 대처법을 익히는 것이 생존의 열쇠가 될 것이다. 이 맵은 단순한 디펜스를 넘어, 전략과 생존의 조합을 요구하는 RPG 요소로 구성되어 있어 스타크래프트의 유즈맵 중에서도 독특한 경험을 제공한다. DOTD: Last Stand is a survival defense RPG-style custom map for StarCraft: Brood War, inspired by Dead Invasion. The map features a central fortress surrounded by vast wasteland terrain, forcing players to survive relentless waves of enemies. The layout is designed around the central fortress, allowing strategic placement of defenses and supply routes. Players must construct defenses with limited resources while continuously battling incoming enemies to ensure survival. Scattered resources and supply bases across the map provide advantages for those who secure key positions early. Enemy offensives intensify as the game progresses, increasing difficulty in later stages. The dark, ruined aesthetic of the wasteland enhances the tense atmosphere, requiring constant adaptation to shifting battle conditions. This map is best suited for intermediate to advanced players who enjoy strategic resource management and tactical planning, though it can also be played solo or in small teams. Prior to starting, it is crucial to study the map layout, identify key defensive positions, and plan resource allocation and defense construction. Analyzing enemy attack patterns is essential for devising effective countermeasures. Unlike typical defense maps, this map incorporates RPG elements, blending strategy and survival mechanics to deliver a unique experience within the StarCraft custom map community.
TOS 마스터 II: Supreme (TOS-MasterII-Supreme)
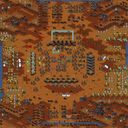
스타크래프트 브루드워의 고전 디펜스 유즈맵인 <TOS-MasterII-Supreme>은 ‘Stay Alive’라는 모토 아래 컴퓨터 유닛과 건물을 파괴하는 목표를 지닌 맵입니다. 황혼 타일셋으로 꾸며진 맵 중앙에는 넓은 개활지가 펼쳐져 있으며, 주위에 플레이어 기지들이 배치되어 있습니다. 맵의 구조상 각각의 플레이어는 초반에는 소수의 유닛으로 시작해 컴퓨터의 끊임없는 공격을 방어하면서 점차 성장해야 합니다. 맵의 특징으로는 중앙에 위치한 컴퓨터 건물들이 끊임없이 유닛을 생산하여 공격해 오는 점인데, 이 유닛들은 강력한 조합을 갖추고 있어 방어선을 구축하지 않으면 순식간에 기지가 무너질 수 있습니다. 또한, 맵의 테두리에는 추가적인 방어 시설이나 리소스가 배치되어 있어 전략적 판단이 요구됩니다. 플레이어는 초반 자원 확보와 방어 태세 구축을 신속히 진행해야 하며, 중반 이후로는 컴퓨터 기지 파괴를 목표로 공격을 펼쳐야 하는 긴장감 넘치는 구조입니다. 이 맵은 특히 컴퓨터 상대 디펜스 유즈맵을 선호하는 유저들에게 적합하며, 방어와 공격의 균형을 맞추는 전략적 깊이가 매력적입니다. 다만, 초보자의 경우 방어 라인을 구축하는 데 어려움을 느낄 수 있으므로, 난이도 조절이 가능한 버전을 찾는 것이 좋습니다. 맵을 플레이하기 전에는 중앙 컴퓨터의 유닛 생산 패턴과 맵의 주요 경로(회랑)를 미리 확인해 두는 것이 중요합니다. 또한, 팀플레이가 가능한 구조는 아니지만, 플레이어 간의 협력이 필요한 경우도 있습니다. 맵의 난이도는 대체로 ‘보통’ 정도로 평가되며, 플레이 시간은 약 30분 내외로 예상됩니다. 다양한 전략적 선택지가 존재하므로, 매 플레이마다 새로운 전술을 시도해 볼 수 있는 재미가 있습니다. This classic Brood War defense custom map, TOS-MasterII-Supreme, challenges players with the core objective of 'Stay Alive' by destroying the AI's units and buildings. Set in the Twilight tileset, the map features a vast central open area surrounded by player bases positioned near the edges. Each player starts with minimal forces, requiring rapid base defense against relentless AI assaults while gradually expanding. A defining feature is the AI's central production buildings, which continuously spawn powerful unit combinations that demand strategic defensive setups. The map's periphery includes additional defensive structures or resources, adding layers of tactical decision-making. Early-game survival hinges on quick resource gathering and base fortification, while mid-to-late game shifts focus to targeting and destroying AI structures. This map is particularly suited for players who enjoy AI-based defense scenarios, offering a balanced mix of defensive tactics and aggressive counterplay. Beginners may struggle with initial defense setups, so opting for difficulty-adjusted versions is advisable. Prior to playing, analyzing the AI's unit production patterns and key pathways (corridors) is crucial for success. While team play isn't explicitly required, cooperative strategies can emerge. The difficulty is generally rated as 'Medium,' with an estimated playtime of around 30 minutes. The map's replayability is high due to its diverse strategic options, encouraging experimentation with different tactics in each session.
![[ПВВ6] – 저그 공격 (Zerg Offensive) 맵 미리보기](https://cdn-star-data.huzy.net/thumbnail_4c872914ece144629eef9d2bc95887cf.jpg)
[ПВВ6] – 저그 공격 (Zerg Offensive)
스타크래프트 브루드워의 유즈맵으로 유명한 '[ПВВ6] – Наступление зергов'는 한 플레이어가 저그 군단을 이끌고 테란 기지를 공격하는 디펜스 게임입니다. 맵은 사막 지형을 배경으로 펼쳐지며, 중앙에 위치한 테란 기지를 향해 끊임없이 몰려드는 저그 웨이브를 방어해야 합니다. 게임의 핵심은 효율적인 자원 관리와 병력 배치로, 초반에는 소규모의 저글링과 히드라리스크가 끊임없이 출현하며, 시간이 지나면서 저그의 공격력이 점점 강해집니다. 플레이어는 미네랄과 가스를 확보해 병력을 강화하고, 방어 건물인 성큰 콜로니와 스포어 콜로니를 건설해 기지를 보호해야 합니다. 특히, 맵의 왼쪽과 오른쪽 하단에 위치한 입구는 저그의 주요 침입 경로로, 이곳을 집중 방어하지 않으면 기지가 순식간에 무너질 위험이 있습니다. 또한, 맵 내 곳곳에 흩어져 있는 보너스 미네랄을 수집해 자원을 절약하는 것이 관건입니다. 게임의 긴장감은 저그의 끊임없는 공격과 플레이어의 방어 능력 사이에서 오가며, 성공적인 방어는 저그의 공격을 막아내고 기지를 지켜내는 순간에 절정을 이룹니다. 초보자도 쉽게 접근할 수 있지만, 고수들은 더 효율적인 병력 운용과 전략으로 게임을 즐길 수 있는 구조입니다. 특히, 저그의 공격 패턴을 미리 예측하고 방어선을 구축하는 것이 중요합니다. 이 맵은 저그의 끊임없는 공격 속에서 플레이어의 전략적 사고와 순간 판단력을 시험하는 재미있는 유즈맵으로, 단일 플레이어용 디펜스 게임을 좋아하는 분들에게 강력히 추천합니다. 플레이 전에는 저그의 공격 패턴과 방어 건물의 배치 위치를 미리 숙지하는 것이 좋습니다. 또한, 자원 수급을 원활히 할 수 있도록 보너스 미네랄의 위치도 확인해 두는 것이 필수입니다. 게임의 난이도는 초보자도 즐길 수 있을 정도로 조절할 수 있지만, 고수들은 더 어려운 난이도로 도전해 볼 수 있습니다. 이 맵을 통해 저그의 공격과 방어의 묘미를 느낄 수 있을 것입니다. Zerg Offensive, a popular Brood War custom map, is a defense-style UMS where a single player controls the Zerg to attack a Terran base. Set in a desert terrain, the map features continuous waves of Zerg units advancing toward the central Terran base, which the player must defend. The core of the gameplay revolves around resource management and strategic unit placement. Initially, small waves of Zerglings and Hydralisks emerge, gradually increasing in strength over time. The player must gather minerals and vespene gas to upgrade their forces and construct defensive buildings like Sunken Colonies and Spore Colonies to protect the base. The lower-left and lower-right entrances are critical choke points where most Zerg attacks occur, making them priority defense zones. Scattered bonus minerals across the map provide additional resources to optimize economy. The tension builds as the player balances between holding off relentless Zerg assaults and expanding their defenses. While accessible to beginners, skilled players can leverage advanced tactics like predicting Zerg attack patterns and optimizing unit compositions. This map is ideal for fans of single-player defense games, testing strategic thinking and quick decision-making under pressure. Before playing, familiarize yourself with Zerg attack patterns, defensive structure placements, and bonus mineral locations. Adjusting difficulty allows both novices and veterans to enjoy the experience, making it a must-try for those seeking the thrill of Zerg versus Terran warfare.
스카우트 블러드 잘하세요 (Scout Blood Jalhaseyo)
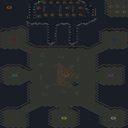
‘스카우트 블러드 잘하세요’는 스타크래프트 브루드워의 유즈맵으로, 커세어 블러드라는 이름의 커스텀 게임입니다. 맵은 설원 테마의 얼음 타일셋으로 꾸며졌으며, 전체 크기 3072x3072의 넓은 공간을 차지하고 있습니다. 내부 설명과 이미지에서 확인되는 바와 같이, 이 맵은 무한한 스플래시 공격을 활용한 공격형 디펜스 게임으로 추정됩니다. 플레이어는 커세어를 조종하여 끊임없이 몰려오는 적 유닛들을 방어하거나 공격해야 하며, 맵 곳곳에 배치된 구조물을 활용해 전략을 세울 수 있습니다. 맵의 특징은 ‘날림’ 작업이라고 언급된 만큼, 빠른 개발과 실험적인 플레이 경험을 제공하는 데 중점을 둔 것으로 보입니다. 내부 설명에서 ‘떠나자! 무한 스플레쉬의 세계로!’라는 문구가 등장하는 점으로 미루어볼 때, 스플래시 공격이 주요 메커니즘일 가능성이 높습니다. 또한, 맵이 wide한 설원 타일셋으로 구성되어 있어 넓은 시야와 넓은 전장 활용이 가능하다는 장점이 있습니다. 플레이어는 7명으로 구성된 팀으로 게임을 진행하며, 각 플레이어의 위치와 역할 분배가 게임의 승패를 좌우할 수 있습니다. 이 맵은 초보자부터 숙련자까지 즐길 수 있도록 설계되었지만, 스플래시 공격을 적극 활용해야 하는 만큼 전략적 사고가 요구됩니다. 특히 넓은 맵에서 적의 진격을 예측하고 방어선을 구축하는 능력이 중요합니다. 또한, 맵 내에 배치된 구조물이나 리소스를 효율적으로 활용하는 것이 관건입니다. ‘무한 스플레쉬’라는 표현이 강조된 만큼, 스플래시 데미지를 극대화할 수 있는 빌드나 조합을 찾는 것이 핵심 전략이 될 것입니다. 플레이어들은 각자의 커세어 유닛을 강화하거나 방어 건물, 보조 유닛 등을 배치해 적의 공세를 막아야 합니다. 이 맵은 실험적이고 재미있는 플레이 경험을 추구하는 유저들에게 특히 추천됩니다. 다만, ‘날림’으로 제작되었다는 점에서 밸런스나 디자인적 완성도는 다소 아쉬울 수 있습니다. 그럼에도 불구하고, 넓은 맵과 스플래시 공격의 조합을 통해 독특한 전투 경험을 제공한다는 점에서 주목할 만한 맵입니다. 초기에는 적응이 필요할 수 있지만, 익숙해지면 다양한 전략을 시도해 볼 수 있는 매력이 있습니다. 플레이 전에는 맵의 구조와 주요 포인트를 미리 숙지하는 것이 좋습니다. 특히, 맵의 중앙 지역이나 주요 길목에 위치한 리소스나 구조물의 위치 파악이 중요합니다. 또한, 팀원과의 실시간 협력이 원활하지 않을 경우, 개인의 전략적 판단이 더욱 중요해질 수 있습니다. 맵의 난이도는 ‘보통’ 정도로 예상되며, 팀워크와 개인의 숙련도가 조화를 이룰 때 최상의 플레이 경험을 얻을 수 있을 것입니다. "Scout Blood Well Done" is a *StarCraft: Brood War* custom map called "Corsair Blood," featuring a snowy ice tileset and spanning a large 3072x3072 space. As seen in its internal description and images, this map appears to be an offensive defense game that leverages infinite splash damage. Players control Corsairs, defending against or attacking relentlessly spawning enemy units while strategizing using structures scattered across the map. Given its mention of being a "rushed" project, the map seems designed to prioritize quick development and experimental gameplay. The internal description’s phrase *"Let’s go! Into the world of infinite splash!"* suggests splash damage is a core mechanic. Additionally, its wide snowy tileset offers expansive visibility and battlefield control. Players compete in teams of seven, with positioning and role distribution playing a crucial role in victory. While accessible to both beginners and veterans, the map demands strategic thinking due to its reliance on splash damage. Success hinges on predicting enemy advances and fortifying defenses across the vast terrain, as well as efficiently utilizing structures and resources. The emphasis on "infinite splash" implies that maximizing splash damage through optimal unit builds or compositions is key. Players must reinforce their Corsairs, deploy defensive buildings, or position auxiliary units to withstand assaults. This map is especially recommended for users seeking experimental and engaging gameplay, though its rushed development may leave some balance or design aspects wanting. Nevertheless, its blend of expansive terrain and splash mechanics delivers a unique combat experience worth noting. While an initial adjustment period may be needed, once mastered, it offers ample room for diverse strategies. Before playing, familiarizing yourself with the map’s layout and key points is advisable. Identifying resource or structure locations—especially around central zones or major pathways—can be critical. If real-time team coordination falters, individual strategic decisions become even more vital. The difficulty is moderate, and optimal enjoyment comes from harmonizing teamwork with personal skill.
최근 등록된 맵
새로 추가된 파일과 버전을 확인하세요.
[ПВВ6] – 저그 공격 (Zerg Offensive)
스타크래프트 브루드워의 유즈맵으로 유명한 '[ПВВ6] – Наступление зергов'는 한 플레이어가 저그 군단을 이끌고 테란 기지를 공격하는 디펜스 게임입니다. 맵은 사막 지형을 배경으로 펼쳐지며, 중앙에 위치한 테란 기지를 향해 끊임없이 몰려드는 저그 웨이브를 방어해야 합니다. 게임의 핵심은 효율적인 자원 관리와 병력 배치로, 초반에는 소규모의 저글링과 히드라리스크가 끊임없이 출현하며, 시간이 지나면서 저그의 공격력이 점점 강해집니다. 플레이어는 미네랄과 가스를 확보해 병력을 강화하고, 방어 건물인 성큰 콜로니와 스포어 콜로니를 건설해 기지를 보호해야 합니다. 특히, 맵의 왼쪽과 오른쪽 하단에 위치한 입구는 저그의 주요 침입 경로로, 이곳을 집중 방어하지 않으면 기지가 순식간에 무너질 위험이 있습니다. 또한, 맵 내 곳곳에 흩어져 있는 보너스 미네랄을 수집해 자원을 절약하는 것이 관건입니다. 게임의 긴장감은 저그의 끊임없는 공격과 플레이어의 방어 능력 사이에서 오가며, 성공적인 방어는 저그의 공격을 막아내고 기지를 지켜내는 순간에 절정을 이룹니다. 초보자도 쉽게 접근할 수 있지만, 고수들은 더 효율적인 병력 운용과 전략으로 게임을 즐길 수 있는 구조입니다. 특히, 저그의 공격 패턴을 미리 예측하고 방어선을 구축하는 것이 중요합니다. 이 맵은 저그의 끊임없는 공격 속에서 플레이어의 전략적 사고와 순간 판단력을 시험하는 재미있는 유즈맵으로, 단일 플레이어용 디펜스 게임을 좋아하는 분들에게 강력히 추천합니다. 플레이 전에는 저그의 공격 패턴과 방어 건물의 배치 위치를 미리 숙지하는 것이 좋습니다. 또한, 자원 수급을 원활히 할 수 있도록 보너스 미네랄의 위치도 확인해 두는 것이 필수입니다. 게임의 난이도는 초보자도 즐길 수 있을 정도로 조절할 수 있지만, 고수들은 더 어려운 난이도로 도전해 볼 수 있습니다. 이 맵을 통해 저그의 공격과 방어의 묘미를 느낄 수 있을 것입니다. Zerg Offensive, a popular Brood War custom map, is a defense-style UMS where a single player controls the Zerg to attack a Terran base. Set in a desert terrain, the map features continuous waves of Zerg units advancing toward the central Terran base, which the player must defend. The core of the gameplay revolves around resource management and strategic unit placement. Initially, small waves of Zerglings and Hydralisks emerge, gradually increasing in strength over time. The player must gather minerals and vespene gas to upgrade their forces and construct defensive buildings like Sunken Colonies and Spore Colonies to protect the base. The lower-left and lower-right entrances are critical choke points where most Zerg attacks occur, making them priority defense zones. Scattered bonus minerals across the map provide additional resources to optimize economy. The tension builds as the player balances between holding off relentless Zerg assaults and expanding their defenses. While accessible to beginners, skilled players can leverage advanced tactics like predicting Zerg attack patterns and optimizing unit compositions. This map is ideal for fans of single-player defense games, testing strategic thinking and quick decision-making under pressure. Before playing, familiarize yourself with Zerg attack patterns, defensive structure placements, and bonus mineral locations. Adjusting difficulty allows both novices and veterans to enjoy the experience, making it a must-try for those seeking the thrill of Zerg versus Terran warfare.
스카우트 블러드 잘하세요 (Scout Blood Jalhaseyo)
‘스카우트 블러드 잘하세요’는 스타크래프트 브루드워의 유즈맵으로, 커세어 블러드라는 이름의 커스텀 게임입니다. 맵은 설원 테마의 얼음 타일셋으로 꾸며졌으며, 전체 크기 3072x3072의 넓은 공간을 차지하고 있습니다. 내부 설명과 이미지에서 확인되는 바와 같이, 이 맵은 무한한 스플래시 공격을 활용한 공격형 디펜스 게임으로 추정됩니다. 플레이어는 커세어를 조종하여 끊임없이 몰려오는 적 유닛들을 방어하거나 공격해야 하며, 맵 곳곳에 배치된 구조물을 활용해 전략을 세울 수 있습니다. 맵의 특징은 ‘날림’ 작업이라고 언급된 만큼, 빠른 개발과 실험적인 플레이 경험을 제공하는 데 중점을 둔 것으로 보입니다. 내부 설명에서 ‘떠나자! 무한 스플레쉬의 세계로!’라는 문구가 등장하는 점으로 미루어볼 때, 스플래시 공격이 주요 메커니즘일 가능성이 높습니다. 또한, 맵이 wide한 설원 타일셋으로 구성되어 있어 넓은 시야와 넓은 전장 활용이 가능하다는 장점이 있습니다. 플레이어는 7명으로 구성된 팀으로 게임을 진행하며, 각 플레이어의 위치와 역할 분배가 게임의 승패를 좌우할 수 있습니다. 이 맵은 초보자부터 숙련자까지 즐길 수 있도록 설계되었지만, 스플래시 공격을 적극 활용해야 하는 만큼 전략적 사고가 요구됩니다. 특히 넓은 맵에서 적의 진격을 예측하고 방어선을 구축하는 능력이 중요합니다. 또한, 맵 내에 배치된 구조물이나 리소스를 효율적으로 활용하는 것이 관건입니다. ‘무한 스플레쉬’라는 표현이 강조된 만큼, 스플래시 데미지를 극대화할 수 있는 빌드나 조합을 찾는 것이 핵심 전략이 될 것입니다. 플레이어들은 각자의 커세어 유닛을 강화하거나 방어 건물, 보조 유닛 등을 배치해 적의 공세를 막아야 합니다. 이 맵은 실험적이고 재미있는 플레이 경험을 추구하는 유저들에게 특히 추천됩니다. 다만, ‘날림’으로 제작되었다는 점에서 밸런스나 디자인적 완성도는 다소 아쉬울 수 있습니다. 그럼에도 불구하고, 넓은 맵과 스플래시 공격의 조합을 통해 독특한 전투 경험을 제공한다는 점에서 주목할 만한 맵입니다. 초기에는 적응이 필요할 수 있지만, 익숙해지면 다양한 전략을 시도해 볼 수 있는 매력이 있습니다. 플레이 전에는 맵의 구조와 주요 포인트를 미리 숙지하는 것이 좋습니다. 특히, 맵의 중앙 지역이나 주요 길목에 위치한 리소스나 구조물의 위치 파악이 중요합니다. 또한, 팀원과의 실시간 협력이 원활하지 않을 경우, 개인의 전략적 판단이 더욱 중요해질 수 있습니다. 맵의 난이도는 ‘보통’ 정도로 예상되며, 팀워크와 개인의 숙련도가 조화를 이룰 때 최상의 플레이 경험을 얻을 수 있을 것입니다. "Scout Blood Well Done" is a *StarCraft: Brood War* custom map called "Corsair Blood," featuring a snowy ice tileset and spanning a large 3072x3072 space. As seen in its internal description and images, this map appears to be an offensive defense game that leverages infinite splash damage. Players control Corsairs, defending against or attacking relentlessly spawning enemy units while strategizing using structures scattered across the map. Given its mention of being a "rushed" project, the map seems designed to prioritize quick development and experimental gameplay. The internal description’s phrase *"Let’s go! Into the world of infinite splash!"* suggests splash damage is a core mechanic. Additionally, its wide snowy tileset offers expansive visibility and battlefield control. Players compete in teams of seven, with positioning and role distribution playing a crucial role in victory. While accessible to both beginners and veterans, the map demands strategic thinking due to its reliance on splash damage. Success hinges on predicting enemy advances and fortifying defenses across the vast terrain, as well as efficiently utilizing structures and resources. The emphasis on "infinite splash" implies that maximizing splash damage through optimal unit builds or compositions is key. Players must reinforce their Corsairs, deploy defensive buildings, or position auxiliary units to withstand assaults. This map is especially recommended for users seeking experimental and engaging gameplay, though its rushed development may leave some balance or design aspects wanting. Nevertheless, its blend of expansive terrain and splash mechanics delivers a unique combat experience worth noting. While an initial adjustment period may be needed, once mastered, it offers ample room for diverse strategies. Before playing, familiarizing yourself with the map’s layout and key points is advisable. Identifying resource or structure locations—especially around central zones or major pathways—can be critical. If real-time team coordination falters, individual strategic decisions become even more vital. The difficulty is moderate, and optimal enjoyment comes from harmonizing teamwork with personal skill.
TOS 마스터 II: Supreme (TOS-MasterII-Supreme)
스타크래프트 브루드워의 고전 디펜스 유즈맵인 <TOS-MasterII-Supreme>은 ‘Stay Alive’라는 모토 아래 컴퓨터 유닛과 건물을 파괴하는 목표를 지닌 맵입니다. 황혼 타일셋으로 꾸며진 맵 중앙에는 넓은 개활지가 펼쳐져 있으며, 주위에 플레이어 기지들이 배치되어 있습니다. 맵의 구조상 각각의 플레이어는 초반에는 소수의 유닛으로 시작해 컴퓨터의 끊임없는 공격을 방어하면서 점차 성장해야 합니다. 맵의 특징으로는 중앙에 위치한 컴퓨터 건물들이 끊임없이 유닛을 생산하여 공격해 오는 점인데, 이 유닛들은 강력한 조합을 갖추고 있어 방어선을 구축하지 않으면 순식간에 기지가 무너질 수 있습니다. 또한, 맵의 테두리에는 추가적인 방어 시설이나 리소스가 배치되어 있어 전략적 판단이 요구됩니다. 플레이어는 초반 자원 확보와 방어 태세 구축을 신속히 진행해야 하며, 중반 이후로는 컴퓨터 기지 파괴를 목표로 공격을 펼쳐야 하는 긴장감 넘치는 구조입니다. 이 맵은 특히 컴퓨터 상대 디펜스 유즈맵을 선호하는 유저들에게 적합하며, 방어와 공격의 균형을 맞추는 전략적 깊이가 매력적입니다. 다만, 초보자의 경우 방어 라인을 구축하는 데 어려움을 느낄 수 있으므로, 난이도 조절이 가능한 버전을 찾는 것이 좋습니다. 맵을 플레이하기 전에는 중앙 컴퓨터의 유닛 생산 패턴과 맵의 주요 경로(회랑)를 미리 확인해 두는 것이 중요합니다. 또한, 팀플레이가 가능한 구조는 아니지만, 플레이어 간의 협력이 필요한 경우도 있습니다. 맵의 난이도는 대체로 ‘보통’ 정도로 평가되며, 플레이 시간은 약 30분 내외로 예상됩니다. 다양한 전략적 선택지가 존재하므로, 매 플레이마다 새로운 전술을 시도해 볼 수 있는 재미가 있습니다. This classic Brood War defense custom map, TOS-MasterII-Supreme, challenges players with the core objective of 'Stay Alive' by destroying the AI's units and buildings. Set in the Twilight tileset, the map features a vast central open area surrounded by player bases positioned near the edges. Each player starts with minimal forces, requiring rapid base defense against relentless AI assaults while gradually expanding. A defining feature is the AI's central production buildings, which continuously spawn powerful unit combinations that demand strategic defensive setups. The map's periphery includes additional defensive structures or resources, adding layers of tactical decision-making. Early-game survival hinges on quick resource gathering and base fortification, while mid-to-late game shifts focus to targeting and destroying AI structures. This map is particularly suited for players who enjoy AI-based defense scenarios, offering a balanced mix of defensive tactics and aggressive counterplay. Beginners may struggle with initial defense setups, so opting for difficulty-adjusted versions is advisable. Prior to playing, analyzing the AI's unit production patterns and key pathways (corridors) is crucial for success. While team play isn't explicitly required, cooperative strategies can emerge. The difficulty is generally rated as 'Medium,' with an estimated playtime of around 30 minutes. The map's replayability is high due to its diverse strategic options, encouraging experimentation with different tactics in each session.
심즈 온 베케이션 (Sims on Vacation Updated)
이 맵은 스타크래프트 브루드워의 유즈맵으로, 플레이어가 ‘심즈’ 역할을 맡아 휴가를 즐기며 진행하는 독특한 디펜스 및 서바이벌 장르의 맵이다. 내부 맵 설명에 따르면 ‘The sims are on vacation’라는 콘셉트를 기반으로, 1~2명의 플레이어가 필수이며 최대 7명까지 참여할 수 있도록 설계되었다. 맵은 사막 타일셋으로 구성되어 있으며, 거대한 4096x4096 크기의 넓은 공간에서 펼쳐진다. 맵의 주요 특징은 ‘휴가’라는 테마에 맞게 자연 경관과 건물, 수영장, 해변가 등 휴양지를 연상시키는 구조물이 배치되어 있다는 점이다. 플레이어는 각자 고유한 건물을 짓고 자원을 관리하며, 끊임없이 몰려오는 적 유닛(보이는 바로는 저글링, 히드라리스크 등)을 방어하는 방식으로 진행된다. 맵의 승패 조건이나 구체적인 게임 루프는 확인되지 않지만, ‘have fun’이라는 설명과 함께 플레이 경험을 중시하는 구성이 특징이다. 넓은 맵과 사막 배경은 휴양지라는 테마에 잘 어울리며, 디펜스 요소와 함께 전략적인 자원 관리와 공간 활용이 요구된다. 이 맵은 특히 휴가 테마를 좋아하는 유저나 디펜스 장르를 선호하는 플레이어에게 추천할 만하다. 단, 내부 설명에 ‘player 1 2 required’라는 문구가 포함된 점, 그리고 최대 7명까지 참여 가능하다는 점은 다소 혼동스러우며, 팀 구성이 필요한지에 대한 명확한 정보는 없다. 플레이 전에는 맵의 승리 조건, AI 난이도, 또는 추가적인 규칙을 확인하는 것이 좋다. This StarCraft: Brood War custom map offers a unique blend of defense and survival gameplay centered around the ‘The Sims on Vacation’ theme. Designed for 1 to 2 players (with a maximum capacity of 7), the map features a sprawling 4096x4096 desert-themed environment filled with vacation-inspired structures like beaches, pools, and buildings. Players must construct their own bases while managing resources to defend against waves of enemy units, primarily Zerglings and Hydralisks as observed. The map’s core mechanic revolves around balancing resource allocation and spatial strategy within a relaxing yet challenging vacation setting. While the exact victory conditions remain unclear, the emphasis on ‘having fun’ suggests a casual yet engaging experience. The desert tileset and thematic elements create an immersive atmosphere, making it ideal for players who enjoy defense-focused maps with a twist. However, the discrepancy between the required player count (1-2) and the maximum capacity (7) may cause confusion, so clarifying the team structure or additional rules before playing is advisable.
픽 유어 애택커! 3v3! V.4 (Pick your attacker! 3v3! V.4)
‘픽 유어 애택커! 3v3! V.4’는 스타크래프트 브루드워에서 즐기는 3:3 팀전 디펜스 유즈맵으로, 적 건물 파괴를 목표로 삼는 공격형 디펜스 장르에 속한다. 맵 중앙에 위치한 좁은 통로와 양측 기지 사이의 넓은 평지가 특징으로, 각 팀은 좁은 길목을 활용해 적의 공격을 방어하거나 반격할 기회를 노려야 한다. 맵 이미지를 보면 중앙 통로 양옆으로 넓은 평지가 펼쳐져 있어 지상 유닛의 기동성과 컨트롤이 중요한 역할을 할 것으로 추정된다. 또한, 통로 양측의 언덕과 협소한 지형은 시야 확보와 유닛 배치에 전략적 이점을 제공할 가능성이 높다. 플레이어는 팀원과 협력해 적의 기지를 공략하거나 방어 진지를 구축해야 하며, 좁은 통로와 넓은 평지의 조화는 유닛의 이동 경로를 제한하면서도 넓은 시야를 확보할 수 있도록 설계된 것으로 보인다. 맵 하단과 상단에 위치한 기지 주변의 방어 건물과 자원 분포는 초반Resource Management와 유닛 생산 타이밍이 승패를 좌우할 수 있음을 시사한다. 특히, 협소한 통로에서 벌어지는 교전은 컨트롤과 타이밍이 중요한 요소로 작용할 것이며, 넓은 평지에서의 기동전은 다수의 유닛을 효율적으로 운용할 수 있는 플레이어에게 유리하게 작용할 것이다. 이 맵은 경쟁력이 있는 유즈맵답게 밸런스 조절과 플레이어간 실력 격차를 고려한 디자인으로 보인다. 초보 플레이어의 경우 좁은 통로에서의 전투와 협동 플레이에 익숙해지는 데 시간이 필요할 것이며, 숙련된 플레이어는 넓은 시야와 기동성을 활용한 전략적 플레이가 가능할 것이다. ‘픽 유어 애택커! 3v3! V.4’는 팀워크와 전략적 사고가 요구되는 맵으로, 3대3 팀전의 짜릿함을 느끼고 싶다면 추천할 만한 작품이다. 특히, 중앙 통로와 넓은 평지의 조화가 주는 긴장감과 짜릿한 전투가 맵의 매력으로 느껴진다. 게임을 시작하기 전, 팀원과의 전략 회의와 유닛 구성을 미리 준비해 두는 것이 좋다. This 3v3 team-based defense custom map, titled ‘Pick your attacker! 3v3! V.4’, challenges players to destroy enemy buildings in a strategic StarCraft: Brood War environment. The map features a narrow central corridor flanked by wide open areas on both sides, creating a balanced mix of restricted movement and expansive maneuvering space. The central choke point forces players to focus on tight control and quick decision-making, while the surrounding flat terrain allows for broader unit positioning and flanking maneuvers. The layout suggests that teamwork and coordination are essential, as players must navigate the narrow passages to defend their base while also launching coordinated attacks. The distribution of resources and defensive structures near the bases implies that early-game resource management and unit production timing play critical roles in securing an advantage. Players skilled in micro-management will excel in the choke points, while those adept at army positioning and mobility will thrive in the open areas. Designed for competitive play, this map likely balances skill levels to ensure fair and engaging matches. Beginners may find the tight corridors and team coordination challenging, whereas experienced players can leverage the wide fields for strategic depth. The dynamic interplay between the narrow pathways and open spaces creates an intense and thrilling experience, making it ideal for team-based defense battles. Before diving in, reviewing team strategies and unit compositions will enhance the overall experience.
피카츄 핵폭격 (NUKE THE PIKACHU!!!)
스타크래프트 브루드워의 유즈맵 계보에서 독특한 개성을 자랑하는 《NUKE THE PIKACHU!!!》는 8인용 디펜스형 맵으로, 플레이어들이 피카츄를 핵미사일로 파괴하는 목표를 달성하기 위해 협력하고 경쟁하는 구조로 설계되었다. 맵 중앙에 위치한 피카츄는 자동으로 움직이는 nemico(적)로, 플레이어들은 각자의 기지에서 핵무기를 생산하여 이를 제거해야 한다. 지형은 우주 테마의 넓은 평지 형태로, 타일셋과 배치로 보아 우주 공간을 연상시키는 배경이 돋보인다. 핵미사일은 특정 위치에 배치된 시설을 통해 생산되며, 피카츄는 맵을 자유롭게 이동하며 위협적인 공격을 가한다. 플레이어는 핵미사일을 조준하고 발사하는 동시에, 피카츄의 공격을 방어하거나 회피하는 전략을 세워야 한다. 맵의 핵심은 ‘공동 목표’와 ‘개인 경쟁’의 혼합으로, 모든 플레이어가 피카츄를 파괴하는 데 기여해야 하지만, 핵미사일을 가장 많이 발사한 플레이어가 최종 보너스를 받을 수 있는 Diseño(디자인)도 포함된 것으로 추정된다. 맵의 인포메이션 창에 표시된 ‘Auto-Arming SilosModifi’는 핵미사일 자동 생산 시스템을 의미하는 것으로 보이며, 이는 디펜스와 공격의 균형을 맞추는 데 중요한 역할을 할 것이다. 추천 플레이 방식은 ‘팀 플레이’와 ‘전략적 협력’으로, 피카츄의 이동 패턴을 예측하고 핵미사일을 효율적으로 배치하는 것이 승리의 열쇠다. 초보 플레이어는 핵미사일 생산의 기본 메커니즘을 익히고, 피카츄의 공격 타이밍을 관찰하는 데 집중해야 한다. 반면 숙련된 플레이어는 핵미사일 발사 타이밍을 조율하고, 피카츄의 위치를 예측하여 더 많은 피해를 입히는 전략을 구사할 수 있다. 맵의 난이도는 ‘보통’ 정도로 예상되며, 피카츄의 공격 패턴과 핵미사일의 생산 속도를 조절하는 설정이 포함되어 있을 가능성이 높다. 플레이 전에는 맵의 시야를 확보하기 위한 ‘시야 확장’이나 ‘레이더’ 기능이 활성화되어 있는지 확인하는 것이 좋다. 또한, 핵미사일의 발사 각도와 속도, 피카츄의 체력과 공격력에 대한 사전 정보가 제공된다면 전략 수립에 큰 도움이 될 것이다. 이 맵은 디펜스와 공격의 균형을 맞추는 재미와 함께, 플레이어 간의 협력과 경쟁이 동시에 작용하는 독특한 경험을 제공할 것이다. 특히 피카츄의 귀여운 외형과 핵무기의 파괴력 사이의 갭이 주는 재미가 인상적이다. 《NUKE THE PIKACHU!!!》 stands out in the legacy of *StarCraft: Brood War* custom maps as an 8-player defense-style map where players must work together—and compete—to destroy the Pikachu at the center using nuclear missiles. The Pikachu, acting as an automated enemy (*nemico*), roams freely across the spacious, sci-fi-themed battlefield, firing relentless attacks while players build and launch nukes from their bases. Missile production is handled via facilities placed at key locations, requiring players to balance offense and defense while dodging or countering Pikachu’s assaults. The map blends communal objectives with individual competition: while all players must contribute to Pikachu’s destruction, the one who fires the most missiles earns a bonus, as hinted by the "Diseño" system. The "Auto-Arming SilosModifi" in the info panel suggests an automated missile production setup, likely critical for maintaining equilibrium between defense and aggression. Success hinges on teamwork and foresight—predicting Pikachu’s movement patterns and strategically positioning nukes. Beginners should focus on mastering missile production and timing their launches against Pikachu’s attacks, while veterans can refine coordination, exploit Pikachu’s predictable routes, and maximize damage output. Designed with a moderate difficulty curve, the map likely includes adjustable settings for Pikachu’s aggression and missile cooldowns. Before diving in, check for active vision-expanding tools like radar or sight upgrades, as map awareness is key. Knowing missile trajectory, speed, Pikachu’s durability, and attack patterns will give players a significant strategic edge. The juxtaposition of Pikachu’s adorable design with the sheer destructive power of nuclear weapons creates a uniquely entertaining dynamic, offering both cooperative defense and cutthroat competition in equal measure.
러커 D 18웨이 v6.3 Final (Lurker D 18way v6.3 FiNaL)
스타크래프트 브루드워의 유즈맵 중에서도 독특한 형식의 디펜스 게임으로 주목받는 〈Lurker D 18way v6.3 FiNaL〉은 다수의 러커가 동시 공격하는 이색적인 전투를 경험할 수 있는 맵이다. 맵의 이름은 러커(Lurker)를 중심으로 18방향의 공격을 펼치는 구조를 의미하며, v6.3 FiNaL 버전은 Vi3tboi818에 의해 최종 개선된 버전임을 시사한다. 내부 설명에 따르면 30초 간격으로 적이 지속적으로 생산되어 난이도가 급격히 상승하는 특징이 있으며, 255단계까지 업그레이드 가능한 시스템을 갖추고 있어 플레이어의 전략적 선택과 적응력이 중요한 포인트로 작용한다. 광물 채취를 위한 미네랄 채굴 유닛도 포함되어 있어 자원 관리와 방어 전략이 혼합된 플레이가 요구된다. 이 맵의 핵심은 러커의 다방향 공격 패턴에 대응하는 것이다. 러커는 지상 유닛을 공격할 수 있지만 공중 유닛에는 무력하다는 한계가 있어, 방어 라인을 구축할 때는 공중 유닛의 비중을 높이는 전략이 효과적이다. 또한 30초 간격으로 쏟아지는 적의 물량은 초반에는 상대적으로 여유롭게 느껴지지만, 후반부로 갈수록 플레이어의 방어선을 압박하는 요소로 변모한다. 255단계까지의 업그레이드는 공격력과 방어력을 극대화할 수 있지만, 너무 일찍 투자하기보다는 자원과 시간을 효율적으로 배분하는 것이 승리의 열쇠가 된다. 맵의 배경은 황무지 타일셋으로 구성되어 있으며, 넓은 시야와 평평한 지형이 러커의 공격 범위를 명확히 확인할 수 있도록 도와준다. 이 맵은 초보자보다는 중급 이상의 플레이어에게 적합하며, 특히 다양한 전략을 시도해보고 싶거나 러커의 특성을 활용한 전투를 즐기고 싶은 유저들에게 추천된다. 방어와 자원 관리의 밸런스를 맞추는 것이 관건이므로, 여러 번의 플레이를 통해 최적의 전략을 찾아가는 것이 좋다. 또한 6인용 맵으로 설계되어 있어 팀 플레이도 가능하다는 점에서, 동료와 협력하여 적의 공격을 버텨내는 재미도 느낄 수 있다. The StarCraft: Brood War custom map 〈Lurker D 18way v6.3 FiNaL〉 stands out as a unique defense game where players face relentless waves of enemies, primarily focusing on Lurkers that attack from 18 different directions. Developed by Vi3tboi818, this version (v6.3 FiNaL) introduces a challenging mechanic where enemy units spawn every 30 seconds, escalating difficulty as the game progresses. The map includes a mineral-mining unit system and allows upgrades up to 255 levels, adding depth to resource management and strategic planning. At its core, the map revolves around countering Lurkers, which excel in ground combat but are ineffective against air units. Players must balance their forces between ground and air defenses, adapting their strategy as the enemy's aggression intensifies. The map’s flat, open terrain, rendered in a barren tileset, provides clear visibility for positioning and attack patterns. While the first few waves may seem manageable, the pressure mounts significantly in later stages, demanding precision and foresight. This map is best suited for intermediate to advanced players who enjoy strategic depth and the challenge of optimizing both defense and resource allocation. The 6-player format also allows for team-based play, making it ideal for those who prefer cooperative strategies over solo challenges. Mastery requires experimentation, so players are encouraged to refine their tactics through repeated attempts to find the most effective approach against the relentless enemy assaults.
5:3 컴까기 헌터 초 255업 (5:3 Compkagi Hunter Final 255)
스타크래프트 브루드워의 5:3 컴까기 장르 유즈맵으로, ‘헌터초 255업’이라는 부제가 붙은 이 맵은 2006년 3월 13일에 제작된 AUDGNSWLWHS의 작품이다. 내부 맵 제목과 설명을 통해 확인할 수 있듯이, 5명의 플레이어가 3명의 컴퓨터를 상대로 컴까기(컴퓨터 상대 유즈맵) 형식으로 진행되는 구조로 추정된다. 타일셋은 사막으로 설정되어 있으며, 맵 크기는 4096x4096의 대규모로 제작되어 전체적인 분위기는 넓은 사막 지형이 펼쳐진 형태로 보인다. 맵 제목에 포함된 ‘[255]’는 버전 넘버링으로, 개발 과정에서 최종 완성 단계에 도달했음을 의미하는 것으로 추정된다. 제작자 메모에서 ‘어셀트 비밀이다’라는 표현이 포함되어 있어, 개발 당시에는 비공개 상태로 개발되었다가 이후 배포되었을 가능성이 있다. 이 맵은 5명의 플레이어가 각자 자신만의 진영을 구축하고, 3명의 컴퓨터가 지속적으로 공격을 가하는 방식으로 진행된다. 플레이어는 자원을 채취하고 건물을 건설하여 방어선을 구축하는 동시에, 컴퓨터의 공격을 방어하거나 역습을 가하는 전략을 세워야 한다. 맵의 구성상으로는 중앙에 넓은 공간이 있어 대규모 전투가 벌어질 가능성이 크며, 사막 타일셋의 특징상 시야가 넓고 개활지가 많아 전략적 움직임이 중요할 것으로 보인다. 맵의 제목에서 ‘헌터’라는 단어는 플레이어가 컴퓨터를 사냥하는 입장이라는 점을 강조하는 것으로, 방어뿐만 아니라 공격적 플레이도 요구되는 맵으로 예상된다. 이 맵을 플레이하기에 가장 적합한 대상은 스타크래프트의 컴까기 장르를 좋아하는 유저들로, 특히 5인 플레이가 가능한 환경에서 즐기고자 하는 플레이어에게 추천된다. 또한, 넓은 맵 크기와 사막 타일셋의 개활지 특성상 전략적 사고와 빠른 판단력이 요구되므로, 초보자보다는 적어도 기본적인 스타크래프트 운영 능력을 갖춘 유저가 플레이하는 것이 바람직할 것이다. 맵의 버전 넘버링과 제작 일자, 제작자 정보가 명시되어 있어, 구버전과의 차이점이나 제작 과정에 대한 интерес 있는 배경 스토리를 가진 맵으로도 볼 수 있다. 플레이 전에는 맵의 규모가 크고 개활지가 많다는 점을 고려하여, 초반 자원 관리와 건물을 배치하는 전략을 미리 세워두는 것이 중요하다. 또한, 컴퓨터의 공격 패턴을 예측하고 방어선을 효율적으로 구축하는 연습을 해두면 게임 진행이 훨씬 수월할 것이다. 5명의 플레이어가 원활하게 협력할 수 있도록 팀 간 의사소통도 필수적이며, 넓은 맵에서 발생할 수 있는 시야 문제와 자원 분포를 미리 숙지하고 있어야 한다. 이 맵은 단순히 방어만 하는 것이 아니라, 컴퓨터를 상대로 적극적인 공세를 펼치는 전략도 중요하므로, 공격과 방어의 균형을 잘 맞추는 플레이가 필요할 것이다. This StarCraft: Brood War custom map, titled '5:3 컴까기헌터초[255]업,' is a 5 versus 3 computer-killing (compkagi) UMS map created by AUDGNSWLWHS on March 13, 2006. The internal map name and description confirm its structure as a large-scale desert-themed map (4096x4096 tiles) where five players defend against three AI opponents. The '[255]' in the title suggests it was considered a finalized version during development, while the developer's note mentioning '어셀트 비밀이다' (Aselt secret) implies early versions were kept private before release. The gameplay revolves around five players establishing bases, gathering resources, and building defenses while fending off relentless AI assaults. The vast open desert terrain allows for large-scale battles, with the map's layout likely featuring choke points and expansion opportunities. The term '헌터' (Hunter) in the title underscores the offensive nature of the map, where players are expected not only to defend but also to counterattack and eliminate the AI opponents. Ideal for players who enjoy StarCraft's UMS compkagi genre, especially those seeking a 5-player competitive experience. The map's scale and open terrain demand strategic foresight, quick decision-making, and efficient resource management, making it more suitable for intermediate to advanced players. The desert tileset provides excellent visibility but also exposes players to long-range attacks, requiring careful positioning and defensive planning. Before playing, it's crucial to prepare a build order and base layout strategy to manage the expansive map effectively. Predicting AI attack patterns and establishing layered defenses will significantly improve performance. Since the map emphasizes both offense and defense, players should balance aggression with caution—coordinating with teammates to control key areas while pressuring AI structures. The map's scale and mechanics reward players who can adapt their strategies dynamically to the AI's evolving tactics.
맵 선택 가이드
태그는 맵의 핵심 특징을 빠르게 설명하지만 제작 버전마다 규칙이 다를 수 있습니다. 상세 설명에서 권장 인원, 난이도, 플레이 시간과 버전을 함께 확인한 뒤 다운로드하세요.