
공격과 방어 스타크래프트 맵 모음
'공격과 방어' 태그가 등록된 맵을 모았습니다. 장르 하나로 찾기 어려운 플레이 방식, 난이도와 특징을 중심으로 인기 맵과 최신 맵을 비교해 보세요.
- 등록 맵
- 28개
- 누적 다운로드
- 17
- 누적 조회
- 1,185
인기 맵
다운로드와 조회 반응이 높은 맵입니다.
★섬맵★Super ★ 빠른무한
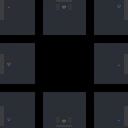
스타크래프트 브루드워의 전장 형태가 섬으로만 구성된 독특한 맵, ★섬맵★Super ★ 빠른무한(Island Rush: Super Infinite)은 8명의 플레이어가 한 팀에 소속되어 무한한 전투를 펼치는 팀 밀리 유즈맵이다. 맵의 이름은 섬 모양의 지형이 특징적이며, 12시와 6시 방향에 가스 수정 기지가 배치되어 있어 자원 확보가 전략적으로 중요하다는 특징을 지닌다. 우주 타일셋을 기반으로 한 어두운 분위기의 맵은 넓은 개방형 공간과 좁은 섬 지형이 교차하는 구조로, 빠른 교전과 이동이 강제되는 플레이 환경을 제공한다. 이 맵의 가장 큰 특징은 무한한 전투를 지향한다는 점이다. 승리 조건이나 제한 시간이 없으며, 오로지 상대 팀의 건물을 모두 파괴하는 것이 목표로 보인다. 좁은 섬 지형과 넓은 수면이 어우러진 지형은 자연스럽게 전투를 유도하며, 섬과 섬 사이의 이동을 위한 다리 역할을 하는 좁은 길목이 여러 군데 존재한다. 이러한 지형적 특징은 플레이어들에게 끊임없는 전투를 강요하며, 섬 간의 이동을 둘러싼 전략적 선택을 요구한다. 전략적인 측면에서 보자면, 가스 수정 기지의 확보가 게임의 초반을 좌우할 가능성이 높다. 가스가 풍부한 12시와 6시 방향의 기지는 자원 확보의 관점에서 매우 유리한 위치에 있으며, 이 곳을 얼마나 빨리 안정적으로 차지하느냐가 게임의 흐름을 결정할 수 있다. 또한, 좁은 길목과 좁은 섬 지형은 방어와 공격을 위한 자연스러운 요새가 되기 때문에, 각 섬의 지배력을 두고 치열한 전투가 벌어질 것으로 예상된다. 초보 플레이어라면 섬 간의 이동과 가스 수정 기지의 확보를 우선순위로 삼아 차근차근 전략을 세워나가는 것이 좋다. 반면, 숙련된 플레이어는 좁은 길목에서의 치고 빠지기와 섬 간의 기습적인 공격을 통해 상대를 혼란에 빠뜨리는 전술을 구사할 수 있을 것이다. 이 맵은 특히 팀워크가 중요한 유즈맵으로, 팀원 간의 원활한 의사소통과 협력이 없으면 섬 간의 이동이나 가스 수정 기지 방어가 어려워질 수 있다. 또한, 맵의 무한한 전투 특성상 체력 관리가 중요하며, 지속적인 전투로 인해 자원과 유닛의 보충이 끊임없이 요구된다. 맵의 지형과 특성을 충분히 숙지한 후, 팀원들과의 전략적인 협의를 통해 승리를 노려보자. StarCraft: Brood War’s unique ★Island Rush: Super Infinite★ map features a battlefield composed entirely of islands, where eight players per team engage in endless team melee combat. The map’s name reflects its island-shaped terrain, with gas geysers positioned at the 12 and 6 o’clock directions—securing these resources early becomes a critical strategic advantage. Set in a dark, cosmic tileset, the map blends wide open spaces with narrow island terrain, forcing rapid engagements and constant movement. The defining feature of this map is its emphasis on infinite combat. There are no victory conditions or time limits—only the objective of destroying all enemy buildings. The mix of narrow islands and expansive waters naturally funnels players into frequent battles, while the sparse bridges connecting the islands create choke points that shape strategic decisions. These geographical traits demand relentless combat and force players to carefully weigh their paths between islands. From a strategic standpoint, securing the gas geysers early can dominate the early game. The rich resources at 12 and 6 o’clock make these positions highly advantageous, and whoever claims them first often dictates the flow of battle. The narrow bridges and confined island spaces also serve as natural strongholds for both defense and offense, leading to fierce struggles over island control. Beginners should prioritize safe island traversal and gas geyser capture to build a foundation, while veteran players can exploit tight chokepoints and ambush tactics to disrupt opponents. This map thrives on teamwork, as poor communication can cripple coordination during island transitions or gas geyser defense. Given the endless combat, managing health and constantly replenishing resources and units are essential. Study the terrain and coordinate closely with teammates to turn these challenges into victory.
임파서블 크레그미 아쿠아 (Impossible Kregmy Aqua v1.1)
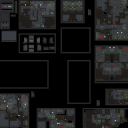
스타크래프트 브루드워의 유즈맵 ‘Impossible Kregmy Aqua v1.1’은 우주 테마를 배경으로 한 디펜스 장르의 유즈맵으로, 6명의 플레이어가 각자 기지를 방어하며 적의 공격을 버텨내야 하는 컴까기 형식을 갖추고 있다. 맵의 전체적인 구조는 중앙 광장과 같은 넓은 공간을 중심으로 각 플레이어의 기지가 배치되어 있으며, 기지 주변에는 방어 건물과 자원 채취 지역이 배치되어 있다. 맵의 이름은 ‘Kregmy’라는 단어와 ‘Aqua’라는 단어가 결합된 형태로, ‘Kregmy’는 제작자 Flemy의 닉네임에서, ‘Aqua’는 물 또는 우주를 연상시키는 테마에서 유래했을 것으로 추정된다. 맵의 제목에 포함된 ‘Impossible’이라는 단어가 시사하듯, 난이도는 상당히 높은 편으로 보이며, 플레이어는 제한된 자원과 지속적인 적의 공격을 효율적으로 방어해야만 생존할 수 있는 구조로 설계되어 있다. 플레이 방식은 기본적으로 컴까기(컴퓨터 상대 유즈맵)로, 플레이어는 각자의 기지에서 자원을 채취하고 방어 건물을 건설하여 적의 공격을 방어하는 동시에, 공격 유닛을 생산해 적 기지를 공격하는 형태로 진행된다. 맵의 중앙에는 넓은 평지가 펼쳐져 있으며, 각 기지 주변에는 높은 언덕과 좁은 통로가 있어 방어 라인을 구축하기 용이하다. 또한, 맵 곳곳에 배치된 자원 지역은 플레이어가 자원을 안정적으로 확보할 수 있도록 돕지만, 적의 공격에 노출되어 있어 신중한 자원 관리가 요구된다. 맵의 디자인상으로는 우주 테마에 걸맞게 어두운 배경과 푸른빛의 액체 같은 질감이 느껴지는 타일셋이 사용되어, 우주 공간의 분위기를 잘 살리고 있다. 이 맵을 추천하는 대상은 스타크래프트 브루드워의 유즈맵을 즐겨 플레이하는 유저, 특히 디펜스 장르에 익숙한 플레이어와 컴까기 형식을 선호하는 유저들이다. 난이도가 높기 때문에 초보자는 다소 어려움을 느낄 수 있지만, 방어 전략과 자원 관리, 유닛 생산의 밸런스를 carefully 다룰 수 있다면 충분히 도전해 볼 만한 가치가 있다. 플레이 전에는 맵의 초기 배치와 방어 건물의 위치, 자원 지역의 분포를 꼼꼼히 확인하고, 적의 공격 패턴을 예측하는 연습을 하는 것이 중요하다. 또한, 맵의 제작자 Discord 채널로 피드백을 남길 수 있어, 개선점을 제안하거나 다른 플레이어들과의 교류도 가능하다. 이 맵은 단순히 방어만 하는 것이 아니라, 공격과 방어의 균형을 맞추며 적 기지를 파괴하는 전략적 요소가 강하기 때문에, 한 번의 실수로 게임이 끝날 수 있는 긴장감을 느낄 수 있다. 맵의 디자인과 난이도가 조화를 이룬 만큼, 숙련된 플레이어들에게는 매우 흥미로운 경험을 제공할 것이다. *Impossible Kregmy Aqua v1.1* is a defense-style custom map in *StarCraft: Brood War* set in a space-themed universe. Six players each defend their own base against waves of enemy attacks in a tower-defense format. The map features a central plaza-like open space with player bases arranged around it, each surrounded by defensive structures and resource-gathering zones. The name combines "Kregmy," likely derived from the creator Flemy’s nickname, and "Aqua," evoking imagery of water or outer space. As the title suggests, the difficulty is exceptionally high. Players must manage limited resources and withstand relentless enemy assaults to survive, with the map designed to test both defensive strategy and efficient unit production. Gameplay follows a tower-defense structure where players gather resources, construct defenses, and launch counterattacks from their bases. The central area is a vast plain, while each base is bordered by elevated terrain and narrow pathways, ideal for setting up choke points. Scattered resource nodes across the map ensure steady income but are exposed to enemy raids, requiring careful resource management. The tile set features dark backgrounds with a fluid, blue-tinged texture, perfectly capturing the essence of a cosmic battlefield. This map is best suited for *Brood War* custom map enthusiasts, particularly those who enjoy tower-defense mechanics and prefer playing against AI opponents. While the high difficulty may overwhelm beginners, experienced players who can balance resource management, unit production, and defense strategies will find it a rewarding challenge. Before playing, it’s crucial to study the initial base layout, defensive building placements, and resource node distribution, as well as to anticipate enemy attack patterns. Players can also leave feedback or engage with others through the map creator’s Discord channel. The map emphasizes strategic balance between offense and defense, where a single mistake can lead to defeat, offering a tense, high-stakes experience. Its well-crafted design and challenging difficulty make it a compelling choice for seasoned players seeking a fresh and demanding challenge.
베이스 디펜스 1.7 (Base Defence 1.7)
‘베이스 디펜스 1.7’은 스타크래프트 브루드워의 대표적인 유즈맵 장르 중 하나인 디펜스 게임으로, 플레이어는 고정된 유닛 비용과 보너스 비용을 고려하며 적의 기지를 파괴하는 목표를 달성해야 한다. 맵은 우주 타일셋을 기반으로 3072x3072 크기의 넓은 필드에서 펼쳐지며, 중앙에 위치한 플레이어 기지 주변으로 적의 공격이 끊임없이 몰려온다. 맵의 특징은 ‘고정 유닛 비용’과 ‘보너스 비용’이라는 두 가지 요소로, 플레이어는 공격 시 추가 보상을 얻거나 패널티를 받을 수 있어 전략적 선택이 요구된다. 또한, ‘비밀스러운 트릭’이 추가되어 있어 맵 곳곳에 숨겨진 요소나 함정, 또는 보너스 포인트가 존재할 가능성이 보인다. 적의 기지를 파괴하기 위해선 공격력과 방어력의 균형이 중요하며, 특히 기지 방어에 중점을 둬야 한다. 초보자도 쉽게 접근할 수 있는 구조이지만, 적의 공격 패턴과 맵 내 숨은 요소들을 파악해야만 안정적으로 승리할 수 있다. 맵의 난이도는 보편적으로 ‘보통’ 수준으로 평가되며, 플레이 시간은 약 20~30분 정도로 추정된다. 이 맵은 디펜스 장르를 любителей, 특히 스타크래프트의 기본 전략을 학습하고 싶은 유저들에게 추천할 만하다. 플레이 전에는 맵의 숨은 요소와 보너스 시스템을 미리 확인해 두는 것이 좋다. Base Defence 1.7 is a classic UMS (User-Made Scenario) defense-style map in StarCraft: Brood War, where players must strategically destroy the enemy base while managing fixed unit costs and bonus rewards. Set on a spacious 3072x3072 map with a space-themed tileset, the gameplay revolves around constant enemy waves attacking the player’s central base. The core mechanics include fixed unit costs and bonus rewards, which add depth to decision-making, as players must balance offensive and defensive strategies. The map also hints at hidden tricks, suggesting the presence of secret elements like traps or bonus points scattered across the field. While the structure is accessible to beginners, mastering the enemy’s attack patterns and uncovering hidden features are key to securing victory. The difficulty is generally moderate, with an estimated playtime of 20 to 30 minutes. This map is ideal for defense genre enthusiasts, especially those looking to refine their StarCraft strategy skills. Players are advised to explore the map and understand its bonus system before diving into the game.
바나나 스플릿 (Banana Split)
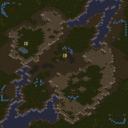
스타크래프트 브루드워의 ‘바나나 스플릿(Banana Split)’은 두 플레이어 팀이 세 명의 컴퓨터 적 팀과 격리된 섬 지역을 방어하는 디펜스 장르의 유즈맵이다. 맵 중앙을 가로지르는 좁은 지협을 두고 좌측과 우측으로 나뉜 두 플레이어는 각자 섬에 위치한 본진 기지를 지키며, 끊임없이 밀려오는 적군의 공격을 막아내야 한다. 적군은 시작 지점에서부터 지속적으로 병력을 보내는데, 초반에는 약한 유닛들이 주를 이루지만随着时间的推移, 점점 강력한 조합의 유닛들이 등장하며 방어 난이도가 급격히 상승한다. 지협의 좁은 길목을 활용하여 방어선을 구축하고, 각 섬의 자원을 효율적으로 관리하는 것이 승리의 핵심이다. 맵의 구조상 두 플레이어 간의 협력이 필수적이므로, 팀워크가 중요한 요소로 작용한다. 맵은 사막 타일셋으로 구성되어 있으며, 평지 지형과 협소한 통로의 조합이 플레이어의 전략적 선택을 제약하고 있다. 바나나 스플릿은 디펜스 장르의 기본 틀을 따르지만, 좁은 공간에서 벌어지는 집중된 전투가 긴장감을 더해주는 것이 특징이다. 초보자도 쉽게 접근할 수 있지만, 후반부의 난타전에서는 숙련된 플레이어와 컴퓨터의 압도적인 물량 перед 공격을 극복해야 한다. 방어선 구축 시 자원 관리에 유의해야 하며, 협소한 길목을 활용한 언덕이나 입구막기 등 지형 활용이 중요하다. 두 플레이어의 팀워크가 좋지 않다면 순식간에 무너질 수 있는 맵이므로, 사전 전략 회의가 필수적이다. 또한, 컴퓨터의 AI가 어느 정도 예측 가능한 패턴을 보이고 있지만, 후반부로 갈수록 변칙적인 공격을 펼치므로 유연하게 대처해야 한다. 바나나 스플릿은 디펜스 유즈맵을 любителей напряжённой командной работы와 전략적 깊이를 즐기는 플레이어들에게 강력히 추천한다. 특히, 좁은 공간에서 벌어지는 전투의 긴장감을 원하거나, 팀 플레이를 중시하는 유저들에게 매력적인 선택지가 될 것이다. 맵을 플레이하기 전, 방어선 구축 위치와 자원 활용 계획을 미리 세워두는 것이 성공의 열쇠다. StarCraft: Brood War’s *Banana Split* is a defense-style custom map where two-player teams defend isolated island regions against three AI-controlled enemy teams. The two players are separated by a narrow isthmus running through the center of the map, each guarding their own island base while fending off relentless waves of enemy attacks. The AI constantly sends forces from their starting points, beginning with weaker units that gradually escalate into increasingly powerful compositions, sharply increasing the difficulty over time. Victory hinges on establishing defensive lines along the narrow choke points and efficiently managing the resources on each island. Due to the map’s structure, cooperation between the two players is essential, making teamwork a critical factor. The map features a desert tile set, combining open terrain with tight corridors that restrict strategic options. While *Banana Split* follows the standard defense format, its concentrated battles in confined spaces heighten the tension. It’s accessible for beginners, but later stages demand overcoming overwhelming AI swarms with expert play. When building defenses, careful resource management is key, and leveraging the terrain—such as using hills or blocking entrances at chokepoints—plays a vital role. Poor teamwork between the two players can lead to a quick collapse, so pre-game strategy discussions are a must. Though the AI follows somewhat predictable patterns, it shifts to unpredictable tactics in later stages, requiring flexible responses. *Banana Split* is highly recommended for defense custom map enthusiasts who enjoy intense teamwork and strategic depth. It’s especially appealing to players seeking the thrill of combat in tight spaces or those who prioritize team play. Before jumping in, planning defense positions and resource strategies is the key to success.
HELL 생존 시험 (Test of Survival - HELL)
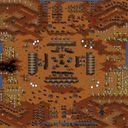
스타크래프트의 ‘Test of Survival - HELL’은 이름에서부터 느껴지듯 극한의 서바이벌 환경을 제공하는 유즈맵이다. 시작과 동시에 벙커로 진입하라는 지시가 있으며, 외부에서는 끊임없이 저글링과 질럿이 무한 스폰되어 플레이어를 압박한다. 맵 중앙의 성큰 콜로니가 방어의 핵심으로, 이를 중심으로 전진배치된 저글링 무리들을 상대하며 건물을 파괴하고 컴퓨터 유닛을 섬멸하는 것이 주요 목표로 보인다. 황혼 타일셋의 어두운 분위기와 붉은 색조가 맵의 긴장감을 한층 더해주며, 특히 성큰 주변의 지형이 복잡하게 배치되어 방어 라인을 구축하기 어렵게 만든다. 벙커와 성큰을 적절히 활용하지 않으면 순식간에 밀려나는 플레이가 예상되며, 끊임없는 적의 물량 공세 속에서Resource management와 위치 선정 능력이 중요할 것으로 추정된다. 초보자에게는 다소 난해할 수 있지만, 숙련된 플레이어라면 이 맵의 치밀한 구조와 전략적 깊이를 즐길 수 있을 것이다. 맵의 난이도는 대체로 높은 수준으로 보이며, 특히 성큰 주변의 좁은 길목에서 벌어지는 전투가 관건일 가능성이 크다. 5인 플레이를 상정하고 제작된 맵으로 보이나, 팀전보다는 개인전 또는 코옵 플레이에 최적화되어 있는 구조다. 플레이 전 반드시 벙커 내부 배치와 성큰의 위치를 숙지하고, 자원 확보 및 방어 전략을 미리 세워두는 것이 중요하다. 이 맵은 순수한 서바이벌 요소와 디펜스 요소가 혼합되어 있으며, 끊임없는 압박 속에서 생존과 공격의 균형을 잡아야 한다. 맵의 분위기와 장르 특성상 긴장감과 몰입도를 중시하는 플레이어에게 강추한다. 맵을 처음 플레이한다면 예상 플레이 시간은 30분 내외로 예상되지만, 난이도에 따라 크게 달라질 수 있으니 주의가 필요하다. StarCraft’s *Test of Survival - HELL* is a custom map that delivers an extreme survival experience, as the name suggests. Right from the start, players are instructed to enter a bunker, while outside, zerglings and zealots spawn endlessly, relentlessly pressuring the player. The core of the defense revolves around the sunkens at the map’s center, where players must fight through waves of zerglings, destroy buildings, and eliminate computer-controlled units. The twilight-themed tileset, with its dark atmosphere and red hues, amplifies the map’s tension, while the complex terrain around the sunkens makes establishing a solid defense line challenging. Without proper use of bunkers and sunkens, players will quickly get overwhelmed by the constant enemy waves. Resource management and strategic positioning are likely key factors in surviving this relentless onslaught. While the map may be difficult for beginners, experienced players will appreciate its intricate design and strategic depth. The difficulty is generally high, with the tight passages around the sunkens likely serving as critical battle points. Though designed with five players in mind, the map is better suited for solo or cooperative play rather than team battles. Before playing, it’s crucial to familiarize yourself with the bunker’s interior layout and the sunkens’ positions, and to plan out resource gathering and defense strategies ahead of time. This map blends pure survival and defense elements, requiring players to balance survival and offense under constant pressure. Given its tense and immersive atmosphere, it’s highly recommended for players who enjoy high-stakes, survival-focused gameplay. If you’re playing for the first time, expect a session to last around 30 minutes, though the difficulty may significantly alter this.
MILES 레이저 태그 ADVANCED (MILES Laser Tag ADVANCEDFix)
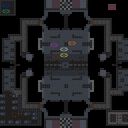
스타크래프트 브루드워의 유즈맵 중 하나인 〈MILES Laser Tag ADVANCEDFix〉는 8인용 CTF(캡처 더 플래그) 기반의 레이저 태그 맵으로, 적팀의 깃발을 빼앗아 아군 베이스에 되돌리는 것이 주요 목표다. 맵의 중앙에는 넓은 개활지와 더불어 곳곳에 배치된 오브젝트와 장애물이 플레이어의 움직임에 영향을 주며, 특히 깃발 전술과 시야 확보가 승리의 열쇠가 된다. 내부 설명에서도 언급된 것처럼 ‘armywell’ 같은 기존 레이저 태그 맵과 유사한 구조를 가지고 있으나, 매디크 버그가 수정된 ADVANCED 버전으로 제공되어 게임의 밸런스를 개선했다는 특징이 있다. 우주 타일셋을 사용한 맵의 배경은 어두운 톤으로 구성되어 있으며, 가운데 위치한 깃발 지역은 지형으로 둘러싸여 있어 방어와 공격의 전략적 선택이 요구된다. 초보 플레이어는 깃발을 되찾는 기본 전술과 시야 확보의 중요성을 먼저 익혀야 하며, 숙련된 플레이어는 팀 간의 연계와 깃발 운반 시의 기습적인 움직임을 통해 승부를 결정지을 수 있다. 맵의 전체 크기는 2048x2048로 достаточно 넓은 공간을 제공하지만, 깃발 지역 주변의 좁은 길목에서는 치열한 전투가 벌어질 수 있어 신중한 플레이가 필요하다. 레이저 태그라는 장르의 특성상 빠른 판단력과 순간적인 움직임이 중요하며, 팀워크가 부족하면 쉽게 패배할 수 있는 구조로 설계되어 있다. 특히, 깃발을奪取한 후 아군 베이스까지 안전하게 귀환하는 과정이 관건이므로, 중간 중간 배치된 엄폐물과 지형을 활용한 플레이가 권장된다. 이 맵은 레이저 태그의 기본적인 재미와 전략성을 동시에 느낄 수 있도록 구성되어 있어, 레이저 태그를 люби하는 플레이어들에게 특히 추천할 만한 유즈맵이다. 게임을 시작하기 전에는 깃발 지역 주변의 지형과 팀원 간의 역할 분담을 미리 숙지하는 것이 좋다. 또한, 맵의 특성상 팀 간의 실력 차이에 따라 결과가 크게 좌우될 수 있으므로, 초보자도 팀원들과의 호흡을 맞추며 점차 실력을 키워나가는 것이 바람직하다. 레이저 태그의 재미를 극대화하기 위해서는 적절한 커뮤니케이션과 함께, 맵의 지형을 최대한 활용한 플레이가 필수적이다. One of the custom maps in *StarCraft: Brood War*, *MILES Laser Tag ADVANCEDFix*, is an 8-player Capture the Flag (CTF) laser tag map where the main objective is to steal the enemy’s flag and return it to your team’s base. The map features a large open central area interspersed with obstacles and objects that influence player movement, with flag tactics and vision control being key to victory. As mentioned in the in-game description, it shares a similar structure with existing laser tag maps like *armywell*, but the ADVANCED version fixes the *medic bug*, improving game balance. The map’s dark-toned space-themed tileset creates a moody atmosphere, while the flag area in the center is enclosed by terrain, demanding strategic decisions for both defense and offense. Beginners should first master basic flag-retrieval tactics and the importance of vision control, while experienced players can decide matches through coordinated teamwork and surprise movements during flag runs. Though the map’s 2048x2048 size offers plenty of space, narrow passages around the flag zone can lead to intense battles, requiring careful play. Given the fast-paced nature of laser tag, quick decision-making and agile movement are crucial, and poor teamwork can lead to easy defeats. Successfully escorting a captured flag back to your base is the most critical challenge, so utilizing cover and terrain along the way is highly recommended. Designed to deliver both the fun and strategic depth of laser tag, this map is especially recommended for fans of the genre. Before starting, it’s wise to study the terrain around the flag zone and discuss team roles with your teammates. Since team performance heavily influences outcomes, beginners should focus on synergy and gradual skill development. To maximize the fun of laser tag, effective communication and smart use of the map’s terrain are essential.
브레이브하트: 요크 타운 시즈4 (Braveheart: York Town Siege4)
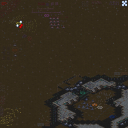
브레이브하트: 요크 타운 시즈4(Braveheart: York Town Siege4)는 스타크래프트 브루드워의 UMS 유즈맵으로, 역사적 배경과 전략적 전투를 결합한 디펜스 장르의 대표작 중 하나다. 맵은 영국과 스코틀랜드의 역사적 대립을 배경으로 윌리엄 월리스가 이끄는 스코틀랜드 군이 요크 타운을 점령하고 영국군을 물리쳐야 하는 구조로 구성되어 있다. 맵의 핵심은 방어와 공격의 균형을 맞추는 데 있으며, 플레이어는 공격과 수비를 번갈아가며 진행해야 한다. 맵의 중앙에는 넓은 평원이 펼쳐져 있으며, 요크 타운은 맵의 북동쪽 지역에 위치해 있다. 플레이어는 시작 지점에서 출발해 요크 타운으로 진격하거나, 반대로 영국군으로부터 요크 타운을 방어해야 한다. 맵 곳곳에는 지형적 이점을 활용할 수 있는 언덕과 숲이 배치되어 있어 전략적 플레이가 요구된다. 특히, 맵의 상단과 하단에는British Bases로 표시된 영국군 기지가 있으며, 이곳을 점령하거나 파괴하는 것이 주요 목표 중 하나다. 맵의 난이도는 맵의 규모와 상대방의 전략에 따라 달라지지만, 대체로 초보자보다는 중급 이상의 플레이어에게 적합한 수준이다. 맵의 진행은 턴제와 실시간 전략이 혼합된 형태로, 플레이어는 자원 관리와 유닛 배치, 타이밍을 잘 조절해야 승리할 수 있다. 특히, 맵의 중앙 평원은 전투가 자주 벌어지는 주요 전장이며, 이곳에서 우위를 점하는 것이 승리의 관건이다. 추천하는 플레이 방법은 먼저 요크 타운의 방어선을 구축한 후, 영국군의 기지를 공격하거나 요크 타운을 직접 점령하는 전략을 세우는 것이다. 맵의 특성상, 팀 플레이가 가능한 구조이기 때문에 친구들과 함께 플레이하면 더욱 재미있고 전략적인 경험을 즐길 수 있다. 마지막으로, 맵의 디자인과 밸런스가 잘 조화되어 있어 오랜 시간 플레이해도 지루하지 않다는 장점이 있다. 이 맵은 역사적 배경에 관심이 있거나, 전략적 디펜스 게임을 즐기는 플레이어에게 특히 추천한다. Braveheart: York Town Siege4 is a UMS custom map for StarCraft: Brood War that stands as one of the most renowned defense genre titles, blending historical context with strategic combat. Set against the backdrop of the historical rivalry between England and Scotland, the map tasks players with leading Scottish forces led by William Wallace to capture York Town and defeat the British army. The core challenge lies in balancing offense and defense, as players must alternate between attacking and defending throughout the match. The map features a vast central plain, with York Town located in the northeastern region. Players begin at their starting point, either advancing toward York Town or defending it from British forces. Strategically placed hills and forests throughout the map provide terrain advantages, requiring careful tactical play. Notably, the top and bottom sections of the map are marked as British Bases, making their capture or destruction a key objective. The difficulty varies depending on the map's scale and the opponent's strategy, but overall, it is best suited for intermediate to advanced players rather than beginners. The gameplay combines turn-based and real-time strategy elements, demanding strong resource management, unit positioning, and precise timing to secure victory. The central plain is a frequent battleground, and gaining control of this area is often decisive in determining the outcome. A recommended strategy involves first fortifying York Town's defenses before launching attacks on British bases or attempting to capture York Town directly. The map's design supports team play, making it especially enjoyable and strategic when played with friends. Its well-balanced design and engaging mechanics ensure that the experience remains fresh even after repeated playthroughs. This map is highly recommended for players who enjoy historical themes or strategic defense games.
E V O L V E S V.MiTiS
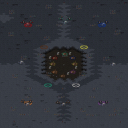
스타크래프트 브루드워의 유즈맵인 <E V O L V E S V.MiTiS>는 플레이어가 진화와 생존을 중심으로 전투를 벌이는 독특한 디펜스 장르의 맵입니다. 맵은 중앙의 거대한 본진 지역을 중심으로 펼쳐지며, 주변에는 여러 개의 소규모据点들이 배치되어 있습니다. 플레이어는 각據点를 점령하고 방어하며, 끊임없이 몰려오는 적 유닛을 상대로 생존을 다투게 됩니다. 맵의 특징적인 점은 ‘진화’라는 시스템으로, 각據点을 방어하거나 공격할 때마다 일정 확률로 새로운 유닛이나 업그레이드가 해금되는 구조입니다. 이는 단순한 디펜스를 넘어 전략적 선택과 리스크 관리가 중요한 게임 플레이를 제공합니다. 전략의 핵심은據点 점령Prioritization과 유닛 관리입니다.據点을 너무 넓게 퍼뜨리면 방어가 취약해지고, 너무 좁게 잡으면 진화 기회가 줄어듭니다. 또한, 진화 시스템 덕분에 초반에는 기본 유닛으로 버티며據点을 안정화하는 것이 중요하며, 후반부로 갈수록 강력한 유닛을 확보해 적을 몰아내는 플레이가 요구됩니다. 맵의 구조상據点 간의 연결이 다소 제한적이어서,據点 간 이동 시 적의 공격에 노출될 위험이 있으니 주의가 필요합니다. 초보자는據点 방어에 집중하고, 숙련자는據点 간 연계와 진화 타이밍을 노려볼 만합니다. 특히據点 간의 거리가 멀지 않아 빠른 대응이 가능한 맵이기 때문에, 실시간 전략과 판단력이 중요한 유즈맵이라고 할 수 있습니다. 이 맵은 6인용으로 설계되었지만, 팀플레이보다는 개별 플레이가 더 효과적인 구조입니다.据点 간의 경쟁이 치열해 팀원 간의 역할 분담이 어렵기 때문입니다. 또한, 맵의 난이도는據点 수와 적의 공격 패턴에 따라 크게 좌우되며, 초반據点 안정화에 실패하면 게임이 급격히 불리해질 수 있습니다. 따라서据点 방어와 진화 타이밍을 잘 조율하는 플레이어가 승리의 열쇠를 쥐고 있습니다. 맵의 분위기는 우주 테마로 구성되어 있어,Darkness 속에서도据点의 불빛과 유닛의 잔상이 독특한 시각적 효과를 제공합니다. 전체적으로 진화와 생존을 테마로 한 전략 디펜스 맵으로, 반복 플레이를 통해據点 관리와 진화 시스템의 최적화를 즐길 수 있는 작품입니다. E V O L V E S V.MiTiS is a unique defense-style custom map in StarCraft: Brood War where players focus on evolution and survival. The map features a central main base area surrounded by multiple smaller据点 (outposts) that players must capture and defend against relentless waves of enemy units. A standout feature is the ‘evolution’ system, where successfully defending or attacking据点 grants a chance to unlock new units or upgrades, adding a layer of strategic depth beyond typical tower defense mechanics. The core of the strategy revolves around据点 prioritization and unit management. Spreading据点 too thin can weaken defenses, while clustering them may limit evolution opportunities. Early-game survival depends on stabilizing據点 with basic units, while mid-to-late game success hinges on unlocking and utilizing advanced units to push back enemies. The map’s layout, with据点 closely connected yet exposed, demands quick decision-making to avoid being flanked by enemy attacks. Beginners should focus on据点 defense first, while experienced players can exploit据点 connections and evolution timing for aggressive plays. The map’s compact据点 layout allows for rapid responses, making real-time strategy and adaptability crucial. Designed for six players, the map thrives on individual performance rather than team coordination due to据点 competition and tight spacing. Difficulty fluctuates based on据点 count and enemy aggression, with early据点 losses often leading to a steep disadvantage. Mastery lies in balancing据点 defense and evolution timing, as poor execution early on can snowball into an unwinnable scenario. Visually, the map adopts a cosmic theme, with据点 illuminated against the darkness, creating a striking contrast between the glowing outposts and the shadows. Overall, this is a strategic defense map centered on evolution and survival, offering deep replayability through据点 management and system optimization.
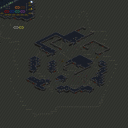
할로 Flood Attack v2.21 (Halo Flood Attack v2.21)
‘할로 Flood Attack v2.21’은 스타크래프트 브루드워의 유즈맵으로, 얼음과 설원으로 가득한 차가운 분위기의 맵이다. 맵 중앙에는 거대한 얼음 덩어리와 산맥이 가로막고 있어 초기에는 넓은 시야를 확보하기 어렵지만, 중앙으로 진입하면 다양한 길이 열려 전략적인 이동과 방어가 가능하다는 특징을 지닌다. 6명의 플레이어가 동시에 참여하는 UMS(유즈맵) 장르로, 각 플레이어는 개별적으로 또는 팀을 구성해 대결을 펼치며, 맵 곳곳에 숨겨진 자원과 건물을 활용해 전략을 세우는 것이 핵심이다. 중앙 지역에 위치한 얼음 구조물은 맵을 세 구역으로 나누며, 각 구역은 좁은 통로로 연결되어 있어 공격과 방어의 균형을 맞추는 것이 중요하다. 특히, 얼음 산맥이 일부 무너지면서 새로운 길이 열리는 듯한 연출이 있어, 플레이어들은 이를 예상해 기지 방어뿐만 아니라 공격 루트를 신중히 계획해야 한다. 맵의 타일셋이 설원인 만큼 시각적 몰입감이 뛰어나며, 차가운 분위기가 긴장감을 더해준다. 또한, 맵의 크기가 3072x3072로 넓어 넓은 시야 확보와 동시에 세밀한 컨트롤이 요구되는 구조로, 초보자보다는 중급 이상의 플레이어에게 적합한 맵으로 보인다. 플레이어는 맵의 다양한 자원과 건물을 확보해 본진을 강화하고, 상대방의 기지를 공격하는 동시에 방어하는 이중적인 전략을 구사해야 한다. 특히, 얼음 산맥이 무너지면서 생기는 새로운 길은 예상치 못한 기습 공격을 가능하게 하므로, 항상 시야를 넓게 유지하고 적의 움직임을 주시하는 것이 중요하다. 또한, 맵 곳곳에 숨겨진 비밀 자원이나 건물이 있을 가능성도 배제할 수 없으므로, 탐색 또한 전략의 일부가 된다. 종합적으로, ‘할로 Flood Attack v2.21’은 넓은 맵과 전략적 깊이를 동시에 제공하는 디펜스와 공격이 혼합된 유즈맵으로, 플레이어 간의 긴장감과 긴밀한 팀워크가 요구되는 맵이다. 초보자가 쉽게 접근하기보다는, 전략적인 사고와 빠른 판단력이 필요한 맵이므로 익숙한 유저들에게 추천할 만하다. 또한, 맵의 난이도를 높이기 위해 일부 비밀 요소나 숨겨진 조건이 제거되었다는 설명이 있어, 공정한 플레이가 강조된 맵이기도 하다. ‘Halo Flood Attack v2.21’ is a custom StarCraft: Brood War map set in a cold, wintry atmosphere filled with ice and snow. The map features a massive ice formation and mountain range blocking the center, limiting initial visibility, but revealing multiple pathways upon entry, allowing for strategic movement and defense. As a six-player UMS (Use Map Settings) genre map, players compete individually or in teams, utilizing hidden resources and structures scattered across the map to craft their strategies. The ice structures in the central region divide the map into three distinct zones, connected by narrow passages where balancing offense and defense is crucial. Notably, parts of the ice mountains collapse, revealing new paths, forcing players to carefully plan both base defenses and attack routes. The snowy tile set enhances immersion, while the chilly atmosphere heightens tension. With a size of 3072x3072, the map demands both broad vision and precise control, making it more suitable for intermediate to advanced players rather than beginners. Players must secure resources and structures across the map to strengthen their bases while simultaneously attacking and defending against opponents. The collapsing ice mountains create unexpected shortcuts for ambushes, so maintaining wide vision and monitoring enemy movements is essential. Additionally, hidden resources or structures may exist in various locations, making exploration part of the strategy. Overall, ‘Halo Flood Attack v2.21’ is a hybrid custom map blending defense and offense, offering a wide map with deep strategic elements that require tension and teamwork among players. Rather than being easily accessible to beginners, it demands strategic thinking and quick decision-making, making it ideal for experienced users. The map also emphasizes fair play, as some hidden elements or conditions have been removed to increase difficulty.
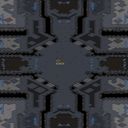
플랫폼 E57IW (Platform E57IW)
‘Platform E57IW’는 스타크래프트 브루드워의 UMS 맵으로, 8명의 플레이어가 우주 맵에서 펼쳐지는 전투에 참여하는 디펜스 장르의 유즈맵이다. 맵의 중앙에는 거대한 플랫폼 구조물이 자리 잡고 있으며, 각 플레이어는 이 플랫폼을 중심으로 배치된 건물을 보호하거나 공격해야 한다. 맵의 특징은 네모난 플랫폼들이 계층적으로 배치되어 있어, 각 층마다 적의 공격 루트가 나뉘어지는 구조다. 특히 플랫폼 간의 연결 통로가 좁고, 각 층 사이에 높이 차이가 있어 유닛의 이동 경로가 제한된다. 이 때문에 전략적인 시야 확보와 병력 배치, 그리고 빠른 반응이 필수적이다. 플레이어는 초반에 자원을 확보한 뒤, 적의 건물을 파괴하거나 방어선을 구축하는 데 집중해야 하며, 맵의 지형을 활용한 방어 태세나 기습 공격이 승패를 좌우할 수 있다. 또한, 플랫폼 간의 고저차가 있기 때문에 공중 유닛의 활용도 중요해진다. 초보자의 경우, 맵의 구조를 충분히 숙지하지 못해 적의 공격 루트를 틀어막지 못하는 경우가 많으므로, 맵을 여러 번 플레이해보면서 플랫폼 간의 연결 구조와 각 층의 중요 위치를 파악하는 것이 좋다. 이 맵은 주로 디펜스와 공격 전술을 동시에 요구하는 만큼, 팀워크와 전략적 사고가 중요한 유즈맵으로, 스타크래프트의 다양한 유즈맵 중에서도 독특한 구조와 긴장감을 제공한다. 특히 우주 맵의 배경과 조화된 플랫폼 디자인이 시각적으로도 흥미를 더한다. 이 맵은 디펜스와 공격 전술을 연마하고자 하는 플레이어들에게 추천할 만한 작품이다. 또한, 맵의 구조상 긴장감이 지속되기 때문에 플레이 시간이 상당히 긴 편이며, 한 번의 실수가 승패를 가를 수 있어 집중력을 요구하는 맵으로도 손꼽힌다. 이 맵을 즐기기 위해서는 빠른 미네랄 수급과 테란의 경우 벙커링, 저그의 경우 뮤탈리스크 활용, 프로토스의 경우 질럿과 드라군의 조합을 고려해보는 것이 좋다. 맵의 플랫폼 구조는 각 플레이어의 시작 위치와도 밀접한 관련이 있으므로, 시작 위치를 잘 활용하는 것도 승리의 핵심 요소다. 이 맵은 스타크래프트 유즈맵 커뮤니티에서 인기 있는 디펜스 장르의 대표작 중 하나로, 특히 우주 맵의 특성을 살린 디자인과 긴장감 있는 진행이 특징이다. 플레이 전에는 맵의 구조와 각 플랫폼의 연결 방식을 미리 확인해보는 것이 좋다. 또한, 팀 플레이를 중시하는 맵이므로, 팀원과의 원활한 소통도 필수적이다. 이 맵은 스타크래프트의 유즈맵답게 자유로운 플레이 스타일을 요구하지만, 기본적인 빌드와 전략이 없으면 쉽게 무너질 수 있으므로, 초보자는 보수적인 플레이를 추천한다. 맵의 난이도는 보통 수준으로, 초보자와 숙련자 모두 즐길 수 있지만, 숙련자들은 더욱 전략적인 플레이를 요구받는다. 이 맵은 스타크래프트의 유즈맵 among the most unique defense maps due to its tiered platform structure and constrained movement paths. Players must balance between resource gathering and aggressive expansion while keeping an eye on enemy advances through narrow corridors. The varying heights between platforms make air units essential, adding a dynamic layer to both offense and defense. For beginners, mastering the map’s layout is critical, as poor positioning can lead to quick defeats. The map rewards those who can adapt their strategies mid-game, whether through defensive fortifications or calculated rushes. The visual design, with its sci-fi platform aesthetic, enhances the immersive experience, making it a standout in the UMS genre. Team coordination is highly recommended, as miscommunication can lead to critical vulnerabilities. Players should prioritize early scouting to identify enemy strategies and adjust their defenses accordingly. The map’s difficulty lies in its depth rather than raw complexity, appealing to both casual and competitive players. Overall, Platform E57IW is a must-try for fans of strategic defense maps, offering a blend of tension, creativity, and tactical depth that keeps matches engaging from start to finish.
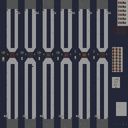
리커 디펜스 백 앤 포스 (Lurker Defense Back 'n' Forth)
스타크래프트 브루드워의 유즈맵 <리커 디펜스 백 앤 포스>는 리커( lurker )를 중심으로 한 독특한 디펜스 장르로, 플레이어의 전략적 판단력이 그대로 승패를 가르는 흥미로운 경험을 제공한다. 맵은 수직으로 나뉜 두 개의 구역( 상단과 하단 )으로 구성되어 있으며, 각각의 구역에 리커와 같은 유닛이 지속적으로 생산되어 반대편 구역으로 이동한다. 플레이어는 자신의 구역에 침입하는 리커를 저지하거나, 반대로 적 구역으로 리커를 보내 상대의 기지를 위협해야 한다. 즉, 단순히 방어만 하는 것이 아니라 공격과 방어가 병행되어야 하며, 이는 리커의 특성을 십분 활용한 전략적 균형감을 요구한다. 맵의 구조는 6인용으로 설계되어 있으며, 상단과 하단의 경계선에 위치한 좁은 통로와 장애물이 리커의 진로를 조절하는 핵심 요소로 작용한다. 리커의 이동 속도가 빠르고 지형에 민감하다는 점을 고려할 때, 통로 배치와 장애물의 활용이 승패의 주요 포인트가 된다. 또한, 리커가 중앙 통로로 몰리는 경우가 많으므로 이를 예측한 방어 라인 구축이 중요하다. 이 맵은 초보자와 숙련자 모두 즐길 수 있지만, 리커의 특성을 잘 이해하고 지형을 적극 활용할 줄 아는 플레이어에게 더 큰 재미를 제공할 것이다. 특히 디펜스 장르에 익숙하지 않거나, 새로운 전략적 접근을 시도해 보고 싶은 유저들에게 강력히 추천한다. 플레이 전에는 리커의 이동 경로와 맵의 상대적 배치, 통로의 넓이와 장애물의 위치를 반드시 숙지하고, 방어와 공격의 균형을 맞출 수 있는 전략을 미리 준비해야 한다. 맵의 난이도는 대체로 보통 수준으로 평가되지만, 리커의 생산 속도나 맵의 난이도 레벨이 내재되어 있어 한 번에 적응하기 어려울 수 있다. 따라서 여러 번 플레이를 통해 지형을 익히고, 상대방의 전략에 유연하게 대응할 수 있는 능력을 키우는 것이 중요하다. 리커 디펜스 백 앤 포스는 단순히 리커를 막는 것 이상의 전략적 깊이를 제공하는 만큼, 스타크래프트의 디펜스 유즈맵 중에서도 독보적인 입지를 차지하고 있다. 새로운 도전과 전략적 재미를 찾는 스타크래프트 팬들에게 강력히 권장하는 맵이다. 특히 리커를 활용한 디펜스 장르에 관심이 있는 플레이어라면, 그 재미에 푹 빠져들 수 있을 것이다. StarCraft: Brood War's custom map *Lurker Defense Back and Forth* offers a unique defense genre centered around the lurker, delivering an engaging experience where strategic decisions directly determine victory or defeat. The map is divided into two vertical zones (upper and lower), each continuously producing units like lurkers that move toward the opposing zone. Players must either block lurkers invading their own zone or send lurkers into enemy territory to threaten their base—meaning offense and defense must work in tandem. This demands a strategic balance that fully leverages the lurker’s traits. Designed for six players, the map’s narrow corridors and obstacles along the boundary between the upper and lower zones act as key elements in controlling lurker movement. Given the lurker’s speed and terrain sensitivity, the placement of pathways and obstacles becomes a major factor in determining outcomes. Lurkers often converge in central corridors, so building defensive lines with this in mind is crucial. While enjoyable for both beginners and experienced players, the map offers greater fun for those who understand lurker mechanics and can actively use the terrain to their advantage. It’s especially recommended for players unfamiliar with defense genres or eager to try new strategic approaches. Before playing, it’s essential to memorize lurker movement paths, the relative layout of the map, corridor widths, and obstacle positions, and to prepare a balanced strategy combining defense and offense. Though generally rated as moderate in difficulty, the map’s lurker spawn rates and inherent challenges can make initial adaptation difficult. Repeated play is key to mastering the terrain and developing the flexibility to counter opponents’ strategies. *Lurker Defense Back and Forth* stands out among Brood War’s defense custom maps by offering strategic depth beyond simply blocking lurkers. It’s highly recommended for StarCraft fans seeking new challenges and strategic fun—especially those interested in lurker-focused defense gameplay, who are likely to find it deeply engaging.
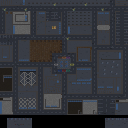
캣 앤 마우스 시티 (Cat N Mouse City)
‘캣 앤 마우스 시티’는 스타크래프트 브루드워에서 즐길 수 있는 독특한 디펜스형 유즈맵으로, 플레이어는 한 명은 고양이, 나머지 플레이어는 쥐 역할을 맡아 상대 진영을 파괴하는 게임이다. 맵은 4096x4096 크기의 넓은 도시 구조를 기반으로 하며, 우주 타일셋을 활용한 밝고 세련된 분위기가 특징이다. 맵 중앙에는 거대한 구조물이 자리 잡고 있으며, 주변으로 복잡한 도로와 건물이 배치되어 있어 시야를 가리는 장애물이 많다. 고양이 플레이어는 상대 쥐를 사냥하거나 건물을 파괴하는 데 중점을 둬야 하며, 쥐 플레이어는 건물을 보호하고 고양이의 공격을 방어하면서 동시에 상대 고양이 건물을 공격해야 한다. 맵은 8명의 플레이어가 참여할 수 있도록 설계되어 있으며, 각 플레이어는 시작 지점에서 시작해 맵 곳곳에 흩어져 있는 리소스를 활용해 유닛을 생산하고 전략을 펼친다. 전투는 주로 근접 및 원거리 유닛을 조합해 진행되며, 맵의 복잡한 지형으로 인해 기동성과 위치 선정이 승패를 좌우할 수 있다. 특히 도시 내의 좁은 통로나 건물 뒤 같은 곳에서 벌어지는 교전은 마치 실제 도시 전투를 방불케 하며, 플레이어는 신속한 판단과 유닛 관리 능력이 요구된다. 맵은 V0.2.0 버전으로, 개발자 GuthixWarrior에 의해 제작되었으며, 지속적인 업데이트를 통해 밸런스가 개선되고 있다. 이 맵은 디펜스와 공격의 균형을 맞추는 재미와 더불어, 팀워크와 개인 전략이 모두 중요하다는 점에서 많은 플레이어들에게 인기를 얻고 있다. 특히 1:7 또는 2:6과 같은 불균형한 팀 구도에서도 흥미로운 대결이 펼쳐질 수 있어, 다양한 전략을 시도해 볼 수 있는 장점이 있다. 플레이 전에는 맵의 복잡한 지형과 리소스 분포를 미리 숙지하는 것이 중요하며, 초기 유닛 생산과 자원 관리를 신중히 계획해야 한다. 또한, 상대의 움직임을 예측하고 기습 공격을 대비하는 것이 승리를 좌우하는 핵심 요소다. 이 맵은 호기심 많은 플레이어들에게 새로운 전략적 경험을 제공하며, 특히 디펜스와 공격의 조합을 즐기는 유저들에게 강력히 추천된다. "Cat and Mouse City" is a unique defense-style custom map in *StarCraft: Brood War*, where one player takes on the role of a cat while the rest play as mice, battling to destroy the opposing team's base. The map features a sprawling 4096x4096 cityscape built with a space-themed tileset, giving it a bright and polished atmosphere. At its center stands a massive structure, surrounded by a maze of roads and buildings that create numerous obstructions, limiting visibility. The cat player must hunt down the mice or destroy their buildings, while the mice focus on defending their structures, fending off cat attacks, and simultaneously targeting the enemy cat base. Designed for up to eight players, each starts at a designated spawn point and gathers scattered resources to produce units and execute strategies. Combat relies on a mix of melee and ranged units, and the map’s intricate terrain means mobility and positioning often determine victory. Fights in tight alleyways or behind buildings feel like real urban warfare, demanding quick decision-making and precise unit control. Currently in version V0.2.0, the map was created by developer GuthixWarrior and continues to evolve with balance updates. Its appeal lies in blending defense and offense, where teamwork and individual tactics both play crucial roles. The game shines even in uneven team setups like 1:7 or 2:6, offering fresh strategic challenges. To succeed, players should study the map’s terrain and resource distribution beforehand, carefully plan initial unit production and resource management, and anticipate enemy movements while preparing for surprise attacks. Ideal for players seeking a fresh strategic experience, "Cat and Mouse City" is especially recommended for those who enjoy balancing defense and offense in their gameplay.
최근 등록된 맵
새로 추가된 파일과 버전을 확인하세요.
★섬맵★Super ★ 빠른무한
스타크래프트 브루드워의 전장 형태가 섬으로만 구성된 독특한 맵, ★섬맵★Super ★ 빠른무한(Island Rush: Super Infinite)은 8명의 플레이어가 한 팀에 소속되어 무한한 전투를 펼치는 팀 밀리 유즈맵이다. 맵의 이름은 섬 모양의 지형이 특징적이며, 12시와 6시 방향에 가스 수정 기지가 배치되어 있어 자원 확보가 전략적으로 중요하다는 특징을 지닌다. 우주 타일셋을 기반으로 한 어두운 분위기의 맵은 넓은 개방형 공간과 좁은 섬 지형이 교차하는 구조로, 빠른 교전과 이동이 강제되는 플레이 환경을 제공한다. 이 맵의 가장 큰 특징은 무한한 전투를 지향한다는 점이다. 승리 조건이나 제한 시간이 없으며, 오로지 상대 팀의 건물을 모두 파괴하는 것이 목표로 보인다. 좁은 섬 지형과 넓은 수면이 어우러진 지형은 자연스럽게 전투를 유도하며, 섬과 섬 사이의 이동을 위한 다리 역할을 하는 좁은 길목이 여러 군데 존재한다. 이러한 지형적 특징은 플레이어들에게 끊임없는 전투를 강요하며, 섬 간의 이동을 둘러싼 전략적 선택을 요구한다. 전략적인 측면에서 보자면, 가스 수정 기지의 확보가 게임의 초반을 좌우할 가능성이 높다. 가스가 풍부한 12시와 6시 방향의 기지는 자원 확보의 관점에서 매우 유리한 위치에 있으며, 이 곳을 얼마나 빨리 안정적으로 차지하느냐가 게임의 흐름을 결정할 수 있다. 또한, 좁은 길목과 좁은 섬 지형은 방어와 공격을 위한 자연스러운 요새가 되기 때문에, 각 섬의 지배력을 두고 치열한 전투가 벌어질 것으로 예상된다. 초보 플레이어라면 섬 간의 이동과 가스 수정 기지의 확보를 우선순위로 삼아 차근차근 전략을 세워나가는 것이 좋다. 반면, 숙련된 플레이어는 좁은 길목에서의 치고 빠지기와 섬 간의 기습적인 공격을 통해 상대를 혼란에 빠뜨리는 전술을 구사할 수 있을 것이다. 이 맵은 특히 팀워크가 중요한 유즈맵으로, 팀원 간의 원활한 의사소통과 협력이 없으면 섬 간의 이동이나 가스 수정 기지 방어가 어려워질 수 있다. 또한, 맵의 무한한 전투 특성상 체력 관리가 중요하며, 지속적인 전투로 인해 자원과 유닛의 보충이 끊임없이 요구된다. 맵의 지형과 특성을 충분히 숙지한 후, 팀원들과의 전략적인 협의를 통해 승리를 노려보자. StarCraft: Brood War’s unique ★Island Rush: Super Infinite★ map features a battlefield composed entirely of islands, where eight players per team engage in endless team melee combat. The map’s name reflects its island-shaped terrain, with gas geysers positioned at the 12 and 6 o’clock directions—securing these resources early becomes a critical strategic advantage. Set in a dark, cosmic tileset, the map blends wide open spaces with narrow island terrain, forcing rapid engagements and constant movement. The defining feature of this map is its emphasis on infinite combat. There are no victory conditions or time limits—only the objective of destroying all enemy buildings. The mix of narrow islands and expansive waters naturally funnels players into frequent battles, while the sparse bridges connecting the islands create choke points that shape strategic decisions. These geographical traits demand relentless combat and force players to carefully weigh their paths between islands. From a strategic standpoint, securing the gas geysers early can dominate the early game. The rich resources at 12 and 6 o’clock make these positions highly advantageous, and whoever claims them first often dictates the flow of battle. The narrow bridges and confined island spaces also serve as natural strongholds for both defense and offense, leading to fierce struggles over island control. Beginners should prioritize safe island traversal and gas geyser capture to build a foundation, while veteran players can exploit tight chokepoints and ambush tactics to disrupt opponents. This map thrives on teamwork, as poor communication can cripple coordination during island transitions or gas geyser defense. Given the endless combat, managing health and constantly replenishing resources and units are essential. Study the terrain and coordinate closely with teammates to turn these challenges into victory.
![에어리언 vs 프레데터[5] (Alien vs Predator[5]) 맵 미리보기](https://cdn-star-data.huzy.net/thumbnail_e6f17b1f7dcd4db6a7f0b69b911864a7.jpg)
에어리언 vs 프레데터[5] (Alien vs Predator[5])
에어리언vs프레데터[5]는 스타크래프트: 브루드워의 유즈맵으로, 에이리언과 프레데터가 인간 세력과 맞서는 독특한 디펜스 형식을 채택한 맵이다. 맵의 전체적인 분위기는 SF 액션물의 느낌이 강하게 느껴지며, 중앙의 넓은 공간을 중심으로 각 세력이 자신의 기지를 방어하고 상대방을 공격하는 방식으로 진행된다. 에이리언과 프레데터는 각각의 특수한 유닛들과 방어탑을 활용해 인간 세력의 공격을 막아내야 하며, 반대로 인간 세력은 에이리언과 프레데터의 기지에 침투해 주요 건물을 파괴하는 목표를 달성해야 한다. 맵 곳곳에 배치된 방어 건물과 자원 수집 구역은 전략적인 포지셔닝과 자원 관리의 중요성을 강조한다. 플레이어는 총 8명이 지원되며, 각 플레이어는 에이리언, 프레데터, 인간 중 하나의 세력을 선택해 플레이할 수 있다. 각 세력은 고유의 유닛과 기술, 방어 구조를 보유하고 있어 전략의 다양성을 극대화하였다. 특히 에이리언과 프레데터의 방어탑은 강력한 공격력을 자랑하며, 인간 세력은 강력한 병력과 방어시설을 통해 이를 상대해야 한다. 맵의 최신 버전에서는 각 세력의 유닛이 더욱 강화되어 밸런스가 조정된 것으로 보이며, 플레이어 간 협동과 대결이 흥미진진하게 펼쳐질 수 있도록 설계되었다. 이 맵은 디펜스와 공격의 균형을 맞추는 것이 관건으로, 특히 인간 세력의 경우 에이리언과 프레데터의 기지를 신속히 공략하는 전략과 방어선을 구축하는 타이밍이 중요하다. 반대로 에이리언과 프레데터는 중앙의 넓은 공간을 활용한 기동전과 방어 건물의 효율적 배치로 인간 세력의 공격을 막아내야 한다. 맵의 규모가 크고 각 세력의 특색이 뚜렷해 반복 플레이 시에도 새로운 전략을 시도해 볼 수 있어 장기적인 재미를 제공한다. 또한, 맵 곳곳에 숨겨진 자원과 숨겨진 길은 보물찾기 같은 재미를 더해주며, 팀 간 또는 개인 간 경쟁을 통해 더욱 흥미로운 플레이가 가능할 것으로 예상된다. 이 맵을 즐기기 위해서는 각 세력의 특성과 유닛의 성능, 맵의 주요 경로와 기지 배치 위치를 숙지하는 것이 중요하다. 또한, 팀 플레이 시에는 각 세력의 특성을 살려 협동하는 전략을 세우는 것이 승리의 관건이다. 특히 인간 세력의 경우 에이리언과 프레데터의 방어탑을 무력화하는 방법을 숙지하고, 에이리언과 프레데터는 인간 세력의 기지 공략 시 방어선을 효율적으로 무너뜨리는 방법을 모색해야 한다. 맵의 복잡한 구조와 다양한 전략적 선택지는 플레이어의 역량을 시험하며, 스타크래프트 유즈맵의 묘미를 느낄 수 있도록 구성되어 있다. Alien vs. Predator [5] is a custom map for *StarCraft: Brood War* where the Alien and Predator factions battle against human forces in a unique defensive format. The map strongly evokes the atmosphere of an SF action film, with wide open spaces in the center where each faction defends its base while attacking the enemy. The Aliens and Predators must use their specialized units and defensive towers to repel human assaults, while the humans aim to infiltrate their bases and destroy key structures. Strategically placed defensive buildings and resource zones across the map highlight the importance of positioning and resource management. The map supports up to eight players, with each choosing to play as either the Aliens, Predators, or Humans. Each faction has its own unique units, abilities, and defensive structures, maximizing strategic variety. The Aliens and Predators feature powerful defensive towers, while the humans must counter them with strong forces and fortifications. The latest version appears to have balanced the factions by strengthening their units, ensuring exciting cooperation and rivalry between players. The key to success lies in balancing defense and offense. Humans must quickly strike the Alien and Predator bases while timing their defensive lines well. Meanwhile, the Aliens and Predators should use the central open space for maneuver warfare and place defensive structures efficiently to hold off human attacks. The large scale and distinct identities of each faction allow for fresh strategies even after repeated plays, offering long-term enjoyment. Hidden resources and secret paths scattered across the map add a treasure-hunt-like thrill, while competition between teams or individuals makes the experience even more engaging. To fully enjoy the map, players should familiarize themselves with each faction’s traits, unit performance, and the map’s key routes and base layouts. In team play, coordinating strategies that leverage each faction’s strengths is crucial for victory. Humans should learn how to neutralize the Alien and Predator defensive towers, while the Aliens and Predators must find efficient ways to break through human defensive lines when attacking their bases. The map’s intricate structure and diverse strategic options test players’ skills, perfectly capturing the charm of *StarCraft* custom maps.
HELL 생존 시험 (Test of Survival - HELL)
스타크래프트의 ‘Test of Survival - HELL’은 이름에서부터 느껴지듯 극한의 서바이벌 환경을 제공하는 유즈맵이다. 시작과 동시에 벙커로 진입하라는 지시가 있으며, 외부에서는 끊임없이 저글링과 질럿이 무한 스폰되어 플레이어를 압박한다. 맵 중앙의 성큰 콜로니가 방어의 핵심으로, 이를 중심으로 전진배치된 저글링 무리들을 상대하며 건물을 파괴하고 컴퓨터 유닛을 섬멸하는 것이 주요 목표로 보인다. 황혼 타일셋의 어두운 분위기와 붉은 색조가 맵의 긴장감을 한층 더해주며, 특히 성큰 주변의 지형이 복잡하게 배치되어 방어 라인을 구축하기 어렵게 만든다. 벙커와 성큰을 적절히 활용하지 않으면 순식간에 밀려나는 플레이가 예상되며, 끊임없는 적의 물량 공세 속에서Resource management와 위치 선정 능력이 중요할 것으로 추정된다. 초보자에게는 다소 난해할 수 있지만, 숙련된 플레이어라면 이 맵의 치밀한 구조와 전략적 깊이를 즐길 수 있을 것이다. 맵의 난이도는 대체로 높은 수준으로 보이며, 특히 성큰 주변의 좁은 길목에서 벌어지는 전투가 관건일 가능성이 크다. 5인 플레이를 상정하고 제작된 맵으로 보이나, 팀전보다는 개인전 또는 코옵 플레이에 최적화되어 있는 구조다. 플레이 전 반드시 벙커 내부 배치와 성큰의 위치를 숙지하고, 자원 확보 및 방어 전략을 미리 세워두는 것이 중요하다. 이 맵은 순수한 서바이벌 요소와 디펜스 요소가 혼합되어 있으며, 끊임없는 압박 속에서 생존과 공격의 균형을 잡아야 한다. 맵의 분위기와 장르 특성상 긴장감과 몰입도를 중시하는 플레이어에게 강추한다. 맵을 처음 플레이한다면 예상 플레이 시간은 30분 내외로 예상되지만, 난이도에 따라 크게 달라질 수 있으니 주의가 필요하다. StarCraft’s *Test of Survival - HELL* is a custom map that delivers an extreme survival experience, as the name suggests. Right from the start, players are instructed to enter a bunker, while outside, zerglings and zealots spawn endlessly, relentlessly pressuring the player. The core of the defense revolves around the sunkens at the map’s center, where players must fight through waves of zerglings, destroy buildings, and eliminate computer-controlled units. The twilight-themed tileset, with its dark atmosphere and red hues, amplifies the map’s tension, while the complex terrain around the sunkens makes establishing a solid defense line challenging. Without proper use of bunkers and sunkens, players will quickly get overwhelmed by the constant enemy waves. Resource management and strategic positioning are likely key factors in surviving this relentless onslaught. While the map may be difficult for beginners, experienced players will appreciate its intricate design and strategic depth. The difficulty is generally high, with the tight passages around the sunkens likely serving as critical battle points. Though designed with five players in mind, the map is better suited for solo or cooperative play rather than team battles. Before playing, it’s crucial to familiarize yourself with the bunker’s interior layout and the sunkens’ positions, and to plan out resource gathering and defense strategies ahead of time. This map blends pure survival and defense elements, requiring players to balance survival and offense under constant pressure. Given its tense and immersive atmosphere, it’s highly recommended for players who enjoy high-stakes, survival-focused gameplay. If you’re playing for the first time, expect a session to last around 30 minutes, though the difficulty may significantly alter this.
스페셜 포스 레전드 (Special Forces LeGenDs)
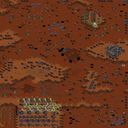
스타크래프트 브루드워의 유즈맵 <_SPECIAL FORCES LEGENDS>는 6명의 플레이어가 참여하는 팀 기반의 디펜스 장르 맵으로, 각 플레이어는 고유한 영웅 유닛을 조종하며 끊임없이 몰려오는 적군을 상대로 요새를 지켜내는 것이 목표다. 맵의 배경은 황혼 테마의 황량한 평야와 숲으로 이루어져 있으며, 중앙의 요새를 중심으로 여러 개의 길과 언덕이 배치되어 있어 전략적 대치가 가능하도록 설계되었다. 적군은 주로 저글링, 히드라리스크, 뮤탈리스크 등으로 구성된 공중 및 지상 혼합 병력으로 공격해 오며, 플레이어는 영웅의 스킬과 기본 유닛을 조합해 방어선을 구축해야 한다. 이 맵의 특징은 영웅 시스템으로, 각 영웅은 고유한 스킬과 특성을 보유하고 있어 플레이 스타일에 따라 다양한 전략을 구사할 수 있다. 예를 들어 원거리 딜러형 영웅은 후방에서 지원 사격을, 탱커형 영웅은 전방에서 적을 저지하는 역할을 맡는다. 또한, 맵 곳곳에 배치된 아이템 상자와 미네랄, 가스 채취 지역을 활용해 영웅을 강화하거나 자원을 확보하는 것도 중요하다. 방어선은 중앙 요새뿐만 아니라 맵 외곽의 체크포인트에서도 유지해야 하며, 일정 주기마다 등장하는 보스 몬스터를 처치하면 추가적인 보상을 얻을 수 있는 구조다. 플레이어는 맵의 지형을 활용해 적의 공격을 효율적으로 방어하고, 영웅의 레벨과 장비를 성장시키며, 보스 몬스터를 사냥하는 동시에 요새를 보호하는 멀티태스킹을 요구받는다. 맵의 난이도는 영웅의 조합과 플레이어의 숙련도에 따라 크게 달라지며, 초보자는 기본 영웅과 간단한 스킬 위주로 플레이하는 것이 권장된다. 또한, 팀원과의 실시간 협력이 필수적이므로 커뮤니케이션이 원활한 플레이어들과 함께 즐기는 것이 좋다. 이 맵은 디펜스 장르에 관심 있는 유저뿐만 아니라, 영웅 성장과 전략적 대전이 매력적인 스타크래프트 유즈맵을 찾는 이들에게도 좋은 선택지가 될 것이다. 특히, 맵의 디자인과 밸런스는 여러 번의 업데이트를 거치며 안정화된 것으로 보이며, 다양한 영웅과 아이템의 조합을 통해 반복 플레이가 가능하다는 장점이 있다. 다만, 초반 자원 확보와 영웅의 스킬 포인트 관리가 다소 복잡하게 느껴질 수 있으니, 게임 시작 전 맵의 구조와 영웅의 특성을 숙지하는 것이 중요하다. _*SPECIAL FORCES LEGENDS* is a team-based defense map in *StarCraft: Brood War* where up to six players defend a central fortress against waves of enemies. Each player controls a unique hero unit, combining their skills with basic units to hold the line against a mix of ground and air units like Zerglings, Hydralisks, and Mutalisks. The map features a twilight-themed landscape of barren plains and forests, with strategic vantage points and elevated terrain around the central fortress. The hero system is the map’s standout feature—each hero comes with distinct abilities and traits, allowing for varied strategies. Ranged damage dealers support from the rear, while tank heroes block enemy advances upfront. Players must also manage resources, securing minerals and gas while collecting items scattered across the map to strengthen their heroes. Defense isn’t just about the central fortress; checkpoints along the map’s edges must be held, and periodic boss encounters offer additional rewards. Success hinges on multitasking—leveraging terrain for defense, leveling up heroes, hunting bosses, and protecting the fortress—all while adapting to the map’s dynamic difficulty based on hero synergy and player skill. Beginners are advised to stick with default heroes and basic abilities, while smooth team coordination is essential for victory. The map’s polished design, refined through multiple updates, offers replayability with diverse hero and item combinations, though players should study the map’s layout and hero mechanics beforehand to streamline early resource and skill point management.
Space Glory Defence (스페이스 글로리 디펜스)
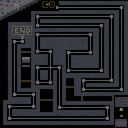
《Space Glory Defence》는 우주 배경의 디펜스 장르 유즈맵으로, 플레이어는 우주 공간에서 끊임없이 몰려오는 적군의 공격을 방어하며 생존을 도전하는 구조를 지닌다. 맵의 전체적인 구도는 중앙에 플레이어 기지가 위치하며, 주변으로 여러 개의 입구가 뚫려 있어 다양한 방향으로 적이 침공하는 특징을 보인다. 적의Publications: 2009년 3월 29일부터 4월 7일까지 'Toker-of-Bongs'에 의해 제작되었으며, 'Space Defence Map'으로 명시된 바와 같이 우주 공간을 배경으로 한 방어전을 펼치는 형식의 맵이다. 맵의 난이도는 'Medium'으로 설정되어 있지만, 실제 플레이에서는 입구 수와 적의 공격 패턴에 따라 난이도가 크게 달라질 수 있다. 맵의 크기는 4096x4096으로 대규모 전투가 가능한 공간을 제공하며, 플레이어는 제한된 자원으로 방어선을 구축하고 적의 공격을 버텨내야 한다. 특히, 맵의 일부 구역에는 자원 채취가 가능한 지역이 배치되어 있어 자원의 중요성도 강조된다. 플레이어는 각자의 전략에 따라 방어塔를 건설하고 유닛을 관리해야 하며, 맵의 균형 잡힌 구조는 초보자와 숙련자 모두에게 흥미로운 도전 과제를 제공한다. 추천 대상은 우주 배경의 디펜스 게임을 즐기는 플레이어이며, 특히 방어와 자원 관리 전략에 중점을 두고 싶은 유저들에게 적합하다. 플레이 전에는 맵의 입구 수와 적의 공격 패턴을 미리 확인하여 방어 전략을 세우는 것이 중요하다. 또한, 자원 채취 지역의 위치를 숙지하고fficient resource management is essential for long-term survival. The map's structure encourages players to balance between offense and defense, making it a compelling experience for those who enjoy strategic depth in StarCraft Brood War custom maps. It is particularly recommended for players who appreciate a mix of base-building, unit management, and real-time strategy elements in a space-themed setting. Before diving into the gameplay, familiarizing oneself with the map layout, entry points, and resource nodes will significantly enhance the overall experience and increase the chances of success against the relentless enemy waves.
랜덤 유닛 워즈 : X (Random Unit Wars : X)
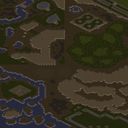
스타크래프트 브루드워의 유즈맵 장르 중에서도 독특한 랜덤 유닛 대전 게임인 <랜덤 유닛 워즈 : X>는 플레이어가 무작위로 배치된 다양한 유닛들을 조합해 적의 리더 유닛을 섬멸하는 전투형 맵이다. 맵은 사막 타일셋을 기반으로 6144x6144의 넓은 공간에 펼쳐져 있으며, 중앙에는 넓은 평지가 있고 주변으로 언덕과 협곡이 조성되어 있다. 이 공간을 활용해 플레이어는 유닛을 배치하고 전술을 구사해야 한다. 게임의 핵심 메커니즘은 '리더 유닛' 시스템으로, 각 플레이어는 자신의 리더 유닛을 보유하고 있으며 이 유닛을 잃으면 패배하게 된다. 리더는 기본적으로 강력한 유닛으로 설정되어 있지만, 맵 곳곳에 배치된 무작위 유닛 상자에서 보조 유닛을 획득하거나 강화를 통해 리더를 업그레이드할 수 있다. 이는 각 플레이어의 전략적 선택을 유도하며, 초반에는 리더의 생존이, 중반 이후에는 유닛의 조합과 전술적 움직임이 승패를 좌우한다. 맵의 중앙 평지는 전투의 주요 무대가 되며, 언덕과 협곡은 기습이나 후방 공격에 유리한 지형을 제공한다. 또한, 맵 곳곳에 배치된 자원 포인트는 유닛의 생산과 업그레이드에 필수적이므로 자원 관리가 중요하다. 플레이어는 리더를 보호하면서도 적의 리더를 공격할 기회를 노려야 하며, 이는 공격과 방어의 균형을 요구하는 흥미로운 전략적 깊이를 제공한다. 이 맵은 특히 다인용 전투에서 그 진가가 발휘되며, 7명의 플레이어가 참가할 수 있어 각 플레이어의 개성과 전략이 충돌하는 재미를 느낄 수 있다. 또한, 무작위 유닛 시스템 덕분에 매 게임마다 새로운 조합과 전술을 시도해 볼 수 있어 반복 플레이가 지루하지 않다. 초보자는 리더의 생존에 집중하고, 숙련자는 자원 관리와 유닛 조합을 최적화해 승리에 도전할 수 있는 매력이 있는 맵이다. 플레이 전에는 맵의 지형과 리더 시스템을 숙지하는 것이 중요하며, 특히 협곡이나 언덕을 활용한 기습 전술을 연습해 보는 것이 좋다. 또한, 자원 포인트의 위치를 미리 확인하고 리더의 초기 배치 위치를 신중히 결정해야 한다. 이 맵은 팀 플레이보다는 개인전 성향이 강하므로, 각 플레이어의 개성을 발휘할 수 있는 환경을 제공한다. 이 맵을 즐기기 위해서는 스타크래프트 브루드워의 기본 조작법에 익숙해야 하며, 특히 유닛의 이동과 공격 명령을 신속하게 내릴 수 있어야 한다. 또한, 상대방의 리더 위치를 파악하고 공격 타이밍을 잡는 것이 승리의 열쇠가 된다. 다양한 유닛 조합을 시도해 보며 자신만의 전략을 발전시켜 보자. StarCraft: Brood War's custom map genre features a unique random unit battle game called *Random Unit Wars: X*, where players combine randomly assigned units to eliminate the enemy's leader unit in a combat-focused battle. The map, set in a desert tileset, spans a vast 6144x6144 area with a central plain surrounded by hills and canyons. Players must strategically position units and deploy tactics within this space. The core gameplay revolves around the 'leader unit' system—each player has a designated leader unit, and losing it results in defeat. While the leader is inherently powerful, players can acquire auxiliary units from random crates scattered across the map or upgrade the leader to enhance its capabilities. This encourages strategic decision-making, where early-game survival of the leader and mid-to-late-game unit combinations and positioning determine victory. The central plain serves as the primary battlefield, while the hills and canyons provide advantageous terrain for ambushes and rear attacks. Scattered resource points across the map are essential for unit production and upgrades, making resource management crucial. Players must balance protecting their leader while seeking opportunities to strike the enemy's, adding depth to the strategic gameplay. This map truly shines in multiplayer battles, supporting up to seven players, where diverse personalities and strategies clash. The random unit system ensures each game offers fresh combinations and tactics, preventing repetitive gameplay. Beginners can focus on leader survival, while experienced players can optimize resource management and unit synergies for victory. Before playing, it's important to familiarize yourself with the map's terrain and the leader system, practicing ambush tactics using canyons or hills. Pre-checking resource point locations and carefully choosing the initial leader placement are key. The map leans toward individual play rather than team-based strategies, allowing each player's unique style to shine. To fully enjoy this map, familiarity with StarCraft: Brood War's basic controls is essential, especially quick unit movement and attack commands. Identifying the opponent's leader position and timing attacks effectively are critical to winning. Experiment with different unit combinations to develop your own strategies.
유니버설 트라이포드 (Universal Tripod)
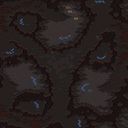
스타크래프트 브루드워 유즈맵으로 유명한 <b>(3)Universal Tripod.(R)-KPGA</b>는 플레이어들이 세 개의 기둥을 중심으로 펼쳐지는 긴장감 넘치는 대결을 펼치는 디펜스 장르의 맵입니다. 맵 중앙에 위치한 거대한 삼각형 구조물 주변으로 좁은 통로가 이어지며, 이곳에서 플레이어들은 끊임없이 몰려오는 적 유닛들을 방어해야 합니다. 내부 맵 설명에서도 언급된 'Turn up the heat'라는 문구는 끊임없이 증가하는 적의 압박감을 강조하는 듯합니다. 8명의 플레이어가 참여할 수 있는 이 맵은 각각의 기둥이 공격 포인트로 작용하며, 세 개의 기둥을 모두 유지하는 것이 핵심 전략이 됩니다. 좁은 길목을 이용한 방어와 적절한 자원 관리가 중요한데, 특히 좁은 통로에서 벌어지는 전투는 미묘한 컨트롤과 타이밍이 요구됩니다. 맵의 전체적인 분위기는 정글 테마로 꾸며져 있으며, 삼각형 구조물의 복잡한 배치 덕분에 다양한 전술적 선택지가 존재합니다. 초보자는 기지 방어에 집중하는 편이 좋지만, 숙련된 플레이어는 적의 움직임을 예측한 선제 공격이나 기습적인 기둥 점령으로 승기를 잡을 수 있습니다. 맵의 밸런스는 세 개의 기둥이 균형을 유지하도록 설계되어 있지만, 플레이어 간의 협력이 필수적입니다. 추천하는 플레이 방식은 기지 방어에 중점을 두면서도, периоди적으로 적의 약점을 공략하는 것입니다. 맵의 타일셋과 구조는 정글의 조밀한 느낌을 살리면서도 전투가 벌어지는 지점은 명확히 구분되어 있어, 시각적 혼란 없이 플레이에 집중할 수 있습니다. 이 맵은 디펜스 장르의 정수를 느낄 수 있는 동시에, 좁은 공간에서의 전투가 주는 긴장감을 즐길 수 있는佳作입니다. 특히 다인원이 참여할수록 전략의 깊이가 더해지는 특징이 있어, 팀플레이가 빛을 발하는 맵으로도 손꼽힙니다. 플레이 전에는 기지 주변의 자원 분포와 통로의 폭을 미리 숙지하고, 각 기둥의 중요도를 정확히 파악하는 것이 중요합니다. 또한, 적의 유닛 조합에 따라 방어 테크와 유닛 구성을 유연하게 변화시켜야 합니다. 이 맵은 단순히 방어만 하는 것이 아니라, 적절한 공격과 기습을 통해 상대방을 압박하는 전략적 깊이가 매력적입니다. 초보자도 규칙을 익히면 즐길 수 있지만, 숙련자들에게는 더욱 치열한 전투가 펼쳐질 수 있는 구조로 설계되어 있습니다. 맵의 복잡한 구조는 처음엔 낯설 수 있지만, 반복 플레이를 통해 최적의 방어 루트를 찾을 수 있습니다. 이 맵을 즐기기 위해서는 공간지각력과 순간적인 판단력이 요구되며, 특히 좁은 길목에서의 전투에서 실수가 치명적일 수 있음을 명심해야 합니다. 디펜스 장르의 묘미를 느끼고 싶다면 이 맵만큼 훌륭한 선택지가 없을 것입니다. 다인원 플레이에서 진정한 팀워크의 가치를 느낄 수 있는 이 맵은, 스타크래프트 브루드워 유즈맵의 역사를 빛낸 명작으로 손꼽힙니다. Universal Tripod.(R)-KPGA is a thrilling defense-style custom map in StarCraft: Brood War, where players must protect three central pillars against relentless enemy assaults. The map’s layout features a dense jungle theme centered around a triangular structure, with narrow pathways connecting each pillar to the outer edges. The core objective revolves around maintaining control of the pillars, as losing any one of them weakens the entire team’s defensive position. With a maximum of 8 players, the map demands strong teamwork and coordination, as individual mistakes can quickly spiral into chaos. The phrase 'Turn up the heat' in the internal description hints at the escalating difficulty as waves of enemies grow more intense. The triangular pillars act as critical chokepoints, forcing players to rely on precise unit control and smart positioning to fend off attacks. The map’s balance is designed to keep all three pillars equally important, but experienced players can exploit gaps in enemy formations to launch surprise attacks or secure temporary advantages. For beginners, the priority should be on base defense and resource management, while veterans can focus on predictive strikes to disrupt enemy strategies. The jungle-themed tileset adds visual depth, though the combat zones are clearly defined to avoid confusion. One of the map’s standout features is its adaptability—different player counts and team compositions can drastically alter the strategy, making each match unique. Prior to playing, it’s essential to study the resource distribution around the base and memorize the narrow passages where most battles unfold. The map’s complexity rewards players who learn to read enemy movements and adjust their defenses dynamically. While the initial setup might seem overwhelming, repeated playthroughs help refine defensive routes and counter-strategies. The narrow corridors amplify the tension, as a single misstep can lead to a swift defeat. Whether you're a casual player looking to enjoy StarCraft’s defense mechanics or a competitive gamer seeking a challenging experience, Universal Tripod offers a perfect blend of strategy, teamwork, and high-stakes action. Its enduring popularity in the Brood War community is a testament to its well-balanced design and replay value.
플랫폼 E57IW (Platform E57IW)
‘Platform E57IW’는 스타크래프트 브루드워의 UMS 맵으로, 8명의 플레이어가 우주 맵에서 펼쳐지는 전투에 참여하는 디펜스 장르의 유즈맵이다. 맵의 중앙에는 거대한 플랫폼 구조물이 자리 잡고 있으며, 각 플레이어는 이 플랫폼을 중심으로 배치된 건물을 보호하거나 공격해야 한다. 맵의 특징은 네모난 플랫폼들이 계층적으로 배치되어 있어, 각 층마다 적의 공격 루트가 나뉘어지는 구조다. 특히 플랫폼 간의 연결 통로가 좁고, 각 층 사이에 높이 차이가 있어 유닛의 이동 경로가 제한된다. 이 때문에 전략적인 시야 확보와 병력 배치, 그리고 빠른 반응이 필수적이다. 플레이어는 초반에 자원을 확보한 뒤, 적의 건물을 파괴하거나 방어선을 구축하는 데 집중해야 하며, 맵의 지형을 활용한 방어 태세나 기습 공격이 승패를 좌우할 수 있다. 또한, 플랫폼 간의 고저차가 있기 때문에 공중 유닛의 활용도 중요해진다. 초보자의 경우, 맵의 구조를 충분히 숙지하지 못해 적의 공격 루트를 틀어막지 못하는 경우가 많으므로, 맵을 여러 번 플레이해보면서 플랫폼 간의 연결 구조와 각 층의 중요 위치를 파악하는 것이 좋다. 이 맵은 주로 디펜스와 공격 전술을 동시에 요구하는 만큼, 팀워크와 전략적 사고가 중요한 유즈맵으로, 스타크래프트의 다양한 유즈맵 중에서도 독특한 구조와 긴장감을 제공한다. 특히 우주 맵의 배경과 조화된 플랫폼 디자인이 시각적으로도 흥미를 더한다. 이 맵은 디펜스와 공격 전술을 연마하고자 하는 플레이어들에게 추천할 만한 작품이다. 또한, 맵의 구조상 긴장감이 지속되기 때문에 플레이 시간이 상당히 긴 편이며, 한 번의 실수가 승패를 가를 수 있어 집중력을 요구하는 맵으로도 손꼽힌다. 이 맵을 즐기기 위해서는 빠른 미네랄 수급과 테란의 경우 벙커링, 저그의 경우 뮤탈리스크 활용, 프로토스의 경우 질럿과 드라군의 조합을 고려해보는 것이 좋다. 맵의 플랫폼 구조는 각 플레이어의 시작 위치와도 밀접한 관련이 있으므로, 시작 위치를 잘 활용하는 것도 승리의 핵심 요소다. 이 맵은 스타크래프트 유즈맵 커뮤니티에서 인기 있는 디펜스 장르의 대표작 중 하나로, 특히 우주 맵의 특성을 살린 디자인과 긴장감 있는 진행이 특징이다. 플레이 전에는 맵의 구조와 각 플랫폼의 연결 방식을 미리 확인해보는 것이 좋다. 또한, 팀 플레이를 중시하는 맵이므로, 팀원과의 원활한 소통도 필수적이다. 이 맵은 스타크래프트의 유즈맵답게 자유로운 플레이 스타일을 요구하지만, 기본적인 빌드와 전략이 없으면 쉽게 무너질 수 있으므로, 초보자는 보수적인 플레이를 추천한다. 맵의 난이도는 보통 수준으로, 초보자와 숙련자 모두 즐길 수 있지만, 숙련자들은 더욱 전략적인 플레이를 요구받는다. 이 맵은 스타크래프트의 유즈맵 among the most unique defense maps due to its tiered platform structure and constrained movement paths. Players must balance between resource gathering and aggressive expansion while keeping an eye on enemy advances through narrow corridors. The varying heights between platforms make air units essential, adding a dynamic layer to both offense and defense. For beginners, mastering the map’s layout is critical, as poor positioning can lead to quick defeats. The map rewards those who can adapt their strategies mid-game, whether through defensive fortifications or calculated rushes. The visual design, with its sci-fi platform aesthetic, enhances the immersive experience, making it a standout in the UMS genre. Team coordination is highly recommended, as miscommunication can lead to critical vulnerabilities. Players should prioritize early scouting to identify enemy strategies and adjust their defenses accordingly. The map’s difficulty lies in its depth rather than raw complexity, appealing to both casual and competitive players. Overall, Platform E57IW is a must-try for fans of strategic defense maps, offering a blend of tension, creativity, and tactical depth that keeps matches engaging from start to finish.
맵 선택 가이드
태그는 맵의 핵심 특징을 빠르게 설명하지만 제작 버전마다 규칙이 다를 수 있습니다. 상세 설명에서 권장 인원, 난이도, 플레이 시간과 버전을 함께 확인한 뒤 다운로드하세요.