
공격 저지 스타크래프트 맵 모음
'공격 저지' 태그가 등록된 맵을 모았습니다. 장르 하나로 찾기 어려운 플레이 방식, 난이도와 특징을 중심으로 인기 맵과 최신 맵을 비교해 보세요.
- 등록 맵
- 2개
- 누적 다운로드
- 0
- 누적 조회
- 70
인기 맵
다운로드와 조회 반응이 높은 맵입니다.
폭격 지대 2000 (Bombing Zone 2000)
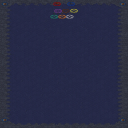
‘Þømbíñg Zôñë 2000’이라는 제목을 지닌 이 스타크래프트 브루드워 유즈맵은 이름에서 느껴지듯 폭격과 생존을 중심으로 전개되는 디펜스 장르의 맵이다. 맵의 핵심은 중앙에 위치한 거대한 폭탄 지대에서 끊임없이 쏟아지는 적 유닛을 저지하고, 이들을 처리하면서 살아남는 것이다. 보라색, 노란색, 초록색, 빨간색 등의 다양한 색상으로 구분된 구역이 맵을 가득 채우고 있으며, 각 구역은 플레이어가 점령하거나 방어해야 하는 핵심 지역으로 보인다. 중앙의 폭탄 심볼과 폭발 이펙트는 맵의 주제와 분위기를 뚜렷하게 전달하며, 플레이어가 집중해야 할 목표를 시각적으로 강조한다. 플레이 방식은 주로 적의 끊임없는 공격을 방어하는 데 초점을 맞추고 있으며, 각 구역을 차지한 후에는 해당 구역을 방어하는 방식으로 진행된다. 적 유닛은 맵의 각 구역에서 지속적으로 생성되며, 이를 저지하지 못하면 자원이나 건물이 피해를 입는 것으로 추정된다. 플레이어는 자원 관리와 유닛 배치 전략을 carefully 하게 세워야 하며, 특히 구역 간의 연결성을 고려한 방어 라인을 구축하는 것이 중요하다. 맵의 구조상 중앙 지역이 가장 중요해 보이며, 이곳을 방어하지 못하면 전체적인 게임 진행이 어려워질 수 있다. 이 맵은 8인 대전이 가능한 규모로 설계되어 있으며, 팀 플레이보다는 개별 플레이어의 판단력과 반응 속도가 중요하게 작용할 것으로 보인다. 맵의 난이도는 보통 수준으로 예상되며, 초보자보다는 어느 정도의 경험이 있는 플레이어에게 더 적합할 것이다. 또한, 맵의 분위기와 장르 특성상 긴장감과 긴박감이 지속되는 플레이 경험을 제공할 것으로 예상된다. 플레이 전에는 맵의 구역별 중요도를 숙지하고, 자원과 유닛의 배치 전략을 미리 계획하는 것이 좋다. 이 맵은 특히 폭격과 생존을 주제로 한 디펜스 장르에 관심이 있는 유즈맵 플레이어들에게 추천할 만하다. 맵의 시각적 디자인과 색상 분할이 명확하여 플레이어의 전략 수립을 돕는 데 효과적이다. 또한, 맵의 규모와 구조가 비교적 단순하면서도 전략적인 깊이를 갖추고 있어, 반복 플레이를 통해 새로운 전략을 시도해 볼 수 있는 재미가 있다. 만일 맵에서 제공되는 승리 조건이나 추가적인 규칙이 있다면, 게임 시작 전 미리 확인하는 것이 좋다. The StarCraft: Brood War custom map titled *Þømbíñg Zôñë 2000* is a defense genre map centered around bombing and survival, as the name suggests. The core gameplay involves blocking and eliminating endless waves of enemy units that continuously spawn in the massive bomb zone at the center of the map, while surviving the chaos. The map is filled with distinct zones marked by vibrant colors like purple, yellow, green, and red—each representing key areas that players must capture and defend. The central bomb symbol and explosive visual effects strongly reinforce the map’s theme and atmosphere, clearly highlighting the player’s primary objective. Gameplay revolves around defending against relentless enemy attacks, with players seizing control of zones and then fortifying them to withstand subsequent waves. Enemies spawn continuously in each zone, and failing to stop them likely results in resource loss or structural damage. Players must carefully manage resources and deploy units strategically, with a particular emphasis on building defensive lines that account for the connections between zones. The central area appears to be the most critical part of the map—losing it could severely hinder overall progress. Designed for up to eight players, this map seems to prioritize individual judgment and reaction speed over team coordination. The difficulty is expected to be moderate, making it more suitable for players with some experience rather than complete beginners. The tense, high-pressure atmosphere of the defense-focused gameplay ensures a consistently engaging experience. Before playing, it’s wise to familiarize yourself with the importance of each zone and plan your resource and unit deployment strategy in advance. This map is especially recommended for custom map players who enjoy defense games centered on bombing and survival. Its clear visual design and color-coded zones help streamline strategic planning, while the relatively simple yet deep structure allows for experimentation with new tactics through repeated play. If the map includes specific victory conditions or additional rules, checking them before starting is highly advisable.
터렛 디펜스 35000 -Final- (Turret Defense 35000 -Final-)
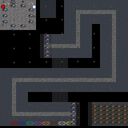
스타크래프트 브루드워의 디펜스 장르 유즈맵인 《터렛 디펜스 35000 -Final-》은 전형적인 구조에서 한층 진화된 방어형 맵으로, 플레이어는 적의 끊임없는 공격을 효과적으로 저지하며 최종 목표까지 도달해야 한다. 이 맵은 우주 테마의 타일셋을 활용해 우주 공간에서 벌어지는 방어전을 연출하며, 곳곳에 배치된 터렛과 방어 건물들이 주요 전략 포인트가 된다. 맵 중앙에는 넓은 통로가 있으며, 좌우로 나뉜 базе 구역이 배치되어 있는데, 이는 적의 공격 루트를 예측하고 방어선을 구축하는 핵심 요소로 활용된다. 특히, 맵의 하단과 상단에는 추가적인 방어 시설이 배치되어 있어, 플레이어는 한정된 자원으로도 다층적인 방어망을 구축할 수 있다. 게임은 기본적으로 유닛 생산과 건물을 통한 방어 전략이 주를 이루며, 초반에는 소규모 유닛을 배치해 적의 약한 공격을 방어하는 데 집중해야 한다. 시간이 지남에 따라 적의 공격 패턴이 변하고 규모가 커지므로, 플레이어는 지속적으로 방어 건물을 업그레이드하거나 새로운 터렛을 배치해야 한다. 맵의 특징 중 하나는 중앙 통로의 넓이와 방어 시설의 배치로, 중앙을 확보하지 않으면 적의 공격이 한층 더 강력해지는 구조로 설계되어 있다. 또한, 맵의 가장자리를 따라 배치된 방어 건물들은 후방 공격을 방어하는 데 필수적이다. 이 맵은 초보 플레이어에게는 다소 난이도가 있을 수 있지만, 방어 건물의 배치와 업그레이드 타이밍을 익히면 점진적으로 클리어가 가능해진다. 반면, 숙련된 플레이어는 빠른 판단을 바탕으로 중앙 통로를 신속히 확보하고, 후방 공격을 차단하는 전략을 구사할 수 있다. 추천하는 플레이 방식은 방어 건물의 효율적인 배치와 자원 관리의 균형을 맞추는 것이며, 특히 초반 자원 확보가 중요하다. 맵의 난이도를 고려할 때, 초보자는 방어 건물의 기본 배치와 업그레이드 우선순위를 숙지한 후 플레이하는 것이 좋다. 또한, 맵의 구조상 중앙 통로를 확보하지 않으면 적의 공격이 지속적으로 밀려오므로, 이를 방지하기 위한 전략 수립이 필수다. StarCraft: Brood War's defense genre custom map, *Turret Defense 35000 -Final-*, is an evolved defensive map that goes beyond typical structures, requiring players to effectively repel endless enemy assaults and reach the final objective. The map employs a space-themed tileset to depict battles unfolding in outer space, with turrets and defensive structures scattered throughout serving as key strategic points. A wide central corridor dominates the map, flanked by base areas on the left and right—elements designed to help players predict enemy attack routes and establish defensive lines. Additional defensive facilities are positioned at the top and bottom of the map, allowing players to construct multi-layered defenses even with limited resources. The game revolves around unit production and defensive structures, with players initially focusing on deploying small units to fend off weaker early attacks. As time progresses, enemy attack patterns intensify and scale up, forcing players to continuously upgrade defensive buildings or deploy new turrets. A defining feature of the map is the width of the central corridor and the arrangement of defensive structures—holding the center not only secures a strategic advantage but also prevents enemy attacks from becoming overwhelmingly powerful. The defensive buildings placed along the map’s edges are also crucial for blocking rear assaults. While the map may pose a challenge for beginners, mastering turret placement and upgrade timing makes gradual completion achievable. Skilled players, on the other hand, can quickly secure the central corridor and employ strategies to cut off rear attacks with decisive judgment. The recommended playstyle emphasizes balancing efficient turret placement with resource management, with early resource acquisition being particularly vital. Given the map’s difficulty, beginners should familiarize themselves with basic turret layouts and upgrade priorities before playing. Additionally, since failing to secure the central corridor results in relentless enemy waves, devising a strategy to hold it is essential.
최근 등록된 맵
새로 추가된 파일과 버전을 확인하세요.
터렛 디펜스 35000 -Final- (Turret Defense 35000 -Final-)
스타크래프트 브루드워의 디펜스 장르 유즈맵인 《터렛 디펜스 35000 -Final-》은 전형적인 구조에서 한층 진화된 방어형 맵으로, 플레이어는 적의 끊임없는 공격을 효과적으로 저지하며 최종 목표까지 도달해야 한다. 이 맵은 우주 테마의 타일셋을 활용해 우주 공간에서 벌어지는 방어전을 연출하며, 곳곳에 배치된 터렛과 방어 건물들이 주요 전략 포인트가 된다. 맵 중앙에는 넓은 통로가 있으며, 좌우로 나뉜 базе 구역이 배치되어 있는데, 이는 적의 공격 루트를 예측하고 방어선을 구축하는 핵심 요소로 활용된다. 특히, 맵의 하단과 상단에는 추가적인 방어 시설이 배치되어 있어, 플레이어는 한정된 자원으로도 다층적인 방어망을 구축할 수 있다. 게임은 기본적으로 유닛 생산과 건물을 통한 방어 전략이 주를 이루며, 초반에는 소규모 유닛을 배치해 적의 약한 공격을 방어하는 데 집중해야 한다. 시간이 지남에 따라 적의 공격 패턴이 변하고 규모가 커지므로, 플레이어는 지속적으로 방어 건물을 업그레이드하거나 새로운 터렛을 배치해야 한다. 맵의 특징 중 하나는 중앙 통로의 넓이와 방어 시설의 배치로, 중앙을 확보하지 않으면 적의 공격이 한층 더 강력해지는 구조로 설계되어 있다. 또한, 맵의 가장자리를 따라 배치된 방어 건물들은 후방 공격을 방어하는 데 필수적이다. 이 맵은 초보 플레이어에게는 다소 난이도가 있을 수 있지만, 방어 건물의 배치와 업그레이드 타이밍을 익히면 점진적으로 클리어가 가능해진다. 반면, 숙련된 플레이어는 빠른 판단을 바탕으로 중앙 통로를 신속히 확보하고, 후방 공격을 차단하는 전략을 구사할 수 있다. 추천하는 플레이 방식은 방어 건물의 효율적인 배치와 자원 관리의 균형을 맞추는 것이며, 특히 초반 자원 확보가 중요하다. 맵의 난이도를 고려할 때, 초보자는 방어 건물의 기본 배치와 업그레이드 우선순위를 숙지한 후 플레이하는 것이 좋다. 또한, 맵의 구조상 중앙 통로를 확보하지 않으면 적의 공격이 지속적으로 밀려오므로, 이를 방지하기 위한 전략 수립이 필수다. StarCraft: Brood War's defense genre custom map, *Turret Defense 35000 -Final-*, is an evolved defensive map that goes beyond typical structures, requiring players to effectively repel endless enemy assaults and reach the final objective. The map employs a space-themed tileset to depict battles unfolding in outer space, with turrets and defensive structures scattered throughout serving as key strategic points. A wide central corridor dominates the map, flanked by base areas on the left and right—elements designed to help players predict enemy attack routes and establish defensive lines. Additional defensive facilities are positioned at the top and bottom of the map, allowing players to construct multi-layered defenses even with limited resources. The game revolves around unit production and defensive structures, with players initially focusing on deploying small units to fend off weaker early attacks. As time progresses, enemy attack patterns intensify and scale up, forcing players to continuously upgrade defensive buildings or deploy new turrets. A defining feature of the map is the width of the central corridor and the arrangement of defensive structures—holding the center not only secures a strategic advantage but also prevents enemy attacks from becoming overwhelmingly powerful. The defensive buildings placed along the map’s edges are also crucial for blocking rear assaults. While the map may pose a challenge for beginners, mastering turret placement and upgrade timing makes gradual completion achievable. Skilled players, on the other hand, can quickly secure the central corridor and employ strategies to cut off rear attacks with decisive judgment. The recommended playstyle emphasizes balancing efficient turret placement with resource management, with early resource acquisition being particularly vital. Given the map’s difficulty, beginners should familiarize themselves with basic turret layouts and upgrade priorities before playing. Additionally, since failing to secure the central corridor results in relentless enemy waves, devising a strategy to hold it is essential.
폭격 지대 2000 (Bombing Zone 2000)
‘Þømbíñg Zôñë 2000’이라는 제목을 지닌 이 스타크래프트 브루드워 유즈맵은 이름에서 느껴지듯 폭격과 생존을 중심으로 전개되는 디펜스 장르의 맵이다. 맵의 핵심은 중앙에 위치한 거대한 폭탄 지대에서 끊임없이 쏟아지는 적 유닛을 저지하고, 이들을 처리하면서 살아남는 것이다. 보라색, 노란색, 초록색, 빨간색 등의 다양한 색상으로 구분된 구역이 맵을 가득 채우고 있으며, 각 구역은 플레이어가 점령하거나 방어해야 하는 핵심 지역으로 보인다. 중앙의 폭탄 심볼과 폭발 이펙트는 맵의 주제와 분위기를 뚜렷하게 전달하며, 플레이어가 집중해야 할 목표를 시각적으로 강조한다. 플레이 방식은 주로 적의 끊임없는 공격을 방어하는 데 초점을 맞추고 있으며, 각 구역을 차지한 후에는 해당 구역을 방어하는 방식으로 진행된다. 적 유닛은 맵의 각 구역에서 지속적으로 생성되며, 이를 저지하지 못하면 자원이나 건물이 피해를 입는 것으로 추정된다. 플레이어는 자원 관리와 유닛 배치 전략을 carefully 하게 세워야 하며, 특히 구역 간의 연결성을 고려한 방어 라인을 구축하는 것이 중요하다. 맵의 구조상 중앙 지역이 가장 중요해 보이며, 이곳을 방어하지 못하면 전체적인 게임 진행이 어려워질 수 있다. 이 맵은 8인 대전이 가능한 규모로 설계되어 있으며, 팀 플레이보다는 개별 플레이어의 판단력과 반응 속도가 중요하게 작용할 것으로 보인다. 맵의 난이도는 보통 수준으로 예상되며, 초보자보다는 어느 정도의 경험이 있는 플레이어에게 더 적합할 것이다. 또한, 맵의 분위기와 장르 특성상 긴장감과 긴박감이 지속되는 플레이 경험을 제공할 것으로 예상된다. 플레이 전에는 맵의 구역별 중요도를 숙지하고, 자원과 유닛의 배치 전략을 미리 계획하는 것이 좋다. 이 맵은 특히 폭격과 생존을 주제로 한 디펜스 장르에 관심이 있는 유즈맵 플레이어들에게 추천할 만하다. 맵의 시각적 디자인과 색상 분할이 명확하여 플레이어의 전략 수립을 돕는 데 효과적이다. 또한, 맵의 규모와 구조가 비교적 단순하면서도 전략적인 깊이를 갖추고 있어, 반복 플레이를 통해 새로운 전략을 시도해 볼 수 있는 재미가 있다. 만일 맵에서 제공되는 승리 조건이나 추가적인 규칙이 있다면, 게임 시작 전 미리 확인하는 것이 좋다. The StarCraft: Brood War custom map titled *Þømbíñg Zôñë 2000* is a defense genre map centered around bombing and survival, as the name suggests. The core gameplay involves blocking and eliminating endless waves of enemy units that continuously spawn in the massive bomb zone at the center of the map, while surviving the chaos. The map is filled with distinct zones marked by vibrant colors like purple, yellow, green, and red—each representing key areas that players must capture and defend. The central bomb symbol and explosive visual effects strongly reinforce the map’s theme and atmosphere, clearly highlighting the player’s primary objective. Gameplay revolves around defending against relentless enemy attacks, with players seizing control of zones and then fortifying them to withstand subsequent waves. Enemies spawn continuously in each zone, and failing to stop them likely results in resource loss or structural damage. Players must carefully manage resources and deploy units strategically, with a particular emphasis on building defensive lines that account for the connections between zones. The central area appears to be the most critical part of the map—losing it could severely hinder overall progress. Designed for up to eight players, this map seems to prioritize individual judgment and reaction speed over team coordination. The difficulty is expected to be moderate, making it more suitable for players with some experience rather than complete beginners. The tense, high-pressure atmosphere of the defense-focused gameplay ensures a consistently engaging experience. Before playing, it’s wise to familiarize yourself with the importance of each zone and plan your resource and unit deployment strategy in advance. This map is especially recommended for custom map players who enjoy defense games centered on bombing and survival. Its clear visual design and color-coded zones help streamline strategic planning, while the relatively simple yet deep structure allows for experimentation with new tactics through repeated play. If the map includes specific victory conditions or additional rules, checking them before starting is highly advisable.
맵 선택 가이드
태그는 맵의 핵심 특징을 빠르게 설명하지만 제작 버전마다 규칙이 다를 수 있습니다. 상세 설명에서 권장 인원, 난이도, 플레이 시간과 버전을 함께 확인한 뒤 다운로드하세요.