
공격 루트 스타크래프트 맵 모음
'공격 루트' 태그가 등록된 맵을 모았습니다. 장르 하나로 찾기 어려운 플레이 방식, 난이도와 특징을 중심으로 인기 맵과 최신 맵을 비교해 보세요.
- 등록 맵
- 2개
- 누적 다운로드
- 0
- 누적 조회
- 31
인기 맵
다운로드와 조회 반응이 높은 맵입니다.
Test of Survival - 햄버거힐1.2
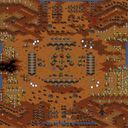
스타크래프트 브루드워의 서바이벌 유즈맵 'Test of Survival - 햄버거힐1.2'는 월남전의 지옥으로 불리는 햄버거힐을 배경으로 펼쳐지는 intense한 전투를 경험할 수 있는 맵이다. 맵의 이름과 설명에서 느껴지는 전쟁의 긴장감은 플레이어에게 끊임없는 긴장감을 안겨주며, 특히 '3차례의 지원부대'가 등장한다는 점은 생존을 위한 필수 요소로 작용한다. 맵의 središ에는 방어 거점이 있으며, 이곳을 중심으로 적의 끊임없는 공격을 막아내며 버텨야 한다. 적의 유닛들은 맵 곳곳에서 끊임없이 쏟아져 나오며, 방어선을 유지하는 것이 관건이다. 지원부대의 등장 타이밍은 플레이어의 전략적 선택을 요구하며, 이를 잘못 판단하면 순식간에 방어선이 무너질 위험이 있다. 맵의 구조는 중앙 방어 거점을 중심으로 방사형으로 퍼져 있으며, 각 구역마다 적의 공격 루트가 분산되어 있어 전략적인 대처가 필요하다. 특히 맵의 외곽 지역은 적의 공격 루트가 복잡하게 얽혀 있어, 초보 플레이어는 방어선을 유지하기 어려울 수 있다. 이 맵은 기본적으로 컴퓨터 상대가 주가 되며, 방어선을 유지하며 버텨내는 것이 핵심 목표다. 추천 대상은 서바이벌 장르를 좋아하는 플레이어, 전략적인 대결을 즐기는 유저, 그리고 긴장감 넘치는 전투를 원하는 게이머들이다. 플레이 전 반드시 확인해야 할 점은 지원부대의 등장 타이밍과 방어선의 유지 여부다. 지원부대를 효과적으로 활용하지 못하면 방어선이 무너질 위험이 커지므로, 초반부터 전략을 잘 세워야 한다. 또한, 맵의 외곽 지역을 방어하는 데 실패하지 않도록 주의해야 한다. 이 맵은 초보자에게는 다소 어려운 난이도를 가지고 있지만, 반복 플레이를 통해 방어 전략을 익힐 수 있으며, 숙련된 플레이어에게는 끊임없는 긴장감과 전략적 깊이를 제공한다. 특히, 지원부대의 효과적인 활용은 이 맵의 재미를 극대화하는 핵심 요소다. "Test of Survival - Hamburger Hill 1.2," a survival custom map in *StarCraft: Brood War*, immerses players in intense battles set against the infamous Hamburger Hill, known as the "Hell of Vietnam." The map's name and description evoke a sense of wartime tension, keeping players on edge throughout. A key survival element is the three waves of reinforcements that appear, forcing players to make strategic decisions—misjudging their timing can lead to a swift collapse of defenses. At the center of the map lies a defensive stronghold, which must be held against relentless enemy assaults. Enemies spawn continuously across the map, and maintaining the defensive line is crucial. The map's design radiates outward from the central stronghold, with enemy attack routes branching into separate zones, requiring adaptable strategies. The outer regions, in particular, feature complex enemy paths, making it challenging for beginners to hold their ground. The primary focus is on defending against AI-controlled enemies, with survival and endurance as the core objectives. Ideal for players who enjoy survival modes, strategic challenges, or high-stakes combat. Before playing, pay close attention to reinforcement timings and the stability of your defenses—poor utilization of reinforcements risks breaking the line, so solid early-game planning is essential. Avoid failing to secure the outer areas, as they are critical to maintaining control. While the map poses a tough challenge for beginners, repeated play allows players to refine their defensive strategies. For seasoned players, it delivers constant tension and deep tactical gameplay. Mastering the effective use of reinforcements is the key to maximizing the map's fun factor.
도onton't go into the Room Final (Don't go into the Room Final)
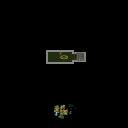
스타크래프트: 브루드워의 공포와 긴장감을 극대화한 UMS 맵, <도onton't go into the Room Final>은 플레이어가 "절대 방에 들어가지 마라"라는 경고를 무시하고 도전하는 공포 디펜스 장르의 정수를 보여준다. 맵은 어두운 분위기의 실내와 복도를 배경으로 하며, 플레이어는 중앙의 방을 중심으로 펼쳐지는 공격 루트를 방어해야 한다. 맵 이미지에서는 어두운 색상의 타일과 붉은 빛으로 강조된 통로가 보이며, 방의 입구는 플레이어의 주의를 끈다. 맵 제목과 설명에서 유추할 수 있듯, 이 맵의 핵심은 방에 들어가는 순간 펼쳐질 공포와 보상을 노리는 플레이어의 선택이다. 맵은 7명의 플레이어를 대상으로 하며, 각 플레이어는 개별적으로 방을 방어하거나 공격 루트를 통제해야 한다. 방의 구조는 복잡하지 않지만, 방어 지점이 제한적이어 전략적 플레이가 요구된다. 공포 요소를 강하게感觉하게 하기 위해 맵은 어두운 조명과 붉은 빛을 활용하며, 플레이어는 방에 들어갔을 때의 보상과 위험을 저울질해야 한다. 이 맵은 공포와 디펜스 장르를 좋아하는 플레이어, 특히 1~2인 플레이를 즐기는 유저들에게 추천된다. 플레이 전에는 방의 구조와 방어 지점을 미리 파악하는 것이 중요하며, 방에 들어가는 순간 벌어질 상황을 예측하는 것이 관건이다. 또한, 팀플레이보다는 개별 플레이가 유리한 구조이므로, 혼자서도 충분히 즐길 수 있는 맵이다. 맵의 난이도는 방의 방어 난이도와 보상의 밸런스에 따라 달라질 수 있으며, 초보자의 경우 방에 들어가는 타이밍을 조절하는 연습이 필요하다. StarCraft: Brood War’s UMS map, *Don’t Go Into the Room Final*, maximizes fear and tension in a horror defense genre where players ignore the warning "Never enter the room" and take on its challenges. Set in dimly lit indoor corridors, the map requires players to defend attack routes centered around a central room. The map’s visuals feature dark tiles and corridors highlighted in red, drawing attention to the room’s entrance. As the title and description suggest, the core of the map lies in the player’s choice—balancing the fear and potential reward that awaits inside. Designed for seven players, each must individually defend the room or control the attack routes. While the room’s layout isn’t overly complex, its limited defensive points demand strategic play. To amplify the horror, the map uses dim lighting and red hues, forcing players to weigh the risks and rewards of entering. Ideal for fans of horror and defense maps—especially those who enjoy solo or duo play—this map rewards thorough pre-game preparation. Understanding the room’s structure and defensive points is crucial, as predicting what happens upon entry is key. Its design favors individual play over teamwork, making it enjoyable even when played alone. Difficulty varies based on the balance between defense difficulty and rewards, and beginners should practice timing their entry into the room.
최근 등록된 맵
새로 추가된 파일과 버전을 확인하세요.
Test of Survival - 햄버거힐1.2
스타크래프트 브루드워의 서바이벌 유즈맵 'Test of Survival - 햄버거힐1.2'는 월남전의 지옥으로 불리는 햄버거힐을 배경으로 펼쳐지는 intense한 전투를 경험할 수 있는 맵이다. 맵의 이름과 설명에서 느껴지는 전쟁의 긴장감은 플레이어에게 끊임없는 긴장감을 안겨주며, 특히 '3차례의 지원부대'가 등장한다는 점은 생존을 위한 필수 요소로 작용한다. 맵의 središ에는 방어 거점이 있으며, 이곳을 중심으로 적의 끊임없는 공격을 막아내며 버텨야 한다. 적의 유닛들은 맵 곳곳에서 끊임없이 쏟아져 나오며, 방어선을 유지하는 것이 관건이다. 지원부대의 등장 타이밍은 플레이어의 전략적 선택을 요구하며, 이를 잘못 판단하면 순식간에 방어선이 무너질 위험이 있다. 맵의 구조는 중앙 방어 거점을 중심으로 방사형으로 퍼져 있으며, 각 구역마다 적의 공격 루트가 분산되어 있어 전략적인 대처가 필요하다. 특히 맵의 외곽 지역은 적의 공격 루트가 복잡하게 얽혀 있어, 초보 플레이어는 방어선을 유지하기 어려울 수 있다. 이 맵은 기본적으로 컴퓨터 상대가 주가 되며, 방어선을 유지하며 버텨내는 것이 핵심 목표다. 추천 대상은 서바이벌 장르를 좋아하는 플레이어, 전략적인 대결을 즐기는 유저, 그리고 긴장감 넘치는 전투를 원하는 게이머들이다. 플레이 전 반드시 확인해야 할 점은 지원부대의 등장 타이밍과 방어선의 유지 여부다. 지원부대를 효과적으로 활용하지 못하면 방어선이 무너질 위험이 커지므로, 초반부터 전략을 잘 세워야 한다. 또한, 맵의 외곽 지역을 방어하는 데 실패하지 않도록 주의해야 한다. 이 맵은 초보자에게는 다소 어려운 난이도를 가지고 있지만, 반복 플레이를 통해 방어 전략을 익힐 수 있으며, 숙련된 플레이어에게는 끊임없는 긴장감과 전략적 깊이를 제공한다. 특히, 지원부대의 효과적인 활용은 이 맵의 재미를 극대화하는 핵심 요소다. "Test of Survival - Hamburger Hill 1.2," a survival custom map in *StarCraft: Brood War*, immerses players in intense battles set against the infamous Hamburger Hill, known as the "Hell of Vietnam." The map's name and description evoke a sense of wartime tension, keeping players on edge throughout. A key survival element is the three waves of reinforcements that appear, forcing players to make strategic decisions—misjudging their timing can lead to a swift collapse of defenses. At the center of the map lies a defensive stronghold, which must be held against relentless enemy assaults. Enemies spawn continuously across the map, and maintaining the defensive line is crucial. The map's design radiates outward from the central stronghold, with enemy attack routes branching into separate zones, requiring adaptable strategies. The outer regions, in particular, feature complex enemy paths, making it challenging for beginners to hold their ground. The primary focus is on defending against AI-controlled enemies, with survival and endurance as the core objectives. Ideal for players who enjoy survival modes, strategic challenges, or high-stakes combat. Before playing, pay close attention to reinforcement timings and the stability of your defenses—poor utilization of reinforcements risks breaking the line, so solid early-game planning is essential. Avoid failing to secure the outer areas, as they are critical to maintaining control. While the map poses a tough challenge for beginners, repeated play allows players to refine their defensive strategies. For seasoned players, it delivers constant tension and deep tactical gameplay. Mastering the effective use of reinforcements is the key to maximizing the map's fun factor.
도onton't go into the Room Final (Don't go into the Room Final)
스타크래프트: 브루드워의 공포와 긴장감을 극대화한 UMS 맵, <도onton't go into the Room Final>은 플레이어가 "절대 방에 들어가지 마라"라는 경고를 무시하고 도전하는 공포 디펜스 장르의 정수를 보여준다. 맵은 어두운 분위기의 실내와 복도를 배경으로 하며, 플레이어는 중앙의 방을 중심으로 펼쳐지는 공격 루트를 방어해야 한다. 맵 이미지에서는 어두운 색상의 타일과 붉은 빛으로 강조된 통로가 보이며, 방의 입구는 플레이어의 주의를 끈다. 맵 제목과 설명에서 유추할 수 있듯, 이 맵의 핵심은 방에 들어가는 순간 펼쳐질 공포와 보상을 노리는 플레이어의 선택이다. 맵은 7명의 플레이어를 대상으로 하며, 각 플레이어는 개별적으로 방을 방어하거나 공격 루트를 통제해야 한다. 방의 구조는 복잡하지 않지만, 방어 지점이 제한적이어 전략적 플레이가 요구된다. 공포 요소를 강하게感觉하게 하기 위해 맵은 어두운 조명과 붉은 빛을 활용하며, 플레이어는 방에 들어갔을 때의 보상과 위험을 저울질해야 한다. 이 맵은 공포와 디펜스 장르를 좋아하는 플레이어, 특히 1~2인 플레이를 즐기는 유저들에게 추천된다. 플레이 전에는 방의 구조와 방어 지점을 미리 파악하는 것이 중요하며, 방에 들어가는 순간 벌어질 상황을 예측하는 것이 관건이다. 또한, 팀플레이보다는 개별 플레이가 유리한 구조이므로, 혼자서도 충분히 즐길 수 있는 맵이다. 맵의 난이도는 방의 방어 난이도와 보상의 밸런스에 따라 달라질 수 있으며, 초보자의 경우 방에 들어가는 타이밍을 조절하는 연습이 필요하다. StarCraft: Brood War’s UMS map, *Don’t Go Into the Room Final*, maximizes fear and tension in a horror defense genre where players ignore the warning "Never enter the room" and take on its challenges. Set in dimly lit indoor corridors, the map requires players to defend attack routes centered around a central room. The map’s visuals feature dark tiles and corridors highlighted in red, drawing attention to the room’s entrance. As the title and description suggest, the core of the map lies in the player’s choice—balancing the fear and potential reward that awaits inside. Designed for seven players, each must individually defend the room or control the attack routes. While the room’s layout isn’t overly complex, its limited defensive points demand strategic play. To amplify the horror, the map uses dim lighting and red hues, forcing players to weigh the risks and rewards of entering. Ideal for fans of horror and defense maps—especially those who enjoy solo or duo play—this map rewards thorough pre-game preparation. Understanding the room’s structure and defensive points is crucial, as predicting what happens upon entry is key. Its design favors individual play over teamwork, making it enjoyable even when played alone. Difficulty varies based on the balance between defense difficulty and rewards, and beginners should practice timing their entry into the room.
맵 선택 가이드
태그는 맵의 핵심 특징을 빠르게 설명하지만 제작 버전마다 규칙이 다를 수 있습니다. 상세 설명에서 권장 인원, 난이도, 플레이 시간과 버전을 함께 확인한 뒤 다운로드하세요.