
공격 스타크래프트 맵 모음
'공격' 태그가 등록된 맵을 모았습니다. 장르 하나로 찾기 어려운 플레이 방식, 난이도와 특징을 중심으로 인기 맵과 최신 맵을 비교해 보세요.
- 등록 맵
- 49개
- 누적 다운로드
- 4
- 누적 조회
- 2,013
인기 맵
다운로드와 조회 반응이 높은 맵입니다.
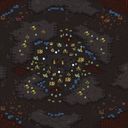
핫 스팟 (Hot Spot)
스타크래프트 브루드워의 유즈맵 《Hot Spot》은 프로토스 플레이어들이 강력한 방어선을 구축한 곳을 공격하는 독특한 디펜스 장르의 맵이다. 맵 중앙에 위치한 ‘핫 스팟’이라 불리는 거점에 프로토스 건물이 빽빽히 배치되어 있으며, 플레이어는 이 구조물을 파괴하는 것이 주요 목표로 보인다. 맵 테두리에는 프로토스 방어 시설이 밀집되어 있어 접근 경로가 제한적이며, 공격 루트는 주로 중앙으로 집중되는 구조로 추정된다. 내부 맵 설명에서 ‘프로토스가 견고히 버티고 있다’는 문구는 방어의 강도를 강조하며, 플레이어는 이 방어선을 돌파하는 전략을 세워야 한다. 맵의 정글 타일셋은 울창한 숲과 자연적인 장애물을 제공하여 시야 확보와 기동성을 제한하는 요소로 보인다. 이 맵은 단일 플레이어용으로 설계되었으며, 컴퓨터가 프로토스 진영을 맡아 방어 역할을 수행하는 것으로 보인다. 공격 루트의 다양성과 방어선의 강도를 고려할 때, 플레이어는 프로토스의 공격 패턴을 파악하고 효율적인 유닛 조합을 활용해야 한다. 특히 프로토스의 보호막과 방어 건물의 조합을 뚫기 위해서는 스플래시 데미지 유닛이나 강력한 근접 유닛이 필수적일 것으로 추정된다. 맵의 난이도는 프로토스의 방어력과 공격 패턴에 따라 크게 달라질 수 있으므로, 초보자는 우선 쉬운 난이도에서 연습한 후 점차 도전하는 것이 좋다. 또한 맵의 중앙 거점이 주요 목표이므로, 공격 루트를 신중히 선택하고 방어 시설을 우선적으로 파괴하는 전략이 중요하다. 플레이 전 미리 프로토스의 방어 라인을 분석하고, 자신이 보유한 유닛의 장단점을 파악하는 것이 성공의 열쇠가 될 것이다. Hot Spot, a custom map in StarCraft: Brood War, is a unique defense-style game where players attack heavily fortified Protoss positions. The map centers around a densely packed Protoss base called the "Hot Spot," which players must destroy to win. The edges of the map feature concentrated Protoss defensive structures, limiting approach routes and forcing attacks primarily through the center. The in-game description emphasizing "Protoss holding firm" highlights the map’s tough defenses, requiring players to break through with strategic planning. The jungle-themed tileset adds dense forests and natural obstacles, restricting visibility and mobility. Designed for single-player, the map pits the player against an AI-controlled Protoss faction defending its base. To overcome the Protoss defenses, players should study attack patterns and optimize unit compositions, as the combination of Protoss shields and defensive structures demands splash damage or powerful melee units. Difficulty varies significantly based on Protoss defense strength and tactics, so beginners are advised to start on easier settings before progressing. Since the central base is the primary objective, careful route selection and prioritizing the destruction of defensive buildings are crucial. Before starting, analyzing the Protoss defensive layout and understanding your units’ strengths and weaknesses will be key to success.
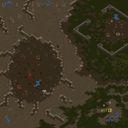
P3) Higher Ground
스타크래프트 브루드워의 Protoss 캠페인 맵 3번째 미션인 'P3) Higher Ground'는 프로토스 군단의 힘을 다시 한 번 확인할 수 있는 흥미로운 전투 맵이다. 이 맵은 프로토스가 테란과 저그를 상대로 전통적인 전술로 승리를 거두는 내용을 담고 있으며, 미션 목표는 '모든 적을 제거하라'로 명시되어 있다. 맵의 전체적인 분위기는 사막 테마의 타일셋으로 구성되어 있으며, 넓은 개활지와 요새화된 고지대가 조화를 이루고 있어 전략적 깊이를 더한다. 플레이어는 프로토스 종족을 선택해 광전사, 집정관, 다크 템플러 등 다양한 유닛을 활용해야 하며, 지형을 활용한 방어와 공격이 핵심이다. 맵의 특징 중 하나는 중앙 고지대가 여러 개의 입구로 나뉘어져 있어 방어와 공세를 펼치기에 적합한 구조로 설계되어 있다는 점이다. 특히, 맵의 왼쪽과 오른쪽 고지대는 각각의 방어 거점으로 활용할 수 있으며, 중앙 평야는 병력 집결과 진격로로 기능한다. 초반에는 적은 소수의 병력으로 공격해오지만, 중반 이후에는 점차 병력의 규모가 커지면서 방어선을 유지하는 동시에 반격을 가해야 한다. 맵의 난이도는 맵의 구조상 프로토스 유저에게 비교적 유리한 편이지만, 테란의 시즈 탱크나 저그의 뮤탈리스크 같은 위협적인 유닛을 상대해야 하기 때문에 신중한 플레이가 요구된다. 추천 대상은 프로토스 유저로, 특히 광전사와 집정관의 조합을 활용한 방어와 반격을 선호하는 플레이어에게 적합하다. 다만, 광전사 위주의 플레이를 선호한다면 테란의 시즈 탱크나 저그의 뮤탈리스크에 취약할 수 있어, 적절한 유닛 조합과 컨트롤이 중요하다. 플레이 전에는 맵의 지형과 주요 거점을 미리 숙지하고, 초반 방어선을 어떻게 구축할 것인지 계획을 세워야 한다. 또한, 자원 관리와 생산 라인의 균형을 유지하는 것도 승리를 좌우하는 중요한 요소다. 맵의 플레이 시간은 개인별 실력에 따라 다르지만, 일반적으로 20~40분 내외로 예상된다. 이 맵은 프로토스 캠페인의 세 번째 미션답게 전략적 깊이를 느낄 수 있는佳作이며, 브루드워의 클래식한Feel을 그대로 느낄 수 있는 작품이다. 특히, 프로토스만의 독특한 유닛 조합과 지형 활용이 매력적인 맵으로, 캠페인 미션의 재미를 극대화하고 싶다면 반드시 플레이해볼 만한 가치가 있다. The third Protoss mission in *StarCraft: Brood War*, "P3) Higher Ground," is an engaging combat map that showcases the might of the Protoss once again. The mission focuses on the Protoss securing victory over Terran and Zerg forces using traditional tactics, with the objective clearly stated as "Destroy all enemies." The map features a desert-themed tileset, blending open plains with fortified high ground to enhance strategic depth. Players control the Protoss, deploying a variety of units such as Zealots, Archons, and Dark Templars, while leveraging the terrain for both defense and offense. A key feature of the map is its central high ground, divided into multiple entrances, making it ideal for both defensive positioning and offensive maneuvers. The left and right high ground areas serve as strong defensive points, while the central plain acts as a gathering point and primary advance route. Early on, enemies attack with small forces, but as the mission progresses, their numbers swell, requiring players to maintain defenses while launching counterattacks. While the map’s structure favors Protoss players, careful play is essential to handle threats like Terran Siege Tanks and Zerg Mutalisks. This mission is best suited for Protoss players, particularly those who favor Zealot and Archon combinations for defense and counterattacks. However, those who rely heavily on Zealots may struggle against Siege Tanks and Mutalisks, making balanced unit composition and control crucial. Before playing, familiarize yourself with the terrain and key strongpoints, and plan your initial defensive setup. Proper resource management and balanced production lines are also vital to securing victory. Playtime varies by skill level but typically ranges between 20 to 40 minutes. As the third Protoss mission in the campaign, "Higher Ground" delivers a deep strategic experience while staying true to *Brood War*’s classic feel. Its unique Protoss unit synergies and terrain utilization make it a standout map, well worth playing for anyone looking to maximize their campaign enjoyment.
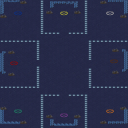
미시 사냥꾼들 (Micro Hunters!)
《Micro Hunters!》는 스타크래프트: 브루드워에서 즐길 수 있는 밀리 기반의 팀 전투형 맵으로, 8인의 플레이어가 두 팀으로 나뉘어 초근접 거리에서 치열한 전투를 펼치는 것이 특징이다. 맵의 이름처럼 ‘미시적 사냥꾼’으로 변신한 플레이어들은 각자 개성을 지닌 유닛을 활용해 적진을 공략하거나 방어해야 하며, 맵 중앙의 좁은 통로와 구불구불한 지형이 전략적인 우위를 점하기 위한 핵심 요소로 작용한다. 맵 전체가 화산 지형으로 디자인되어 지형적 특성과 더불어 시각적인 몰입감을 높였으며, 특히 좁고 복잡한 통로들은 소규모 전투를 유도하여 팀워크와 순간적인 판단력이 요구된다. 초반부터 적과 마주치게 되는 구조상 ‘Speed is of the essence’라는 맵 설명 그대로 신속한 판단과 공격적인 플레이가 승리를 좌우할 것이며, 방어와 공격의 균형을 맞추는 것이 관건이다. 초보 입문자보다는 밀리 경험이 있는 플레이어들에게 더 적합한 맵으로, 특히 팀 전략과 유닛 조합에 대한 이해가 부족한 경우 불리한 위치에서 전투를 시작할 가능성이 크므로, 플레이 전 맵의 지형을 충분히 숙지하고 각 팀의 역할 분담을 미리 정하는 것이 중요하다. 또한, 좁은 길목에서 벌어지는 소규모 교전은 마치 ‘미시적 사냥’을 연상시키며, 팀 전체의 협동심이 빛을 발할 수 있는 구조로 설계되었다는 점에서 흥미로운 경험을 제공한다. 이 맵은 단순 전투뿐만 아니라 맵의 지형을 활용한 전략적 플레이가 요구되므로, 전술적인 사고를 키우고 싶은 밀리 유저들에게 추천할 만하다. Micro Hunters! is a team-based melee map for StarCraft: Brood War, where 8 players are divided into two teams to engage in intense combat in very close proximity. As "micro hunters," players utilize unique units to attack enemy positions or defend their own, with the map's narrow central corridors and winding terrain serving as key strategic elements. The entire map is designed with volcanic terrain, enhancing both visual immersion and tactical depth. The convoluted pathways encourage small-scale battles, demanding quick decision-making and strong teamwork. Given the map's structure, where players confront enemies almost immediately, speed and aggressive play are crucial for victory, as maintaining a balance between defense and offense becomes essential. This map is better suited for experienced melee players rather than beginners, as those unfamiliar with unit compositions and team strategies may find themselves at a disadvantage in unfavorable positions. The narrow pathways evoke a sense of "micro hunting," offering an engaging experience that highlights the importance of team coordination. With its emphasis on strategic play and terrain utilization, Micro Hunters! is highly recommended for melee players looking to hone their tactical skills.
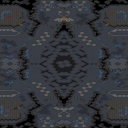
네오 포르테 2.1 (Neo Forte 2.1)
스타크래프트 브루드워 유즈맵 <네오 포르테 2.1>은 강력한 공격과 방어가 조화를 이루는 컴까기 장르의 정석과 같은 맵이다. 맵은 우주 테마의 넓은 공간에 펼쳐져 있으며, 중앙의 요충지를 두고 양측이 끊임없이 병력을 생산하고 전투를 벌인다. 맵의 구조는 대칭형으로 설계되어 있어 공평한 전투가 가능하며, 초보와 숙련자 모두 즐길 수 있는 밸런스를 갖추고 있다. 초반에는 자원 수집과 병력 생산에 집중해야 하며, 중반부터는 상대방의 기지를 공격하거나 방어하는 전략이 중요해진다. 맵 곳곳에 숨겨진 자원 지역과 확장 기지는 플레이어의 선택에 따라 승패를 좌우할 수 있는 변수가 된다. 특히, 맵의 이름은 이탈리아어 음악 용어 'Fortissimo'(매우 강하게)에서 영감을 받은 것으로 보이며, 맵의 빠른 템포와 강렬한 전투를 연상시킨다. 플레이어는 제한된 시간에 맞춰 끊임없이 병력을 생산하고 전략을 구사해야 하며, 한 번의 실수가 전체 게임을 뒤집을 수 있는 긴장감 넘치는 전개가 특징이다. 이 맵은 스타크래프트 유즈맵 중에서도 손꼽히는 인기 컴까기 맵으로, 다운로드와 플레이 횟수가 매우 높은 편이다. 초보자의 경우 기본적인 유닛 컨트롤과 자원 관리부터 숙지한 후 도전하는 것이 좋으며, 숙련자의 경우 다양한 전략과 카운터 전략을 연습할 수 있는 좋은 기회가 된다. 맵의 디자인과 밸런스가 뛰어나며, 특히 우주 테마의 시각적 효과가 gameplay와 어우러져 몰입감을 높인다. 플레이 전에는 맵의 구조와 자원 분포를 숙지하고, 초반 병력 생산 라인을 최적화하는 것이 중요하다. 또한, 상대방의 전략에 따라 유연하게 대처할 수 있는 준비를 갖추는 것이 필수적이다. 게임의 승패는 단순히 병력의 수보다도 전략과 타이밍에 달려있으므로, 신중한 플레이가 요구된다. Neo Forte 2.1, a Brood War custom map in the StarCraft series, is a quintessential example of the "comp" genre, where strong offense and defense come together in perfect harmony. The map unfolds across a vast cosmic landscape, with both sides continuously producing forces and clashing over a central strategic point. Its symmetrical design ensures fair combat, offering balanced gameplay that both beginners and veterans can enjoy. Early on, players must focus on gathering resources and building armies, while mid-game strategies shift toward attacking or defending the opponent’s base. Hidden resource spots and expansion bases scattered throughout the map introduce variables that can sway the outcome based on player choices. The map’s name appears inspired by the Italian musical term *Fortissimo*, meaning "very loud," mirroring its fast-paced, intense battles. Players must constantly produce units and adapt strategies within tight time constraints, where even a single mistake can flip the entire game. As one of the most popular comp maps in StarCraft custom games, it boasts high download and play counts. Beginners should master basic unit control and resource management before diving in, while experienced players will find ample opportunities to refine diverse strategies and counter-strategies. The map’s excellent design and balance, especially its immersive cosmic visuals, enhance the gameplay experience. Before jumping in, familiarize yourself with the map’s layout and resource distribution, optimize your early production lines, and prepare flexible responses to your opponent’s tactics. Victory hinges more on strategy and timing than sheer force, demanding careful, deliberate play.
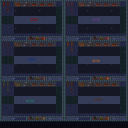
머털이의 개인럴커!! (Muttari's Personal Lurker!!)
스타크래프트 브루드워의 유즈맵으로 주목받는 '[머털이의 개인럴커!!(유닛공짜)]'는 유닛을 무료로 제공하는 컴까기(컴퓨터 상대) 장르의 맵으로, 플레이어는 저렴한 비용으로 강력한 유닛을 활용할 수 있는 특별한 경험을 즐길 수 있다. 맵은 화산 테마의 타일셋을 사용해 시각적 몰입감을 높였으며, 넓은 맵 크기(2048 x 3072)와 화산 지형의 복잡한 구조가 디펜스와 공격 전략의 다양성을 제공한다. 특히 공짜로 제공되는 럴커, 드론, 히드라 등은 초반부터 강력한 전투력을 발휘할 수 있게 해 주어, 플레이어는 자원 관리보다는 전략적 배치와 유닛 활용에 집중할 수 있다. 맵의 하단과 상단에 위치한 기지 구조는 전통적인 디펜스 맵과 유사하지만, 유닛 공짜라는 독특한 요소로 인해 일반적인 컴까기 맵과는 다른 전술적 접근이 요구된다. 초보자는 물론, 전략적 플레이를 선호하는 숙련자까지 폭넓은 유저층을 고려한 밸런스가 특징이다. 플레이어는 기지 방어를 강화하면서도, 맵 곳곳에 배치된 자원과 보너스 지역을 활용해 추가적인 이점을 얻을 수 있다. 특히 럴커의 경우, 지형지물을 활용한 침투 공격이 가능해 맵의 복잡한 구조와 시너지를 발휘한다. 다만, 유닛이 공짜라 하더라도 전술적 판단과 기지 관리가 필수적이므로, 단순히 유닛을Batch 생산하는 것만으로는 승리를 장담할 수 없다. 맵을 플레이하기 전에는 기지 배치와 유닛 조합을 carefully plan하고, 맵의 주요 길목과 고지대를 미리 점령하는 전략이 중요하다. 또한, 상대방의 공격 패턴을 분석해 방어 라인을 효율적으로 구축하는 것이 승리의 열쇠가 될 것이다. 추천하는 플레이어는 전략적 사고를 즐기며, 유닛의 특성을 적극 활용하고자 하는 유저들이다. 특히 초보자의 경우, 기본적인 유닛 조합과 기지 관리 방법을 익힌 후 도전하는 것이 바람직하다. 반면, 숙련자라면 맵의 지형적 특징을 최대한 활용한 기습 공격이나 방어 전략을 세워 볼 수 있을 것이다. 맵의 몰입도를 높이기 위해선, 사운드와 그래픽 설정을 최적화하고, 맵의 특성을 충분히 이해한 후 플레이하는 것이 좋다. 이 맵은 단순히 유닛을Batch 생산하는 재미뿐만 아니라, 전략적 깊이와 전술적 다양성을 동시에 제공하는 훌륭한 유즈맵으로 평가된다. This StarCraft: Brood War custom map, '[Muttari's Personal Lurker!! (Free Units)]', stands out for its unique 'free units' mechanic in the computer-killing (competing against AI) genre. The map utilizes a volcanic tileset, enhancing visual immersion with its expansive size (2048 x 3072) and intricate terrain, which adds depth to defense and attack strategies. The free access to powerful units like Lurkers, Drones, and Hydralisks shifts the focus from resource management to strategic unit deployment and tactical play. While the base structures at the top and bottom resemble classic defense maps, the absence of unit costs allows players to experiment with aggressive or defensive tactics without financial constraints. This feature makes the map appealing to both beginners seeking an accessible entry point and veterans looking for strategic depth. Players should prioritize scouting and securing high-ground positions, as the map's terrain—especially its volcano-themed layout—offers natural chokepoints and ambush opportunities. Lurkers, in particular, excel in terrain-based engagements, making their positioning crucial. However, victory isn't guaranteed by simply producing units; players must adapt their strategies based on AI behavior, which may vary in aggression and unit composition. For optimal performance, beginners should focus on mastering basic unit synergies and base defense mechanics, while advanced players can explore unconventional tactics like feigning attacks or exploiting map asymmetries for surprise victories. The map’s balance between simplicity and depth ensures replayability, making it a solid choice for those who enjoy UMS maps with a twist. To fully appreciate its design, players are encouraged to adjust their game settings for clarity and immerse themselves in the map’s strategic nuances before diving into full-scale battles.
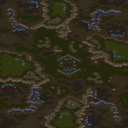
저글링 스토리 (Jungle Story)
스타크래프트 브루드워의 유즈맵 <저글링 스토리>는 정글을 배경으로 펼쳐지는 디펜스형 맵이다. 맵 중앙에 위치한 고대 유적지가 무대이며, 플레이어는 이 유적지를 지키며 끊임없이 몰려드는 적의 공격을 방어해야 한다. 맵의 특징은 사방에서 몰려드는 적 유닛을 상대로 전략적 배치와 자원 관리를 동시에 요구한다는 점으로, 단순히 막아내는 것만이 아니라 적절한 타이밍에 공격을 펼치며 반격을 시도해야 한다. 맵의 지형은 숲과 절벽으로 구성되어 있으며, 이 지형적 특징은 적의 접근 경로를 제한하거나 플레이어의 방어 라인을 보완하는 데 유용하게 활용할 수 있다. 초반에는 비교적 수비에 집중해야 하지만, 중반 이후에는 공격적으로 전환하여 적의 주요 건물을 파괴하는 것이 핵심 목표로 보인다. 맵의 진행 방식은 한정된 자원과 유닛 생산 능력을 바탕으로 적을 제압하는 방식으로,Resource Management(자원 관리)와 Positioning(위치 선정)이 승패를 좌우할 것이다. 난이도는 초보가 플레이하기에는 다소 어렵게 느껴질 수 있으며, 특히 적의 공격 패턴과 타이밍을 숙지하지 못하면 금방 무너질 위험이 있다. 이 맵은 디펜스와 공격의 균형을 맞춰야 하는 만큼, 전략적 사고가 필요한 유저에게 추천한다. 플레이 전 미리 맵의 지형과 적의 공격 루트를 분석해두는 것이 중요하며, 초반에는 방어에 집중하되 중반 이후에는 공격적으로 전환하는 타이밍을 잘 잡아야 한다. 또한, 팀 플레이를 전제로 한 맵이기 때문에 팀원 간의 협력이 필수적이며, 각 플레이어의 역할을 clearly(분명히) 정해두는 것이 좋다. 맵의 분위기는 정글과 고대 유적이 어우러진 신비로운 느낌으로, 플레이어는 맵의 아름다움과 긴장감을 동시에 느낄 수 있을 것이다. StarCraft: Brood War's custom map *Zergling Story* is a defense-focused map set against a jungle backdrop. The stage is an ancient ruin located at the center of the map, and players must defend it from relentless enemy attacks. The map’s key feature is the need to balance strategic unit placement and resource management while fending off enemies from all directions—not just defending, but also launching well-timed counterattacks. The terrain consists of forests and cliffs, which can restrict enemy approaches or reinforce the player’s defensive lines. While the early game requires a focus on defense, mid-to-late game shifts to an aggressive playstyle, with the primary objective being the destruction of enemy key structures. The gameplay revolves around overcoming enemies with limited resources and unit production, where resource management and positioning determine victory or defeat. The difficulty may feel steep for beginners, as failing to recognize enemy attack patterns and timings can lead to quick collapses. This map is best suited for players who enjoy balancing defense and offense, requiring strategic thinking. Before playing, it’s crucial to analyze the terrain and enemy attack routes, focusing on defense early while seizing the right moment to switch to aggression in the mid-game. Since the map is designed for team play, cooperation among teammates is essential, and clearly defining each player’s role is highly recommended. The atmosphere blends jungle and ancient ruins into a mystical setting, allowing players to experience both the map’s beauty and the tension of battle.
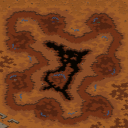
핫 스팟 (Hot Spot)
‘핫 스팟(Hot Spot)’은 스타크래프트 브루드워의 밀리 맵으로, 2~7인의 플레이어가 한꺼번에 전투를 벌이는 중앙 지점이 인상적인 맵이다. 맵 중앙에는 거대한 ‘핫 스팟’이라는 이름의 분화구가 있으며, 주변은 넓은 평지나 언덕으로 둘러싸여 있다. 이 분화구는 맵의 이름과도 같은 핵심 지역으로, 대부분의 전투가 벌어지는 곳이기도 하다. 플레이어들은 이곳을 중심으로 자원과 병력을 모아 전투를 펼치거나, 상대방을 밀어내는 전략을 구사해야 한다. 전투는 맵 중앙의 좁은 통로를 두고 벌어지는 경우가 많으며, 언덕이나 벙커를 활용한 방어 전략, 또는 빠른 기동력으로 적을 몰아치는 공격 전략이 유효하다. 또한, 맵 곳곳에 있는 미네랄과 가스는 비교적 균등하게 분배되어 있어, 자원 부족으로 인한 불리함을 겪기 어려운 구조다. 다만, 중앙 지역을 장악하지 못하면 자원 채취가 어려워질 수 있으므로, 초반부터 적극적인 움직임을 보이는 것이 중요하다. 이 맵은 특히 2~4인 정도의 소규모 전투에서 밸런스가 잘 맞으며, 다수의 플레이어가 참여할수록 전략의 다양성이 커지는 특징이 있다. 또한, 맵의 지형이 비교적 단순해 초보 플레이어도 쉽게 적응할 수 있지만, 중앙 지역을 둘러싼 언덕과 좁은 통로, 벙커 등은 숙련된 플레이어에게 유리한 요소가 될 수 있다. ‘핫 스팟’은 밀리 맵으로서의 기본적인 재미와 전략적 깊이를 모두 제공하는 동시에, 빠른 전투와 긴장감 있는 상황을 연출하는 데 최적화된 맵이다. 플레이 전에는 맵의 중앙 지역과 주변의 언덕, 벙커 위치를 숙지하고, 자원 분배와 병력 이동 경로를 미리 계획하는 것이 좋다. 또한, 상대방의 움직임을 예측하며 중앙 장악을 노리는 전략과, 방어선을 구축하는 전략 중 하나를 선택해 플레이하는 것이 효과적이다. 이 맵은 밀리 맵 중에서도 비교적 공격적인 플레이가 유효한 맵으로, 빠른 전투와 전략적인 판단이 승리를 좌우할 것이다. ‘Hot Spot’ is a *StarCraft: Brood War* melee map where 2 to 7 players engage in combat at a central hotspot. The map features a massive crater named "Hot Spot" at its core, surrounded by open plains and hills. This crater is the namesake and focal point of the map, where most battles unfold. Players must gather resources and forces around this area or push opponents out to secure dominance. Fights often happen in the narrow passages near the crater’s center, where defensive strategies—like using hills or bunkers—or aggressive rushes with fast-moving units can be effective. The map distributes minerals and gas evenly, minimizing resource disadvantages, though controlling the central area is crucial to avoid early economic struggles. The map excels in small-scale battles with 2 to 4 players, where balance is strong, while larger player counts introduce more strategic variety. Its simple terrain makes it easy for beginners to adapt, but the surrounding hills, narrow paths, and bunkers favor experienced players. ‘Hot Spot’ delivers both fundamental fun and depth as a melee map, optimized for fast-paced, high-tension gameplay. Before playing, familiarize yourself with the central area, surrounding hills, and bunker positions, and plan resource and troop movement routes. Choose between strategies—either pressuring opponents for central control or fortifying defenses. This map rewards aggressive play, where quick battles and sharp decisions often decide victory.
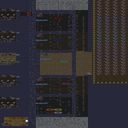
라인 매트릭스 2.0 (Line Matrix 2.0)
Line Matrix 2.0은 스타크래프트 브루드워용 UMS 유즈맵으로, 주로 1대5 혹은 1대다 형태의 비대칭 전투를 목표로 설계된 컴까기(컴퓨터 상대와의 전투) 맵이다. 맵 전체가 2048×4096 타일 해상도로 구성돼 있어 넓은 전장과 복잡한 지형이 특징이며, 황무지 타일셋을 사용해 광활한 사막 느낌을 준다. 시작 지점은 중앙에 위치하고, 플레이어는 제한된 자원으로 기본 유닛을 생산해 적군의 베이스를 침공한다. 적은 여러 웨이브로 몰려오며, 각 웨이브마다 유닛 종류와 진입 경로가 다소 변형되어 전술적 변수를 제공한다. 주요 목표는 적의 핵심 건물을 파괴하거나, 일정 시간 동안 살아남아 적의 공격을 견디는 것이다. 전투 진행 중에는 지형을 이용한 우회로와 고지대에서의 사격이 효과적이며, 자원 배치가 고르게 분포돼 있어 초반 확장과 방어를 동시에 고민해야 한다. 플레이 전 확인해야 할 포인트는 적의 웨이브 패턴을 파악하고, 초기 자원 배분을 어떻게 할지 전략을 세우는 것이다. 초보자보다는 기본 유닛 운용에 익숙한 플레이어에게 적합하며, 빠른 속도의 공격과 방어 전환을 즐기는 유저에게 특히 추천한다. Line Matrix 2.0 is a custom UMS map for StarCraft: Brood War designed primarily for asymmetric battles such as 1‑vs‑5 or 1‑vs‑many. The map spans a large 2048×4096 tile area using the Desert tileset, giving it an expansive, barren feel. Players start near the center with limited resources, building basic units to assault the AI‑controlled base. Enemy forces arrive in multiple waves, each varying slightly in unit composition and entry points, adding tactical variety. The main objectives are either to destroy the enemy’s core structures or to survive a set duration against continuous attacks. Utilizing terrain—such as high ground for ranged advantage and alternate paths for flanking—is crucial, and resources are spread evenly, forcing early expansion and defense decisions. Before playing, it’s advisable to study the wave patterns and plan initial resource allocation. The map suits players comfortable with basic unit control rather than complete beginners, and it especially appeals to those who enjoy rapid attack‑defense transitions.
넥서스 디스트로이어 판타지 (Nexus Destroyers Fantasy)
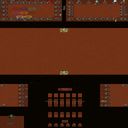
스타크래프트 브루드워의 유즈맵 <Nexus Destroyers Fantasy>는 프로토스 종족의 기지를 파괴하는 목표를 중심으로 구성된 컴까기(컴퓨터 상대 공격) 장르의 맵입니다. 맵 제목에서 알 수 있듯 ‘넥서스를 파괴하라’라는 핵심 컨셉을 가지고 있으며, 프로토스 기지가 중앙에 배치되어 있고 플레이어는 테란 또는 저그로 이 기지를 공격해야 합니다. 맵 이미지를 보면 중앙에 거대한 프로토스 기지가 있으며, 주변으로 공격로를 따라 방어 시설과 유닛들이 배치되어 있는 것이 보입니다. 특히 기지 주변의 방어 타워와 유닛 배치로 인해 공격이 쉽지 않으며, 다양한 전략을 구사해야만 승리를 가져올 수 있을 것으로 추정됩니다. 플레이 방식은 기본적으로 컴퓨터가 소유한 프로토스 기지를 파괴하는 것이 목표입니다. 맵의 구조상 중앙 기지에서부터 멀어질수록 방어가 약화되는 구조로 보이며, 초반에는 소규모 유닛으로 기지를 공격하다가 점차 병력을 모아 대규모 공격을 펼치는 전략이 필요할 것입니다. 맵의 해상도가 2048 x 3072로 넓은 편이지만, 타일 단위가 64 x 96로 비교적 큰 편이라 시야 확보가 용이하며, 황혼 타일셋을 사용해 분위기가 웅장하게 느껴집니다. 이 맵은 초보자가 플레이하기에는 다소 어려울 수 있으며, 적어도 테란이나 저그의 기본적인 빌드와 유닛 운용에 익숙한 플레이어에게 추천됩니다. 또한, 다인용 맵으로 설계되어 있어 6명의 플레이어가 참여할 수 있지만, 팀전보다는 각자 독립적으로 플레이하는 구조로 보입니다. 맵의 버전이 1.5로 안정화된 상태이며, 제작자 MidNighTime에 의해 공식적으로 배포되었습니다. 플레이 시간은 맵의 규모와 난이도를 고려했을 때 약 20~40분 정도로 예상되며, 난이도는 보통 정도로 설정하는 것이 적절해 보입니다. 플레이 전 확인해야 할 점은 기지 주변의 방어 시설과 유닛 배치입니다. 특히 프로토스 기지의 보호막 및 실드 배터리, 그리고 주변의 질럿과 드라군 위주로 구성된 방어 병력은 상당한 위협이 될 수 있습니다. 또한, 맵의 넓은 공간을 활용한 기습 공격이나 다중 공격 루트를 고려해야 합니다. 초반에는 소규모 정찰로 방어 상태를 확인하고, 이후에는 적절한 타이밍에 대규모 공격을 감행하는 것이 핵심 전략이 될 것입니다. StarCraft: Brood War's custom map *Nexus Destroyers Fantasy* is a PvE (player vs. environment) map where the core objective is to destroy a Protoss base. As the title suggests, the central concept revolves around "destroying the Nexus," with the Protoss base positioned at the center of the map. Players take on the role of either Terran or Zerg and must launch attacks against this base. The map image reveals a massive Protoss base at the center, surrounded by defensive structures and units along the attack paths, making direct assaults challenging and requiring varied strategies to secure victory. The primary goal is to destroy the computer-controlled Protoss base. The map’s design appears to weaken defenses as you move farther from the central base, so early-game strategies involve small-scale unit attacks before gradually amassing forces for large-scale offensives. With a resolution of 2048 x 3072, the map is spacious, but its tile size of 64 x 96 makes vision management easier. The twilight tileset enhances the map’s grand and immersive atmosphere. This map may prove difficult for beginners, so it’s best suited for players already familiar with basic Terran or Zerg builds and unit control. Designed for up to six players, it follows a free-for-all format rather than a team-based structure. Currently in a stable version 1.5, the map is officially distributed by its creator, MidNighTime. Given its scale and difficulty, playtime typically ranges from 20 to 40 minutes, with an overall moderate difficulty level. Before playing, it’s crucial to assess the defensive setups around the base, particularly the Protoss shield batteries, protective barriers, and the Zealots and Dragoons stationed nearby—these can pose significant threats. Players should also consider exploiting the map’s open spaces for ambushes or multi-pronged attacks. Early reconnaissance to gauge the enemy’s defensive state is vital, followed by well-timed large-scale assaults as the key to success.
뉴 넥서스 디스트로이어 (NEW NEXUS DESTROYERS)
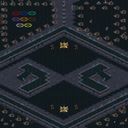
‘뉴 넥서스 디스트로이어!’는 스타크래프트 브루드워의 대표적인 넥서스 부수기 유즈맵으로, v4.2 버전으로 업데이트된 작품이다. 이 맵은 플레이어가 직접 넥서스를 파괴하는 것이 목표인 만큼, 공격과 방어의 균형을 맞추며 치열한 전투를 펼치게 된다. 맵 중앙에는 거대한 프로토스 넥서스가 자리 잡고 있으며, 플레이어는 자신의 본진에서 유닛을 생산해 이 넥서스를 향해 끊임없이 공격을 시도한다. 맵의 특징은 유닛 선택 시스템으로, 두 가지의 다른 유닛 조합을 선택할 수 있어 전략적 다양성을 제공한다는 점이다. 이를 통해 플레이어는 자신의 플레이 스타일에 따라 공격과 방어의 비중을 조절할 수 있으며, 상대방의 전략에 대응하는 유연성을 발휘할 수 있다. 공격 측과 방어 측의 역할이 명확히 나뉘어 있으며, 맵 곳곳에 배치된 자원과 방어 시설은 전투의 긴장감을 더한다. 특히 넥서스 주변의 좁은 통로와 요새화된 지역은 소규모 전투가 자주 벌어지는 곳이기 때문에, 미세한 컨트롤과 타이밍이 승패를 좌우할 수 있다. 맵 디자인 또한 화산 타일셋을 활용해 독특한 분위기를 연출하며, 전장의 열기 속에서 플레이어는 각자의 역할을 충실히 수행해야 한다. 초보자의 경우 유닛의 특성과 맵의 지형을 익히는 데 시간이 필요할 수 있지만, 점차 익숙해지면 전략적인 플레이가 가능해진다. 이 맵은 주로 6명의 플레이어가 참여하는 것이 적합하며, 팀 플레이보다는 각자의 역할을 맡아 개별적으로 넥서스를 파괴하는 데 집중하는 것이 특징이다. 플레이 시간은 맵의 복잡성과 플레이어의 숙련도에 따라 달라질 수 있지만, 일반적으로는 약 30분 내외의 전투가 예상된다. ‘뉴 넥서스 디스트로이어!’는 넥서스 부수기 장르의 정수를 담아낸 작품으로, 공격과 방어의 긴장감 속에서 흥미로운 전투를 경험할 수 있는 맵이다. 초보자부터 숙련자까지 모두 즐길 수 있는 만큼, 프로토스 유닛의 조합과 맵의 특징을 숙지한 후 플레이를 시작하는 것이 좋다. “New Nexus Destroyer!” is a classic Brood War Nexus-destruction custom map, now updated to version 4.2. Since the goal is to smash the enemy Nexus yourself, every match becomes a tense tug-of-war between relentless offense and stubborn defense. At the center of the map looms a towering Protoss Nexus; players spawn in their own bases, pump out units, and hurl wave after wave toward that glowing target. What sets this map apart is its dual-unit system: before the battle begins you pick one of two distinct unit compositions, giving you room to tailor your strategy. Lean aggressive? Lean defensive? You decide. And when your opponent surprises you with an unexpected build, the system’s flexibility lets you pivot fast. Attackers and defenders each have crystal-clear roles, while scattered resources and defensive structures scattered across the map keep the pressure on. The tight corridors and fortified zones around the Nexus are hotspots for small-scale skirmishes, so tight micro and perfect timing can flip the outcome in an instant. The map’s volcanic tile set cranks up the heat visually, turning the battlefield into a fiery crucible where every player must execute their role to the letter. Newcomers will need time to learn the unit quirks and terrain quirks, but once those clicks become muscle memory the map opens up to real strategic depth. Six players is the sweet spot, and while team play isn’t the focus, everyone still feels the push-and-pull of collective momentum. Matches usually clock in around thirty minutes, though that can stretch or shrink depending on map familiarity and player skill. “New Nexus Destroyer!” distills the Nexus-destruction genre into its purest form, wrapping explosive offense and nerve-wracking defense into one unforgettable experience. Whether you’re a rookie or a seasoned veteran, study those Protoss comps and the map layout first—then dive in and start tearing Nexuses apart.
사하라 워즈 (Sahara Warz)
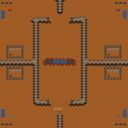
사하라 사막 한가운데서 펼쳐지는 피 튀기는 전투를 그린 스타크래프트 브루드워 유즈맵 <사하라 워즈>는, 플레이어와 적들이 모두 사막에 고립된 상태에서 벌어지는 사투를 묘사한 작품이다. 맵의 전체적인 구도는 사각형 형태의 넓은 평지 위에 건조한 사막 지형과 오아시스가 배치되어 있으며, 중앙에는 거대한 분화구가 있어 전투의 무대가 된다. 지형의 특징상 시야가 제한적이고 기동성이 중요해지는데, 특히 오아시스 주변은 자원 확보와 방어의 핵심 지점이 된다. 플레이어는 시작 지점에서 출발해 맵 곳곳에 흩어진 자원을 확보하며 병력을 양성하고, 상대방을 먼저 전멸시키는 것이 목표로 보인다. 맵의 중앙 분화구는 전투가 자주 벌어지는 장소로, 이곳에서 병력이 교착하는 경우가 많을 것이다. 맵의 가장자리로 갈수록 완만하게 지형이 높아지며, 언덕 지형이 제공되어 시야 확보와 방어에 유리한 지점이 된다. 맵의 디자인상으로는 중앙 지역이 가장 치열한 전투가 벌어지는 장소로 예상되며, 상대방을 각개격파하기보다는 중앙에서 포위 공략을 시도하는 전략이 유효할 것으로 보인다. 초보자부터 숙련자까지 모두 즐길 수 있는 밸런스형 맵으로 보이며, 자원 관리와 병력 운용이 핵심인 만큼 이 두 가지에 집중하면 좋은 결과를 얻을 수 있을 것이다. 특히, 초반 자원 확보가 느리므로 신속한 확장과 병력 생산 타이밍을 맞추는 것이 중요하다. 또한, 맵의 중앙 분화구는 적대 진영과의 등지고 싸우는 경우가 많으므로, 상대방의 병력 움직임을 예측하고 기동성을 살린 공격을 계획하는 것이 중요하다. 이 맵은 디펜스와 공격의 균형을 맞추는 전략적 사고를 요구하며, 이를 통해 플레이어는 전투의 재미와 긴장감을 동시에 느낄 수 있을 것이다. Sahara Warz is a StarCraft: Brood War custom map that immerses players in a brutal desert showdown. Set in the middle of the Sahara Desert, the map features a wide rectangular battlefield with arid terrain and scattered oases. The centerpiece is a massive crater, serving as the focal point of intense battles. The terrain restricts visibility and demands high mobility, especially around the oases, which are critical for resource control and defense. Players start at designated positions, gather scattered resources, and build armies to eliminate opponents. The central crater is likely the most contested area, where most clashes occur. The map edges rise gradually, offering elevated terrain that provides better visibility and defensive advantages. The design suggests that central area battles are inevitable, and strategies revolving around encirclement and coordination may prove effective. This map offers a balanced experience suitable for both beginners and seasoned players, with resource management and army deployment being key factors for success. Early-game resource scarcity makes quick expansion and timely army production vital. The central crater often forces face-to-face confrontations, so predicting enemy movements and leveraging mobility in attacks is crucial. Sahara Warz challenges players to balance defense and offense, delivering both strategic depth and thrilling combat experiences.
LT with Crazy CPU 3.7 (컴까기)
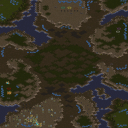
스타크래프트 브루드워의 대표적인 컴까기 장르 유즈맵인 <LT with Crazy CPU 3.7>은 다수의 플레이어가 컴퓨터 상대를 펼치는 전략 디펜스 게임으로, 그야말로 '미치도록 어려운 컴퓨터'와의 전투를 경험할 수 있는 맵이다. 맵은 사막 타일셋으로 구성되어 있으며, 넓은 평원과 산지 지형이 조화를 이루며 플레이어의 시선을 사로잡는다. 내부 설명에 따르면 플레이어 3명이 최적의 밸런스를 제공한다고 하지만, 실제로는 6인까지 플레이가 가능한 구조로 보인다. 게임의 주 목표는 컴퓨터의 모든 건물을 파괴하는 것이며, 맵의 제목에서 느껴지듯Crazy CPU'라는 이름에 걸맞게 엄청난 물량과 스킬, 전략을 구사하는 컴퓨터와 맞서 싸워야 한다. 맵의 버전 3.7은 2008년 11월 27일로 마지막 업데이트가 이루어진 것으로 확인되며, 제작자인 theleo_ua는 이 맵을 2000년 11월 18일에 배포했다고 명시하고 있다. 맵의 분위기는 다소 도전적인 면이 강하며, 특히 컴퓨터의 공격 패턴이 예측하기 어려워 초보 플레이어에게는 적합하지 않을 수 있다. 하지만 숙련된 플레이어라면 다양한 전략을 구사하며 승리를 노려볼 만하다. 플레이 전에는 반드시 컴퓨터의 공격 패턴과 맵의 주요 경로, 자원 분포를 숙지하고, 방어 건물의 배치와 유닛 조합을 신중히 계획해야 한다. 또한, 맵의 넓은 공간을 활용한 기동전과 лока드(locaid) 전술을 익히는 것이 승리의 열쇠가 될 것이다. 이 맵은 단순히 방어뿐만 아니라 공격과 기습, 자원 관리까지 종합적으로 요구하는 만큼, 스타크래프트의 전략적 깊이를 즐기고자 하는 플레이어에게 강력히 추천된다. StarCraft: Brood War's classic "comp-kill" genre custom map, *LT with Crazy CPU 3.7*, is a strategy defense game where multiple players face off against computer opponents—truly a battle against "insanely difficult AI." The map features a desert tileset, blending vast plains and rugged terrain to captivate players. While the internal description suggests an optimal balance for three players, the structure appears to support up to six. The primary objective is to destroy all of the computer's buildings, and as the name *Crazy CPU* implies, you'll face relentless waves, overwhelming skill usage, and cunning strategies from the AI. Version 3.7, the final update released on November 27, 2008, was originally distributed by the creator, theleo_ua, on November 18, 2000. The map exudes a challenging atmosphere, with the computer's unpredictable attack patterns making it unsuitable for beginners. However, experienced players can test their mettle by employing diverse strategies. Before diving in, you must thoroughly understand the AI's attack patterns, key pathways, and resource distribution, then carefully plan your defensive structures and unit compositions. Mastering mobile warfare and *locaid* tactics—leveraging the map's open spaces—will be crucial to victory. Since this map demands more than just defense—requiring offense, ambushes, and resource management—it's highly recommended for players seeking to experience the full strategic depth of StarCraft.
최근 등록된 맵
새로 추가된 파일과 버전을 확인하세요.
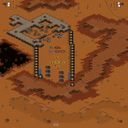
벌쳐 태그 II: 더 인베이전 (Vulture Tag II: the Invasion)
스타크래프트: 브루드워의 숨은 명작 유즈맵 가운데 하나로 꼽히는 《벌쳐 태그 II: 더 인베이전》은 벌쳐를 조종하며 Protoss 기지를 파괴하는 컴까기 맵이다. 맵의 핵심은 적 기지 방어塔와 벙커로 둘러싸인 Protoss 본진을 찾아내어 공격을 성공시키는 데 있다. 황혼 테마의 넓은 지형 위에 배치된 벙커와 방어 시설들은 플레이어의 전략적 선택을 끊임없이 요구하며, 맵의 전체적인 분위기는 긴장감과 집중력을 요구하는 디펜스 및 공격형 플레이가 조화를 이룬다. 벌쳐의 빠른 기동성과 Protoss 유닛의 강력한 방어력 간의 대결은 이 맵의 매력을 극대화하는 요소로, 초보자와 숙련자 모두에게 즐거움을 제공할 수 있는 구조로 설계되었다. 특히 맵의 중간 지점에 위치한 Protoss 방어시설은 플레이어의 실력에 따라 공략 난이도가 크게 달라지므로, 반복 플레이를 통해 전략을 다듬을 수 있는 장점이 있다. 벌쳐의 특수 능력인 공중 유닛이라는 점과 Protoss의 방어력 우위라는 상성을 고려한 밸런스는 이 맵의 핵심 경쟁력으로, 브루드워 유즈맵의 정수를 느낄 수 있는 작품이라 할 수 있다. Vulture Tag II: the Invasion is one of the hidden gems among StarCraft: Brood War custom maps, where players control Vultures to destroy Protoss bases. The core gameplay revolves around locating and attacking Protoss bases surrounded by bunkers and defensive towers. The twilight-themed terrain, featuring bunkers and defensive structures, demands constant strategic decision-making from players, blending defensive and offensive elements seamlessly. The tension between the Vulture's speed and the Protoss units' defensive power maximizes the map's appeal, offering an enjoyable experience for both beginners and veterans. The mid-map Protoss defensive structures vary in difficulty based on player skill, making the map ideal for refining strategies through repeated play. The balanced synergy between Vultures' aerial advantage and Protoss' defensive strength is a key competitive feature, encapsulating the essence of Brood War custom maps.
핫 스팟 (Hot Spot)
스타크래프트 브루드워의 유즈맵 《Hot Spot》은 프로토스 플레이어들이 강력한 방어선을 구축한 곳을 공격하는 독특한 디펜스 장르의 맵이다. 맵 중앙에 위치한 ‘핫 스팟’이라 불리는 거점에 프로토스 건물이 빽빽히 배치되어 있으며, 플레이어는 이 구조물을 파괴하는 것이 주요 목표로 보인다. 맵 테두리에는 프로토스 방어 시설이 밀집되어 있어 접근 경로가 제한적이며, 공격 루트는 주로 중앙으로 집중되는 구조로 추정된다. 내부 맵 설명에서 ‘프로토스가 견고히 버티고 있다’는 문구는 방어의 강도를 강조하며, 플레이어는 이 방어선을 돌파하는 전략을 세워야 한다. 맵의 정글 타일셋은 울창한 숲과 자연적인 장애물을 제공하여 시야 확보와 기동성을 제한하는 요소로 보인다. 이 맵은 단일 플레이어용으로 설계되었으며, 컴퓨터가 프로토스 진영을 맡아 방어 역할을 수행하는 것으로 보인다. 공격 루트의 다양성과 방어선의 강도를 고려할 때, 플레이어는 프로토스의 공격 패턴을 파악하고 효율적인 유닛 조합을 활용해야 한다. 특히 프로토스의 보호막과 방어 건물의 조합을 뚫기 위해서는 스플래시 데미지 유닛이나 강력한 근접 유닛이 필수적일 것으로 추정된다. 맵의 난이도는 프로토스의 방어력과 공격 패턴에 따라 크게 달라질 수 있으므로, 초보자는 우선 쉬운 난이도에서 연습한 후 점차 도전하는 것이 좋다. 또한 맵의 중앙 거점이 주요 목표이므로, 공격 루트를 신중히 선택하고 방어 시설을 우선적으로 파괴하는 전략이 중요하다. 플레이 전 미리 프로토스의 방어 라인을 분석하고, 자신이 보유한 유닛의 장단점을 파악하는 것이 성공의 열쇠가 될 것이다. Hot Spot, a custom map in StarCraft: Brood War, is a unique defense-style game where players attack heavily fortified Protoss positions. The map centers around a densely packed Protoss base called the "Hot Spot," which players must destroy to win. The edges of the map feature concentrated Protoss defensive structures, limiting approach routes and forcing attacks primarily through the center. The in-game description emphasizing "Protoss holding firm" highlights the map’s tough defenses, requiring players to break through with strategic planning. The jungle-themed tileset adds dense forests and natural obstacles, restricting visibility and mobility. Designed for single-player, the map pits the player against an AI-controlled Protoss faction defending its base. To overcome the Protoss defenses, players should study attack patterns and optimize unit compositions, as the combination of Protoss shields and defensive structures demands splash damage or powerful melee units. Difficulty varies significantly based on Protoss defense strength and tactics, so beginners are advised to start on easier settings before progressing. Since the central base is the primary objective, careful route selection and prioritizing the destruction of defensive buildings are crucial. Before starting, analyzing the Protoss defensive layout and understanding your units’ strengths and weaknesses will be key to success.
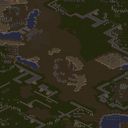
십자군전쟁 HolyCross
《십자군전쟁 HolyCross》는 스타크래프트: 브루드워의 유즈맵으로, 역사적 배경인 십자군 전쟁을 배경으로 한 디펜스 장르의 전략 게임이다. 맵은 넓은 평야와 도시를 배경으로 펼쳐지며, 이슬람군과 십자군 간의 공격과 방어가 주요 콘텐츠로 구성되어 있다. 플레이어는 이슬람군을 선택해 예루살렘을 지키거나, 십자군을 선택해 예루살렘을 공격하는 두 가지 주요 목표 중 하나를 수행해야 한다. 맵의 중앙에 위치한 예루살렘은 전략적 요충지로, here를 중심으로 여러 개의 입구가 배치되어 있어 방어와 공격의 균형을 맞추는 것이 중요하다. 특히, 맵의 지형은 도시와 평야가 조화를 이루며, 각 지역의 타일 배치와 고저차가 공격 루트와 방어 전략에 큰 영향을 미친다. 맵의 디자인에서 돋보이는 점은 사막 타일셋을 활용한 사실적인 분위기와 함께, 유닛 배치와 방어 시설의 구성이 플레이어의 전략적 선택을 유도한다는 것이다. 예를 들어, 예루살렘 주변의 성벽과 탑은 방어의 핵심이 되며, 여기에서 보병과 궁수 유닛을 배치해 적의 공격을 견뎌내야 한다. 반면, 십자군이라면 예루살렘을 향해 진군하는 루트를 carefully 설계해야 하며, 보급로와 후방 지원 유닛의 활용이 승패를 가를 수 있다. 이 게임은 단일 플레이어 또는 다중 플레이어로 진행할 수 있으며, 특히 7인 플레이를 지원하는 것으로 추정된다. 맵의 난이도는 보통 수준으로, 초보자는 방어와 공격의 기본을 익히는 데 집중해야 하며, 숙련자는 전략적 심화와 유닛 조합을 통해 승률을 높일 수 있다. 《십자군전쟁 HolyCross》는 역사적 스토리와 전략적 깊이를 결합한 유즈맵으로, 스타크래프트의 클래식한 디펜스 장르의 매력을 느낄 수 있는 작품이다. 특히, 넓은 맵과 다양한 전략적 선택지가 제공되어 반복 플레이 시에도 질리지 않는 재미를 선사한다. 추천하는 대상은 전략 게임과 역사물을 좋아하는 플레이어로, 팀워크와 전략적 사고가 중요한 만큼 친구들과 함께 플레이하는 것을 권장한다. 또한, 맵을 처음 플레이하기 전에는 예루살렘 주변의 방어 시설과 공격 루트를 미리 살펴보는 것이 중요하다. 맵의 인코딩이 cp949로 되어 있어 한글 표시가 정상적으로 작동한다는 점도 고려할 때, 한국어 사용자에게는 더욱 친숙한 환경에서 즐길 수 있다. HolyCross is a UMS (User-Made Scenario) map for StarCraft: Brood War, set in the historical context of the Crusades. The game blends defense mechanics with strategic depth, challenging players to either defend Jerusalem as the Islamic forces or attack it as the Crusaders. The map features a vast open plain interspersed with urban structures, creating a dynamic battlefield where terrain and elevation play crucial roles in gameplay. Jerusalem, located centrally, serves as the focal point of the conflict, surrounded by multiple entry points that demand careful defensive or offensive planning. The map’s design leverages the desert tileset to evoke a sense of authenticity, with strategic elements like walls and towers around Jerusalem acting as key defensive structures. Players must deploy infantry and ranged units effectively to withstand enemy assaults. For the Crusaders, advancing toward Jerusalem requires meticulous route planning, supply line management, and tactical unit deployment to secure a victory. The map supports single-player or multiplayer modes, with an estimated player count of 7, though team configurations are not explicitly defined. The difficulty is moderate, making it accessible to beginners who can focus on mastering basic defense and attack strategies, while advanced players can experiment with unit synergies and deeper strategic nuances. HolyCross stands out for its historical narrative and strategic complexity, offering a fresh take on classic defense-themed UMS maps in StarCraft. Its expansive map design and varied strategic options ensure replayability, appealing to fans of strategy games and historical themes alike. For optimal gameplay, players are advised to familiarize themselves with the defensive structures around Jerusalem and potential attack routes before diving into the action. The map’s cp949 encoding ensures seamless Korean language support, enhancing accessibility for Korean-speaking players.
9999의 발키리잡아라 (Valkyrie Hunting 9999)
‘9999의 발키리잡아라’는 스타크래프트 브루드워에서 제공하는 유즈맵으로, 플레이어들이 발키리를 잡는 전투를 펼치는 디펜스형 맵이다. 맵의 목표는 맵 중앙에 등장하는 발키리 유닛을 제한된 시간 안에 제거하는 것이며, 난이도는 제작자의 설명대로 ‘상당히 어려움’으로 설정되어 있다. 맵 전체는 정글 타일셋으로 이루어져 있으며, 넓은 공간과 복잡한 지형이 특징이다. 발키리는 지속적으로 이동하거나 공격을 가하며 플레이어의 병력을 소모시키기 때문에, 효율적인 자원 관리와 전략 구사가 필수적이다. 맵의 이름과 설명에서 알 수 있듯이, 발키리 제거라는 단순한 목표와는 달리 난이도가 높아져서 도전적인 경험을 제공한다. 특히 발키리의 패턴을 숙지하고, 병력 조합 및 배치에 신경을 써야만 성공할 수 있다. 제작자 주석에 따르면 이 맵은 심심할 때 만들기 시작한 것으로 보이며, 커스텀 게임에서 즐기기에 적합한 유즈맵으로 보인다. 초보 플레이어는 발키리의 공격 패턴과 맵 구조를 충분히 숙지한 후 참여하는 것이 좋으며, 충분한 연습을 통해 클리어 확률을 높일 수 있을 것이다. 디펜스 장르 특성상 맵의 밸런스와 난이도 조절이 핵심인데, 제작자는 이를 ‘상당히 어려움’으로 명시해 과도한 난이도를 설정했을 가능성이 있다. 따라서 플레이어는 맵의 특성과 발키리의 행동을 분석하여 전략을 세우는 것이 중요하다. 이 맵은 발키리 제거라는 명확한 목표와 함께, 전략적 사고와 적응력을 요구하는 디펜스 게임으로 즐길 수 있으며, 특히 도전적인 유저들에게 추천할 만하다. 맵을 플레이하기 전에는 발키리의 이동 경로와 공격 범위를 미리 확인하고, 병력 생산 및 업그레이드 타이밍을 조율하는 데 중점을 두는 것이 좋다. ‘Catch the Valkyries’ in StarCraft: Brood War is a custom defense map where players engage in combat to hunt down Valkyries. The objective is to eliminate the Valkyries that appear in the center of the map within a limited time, with the difficulty set to "very hard" as described by the creator. The entire map features a jungle tileset, characterized by its vast open spaces and intricate terrain. Since Valkyries continuously move or attack to deplete players' forces, efficient resource management and strategic execution are essential. Despite the straightforward goal of eliminating Valkyries, the difficulty is heightened by their patterns, requiring players to master the Valkyries' behavior, troop compositions, and positioning to succeed. According to the creator’s notes, the map was likely made during a spare moment and seems well-suited for casual custom games. Beginners should familiarize themselves with the Valkyries' attack patterns and map layout before attempting, as practice will significantly improve their chances of clearing the map. As a defense genre map, balancing difficulty is key, and the creator’s "very hard" classification may indicate an intentionally high challenge. Players should analyze the map’s mechanics and Valkyries’ behavior to devise effective strategies. With its clear objective and emphasis on strategic thinking and adaptability, this map offers an engaging defense experience, especially recommended for those seeking a challenge. Before playing, it’s wise to study the Valkyries’ movement paths and attack ranges and focus on coordinating troop production and upgrade timing.
P3) Higher Ground
스타크래프트 브루드워의 Protoss 캠페인 맵 3번째 미션인 'P3) Higher Ground'는 프로토스 군단의 힘을 다시 한 번 확인할 수 있는 흥미로운 전투 맵이다. 이 맵은 프로토스가 테란과 저그를 상대로 전통적인 전술로 승리를 거두는 내용을 담고 있으며, 미션 목표는 '모든 적을 제거하라'로 명시되어 있다. 맵의 전체적인 분위기는 사막 테마의 타일셋으로 구성되어 있으며, 넓은 개활지와 요새화된 고지대가 조화를 이루고 있어 전략적 깊이를 더한다. 플레이어는 프로토스 종족을 선택해 광전사, 집정관, 다크 템플러 등 다양한 유닛을 활용해야 하며, 지형을 활용한 방어와 공격이 핵심이다. 맵의 특징 중 하나는 중앙 고지대가 여러 개의 입구로 나뉘어져 있어 방어와 공세를 펼치기에 적합한 구조로 설계되어 있다는 점이다. 특히, 맵의 왼쪽과 오른쪽 고지대는 각각의 방어 거점으로 활용할 수 있으며, 중앙 평야는 병력 집결과 진격로로 기능한다. 초반에는 적은 소수의 병력으로 공격해오지만, 중반 이후에는 점차 병력의 규모가 커지면서 방어선을 유지하는 동시에 반격을 가해야 한다. 맵의 난이도는 맵의 구조상 프로토스 유저에게 비교적 유리한 편이지만, 테란의 시즈 탱크나 저그의 뮤탈리스크 같은 위협적인 유닛을 상대해야 하기 때문에 신중한 플레이가 요구된다. 추천 대상은 프로토스 유저로, 특히 광전사와 집정관의 조합을 활용한 방어와 반격을 선호하는 플레이어에게 적합하다. 다만, 광전사 위주의 플레이를 선호한다면 테란의 시즈 탱크나 저그의 뮤탈리스크에 취약할 수 있어, 적절한 유닛 조합과 컨트롤이 중요하다. 플레이 전에는 맵의 지형과 주요 거점을 미리 숙지하고, 초반 방어선을 어떻게 구축할 것인지 계획을 세워야 한다. 또한, 자원 관리와 생산 라인의 균형을 유지하는 것도 승리를 좌우하는 중요한 요소다. 맵의 플레이 시간은 개인별 실력에 따라 다르지만, 일반적으로 20~40분 내외로 예상된다. 이 맵은 프로토스 캠페인의 세 번째 미션답게 전략적 깊이를 느낄 수 있는佳作이며, 브루드워의 클래식한Feel을 그대로 느낄 수 있는 작품이다. 특히, 프로토스만의 독특한 유닛 조합과 지형 활용이 매력적인 맵으로, 캠페인 미션의 재미를 극대화하고 싶다면 반드시 플레이해볼 만한 가치가 있다. The third Protoss mission in *StarCraft: Brood War*, "P3) Higher Ground," is an engaging combat map that showcases the might of the Protoss once again. The mission focuses on the Protoss securing victory over Terran and Zerg forces using traditional tactics, with the objective clearly stated as "Destroy all enemies." The map features a desert-themed tileset, blending open plains with fortified high ground to enhance strategic depth. Players control the Protoss, deploying a variety of units such as Zealots, Archons, and Dark Templars, while leveraging the terrain for both defense and offense. A key feature of the map is its central high ground, divided into multiple entrances, making it ideal for both defensive positioning and offensive maneuvers. The left and right high ground areas serve as strong defensive points, while the central plain acts as a gathering point and primary advance route. Early on, enemies attack with small forces, but as the mission progresses, their numbers swell, requiring players to maintain defenses while launching counterattacks. While the map’s structure favors Protoss players, careful play is essential to handle threats like Terran Siege Tanks and Zerg Mutalisks. This mission is best suited for Protoss players, particularly those who favor Zealot and Archon combinations for defense and counterattacks. However, those who rely heavily on Zealots may struggle against Siege Tanks and Mutalisks, making balanced unit composition and control crucial. Before playing, familiarize yourself with the terrain and key strongpoints, and plan your initial defensive setup. Proper resource management and balanced production lines are also vital to securing victory. Playtime varies by skill level but typically ranges between 20 to 40 minutes. As the third Protoss mission in the campaign, "Higher Ground" delivers a deep strategic experience while staying true to *Brood War*’s classic feel. Its unique Protoss unit synergies and terrain utilization make it a standout map, well worth playing for anyone looking to maximize their campaign enjoyment.
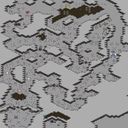
호랑이 감옥 전투 (Battle of Tiger Prison)
호랑이 감옥 전투는 플랫폼 타일셋의 삭막하고 기계적인 분위기를 활용해 적 기지를 정면 돌파하는 유즈맵이다. 제목에서 풍기는 고립된 요새의 이미지처럼 맵은 중앙의 거대한 감옥 기지를 중심으로 설계되어 있으며, 플레이어들은 외곽에서 출발해 이 요새를 향해 진격하게 된다. 시작 지점은 자원이 풍부하지 않아 주어진 병력과 초반 확보한 자원을 얼마나 효율적으로 운용하느냐가 생존과 직결된다. 맵 곳곳에는 좁은 통로와 플랫폼 특유의 고저차가 존재해 시야 확보와 지형을 이용한 전술적 교전이 중요하게 작용한다. 적 기지는 여러 겹의 방어선으로 중무장되어 있어 단순한 물량 공세보다는 특정 지점을 집중 공략하거나 우회 경로를 찾는 센스가 요구된다. 아군과의 협동이 강조되는데, 각 플레이어가 맡은 전선에서 동시에 압박을 가해야 적의 방어를 분산시킬 수 있고, 한 명이라도 방심하면 전선이 빠르게 무너질 수 있다. 전투가 장기화되면 후방의 자원이 고갈되기 때문에 지속적인 병력 보충보다는 한 번의 결정적인 돌파 타이밍을 잡는 것이 중요하다. 맵의 시각적 구성은 플랫폼 타일셋의 강철 구조물과 어두운 배경이 어우러져 긴장감을 높이며, 감옥이라는 콘셉트를 잘 살리기 위해 폐쇄적인 공간 배치와 인공적인 지형이 두드러진다. 이 맵은 혼자서는 공략이 거의 불가능할 정도로 적의 방어가 견고하기 때문에, 팀원 간의 소통과 역할 분담을 즐기는 플레이어에게 추천한다. 다만, 플레이 전에 시작 지점의 자원 분포와 적 방어선의 배치를 미리 파악하지 않으면 초반부터 큰 피해를 입을 수 있으므로, 첫 시도에서는 신중한 정찰과 함께 팀원과의 전략 공유가 반드시 필요하다. 전반적으로 이 맵은 단순한 전투보다는 지형을 이해하고 제한된 자원 속에서 최적의 공격 경로를 찾아내는 퍼즐 같은 재미를 제공하며, 친구들과 함께 호흡을 맞춰 난공불락의 요새를 함락시키는 성취감을 맛보기에 좋은 유즈맵이다. The Battle of Tiger Prison is a use map setting that leverages the cold, mechanical atmosphere of the Platform tileset to create a fortress assault scenario. The name evokes an image of a tightly locked stronghold, and the map is indeed structured around a massive central prison base that players must storm from the outer edges. Starting resources are not abundant, so efficient management of the initial units and early expansions determines survival and the tempo of the game. Narrow corridors and the distinct elevation changes of the platform terrain make line of sight and tactical positioning crucial in every firefight. The enemy base is layered with multiple defensive lines, demanding more than a simple massed attack; you need to concentrate force on specific weak points or discover alternative flanking routes. Cooperation is heavily emphasized because simultaneous pressure from all players is required to stretch the enemy defenses thin, and a single collapsed front can cause a chain reaction that unravels the entire assault. As the battle drags on, rear area resources tend to dry up, making it vital to seize a decisive timing for a knockout strike rather than relying on endless reinforcements. Visually, the dark steel structures and artificial lighting of the platform tileset heighten the sense of confinement and urgency, reinforcing the prison break concept through claustrophobic corridor layouts. This map is nearly impossible to clear solo due to the sheer density of hostile fortifications, so it is best suited for players who enjoy active communication and clear role distribution within a team. Before jumping in, it is advisable to scout the starting mineral distribution and the enemy defense perimeter carefully, as a blind rush often leads to devastating early losses. Sharing scouting information and coordinating a synchronized push with your allies is not optional but mandatory. In essence, this map offers a puzzle-like satisfaction where understanding the terrain and finding the optimal attack vector under resource constraints matters more than brute force, delivering a rewarding sense of achievement when the seemingly impregnable fortress finally falls to a well-executed team effort.
아마징 터렛 비사가스 파이널 (Amazing Turret Visagoth Final)
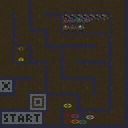
‘Amazing Turret Visagoth Final’는 스타크래프트: 브루드워의 UMS 유즈맵으로, 일명 ‘터렛 디펜스’라는 장르에 속하는 임무입니다. 맵은 황무지 타일셋을 바탕으로 2048x2048의 넓은 공간에 펼쳐져 있으며, 중앙에 위치한 플레이어 기지 주변으로 적의 웨이브가 끊임없이 밀려듭니다. 플레이어는 건물을 지어 방어선을 구축하고, 적이 오는 길을 차단하거나 직접 공격해 막아내는 방식으로 progression을 즐길 수 있습니다. 맵 곳곳에는 자원과 건물을 배치할 수 있는 공간이 넓게 배치되어 있어, 방어 타워를 효율적으로 배치하고 업그레이드를 진행하는 재미가 있습니다. 특히 ‘Visagoth’라는 이름답게, 맵의 곳곳에 특이한 형태로 배치된 구조물이 인상적입니다. 초반에는 자원 수집과 방어선 구축이 중요하며, 중반부터는 다채로운 유닛과 스킬을 활용해 웨이브를 막아내는 전략이 요구됩니다. 맵의 난이도는 중간 정도로 예상되며, 초보자의 경우 방어 타워의 배치를 carefully 해야 하고, 숙련자라면 보다 공격적인 전략으로 웨이브를 소탕할 수 있습니다. 플레이 시간은 개인의 전략과 난이도 조절에 따라 30분에서 1시간 정도가 소요될 것으로 보입니다. 이 맵은 디펜스와 타워 디펜스 장르를 좋아하는 플레이어, 특히 건물을 건설하고 방어선을 구축하는 재미를 중시하는 유저들에게 강력히 추천합니다. 다만, 팀 플레이보다는 개인 플레이에 중점을 둔 구조이므로, 1인 또는 1팀 구성이 적합할 것입니다. 맵을 플레이하기 전에는 반드시 방어 타워의 종류와 업그레이드 경로를 숙지하고, 자원의 분배를 신중히 결정해야 합니다. 또한, 중앙 기지 주변의 입구와 길목을 미리 확인해 두어 예상치 못한 웨이브가 몰려올 때 빠르게 대응할 수 있도록 준비하는 것이 중요합니다. Amazing Turret Visagoth Final is a UMS custom map in StarCraft: Brood War, falling under the turret defense genre. The map, set on a 2048x2048 wasteland tileset, features a central player base surrounded by relentless enemy waves. Players construct buildings to establish defensive lines, blocking enemy paths or engaging them directly to progress through the challenge. The map offers ample space for resource management and tower placement, allowing for strategic upgrades and layout planning. The distinctive Visagoth-themed structures scattered across the map add a unique visual flair. Early gameplay focuses on resource gathering and base fortification, while mid-to-late stages require leveraging diverse units and skills to withstand escalating waves. The difficulty is moderate, with beginners needing to carefully position defensive towers and veterans able to adopt more aggressive strategies. Playtime varies between 30 minutes to an hour, depending on strategy and difficulty settings. This map is highly recommended for players who enjoy defense and tower defense genres, particularly those who appreciate the satisfaction of building and reinforcing defenses. Its design caters more to solo play or single-team setups rather than multiplayer cooperation. Before playing, it’s essential to familiarize yourself with tower types, upgrade paths, and resource allocation. Additionally, pre-checking entry points and pathways around the central base ensures quick responses to unexpected waves.
터렛 디펜스 x2 골드 에디션 (Turret Defense x2 Gold Edition)
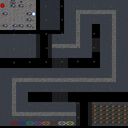
스타크래프트 브루드워의 디펜스 장르 유즈맵 〈터렛 디펜스 x2 골드 에디션〉은 이름 그대로 방어와 포탑 운영에 중점을 둔 작품으로, 강력한 적의 공세를 효과적인 영웅 유닛과 방어 시설로 막아내는 재미를 제공한다. 맵 내부는 넓은 우주 타일셋을 기반으로 구성되어 있으며, 왼쪽 아래에서 시작하는 플레이어는 지속적인 웨이브 공격을 방어해야 한다. 화면 가운데에 위치한 대형 구조물은 방어 거점으로 기능하며, 이곳을 중심으로 다수의 포탑을 건설하고 영웅 유닛을 배치해 전선을 유지해야 한다. 적의 공격 패턴은 등급에 따라 점차 강력해지므로 초반에 충분한 준비를 갖추는 것이 중요하며, 특히 강력한 영웅 유닛의 활용이 관건이다. 맵 우측 하단에 위치한 미네랄 멀미(?) 지역은 일종의 보너스 자원으로 추정되어 추가적인 포탑 건설이나 영웅 업그레이드에 활용할 수 있다. 전체적으로는 방어선의 균형을 맞추면서도 영웅 유닛의 성장과 포탑 배치 전략을 끊임없이 고민하게 만드는 구조로, 디펜스 장르의 전형적인 재미를 잘 살린 작품이다. 초보자도 쉽게 접근할 수 있지만, 고난이도 웨이브에서는 전략적 판단력이 요구된다. 특히 영웅 유닛의 선택과 배치, 포탑 종류별 특성 이해가 승패를 좌우하므로 게임에 익숙해질수록 전략의 깊이가 깊어지는 특징을 지닌다. 추천 대상은 디펜스 장르에 관심 있는 유저이며, 방어와 전략적 플레이를 좋아하는 게이머들에게 특히 어울린다. 플레이 전에는 맵 중앙의 방어 거점 위치와 포탑 건설 가능 지역, 영웅 유닛의 초기 배치 위치를 미리 확인하는 것이 좋다. 또한, 맵 우측 하단의 추가 자원 지역을 활용해 후반 방어력을 보강할 수 있는지를 점검해두면 좋다. 맵의 난이도는 상대적으로 높은 편이지만, 영웅 유닛의 성장과 포탑의 효율적인 배치로 극복할 수 있는 구조로 설계되어 있다. Turret Defense x2 Gold Edit is a StarCraft: Brood War UMS defense map where players must hold off relentless enemy waves using hero units and defensive structures. The map is set on a vast space-themed tile set, with the player starting at the bottom-left corner and defending a central stronghold that serves as the main defensive point. Multiple turret placements are available around the stronghold, and players must balance resource management with strategic upgrades. The right-bottom corner of the map appears to contain supplementary mineral resources, potentially useful for late-game fortifications or hero enhancements. The enemy's attack waves escalate in strength over time, making early preparation and efficient hero management crucial for survival. The map's design emphasizes strategic depth, requiring players to constantly adapt their defenses while leveraging hero units' unique abilities. While accessible to beginners, higher difficulty waves demand careful planning and execution. The map is particularly recommended for players who enjoy defense mechanics and strategic gameplay. Before playing, it's advisable to familiarize yourself with the stronghold's location, available turret placement zones, and initial hero positioning. The map's difficulty is notably high, but effective use of hero progression and turret layouts can turn the tide in your favor.
맵 선택 가이드
태그는 맵의 핵심 특징을 빠르게 설명하지만 제작 버전마다 규칙이 다를 수 있습니다. 상세 설명에서 권장 인원, 난이도, 플레이 시간과 버전을 함께 확인한 뒤 다운로드하세요.