
고전 맵 스타크래프트 맵 모음
'고전 맵' 태그가 등록된 맵을 모았습니다. 장르 하나로 찾기 어려운 플레이 방식, 난이도와 특징을 중심으로 인기 맵과 최신 맵을 비교해 보세요.
- 등록 맵
- 49개
- 누적 다운로드
- 21
- 누적 조회
- 2,067
인기 맵
다운로드와 조회 반응이 높은 맵입니다.
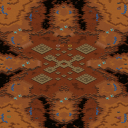
트로이 SE 2.0 (Troy SE 2.0)
스타크래프트 브루드워의 고전 맵으로 renowned ASL(아프리카TV 스타리그) 공식맵으로도 채택된 Troy SE 2.0은 2007년 최초 제작 이후 오랜 기간 동안 사랑받아온 밀리 맵이다. 황혼 테마의 넓은 평야와 중앙의 협곡이 조화를 이루며, 중앙 자원지대와 두 개의 멀티 지역이 균형 있게 배치되어 있다. 맵의 이름은 고대 도시 트로이를 연상시키며, 맵의 구조 역시 마치 트로이 전쟁의 격전지와도 같은 위험한 중앙 교두보를 공유하는 두 진영의 대결을 떠올리게 한다. 시작 위치가 서로의 시야에서 멀리 떨어져 있어 초반의 정찰과 전략적 판단이 중요한데, 특히 중앙 자원지대 주변의 언덕과 협곡은 빠른 진출을 방해하는 요소가 된다. 4096x4096의 넓은 맵 크기 덕분에 넓은 시야와 긴 교전 거리를 제공하며, 황혼 테마의 붉은 노을 색감은 맵의 분위기를 한층 더 깊게 만든다. ASL 공식맵으로 채택된 만큼 밸런스와 플레이어간의 공정한 경쟁을 중시한 디자인으로, 프로게이머들 사이에서도 전략적 깊이를 높이 평가받는 맵이다. 초보자들은 중앙 교두보의 중요성을 간과하기 쉬우며, 경험 있는 플레이어라면 언덕과 협곡을 활용한 다양한 전략을 펼칠 수 있다. especialmentes 초반 출발선에서 멀티 지역으로의 접근성이 중요하며, 테란의 경우 벙커링이나 사이클론 활용, 프로토스의 경우 관문 빌드를 통한 빠른 진출, 저그의 경우 뮤탈리스크나 러커를 활용한 중앙 장악 등 다양한 전략 구사가 가능하다. 맵의 난이도는 중간 수준으로 평가되며, 넓은 시야와 긴 교전 거리 덕분에 전략적 사고와micro 컨트롤 모두 요구되는 하이브리드형 밸런스 맵으로 자리잡았다. 특히 ASL 공식맵으로 사용되면서 많은 프로게이머들의 검증을 받았기 때문에, 경쟁력을 갖추고자 한다면 반드시 연습해볼 만한 가치가 있는 맵이다. 시작 전에는 중앙 자원지대의 배치와 협곡의 존재 여부를 확인하고, 자신의 전략에 맞는 빌드와 운영 계획을 미리 세워두는 것이 중요하다. Troy SE 2.0 is a classic Brood War map that has been widely loved since its initial release in 2007 and was even adopted as an official map for the renowned ASL (AfreecaTV StarLeague). Set against a twilight theme, the map features vast plains and a central canyon that create a balanced battlefield. The central resource area and two multi-location bases on each side are strategically positioned to ensure fairness. The map's name, Troy, evokes the ancient city and its design mirrors the strategic challenges of the Trojan War, with both sides sharing a dangerous central foothold. The starting positions are deliberately placed far from each other, emphasizing the importance of early scouting and strategic decision-making. The central resource zone, surrounded by hills and canyons, adds an extra layer of challenge by limiting quick advances. With a map size of 4096x4096, Troy SE 2.0 offers wide sight lines and long engagement distances, enhanced by the red-hued twilight atmosphere. As an ASL official map, its design prioritizes balance and fair competition, earning high praise from professional gamers for its strategic depth. Beginners may overlook the significance of the central foothold, while experienced players can leverage the terrain—such as hills and canyons—for diverse strategies. Terran players might utilize bunkers or Cyclones for early pressure, Protoss players could opt for gateway builds for rapid expansion, and Zerg players could focus on Mutalisks or Lurkers to control the center. The map is considered to have a medium difficulty level, requiring both strategic foresight and micro-management due to its wide sight lines and extended engagement ranges. Its status as an ASL official map means it has been thoroughly tested by top-tier players, making it a valuable map to practice for those aiming to improve their competitive edge. Before starting, players should verify the layout of the central resource area and the presence of canyons, then plan their build orders and strategies accordingly to maximize their chances of success.
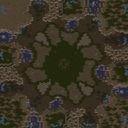
태도 SE 1.91 (Attitude SE 1.91)
스타크래프트 브루드워의 고전 밀리 맵 'Attitude SE 1.91'은 4인용 맵으로, 사막 테마의 넓은 평지 위에서 펼쳐지는 치열한 전투를 즐길 수 있는 명작으로 평가받습니다. 맵의 중앙에는 넓은 개활지가 펼쳐져 있어 빠른 전투가 가능하며, 양 측 진영은 좌우로 대칭을 이루며 배치되어 있습니다. 각 진영에는 미네랄과 베스핀 가스가 풍부하게 배치되어 있어 자원 수급이 원활하고, 건물을 짓기에도 적합한 공간이 확보되어 있습니다. 맵의 가장 큰 특징은 입구와 출구가 상대적으로 넓고 평탄하다는 점으로, 탱크나 벌처 같은 유닛을 활용한 기동전이나 시즈 탱크의 포격전을 펼치기에 최적화되어 있습니다. 또한, 맵의 가장자리로 갈수록 지형이 점점 높아지며 바위가 등장하는데, 이 지역은ucker나 러커 같은 지상 유닛을 배치하기 어려운 구조로 되어 있어 상대방의 러시 방어를 위한 요충지가 될 수 있습니다. 맵의 밸런스는 비교적 안정적이지만, 중앙 개활지에서 벌어지는 전투에서 승리하는 쪽이 게임을 쉽게 이끌어나갈 수 있어 초반 러시나 타이밍 러시를 노리는 플레이가 중요합니다. 또한, 맵의 넓이 때문에 오버로드나 드랍쉽을 활용한 후방 교란이 유용하게 활용될 수 있으며, 상대방의 mineral line을 노리거나 mineral line에 위치한 SCV를 견제하는 플레이가 승리를 좌지우지할 수 있습니다. 초보자부터 숙련자까지 즐길 수 있는 밸런스 좋은 맵으로, 특히 테란과 프로토스의 조합이 강세를 보이는 맵으로 알려져 있습니다. 플레이 전에는 자원 분배와 초반 러시 타이밍을 carefully 계획하는 것이 중요하며, 상대방의 빌드 오더를 읽고 그에 맞게 대응하는 것이 관전 포인트입니다. 이 맵은 스타크래프트의 밀리 대전 문화에서 오랫동안 사랑받아 온 맵으로, 특히 1.91 버전은 여러 번의 밸런스 패치를 거쳐 안정적인 플레이 환경을 제공합니다. Attitude SE 1.91 is a classic 4-player melee map in StarCraft: Brood War, offering intense battles on a wide, desert-themed open field. The map features symmetrical starting positions on both sides, each with abundant mineral and vespene gas resources, making resource management and building placement straightforward. The most notable feature is the wide, flat entrances and exits, which are ideal for tank or vulture-based mobility or siege tank sniping. The terrain gradually rises near the edges, with rocks that make it difficult to deploy ground units like zerglings or hydralisks, serving as strategic choke points for defense. While the map is generally balanced, controlling the central open area can give a significant advantage, making early rushes or timing attacks crucial. The map's size also allows for effective use of overlords or dropships to disrupt the opponent's mineral lines or target SCVs. Suitable for both beginners and advanced players, this map is particularly favored for Terran and Protoss matchups. Before playing, careful planning of resource distribution and rush timing is essential, and adapting to the opponent's build order can be a key factor in victory. Popular in Brood War melee culture, version 1.91 has undergone multiple balance patches to ensure a stable and enjoyable playing experience.
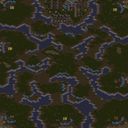
임요환 과 7:1 (Im Yo-Hwan vs 7:1)
‘임요환 과 7:1’은 스타크래프트 브루드워의 classic 맵으로, 1명의 플레이어가 7명의 상대방을 상대로 싸우는 역전 드라마를 연출하는 팀 밀리 장르의 유즈맵이다. 맵의 핵심은 ‘1 vs 7’이라는 극명한 대비를 살린 전투 설계에 있다. 1명의 플레이어는 중앙에 위치한 넥서스에서 시작하며, 광물과 가스를 확보한 후 빠르게 테란 병력을 육성해야 한다. 반면, 7명의 상대방은 맵 외곽에 배치된 시작 지점에서 출발해 중앙으로 밀집하며, 대군으로 밀어붙이는 전략을 구사한다. 맵의 구조는 중앙 언덕과 평지, 좁은 길목이 교묘히 배치되어 있어 1명의 플레이어는 좁은 통로를 방어하거나, 언덕을 활용한 시야 우위를 바탕으로 다수의 적을 상대해야 한다. 반대로 7명의 플레이어는 협공을 통해 중앙을 장악하거나, 언덕을 우회해 후방 타격을 노리는 전술적 선택이 필요하다. 전투는 초반부터 치열하게 전개되며, 1명의 플레이어는 조합과 컨트롤로 버텨야 하고, 7명의 플레이어는 빠른 확장과 병력 운용으로 승리를 노린다. 이 맵의 묘미는 단일 플레이어의 끈기 있는 플레이와 다수의 플레이어의 협동심이 동시에 요구된다는 점이다. 특히, 1명의 플레이어는 다수의 공격을 막아내며 시간을 벌어야 하고, 7명의 플레이어는 한 명의 실수로 전선이 무너질 수 있어 긴장감이 지속된다. 초보자는 방어와 자원 관리에 중점을 두고, 숙련자는 병력 조합과 위치 선정을 통해 승기를 잡는 것이 중요하다. 또한, 맵의 디자인과 분위기는 ‘헌터 편’이라는 설명에서 느껴지는 바와 같이, 1명의 영웅이 다수의 적을 상대하는 서사적 구도를 강조한다. 이 맵은 팀 밀리 장르의 정수를 담아내며, 플레이어 간의 전략과 심리전을 극대화하는 데 중점을 두고 있다. 추천 대상은 팀 밀리 경험이 있는 플레이어부터, 역전 드라마를 즐기는 모든 유저들에게 적합하다. 특히, 1명의 플레이어는 끈기 있게 방어하며 시간을 버는 플레이 스타일을 선호하는 경우, 7명의 플레이어는 빠른 확장과 협공 전략을 즐기는 경우에 매력적으로 느껴질 것이다. 플레이 전에는 맵의 지형을 숙지하고, 병력 조합과 자원 관리에 대한 사전 계획을 세우는 것이 중요하다. 또한, 팀 간의 커뮤니케이션이 원활하지 않다면 예상치 못한 실수로 인해 경기가 급변할 수 있으므로 주의가 필요하다. 이 맵은 스타크래프트 유즈맵의 클래식한 재미를 재현하면서도, 1 vs 7이라는 극적인 대비를 통해 흥미로운 전투를 제공한다. This classic Brood War custom map, ‘임요환 과 7:1’, delivers a thrilling 1 vs 7 team melee experience where one player faces off against seven opponents in a dramatic reversal of fortunes. The map’s core lies in its asymmetrical design: the single player starts at a central Nexus with limited resources, while the seven opponents begin on the outskirts, quickly expanding and coordinating their forces to overwhelm the lone player. The terrain features a mix of central hills and narrow pathways, forcing the single player to rely on strategic positioning and tight choke points for defense, while the seven players must navigate terrain advantages and execute coordinated attacks to break through. The gameplay unfolds in intense, early-stage battles where the lone player must survive through careful resource management and micro-management, while the seven players aim to crush their foe through overwhelming numbers and rapid expansions. The true appeal of this map is its dual demand for perseverance from the single player and teamwork from the seven players, creating a tense and dynamic experience. Beginners should focus on solid defense and resource efficiency, while veterans will thrive by optimizing unit compositions and exploiting positional advantages. The narrative hinted at in the internal description—‘헌터편’—adds a heroic undertone, framing the single player as a lone warrior against hordes of enemies. This map perfectly encapsulates the essence of team melee custom maps, emphasizing strategic depth and psychological warfare. Ideal for players who enjoy team-based melee with a twist, it rewards patience, coordination, and adaptability. Before playing, familiarize yourself with the map’s terrain, plan your unit compositions, and establish clear communication with teammates to avoid costly mistakes. Whether you’re defending or attacking, ‘임요환 과 7:1’ offers a classic Brood War experience with a fresh, high-stakes twist.
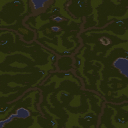
Garden Of War (가든 오브 워)
‘Garden Of War’는 스타크래프트 브루드워의 고전 밀리 맵으로, 8명의 플레이어가 중앙의 넓은 평원과 외곽의 협소한 지역을 중심으로 전투를 벌이는 구조를 갖추고 있다. 맵의 이름은 ‘전쟁의 정원’이라는 뜻으로, 마치 평화로운 정원처럼 보이는 지형이 실제로는 치열한 전투가 벌어지는 전장으로 변모하는 아이러니를 담고 있다. 맵은 크게 세 구역으로 나뉘며, 중앙은 넓은 평야가 펼쳐져 있어 병력 운용과 기지 확장 시 유리한 위치를 제공한다. 반면 외곽 지역은 협소한 지형과 복잡한 지형이 조화를 이루며, 초반 러시나 기습 공격에 취약한 지점들도 존재한다. 특히 맵의 동쪽과 서쪽에는 협곡과 언덕이 있어 시야 확보와 병력 배치에서 전략적 우위를 점할 수 있는 포인트가 많다. 맵의 타일셋은 사막을 바탕으로 디자인되어 있으며, 황량한 지형이 전투의 긴장감을 더한다. 맵의 밸런스는 중앙 평야를 차지하는 자와 외곽을 선점하는 자 간의 힘싸움이 주요 특징으로, 초보자와 숙련자 모두에게 흥미로운 전략적 선택을 강요한다. 특히 중앙을 차지하기 위한 치열한 접전이 벌어질 가능성이 높으며, 초반 멀티테스킹과 자원 관리 능력이 승패를 가르는 중요한 요소로 작용할 것이다. 이 맵은 밀리 장르의 기본 틀을 따르지만, 지형의 복잡성과 중앙 평원의 중요성 때문에 초보자보다는 intermediate 이상의 플레이어에게 더 적합한 구성으로 보인다. 스팀 맵 최초로 ‘Garden Of War’라는 제목으로 재탄생한 이 맵은, 스타크래프트의 밀리 장르에 익숙한 플레이어라면 누구나 한 번쯤 즐겨볼 만한Classic한 선택지다. 플레이 전에는 중앙 평야의 확보 가능성, 외곽 지역에서의 기습 가능성, 그리고 지형의 복잡도를 미리 숙지하고 임하는 것이 좋다. 특히 언덕과 협곡을 활용한 시야 싸움과 병력 배치 전략을 미리 연습해두면 전투에서 큰 이점을 얻을 수 있을 것이다. ‘Garden of War’ is a classic *StarCraft: Brood War* melee map featuring eight players battling across a central open plain and narrow outer regions. The name—meaning “Garden of War”—reflects the irony of a terrain that appears peaceful yet transforms into a fierce battlefield. The map is divided into three main zones: the expansive central plain offers strong positioning for troop movement and base expansion, while the outer areas combine tight spaces and complex terrain, creating vulnerability to early rushes and ambushes. The eastern and western sides feature valleys and hills, providing strategic vantage points for vision control and troop placement. Designed with a desert tile set, the barren landscape heightens the tension of combat. The balance hinges on the struggle between those controlling the center and those dominating the outer regions, forcing both beginners and experienced players to make meaningful strategic choices. Fierce clashes for central control are likely, with early multitasking and resource management playing decisive roles in victory. While following the conventions of the melee genre, the map’s complexity and the importance of the central plain make it better suited for intermediate or higher-level players. Revived on Steam under the same name, it remains a classic choice for *StarCraft* melee veterans. Before playing, assess your chances of securing the central plain, the risks of ambushes in outer zones, and the terrain’s intricacies. Mastering vision control and troop positioning on hills and valleys will give you a significant edge in battle.
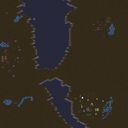
토탈 Annihilation (Total Annihilation)
스타크래프트 브루드워의 고전 밀리 맵 'Total Annihilation'은 넓은 황무지 타일셋과 균형 잡힌 지형을 바탕으로 한 3인용 맵으로, 전장 한가운데 위치한 중앙 섬에서 전투가 펼쳐지는 것이 특징이다. 맵의 핵심은 중앙 섬 주변의 좁은 통로와 다리로, 이 곳을 두고 플레이어들이 초반 자원 확보와 병력 운용 전략을 펼치게 된다. 황무지 타일셋의 황량한 분위기는 맵의 긴장감을 더하며, 넓은 평지에서는 대규모 병력 교전이 가능해 밀리 특유의 박진감을 느낄 수 있다. 중앙 섬은 중앙 자원 멀티 역할을 겸하기도 하며, 이곳을 장악한 플레이어는 전황을 유리하게 이끌 수 있다. 시작 위치 간 거리는 비교적 가까워서 초반 러시가 빈번히 발생할 수 있으며, 다리나 좁은 길목을 방어하기 위한 입구막기 전략도 중요하다. 맵의 난이도는 밸런스가 잘 잡혀 있어 초보자와 숙련자 모두 즐길 수 있으며, 특히 3인전에서의 변수와 전략적 깊이가 돋보인다. 플레이 전에는 중앙 섬의 자원과 병력 동선, 다리/통로의 방어 포인트를 미리 숙지하는 것이 좋다. 이 맵은 밀리 맵으로서의 기본기를 충실히 갖추고 있어, 브루드워의 정통파 밀리 플레이를 즐기고자 하는 유저들에게 추천할 만하다. Total Annihilation is a classic Brood War melee map set on a vast wasteland tileset, designed for 3 players. The central island in the middle of the map becomes the focal point of early-game combat, where players vie for control of resources and strategic positioning. The wasteland aesthetic enhances the map's tense atmosphere, while the open plains allow for large-scale engagements typical of melee matches. The central island also functions as a shared resource point, and securing it early can dictate the flow of the game. With relatively short distances between starting positions, early rushes are common, making choke point defenses around bridges or narrow paths crucial. The map's balanced design ensures it appeals to both beginners and experienced players, with the 3-player format introducing unique strategic variables. Before playing, it's wise to familiarize yourself with the central island's resources, troop movement routes, and defensive positions around bridges or corridors. This map is a solid choice for those seeking a traditional Brood War melee experience, offering a faithful representation of core melee mechanics.
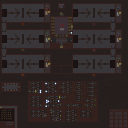
와리가리 디펜스 Fixed 2.4 (WaRiGaRi Defense Fixed 2.4)
와리가리 디펜스 Fixed 2.4는 스타크래프트 브루드워의 대표적인 디펜스 장르 유즈맵으로, 플레이어들이 끊임없이 몰려드는 적군을 방어하는 재미를 극대화한 맵이다. 맵의 중앙에는 거대한 기지 건물이 자리 잡고 있으며, 외부 테두리를 따라 적절한 위치에 방어 건물이 배치되어 있다. 적의 공격 루트는 맵 여기저기 흩어져 있는 입구들을 통해 끊임없이 들어오며, 플레이어는 제한된 자원으로 각 입구를 어떻게 방어할지 전략을 세우고 건설을 관리해야 한다. 맵의 특징은 정글 타일셋을 활용한 자연스러운 지형 배치와 함께, 중앙 기지 주변으로 잔디와 나무가 어우러져 눈길을 사로잡는 디자인에 있다. 방어 건물의 종류는 다양하게 배치되어 있으며, 플레이어는 자원 관리와 동시에 적절한 건물 조합을 선택해야 한다. 맵의 난이도는 단계적으로 상승하며, 후반으로 갈수록 적의 공격 패턴이 복잡해지고 물량이 많아진다. 초보자도 쉽게 접근할 수 있는 구조이지만, 고수층을 위한Challenge도 충분히 제공한다. 특히, 각 입구를 방어하는 전략이 중요한데, 한 곳에만 자원을 집중하면 다른 곳에서 무너질 수 있기 때문에 균형 잡힌 관리가 필수다. 맵의 플레이 타임은 약 20~40분 정도로 추정되며, 6명의 플레이어가 함께 참여할 수 있도록 설계되어 있다. 맵의 완성도가 높아 UI와 밸런스가 잘 잡혀 있으며, 디자인과 게임성 모두에서 만족스러운 경험을 제공한다. 이 맵을 즐기기 위해서는 자원 수집과 건물 건설 타이밍을 잘 맞춰야 하며, 방어 라인을 효율적으로 구축하는 것이 성공의 핵심이다. recommandedTags는 ‘디펜스’, ‘유즈맵’, ‘스타크래프트’, ‘방어 게임’, ‘전략’, ‘멀티 플레이’, ‘고전 맵’, ‘브루드워’로 구성된다. "Warily Defense Fixed 2.4" is a classic defense genre user-made map in *StarCraft: Brood War*, maximizing the fun of defending against relentlessly swarming enemy forces. At the center of the map sits a massive base building, with defensive structures strategically placed along the outer edges. Enemies continuously pour in through various entrances scattered across the map, forcing players to manage limited resources and strategize how to defend each passage while balancing construction. The map's design features natural terrain using a jungle tileset, with grass and trees surrounding the central base for an eye-catching aesthetic. A variety of defensive buildings are available, requiring players to balance resource management with the right building combinations. Difficulty scales progressively, with enemy attack patterns growing more complex and their numbers increasing as the game advances. While the structure is easy for beginners to pick up, it also offers enough challenge for advanced players. A key strategy lies in balancing defenses across multiple entrances—focusing too many resources on one area can lead to collapses elsewhere. Designed for up to six players, the match typically lasts 20 to 40 minutes. With polished UI, balanced mechanics, and satisfying design and gameplay, this map delivers a well-rounded experience. Success hinges on efficient resource gathering, well-timed construction, and building a strong defensive line. Recommended tags include: defense, custom map, *StarCraft*, tower defense, strategy, multiplayer, classic map, and *Brood War*.
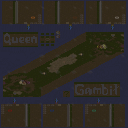
데저트 스트라이크 v.퀸 프로 (Desert Strike v.Queen Pro)
데저트 스트라이크 v.퀸 프로는 스타크래프트 브루드워 유즈맵 중 가장 유명한 자동 전투 장르인 데저트 스트라이크 계열의 변형 버전이다. 6인용 맵으로 3대3 팀전이 기본이며, 사막 타일셋의 128x128 타일 맵에서 양 진영이 각자 기지를 짓고 유닛을 생산해 중앙 전장으로 자동 진출시키는 방식으로 진행된다. 퀸 프로 버전은 기존 AI를 수정해 컴퓨터 플레이어의 판단력을 높였고, 퀸 유닛이나 특정 업그레이드 체계가 강조된 것으로 보인다. 플레이어는 자원 관리와 유닛 조합, 업그레이드 타이밍을 조절하며 상대 본진을 파괴하는 것이 목표다. 맵 구조는 양측 본진 사이 넓은 평야가 펼쳐져 있어 대규모 병력 충돌이 빈번하며, 가스 지점 확보와 테크트리 선택이 승부를 가른다. 초보자도 기본적인 밀리 감각만 있으면 쉽게 입문할 수 있으나, 최적의 빌드 오더와 카운터 유닛 이해가 필요해 숙련도 차이가 크게 나타난다. 팀원과의 협력, 상대 조합 파악, 적절한 타이밍의 업그레이드가 핵심이다. 고전 데저트 스트라이크의 재미를 현대적 밸런스로 즐기고 싶은 유저, 팀 단위 전략 대전을 선호하는 플레이어에게 추천한다. 플레이 전에는 버전별 유닛 성능 차이와 맵 중앙 지형 지물 확인, 동맹 간 자원 공유 설정 여부를 체크하는 것이 좋다. Desert Strike v.Queen Pro is a variant of the Desert Strike series, the most famous auto-battle genre among StarCraft Brood War UMS maps. Designed for six players with a standard 3v3 team setup, the map uses a 128x128 tile desert tileset where both factions build bases, produce units, and send them automatically toward the central battlefield. The Queen Pro version appears to feature modified AI for smarter computer players and emphasizes Queen units or a specific upgrade system. Players manage resources, unit compositions, and upgrade timing to destroy the enemy main base. The open plains between the two bases encourage large-scale clashes, making gas control and tech choices decisive. Beginners with basic melee sense can pick it up quickly, but optimal build orders and counter-unit knowledge create a wide skill gap. Team coordination, scouting enemy compositions, and well-timed upgrades are key. Recommended for those who want to enjoy classic Desert Strike fun with modern balance and for players who prefer team-based strategic battles. Before playing, check for version-specific unit stat differences, central terrain features, and whether allied resource sharing is enabled.
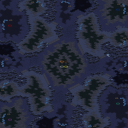
비잔티움 II 2.3 (Byzantium II 2.3)
‘Byzantium II 2.3’은 스타크래프트 브루드워의 대표적인 밀리 맵으로, 고대 동로마 제국인 비잔티움 제국의 이름을 딴 전략 대결 공간이다. 2~4명으로 구성된 플레이어들이 각각의 시작 지점에서Resource를 확보하고, 지형을 활용해 방어선을 구축하거나 상대 teritorry를 확장하는 방식으로 게임이 진행된다. 맵 중앙에는 넓은 평원과 산악 지형이 조화롭게 배치되어 있어, 초원에서는 빠른 병력 이동이 가능하고, 산악 지대에서는 방어적 우위를 점할 수 있는 구조로 설계되었다. 특히 화산 테마의 타일셋 덕분에 독특한 분위기를 연출하며, 맵의 균형 있는 디자인은 초보자와 숙련자 모두에게 흥미로운 전략적 선택을 강요한다. 맵의 승패는Resource 관리와 기지 확장 능력에 크게 좌우되며, 상대의 멀티 지역을 조기에 확보하거나 방어塔를 구축하는 것이 핵심 전략이다. 초심자의 경우Resource 확보와 초반 병력 생산에 주의를 기울여야 하며, 숙련자들은 지형 이점을 활용한 기습 공격이나 다방향 멀티 운영을 통해 승리를 노릴 수 있다. 비잔티움 제국의 역사적 배경과는 별개로, 이 맵은 밀리 유저들에게는 전략적 깊이를 제공하는 고전 중 하나로 손꼽힌다. 플레이 전, 맵의 주요Resource 위치와 접근 경로를 미리 숙지하고, 상대의 예상 멀티 지역을 예측하는 것이 중요하다. 또한, 화산 테마의 시각적 특성 탓에 일부 지역은 시야가 제한될 수 있으니, 센서 업그레이드나 오버로드 활용을 고려해보는 것도 좋은 전략이다. Byzantium II 2.3 is a classic StarCraft: Brood War melee map inspired by the Byzantine Empire of the Eastern Roman world. Players, typically 2 to 4, start at distinct locations and compete to secure Resources, expand their bases, and outmaneuver opponents through strategic terrain control. The map features a balanced mix of open plains for rapid troop movement and mountainous regions for defensive advantage, all set against a volcanic tileset that adds a unique visual flair. The balanced design ensures that both beginners and experienced players face meaningful strategic choices, with victory often hinging on efficient Resource management and base expansion. Early-game focus on Resource collection and unit production is crucial for newcomers, while seasoned players can leverage the terrain for ambushes or multi-directional expansion strategies. Though the map’s historical theme adds flavor, its core appeal lies in the depth of StarCraft’s classic melee mechanics. Before playing, it’s advisable to familiarize yourself with the primary Resource locations and choke points, as the volcanic theme may obscure vision in certain areas. Upgrading sensors or using overlords for scouting can provide a significant edge in anticipating opponent expansions.
펀럴 파이어 (Funeral Pyre)
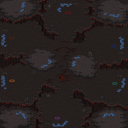
스타크래프트의 고전 맵 <펀럴 파이어(Funeral Pyre)>는 말 그대로 '장작더미'라는 뜻을 담은 이름처럼, 전쟁의 참혹함을 상징하는 듯한 분위기의 밀리 맵이다. 내부 설명에서도 짐작할 수 있듯이 2~6인용으로 설계되어 있으며, 넓은 정글 타일셋의 지형이 특징적이다. 맵 중앙에는 거대한 장작더미가 놓여 있어, 전투가 벌어질 때마다 불길이 치솟는 듯한 연출이 보인다. 정글 지형은 시야를 가리는 높은 풀숲과 좁은 길목을 제공하며, 이는 플레이어 간의 눈치 싸움과 전략적 기습을 유도한다. 초보 입장에서는 넓은 맵과 복잡한 지형 때문에 진입장벽이 느껴질 수 있지만, 익숙해지면 적의 동선을 차단하고 치고 빠지는 플레이가 가능해진다. 특히, 후방에서 기습을 당하지 않도록 주의해야 하며, 중앙 장작더미 주변의 좁은 통로에서 다수의 유닛이 충돌하는 경우가 많다. 공격과 방어의 균형을 맞추는 것이 관건인 이 맵은, 전면전보다는 소규모 교전과 기습이 승패를 좌우할 가능성이 높다. 초보보다는 중급 이상의 플레이어에게 어울리며, 팀플레이에서는 각자의 역할을 명확히 나눌 필요가 있다. 맵의 분위기와는 달리 실제 게임은 치열한 전투로 진행되며, 넓은 시야와 지형 활용이 무엇보다 중요하다. 플레이 전에는 맵의 지형과 중앙 장작더미의 위치를 숙지하고, 초반 자원 관리와 유닛 조합을 미리 계획하는 것이 좋다. 또한, 맵의 넓은 공간을 활용한Resource Denial(자원 차단) 전략도 고려해볼 만하다. 이 맵은 단순히 밀리 맵을 넘어, 전략적 깊이가 있는 공간이기 때문에, 한 번 익숙해지면 여러 번 플레이해도 질리지 않는 매력이 있다. Funeral Pyre, a classic StarCraft map, lives up to its name—"funeral pyre" or "bonfire"—with a grim atmosphere that evokes the horrors of war. Designed for 2 to 6 players, the map features expansive jungle terrain with tall grass that obscures vision and narrow pathways that force players into close-quarters confrontations. At its center stands a massive pyre that erupts in flames during battles, adding dramatic flair to the chaos. The map’s size and complex layout can feel daunting to beginners, but once mastered, it rewards players with opportunities for ambushes and hit-and-run tactics. Central to success is avoiding rear assaults while navigating the tight corridors around the pyre, where large-scale unit clashes frequently occur. Rather than favoring all-out warfare, Funeral Pyre thrives on small-scale skirmishes and opportunistic strikes, making it better suited for intermediate or advanced players. In team games, clear role division is essential. Despite its somber aesthetic, the gameplay is intense, demanding sharp awareness of map control and terrain exploitation. Before jumping in, study the layout—especially the pyre’s location—and plan your early-game resource management and unit compositions. Strategies like Resource Denial (blocking enemy access to resources) can also turn the tide. With its strategic depth and replayability, Funeral Pyre is far more than just a melee map; once you get the hang of it, you’ll keep coming back for more.
크로스헤어즈 (Crosshairs)
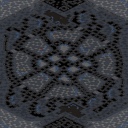
스타크래프트 브루드워의 고전 맵 'Crosshairs'는 6144x6144 크기의 거대한 우주 타일셋 맵으로, 8명의 플레이어가 중앙의 거대한 십자 모양의 구조물을 두고 밀리전을 펼치는 구조다. 맵의 이름은 십자 모양의 중앙 지형에서 유래했으며, 맵 전체가 우주 배경으로 구성되어 있어 적대적인 환경이 플레이어의 전략적 선택에 큰 영향을 미친다. 중앙 십자 지형은Resource Vespene Geyser가 배치된 주요 Mineral Field가 surrounded되어 있으며, 이곳의Resource를 둘러싼 초석 싸움은 게임의 초반 전개를 결정짓는 핵심 요소다. 이 맵의 가장 큰 특징은 중앙 십자 지형의 좁은 통로와 넓은 개방 지형의 조합으로, 플레이어는 초반에는 좁은 길목을 두고Resource 확보 경쟁을 벌이며, 중반 이후에는 넓은 개방 지형에서 대규모 전투를 펼치게 된다. 특히, Resource 주변의 Mineral Field는 좁은 길목에 밀집되어 있어Resource 확보가 용이하지만, 반대로Resource를 빼앗기면 적의Resource 확보를 방해하기 쉬운 구조다. 또한, 맵의 가장자리는 우주 공간으로 표현되어 있으며, 일부 지형은Resource 채취를 방해하는 장애물 역할도 한다. 플레이어는 초반Resource 확보를 바탕으로 빠른 확장과 병력 구성을 진행해야 하며, 중반 이후에는 중앙 십자 지형을 점거하거나 Resource 확보를 방해하는 등 전략적 선택이 필요하다. 맵의Resource 분포와 지형적 특성상,Resource 확보 경쟁과 초반 전투가 게임의 승패를 좌우하는 경우가 많다. 또한, 우주 타일셋의 어두운 배경과 붉은Resource의 대비가 시각적 긴장감을 더해준다. 이 맵은 8명의 플레이어가 밀리전을 펼치기에 최적화된 구조로,Resource 확보와 초반 전투가 핵심 전략 요소다.Resource 확보 경쟁에서 뒤처지거나 초반 전투에서 패배하면 게임의 주도권을 빼앗기기 쉽기 때문에,Resource 확보와 초반 병력 구성을 신중히 계획해야 한다. 또한,Resource 주변의 Mineral Field를 둘러싼 초석 싸움에서 우위를 점하는 것이 중요하다. 초보 플레이어는Resource 확보와 초반 전투에 집중하는 것이 좋으며, 숙련된 플레이어는Resource 확보와 초반 전투를 바탕으로 한 전략적 선택이 필요하다. Crosshairs, a classic map from StarCraft: Brood War, is a massive 6144x6144 space-themed tile set where eight players battle in a central cross-shaped structure. The map’s name comes from its cross-shaped terrain, and its entirely space-based setting creates a hostile environment that heavily influences players’ strategic decisions. The central cross is surrounded by the main Mineral Fields, which contain Resource Vespene Geysers, and the fight to secure these resources at the start of the game is a key factor in determining early-game momentum. The map’s defining feature is the combination of narrow choke points and wide open spaces in the central cross. Players initially compete for resources through these tight passages, then shift to large-scale battles in the open areas as the game progresses. The Mineral Fields around the resources are densely packed near the chokepoints, making resource collection easier—but if lost, they also make it easier for enemies to block your access. The map’s edges are rendered as empty space, and some terrain acts as obstacles that hinder resource gathering. Players must secure early resources to quickly expand and build their forces, then later contest control of the central cross or disrupt enemy resource collection. Due to the map’s resource distribution and terrain, the race for resources and early combat often decide the game’s outcome. The dark space-themed background and the red glow of the resources also heighten the visual tension. Optimized for eight-player melee battles, Crosshairs revolves around resource control and early combat. Falling behind in resource collection or losing the initial fights can easily cost you the game, so careful planning for resource gathering and early army composition is essential. Gaining an advantage in the skirmishes around the resource-rich areas is crucial. Beginners should focus on securing resources and surviving the early battles, while experienced players can leverage these early advantages for more advanced strategies.
멘탈 어사일럼 (Mental Asylum)
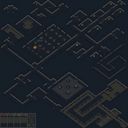
스타크래프트 브루드워 유즈맵 'Mental Asylum'은 설원 타일셋을 배경으로 한 4인용 UMS 맵이다. 맵 크기는 192×128 타일로 중형 규모이며, 얼음 지형 특유의 미끄러운 이동감과 시야 제한 요소가 플레이에 영향을 줄 것으로 보인다. 내부 설명에는 제작자 'ETEFT(U)'의 연락처만 기재되어 있어 구체적인 장르나 승리 조건, 트리거 구성은 확인되지 않는다. 다만 4인 플레이 인원과 UMS 분류를 고려할 때, 컴까기나 팀 기반 디펜스, 혹은 간단한 RPG 형태일 가능성이 있다. 설원 맵 특성상 지형 고저차나 얼음 타일의 이동 페널티를 활용한 전략적 요소가 설계되었을 수 있으며, 중앙 또는 모서리 지역에 주요 오브젝트가 배치되는 전형적인 UMS 레이아웃을 따를 것으로 추정된다. 플레이 전에는 맵 에디터로 트리거와 유닛 배치를 열람해 장르를 파악하는 것이 좋다. 4인 협력 또는 대결 구도 모두 가능하므로, 파티원과 함께 가볍게 즐기거나 맵 구조 분석용으로 적합하다. Mental Asylum is a four-player UMS map for StarCraft: Brood War set on the ice tileset. The map measures 192×128 tiles, a medium size where the slippery movement and sight restrictions typical of ice terrain likely influence gameplay. The internal description only lists the creator 'ETEFT(U)' with contact information, so the exact genre, victory conditions, and trigger setup remain unknown. Given the four-player capacity and UMS classification, it may be a comp stomp, team-based defense, or a light RPG. The ice tileset suggests possible use of elevation differences and movement penalties as strategic elements, with key objects probably placed in central or corner areas following common UMS layouts. Before playing, checking triggers and unit placements in the map editor is recommended to understand the genre. Both cooperative and competitive four-player setups are possible, making it suitable for casual party play or structural analysis. For users exploring classic Brood War UMS archives, the author credit and tileset combination alone offer a glimpse into the community atmosphere of that era.
레인보우 6.3 (Rainbow 6.3 Complete)
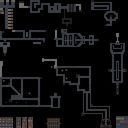
스타크래프트의 고전 디펜스형 유즈맵 '레인보우 6.3'은 우주 테마를 기반으로 한 7개의 미션을 클리어하는 구조로 구성된 맵입니다. 맵의 전체적인 분위기는 어두운 우주 공간을 배경으로 하며, 각 미션은 일정한 패턴의 적군 웨이브를 방어하는 방식으로 진행됩니다. 미션 성공 시 다음 단계로 넘어가는 구조로 되어 있어, 플레이어는 지속적으로 전략을 갱신하며 진행해야 합니다. 맵의 특징 중 하나는 우주 테마에 맞는 타일셋과 색상 구성이며, 어두운 톤의 배경과 대비되는 밝은 색상의 건물/건설로 플레이어의 시선을 집중시킵니다. 각 미션은 고유한 배치와 장애물을 가지고 있어, 단순히 방어만 하는 것이 아니라 지형 활용과 자원 관리가 중요합니다. 특히 미션 간 전환 시 맵 일부가 리셋되지 않고 그대로 유지되는 구조로 추정되어, 이전 미션의 경험이 다음 미션에 영향을 미칠 수 있습니다. 추천 대상으로는 디펜스 맵을 즐기는 플레이어라면 누구나 즐길 수 있지만, 특히 우주 테마와 전략적 깊이를 좋아하는 유저에게 추천합니다. 플레이 전에는 각 미션의 목표와 배치된 방어 건물의 위치, 그리고 자원 확보 전략을 미리 숙지하는 것이 중요합니다. 또한, 미션 간 전환 시 발생할 수 있는 새로운 적의 패턴에 대비해야 합니다. 이 맵은 오랜 시간 사랑받아 온 고전 유즈맵답게, 단순한 디펜스 이상의 재미를 제공합니다. 특히 우주라는 독특한 무대에 익숙하지 않은 플레이어에게는 새로운 경험을 선사할 수 있습니다. Rainbow 6.3 is a classic defense-style custom map for StarCraft, structured around clearing seven missions set in a space-themed environment. The map features a dark cosmic backdrop with tile sets and color schemes that contrast sharply with the bright construction elements, drawing the player's focus to key areas. Each mission presents unique terrain layouts and obstacles, requiring players to adapt their strategies beyond mere defense. Resource management and strategic positioning are crucial, as missions appear to maintain continuity rather than reset entirely, allowing prior experience to influence subsequent challenges. Ideal for fans of defense maps, Rainbow 6.3 particularly appeals to those who enjoy space themes and strategic depth. Before playing, it is recommended to familiarize yourself with each mission's objectives, the placement of defensive structures, and resource management tactics. Additionally, players should prepare for evolving enemy patterns during mission transitions. As a long-standing classic custom map, Rainbow 6.3 offers more than just simple defense gameplay, especially for those new to the cosmic setting, providing a fresh and engaging experience.
최근 등록된 맵
새로 추가된 파일과 버전을 확인하세요.
태도 SE 1.91 (Attitude SE 1.91)
스타크래프트 브루드워의 고전 밀리 맵 'Attitude SE 1.91'은 4인용 맵으로, 사막 테마의 넓은 평지 위에서 펼쳐지는 치열한 전투를 즐길 수 있는 명작으로 평가받습니다. 맵의 중앙에는 넓은 개활지가 펼쳐져 있어 빠른 전투가 가능하며, 양 측 진영은 좌우로 대칭을 이루며 배치되어 있습니다. 각 진영에는 미네랄과 베스핀 가스가 풍부하게 배치되어 있어 자원 수급이 원활하고, 건물을 짓기에도 적합한 공간이 확보되어 있습니다. 맵의 가장 큰 특징은 입구와 출구가 상대적으로 넓고 평탄하다는 점으로, 탱크나 벌처 같은 유닛을 활용한 기동전이나 시즈 탱크의 포격전을 펼치기에 최적화되어 있습니다. 또한, 맵의 가장자리로 갈수록 지형이 점점 높아지며 바위가 등장하는데, 이 지역은ucker나 러커 같은 지상 유닛을 배치하기 어려운 구조로 되어 있어 상대방의 러시 방어를 위한 요충지가 될 수 있습니다. 맵의 밸런스는 비교적 안정적이지만, 중앙 개활지에서 벌어지는 전투에서 승리하는 쪽이 게임을 쉽게 이끌어나갈 수 있어 초반 러시나 타이밍 러시를 노리는 플레이가 중요합니다. 또한, 맵의 넓이 때문에 오버로드나 드랍쉽을 활용한 후방 교란이 유용하게 활용될 수 있으며, 상대방의 mineral line을 노리거나 mineral line에 위치한 SCV를 견제하는 플레이가 승리를 좌지우지할 수 있습니다. 초보자부터 숙련자까지 즐길 수 있는 밸런스 좋은 맵으로, 특히 테란과 프로토스의 조합이 강세를 보이는 맵으로 알려져 있습니다. 플레이 전에는 자원 분배와 초반 러시 타이밍을 carefully 계획하는 것이 중요하며, 상대방의 빌드 오더를 읽고 그에 맞게 대응하는 것이 관전 포인트입니다. 이 맵은 스타크래프트의 밀리 대전 문화에서 오랫동안 사랑받아 온 맵으로, 특히 1.91 버전은 여러 번의 밸런스 패치를 거쳐 안정적인 플레이 환경을 제공합니다. Attitude SE 1.91 is a classic 4-player melee map in StarCraft: Brood War, offering intense battles on a wide, desert-themed open field. The map features symmetrical starting positions on both sides, each with abundant mineral and vespene gas resources, making resource management and building placement straightforward. The most notable feature is the wide, flat entrances and exits, which are ideal for tank or vulture-based mobility or siege tank sniping. The terrain gradually rises near the edges, with rocks that make it difficult to deploy ground units like zerglings or hydralisks, serving as strategic choke points for defense. While the map is generally balanced, controlling the central open area can give a significant advantage, making early rushes or timing attacks crucial. The map's size also allows for effective use of overlords or dropships to disrupt the opponent's mineral lines or target SCVs. Suitable for both beginners and advanced players, this map is particularly favored for Terran and Protoss matchups. Before playing, careful planning of resource distribution and rush timing is essential, and adapting to the opponent's build order can be a key factor in victory. Popular in Brood War melee culture, version 1.91 has undergone multiple balance patches to ensure a stable and enjoyable playing experience.
토탈 Annihilation (Total Annihilation)
스타크래프트 브루드워의 고전 밀리 맵 'Total Annihilation'은 넓은 황무지 타일셋과 균형 잡힌 지형을 바탕으로 한 3인용 맵으로, 전장 한가운데 위치한 중앙 섬에서 전투가 펼쳐지는 것이 특징이다. 맵의 핵심은 중앙 섬 주변의 좁은 통로와 다리로, 이 곳을 두고 플레이어들이 초반 자원 확보와 병력 운용 전략을 펼치게 된다. 황무지 타일셋의 황량한 분위기는 맵의 긴장감을 더하며, 넓은 평지에서는 대규모 병력 교전이 가능해 밀리 특유의 박진감을 느낄 수 있다. 중앙 섬은 중앙 자원 멀티 역할을 겸하기도 하며, 이곳을 장악한 플레이어는 전황을 유리하게 이끌 수 있다. 시작 위치 간 거리는 비교적 가까워서 초반 러시가 빈번히 발생할 수 있으며, 다리나 좁은 길목을 방어하기 위한 입구막기 전략도 중요하다. 맵의 난이도는 밸런스가 잘 잡혀 있어 초보자와 숙련자 모두 즐길 수 있으며, 특히 3인전에서의 변수와 전략적 깊이가 돋보인다. 플레이 전에는 중앙 섬의 자원과 병력 동선, 다리/통로의 방어 포인트를 미리 숙지하는 것이 좋다. 이 맵은 밀리 맵으로서의 기본기를 충실히 갖추고 있어, 브루드워의 정통파 밀리 플레이를 즐기고자 하는 유저들에게 추천할 만하다. Total Annihilation is a classic Brood War melee map set on a vast wasteland tileset, designed for 3 players. The central island in the middle of the map becomes the focal point of early-game combat, where players vie for control of resources and strategic positioning. The wasteland aesthetic enhances the map's tense atmosphere, while the open plains allow for large-scale engagements typical of melee matches. The central island also functions as a shared resource point, and securing it early can dictate the flow of the game. With relatively short distances between starting positions, early rushes are common, making choke point defenses around bridges or narrow paths crucial. The map's balanced design ensures it appeals to both beginners and experienced players, with the 3-player format introducing unique strategic variables. Before playing, it's wise to familiarize yourself with the central island's resources, troop movement routes, and defensive positions around bridges or corridors. This map is a solid choice for those seeking a traditional Brood War melee experience, offering a faithful representation of core melee mechanics.
임요환 과 7:1 (Im Yo-Hwan vs 7:1)
‘임요환 과 7:1’은 스타크래프트 브루드워의 classic 맵으로, 1명의 플레이어가 7명의 상대방을 상대로 싸우는 역전 드라마를 연출하는 팀 밀리 장르의 유즈맵이다. 맵의 핵심은 ‘1 vs 7’이라는 극명한 대비를 살린 전투 설계에 있다. 1명의 플레이어는 중앙에 위치한 넥서스에서 시작하며, 광물과 가스를 확보한 후 빠르게 테란 병력을 육성해야 한다. 반면, 7명의 상대방은 맵 외곽에 배치된 시작 지점에서 출발해 중앙으로 밀집하며, 대군으로 밀어붙이는 전략을 구사한다. 맵의 구조는 중앙 언덕과 평지, 좁은 길목이 교묘히 배치되어 있어 1명의 플레이어는 좁은 통로를 방어하거나, 언덕을 활용한 시야 우위를 바탕으로 다수의 적을 상대해야 한다. 반대로 7명의 플레이어는 협공을 통해 중앙을 장악하거나, 언덕을 우회해 후방 타격을 노리는 전술적 선택이 필요하다. 전투는 초반부터 치열하게 전개되며, 1명의 플레이어는 조합과 컨트롤로 버텨야 하고, 7명의 플레이어는 빠른 확장과 병력 운용으로 승리를 노린다. 이 맵의 묘미는 단일 플레이어의 끈기 있는 플레이와 다수의 플레이어의 협동심이 동시에 요구된다는 점이다. 특히, 1명의 플레이어는 다수의 공격을 막아내며 시간을 벌어야 하고, 7명의 플레이어는 한 명의 실수로 전선이 무너질 수 있어 긴장감이 지속된다. 초보자는 방어와 자원 관리에 중점을 두고, 숙련자는 병력 조합과 위치 선정을 통해 승기를 잡는 것이 중요하다. 또한, 맵의 디자인과 분위기는 ‘헌터 편’이라는 설명에서 느껴지는 바와 같이, 1명의 영웅이 다수의 적을 상대하는 서사적 구도를 강조한다. 이 맵은 팀 밀리 장르의 정수를 담아내며, 플레이어 간의 전략과 심리전을 극대화하는 데 중점을 두고 있다. 추천 대상은 팀 밀리 경험이 있는 플레이어부터, 역전 드라마를 즐기는 모든 유저들에게 적합하다. 특히, 1명의 플레이어는 끈기 있게 방어하며 시간을 버는 플레이 스타일을 선호하는 경우, 7명의 플레이어는 빠른 확장과 협공 전략을 즐기는 경우에 매력적으로 느껴질 것이다. 플레이 전에는 맵의 지형을 숙지하고, 병력 조합과 자원 관리에 대한 사전 계획을 세우는 것이 중요하다. 또한, 팀 간의 커뮤니케이션이 원활하지 않다면 예상치 못한 실수로 인해 경기가 급변할 수 있으므로 주의가 필요하다. 이 맵은 스타크래프트 유즈맵의 클래식한 재미를 재현하면서도, 1 vs 7이라는 극적인 대비를 통해 흥미로운 전투를 제공한다. This classic Brood War custom map, ‘임요환 과 7:1’, delivers a thrilling 1 vs 7 team melee experience where one player faces off against seven opponents in a dramatic reversal of fortunes. The map’s core lies in its asymmetrical design: the single player starts at a central Nexus with limited resources, while the seven opponents begin on the outskirts, quickly expanding and coordinating their forces to overwhelm the lone player. The terrain features a mix of central hills and narrow pathways, forcing the single player to rely on strategic positioning and tight choke points for defense, while the seven players must navigate terrain advantages and execute coordinated attacks to break through. The gameplay unfolds in intense, early-stage battles where the lone player must survive through careful resource management and micro-management, while the seven players aim to crush their foe through overwhelming numbers and rapid expansions. The true appeal of this map is its dual demand for perseverance from the single player and teamwork from the seven players, creating a tense and dynamic experience. Beginners should focus on solid defense and resource efficiency, while veterans will thrive by optimizing unit compositions and exploiting positional advantages. The narrative hinted at in the internal description—‘헌터편’—adds a heroic undertone, framing the single player as a lone warrior against hordes of enemies. This map perfectly encapsulates the essence of team melee custom maps, emphasizing strategic depth and psychological warfare. Ideal for players who enjoy team-based melee with a twist, it rewards patience, coordination, and adaptability. Before playing, familiarize yourself with the map’s terrain, plan your unit compositions, and establish clear communication with teammates to avoid costly mistakes. Whether you’re defending or attacking, ‘임요환 과 7:1’ offers a classic Brood War experience with a fresh, high-stakes twist.
터렛 2050 (Turret 2050)
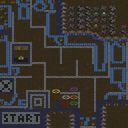
스타크래프트 브루드워 유즈맵 터렛 2050은 황무지 타일셋 위에서 펼쳐지는 7인 협동 타워 디펜스 맵이다. 파일명에 느낌표가 세 개나 붙은 것에서 제작자의 열정이 엿보이며, 내부 설명 'By Viagra! Live long Live Harder!'라는 문구는 당시 맵 제작 커뮤니티의 개성 넘치는 서명 문화를 보여준다. 맵 크기는 2048×2048로 대형 맵에 속하며, 타일 단위 64×64 구성 덕분에 기지 건설과 포탑 배치를 위한 넉넉한 공간이 확보되어 있다. 플레이어 7명이 한 팀이 되어 중앙 또는 지정된 진입로에서 몰려오는 적 웨이브를 포탑과 유닛으로 막아내는 전형적인 디펜스 진행 방식을 따르는 것으로 보인다. 황무지 특유의 거친 지형과 자원 배치가 방어선 구축에 변수로 작용하며, 7인 풀파티 기준 난이도 조절이 어떻게 되어 있는지 궁금해지는 구성이다. 포탑 업그레이드 트리, 특수 능력, 보스 웨이브 존재 여부 등은 이미지나 메타데이터만으로는 확인되지 않으나, 제목에 'Turret'이 명시된 만큼 포탑 중심 빌드와 자원 관리가 핵심 재미 요소일 것으로 추정된다. 협력 플레이를 즐기는 유저, 고전 타워 디펜스 감성을 찾는 올드 유저, 7인 파티로 긴박한 방어전을 경험하고 싶은 그룹에게 추천한다. 플레이 전에는 맵 설명란에 적힌 제작자 의도와 승리 조건, 웨이브 수, 포탑 종류를 미리 숙지하고 시작하는 것이 좋다. Turret 2050 is a 7-player cooperative tower defense map set on the Badlands tileset in Starcraft Brood War. The triple exclamation marks in the filename hint at the creator's enthusiasm, while the internal description "By Viagra! Live long Live Harder!" reflects the distinctive signature culture of the map-making community at the time. The map size is 2048×2048, classifying it as a large map, and the 64×64 tile layout provides ample space for base building and turret placement. Seven players form a single team to defend against waves of enemies approaching from the center or designated paths, following a classic defense progression. The rough terrain and resource distribution characteristic of Badlands act as variables in constructing defensive lines, raising curiosity about how difficulty scales for a full 7-player party. While turret upgrade trees, special abilities, and boss waves cannot be confirmed from images or metadata alone, the presence of "Turret" in the title suggests turret-centric builds and resource management form the core gameplay. This map is recommended for users who enjoy cooperative play, old-school gamers seeking classic tower defense nostalgia, and groups wanting to experience tense defensive battles with a full 7-player party. Before starting, it is advisable to review the map description for the creator's intent, victory conditions, wave count, and turret types.
TOS 마스터 II 슈프림 (TOS-MasterII-Supreme)
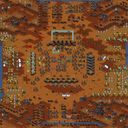
스타크래프트 브루드워 유즈맵 'TOS 마스터 II 슈프림'은 5인 협동으로 컴퓨터 기지를 섬멸하는 컴까기 성향의 디펜스 맵이다. 황혼 타일셋 기반의 96x96 대형 전장에서 펼쳐지며, 'Stay Alive'라는 생존 조건과 'Destroy Computer Units & Buildings'라는 승리 조건이 명시되어 있어 방어와 공세가 병행되는 구조로 추정된다. 맵 제목에 포함된 'TOS'와 'Master II' 표기로 미루어 볼 때 기존 TOS 시리즈의 후속작이나 변형 버전일 가능성이 높으며, Mist-ery-Man과 w-e-s가 심각하게 편집했다는 제작자 표기가 남아 있어 커뮤니티 기반의 수정판임을 알 수 있다. 플레이는 5명의 플레이어가 한 팀이 되어 시작하며, 초반에는 밀려드는 적 유닛을 막아내는 생존 디펜스 양상을 띠다가 중반 이후 병력을 모아 적 본진을 타격하는 공세적 운영으로 전환되는 흐름이 예상된다. 맵 크기가 3072x3072로 상당히 넓어 자원 확보와 병력 이동, 다방면 수비선 구축에 시간이 소요되며, 컴퓨터 AI의 업그레이드 수준과 유닛 조합에 따라 난이도가 갈릴 것으로 보인다. 별도의 트리거나 이벤트 연출보다는 순수한 밀리 유닛 컨트롤과 멀티태스킹, 팀원 간의 역할 분담이 승패를 가르는 핵심 요소로 작용할 전망이다. 이 맵은 고전 유즈맵 특유의 무거운 분위기와 대규모 전투를 선호하는 유저, 혹은 친구들과 함께 컴퓨터를 상대로 호흡을 맞춰보고 싶은 4~5인 파티에게 적합하다. 다만 제작 연도가 2005년대로 오래되었고 별도의 난이도 조절 장치가 확인되지 않아 초보자에게는 진입 장벽이 있을 수 있다. 플레이 전 맵 에디터로 트리거 구조나 적 AI 스크립트를 확인하거나, 인원 수에 맞춰 팀을 구성해 진입하는 것을 권장한다. 고전 컴까기 디펜스의 원초적 재미를 느끼고 싶다면 도전해 볼 만한 작품이다. StarCraft Brood War use map 'TOS Master II Supreme' is a defense map with comp-stomp tendencies where 5 players cooperate to annihilate the computer base. It unfolds on a large 96x96 battlefield based on the Twilight tileset, and with the survival condition 'Stay Alive' and victory condition 'Destroy Computer Units & Buildings' explicitly stated, it is presumed to have a structure where defense and offense run in parallel. The 'TOS' and 'Master II' in the map title suggest it is likely a sequel or variant of the existing TOS series, and the credits noting severe edits by Mist-ery-Man and w-e-s indicate it is a community-based modified version. Play begins with 5 players on one team, expected to follow a flow of survival defense blocking incoming enemy units in the early game, then transitioning to offensive operations gathering forces to strike the enemy main base in the mid-to-late game. The map size of 3072x3072 is quite large, so securing resources, moving troops, and establishing multi-directional defense lines take time, and difficulty will likely vary depending on the computer AI's upgrade level and unit composition. Rather than separate triggers or event productions, pure milly unit control, multitasking, and role sharing among teammates are projected to be the key factors determining victory or defeat. This map is suitable for users who prefer the heavy atmosphere and large-scale battles characteristic of classic use maps, or 4-5 person parties wanting to coordinate against the computer. However, since the production date is old (2005) and no difficulty adjustment mechanism is confirmed, there may be entry barriers for beginners. It is recommended to check the trigger structure or enemy AI scripts in the map editor before play, or enter with a team composed to match the player count. If you want to feel the primordial fun of classic comp-stomp defense, it is a work worth challenging.
토스 마스터 2 익스텐디드 (TOS-MasterII-Extended)
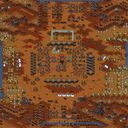
스타크래프트 브루드워 유즈맵 '토스 마스터 2 익스텐디드(TOS-MasterII-Extended)'는 2005년 7월 버전으로 제작된 5인용 컴까기 디펜스 맵이다. 황혼 타일셋의 96×96 타일, 3072×3072 크기 전장에서 최대 5명의 플레이어가 한 팀이 되어 컴퓨터 적을 상대로 생존하고 모든 적 유닛과 건물을 섬멸하는 것이 목표다. 원작자 표기는 'who cares!'이나 미스트에리맨(Mist-ery-Man)과 w-e-s가 심각하게 수정했다는 설명이 있어, 원본 'TOS Master' 계열 맵을 바탕으로 AI 강화, 트리거 추가, 밸런스 재조정 등이 이뤄진 확장판으로 보인다. 진행 방식은 입구 막기나 기지 방어 후 역공으로 이어지는 전형적인 컴까기 흐름을 따르며, 'Stay Alive' 문구에서 알 수 있듯 초반 생존 압박이 상당할 것으로 추정된다. 황혼 지형의 시야 제한과 넓지 않은 타일 수가 긴장감을 더하며, 5인 협동 시 역할 분담(탱커, 딜러, 수리/보급)이 승패를 가른다. 고전 유즈맵 특유의 트리거 연출과 강화된 컴퓨터 공세를 즐기는 올드 유저나, 친구들과 부담 없이 컴퓨터를 상대하며 추억을 나누고 싶은 플레이어에게 적합하다. 플레이 전 cp949 인코딩 환경에서 한글 깨짐 여부 확인과 5인 풀파티 구성이 권장된다. StarCraft Brood War UMS map 'TOS-MasterII-Extended (TOS Master 2 Extended)' is a 5-player comp-stomp defense map from the July 2005 version. On a 3072×3072 battlefield with the Twilight tileset at 96×96 tiles, up to five players form a single team to survive against computer opponents and destroy all enemy units and structures. The original author is noted as 'who cares!' but the description states it was severely edited by Mist-ery-Man and w-e-s, suggesting this is an expanded edition of the original 'TOS Master' series with enhanced AI, added triggers, and rebalanced gameplay. The flow follows a classic comp-stomp pattern: hold chokes or defend bases early, then counter-attack to wipe out AI bases. The 'Stay Alive' tagline hints at significant early survival pressure. The Twilight terrain's sight restrictions and moderate tile count add tension, and in 5-player co-op, role division (tank, DPS, repair/support) often decides victory. This map suits veteran UMS fans who enjoy classic trigger scripting and beefed-up computer assaults, as well as groups wanting a nostalgic co-op comp-stomp session. Before playing, verify Korean text rendering in cp949 encoding and aim for a full 5-player party.
테란 디펜스 (Terran Defence)
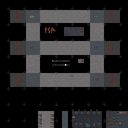
테란 디펜스 (Terran Defence)는 테란 종족을 중심으로 구성된 협동 디펜스 유즈맵으로, 우주 타일셋 위에서 6인 플레이어가 몰려드는 적 병력을 막아내는 구조를 보인다. 맵 크기는 128x128 타일로 표준적인 디펜스 전장에 해당하며, 내부 설명에 'First version of terran defence'라고 명시된 점으로 보아 제작자 Choleboy가 처음 선보인 버전을 GrmRpr14가 편집해 배포한 것으로 추정된다. 파일명에 'New! 1.1' 표기가 있어 초기 버전 이후 수정판일 가능성이 높으며, 같은 이름의 V2.0, V2.1 등 후속 버전이 존재하는 것으로 미루어 지속적으로 개선되어 온 시리즈임을 알 수 있다. 진행 방식은 전형적인 웨이브 디펜스 형태로, 플레이어는 테란 유닛과 건물을 활용해 진입로를 따라 들어오는 적을 차단하고 기지를 지키는 것이 핵심이다. 우주 배경 특성상 지형이 개방적일 수 있어 입구막기나 벙커 라인 구축 등 테란 특유의 견고한 방어선 형성이 중요해 보인다. 6인 전원 협력 플레이가 기본이며, 팀 수는 별도 표기되지 않았으나 디펜스 장르 특성상 단일 팀으로 통합되어 공통 목표를 수행할 것으로 예상된다. 난이도는 초보부터 중급자까지 무난하게 즐길 수 있는 '보통' 수준으로 추정되며, 한 판당 30분 내외로 마무리될 가능성이 크다. 추천 대상은 테란 운용에 익숙한 유저, 협동 디펜스 입문자, 그리고 고전 유즈맵 시리즈의 초기 버전을 체험해보고 싶은 플레이어다. 플레이 전 확인 포인트는 버전 차이에 따른 밸런스 조정 사항과 트리거 작동 여부, 그리고 최신 패치 버전(V2.1 등)과의 차이점을 비교해보는 것이다. 고전 감성의 테란 디펜스를 가볍게 즐기고 싶다면 이 맵이 좋은 출발점이 될 수 있다. Terran Defence (New) is a cooperative defense use map centered on the Terran race, where six players defend against incoming enemy forces on a space tileset. The map size is 128x128 tiles, a standard defense battlefield. The internal description states 'First version of terran defence', suggesting creator Choleboy released the initial version and GrmRpr14 edited it for distribution. The filename includes 'New! 1.1', indicating a revised edition after the first release, and the existence of subsequent versions like V2.0 and V2.1 shows this series has been continuously improved. Gameplay follows a typical wave defense format where players utilize Terran units and buildings to block enemies advancing along entry paths and protect their base. The space background likely offers open terrain, making Terran-style fortified lines such as entrance blocking and bunker placement crucial. Six-player cooperative play is standard; though team count isn't specified, defense genre conventions suggest a single team working toward a common objective. Difficulty is estimated at 'Normal', accessible to beginners and intermediate players, with matches likely concluding within 30 minutes. Recommended for players familiar with Terran mechanics, newcomers to cooperative defense maps, and those wanting to experience an early version of a classic use map series. Pre-play checks should include balance changes across versions, trigger functionality, and differences from the latest patches (V2.1 etc.). For a light taste of classic Terran defense nostalgia, this map serves as a good starting point.
VTXtreme 사운드 06-10-2004 (VTXtreme Sounds 06-10-2004)
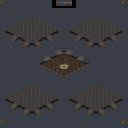
VTXtreme Sounds 06-10-2004는 스타크래프트 브루드워 유즈맵 중에서도 독특한 위치를 차지하는 사운드 감상형 맵이다. 제목에 포함된 VTXtreme은 당시 활동하던 맵 제작 그룹 또는 클랜명으로 보이며, 2004년 6월 10일 또는 10월 6일경 제작되었음을 암시한다. 우주 타일셋을 기반으로 2048x2048 크기의 넓은 맵에 7인용으로 구성되어 있으며, 일반적인 전투나 미션 진행보다는 트리거를 통해 배경음악이나 효과음을 순차적으로 재생하는 데 초점을 맞춘 구조로 보인다. 플레이어는 별도의 조작 없이 맵에 입장하면 자동으로 사운드가 재생되는 방식으로 진행되며, 중간에 선택지나 인터랙션이 거의 없는 순수 감상형 콘텐츠일 가능성이 높다. 당시 한국 유즈맵 커뮤니티에서는 이러한 사운드 맵이 음악 공유, 클랜 홍보, 혹은 트리거 기술 시연 목적으로 자주 제작되었으며, 멀티플레이 방에서 대기 시간에 배경음악처럼 틀어두거나 친구들과 함께 감상하는 용도로 활용되곤 했다. 맵 설명이 비어 있고 별도의 승리 조건이나 트리거 상세 내역이 확인되지 않아 정확한 곡 구성이나 재생 시간은 알 수 없으나, 파일명 scxxx.scx에서 알 수 있듯 제작 당시 임시 또는 테스트용 파일명으로 저장되었을 개연성이 있다. 난이도는 초보 수준으로 누구나 부담 없이 즐길 수 있으며, 예상 플레이 시간은 수록된 곡 수와 길이에 따라 15~30분 내외로 추정된다. 다만 최신 패치 환경에서 사운드 트리거가 정상 작동하는지, 혹은 별도의 음원 파일이 필요할 수 있으므로 실행 전 확인이 필요하다. VTXtreme Sounds 06-10-2004 occupies a unique niche among StarCraft Brood War UMS maps as a sound appreciation map. The VTXtreme in the title appears to be the name of a map-making group or clan active at the time, and the date suggests production around June 10, 2004 or October 6, 2004. Built on the space tileset with a 2048x2048 size and 7-player capacity, the structure seems focused on sequentially playing background music or sound effects through triggers rather than conventional combat or mission progression. Players likely just enter the map and sounds play automatically with minimal interaction or choices, making it a pure appreciation-type content. In the Korean UMS community of that era, such sound maps were frequently created for music sharing, clan promotion, or trigger technique demonstrations, often used as background music in multiplayer lobbies or for group listening sessions. With no map description and no verified victory conditions or trigger details, the exact track list and playback duration remain unknown, though the filename scxxx.scx suggests it may have been saved under a temporary or test name during production. Difficulty is beginner level for anyone to enjoy casually, and estimated playtime runs 15-30 minutes depending on the number and length of included tracks. Recommended for users exploring classic Brood War UMS archives or wanting to experience the sound map genre that was part of the community culture at the time. However, verification is advised before running whether sound triggers work properly in the current patch environment or if separate audio files are required.
맵 선택 가이드
태그는 맵의 핵심 특징을 빠르게 설명하지만 제작 버전마다 규칙이 다를 수 있습니다. 상세 설명에서 권장 인원, 난이도, 플레이 시간과 버전을 함께 확인한 뒤 다운로드하세요.