
고렘 스타크래프트 맵 모음
'고렘' 태그가 등록된 맵을 모았습니다. 장르 하나로 찾기 어려운 플레이 방식, 난이도와 특징을 중심으로 인기 맵과 최신 맵을 비교해 보세요.
- 등록 맵
- 14개
- 누적 다운로드
- 0
- 누적 조회
- 169
인기 맵
다운로드와 조회 반응이 높은 맵입니다.
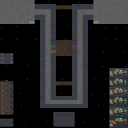
고렘 디펜스 V3 (Golem! Defense V3)
「고렘 디펜스 V3」는 스타크래프트 브루드워의 대표적인 디펜스 장르 유즈맵으로, 거대한 고렘 몬스터가 끊임없이 밀려오는 적들을 상대로 플레이어가 방어선을 구축하는 전략적 재미를 제공한다. 맵 중앙에 위치한 성채를 중심으로 6개의 플레이어가 각자 고유한 유닛과 업그레이드 시스템을 활용해 мон스터 웨이브를 막아내야 한다. 맵 구조는 입구와 통로, 고블린과 몬스터 웨이브가 오는 길목이 뚜렷하게 구분되어 있으며, 중앙 성채 주변으로 방어 건물과 자원 채취 지역이 배치되어 있다. 게임 시작 직후부터 강한 압박을 느끼게 되는 이 맵은 초반부터 적극적인 대처가 필요한데, 특히 입구막기용 유닛과 광역 공격 유닛의 조합이 필수적이다. 업그레이드 시스템이 존재하는데, 이를 통해 유닛의 체력, 공격력, 공격 속도 등을 강화할 수 있어 장기전에 대비한 전략적 깊이가 있다. 또한, 인공지능이 조종하는 몬스터는 단계별로 점점 강해지므로, 단순히 방어만으로는 버티기 어려운 구조로 설계되어 있다. 맵의 분위기는 어둡고 장대하며, 고렘 몬스터의 거대한 몸체가 맵 곳곳에 배치되어 있어 몰입감을 높인다. 특히 후반부에는 massive wave가 쏟아지므로, 플레이어 간의 협력이 중요해진다. 초보자는 업그레이드와 유닛 조합에 대한 이해가 부족할 수 있으므로, 난이도 조절을 위해 낮은 난이도 모드나 튜토리얼이 포함된 버전을 찾는 것이 좋다. 이 맵의 백미는 끊임없는 몰려오는 적을 상대로 자신의 방어선을 지키며 살아남는 성취감으로, 디펜스 유즈맵의 정수를 느낄 수 있다. 추천 대상은 디펜스 장르를 좋아하는 플레이어, 특히 전략적 사고와 팀웍을 중요시하는 유저들에게 적합하다. 또한, 팀 플레이를 선호하는 경우 2~3인 1팀으로 플레이하는 것도 재미있다. 플레이 전에는 자신의 유닛 조합과 업그레이드 우선순위를 미리 계획해두는 것이 좋다. 맵 특성상 입구 하나당 방어 건물을 집중 배치하는 것이 핵심이며, 자원 관리도 신중해야 한다. 이 맵은 디펜스 유즈맵의 고전으로, 오랜 기간 사랑받아 온 만큼 그 재미와 전략성이 입증된 작품이라 할 수 있다. 「Golem Defense V3」 is a representative defense genre custom map in *StarCraft: Brood War*, where players build defensive lines against waves of giant golem monsters. Six players must work together to protect the central fortress, each utilizing unique units and upgrade systems to withstand the relentless monster attacks. The map features clear pathways, goblin spawn points, and monster waves, with defensive structures and resource-gathering areas surrounding the central fortress. From the very start, the map exerts strong pressure, requiring immediate and strategic responses. Effective early-game unit combinations—especially for blocking entrances and dealing with area-of-effect attacks—are crucial. The upgrade system allows players to enhance unit health, attack power, and attack speed, adding depth for long-term survival. Since AI-controlled monsters grow stronger with each wave, relying solely on basic defenses won’t suffice. The map’s dark, grandiose atmosphere is heightened by the towering golem bodies scattered throughout, immersing players in the experience. Late-game waves become massive, making teamwork essential for survival. Beginners may struggle with unit combinations and upgrades, so those new to the genre should look for easier difficulty modes or versions with tutorials. The true highlight lies in the thrill of holding the line against endless waves and the satisfaction of outlasting them—a core appeal of defense custom maps. It’s especially recommended for players who enjoy strategic thinking and teamwork. For those who prefer cooperative play, teaming up with 2–3 others can make the experience even more enjoyable. Before playing, it’s wise to plan your unit composition and upgrade priorities. Since the map’s design revolves around concentrated defenses at each entrance, resource management must also be handled carefully. As a classic defense map with a proven track record of fun and strategy, *Golem Defense V3* remains a beloved title in the genre.
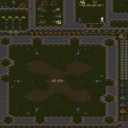
고렘 매드니스 울트라 (Golem Madness Ultra)
스타크래프트 브루드워의 유즈맵 〈고렘 매드니스 울트라〉는 고렘을 모아 적 기지를 파괴하는 독특한 디펜스 장르의 맵이다. 맵의 핵심은 ‘고렘 크레딧’이라는 자원을 모아 특수 고렘을 건설하고, 이를 활용해 적 기지를 공격하는 전략에 있다. 맵 중앙에는 광맥이 흩어져 있어 자원 획득이 용이하며, 고렘을 강화하거나 업그레이드할 수 있는 시설이 배치되어 있어 장기적인 전투를 가능하게 한다. 고렘의 종류는 다양하며, 각각의 특성과 조합을 고려한 플레이가 요구된다. 맵의 구조는 중앙 광맥 주변을 중심으로 방어 타워와 생산 건물이 배치되어 있어, 공격과 방어의 균형을 맞추는 것이 중요하다. 초보 플레이어는 자원 관리와 고렘 조합에 어려움을 느낄 수 있지만, 숙련된 플레이어는 다양한 전략을 시도할 수 있는 깊이 있는 콘텐츠를 제공한다. 맵의 분위기는 사막 타일셋을 기반으로 하여 건조하고 탁한 색감으로 조성되어 있으며, 고렘의 움직임과 폭발 이펙트가 시원하게 표현되어 있어 시각적 만족감도 높다. 이 맵은 고렘을 중심으로 한 전략적 디펜스 게임을 즐기고 싶은 플레이어들에게 강력히 추천할 만하다. 특히, 고렘의 조합과 업그레이드 시스템을 즐기는 유저들에게는 필수급 콘텐츠가 될 것이다. 플레이 전에는 광맥의 위치와 고렘 생산 건물의 배치를 숙지하고, 적 기지의 약점을 분석하는 연습을 해두는 것이 좋다. 또한, 고렘의 이동 경로와 공격 범위를 미리 확인하여 효율적인 전투를 준비해야 한다. 맵의 난이도는 중상 정도로 예상되며, 팀플레이를 지원하는 구조는 아니지만, 혼자서도 충분히 즐길 수 있는 콘텐츠로 구성되어 있다. 고렘 매드니스 울트라는 단순히 디펜스를 넘어서, 고렘이라는 독특한 유닛을 활용한 전략적 깊이를 제공하는 맵으로, 스타크래프트 유즈맵의 새로운 장르를 개척한 작품으로 평가된다. Golem Madness Ultra is a unique defense-style custom map in StarCraft: Brood War where players gather "Golem Credits" to construct and upgrade special golems, then use them to destroy enemy bases. The map features scattered ore veins in the center, allowing players to collect resources efficiently. Facilities for upgrading and reinforcing golems are strategically placed, enabling long-term strategic gameplay. The variety of golem types encourages players to experiment with different combinations and tactics. The map’s layout is centered around the central ore veins, with defensive towers and production buildings arranged to balance offense and defense. While beginners may struggle with resource management and golem combinations, experienced players will find deep strategic content to explore. The desert-themed tile set gives the map a dry, gritty atmosphere, enhanced by dynamic visual effects like golem movements and explosions. This map is highly recommended for players who enjoy strategic defense games centered around golems. It offers a fresh take on the genre, particularly for those who appreciate golem combinations and upgrade systems. Before playing, familiarize yourself with ore vein locations, golem production buildings, and enemy base weaknesses. Analyzing golem movement paths and attack ranges is also crucial for efficient combat. The difficulty is estimated to be moderate to high, and while the map does not support team play, it delivers a satisfying solo experience. Golem Madness Ultra stands out as a map that redefines the defense genre by introducing a compelling golem-based strategy system, making it a must-play for StarCraft custom map enthusiasts.
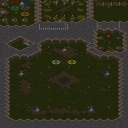
골렘 레벨레이션 v3.1 (Golem Revelation v3.1)
스타크래프트 브루드워 유즈맵 역사에서 '고렘' 열풍의 시초로 평가받는 골렘 레벨레이션 v3.1(Golem Revelation v3.1)은 dlw-shadows가 제작한 5인용 협동 생존 RPG 맵이다. 사막 타일셋의 2048x2048 대형 전장에서 플레이어는 각각 고유한 능력을 지닌 골렘 영웅 한 기를 조종하여 몰려드는 적 웨이브를 막아내고 성장하는 방식으로 진행된다. 맵 설명에 '고렘 열풍을 시작한 맵'이라 명시된 만큼, 후속작들과 수많은 아류작의 기준이 된 클래식한 시스템을 갖추고 있다. 진행 방식은 전형적인 웨이브 디펜스와 RPG 육성이 결합된 형태다. 게임이 시작되면 플레이어는 기지 없이 골렘 단일 유닛으로 시작하며, 주기적으로 생성되는 적 무리를 처치해 경험치와 미네랄을 획득한다. 레벨업 시 스탯 포인트를 분배하거나 상점에서 아이템을 구매해 공격력, 방어력, 특수 스킬을 강화하는 성장 루프가 핵심 재미다. 5인 협력이 필수적이라 역할 분담(탱커, 딜러, 서포터)과 아이템 공유, 부활 타이밍 조율 등 팀워크가 승패를 가른다. 난이도는 웨이브가 거듭될수록 급격히 상승하므로 초반 자원 관리와 스킬 빌드 선택이 중요하다. 플레이 경험은 추억 속 '컴까기' 감성과 현대적 RPG 파밍 재미가 공존한다. 화려한 트리거 연출이나 복잡한 스토리보다는 순수한 육성 쾌감과 웨이브 클리어의 긴장감에 집중했다. 최신 버전(v12.2)까지 이어지는 시리즈의 초기 버전인 만큼, 고렘 장르의 원형을 체험하고 싶거나 옛 친구들과 협동 플레이를 즐기고 싶은 유저에게 추천한다. 플레이 전 확인할 점은 맵 파일명에 포함된 대괄호 표기(`v[1].3.0`)가 단순 표기 차이인지 버전 차이인지 확인하고, 5인 풀파티가 모이지 않을 경우 난이도 조절이 필요할 수 있다는 점이다. Recognized as the origin of the 'Golem' craze in StarCraft Brood War UMS history, Golem Revelation v3.1 is a 5-player cooperative survival RPG map created by dlw-shadows. On a vast 2048x2048 desert tileset battlefield, each player controls a unique Golem hero unit to fend off incoming enemy waves and grow stronger. As the description states, 'The map that started the golems craze,' it features the classic systems that became the standard for numerous sequels and imitators. The gameplay combines a typical wave defense format with RPG progression. At the start, players begin with a single Golem unit without a base, gaining experience and minerals by defeating periodically spawning enemy hordes. The core loop revolves around allocating stat points upon leveling up and purchasing items from shops to enhance attack, defense, and special skills. Since 5-player cooperation is essential, teamwork—role division (tank, dealer, support), item sharing, and resurrection timing—determines victory or defeat. Difficulty spikes sharply as waves progress, making early resource management and skill build choices critical. The play experience blends the nostalgic 'comp-kkagi' (vs AI) sentiment with modern RPG farming fun. It focuses on the pure joy of growth and the tension of clearing waves rather than flashy trigger effects or complex narratives. As an early version of a series continuing to v12.2, it is recommended for users wanting to experience the prototype of the Golem genre or enjoy cooperative play with old friends. Before playing, note that the bracket notation in the filename (`v[1].3.0`) may indicate a version difference, and difficulty adjustment may be necessary if a full 5-player party cannot be assembled.
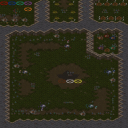
고렘 매드니스 매스 어택 (Golem Madness Mass Attack)
‘고렘 매드니스 매스 어택(Golem Madness Mass Attack)’은 스타크래프트 브루드워의 유즈맵으로, 5명의 플레이어가 고렘(골렘) 조합과 파괴를 기반으로 전투를 펼치는 디펜스 및 빌드 전략 장르의 맵이다. 맵은 사막 타일셋으로 구성되어 있으며, 넓은 평야와 중앙의 요새 구조가 특징적이다. 각 플레이어는 고렘의 부품을 수집하고 조합하여 강력한 유닛을 생산하거나 상대의 고렘을 파괴하는 방식으로 진행된다. 맵의 핵심은 ‘4개의 고렘 파츠 조합’을 완성하는 것이며, 이를 통해 다양한 고렘 유닛을 생성할 수 있다. 특히, 고렘의 파괴와 재조합이 가능한 구조는 전술적 선택을 강제하며, 상대방의 전략을 읽고 대응해야만 승리를 이끌어낼 수 있다. 맵의 디자인은 중앙의 넓은 평야가 확장 공간으로 활용되며, 요새 주변의 언덕과 협곡은 고렘의 이동 경로를 제한하는 역할을 한다. 플레이어는 초반에 자원을 확보하고 고렘 부품을 확보하는 데 집중해야 하며, 중반부터는 고렘 조합을 통한 화력과 방어 전략을 구사해야 한다. 맵의 난이도는 고렘의 조합과 파괴의 균형을 맞추는 데 있으며, 초보자는 고렘의 기본 조합법을 익히는 데 시간이 필요할 수 있다. 추천 대상은 디펜스와 빌드 전략을 즐기는 플레이어, 그리고 고렘의 조합과 파괴를 통한 전술적 플레이를 선호하는 유저들이다. 플레이 전에는 맵의 고렘 파츠 위치와 요새 구조를 숙지하고, 상대방의 고렘 조합을 예측하는 연습을 추천한다. 고렘의 파괴와 재조합이 가능한 맵의 특성상, 지속적인 자원 관리와 전술적 전환이 승리를 좌우할 것이다. This StarCraft: Brood War custom map, titled ‘Golem Madness Mass Attack’, drops players into a 5-player defense and build strategy experience centered around collecting, combining, and destroying golems. The map is set against a desert tileset, featuring expansive plains and central fortress structures that create natural choke points and strategic vantage points. Each player starts with the goal of gathering golem components to assemble powerful units or dismantle opponents’ golems for resources. The core mechanic revolves around completing one of four unique golem part combinations, unlocking specialized units that can turn the tide of battle. The map’s design emphasizes spatial awareness, with central open areas for expansion and elevated terrain around fortresses that restrict unit movement and encourage tactical positioning. Early-game focus should be on securing resources and components, while mid-to-late game demands mastery of golem combinations and defensive play. The challenge lies in balancing golem production with strategic destruction, making it a test of adaptability for players. Newcomers may find the learning curve steep as they familiarize themselves with component locations and fortress layouts, but the depth of golem combinations rewards persistent experimentation. Ideal for players who enjoy defense mechanics paired with build strategies, this map challenges both resource management and tactical foresight. Before diving in, study the golem part spawn points and fortress layouts to anticipate opponent strategies, and be prepared to pivot between offense and defense as the match progresses.
고렘 매드니스 (Golem Madness)
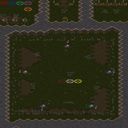
고렘 매드니스(Golem Madness)는 스타크래프트 브루드워 유즈맵 중 고렘을 주제로 한 전투형 아레나 맵으로, 파일명 '----GOLEM MADNESS v. 6.0.scm'과 내부 설명 'Destroy and build golems'에서 알 수 있듯 고렘을 파괴하고 생산하며 싸우는 핵심 메커니즘을 갖춘 것으로 보인다. 최대 5인이 참여할 수 있으며, 사막 타일셋의 2048x2048 대형 맵에서 펼쳐지는 난전 양상이 예상된다. v6.0이라는 버전 표기와 함께 v9.5, v10.0 'Mass Attack' 등 후속 버전이 존재하는 점으로 미루어 오랜 기간 업데이트되며 밸런스와 콘텐츠가 다듬어져 왔을 것으로 추정된다. 플레이어는 각자 고렘을 조종하거나 생산 시설을 운영하며 상대의 고렘을 격파하고 자신의 세력을 확장하는 방식으로 진행될 가능성이 높다. '매드니스'라는 부제답게 다수의 고렘이 동시에 충돌하는 혼란스러운 전투가 핵심 재미 요소로 보이며, 고렘의 종류나 업그레이드 경로에 따라 전략적 선택지가 갈릴 것으로 보인다. 5인 자유 대전(FFA) 구도라면 외교나 일시적 연합, 배신 등 심리전도 중요한 변수가 될 수 있다. 사막 지형의 개활지는 기동전과 포위 공격에 유리한 환경을 제공하며, 맵 크기가 넓어 초반 정찰과 자원 확보, 거점 선점이 승부를 가를 전망이다. 고렘이라는 단일 유닛 유형을 중심으로 한 단순하면서도 깊은 전투 시스템은 초보자도 쉽게 접근할 수 있으나, 숙련자 간의 대결에서는 미세한 컨트롤과 타이밍 싸움이 승패를 좌우할 것으로 예상된다. 이 맵은 고렘 육성 및 대전 장르를 즐기는 유저, 5인 내외의 지인들과 가볍게 즐길 수 있는 아레나형 유즈맵을 찾는 플레이어에게 적합하다. 플레이 전 버전별 차이점(v6.0 대비 v9.5, v10.0)의 밸런스 변화나 추가 요소를 확인하고, 자신의 플레이 스타일에 맞는 버전을 선택하는 것이 좋다. Golem Madness is a Brood War UMS map centered on golem-themed arena combat. The filename '----GOLEM MADNESS v. 6.0.scm' and internal description 'Destroy and build golems' indicate a core mechanic of destroying enemy golems while producing and upgrading your own. It supports up to 5 players on a large 2048x2048 desert tileset map, suggesting chaotic free-for-all battles. The presence of version 6.0 alongside later versions like v9.5 and v10.0 'Mass Attack' implies a long update history with balance refinements and added content. Players likely control individual golems or manage production facilities, aiming to eliminate rivals and expand their forces. True to the 'Madness' subtitle, the fun lies in massive simultaneous golem clashes, with strategic depth coming from golem types and upgrade paths. In a 5-player FFA setting, diplomacy, temporary alliances, and betrayal add a psychological layer. The open desert terrain favors maneuver warfare and flanking, while the map size makes early scouting, resource control, and positional advantage critical. The focused system around a single unit type—golems—offers accessibility for newcomers, yet high-level matches will hinge on micro-control and timing. This map suits fans of golem-raising and battle genres, as well as groups of around five looking for a lighthearted arena UMS. Before playing, it is wise to check version differences (v6.0 vs v9.5 vs v10.0) for balance changes and new features, then pick the version that matches your playstyle. Golem Madness remains a noted classic in the StarCraft UMS archive, worth trying for anyone seeking a unique golem-themed gameplay experience.
고렘 매드니스 (Golem Madness)
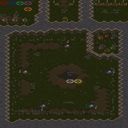
스타크래프트 브루드워의 유즈맵 ‘고렘 매드니스(Golem Madness)’는 플레이어가 고렘을 파괴하고 재건하는 독특한 메커니즘을Core한 디펜스 장르의 유즈맵입니다. 맵의 중앙에 위치한 커다란 고렘을 둘러싼Battlefield는 사막 테마의 넓은 평야와 높은 언덕으로 구성되어 있으며, 플레이어는 이 지형을 활용해 전략적인 공격과 방어를 펼칠 수 있습니다. 고렘은 플레이어의 공격을 받아 파괴되면 일정 시간 후 다시 재건되며, 이 과정에서 적절한 자원 관리와 위치 선정이 승리의 핵심으로 작용합니다. 플레이 방식은 크게 두 가지로 나뉩니다. 첫째, 고렘을 파괴하는 ‘공격’ 단계와 둘째, 파괴된 고렘을 재건하는 ‘방어’ 단계입니다. 공격 단계에서는 플레이어가 보유한 유닛으로 고렘을 공격할 수 있으며, 고렘의 체력이 낮아질수록 파괴 속도가 빨라집니다. 반면 방어 단계에서는 파괴된 고렘이 자연스럽게 재건되므로,在此期间 플레이어는 고렘 주변의 방어선을 강화하거나 추가 자원을 확보하는 데 주력해야 합니다. 맵의 사막 지형은 시야를 제한하는 언덕과 협곡을 제공해, 플레이어 간의 심리전과 위치 싸움이 치열해지는 요소로 작용합니다. 이 맵은 특히 팀 플레이보다는 개인전 또는 동맹을 맺은 소규모 팀에서 즐기기에 최적화되어 있습니다. 맵의 넓은 공간과 고렘 파괴에 따른 지속적인 전투는 플레이어 간의 긴장감을 높이며, 전략적인 자원 관리와 타이밍 감각이 요구됩니다. 또한, 고렘의 재건 주기와 파괴 속도를 정확히 예측하는 것이 승리의 관건으로, 초보자는 물론 숙련자까지 두루 즐길 수 있는 전략적 깊이를 갖추고 있습니다. 추천 대상으로는 스타크래프트 유즈맵을 즐기는 모든 플레이어, 특히 디펜스와 전략 장르를 선호하는 유저들에게 적합합니다. 또한, 고렘의 파괴와 재건이라는 독특한 메커니즘을 경험해 보고 싶은 플레이어들에게도 추천할 만한 작품입니다. 플레이 전에는 맵의 중앙 고렘의 체력과 재건 주기를 숙지하고, 언덕과 협곡을 활용한 위치 선정 전략을 미리 세워두는 것이 좋습니다. 맵의 사막 테마는 시각적으로도 매력적이므로, 그래픽적 요소도 즐기고 싶은 플레이어들에게도 좋은 선택이 될 것입니다. Golem Madness is a unique UMS-style defense map in StarCraft: Brood War where players focus on destroying and rebuilding golems at the center of a desert-themed battlefield. The map features a vast open area surrounded by hills and canyons, providing strategic depth through terrain exploitation. Players must balance offensive strikes against the golem with defensive preparations during its regeneration phases. The gameplay alternates between two core phases: the attack phase, where golems are damaged and eventually destroyed through coordinated unit attacks, and the defense phase, where players reinforce their positions while the golem slowly regenerates. The desert terrain, characterized by elevated hills and narrow canyons, restricts visibility and forces players to adopt precise positioning and psychological tactics. The golem’s regeneration timing and destruction speed create a dynamic challenge that rewards foresight and adaptability. Designed primarily for solo or small-team play rather than large-scale team battles, Golem Madness emphasizes personal strategy and resource management over raw combat power. Its pacing and mechanics appeal to both casual and hardcore UMS fans, offering a fresh take on the defense genre. The map’s visual design, with its warm desert palette and rugged terrain, enhances immersion and adds aesthetic value to the strategic experience. Ideal for players who enjoy StarCraft custom maps, especially those fond of defense and strategy games, this map caters to a wide audience from beginners to experienced UMS veterans. Before playing, it’s recommended to familiarize yourself with the golem’s regeneration cycle and the terrain layout, particularly the high ground and choke points. The unique golem mechanic and immersive setting make it a standout title worth exploring for anyone interested in StarCraft custom content.
라커 DGolemz Hybrid 3.0 (Lurker DGolemz Hybrid 3.0)
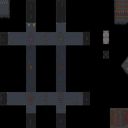
스타크래프트 브루드워의 유즈맵 ‘라커 DGolemz Hybrid 3.0’은 8방향에서 끊임없이 몰려오는 적군을 상대로 golems를 만들고 방어전을 펼쳐나가는 하이브리드 디펜스 장르의 맵이다. 내부 설명에 따르면 플레이어는 30레벨에 달하는 웨이브를 돌파해야 하며, 맵 곳곳에 배치된 네 개의 유닛이 각각 다른 방향으로 보석을 부팅하는 메커니즘이 특징으로 보인다. 보석을 부팅하지 말아야 할 붉은 보석도 함께 존재해 전략적 선택을 요구한다. 맵의 전장 중앙에는 golems를 생성할 수 있는 건물이 배치되어 있어, 유닛을 소환해 적군을 막아내는 동시에 공격적인 플레이도 가능하다는 점에서 타워 디펜스와 액션 디펜스가 혼합된 구조다. 이미지에서는 맵 중심부의 넓은 공간과 외곽의 좁아지는 길목이 보이며, 외곽 각 방향마다 적군이 진입할 수 있는 입구가 확인된다. 특히 맵 좌측 상단과 우측 하단에는 붉은 색으로 강조된 보석들이 배치되어 있어 부팅 여부를 신중히 판단해야 할 것이다. 플레이어는 초반에 자원을 모아 golems를 빠르게 생산해야 하며, 각 웨이브가 끝날 때마다 적의 공격 패턴이 변한다는 점에서 끊임없는 대처가 요구된다. 추천 대상은 디펜스와 전략적 건물 관리 모두를 좋아하는 유저들로, 특히 중수 이상이 즐기기에 알맞은 난이도로 보인다. 시작 전 확인해야 할 포인트는 네 개의 보석 부팅 여부와 초반 자원 관리, 그리고 golems의 생산 우선순위다. 맵의 구조상 외곽 입구 주변에 방어 건물을 집중 배치하는 것이 효율적일 수 있으며, 레벨이 올라갈수록 등장하는 적군의 수가 급격히 증가하므로 유닛의 효율적인 배치와 컨트롤이 victory의 열쇠가 될 것이다. This StarCraft: Brood War custom map, 'Lurker DGolemz Hybrid 3.0,' blends tower defense and action defense mechanics by challenging players to survive 30 waves of enemies attacking from eight directions. The map features a central structure for summoning golems while requiring players to strategically boot gems—avoiding red ones—to control enemy approach paths. The terrain includes wide central areas with narrow chokepoints, forcing players to balance resource management, unit production, and adaptive defense strategies. Early gameplay demands rapid golem production to counter initial waves, with later levels introducing increased enemy density and varied attack patterns. Ideal for players who enjoy micromanagement and strategic depth, this map rewards efficient unit placement and timely upgrades. Key pre-game considerations include gem booting priorities, early resource allocation, and prioritizing golem production over direct combat. The hybrid nature ensures dynamic gameplay, appealing to those seeking both challenge and replayability in custom map experiences.
고렘 매드니스 (Golem Madness)
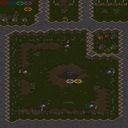
《고렘 매드니스》는 스타크래프트: 브루드워의 유즈맵으로, 대량의 고렘을 파괴하고 조립하는 독특한 게임 플레이를 제공한다. 이 맵은 5명의 플레이어가 각자의 기지에서 고렘을 조립하고, 전투를 통해 상대의 고렘을 파괴하는 방식으로 진행된다. 맵의 배경은 사막 타일셋으로 꾸며져 있으며, 전투는 맵 중앙의 넓은 평지에서 벌어지며, 고렘의 체력과 공격력은 플레이어 간 전투력에 따라 달라진다. 맵의 이름은 ‘GOLEM MADNESS’로, 고렘의 광기로운 전투를 강조하며, ‘wMassAttack 7new!’는Mass Attack이라는 스킬을 7번째 버전으로 새롭게 구현했다는 의미를 담고 있다. 플레이어는 고렘을 조립하기 위한 자원을 수집하고, 상대방의 고렘을 파괴하여 승리를 차지하는 것이 목표이다. 맵의 구조는 비교적 단순하지만, 고렘의 조립과 파괴, 자원 관리, 전투 전략이 복합적으로 요구되어 재미를 더한다. 특히 고렘의 체력과 공격력이 플레이어의 선택에 따라 달라지기 때문에, 전략적인 플레이가 중요하다. 이 맵은 고렘이라는 독특한 유닛을 중심으로 전투가 펼쳐지므로, 스타크래프트의 기본 유닛이 아닌 유즈맵 특화 유닛을 활용하는 재미가 있다. 또한, Mass Attack이라는 스킬을 통해 다수의 고렘을 한꺼번에 조립하거나 파괴할 수 있어, 전투의 스케일을 크게 할 수 있다. 이 맵은 주로 5인 대전이지만, 팀 플레이를 지원하지 않으므로 개인전 위주의 플레이가 특징이다. 고렘의 조립과 파괴를 반복하면서 전투의 재미를 느낄 수 있으며, 상대방의 고렘을 파괴하는 동시에 자신의 고렘을 성장시키는 균형 잡힌 전략이 필요하다. 이 맵을 즐기기 위해서는 고렘의 조립과 파괴 메커니즘을 이해하고, 자원 관리와 전투 타이밍을 잘 조율하는 능력이 요구된다. 또한, 사막 배경의 넓은 평지에서 벌어지는 전투는 시각적으로도 매력적이며, 고렘의 거대한 크기가 전투의 박진감을 더해준다. 이 맵은 스타크래프트 유즈맵의 특징인 창의적인 게임 플레이와 전략적 깊이를 동시에 제공하므로, 다양한 스타일의 플레이어에게 추천할 만하다. 특히, 고렘이라는 독특한 유닛을 활용한 전투를 즐기고 싶거나,Mass Attack 스킬을 통해 대규모 전투를 경험하고 싶은 플레이어에게 suitable하다. 또한, 5인 대전이 가능한 맵이므로, 친구들과 함께 플레이하기에도 적합하다. 플레이 전에는 고렘의 조립과 파괴 메커니즘,Mass Attack 스킬의 사용법, 자원 관리 방법 등을 미리 숙지하는 것이 좋다. 이 맵은 스타크래프트의 기본 시스템을 벗어나 새로운 전투 방식을 제공하므로, 기존의 밀리 게임과는 다른 재미를 느낄 수 있다. 고렘의 체력과 공격력이 플레이어의 선택에 따라 달라지기 때문에, 각 플레이어의 전략과 전투 스타일이 승패를 좌우할 수 있다. 이러한 특징은 이 맵을 더욱 흥미롭게 만든다. 《Golem Madness》 is a custom map for *StarCraft: Brood War* that offers a unique gameplay experience centered around assembling and destroying massive golems. In this five-player free-for-all, each player starts at their own base, gathering resources to construct golems and engaging in battles to dismantle their opponents' creations. The map features a desert-themed tile set, with combat unfolding on a vast central plain where golems' health and attack power fluctuate based on the player's combat effectiveness. The name *Golem Madness* reflects the frenzied, chaotic battles between golems, while *wMassAttack 7new!* indicates that the Mass Attack skill has been reimagined in its seventh iteration. Players must collect resources to build golems, destroy enemy golems, and secure victory through strategic planning. Though the map's layout is relatively simple, the interplay of golem assembly, destruction, resource management, and combat tactics adds depth and excitement. Since golems' stats can be customized, strategic decision-making becomes crucial. The map shines in its use of custom golem units, distinct from *StarCraft*'s standard units, offering a fresh twist on the game. The Mass Attack skill allows players to assemble or destroy multiple golems simultaneously, amplifying the scale of battles. While designed for five players, the game emphasizes individual competition rather than team play. Success hinges on balancing golem growth with destruction, requiring a solid grasp of assembly mechanics, resource allocation, and battle timing. The vast desert battlefield not only provides a visually striking backdrop but also enhances the sense of scale with the golems' imposing presence. Combining creative gameplay with strategic depth, *Golem Madness* caters to a wide range of players. It’s especially ideal for those eager to experiment with golem-based combat or experience large-scale battles through Mass Attack. The five-player format also makes it a great choice for casual matches with friends. Before diving in, players should familiarize themselves with golem assembly and destruction mechanics, how to use Mass Attack, and resource management strategies. By stepping outside *StarCraft*'s traditional systems, the map delivers a fresh and engaging alternative to standard melee matches. The dynamic stats of golems mean that each player’s approach—whether aggressive, defensive, or balanced—can directly influence the outcome, adding another layer of excitement to the experience.
고렘 리벨리온 v9.0 (Golem Revelation v9.0)
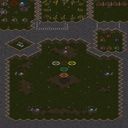
스타크래프트 브루드워의 유즈맵 <고렘 리벨리온 v9.0>은 오리지널 맵이 아니라 개조 유즈맵으로, 고렘을 직접 조종하거나 건물을 파괴하고 공장을 건설하는 독특한 게임플레이가 특징이다. 맵 상단과 하단에 각각의 기지 구조가 배치되어 있으며, 플레이어는 초기에 주어지는 고렘 유닛을 이용해 적의 건물을 파괴하거나 새로운 고렘을 생산하는 공장을 건설해야 한다. 맵 중앙에는 넓은 평지와 함께 고지대가 존재하며, 이 지형을 활용한 진형 싸움이나 방어 라인 구축이 중요해 보인다. 맵의 배경은 건조한 사막 지형으로, 타일셋이 Desert로 설정되어 있어 건조한 환경이 시각적으로 두드러진다. 내부 맵 설명에서 'Destroy and build Golems'와 'Destroy Golem Factories'라는 문구가 반복되는 점으로 미루어 보아, 고렘 유닛의 생산과 파괴가 핵심 메커니즘임을 알 수 있다. 맵의 제목인 'Golem Revelation'은 고렘의 부활 또는 진실한 힘의 각성을 의미하는 것으로 보이며, 'v9.0'은 이 맵의 개선된 버전을 나타낸다. 이 맵은 고렘 유닛을 중심으로 한 전략적 플레이가 요구되며, 특히 건물을 파괴하고 공장을 건설하는 과정에서Resource Management와Unit Control 능력이 중요해질 것으로 예상된다. 또한, 맵의 크기가 1024x1024로 비교적 크고, 해상도가 2048x2048로 세밀한 디자인 덕분에 넓은 시야와 전략적 깊이를 제공할 것으로 보인다. 초보자와 숙련자 모두 즐길 수 있는 콘텐츠로, 고렘의 특성을 활용한 다양한 전략을 구사할 수 있을 것이다. 다만, 맵의 난이도나 승리 조건에 대한 구체적인 설명이 없어서 플레이 전 미리 확인해 볼 필요가 있다. 이 맵은 주로 고렘을 중심으로 한 전략적 전투와 건물을 파괴하는 재미를 추구하는 유저들에게 적합할 것으로 보이며, 특히 디펜스나 빌드 오더를 중시하는 플레이어들에게 흥미로운 경험을 제공할 것이다. 또한, 맵의 이름에서 알 수 있듯이 고렘이라는 독특한 유닛을 활용한 새로운 플레이 스타일을 경험하고자 하는 유저들에게도 추천할 만하다. 플레이 전 반드시 확인해야 할 요소는 고렘의 특성과 생산 방식, 건물을 파괴하는 방법, 그리고 승리 조건 등이다. 이러한 요소들이 명확하게 제시되지 않은 맵이므로, 게임 시작 전에 맵의 설명이나 튜토리얼을 숙지하는 것이 중요하다. 또한, 맵의 디자인상 중앙 고지대를 활용한 진형 싸움이나 방어 라인 구축이 필요할 가능성이 높으므로, 지형을 잘 활용하는 전략을 준비해 보는 것이 좋다. StarCraft: Brood War's custom map *Golem Revelation v9.0* is a modified version rather than an original map, featuring unique gameplay where players directly control golems, destroy buildings, and construct factories. The map has base structures at both the top and bottom, and players must use their initial golems to either destroy enemy buildings or build factories to produce new ones. The central area includes a vast plain with elevated terrain, making positional battles and defensive line setups crucial. The map’s setting is a dry desert environment with a Desert tileset, emphasizing its arid landscape visually. The recurring phrases *"Destroy and build Golems"* and *"Destroy Golem Factories"* in the internal map description highlight the core mechanics centered around golems—production and destruction. The title *Golem Revelation* suggests themes of resurrection or awakening true power, while *v9.0* indicates an improved iteration of the map. This map demands strategic play focused on golems, particularly in resource management and unit control during building destruction and factory construction. With a map size of 1024x1024 and a resolution of 2048x2048, its detailed design offers wide visibility and deep strategic layers. Suitable for both beginners and experienced players, it allows for diverse strategies leveraging the unique properties of golems. However, since the map lacks specific details on difficulty or victory conditions, players should review these before starting. The map is best suited for players who enjoy strategic battles centered on golems and the thrill of destroying buildings, particularly those who value defense and build orders. It also appeals to users seeking fresh playstyles through the distinctive golem units, as suggested by its name. Before playing, it’s essential to understand the golems’ traits, production methods, building destruction mechanics, and victory conditions, as these aren’t clearly outlined in the map. Reviewing the map’s description or tutorial beforehand is highly recommended. Given its design, mastering positional combat and defensive strategies around the central high ground will likely be key to success.
고렘 매드니스 메스 어택 v12 (Golems Madness Mass Attack v12)
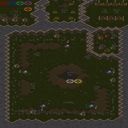
‘고렘 매드니스 메스 어택 v12’는 스타크래프트 브루드워의 유즈맵으로, 플레이어가 고렘을 파괴하고 건립하는 독특한 전투와 건설의 조화를 경험할 수 있는 맵이다. 내부 설명에 따르면 플레이어는 프로토스 유닛인 ‘고렘’을 조종하거나 조종당하는 방식으로 진행되며, 맵은 ‘Pro-TossMySalad’에 의해 모든 고렘 파츠 조합이 생성된다고 설명되어 있다. 맵의 배경은 사막 타일셋으로 구성되어 있으며, 넓은 공간에서 고렘의 전투와 건설이 펼쳐진다. 5명의 플레이어가 참여하는 구조로 예상되며, 맵의 목표는 고렘을 파괴하고 새로운 고렘을 건설하는 데 중점을 두고 있는 것으로 추정된다. 맵의 제목과 설명에서 ‘매드니스’와 ‘메스 어택’이라는 단어가 사용되면서 전투와 파괴의 임팩트가 강조되고 있으며, 고렘의 조합과 사용이 핵심 메커니즘으로 보인다. 플레이어는 고렘의 파츠를 조합하여 강력한 고렘을 만들어내거나, 상대방의 고렘을 파괴하는 전략을 구사해야 할 것이다. 맵의 구조와 진행 방식은 고렘을 중심으로 한 전투와 건설의 균형을 맞추는 것이 중요하며, 이는 플레이어의 전략과 타이밍 감각을 요구할 것으로 예상된다. 특히 고렘의 파츠 조합이 맵의 핵심 요소로 작용하므로, 플레이어는 맵의 특성과 파츠의 조합 방법을 신중히 고려해야 한다. 이 맵은 고렘을 любить하는 플레이어나 파괴와 건설의 조화를 즐기는 유저에게 적합할 것으로 보이며, 특히 고렘의 조합과 전투의 조화를 중시하는 플레이 스타일을 선호하는 유저에게 추천할 만하다. 또한 맵의 넓은 공간과 사막 배경은 고렘의 전투와 건설을 돋보이게 하며, 시각적인 몰입감을 높이는 요소로 작용할 것이다. 플레이 전에는 고렘의 파츠 조합 방법과 맵의 구조를 충분히 숙지하는 것이 중요하다. 또한 상대방과의 전략 대결에서 우위를 점하기 위해 고렘의 조합과 파괴 타이밍을 신중히 계획해야 한다. 맵의 특성과 요구 사항을 이해하고 준비한다면, ‘고렘 매드니스 메스 어택 v12’는 흥미로운 전략과 전투의 조화를 제공할 것이다. 특히 고렘의 조합과 파괴가 맵의 핵심 메커니즘이므로, 이를 중심으로한 전략 수립이 필수적이다. 플레이어는 고렘의 파츠를 효율적으로 활용하고, 상대방의 고렘을 파괴하는 데 주력해야 할 것이다. 맵의 넓은 공간과 사막 배경은 전투와 건설의 조화를 시각적으로 돋보이게 하므로, 플레이어는 이를 적극 활용하여 전략을 펼쳐야 한다. 이 맵은 고렘을 좋아하는 유저뿐만 아니라, 전략과 전투의 조화를 즐기는 모든 플레이어에게 흥미로운 경험을 제공할 것이다. ‘Golem Madness Mass Attack v12’ is a custom map for *StarCraft: Brood War* where players experience a unique blend of combat and construction as they destroy and build golems. According to the in-game description, players control or are controlled by Protoss units called ‘golems,’ with all golem parts combinations generated by ‘Pro-TossMySalad.’ The map features a desert tileset, offering wide-open spaces where golem battles and construction unfold. Designed for five players, the objective revolves around destroying enemy golems and constructing new ones. The title and description emphasize combat and destruction with words like ‘Madness’ and ‘Mass Attack,’ while golem assembly and usage serve as the core mechanics. Players must strategize—either assembling powerful golems or dismantling opponents’—requiring a balance of combat and construction. Since golem part combinations are central, players should study the map’s mechanics and assembly methods carefully. This map suits those who love golems or enjoy the harmony of destruction and creation, especially players who value strategic golem assembly and combat synergy. The expansive desert setting enhances visual immersion, making the battles and constructions stand out. Before playing, familiarize yourself with golem part combinations and map layout, and plan your assembly and destruction timings carefully to gain an edge. When understood and prepared for, ‘Golem Madness Mass Attack v12’ delivers an engaging fusion of strategy and combat, where golem assembly and destruction drive the experience. Players should optimize part usage and focus on dismantling enemy golems, leveraging the map’s open spaces and desert aesthetic to execute their strategies. Whether you love golems or simply enjoy strategic combat, this map offers an exciting experience for all players.
고렘 매드니스 테크니컬러 (Golem Madness Technicolor)
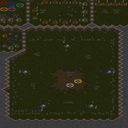
‘고렘 매드니스 테크니컬러’는 5인용 UMS 유즈맵으로, ‘고렘’이라는 소환 가능한 유닛을 중심으로 진행되는 디펜스와 빌드업의 조합을 핵심으로 삼고 있다. 맵은 사막 타일셋을 기반으로 깔끔한 64×64 타일 구조로 구성되어 있으며, 전면전과 방어가 동시에 요구되는 전략적 요소와 대규모 물량 공세를 버텨내야 하는 서바이벌 감각을 동시에 요구한다. 내부 설명에 따르면 ‘파괴와 건설’이라는 테마가 강조된 만큼, 플레이어는 AI가 소환하는 적대적 고렘 유닛을 파괴하거나 방어선을 구축하면서 자신의 고렘을 강화하고 배치하는 방식으로 진행된다. 특히 ‘mass assault’이라는 표현에서 알 수 있듯이 후반부로 갈수록 몰려드는 적군 물량에 대응하는 것이 관건으로, 단순한 방어뿐 아니라 능동적인 공격과 자원 관리, 업그레이드 전략이 필수적이다. 맵의 제목에 ‘Technicolor’라는 표현이 포함된 점으로 미루어 볼 때, 시각적인 색상 변화나 이펙트 위주의 디자인 요소도 포함되어 있을 가능성이 높아 흥미로운 비주얼 경험을 제공할 것으로 예상된다. 초보자보다는 전략적 사고와 빠른 판단력이 필요한 맵으로, 팀플레이가 가능하더라도 개인의 판단력이 중요한 장르로 보인다. 플레이 전에는 맵 내의 고렘 유닛의 종류와 특성, 방어 건물의 위치, 자원 관리 방식 등을 미리 숙지하는 것이 중요하며, 특히 적군의 공격 패턴과 타이밍을 읽는 능력이 중요하다. 맵의 내부 설명에 ‘totally new version’이라는 언급이 포함된 점을 고려할 때, 이전 버전에서의 개선점이나 새로운 유닛/기능이 추가되었을 가능성이 있어, 구버전 플레이어라면 새로운 메커니즘에 주목할 필요가 있다. Golem Madness Technicolor is a 5-player UMS custom map that blends defense and build mechanics centered around summonable Golem units. Set on a desert tileset with a clean 64×64 tile structure, the map demands both strategic frontline combat and survival instincts to withstand escalating enemy waves. The internal description highlights a "destroy and build" theme, where players must either dismantle hostile Golem units or construct defensive lines while upgrading and deploying their own Golems. The term "mass assault" in the description suggests that late-game focus shifts to managing overwhelming enemy numbers, requiring not just passive defense but active offense, resource management, and strategic upgrades. The inclusion of "Technicolor" in the title hints at vibrant visual effects or color shifts during gameplay, adding an engaging aesthetic layer. While team play is possible, the map leans toward individual decision-making and tactical foresight, making it more suited to experienced players. Before diving in, it's wise to study the map’s Golem unit roster, defensive structure placements, and resource mechanics. The note about a "totally new version" in the internal description implies significant overhauls or added features compared to prior iterations, so returning players should watch for new mechanics or unit behaviors that could shift the meta.
고렘스 매스 익스피리언스 (GoLeMs MaSs ExP)
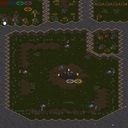
"고렘스 매스 익스피리언스(GoLeMs MaSs ExP)"는 스타크래프트 브루드워의 유즈맵으로, 플레이어가 고렘을 파괴하고 건설하는 독특한 전략을 펼치는 디펜스 장르의 맵이다. 맵 제목과 내부 설명에서 확인할 수 있듯이, 주요 목표는 고렘을 파괴하고 새로운 고렘을 건설하는 방식으로 진행된다. 사막 타일셋을 바탕으로 조성된 넓은 맵은 시야를 제한하는 요소 없이 전략적 플레이를 펼칠 수 있도록 설계되어 있으며, 플레이어는 자원을 확보하고 고렘을 관리하는 동시에 적의 공격을 방어해야 한다. 맵의 구조상 5인 플레이를 상정하고 있으며, 팀 플레이보다는 개별 플레이에 중점을 두고 있는 것으로 추정된다. 고렘의 파괴와 건설이라는 독특한 메커니즘은 기존의 디펜스 맵과는 차별화된 경험을 제공하며, 전략적 자원 관리와 타이밍 플레이가 핵심이다. 맵의 난이도는 맵의 구조와 고렘의 특성에 따라 초보자는 다소 어려울 수 있으나, 중간 정도의 전략적 감각을 가진 플레이어라면 충분히 즐길 수 있을 것이다. 특히 고렘의 파괴와 건설을 반복하는 사이클은 플레이어의 집중력을 요구하며,Resource 관리와 방어 라인의 구축이 승리 여부를 가를 가능성이 높다. 이 맵을 플레이하기 전에는 고렴의 특성과 맵의 주요 구조를 미리 숙지하는 것이 중요하다. 또한, 고렘의 파괴 및 건설 타이밍을 고려한 자원 관리와 방어 전략을 세우는 것이 필수적이다. 이 맵은 디펜스 장르에 익숙한 플레이어뿐만 아니라, 새로운 전략적 경험을 원하는 플레이어에게도 추천할 만한 작품이다. 고렘의 파괴와 건설이라는 독특한 콘셉트는 스타크래프트 유즈맵의 가능성을 넓히는 데 기여하며, 전략적 깊이를 더하는 요소로 작용한다. 이 맵을 통해 플레이어는Resource 관리와 방어 전략의 중요성을 다시 한번 느낄 수 있을 것이다. "GoLeMs MaSs ExP" is a custom StarCraft: Brood War defense map where players engage in a unique strategy of destroying and constructing golems. As the map's title and in-game description suggest, the main objective revolves around breaking down golems and building new ones. The wide desert-themed map is designed for strategic gameplay without restrictive visibility, requiring players to gather resources, manage golems, and defend against enemy attacks simultaneously. The map is structured for five players, emphasizing individual play over team coordination. The distinctive mechanics of destroying and constructing golems set this map apart from traditional defense games, with strategic resource management and precise timing being key to success. While beginners may find the map challenging due to its structure and the unique nature of the golems, players with moderate strategic awareness should find it thoroughly enjoyable. The repetitive cycle of destroying and rebuilding golems demands sustained focus, and efficient resource management alongside well-planned defensive lines will likely determine victory. Before playing, it's crucial to familiarize yourself with the golems' traits and the map's key structures. Developing a resource management and defense strategy that accounts for the timing of golem destruction and construction is essential. This map is recommended not only for players familiar with defense genres but also for those seeking fresh strategic experiences. The golem-based concept expands the possibilities of StarCraft custom maps, adding depth to the gameplay. Through this map, players will once again appreciate the critical role of resource management and defensive tactics.
최근 등록된 맵
새로 추가된 파일과 버전을 확인하세요.
고렘 -:- 레전더리스 (Golem -:- Legendaries)
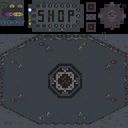
‘고렘 -:- 레전더리스(Golem -:- Legendaries)’는 스타크래프트 브루드워의 유즈맵으로, 8명의 플레이어가 각각 고렘(Golem) 공장을 파괴하는 것을 목표로 하는 디펜스형 맵이다. 내부 맵 설명에 따르면 원작자는 Ed_e_o이며, 레전더리스 버전은 PossessedAngel에 의해 제작되었다고 한다. 우주 타일셋을 기반으로 한 넓은 1024x1024 맵에서 펼쳐지는 전투는 고렘 공장 간의 경쟁을 중심으로 전개된다. 맵 중앙에는 거대한 고렘 형상이 배치되어 있으며, 이 고렘은 맵의 상징이자 주요 전투 공간으로 추정된다. 플레이어는 자신의 고렘 공장을 지키며 상대방의 고렘 공장을 파괴하는 전략을 구사해야 한다. 고렘 공장은 맵 곳곳에 흩어져 있으며, 각 공장은 Ressource Minerals와 Vespene Gas를 채취할 수 있는 미네랄 멀티와 가스를 확보할 수 있는 가스 멀티를 확보하고 있는 것으로 보인다. 이를 바탕으로 병력을 생산하고 방어선을 구축하는 것이 핵심이다. 맵의 구조상 고렘 공장 간의 거리가 멀기 때문에, 중앙 고렘 지역을 두고 벌어지는 전투가 자주 발생할 것으로 예상된다. 방어 시에는 고렘 공장 주변에 방어 건물을 건설하거나 병력을 배치하여 상대방의 공격을 저지할 수 있으며, 공격 시에는 빠른 이동과 기습을 통해 상대방의 공장을 파괴하는 전략이 중요하다. 특히, 우주 타일셋의 어두운 배경은 고렘의 거대한 형상과 조화를 이루며, 마치 신화 속의 전투장 같은 분위기를 연출한다. 이 맵은 고렘 공장 간의 전투와 자원 관리를 중심으로 한 전략적 플레이가 요구되며, 입문자보다는 중급 이상의 플레이어에게 적합할 것으로 보인다. 또한, 맵의 넓고 복잡한 구조는 시야 확보와 병력 이동 경로 설정이 중요하므로, 맵을 충분히 숙지하고 플레이해야 한다. Golem -:- Legendaries is a custom map for StarCraft: Brood War, designed as a defense-style game where eight players compete to destroy opposing Golem factories. According to the internal description, the original creator is Ed_e_o, and the Legendaries version was developed by PossessedAngel. The map features a vast 1024x1024 space set against a space-themed tileset, with a massive Golem structure at its center serving as both a landmark and a focal point for battles. Players must protect their own Golem factories while strategically targeting and destroying enemy factories. Factories appear to be spread across the map and are likely connected to mineral and Vespene Gas resources, providing the necessary materials for unit production and base defense. The map’s layout suggests frequent clashes around the central Golem area due to the distance between factories. Defensive play involves constructing buildings or positioning units near factories to fend off attacks, while aggressive strategies require swift movements and ambushes to dismantle enemy bases. The dark, cosmic backdrop enhances the map’s mythical atmosphere, evoking the feel of an epic battle scene. This map emphasizes strategic depth, resource management, and tactical positioning, making it more suitable for intermediate to advanced players. Its expansive and intricate layout demands careful exploration and route planning to gain a competitive edge.
고렘 매드니스 V 11.0 (Golem Madness V 11.0)
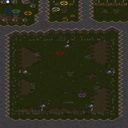
스타크래프트 브루드워의 독특한 유즈맵인 <고렘 매드니스 V 11.0>은 플레이어가 직접 고렘을 조종하고 파괴하는 동시에 새로운 고렘을 건설하는 이중적인 플레이를 요구하는 디펜스 장르의 걸작이다. 맵의 핵심 메커니즘은 '파괴와 건설'의 순환 구조로, 초반에는 제한된 자원으로 고렘을 파괴하는 데 집중해야 하며, 파괴 후 남은 잔해와 자원을 활용해 더 강력한 고렘을 조합하고 배치하는 전략이 필요하다. 특히 5인 플레이를 전제로 설계된 맵은 팀워크와 개인 역량이 동시에 요구되며, 각 플레이어의 자원 관리와 고렘 조합 선택이 승패를 좌우하는 결정적인 요소가 된다. 맵의 배경은 사막 타일셋으로 구성되어 있으며, 넓은 개활지와 전략적 요충지가 조화를 이룬 공간에서 전투가 펼쳐진다. 고렘의 종류와 능력치는_VERSION 11.0_에서 새롭게 추가된 요소들이 포함되어 있어, 기존 버전과는 다른 전략적 깊이를 제공한다. 플레이어는 초보자와 숙련자를 가리지 않고 접근할 수 있지만, 고렘의 조합과 배치에 대한 이해가 깊어질수록 더 높은 난이도와 재미를 느낄 수 있는 구조로 설계되어 있다. 맵을 시작하기 전, 각 고렘의 능력치와 자원 소모량을 반드시 숙지하고, 팀원과의 역할 분담을 사전에 협의하는 것이 중요하다. 또한, 고렘의 파괴와 건설을 반복하는 과정에서 발생하는 자원 부족 현상에 대비하기 위해 여유 자원을 확보하는 전략도 필수적이다. 이 맵의 진정한 묘미는 단순한 디펜스가 아니라, 끊임없이 변화하는 전장에서 새로운 전략을 창조해내는 창의력과 순발력에 있다. 고렘 매드니스 V 11.0은 스타크래프트의 유즈맵 역사에서 독보적인 위치를 차지하는 작품으로, 디펜스와 전략의 조화를 극대화한 작품 중 하나로 평가받고 있다. Golem Madness V 11.0 is a standout custom map in StarCraft: Brood War that challenges players with a unique dual mechanic of both destroying and constructing golems. The core gameplay revolves around a cycle of destruction and creation, where players must initially focus on demolishing golems using limited resources, then repurpose the remnants to build even stronger variants. Designed for five players, the map demands both individual skill and team coordination, as resource management and golem composition choices directly influence the outcome. The map's desert-themed tile set provides a visually striking battleground, featuring wide-open spaces and strategic choke points that enhance tactical depth. Version 11.0 introduces new golem types and abilities, adding layers of complexity compared to previous iterations. While accessible to beginners, mastering the nuances of golem combinations and placement unlocks higher levels of strategic depth and enjoyment. Before starting, players should familiarize themselves with golem stats and resource costs, and coordinate roles with teammates to optimize performance. Managing resource shortages during the destruction-construction cycle is critical, and the map's true appeal lies in its dynamic battlefields that reward creativity and quick decision-making. Golem Madness V 11.0 stands as a testament to the innovation within StarCraft's custom map scene, blending defense mechanics with strategic depth in a way few maps achieve.
고렘스 매스 익스피리언스 (GoLeMs MaSs ExP)
"고렘스 매스 익스피리언스(GoLeMs MaSs ExP)"는 스타크래프트 브루드워의 유즈맵으로, 플레이어가 고렘을 파괴하고 건설하는 독특한 전략을 펼치는 디펜스 장르의 맵이다. 맵 제목과 내부 설명에서 확인할 수 있듯이, 주요 목표는 고렘을 파괴하고 새로운 고렘을 건설하는 방식으로 진행된다. 사막 타일셋을 바탕으로 조성된 넓은 맵은 시야를 제한하는 요소 없이 전략적 플레이를 펼칠 수 있도록 설계되어 있으며, 플레이어는 자원을 확보하고 고렘을 관리하는 동시에 적의 공격을 방어해야 한다. 맵의 구조상 5인 플레이를 상정하고 있으며, 팀 플레이보다는 개별 플레이에 중점을 두고 있는 것으로 추정된다. 고렘의 파괴와 건설이라는 독특한 메커니즘은 기존의 디펜스 맵과는 차별화된 경험을 제공하며, 전략적 자원 관리와 타이밍 플레이가 핵심이다. 맵의 난이도는 맵의 구조와 고렘의 특성에 따라 초보자는 다소 어려울 수 있으나, 중간 정도의 전략적 감각을 가진 플레이어라면 충분히 즐길 수 있을 것이다. 특히 고렘의 파괴와 건설을 반복하는 사이클은 플레이어의 집중력을 요구하며,Resource 관리와 방어 라인의 구축이 승리 여부를 가를 가능성이 높다. 이 맵을 플레이하기 전에는 고렴의 특성과 맵의 주요 구조를 미리 숙지하는 것이 중요하다. 또한, 고렘의 파괴 및 건설 타이밍을 고려한 자원 관리와 방어 전략을 세우는 것이 필수적이다. 이 맵은 디펜스 장르에 익숙한 플레이어뿐만 아니라, 새로운 전략적 경험을 원하는 플레이어에게도 추천할 만한 작품이다. 고렘의 파괴와 건설이라는 독특한 콘셉트는 스타크래프트 유즈맵의 가능성을 넓히는 데 기여하며, 전략적 깊이를 더하는 요소로 작용한다. 이 맵을 통해 플레이어는Resource 관리와 방어 전략의 중요성을 다시 한번 느낄 수 있을 것이다. "GoLeMs MaSs ExP" is a custom StarCraft: Brood War defense map where players engage in a unique strategy of destroying and constructing golems. As the map's title and in-game description suggest, the main objective revolves around breaking down golems and building new ones. The wide desert-themed map is designed for strategic gameplay without restrictive visibility, requiring players to gather resources, manage golems, and defend against enemy attacks simultaneously. The map is structured for five players, emphasizing individual play over team coordination. The distinctive mechanics of destroying and constructing golems set this map apart from traditional defense games, with strategic resource management and precise timing being key to success. While beginners may find the map challenging due to its structure and the unique nature of the golems, players with moderate strategic awareness should find it thoroughly enjoyable. The repetitive cycle of destroying and rebuilding golems demands sustained focus, and efficient resource management alongside well-planned defensive lines will likely determine victory. Before playing, it's crucial to familiarize yourself with the golems' traits and the map's key structures. Developing a resource management and defense strategy that accounts for the timing of golem destruction and construction is essential. This map is recommended not only for players familiar with defense genres but also for those seeking fresh strategic experiences. The golem-based concept expands the possibilities of StarCraft custom maps, adding depth to the gameplay. Through this map, players will once again appreciate the critical role of resource management and defensive tactics.
고렘 매드니스 테크니컬러 (Golem Madness Technicolor)
‘고렘 매드니스 테크니컬러’는 5인용 UMS 유즈맵으로, ‘고렘’이라는 소환 가능한 유닛을 중심으로 진행되는 디펜스와 빌드업의 조합을 핵심으로 삼고 있다. 맵은 사막 타일셋을 기반으로 깔끔한 64×64 타일 구조로 구성되어 있으며, 전면전과 방어가 동시에 요구되는 전략적 요소와 대규모 물량 공세를 버텨내야 하는 서바이벌 감각을 동시에 요구한다. 내부 설명에 따르면 ‘파괴와 건설’이라는 테마가 강조된 만큼, 플레이어는 AI가 소환하는 적대적 고렘 유닛을 파괴하거나 방어선을 구축하면서 자신의 고렘을 강화하고 배치하는 방식으로 진행된다. 특히 ‘mass assault’이라는 표현에서 알 수 있듯이 후반부로 갈수록 몰려드는 적군 물량에 대응하는 것이 관건으로, 단순한 방어뿐 아니라 능동적인 공격과 자원 관리, 업그레이드 전략이 필수적이다. 맵의 제목에 ‘Technicolor’라는 표현이 포함된 점으로 미루어 볼 때, 시각적인 색상 변화나 이펙트 위주의 디자인 요소도 포함되어 있을 가능성이 높아 흥미로운 비주얼 경험을 제공할 것으로 예상된다. 초보자보다는 전략적 사고와 빠른 판단력이 필요한 맵으로, 팀플레이가 가능하더라도 개인의 판단력이 중요한 장르로 보인다. 플레이 전에는 맵 내의 고렘 유닛의 종류와 특성, 방어 건물의 위치, 자원 관리 방식 등을 미리 숙지하는 것이 중요하며, 특히 적군의 공격 패턴과 타이밍을 읽는 능력이 중요하다. 맵의 내부 설명에 ‘totally new version’이라는 언급이 포함된 점을 고려할 때, 이전 버전에서의 개선점이나 새로운 유닛/기능이 추가되었을 가능성이 있어, 구버전 플레이어라면 새로운 메커니즘에 주목할 필요가 있다. Golem Madness Technicolor is a 5-player UMS custom map that blends defense and build mechanics centered around summonable Golem units. Set on a desert tileset with a clean 64×64 tile structure, the map demands both strategic frontline combat and survival instincts to withstand escalating enemy waves. The internal description highlights a "destroy and build" theme, where players must either dismantle hostile Golem units or construct defensive lines while upgrading and deploying their own Golems. The term "mass assault" in the description suggests that late-game focus shifts to managing overwhelming enemy numbers, requiring not just passive defense but active offense, resource management, and strategic upgrades. The inclusion of "Technicolor" in the title hints at vibrant visual effects or color shifts during gameplay, adding an engaging aesthetic layer. While team play is possible, the map leans toward individual decision-making and tactical foresight, making it more suited to experienced players. Before diving in, it's wise to study the map’s Golem unit roster, defensive structure placements, and resource mechanics. The note about a "totally new version" in the internal description implies significant overhauls or added features compared to prior iterations, so returning players should watch for new mechanics or unit behaviors that could shift the meta.
고렘 매드니스 메스 어택 v12 (Golems Madness Mass Attack v12)
‘고렘 매드니스 메스 어택 v12’는 스타크래프트 브루드워의 유즈맵으로, 플레이어가 고렘을 파괴하고 건립하는 독특한 전투와 건설의 조화를 경험할 수 있는 맵이다. 내부 설명에 따르면 플레이어는 프로토스 유닛인 ‘고렘’을 조종하거나 조종당하는 방식으로 진행되며, 맵은 ‘Pro-TossMySalad’에 의해 모든 고렘 파츠 조합이 생성된다고 설명되어 있다. 맵의 배경은 사막 타일셋으로 구성되어 있으며, 넓은 공간에서 고렘의 전투와 건설이 펼쳐진다. 5명의 플레이어가 참여하는 구조로 예상되며, 맵의 목표는 고렘을 파괴하고 새로운 고렘을 건설하는 데 중점을 두고 있는 것으로 추정된다. 맵의 제목과 설명에서 ‘매드니스’와 ‘메스 어택’이라는 단어가 사용되면서 전투와 파괴의 임팩트가 강조되고 있으며, 고렘의 조합과 사용이 핵심 메커니즘으로 보인다. 플레이어는 고렘의 파츠를 조합하여 강력한 고렘을 만들어내거나, 상대방의 고렘을 파괴하는 전략을 구사해야 할 것이다. 맵의 구조와 진행 방식은 고렘을 중심으로 한 전투와 건설의 균형을 맞추는 것이 중요하며, 이는 플레이어의 전략과 타이밍 감각을 요구할 것으로 예상된다. 특히 고렘의 파츠 조합이 맵의 핵심 요소로 작용하므로, 플레이어는 맵의 특성과 파츠의 조합 방법을 신중히 고려해야 한다. 이 맵은 고렘을 любить하는 플레이어나 파괴와 건설의 조화를 즐기는 유저에게 적합할 것으로 보이며, 특히 고렘의 조합과 전투의 조화를 중시하는 플레이 스타일을 선호하는 유저에게 추천할 만하다. 또한 맵의 넓은 공간과 사막 배경은 고렘의 전투와 건설을 돋보이게 하며, 시각적인 몰입감을 높이는 요소로 작용할 것이다. 플레이 전에는 고렘의 파츠 조합 방법과 맵의 구조를 충분히 숙지하는 것이 중요하다. 또한 상대방과의 전략 대결에서 우위를 점하기 위해 고렘의 조합과 파괴 타이밍을 신중히 계획해야 한다. 맵의 특성과 요구 사항을 이해하고 준비한다면, ‘고렘 매드니스 메스 어택 v12’는 흥미로운 전략과 전투의 조화를 제공할 것이다. 특히 고렘의 조합과 파괴가 맵의 핵심 메커니즘이므로, 이를 중심으로한 전략 수립이 필수적이다. 플레이어는 고렘의 파츠를 효율적으로 활용하고, 상대방의 고렘을 파괴하는 데 주력해야 할 것이다. 맵의 넓은 공간과 사막 배경은 전투와 건설의 조화를 시각적으로 돋보이게 하므로, 플레이어는 이를 적극 활용하여 전략을 펼쳐야 한다. 이 맵은 고렘을 좋아하는 유저뿐만 아니라, 전략과 전투의 조화를 즐기는 모든 플레이어에게 흥미로운 경험을 제공할 것이다. ‘Golem Madness Mass Attack v12’ is a custom map for *StarCraft: Brood War* where players experience a unique blend of combat and construction as they destroy and build golems. According to the in-game description, players control or are controlled by Protoss units called ‘golems,’ with all golem parts combinations generated by ‘Pro-TossMySalad.’ The map features a desert tileset, offering wide-open spaces where golem battles and construction unfold. Designed for five players, the objective revolves around destroying enemy golems and constructing new ones. The title and description emphasize combat and destruction with words like ‘Madness’ and ‘Mass Attack,’ while golem assembly and usage serve as the core mechanics. Players must strategize—either assembling powerful golems or dismantling opponents’—requiring a balance of combat and construction. Since golem part combinations are central, players should study the map’s mechanics and assembly methods carefully. This map suits those who love golems or enjoy the harmony of destruction and creation, especially players who value strategic golem assembly and combat synergy. The expansive desert setting enhances visual immersion, making the battles and constructions stand out. Before playing, familiarize yourself with golem part combinations and map layout, and plan your assembly and destruction timings carefully to gain an edge. When understood and prepared for, ‘Golem Madness Mass Attack v12’ delivers an engaging fusion of strategy and combat, where golem assembly and destruction drive the experience. Players should optimize part usage and focus on dismantling enemy golems, leveraging the map’s open spaces and desert aesthetic to execute their strategies. Whether you love golems or simply enjoy strategic combat, this map offers an exciting experience for all players.
고렘 리벨리온 v9.0 (Golem Revelation v9.0)
스타크래프트 브루드워의 유즈맵 <고렘 리벨리온 v9.0>은 오리지널 맵이 아니라 개조 유즈맵으로, 고렘을 직접 조종하거나 건물을 파괴하고 공장을 건설하는 독특한 게임플레이가 특징이다. 맵 상단과 하단에 각각의 기지 구조가 배치되어 있으며, 플레이어는 초기에 주어지는 고렘 유닛을 이용해 적의 건물을 파괴하거나 새로운 고렘을 생산하는 공장을 건설해야 한다. 맵 중앙에는 넓은 평지와 함께 고지대가 존재하며, 이 지형을 활용한 진형 싸움이나 방어 라인 구축이 중요해 보인다. 맵의 배경은 건조한 사막 지형으로, 타일셋이 Desert로 설정되어 있어 건조한 환경이 시각적으로 두드러진다. 내부 맵 설명에서 'Destroy and build Golems'와 'Destroy Golem Factories'라는 문구가 반복되는 점으로 미루어 보아, 고렘 유닛의 생산과 파괴가 핵심 메커니즘임을 알 수 있다. 맵의 제목인 'Golem Revelation'은 고렘의 부활 또는 진실한 힘의 각성을 의미하는 것으로 보이며, 'v9.0'은 이 맵의 개선된 버전을 나타낸다. 이 맵은 고렘 유닛을 중심으로 한 전략적 플레이가 요구되며, 특히 건물을 파괴하고 공장을 건설하는 과정에서Resource Management와Unit Control 능력이 중요해질 것으로 예상된다. 또한, 맵의 크기가 1024x1024로 비교적 크고, 해상도가 2048x2048로 세밀한 디자인 덕분에 넓은 시야와 전략적 깊이를 제공할 것으로 보인다. 초보자와 숙련자 모두 즐길 수 있는 콘텐츠로, 고렘의 특성을 활용한 다양한 전략을 구사할 수 있을 것이다. 다만, 맵의 난이도나 승리 조건에 대한 구체적인 설명이 없어서 플레이 전 미리 확인해 볼 필요가 있다. 이 맵은 주로 고렘을 중심으로 한 전략적 전투와 건물을 파괴하는 재미를 추구하는 유저들에게 적합할 것으로 보이며, 특히 디펜스나 빌드 오더를 중시하는 플레이어들에게 흥미로운 경험을 제공할 것이다. 또한, 맵의 이름에서 알 수 있듯이 고렘이라는 독특한 유닛을 활용한 새로운 플레이 스타일을 경험하고자 하는 유저들에게도 추천할 만하다. 플레이 전 반드시 확인해야 할 요소는 고렘의 특성과 생산 방식, 건물을 파괴하는 방법, 그리고 승리 조건 등이다. 이러한 요소들이 명확하게 제시되지 않은 맵이므로, 게임 시작 전에 맵의 설명이나 튜토리얼을 숙지하는 것이 중요하다. 또한, 맵의 디자인상 중앙 고지대를 활용한 진형 싸움이나 방어 라인 구축이 필요할 가능성이 높으므로, 지형을 잘 활용하는 전략을 준비해 보는 것이 좋다. StarCraft: Brood War's custom map *Golem Revelation v9.0* is a modified version rather than an original map, featuring unique gameplay where players directly control golems, destroy buildings, and construct factories. The map has base structures at both the top and bottom, and players must use their initial golems to either destroy enemy buildings or build factories to produce new ones. The central area includes a vast plain with elevated terrain, making positional battles and defensive line setups crucial. The map’s setting is a dry desert environment with a Desert tileset, emphasizing its arid landscape visually. The recurring phrases *"Destroy and build Golems"* and *"Destroy Golem Factories"* in the internal map description highlight the core mechanics centered around golems—production and destruction. The title *Golem Revelation* suggests themes of resurrection or awakening true power, while *v9.0* indicates an improved iteration of the map. This map demands strategic play focused on golems, particularly in resource management and unit control during building destruction and factory construction. With a map size of 1024x1024 and a resolution of 2048x2048, its detailed design offers wide visibility and deep strategic layers. Suitable for both beginners and experienced players, it allows for diverse strategies leveraging the unique properties of golems. However, since the map lacks specific details on difficulty or victory conditions, players should review these before starting. The map is best suited for players who enjoy strategic battles centered on golems and the thrill of destroying buildings, particularly those who value defense and build orders. It also appeals to users seeking fresh playstyles through the distinctive golem units, as suggested by its name. Before playing, it’s essential to understand the golems’ traits, production methods, building destruction mechanics, and victory conditions, as these aren’t clearly outlined in the map. Reviewing the map’s description or tutorial beforehand is highly recommended. Given its design, mastering positional combat and defensive strategies around the central high ground will likely be key to success.
고렘 매드니스 (Golem Madness)
《고렘 매드니스》는 스타크래프트: 브루드워의 유즈맵으로, 대량의 고렘을 파괴하고 조립하는 독특한 게임 플레이를 제공한다. 이 맵은 5명의 플레이어가 각자의 기지에서 고렘을 조립하고, 전투를 통해 상대의 고렘을 파괴하는 방식으로 진행된다. 맵의 배경은 사막 타일셋으로 꾸며져 있으며, 전투는 맵 중앙의 넓은 평지에서 벌어지며, 고렘의 체력과 공격력은 플레이어 간 전투력에 따라 달라진다. 맵의 이름은 ‘GOLEM MADNESS’로, 고렘의 광기로운 전투를 강조하며, ‘wMassAttack 7new!’는Mass Attack이라는 스킬을 7번째 버전으로 새롭게 구현했다는 의미를 담고 있다. 플레이어는 고렘을 조립하기 위한 자원을 수집하고, 상대방의 고렘을 파괴하여 승리를 차지하는 것이 목표이다. 맵의 구조는 비교적 단순하지만, 고렘의 조립과 파괴, 자원 관리, 전투 전략이 복합적으로 요구되어 재미를 더한다. 특히 고렘의 체력과 공격력이 플레이어의 선택에 따라 달라지기 때문에, 전략적인 플레이가 중요하다. 이 맵은 고렘이라는 독특한 유닛을 중심으로 전투가 펼쳐지므로, 스타크래프트의 기본 유닛이 아닌 유즈맵 특화 유닛을 활용하는 재미가 있다. 또한, Mass Attack이라는 스킬을 통해 다수의 고렘을 한꺼번에 조립하거나 파괴할 수 있어, 전투의 스케일을 크게 할 수 있다. 이 맵은 주로 5인 대전이지만, 팀 플레이를 지원하지 않으므로 개인전 위주의 플레이가 특징이다. 고렘의 조립과 파괴를 반복하면서 전투의 재미를 느낄 수 있으며, 상대방의 고렘을 파괴하는 동시에 자신의 고렘을 성장시키는 균형 잡힌 전략이 필요하다. 이 맵을 즐기기 위해서는 고렘의 조립과 파괴 메커니즘을 이해하고, 자원 관리와 전투 타이밍을 잘 조율하는 능력이 요구된다. 또한, 사막 배경의 넓은 평지에서 벌어지는 전투는 시각적으로도 매력적이며, 고렘의 거대한 크기가 전투의 박진감을 더해준다. 이 맵은 스타크래프트 유즈맵의 특징인 창의적인 게임 플레이와 전략적 깊이를 동시에 제공하므로, 다양한 스타일의 플레이어에게 추천할 만하다. 특히, 고렘이라는 독특한 유닛을 활용한 전투를 즐기고 싶거나,Mass Attack 스킬을 통해 대규모 전투를 경험하고 싶은 플레이어에게 suitable하다. 또한, 5인 대전이 가능한 맵이므로, 친구들과 함께 플레이하기에도 적합하다. 플레이 전에는 고렘의 조립과 파괴 메커니즘,Mass Attack 스킬의 사용법, 자원 관리 방법 등을 미리 숙지하는 것이 좋다. 이 맵은 스타크래프트의 기본 시스템을 벗어나 새로운 전투 방식을 제공하므로, 기존의 밀리 게임과는 다른 재미를 느낄 수 있다. 고렘의 체력과 공격력이 플레이어의 선택에 따라 달라지기 때문에, 각 플레이어의 전략과 전투 스타일이 승패를 좌우할 수 있다. 이러한 특징은 이 맵을 더욱 흥미롭게 만든다. 《Golem Madness》 is a custom map for *StarCraft: Brood War* that offers a unique gameplay experience centered around assembling and destroying massive golems. In this five-player free-for-all, each player starts at their own base, gathering resources to construct golems and engaging in battles to dismantle their opponents' creations. The map features a desert-themed tile set, with combat unfolding on a vast central plain where golems' health and attack power fluctuate based on the player's combat effectiveness. The name *Golem Madness* reflects the frenzied, chaotic battles between golems, while *wMassAttack 7new!* indicates that the Mass Attack skill has been reimagined in its seventh iteration. Players must collect resources to build golems, destroy enemy golems, and secure victory through strategic planning. Though the map's layout is relatively simple, the interplay of golem assembly, destruction, resource management, and combat tactics adds depth and excitement. Since golems' stats can be customized, strategic decision-making becomes crucial. The map shines in its use of custom golem units, distinct from *StarCraft*'s standard units, offering a fresh twist on the game. The Mass Attack skill allows players to assemble or destroy multiple golems simultaneously, amplifying the scale of battles. While designed for five players, the game emphasizes individual competition rather than team play. Success hinges on balancing golem growth with destruction, requiring a solid grasp of assembly mechanics, resource allocation, and battle timing. The vast desert battlefield not only provides a visually striking backdrop but also enhances the sense of scale with the golems' imposing presence. Combining creative gameplay with strategic depth, *Golem Madness* caters to a wide range of players. It’s especially ideal for those eager to experiment with golem-based combat or experience large-scale battles through Mass Attack. The five-player format also makes it a great choice for casual matches with friends. Before diving in, players should familiarize themselves with golem assembly and destruction mechanics, how to use Mass Attack, and resource management strategies. By stepping outside *StarCraft*'s traditional systems, the map delivers a fresh and engaging alternative to standard melee matches. The dynamic stats of golems mean that each player’s approach—whether aggressive, defensive, or balanced—can directly influence the outcome, adding another layer of excitement to the experience.
라커 DGolemz Hybrid 3.0 (Lurker DGolemz Hybrid 3.0)
스타크래프트 브루드워의 유즈맵 ‘라커 DGolemz Hybrid 3.0’은 8방향에서 끊임없이 몰려오는 적군을 상대로 golems를 만들고 방어전을 펼쳐나가는 하이브리드 디펜스 장르의 맵이다. 내부 설명에 따르면 플레이어는 30레벨에 달하는 웨이브를 돌파해야 하며, 맵 곳곳에 배치된 네 개의 유닛이 각각 다른 방향으로 보석을 부팅하는 메커니즘이 특징으로 보인다. 보석을 부팅하지 말아야 할 붉은 보석도 함께 존재해 전략적 선택을 요구한다. 맵의 전장 중앙에는 golems를 생성할 수 있는 건물이 배치되어 있어, 유닛을 소환해 적군을 막아내는 동시에 공격적인 플레이도 가능하다는 점에서 타워 디펜스와 액션 디펜스가 혼합된 구조다. 이미지에서는 맵 중심부의 넓은 공간과 외곽의 좁아지는 길목이 보이며, 외곽 각 방향마다 적군이 진입할 수 있는 입구가 확인된다. 특히 맵 좌측 상단과 우측 하단에는 붉은 색으로 강조된 보석들이 배치되어 있어 부팅 여부를 신중히 판단해야 할 것이다. 플레이어는 초반에 자원을 모아 golems를 빠르게 생산해야 하며, 각 웨이브가 끝날 때마다 적의 공격 패턴이 변한다는 점에서 끊임없는 대처가 요구된다. 추천 대상은 디펜스와 전략적 건물 관리 모두를 좋아하는 유저들로, 특히 중수 이상이 즐기기에 알맞은 난이도로 보인다. 시작 전 확인해야 할 포인트는 네 개의 보석 부팅 여부와 초반 자원 관리, 그리고 golems의 생산 우선순위다. 맵의 구조상 외곽 입구 주변에 방어 건물을 집중 배치하는 것이 효율적일 수 있으며, 레벨이 올라갈수록 등장하는 적군의 수가 급격히 증가하므로 유닛의 효율적인 배치와 컨트롤이 victory의 열쇠가 될 것이다. This StarCraft: Brood War custom map, 'Lurker DGolemz Hybrid 3.0,' blends tower defense and action defense mechanics by challenging players to survive 30 waves of enemies attacking from eight directions. The map features a central structure for summoning golems while requiring players to strategically boot gems—avoiding red ones—to control enemy approach paths. The terrain includes wide central areas with narrow chokepoints, forcing players to balance resource management, unit production, and adaptive defense strategies. Early gameplay demands rapid golem production to counter initial waves, with later levels introducing increased enemy density and varied attack patterns. Ideal for players who enjoy micromanagement and strategic depth, this map rewards efficient unit placement and timely upgrades. Key pre-game considerations include gem booting priorities, early resource allocation, and prioritizing golem production over direct combat. The hybrid nature ensures dynamic gameplay, appealing to those seeking both challenge and replayability in custom map experiences.
맵 선택 가이드
태그는 맵의 핵심 특징을 빠르게 설명하지만 제작 버전마다 규칙이 다를 수 있습니다. 상세 설명에서 권장 인원, 난이도, 플레이 시간과 버전을 함께 확인한 뒤 다운로드하세요.