
고난도 스타크래프트 맵 모음
'고난도' 태그가 등록된 맵을 모았습니다. 장르 하나로 찾기 어려운 플레이 방식, 난이도와 특징을 중심으로 인기 맵과 최신 맵을 비교해 보세요.
- 등록 맵
- 84개
- 누적 다운로드
- 2
- 누적 조회
- 2,987
인기 맵
다운로드와 조회 반응이 높은 맵입니다.
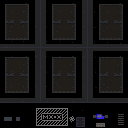
랜덤 마이크로 챌린지 3 (RandomMicroChallenge3)
랜마첼3목무한개인.scx 파일명으로 알려진 스타크래프트 브루드워 맵 RandomMicroChallenge3은 플레이어의 극단적인 컨트롤 능력을 시험하는 고난도 아레나 장르의 유즈맵이다. 전체적인 지형 구조는 독립된 여러 개의 격리된 방 형태를 띠고 있으며, 각 구역마다 유닛들이 배치되어 치열한 전투가 벌어지도록 설계된 것으로 보인다. 제공된 내부 설명에 따르면 이 맵은 초보자나 컨트롤 실력이 부족한 유저들에게는 전혀 적합하지 않으며, 오히려 심한 두통을 유발할 수 있다고 경고하고 있어 상당한 숙련도와 도전 정신을 요구하는 플레이어들에게 제격이다. 일반적인 유즈맵들과 달리 자원 채취나 기지 건설 같은 평화로운 요소보다는 주어진 제한된 상황 속에서 유닛의 미세 컨트롤과 전투 센스를 활용해 난관을 돌파하는 데 집중되어 있다. 각 구역에서 벌어지는 전투 양상은 매번 정밀한 반응 속도와 상황 판단력을 필요로 하며, 손이 바쁘게 움직이는 마이크로 컨트롤의 재미를 극대화한다. 친구들과 함께 자신의 컨트롤 한계를 시험하고 싶거나 고난도 아레나 스타일의 긴장감 넘치는 전투를 선호하는 유저들에게 추천할 만하다. 플레이하기 전, 높은 난이도와 강도 높은 컨트롤을 요구한다는 점을 반드시 염두에 두어야 하며, 초보 유저라면 충분한 사전 준비나 마음의 준비를 갖추고 도전하는 것이 좋다. RandomMicroChallenge3, known by the file name 랜마첼3목무한개인.scx, is a high-difficulty StarCraft Brood War UMS map belonging to the arena genre, designed to test players' extreme control capabilities. The overall terrain structure features multiple isolated room-like areas, seemingly laid out to host intense combat encounters in each designated zone. According to the provided internal description, the map explicitly warns that it is not suitable for newbies or people with lacking skills and may even cause several headaches, making it ideal for players who possess a high level of proficiency and a strong drive for challenge. Unlike typical use maps, the focus leans away from peaceful elements like resource gathering or base building, centering instead on overcoming obstacles through micro-control and tactical combat sense within given restrictive scenarios. The nature of combat in each section constantly demands precise reaction speeds and situational awareness, maximizing the fast-paced thrill of intensive micro-play. It is strongly recommended for users who want to test their control limits with friends or who prefer tension-filled battles in a high-difficulty arena style. Before playing, users must keep in mind that the map demands a high level of difficulty and intense control, and novices would do well to approach it with thorough mental preparation.
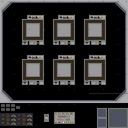
Single Mini Defense 신의경지 수정
스타크래프트 브루드워 맵을 즐기는 유저들 사이에서 디펜스 장르는 언제나 독보적인 몰입감과 도전 정신을 자극하는 대표적인 유즈맵 카테고리로 사랑받아 왔습니다. 이번에 살펴볼 맵은 이러한 디펜스 장르의 고유한 재미를 극한으로 끌어올린 작품으로 평가받는 'Single Mini Defense 신의경지 수정'입니다. 맵 제목과 내부 설명에서 짐작할 수 있듯, 이 유즈맵은 만만하게 볼 수 없는 고난도의 방어 플레이를 요구하며 플레이어의 전략적 판단과 유닛 운용 능력을 철저하게 시험합니다. 전체적인 맵 구조를 살펴보면, 플레이어들이 각각 독립된 공간에서 방어 임무를 수행할 수 있도록 배치된 구역들이 눈에 띕니다. 각 진영은 주어진 자원과 유닛을 활용해 몰려오는 적들의 공세를 막아내야 하며, 제한된 공간 속에서 효율적인 건물의 배치와 업그레이드 타이밍을 잡는 것이 승패를 가르는 핵심 요소로 작용합니다. 특히 초절정 난이도를 표방하고 있는 만큼, 일반적인 디펜스 맵에 익숙한 유저라 할지라도 방심하는 순간 순식간에 방어선이 무너지는 아찔한 상황을 마주하게 됩니다. 다수의 플레이어가 협력하거나 혹은 각자의 구역에서 치열한 생존 경쟁을 벌이듯 방어전을 펼치기 때문에, 친구들과 함께 모여 각자의 빌드와 전략을 비교하며 도전하기에 안성맞춤입니다. 반복되는 플레이 속에서 적의 웨이브 패턴을 파악하고 최적의 유닛 조합을 찾아내는 재미가 쏠쏠하며, 마침내 고난도 웨이브를 돌파했을 때의 짜릿한 성취감은 이 맵만이 가진 강력한 매력 포인트입니다. 평소 자신의 컨트롤과 방어 전략에 자신 있는 유저들이나 색다른 고난도 디펜스 유즈맵을 찾고 있는 플레이어라면 한 번쯤 도전해 볼 가치가 충분합니다. 다만 난이도가 상당히 높은 편에 속하므로, 처음 플레이할 때는 기본적인 유닛 특성과 자원 관리 주기를 차근차근 파악하면서 빌드를 다듬어 나가는 접근이 필요합니다. Among users who enjoy StarCraft: Brood War maps, the defense genre has always been loved as a representative Use Map category that stimulates unrivaled immersion and a challenging spirit. The map we will look at this time is 'Single Mini Defense God's Realm Modified', which is evaluated as a work that maximizes the unique fun of this defense genre to the extreme. As can be guessed from the map title and internal description, this Use Map demands a high-difficulty defense play that cannot be taken lightly and thoroughly tests the player's strategic judgment and unit operation abilities. Looking at the overall map structure, areas arranged so that players can perform defense missions in independent spaces stand out. Each faction must block the offensive of enemies flocking using given resources and units, and catching the efficient placement of buildings and upgrade timing in a limited space acts as a key factor in determining victory or defeat. Especially since it proclaims an ultra-high difficulty, even users familiar with general defense maps will face a dizzying situation where the defense line collapses in an instant the moment they let their guard down. Since multiple players cooperate or fight a fierce survival competition in their respective zones to unfold defense battles, it is perfect for gathering with friends to compare each other's builds and strategies and take on the challenge. The fun of figuring out the enemy's wave pattern and finding the optimal unit combination in repeated plays is substantial, and the thrilling sense of accomplishment when finally breaking through the high-difficulty wave is a strong attraction point of this map. If you are a user who is confident in your control and defense strategy or a player looking for a different high-difficulty defense Use Map, it is well worth challenging at least once. However, since the difficulty belongs to a considerably high side, when playing for the first time, an approach of gradually figuring out the basic unit characteristics and resource management cycles while refining the build is necessary.
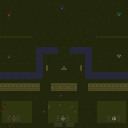
5:3 Impossible CPU v3.0
'5:3 Impossible CPU v3.0'은 5명의 플레이어가 3명의 임파서블 난이도 컴퓨터를 상대하는 컴까기(Comp Stomp) 형태의 유즈맵이다. 사막 타일셋의 128x128 타일 크기 맵에서 진행되며, 제작자 'b1cksheep'이 편집한 버전 3.0이다. 제목의 '5:3'은 인원 비율을, 'Impossible'은 컴퓨터 난이도가 최상위 단계로 설정되었음을 암시한다. 일반적인 밀리 맵과 달리 시작부터 자원과 유닛 배치가 조정된 트리거가 적용되어 있을 것으로 보이며, 압도적인 컴퓨터의 생산력과 멀티태스킹을 뚫고 승리를 쟁취하는 것이 핵심 목표다. 5인 협동 플레이가 필수적이므로 팀원 간의 역할 분담과 초반 러시 방어, 중반 멀티 확보, 후반 공세 전환 등 체계적인 운영이 요구된다. 디펜스 장르로 분류되어 있으나 웨이브 방어가 아닌 컴퓨터 본진 섬멸이 주 목적인 만큼 '컴까기' 성격이 강하다. 고난도 AI 상대 연습이나 협동전 재미를 찾는 유저에게 적합하며, 게임 시작 전 난이도 체감과 트리거 내용을 확인할 필요가 있다. '5:3 Impossible CPU v3.0' is a Use Map Settings (UMS) map of the Comp Stomp genre where 5 players face 3 Impossible-difficulty computers. It plays on a 128x128 tile Desert tileset map, edited by creator 'b1cksheep' at version 3.0. The '5:3' in the title indicates the player-to-AI ratio, while 'Impossible' implies the computer difficulty is set to the highest level. Unlike standard melee maps, triggers adjusting starting resources and unit placements are likely applied from the beginning. The core objective is to overcome the overwhelming production and multitasking of the AI to destroy their bases. Since 5-player cooperation is essential, systematic management is required: role assignment, early rush defense, mid-game expansion, and late-game offensive transition. Although classified as Defense, the main goal is annihilating AI bases rather than wave defense, giving it a strong 'Comp Stomp' character. It is recommended for users seeking high-difficulty AI practice or cooperative gameplay, though checking the difficulty feel and trigger details before starting is advised.
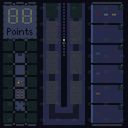
러커 디펜스 XYZ 3 (Lurker Defense XYZ 3)
Lurker Defense XYZ 3은 스타크래프트 브루드워의 디펜스 장르 맵으로, 특히 뮤턴트 러커를 방어하는 데 초점을 맞춘 고난도 맵입니다. 맵 중앙의 두 개의 주요 방어 라인을 중심으로 전개되는 구조로, 각 라인에는 터렐과 웨이브를 방어해야 하는 복잡한 레이아웃이 구현되어 있습니다. 상단에는 점수 표시 영역이 존재하며, 하단에는 유닛 군집과 자원 관리가 필요해 전략적 깊이가 느껴집니다. 맵은 4096x4096 크기로 설계되어 있으며, 화산 타일셋을 활용해 어두운 분위기를 강조했습니다. 하지만 맵 설명에 따르면 'v2보다 훨씬 더 어려움'이라는 경고가 있으며, 프로 플레이어 위주로 설계된 것으로 추정됩니다. 맵은 7명의 플레이어를 지원하며, 팀 기반으로 진행되는 것으로 보이나 정확한 팀 수는 명시되지 않았습니다. 예상 플레이 시간은 충분한 준비와 전략 수립이 필요해 30분 이상 소요될 것으로 예상됩니다. 난이도는 고급 플레이어를 대상으로 하므로 초보자에는 부적합합니다. 맵의 주요 특징은 복잡한 방어 라인 구성, 뮤턴트 러커의 특수 메커닉, 그리고 높은 난이도인데, 이는 UMS(유저 커스텀 게임) 맵의 전형적인 특성입니다. 태그로는 디펜스, 유즈맵, 뮤턴트, 러커 방어, 고난도 등이 적절할 것입니다. Lurker Defense XYZ 3 is a defense genre map in StarCraft Brood War, focusing on defending Mutant Lurkers with high difficulty. The map centers around two main defense lines in the middle, each with complex layouts requiring defense of turrets and waves. The top features a score display area, while the bottom requires managing unit clusters and resources, adding strategic depth. Designed at 4096x4096, it uses a volcanic tileset to emphasize a dark atmosphere. However, the map description warns it’s "much harder than v2," suggesting it’s designed for pro players. It supports 7 players, likely team-based, though the exact team count isn’t specified. The expected playtime requires sufficient preparation and strategy, likely exceeding 30 minutes. The high difficulty targets advanced players, making it unsuitable for beginners. Key features include complex defense lines, Mutant Lurker mechanics, and high difficulty, typical of UMS maps. Appropriate tags would be defense, custom map, mutant, lurker defense, high difficulty.
테스트 오브 서바이벌 - INSANE!!! (Test of Survival - INSANE!!!)
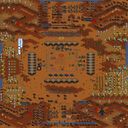
스타크래프트 브루드워 유즈맵 중에서도 극강의 난이도를 자랑하는 서바이벌 장르의 Test of Survival - INSANE!!! 맵을 소개합니다. 이 맵은 플레이어가 몰려오는 컴퓨터 유닛과 건물들을 파괴하며 살아남아야 하는 전형적인 서바이벌 방식을 채택하고 있습니다. 맵의 구조를 살펴보면 중앙의 넓은 아레나 형태의 공간을 중심으로 사방에서 적군이 밀려드는 구조로 보이며, 플레이어는 지정된 구역 내에서 끊임없이 몰려오는 적들을 상대하며 버텨내야 합니다. 맵의 타이틀에서 알 수 있듯이 'INSANE'이라는 이름에 걸맞게 매우 높은 난이도가 예상되며, 단순히 유닛을 생산하는 것을 넘어 정교한 컨트롤과 전략적인 자원 관리가 필수적인 플레이 경험을 제공할 것으로 보입니다. 맵의 지형은 황혼 타일셋을 사용하여 다소 어둡고 긴장감 넘치는 분위기를 조성하며, 이는 생존을 위한 처절한 전투를 더욱 몰입감 있게 만들어줍니다. 플레이어는 적의 공세를 막아내는 과정에서 유닛의 배치와 화력 집중이 매우 중요하며, 자칫 한순간의 방심으로도 패배할 수 있는 긴박한 상황이 지속될 것으로 추정됩니다. 이 맵은 일반적인 밀리 게임과는 결이 다른, 오로지 생존이라는 단 하나의 목표를 향해 달리는 극한의 도전 정신을 가진 플레이어들에게 강력히 추천합니다. 플레이 전에는 몰려오는 적의 종류와 패턴을 파악하는 것이 중요하며, 고난도 맵인 만큼 초보자보다는 숙련된 컨트롤을 보유한 유저들에게 적합한 스타크래프트 유즈맵입니다. Introducing the Test of Survival - INSANE!!!, a survival-genre StarCraft: Brood War custom map that boasts extreme difficulty. This map adopts a classic survival mechanic where players must destroy incoming computer units and buildings to stay alive. Looking at the map structure, it appears to feature a large central arena-style area, with enemies swarming from all directions, requiring players to endure constant waves of attacks within a designated zone. As the title 'INSANE' suggests, a very high level of difficulty is expected, offering a gameplay experience where sophisticated control and strategic resource management are essential beyond mere unit production. The terrain utilizes the Twilight tileset, creating a dark and tense atmosphere that enhances the immersion of desperate combat for survival. Players will find that unit positioning and fire concentration are crucial in repelling enemy assaults, with intense situations likely persisting where a single moment of negligence could lead to defeat. This map is highly recommended for players with a strong sense of challenge who seek a different experience from standard melee games, focusing solely on the single goal of survival. Before playing, it is important to understand the types and patterns of the incoming enemies; due to its high difficulty, this StarCraft custom map is best suited for experienced users with skilled micro-management rather than beginners.
임파서블 정글 믹스 v3 (IMPOSS Jungle Mix v3)
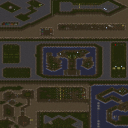
이 맵은 사막 타일셋을 배경으로 한 7인용 디펜스 모드로, 내부 설명에 적힌 'complete each stage'처럼 여러 스테이지를 차례로 클리어하는 방식으로 진행된다. 플레이어는 각자 기지를 방어하면서 몰려오는 적 유닛을 막아내고, 스테이지가 바뀔 때마다 새로운 웨이브와 지형 변화가 추가되어 난이도가 점진적으로 상승한다. 디펜스 장르 특성상 자원 관리와 유닛 배치의 타이밍이 승패를 가르는 핵심 요소이며, 협동이 필수적인 7인 구성 덕분에 팀워크와 역할 분담이 자연스럽게 요구된다. 맵 구조는 중앙에 공통 방어선을 두고 양옆으로 개인 기지가 배치되어 있어, 중앙 전선에서의 집중 방어와 측면에서의 지원 플레이가 동시에 이루어진다. 초보자에게는 웨이브 패턴 파악과 기본 유닛 조합 연습에 적합하며, 숙련자는 최적의 빌드 오더와 마이크로 컨트롤로 높은 점수를 노릴 수 있다. 플레이 전에는 맵 파일이 최신 버전인지, 팀원 간 통신 수단이 준비되었는지, 그리고 각 종족별 특수 유닛의 활용법을 숙지하고 시작하는 것이 좋다. 또한, 스테이지 전환 시 맵 중앙의 장애물이 재배치되어 새로운 전략적 포인트를 제공하므로 반복 플레이에도 신선함을 유지한다. This map uses a desert tileset for a seven‑player defense mode, progressing by clearing each stage as the internal description ‘complete each stage’ indicates. Each player defends their own base while stopping waves of enemy units, and every new stage introduces fresh waves and terrain changes that gradually raise the difficulty. Resource management and the timing of unit placement are the core factors that decide victory in this defense genre, and the mandatory seven‑player setup naturally demands teamwork and role division. The layout places a shared front line in the center with individual bases on both sides, allowing concentrated defense at the middle and simultaneous support play on the flanks. Beginners can practice wave patterns and basic unit combos, while veterans can aim for high scores with optimal build orders and micro control. Before starting, verify that the map file is the latest version, that communication tools for the team are ready, and that each race’s special units are understood. Additionally, obstacles in the central area are rearranged at each stage transition, providing new strategic points and keeping repeated play fresh.
임파서블 컨티넘 4.2 (Impossible Continuum 4.2)
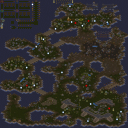
임파서블 컨티넘 4.2는 '임파서블 롱게이션'에서 영감을 받아 제작된 고난도 바운드 맵으로, 사막 타일셋 위에서 4명의 플레이어가 협동하여 끝없는 장애물 구간을 돌파하는 유즈맵이다. 맵 제목인 '컨티넘(Continuum)'이 암시하듯 이 맵은 명확한 스테이지 구분 없이 하나의 긴 선형 코스로 이어지며, 점프, 회피, 타이밍 계산 등 컨트롤 숙련도를 종합적으로 시험한다. 제작자 부시웍(bushwack)의 원작을 바탕으로 hahaha666의 편집과 Sgr의 수정 및 픽스가 더해진 4.2 버전은 기존 버전에서 지적되던 버그나 밸런스 문제를 개선하여 완성도를 높인 것으로 보인다. 128x128 타일, 4096x4096 크기의 광활한 맵 영역은 시각적으로 단조로울 수 있는 사막 지형을 다양한 트리거와 유닛 배치를 통해 입체적인 장애물 코스로 탈바꿈시켰다. 플레이어는 마린이나 저글링 등 기본 유닛을 조작해 좁은 통로, 움직이는 장애물, 순간 이동 구간 등을 통과해야 하며, 한 번의 실수가 즉각적인 탈락으로 이어지는 긴장감이 핵심 재미 요소다. 4인 협동 플레이를 전제로 설계되었으나 실력 차이에 따른 진행 속도 차이, 대기 시간 발생 가능성은 감안해야 한다. 고난도 바운드 장르 특성상 초보자보다는 정교한 컨트롤과 맵 암기 능력을 갖춘 숙련자, 혹은 극한의 도전을 즐기는 유저에게 권장된다. 플레이 전에는 최신 버전인 4.2 적용 여부와 동맹 설정, 맵 고정 옵션을 확인하는 것이 좋다. Impossible Continuum 4.2 is a high-difficulty bound map inspired by 'Impossible Longation,' where four players cooperate on a desert tileset to break through an endless series of obstacle sections. As the title 'Continuum' implies, this map consists of a single long linear course without distinct stage divisions, comprehensively testing control proficiency including jumping, dodging, and timing calculation. Version 4.2, which adds hahaha666's edits and Sgr's fixes and changes to the original work by bushwack, appears to have improved completeness by addressing bugs and balance issues noted in previous versions. The vast map area of 128x128 tiles and 4096x4096 transforms the visually monotonous desert terrain into a three-dimensional obstacle course through various triggers and unit placements. Players control basic units such as Marines or Zerglings to navigate narrow passages, moving obstacles, and teleport sections, where a single mistake leads to immediate elimination, forming the core tension and fun. Designed for four-player cooperation, differences in skill level may cause pacing gaps and waiting times. Due to the nature of the high-difficulty bound genre, it is recommended for veterans with precise control and map memorization skills, or users who enjoy extreme challenges. Before playing, it is advisable to verify the application of the latest version 4.2, ally settings, and fixed map options.
임파서블 롱게이션 (Impossible Longation)
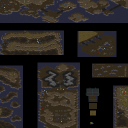
임파서블 롱게이션(Impossible Longation)은 실렌트 발크(Sil3nt_Valk) 제작자가 만든 5인용 유즈맵으로, '임파서블 시나리오즈(Longation)'라는 부제가 암시하듯 여러 고난도 시나리오를 연달아 돌파하는 캠페인 스타일 진행이 특징이다. 황무지 타일셋 위에 8192×8192 크기의 초대형 맵이 펼쳐져 있으며, 이는 일반적인 밀리 맵의 4배에 달하는 방대한 규모로 장시간 탐험과 전투가 이어질 것임을 예고한다. 맵 제목에 '롱게이션(Longation)'이라는 단어가 쓰인 점에서 알 수 있듯, 단순한 한 판 승부가 아니라 여러 단계로 나뉜 미션을 순차적으로 클리어하며 스토리를 따라가는 구조로 보인다. 5인 협력 플레이를 전제로 설계되어 있어 각 플레이어의 역할 분담과 팀워크가 생존의 열쇠가 될 전망이다. 내부 설명에 제작자의 위스퍼 안내와 후원 링크가 포함된 점으로 미루어 볼 때, 커뮤니티 피드백을 반영하며 버전업을 거듭해 온 작품으로 추정된다. 난이도 표기가 '임파서블'인 만큼 초보자보다는 브루드워 유즈맵 숙련자나 협동 캠페인을 즐기는 고정 파티에게 적합해 보인다. 플레이 전에는 맵 용량이 크므로 로딩 시간을 감안해야 하며, 트리거 구조상 특정 미션에서 전원 전멸 시 처음부터 다시 시작해야 할 가능성이 있어 세이브 포인트 유무를 확인하는 것이 좋다. 장르 분류상으로는 UMS로 등록되어 있으나, 실질적인 플레이 양상은 시나리오 기반 협동 캠페인에 가까워 캠페인 카테고리로 재분류하는 것이 타당해 보인다. Impossible Longation is a 5-player use map created by Sil3nt_Valk, and as the subtitle 'Impossible Scenarios Longation' implies, it features a campaign-style progression where players break through multiple high-difficulty scenarios in sequence. An enormous 8192×8192 map unfolds on the Badlands tileset, which is four times the size of a standard melee map, heralding extended exploration and combat. As the word 'Longation' in the map title suggests, the structure appears to be not a single match but a sequential clearance of missions divided into multiple stages while following a story. Designed for 5-player cooperative play, role assignment and teamwork among players are likely to be the key to survival. The inclusion of the creator's whisper guide and a sponsorship link in the internal description suggests this is a work that has undergone version updates reflecting community feedback. Given the 'Impossible' difficulty rating, it seems more suitable for Brood War use map veterans or fixed parties who enjoy cooperative campaigns rather than beginners. Before playing, one should account for longer loading times due to the large map size, and since the trigger structure may require restarting from the beginning if the entire team is wiped out in a specific mission, checking for save points is advisable. Although registered as UMS in genre classification, the actual gameplay aspect is closer to a scenario-based cooperative campaign, making reclassification into the campaign category appropriate.
임가능 스케나리오스 아이스 (Impossible Scenarios Ice)
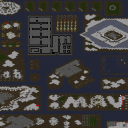
임가능 스케나리오스 아이스(Impossible Scenarios Ice)는 스타크래프트 브루드워 맵 유저들 사이에서 도전적인 서바이벌 및 시나리오 플레이를 즐기는 이들에게 잘 알려진 대표적인 유즈맵입니다. 이 맵은 기존에 제작된 스노우 테마의 동종 시리즈를 리메이크한 확장판 성격을 지니고 있으며, 원작보다 훨씬 강화된 난이도와 엘리트 급의 고강도 플레이 환경을 제공하는 것이 가장 큰 특징입니다. 전체적인 맵 구조를 살펴보면 플랫폼 타일셋을 기반으로 다양한 구역이 분할되어 있으며, 미로 형태의 지형과 다채로운 유닛 배치가 돋보입니다. 플레이어는 제한된 자원과 상황 속에서 끊없이 몰아치는 위기를 극복해야 하므로, 철저한 빌드 연구와 고도의 전술적 판단력이 요구됩니다. 특히 일반적인 밀리 방식이나 단순한 컴까기와는 차별화된 독특한 진행 방식을 통해 색다른 재미를 선사하며, 협동 플레이를 통해 난관을 타개하는 성취감이 매우 높습니다. 고난도 시나리오와 극한의 서바이벌 장르를 선호하는 숙련된 플레이어들에게 추천할 만하며, 평소 평이한 진행에 지루함을 느꼈던 유저들이라면 누구나 흥미롭게 도전해 볼 수 있습니다. 다만 난이도가 매우 높기 때문에 게임을 시작하기 전에 지형의 특성과 유닛 배치 상황을 미리 파악하는 것이 안전하며, 팀원 간의 유기적인 소통과 역할 분담이 클리어 여부를 가르는 핵심 포인트가 될 수 있습니다. Impossible Scenarios Ice is a well-known custom map among StarCraft: Brood War users who enjoy challenging survival and scenario gameplay. This map serves as an expanded remake of an existing snow-themed series, featuring a significantly higher difficulty and an elite-tier high-intensity play environment compared to the original. Looking at the overall map structure, it is divided into various zones based on the platform tileset, highlighting labyrinth-like terrain and diverse unit placements. Players must overcome continuous crises within limited resources and situations, requiring thorough build research and advanced tactical judgment. In particular, it delivers unique fun through a progression method differentiated from typical melee or simple computer-opposed matches, offering a high sense of achievement when overcoming difficulties through cooperative play. It is recommended for experienced players who prefer high-difficulty scenarios and extreme survival genres, and any user bored with ordinary progression can challenge it with interest. However, since the difficulty is extremely high, it is safe to grasp the characteristics of the terrain and unit placement situations before starting the game, and organic communication and role division among team members can be key points determining whether to clear the map.
로드 오브 더 링 v L.A.: 엘리트 (LotR v L.A.: Elite)
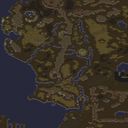
'LotR v L.A.: Elite'는 반지의 제왕(Lord of the Rings) 세계관을 연상시키는 'LotR'과 미상의 'L.A.' 진영이 대립하는 구도 위에, 4인 협동 디펜스 형식을 얹은 유즈맵으로 보인다. 원본 파일명 'LOTR LA. CPU. Elite15.scx'에 'CPU'가 포함되고 내부 설명이 '아카데미나 넥서스를 지어 더 나은 스폰을 확보하라'고 안내하는 점으로 미루어, 플레이어가 테란의 아카데미나 프로토스의 넥서스 같은 종족별 거점 건물을 건설하면 해당 건물에서 자동으로 유닛이 스폰되어 몰려드는 컴퓨터 적 병력과 맞서는 전형적인 '컴까기(컴퓨터 까기)' 스타일 진행이 추정된다. 맵 크기는 256×256 타일, 황무지(Badlands) 타일셋을 사용해 넓고 황량한 전장 분위기를 조성하며, 4명이 단일 팀을 이루어 'Elite'라는 부제에 걸맞은 고난도 적 웨이브를 방어하거나 적 기지를 역공략하는 미션을 수행할 것으로 예상된다. 종족마다 스폰 건물이 다르게 지정되어 있어 테란·프로토스·저그 선택에 따른 운영 난이도와 전략적 변수가 생기며, 제작자 'Red_Fangs(aka HoArMuRaTh)'가 버전 'Elite15'까지 업데이트하며 밸런스를 다듬어 온 흔적이 엿보인다. 입구 막기·대규모 병력 운용·자원 공유 등 협동 전술이 핵심이므로, 친구들과 음성 채팅을 하며 호흡을 맞춰보고 싶은 유저나 고난도 컴까기 맵을 찾는 플레이어에게 적합하다. 플레이 전에는 팀원 간 종족 분배, 스폰 건물 우선순위, 인구수 200 한도 내 효율적 유닛 조합을 사전에 논의하면 생존 확률을 크게 높일 수 있을 것이다. 'LotR v L.A.: Elite' appears to be a Use Map Settings (UMS) map for four-player cooperative defense, borrowing the Lord of the Rings (LotR) theme and pitting it against an unknown 'L.A.' faction. The original filename 'LOTR LA. CPU. Elite15.scx' includes 'CPU,' and the internal description instructs players to 'Build Academy or Nexus for better spawn,' suggesting a classic 'comp stomp' (computer bashing) style where players construct race-specific buildings—Terran Academy or Protoss Nexus—to automatically spawn units that fight off incoming computer-controlled enemy waves. The map uses a 256x256 tile size with the Badlands tileset, creating a vast, desolate battlefield. Four players form a single team to withstand high-difficulty enemy waves worthy of the 'Elite' subtitle or to counter-attack and destroy the enemy base. Since spawn buildings differ by race, strategic variables arise depending on whether players choose Terran, Protoss, or Zerg. The author 'Red_Fangs (aka HoArMuRaTh)' has updated the map to version 'Elite15,' indicating ongoing balance refinements. Core gameplay revolves around cooperative tactics such as chokepoint defense, mass army management, and resource sharing. This map is recommended for users who enjoy coordinating with friends via voice chat or those seeking high-difficulty comp stomp maps. Before playing, discussing race assignments, spawn building priorities, and efficient unit compositions within the 200 supply limit will significantly increase survival chances.
히드라 디펜스 익스트림 2 (Hydra Defense Extreme 2)
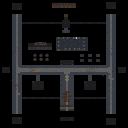
히드라 디펜스 익스트림 2(Hydra Defense Extreme 2)는 스타크래프트 브루드워 유즈맵 가운데서도 강력한 적 공세와 사령관 방어선을 다루는 전통적인 디펜스 장르의 작품이다. 내부 설명에 따르면 매우 어려운 난이도를 지니고 있으며 숙련된 플레이어들을 위한 도전적인 구성을 보여준다. 맵 전체는 우주 타일셋을 바탕으로 대칭적이거나 다중 라인이 교차하는 구조를 취하고 있으며, 플레이어들이 각자의 위치에서 몰려오는 적들을 막아내며 협동해야 하는 플레이 특징을 지닌다. 중앙과 외곽 지역에는 유닛 생산 시설이나 방어 건물을 배치할 수 있는 공간이 마련되어 있고, 경로를 따라 이동하는 적들을 효율적으로 저지하기 위한 타워나 전투 유닛의 배치 조합이 매우 중요하다. 초보자보다는 게임 메커니즘을 잘 이해하고 있는 숙련된 유저나 친구들과 함께 호흡을 맞추며 고난도 방어전을 즐기고 싶은 이들에게 적합하다. 플레이 전 철저한 유닛 조합과 자원 관리 계획을 세우는 것이 생존의 열쇠가 된다. Hydra Defense Extreme 2 is a traditional defense genre map in StarCraft: Brood War custom maps, featuring intense enemy waves and commander defense lines. According to the internal description, it boasts a very hard difficulty and presents a challenging setup intended for experienced players. The entire map utilizes a space tileset with a symmetrical or multi-line intersecting structure, and features a gameplay style where players must cooperate to hold back incoming enemies from their respective positions. Spaces for placing unit production facilities or defensive structures are provided in the central and outer areas, making the arrangement and combination of towers or combat units crucial for efficiently stopping enemies moving along the paths. It is well-suited for seasoned users who understand game mechanics well rather than beginners, or for those who want to enjoy high-difficulty defense battles while coordinating with friends. Establishing a thorough unit combination and resource management plan before playing is the key to survival.
임가능 스세나리오 블루 (Impossible Scenarios Blue)
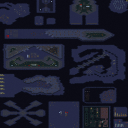
임가능 스세나리오 블루(Impossible Scenarios Blue)는 스타크래프트 브루드워 UMS(유즈맵) 장르에서 독특한 위치를 차지하고 있는 고난도 시나리오 맵입니다. 이 맵은 과거 많은 유저들에게 도전 의식을 불러일으켰던 유명 시리즈의 연장선에 위치하며, 제작자 Maverikk의 손길을 거쳐 탄생한 후속작입니다. 맵의 전체적인 구조를 살펴보면, 화산 타일셋을 바탕으로 여러 개의 독립된 구역과 미로, 그리고 독특한 지형적 특징을 지닌 섬 형태의 플랫폼들이 산재해 있는 것을 확인할 수 있습니다. 이러한 맵 디자인은 플레이어에게 단순한 전투를 넘어 다채로운 공간 활용과 전략적 판단을 요구하며, 매 순간 치밀한 계산과 협력이 동반되어야만 난관을 헤쳐나갈 수 있도록 설계되어 있습니다. 플레이어는 제한된 환경 속에서 밀려오는 적의 공세나 혹은 주어진 가혹한 과제들을 해결해 나가야 하는 독특한 진행 방식을 마주하게 됩니다. 맵 전체에 흩어져 있는 유닛 배치 구역과 방어선 구축에 적합한 좁은 길목, 그리고 미로처럼 얽힌 지역들은 플레이어에게 매번 색다른 전술적 선택지를 제공합니다. 특히 전작인 스노우 앤 아이스(Snow and Ice)의 계보를 잇는 만큼, 이 맵 역시 이름에 걸맞게 극한의 난이도와 까다로운 조건들을 제시하여 유저들의 승부욕을 강하게 자극합니다. 혼자서 모든 상황을 타개하기보다는 다수의 인원이 모여 각자의 역할을 분담하고 유기적인 호흡을 맞출 때 비로소 맵의 진정한 재미를 느낄 수 있습니다. 스타크래프트 유즈맵 특유의 매운맛을 즐기는 유저들이나, 기존의 정형화된 플레이에서 벗어나 새로운 도전 과제를 찾는 숙련된 플레이어들에게 추천할 만한 가치가 있는 맵입니다. 다만, 난이도가 상당히 높고 사전에 맵의 구조나 진행 방식을 파악하지 못하면 자칫 당황할 수 있으므로, 플레이 전 지형의 특성과 배치된 유닛들의 위치를 꼼꼼히 살펴보는 것이 공략의 핵심 포인트가 됩니다. Impossible Scenarios Blue is a high-difficulty scenario map occupying a unique position within the StarCraft: Brood War UMS custom map genre. Positioned as a continuation of the famous series that once sparked a strong sense of challenge among many users, this map is a sequel crafted by the creator Maverikk. Examining the overall structure of the map reveals various independent zones, mazes, and island-like platforms with distinct terrain features based on the volcanic tileset. This map design demands versatile spatial utilization and strategic judgment beyond simple combat from the players, engineered so that every moment requires meticulous calculation and cooperation to overcome obstacles. Players encounter a distinct progression style where they must tackle incoming enemy offensives or harsh given tasks within a constrained environment. The unit deployment zones scattered throughout the map, narrow choke points suitable for defense line establishment, and maze-like interlinked areas offer players diverse tactical choices every time. In particular, carrying on the lineage of its predecessor Snow and Ice, this map lives up to its name by presenting extreme difficulty and demanding conditions that strongly stimulate users' competitive spirit. Rather than trying to break through every situation alone, the true fun of the map can be experienced when multiple people gather to divide roles and coordinate organically. It is a map worth recommending to users who enjoy the distinct hardcore flavor of StarCraft custom maps or seasoned players looking for new challenges outside of standardized gameplay. However, since the difficulty is quite high and you might feel overwhelmed without understanding the map structure or progression method beforehand, closely inspecting the terrain characteristics and the positions of deployed units before playing becomes the core point of strategy.
최근 등록된 맵
새로 추가된 파일과 버전을 확인하세요.
![골라서 입구막기 ICE[HARD] 맵 미리보기](https://cdn-star-data.huzy.net/thumbnail_f44ff298a74d4098a68406f49e7aa77d.jpg)
골라서 입구막기 ICE[HARD]
골라서 입구막기 ICE[HARD]는 제목에서부터 명확한 목적을 드러내는 디펜스 맵이다. 플랫폼 타일셋의 차가운 금속 질감과 어두운 우주 공간 배경이 어우러져 마치 버려진 우주 정거장에서 최후의 저항을 펼치는 듯한 긴장감을 조성한다. 여섯 명의 플레이어가 각자 독립된 구역에 배치되며, 공통된 적이 몰려오는 입구를 향해 방어선을 구축하는 방식으로 진행된다. 맵의 가장 큰 특징은 제목 그대로 입구를 막는 방법을 플레이어가 직접 선택할 수 있다는 점이다. 단순히 병력을 생산해 싸우는 것을 넘어, 테란의 서플라이 디포, 프로토스의 파일런, 저그의 성큰 콜로니처럼 건물을 활용한 물리적 차단벽을 어디에 어떻게 설치할지 전략적으로 판단해야 한다. 게임이 시작되면 각 플레이어는 제한된 자원과 공간 안에서 빠르게 건물을 배치하고 병력을 정비해야 한다. 초반에는 비교적 약한 적 유닛이 몰려오지만, 시간이 지날수록 강력한 물량과 체력을 가진 적들이 쉴 새 없이 밀려든다. 방어선이 한 번 뚫리면 연쇄적으로 붕괴할 위험이 크기 때문에, 건물을 활용해 적의 진로를 차단하거나 길게 우회시키는 창의적인 입구 막기 설계가 생존의 핵심이다. 특히 이 맵은 하드 난이도를 표방하고 있어 방심하는 순간 순식간에 진영이 초토화될 수 있다. 따라서 입구를 막는 건축물의 내구도와 배치 간격, 그리고 후방에서 지원하는 화력의 균형을 섬세하게 조율해야 한다. 같은 팀원이더라도 서로 다른 종족의 특성을 살려 방어선을 이중 삼중으로 겹쳐 쌓는 협동 플레이가 권장된다. 플레이 경험은 극도로 압박감이 강한 생존 게임에 가깝다. 밀려오는 적의 숫자와 속도에 압도당하지 않으려면 초 단위의 빠른 판단과 지속적인 건물 수리 및 증축이 필수적이다. 후반으로 갈수록 단순한 병력 전투만으로는 버티기 어려워지며, 건물을 이용한 길찾기 방해 전술이 승패를 결정짓는다. 이 맵은 단순한 디펜스에 질려버린 숙련자나, 건물 전략을 극한까지 실험해보고 싶은 플레이어에게 강력히 추천한다. 반면, 디펜스 장르에 익숙하지 않거나 느긋한 성장을 선호하는 유저라면 극초반부터 몰아치는 난이도에 다소 당황할 수 있다. 플레이 전에는 반드시 종족별 건물의 방어력과 시야 확보 방안을 숙지해야 하며, 빠른 건설 단축키 설정을 점검하는 것이 좋다. 입구를 어떻게 창의적으로 막을지 고민하는 과정 자체가 이 맵의 진정한 재미이며, 성공적으로 방어선을 유지했을 때의 성취감은 상당하다. The defense map "Choose Your Entrance Block ICE" declares its clear purpose right from the title. The cold metallic texture of the platform tileset combined with the dark outer space background creates a tense atmosphere reminiscent of a last stand on an abandoned space station. Six players are placed in separate zones and must build their defenses facing a common enemy entrance. The map's defining feature is that players can directly choose how to block the entrance. Beyond simply massing units, you must strategically decide where and how to install physical barriers using structures like Supply Depots, Pylons, or Sunken Colonies. Once the game starts, each player must quickly construct buildings and organize forces within limited space and time. Early waves consist of relatively weak enemy units, but relentless swarms of stronger, high-health enemies soon follow. A single breach in the defense can lead to a catastrophic chain collapse, making creative entrance designs that block or lengthen the enemy's path essential for survival. Since this map is labeled as hard difficulty, a moment of carelessness can instantly devastate your position. You must delicately balance the durability and spacing of blocking structures with the supporting firepower behind them. Even among teammates, cooperative play that layers defensive lines by exploiting each race's unique structural traits is highly recommended. The gameplay experience is akin to an intensely oppressive survival game. To avoid being overwhelmed by the sheer number and force of enemies, split-second decisions, constant repairs, and expansion of structures are mandatory. In the later stages, relying solely on unit combat becomes unsustainable, and the tactic of pathing manipulation using buildings determines victory or defeat. This map is strongly recommended for seasoned players tired of standard defense maps and for those who wish to experiment with building strategies to their absolute limit. Conversely, players unfamiliar with the defense genre or those who prefer a slow, growing pace may find the relentless early-game rush somewhat bewildering. Before playing, it is crucial to familiarize yourself with the defensive stats of your race's buildings and methods for securing vision, and checking your hotkey settings for rapid construction is advisable. The process of creatively devising how to block the entrance is the core fun of this map, and the sense of achievement when successfully maintaining the defensive line is immense.
럴커 다크웨이 디펜스 (Lurkers DarkWay D!!)
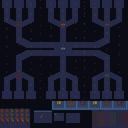
화산 타일셋의 이글거리는 지형 위에서 펼쳐지는 이 디펜스 맵은 단순한 제목 이상의 혼란스러운 재미를 선사한다. 제목에서 암시하듯, 플레이어는 18갈래에 달하는 적의 진입로를 틀어막아야 하는 막중한 임무를 짊어진다. 일반적인 선형 디펜스와 달리, 이 맵은 다방향에서 밀려드는 럴커 웨이브를 상대해야 하므로 긴장의 끈을 단 한순간도 놓을 수 없다. 지형은 화산 타일셋 특유의 좁은 협곡과 불규칙한 언덕으로 이루어져 있어, 유닛 배치와 시야 확보가 까다롭다. 시작과 동시에 주어지는 자원과 시간은 제한적이며, 적의 공세는 예측하기 어려운 패턴으로 거세진다. 따라서 초반 빌드오더를 얼마나 효율적으로 가져가느냐에 따라 중반 이후의 생존 여부가 극명하게 갈린다. 플레이 경험은 그야말로 숨 막히는 공성전의 연속이다. 18개의 진입로라는 표현에서 느껴지듯, 적들은 단순히 몰려오는 것이 아니라 맵 곳곳에 뚫어놓은 통로를 통해 파고든다. 이는 플레이어로 하여금 일점 방어가 아닌 전방위적인 수비 전략을 강제한다. 특정 지점을 과도하게 보강하면 다른 통로가 순식간에 뚫리기 일쑤이며, 병력의 기동성과 시야 확보를 위한 관측선 운용이 생명줄과도 같다. 지형을 활용한 시즈 탱크의 포격 진지 구축, 혹은 좁은 입구를 틀어막는 벌처의 마인 살포 등 전형적인 테란 디펜스 전술이 유효하지만, 맵 구조상 완벽한 티어 형성은 불가능에 가깝다. 끊임없이 재배치하고 빈틈을 메우는 과정에서 극도의 몰입감을 느끼게 된다. 이 맵은 디펜스 장르에 능숙한 베테랑보다는, 협동을 통해 혼돈을 극복하는 재미를 선호하는 플레이어에게 추천한다. 최대 6인이 함께 플레이할 수 있지만, 다수의 인원이 참여할수록 병력 배치와 자원 분배에 대한 명확한 소통이 필수적이다. 각자 구역을 나누어 방어하는 것이 기본이지만, 맵의 구조상 특정 지역으로 적이 쏠리는 현상이 잦아 유기적인 지원이 요구된다. 플레이 전 반드시 확인해야 할 사항은, 이 맵이 전통적인 밸런스보다는 압도적인 물량과 예측 불가능성에 초점을 맞추고 있다는 점이다. 따라서 완벽한 클리어를 목표로 하기보다는, 끊임없이 밀려오는 적을 상대로 아군과 함께 버티는 과정 자체에서 쾌감을 찾는 것이 올바른 접근법이다. 인내심을 시험하는 수많은 웨이브 속에서, 당신의 방어선은 과연 신과 같은 방어력을 보여줄 수 있을까. This defense map, set upon the smoldering ground of a volcanic tileset, delivers a chaotic experience that goes far beyond its straightforward title. As the name suggests, players are tasked with the overwhelming duty of blocking eighteen distinct enemy pathways. Unlike standard linear defense maps, this one forces you to contend with waves of Lurkers pouring in from multiple directions simultaneously, ensuring the tension never lets up for a single moment. The terrain is characterized by the narrow canyons and irregular cliffs typical of the volcanic setting, making unit placement and vision control particularly tricky. The resources and time provided at the start are extremely limited, and the enemy offensive intensifies in unpredictable patterns. Consequently, your survival in the later stages hinges entirely on how efficiently you manage your initial build order. The gameplay experience is essentially a series of breathless siege battles. As the eighteen pathways imply, the enemies do not simply rush forward; they infiltrate through gaps spread all across the map. This forces players to adopt an omnidirectional defensive strategy rather than relying on a single chokepoint. Over-reinforcing one area often leads to the immediate collapse of another, making troop mobility and the use of overlords for vision absolutely critical. While classic Terran defense tactics, such as establishing siege tank firing lines using the high ground or spreading vulture spider mines at narrow entrances, are viable, the map structure makes it nearly impossible to form a perfect defensive tier. The extreme sense of immersion comes from the frantic process of constantly repositioning and plugging the gaps. This map is recommended not for defense purists seeking meticulous balance, but for players who enjoy overcoming chaos through cooperation. Up to six players can join, but a larger group makes clear communication regarding troop placement and resource distribution essential. While dividing the defense zones is the basic approach, the map’s design causes enemy forces to occasionally swarm specific areas, requiring flexible support from teammates. A crucial point to check before playing is that this map focuses on overwhelming numbers and unpredictability rather than traditional balance. Therefore, the correct mindset is not to dream of a perfect, flawless clear, but to find pleasure in the sheer act of holding the line with your allies against the relentless tide. Amid countless waves that test your patience, can your defensive line truly prove to be godlike?
막장이된 혈압 마라톤 (Blood Pressure Marathon Gone Wrong)
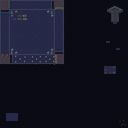
스타크래프트 브루드워 유즈맵 '막장이된 혈압 마라톤'은 화산 타일셋을 배경으로 최대 7인이 함께 즐길 수 있는 생존·내구형 맵으로 보인다. 제목에 '마라톤'과 '혈압'이 함께 쓰인 점에서 장시간 버티기나 고강도 회피 플레이가 핵심일 것으로 추정된다. 맵 크기 128×128 타일 전역이 활용되는 구조라면 시작 지점에서 먼 거리까지 이동하거나 파도처럼 몰려오는 적을 상대하며 제한 시간 내 생존하는 방식일 가능성이 높다. 7인 전원이 한 팀으로 협력하거나 개인별 생존 경쟁을 벌이는 구도 모두 상정할 수 있으며, 화산 지형 특성상 용암 지대나 좁은 통로 같은 환경 장애물이 난이도를 끌어올리는 요소로 작용했을 것이다. 트리거 구성은 별도 확인되지 않았으나 마라톤류 맵 특성상 주기적 유닛 소환, 구간별 미션 전환, 보스전 같은 단계적 난이도 상승 패턴이 적용됐을 것으로 보인다. 추천 대상은 고난도 회피·생존 플레이를 선호하는 유저, 친구들과 음성 채팅으로 호흡을 맞추며 클리어를 노리는 파티, 짧은 밀리 대전 대신 20~40분 내외 집중 플레이를 원하는 유저다. 플레이 전에는 인원 수에 따른 난이도 스케일링 여부, 부활·저장 시스템 유무, 맵 끝까지 도달 시 승리 조건이 무엇인지 정도만 미리 확인하면 불필요한 시행착오를 줄일 수 있다. The StarCraft Brood War use map 'Blood Pressure Marathon Gone Wrong' appears to be a survival-endurance map for up to seven players set on a volcanic tileset. The combination of 'marathon' and 'blood pressure' in the title suggests that prolonged endurance or high-intensity dodge gameplay forms the core experience. If the full 128×128 tile area is utilized, the structure likely involves traveling long distances from the starting point or surviving within a time limit while facing waves of enemies. Both cooperative team play and individual survival competition are plausible, and volcanic terrain features such as lava zones and narrow passages would act as difficulty amplifiers. Although trigger details are unconfirmed, marathon-style maps typically employ periodic unit spawns, stage-based mission shifts, and boss encounters for progressive difficulty scaling. Recommended for players who enjoy high-difficulty dodge and survival gameplay, parties coordinating via voice chat aiming for a clear, and those seeking focused 20-40 minute sessions instead of quick melee matches. Before playing, checking whether difficulty scales with player count, if revive or save systems exist, and what the victory condition is upon reaching the map's end can reduce unnecessary trial and error.
혈압 마라톤 Super Hell
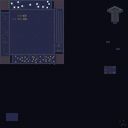
를 통해 살펴볼 유즈맵인 혈압 마라톤 Super Hell은 고난도 컨트롤과 극한의 인내심을 요구하는 독특한 장르의 스타크래프트 맵입니다. 이 맵은 플레이어가 유닛을 조작하여 장애물과 적의 공격을 피해 목적지까지 이동하거나 생존하는 방식을 취하고 있으며, 이름에서 드러나듯 극악의 난이도를 자랑하는 피하기 및 마라톤 계열의 대표적인 작품 중 하나입니다. 내부 설명에서도 확인할 수 있듯 매우 도전적인 코스가 준비되어 있어, 일반적인 플레이 방식과는 차별화된 재미를 선사합니다. 맵의 전체적인 구조는 넓은 공간 속에 다양한 위험 요소와 이동 경로가 복잡하게 얽혀 있는 형태로 보입니다. 플레이어는 정교한 컨트롤을 바탕으로 순식간에 날아오는 공격과 트랩을 피해야 하며, 타이밍을 놓치면 곧바로 실패로 이어지기 때문에 높은 집중력이 필수적입니다. 협동 플레이나 멀티플레이 환경에서는 동료들과 함께 서로의 플레이를 지켜보며 웃고 즐기는 재미가 크며, 특히 실패를 거듭하며 패턴을 파악해 나가는 과정 자체가 이 맵의 핵심적인 매력 포인트라고 할 수 있습니다. 이 스타크래프트 유즈맵은 평소 단순한 밀리 게임이나 일반적인 컴까기에서 벗어나 색다른 도전을 즐기고 싶은 유저들에게 매우 잘 어울립니다. 특히 컨트롤 실력을 극한으로 시험해보고 싶거나, 친구들과 함께 모여 서로의 실수를 놀리며 가볍게 즐길 만한 고난도 피하기 맵을 찾는 플레이어라면 한 번쯤 도전해 볼 가치가 충분합니다. 다만 난이도가 매우 높기 때문에 초보자라면 다소 당황할 수 있으며, 여러 번의 시행착오를 겪을 각오를 하고 플레이하는 것이 좋습니다. 본격적으로 게임을 시작하기 전에 맵의 전반적인 지형과 트랩 배치를 가볍게 파악해 두는 것이 클리어 확률을 높이는 데 도움이 됩니다. Blood Pressure Marathon Super Hell is a custom StarCraft Brood War use map known for demanding high-level control and extreme patience from players. As part of the avoidance and marathon genre, this map challenges players to maneuver units past obstacles and enemy assaults to reach a destination or survive against overwhelming odds. True to its name, it offers a punishingly high difficulty level that sets it apart from traditional gameplay experiences, featuring intricate courses designed to test a player's reflexes and concentration. The layout of the map appears to consist of expansive areas filled with complex paths, hazards, and potential traps that require precise timing to navigate. Players must react quickly to incoming threats, as a single mistake can lead to failure, making intense focus an absolute necessity. In multiplayer settings, the experience is enhanced by sharing the challenge with others, observing each other's attempts, and learning the patterns through repeated failures, which forms the core appeal of this customized scenario. This StarCraft use map is highly recommended for users seeking a unique challenge away from standard melee games or typical computer-opponent matches. It is an ideal choice for players who want to push their control skills to the absolute limit or enjoy a difficult avoidance map with friends. Due to its steep difficulty curve, beginners should prepare for multiple trials and errors before making significant progress. Reviewing the basic terrain and trap locations before diving in can help improve overall survival and progression during the run.
테스트 오브 서바이벌 - INSANE!!! (Test of Survival - INSANE!!!)
스타크래프트 브루드워 유즈맵 중에서도 극강의 난이도를 자랑하는 서바이벌 장르의 Test of Survival - INSANE!!! 맵을 소개합니다. 이 맵은 플레이어가 몰려오는 컴퓨터 유닛과 건물들을 파괴하며 살아남아야 하는 전형적인 서바이벌 방식을 채택하고 있습니다. 맵의 구조를 살펴보면 중앙의 넓은 아레나 형태의 공간을 중심으로 사방에서 적군이 밀려드는 구조로 보이며, 플레이어는 지정된 구역 내에서 끊임없이 몰려오는 적들을 상대하며 버텨내야 합니다. 맵의 타이틀에서 알 수 있듯이 'INSANE'이라는 이름에 걸맞게 매우 높은 난이도가 예상되며, 단순히 유닛을 생산하는 것을 넘어 정교한 컨트롤과 전략적인 자원 관리가 필수적인 플레이 경험을 제공할 것으로 보입니다. 맵의 지형은 황혼 타일셋을 사용하여 다소 어둡고 긴장감 넘치는 분위기를 조성하며, 이는 생존을 위한 처절한 전투를 더욱 몰입감 있게 만들어줍니다. 플레이어는 적의 공세를 막아내는 과정에서 유닛의 배치와 화력 집중이 매우 중요하며, 자칫 한순간의 방심으로도 패배할 수 있는 긴박한 상황이 지속될 것으로 추정됩니다. 이 맵은 일반적인 밀리 게임과는 결이 다른, 오로지 생존이라는 단 하나의 목표를 향해 달리는 극한의 도전 정신을 가진 플레이어들에게 강력히 추천합니다. 플레이 전에는 몰려오는 적의 종류와 패턴을 파악하는 것이 중요하며, 고난도 맵인 만큼 초보자보다는 숙련된 컨트롤을 보유한 유저들에게 적합한 스타크래프트 유즈맵입니다. Introducing the Test of Survival - INSANE!!!, a survival-genre StarCraft: Brood War custom map that boasts extreme difficulty. This map adopts a classic survival mechanic where players must destroy incoming computer units and buildings to stay alive. Looking at the map structure, it appears to feature a large central arena-style area, with enemies swarming from all directions, requiring players to endure constant waves of attacks within a designated zone. As the title 'INSANE' suggests, a very high level of difficulty is expected, offering a gameplay experience where sophisticated control and strategic resource management are essential beyond mere unit production. The terrain utilizes the Twilight tileset, creating a dark and tense atmosphere that enhances the immersion of desperate combat for survival. Players will find that unit positioning and fire concentration are crucial in repelling enemy assaults, with intense situations likely persisting where a single moment of negligence could lead to defeat. This map is highly recommended for players with a strong sense of challenge who seek a different experience from standard melee games, focusing solely on the single goal of survival. Before playing, it is important to understand the types and patterns of the incoming enemies; due to its high difficulty, this StarCraft custom map is best suited for experienced users with skilled micro-management rather than beginners.
SingleMini Defense신의경지PLUS
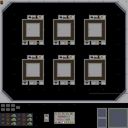
스타크래프트 브루드워 맵 싱글미니 디펜스 신의경지 플러스(SingleMini Defense 신의경지PLUS)는 독특한 구조와 높은 난이도로 도전 의식을 불러일으키는 유즈맵이다. 전체적인 맵 구성은 플레이어들이 각각 독립된 구역에서 적의 공세를 방어하는 형태로 설계되어 있으며, 시각적으로는 플랫폼 타일셋을 기반으로 깔끔하게 정돈된 진영 배치가 눈에 띈다. 각 플레이어의 공간 주변에는 유닛을 생산하거나 자원을 관리할 수 있는 시설들이 배치되어 있어 효율적인 기지 운영이 승패를 가르는 중요한 요소로 작용한다. 내부 설명에서 초절정 난이도를 표방하고 있는 만큼, 일반적인 디펜스 장르의 유즈맵들과 비교했을 때 상당한 집중력과 빠른 판단력이 요구되는 플레이 경험을 제공한다. 게임이 시작되면 몰려오는 적들의 공세를 막아내기 위해 주어진 자원을 최적화하고, 타이밍에 맞는 유닛 배치와 업그레이드를 수행해야 한다. 특히 다인용 플레이 환경에 적합한 구조를 갖추고 있어 친구들과 함께 협동하여 고난도 웨이브를 돌파하는 재미를 느낄 수 있다. 평소 난이도 높은 방어 게임이나 극한의 컨트롤을 요하는 스타크래프트 유즈맵을 즐기는 유저들에게 알맞은 선택이 될 것이다. 플레이를 시작하기 전, 각 구역의 자원 수급 방식과 적의 진격 경로를 미리 파악해 두는 것이 생존 확률을 높이는 데 도움이 된다. 고난도 웨이브를 차례대로 극복해 나가는 성취감을 원한다면 이 맵에서 색다른 도전의 재미를 만끽할 수 있을 것이다. SingleMini Defense Shinui Gyeongji Plus is a custom map for StarCraft: Brood War that sparks a strong sense of challenge through its unique structure and high difficulty. The overall map layout is designed so that players can defend against enemy offensives in independent zones, featuring a clean and well-organized base placement based on the platform tileset. Facilities capable of producing units and managing resources are positioned around each player's space, making efficient base operation a crucial factor that determines victory or defeat. As it claims an ultra-high difficulty in its internal description, it provides a gameplay experience that requires significant concentration and quick decision-making compared to typical defense-genre custom maps. When the game begins, players must optimize their given resources and execute timely unit placements and upgrades to repel the waves of oncoming enemies. Especially featuring a structure suitable for multiplayer environments, it allows players to enjoy the fun of cooperating with friends to break through high-difficulty waves. It will be a fitting choice for users who usually enjoy difficult defensive games or StarCraft custom maps that demand extreme control. Before starting the play, understanding the resource supply method of each zone and the enemy's advance path in advance helps increase the survival rate. If you want the sense of accomplishment of overcoming high-difficulty waves one by one, you can fully enjoy the fun of a unique challenge on this map.
썬큰 디펜스 10웨이 15.4 임파서블 (SunkenD 10Way 15.4 Impossible)
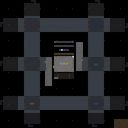
'썬큰 디펜스 10웨이 15.4 임파서블(SunkenD 10Way 15.4 Impossible)'은 스타크래프트 브루드워 유즈맵 중에서도 손꼽히는 고난도 협동 디펜스 맵으로, 최대 10인의 플레이어가 우주 타일셋 위에서 25단계 저그 웨이브를 상대로 생존을 겨루는 구조다. '10웨이(10Way)' 명칭대로 열 개의 독립 진입로가 'Even Mid' 대칭 배치로 구성되어 공평한 자원 분배와 난이도를 제공하며, '임파서블' 표기답게 일반 디펜스와는 차원이 다른 생존 압박이 지속된다. 플레이어는 감염된 커맨드 센터 또는 해처리를 거점으로 자원을 확보해 썬큰 콜로니 위주의 방진을 구축, 저글링부터 울트라리스크까지 진화하는 적 병력을 막아내야 한다. 'Backwash wont kill you' 설명은 후방 우회 병력(백워시)으로 인한 즉사 패널티를 완화해 전방 라인 유지와 업그레이드 타이밍에 집중하도록 유도한 트리거 설계로 보인다. 128x128 타일 기반 4096x4096 해상도는 10인 동시 플레이에 적절한 공간감을 주며, 버전 15.4까지 이어진 업데이트 이력과 'sc-maps.com' 출처는 지속적인 밸런스 검증이 있었음을 시사한다. 이 맵은 단순 타워 배치를 넘어 유닛 상성, 자원 관리, 10명 전원의 역할 분담과 웨이브 클리어 속도 조율이 유기적으로 맞물려야 하는 고차원적 협동을 요구한다. 입문자에게는 진입 장벽이 높으나, 정석 '입구 막기' 메커니즘을 익힌 숙련자 파티에게는 최적의 도전 과제다. 플레이 전 버전 호환성(리마스터/1.16.1), 팀원 간 의사소통 수단, 웨이브별 출현 유닛 공략 숙지 여부를 점검하고 진입하는 것이 생존의 열쇠가 된다. SunkenD 10Way 15.4 Impossible stands out as one of the highest-difficulty cooperative defense maps in the StarCraft Brood War UMS scene. Up to ten players face 25 stages of evolving Zerg waves on a space tileset. The "10Way" designation indicates ten independent lanes arranged in an "Even Mid" symmetrical layout, ensuring fair resource distribution and balanced difficulty. True to its "Impossible" label, the survival pressure far exceeds standard defense maps. Players establish bases around Infested Command Centers or Hatcheries, building Sunken Colony-centric defenses to stop enemies ranging from Zerglings to Ultralisks. The note "Backwash wont kill you" suggests triggers prevent instant loss from rear leaks, letting players focus on front-line upgrades and timing. The 4096x4096 resolution on 128x128 tiles provides ample room for ten players, while the v15.4 history and sc-maps.com origin imply long-term balance refinement. This map demands more than tower placement; it requires deep unit-counter knowledge, economy management, role assignment, and synchronized wave-clearing across all ten slots. The barrier is high for newcomers, but veteran parties mastering classic choke-point defense will find a rewarding challenge. Before starting, verify version compatibility (Remastered/1.16.1), ensure voice communication, and study wave compositions to maximize survival chances.
썬컨D 10웨이 13.5 임파서블 (SunkenD 10Way 13.5 Impossible)
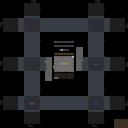
‘썬컨D 10웨이 13.5 임파서블(SunkenD 10Way 13.5 Impossible)’은 스타크래프트: 브루드워의 컴까기 장르 유즈맵으로, 중앙에 위치한 플레이어 기지에 10방향에서 끊임없이 몰려드는 적군 스폰 지역을 방어하는 디펜스 형식의 맵이다. 맵의 이름은 ‘썬컨D’라는 시리즈명과 ‘10Way’(10방향), ‘13.5’, ‘임파서블’이라는 난이도 표기가 조합되어 있는데, 특히 ‘13.5’는 맵의 규모나 난이도 레벨을 나타내는 것으로 추정된다. 내부 맵 설명에 ‘levelsEven MidImpossible’이 포함되어 있어 초중수와 중고수 사이의 난이도 구분이 있음을 유추할 수 있다. 이 맵의 핵심을 차지하는 것은 중앙 기지에서 펼쳐지는 디펜스 전투다. 플레이어는 스타크래프트의 종족 선택 없이 중립 건물인 ‘캐리어’와 ‘아비터’를 조종하며, 화면 중앙의 메인 기지에서 출발하는 적군 웨이브를 저지해야 한다. 맵의 구조는 완벽한 대칭형으로 설계되어 있어 10방향에서 동시 또는 순차적으로 적이 출현하는 방식으로 진행되며, 특히 ‘13.5’라는 숫자에서 보듯 기존 10웨이 시리즈보다 더 높은 밀도의 공격 패턴과 더 긴 플레이 지속 시간을 자랑한다. 적군은 주로 저글링, 히드라리스크, 뮤탈리스크, 울트라리스크 등 스타크래프트의 주요 공중/지상 유닛으로 구성되어 있으며, 플레이어는 제한된 자원과 건물을 활용해 이들을 방어해야 한다. 맵 중앙의 ‘캐리어’와 ‘아비터’는 공중 유닛을 주력으로 운용할 수 있도록 지원하며, 추가로 중앙에 위치한 ‘아둔의 성소’나 ‘네라짐 사원’과 같은 건물을 통해 추가적인 방어 수단을 확보할 수 있다. ‘썬컨D 10웨이 13.5 임파서블’의 가장 큰 특징은 ‘임파서블’이라는 이름에 걸맞게 초보 플레이어에게는 매우 어려운 난이도로 구성되어 있다는 점이다. 맵의 대칭성과 10방향 공격 패턴은 방어 전략의 수립을 요구하며, 특히 후반부로 갈수록 적군의 공격력이 급상승하는 구조로 인해 지속적인 스킬과 자원의 관리가 필수적이다. 또한, 맵의 크기가 4096x4096으로 상당히 넓고, 10개의 스폰 지역이 동시에 공격에 참여할 수 있어 전략적 선택과 집중력이 요구된다. 이 맵은 주로 6인용으로 설계되어 있으며, 팀플레이보다는 개인 플레이를 중시하는 구조로 보이나, 내부 설명에 ‘levelsEven’이라는 표현이 포함된 점으로 미루어 보아 난이도 조절을 통한 개인별 진행도 가능한 것으로 추정된다. 이 맵을 플레이하기에 앞서, 플레이어는 스타크래프트의 기본 조작법과 유닛의 특성을 충분히 숙지하고 있어야 한다. 캐리어의 인터셉터와 아비터의 스테이시스 필드, 리콜 등은 이 맵의 핵심 방어 수단이므로 이들의 활용법을 미리 연습해 두는 것이 좋다. 또한, 맵의 공격 패턴을 분석하고, 적군의 공격 타이밍에 맞춰 유닛을 배치하는 것이 중요하다. 맵의 난이도가 높기 때문에, 초보자의 경우 ‘12.x’ 버전이나 ‘13.x’ 버전의 하위 난이도 버전을 먼저 플레이해 보는 것도 하나의 방법이다. 마지막으로, 맵의 대칭성과 공격 패턴을 숙지한 후에는 중앙 기지 주변의 방어 건물을 효율적으로 배치하여 적군의 공격을 최대한 지연시키는 전략을 세워야 한다. 이 맵은 디펜스 장르의 정수를 보여주는 동시에, 플레이어의 전략적 사고와 순간 판단력을 시험하는 excellent한 경험을 제공할 것이다. This StarCraft: Brood War UMS map, ‘SunkenD 10Way 13.5 Impossible,’ is a defense-oriented mini-game where players must protect a central base against relentless waves of enemy units spawning from 10 different directions. The name ‘SunkenD’ suggests a series of defensive maps, while ‘10Way’ indicates the number of attack routes, and ‘13.5 Impossible’ hints at an extremely high difficulty level—likely a progression from earlier versions like ‘12.6’ or ‘12.9.’ The internal description, ‘levelsEven MidImpossible,’ further implies a balanced yet challenging experience for mid-level players. The core gameplay revolves around defending a central base using neutral structures such as the Carrier and Arbiter. Players control these units to fend off waves of enemy units, which escalate in both quantity and variety as the game progresses. The map’s symmetrical design ensures that enemies spawn simultaneously or in sequence from all 10 directions, creating a dynamic and strategic challenge. Players must manage limited resources and construct additional defensive buildings to counter the increasing threats. The Carrier and Arbiter provide aerial dominance, while structures like the ‘Temple of the Sun’ or ‘Nerazim Shrine’ offer supplementary defensive options. What sets ‘SunkenD 10Way 13.5 Impossible’ apart is its punishing difficulty, designed for experienced players. The sheer number of spawn points and the escalating enemy strength make it a test of both macro-management and quick decision-making. While the map is technically playable solo, its design suggests a focus on individual skill rather than team coordination. The large 4096x4096 map size and the need to monitor multiple attack vectors demand constant attention and adaptability. For players attempting this map, mastering the Carrier’s Interceptors and the Arbiter’s abilities like Recall and Stasis Field is crucial. Pre-game practice with unit control and positioning will significantly improve survival chances. Beginners may find it helpful to start with earlier versions of the map (e.g., ‘12.7’ or ‘12.9’) to acclimate to the mechanics before tackling the ‘13.5 Impossible’ challenge. Efficient base layout and strategic unit placement around the central base are key to delaying enemy advances. Ultimately, this map is a masterclass in defense strategy, pushing players to refine their tactics and reflexes in an unforgiving yet rewarding environment.
맵 선택 가이드
태그는 맵의 핵심 특징을 빠르게 설명하지만 제작 버전마다 규칙이 다를 수 있습니다. 상세 설명에서 권장 인원, 난이도, 플레이 시간과 버전을 함께 확인한 뒤 다운로드하세요.