
경쟁형 스타크래프트 맵 모음
'경쟁형' 태그가 등록된 맵을 모았습니다. 장르 하나로 찾기 어려운 플레이 방식, 난이도와 특징을 중심으로 인기 맵과 최신 맵을 비교해 보세요.
- 등록 맵
- 15개
- 누적 다운로드
- 0
- 누적 조회
- 659
인기 맵
다운로드와 조회 반응이 높은 맵입니다.
개인 라이프 컨트롤 V5 (Individual Life Control V5)
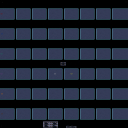
스타크래프트 브루드워의 개인 라이프 컨트롤 V5(Individual Life Control V5)는 6명의 플레이어가 동시에 참여하는 미니게임 형식의 유즈맵으로, 각 플레이어가 개별적으로 '라이프'를 관리하며 생존을 목표로 경쟁하는 구조를 가지고 있다. 이 맵은 개인의 판단력과 빠른 반응이 무엇보다 중요한 게임으로, 플레이어는 제한된 리소스를 효율적으로 활용해 상대방을 제압하거나 자원을 확보해야 한다. 맵은 화산 타일셋을 기반으로 8192x8192의 넓은 공간에 배치되어 있으며, 각 플레이어는 중앙과 외곽에 위치한 자원지대에서 시작해 자원을 채취하거나 방어 전략을 구축할 수 있다. 게임의 핵심은 '라이프' 시스템으로, 라이프가 0이 되면 탈락하게 되며 마지막까지 살아남은 플레이어가 승리한다. 맵 곳곳에 배치된 특수 건물을 통해 추가 자원이나 방어력을 확보할 수 있지만, 상대방의 공격을 방어하는 데에도 신중을 기해야 한다. 초보자도 쉽게 접근할 수 있지만, 전략적 깊이와 실시간 판단력이 요구되는 만큼 숙련자들도 흥미롭게 플레이할 수 있는 장점이 있다. 특히 팀플레이가 불가능한 솔로 플레이 중심의 맵이기 때문에, 각 플레이어의 개별 역량이 승패를 좌우한다는 점이 매력적이다. 다만, 맵의 넓이가 넓어 자원 확보나 이동에 시간이 소요될 수 있으므로, 초반 전략 수립이 중요하다. 안정적인 자원 수급과 방어 시설의 구축을 동시에 고려해야 하며, 상대방의 움직임을 면밀히 관찰해 공격 타이밍을 잡아야 한다. 이 맵은 스타크래프트의 기본 메커니즘을 활용하되, 개인 라이프 관리라는 새로운 요소를 도입해 독특한 재미를 제공한다. 특히 트리거 시스템을 통한 라이프 관리와 승리 조건의 구현이 돋보이며, 미니게임답게 한판 한판이 짧고 집중력 있게 진행된다. 플레이 전에는 맵의 자원 분포와 주요 건물을 미리 확인해 전략을 수립하는 것이 좋다. 또한, 상대방의 공격 패턴을 빠르게 파악해 방어선을 강화하는 것도 승리의 열쇠가 된다. 이 맵은 스타크래프트의 유즈맵 among Us나 Among Us와 유사한 개인 생존 요소와 전략적 요소가 결합된 형태로, 시원한 플레이 경험을 제공한다고 볼 수 있다. Individual Life Control V5 is a StarCraft: Brood War mini-game where six players compete in a life management system, aiming to survive longer than their opponents. The game revolves around individual decision-making and quick reactions, as players must efficiently gather resources and defend their bases while depleting their opponents' life points. The map, set on a volcanic terrain with a resolution of 8192x8192, features central and peripheral resource zones where players start and expand their operations. Core mechanics include resource collection, base defense, and strategic building placement to enhance survivability. Players can secure additional resources or defensive bonuses through special structures scattered across the map, but must balance expansion with defense to avoid early elimination. While accessible to beginners, the game demands strategic depth and real-time adaptability, making it engaging for experienced players as well. The solo-player focus eliminates team coordination, emphasizing individual skill in resource management and tactical decision-making. The wide map layout requires careful early-game planning to secure resources and establish defenses, as inefficient play can lead to being overwhelmed by opponents. The unique charm lies in the integration of StarCraft's core mechanics with a life-depletion system, creating a fast-paced, high-stakes mini-game experience. Each match is concise and demanding, rewarding players who can quickly assess resource distribution, opponent behavior, and optimal timing for attacks. Prior to playing, it's advisable to familiarize oneself with the map's resource hotspots and key structures to formulate an effective strategy. Recognizing opponent attack patterns and reinforcing defenses accordingly are critical to securing victory in this engaging survival-style mini-game.
포켓몬 캐쳐스 2 GS2 (Pokémon Catchers2 GS2)
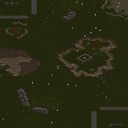
포켓몬스터를 모티브로 한 스타크래프트 브루드워 유즈맵 「포켓몬 캐쳐스 2 GS2(Pokémon Catchers2 GS2)」는 2~6명이 참가하는 경쟁형 디펜스 맵으로, 상대 팀보다 더 많은 포켓몬을 잡는 것이 목표다. 맵은 사막 테마로 꾸며졌으며, 넓은 평야와 흩어져 있는 바위 지형이 특징이다. 플레이어는 시작 지점에서 각자 포켓몬을 획득할 수 있는 영역을 확보한 뒤, 맵 곳곳에 배치된 「포켓몬 스폿」을 차지해 포켓몬을 획득하거나 방어해야 한다. 스폿은 중앙의 넓은 평야와 언덕, 협곡 등에 위치해 있으며, 방어에 성공하면 포켓몬을 지속적으로 획득할 수 있다. 상대방의 스폿을 점령하거나 방해하는 전략도 중요하며, 맵의 지형을 활용한 진입로 통제도 핵심이다. 공격과 방어의 균형을 맞추는 것이 중요하며, 초반에는 스폿 확보에 주력하고 중반부터는 상대방을 견제하거나 방어를 강화하는 플레이가 필요하다. 맵의 규모가 크기 때문에 빠른 이동과 효율적인 자원 관리가 관건이다. 특히 2인 팀플레이 시에는 역할 분담을 통해 더 효과적인 전략을 구사할 수 있으며, 4~6인 풀방에서는 동맹과 배신, 또는 연합 플레이가 게임의 재미를 더한다. 맵의 특성상 포켓몬의 종류나 능력은 직접적으로 등장하지 않지만, 「잡는 것」에 집중된 간단한 목표 덕분에 진입 장벽이 낮고 누구나 즐길 수 있다. 다만, 상대방을 방해하는 능력이 제한적이기 때문에, 방어와 스폿 확보에 더욱 신경 써야 한다. 이 맵은 스타크래프트의Classic UMS 스타일을 계승한 유즈맵으로, 포켓몬이라는 친숙한 소재를 활용해 개성 있는 재미를 제공한다. 맵의 구조상 한 곳에 모여 있는 것보다 넓게 퍼지는 플레이가 유리하며, 중앙 지역을 장악하는 것이 게임의 흐름을 좌우할 수 있다. 초보자가 플레이하기에는 맵의 규모가 다소 크고 전략적 요소가 복잡할 수 있지만, 반복 플레이를 통해 지형과 스폿의 위치, 상대의 움직임을 익히면 점차 실력이 향상될 것이다. 무엇보다도, 팀원과의 조율과 소통이 승리의 열쇠가 될 것이다. 「Pokémon Catchers 2 GS2」 is a competitive defense-style custom map for *StarCraft: Brood War* inspired by Pokémon, where 2 to 6 players compete to catch more Pokémon than the opposing team. The map features a desert theme with wide plains and scattered rocky terrain. Players secure their starting areas to acquire Pokémon, then capture and defend "Pokémon Spots" scattered across the map to collect Pokémon continuously. Spots are located in central plains, hills, and canyons, and controlling them is key to sustained gains. Strategically capturing or disrupting enemy spots is crucial, as is leveraging the terrain to control access routes. Balancing offense and defense is essential—prioritize securing spots early, then shift to pressuring opponents or reinforcing defenses mid-game. The map’s large scale demands quick movement and efficient resource management. In 2-player team games, role specialization enhances strategy, while 4-to-6-player full matches add layers of alliances, betrayals, and coalition play for deeper engagement. Though Pokémon types and abilities aren’t directly featured, the simple objective of "catching" keeps the entry barrier low for all players. However, limited disruptive tools mean defense and spot control should be the primary focus. As a classic UMS-style map, it inherits *StarCraft*’s legacy while offering unique fun through Pokémon. Spreading out and controlling central areas proves more advantageous than clustering, with dominance in the midfield shaping the game’s flow. The map’s size and strategic depth may overwhelm beginners, but repeated play helps players learn terrain, spot locations, and opponent behaviors to steadily improve. Above all, coordination and communication with teammates will be the deciding factor in victory.
상점 탈출 (Shop Lift!)
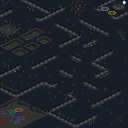
스타크래프트 브루드워의 유즈맵으로 유명한 ‘(6)Shop Lift!’는 6명의 플레이어가 참가하는 디펜스와 아이템 수집을 병합한 독특한 장르의 맵이다. 맵 제목에서 느껴지듯, 이 곳은 대형 쇼핑몰 내부 공사 중인 엘리베이터와 복도를 배경으로 하며, 플레이어는 각자의 시작 지점에서 출발해 맵 곳곳에 흩어져 있는 아이템을 최대한 많이 획득해야 한다. 아이템은 맵 여기저기 숨겨져 있으며, 특히 중앙 엘리베이터 주변과 복도 구석에 집중되어 있다. 주요 특징은 ‘경비원’이라는 AI 유닛의 존재로, 플레이어는 아이템을 획득하는 동시에 경비원의 공격을 피하거나 제압해야 한다. 경비원은 일정 간격으로 순찰하며, 플레이어를 발견하면 추격해 오기 때문에 소지한 아이템을 잃을 위험이 있다. 아이템을 많이 획득할수록 더 높은 점수를 얻을 수 있지만, 경비원의 스폰 지역과 추격 루트를 숙지하지 못하면 순식간에 아이템을 잃고 게임에서 뒤처질 수 있다. 맵의 대부분은 복도와 엘리베이터로 구성되어 있어 길찾기가 용이하지만, 아이템이 숨겨진 장소는 전략적 위치를 차지하고 있어 미리 탐색하는 것이 중요하다. 플레이 방식은 경쟁적이고, 아이템 수집 속도와 경비원 회피 능력이 승패를 좌우한다. 아이템을 획득하면 맵 상단에 획득한 아이템의 종류와 개수가 표시되는데, 이를 통해 상대방의 진행 상황을 가늠할 수 있다. 또한, 맵의 특성상 아이템이 한정된 수량으로 배치되어 있어 초반에 빠르게 확보하는 것이 유리하다. 20분의 제한 시간이 있어, 모든 아이템을 획득하는 것은 불가능에 가깝고, 최대한 많은 아이템을 확보하는 것이 목표다. 이 맵은 빠른 판단력과 전략적 움직임이 요구되며, 초보자와 숙련자 모두 즐길 수 있지만, 경비원과의 교전 전략을 익히는 데 시간이 걸릴 수 있다. 이 맵은 특히 복도와 엘리베이터의 구조가 단순하면서도 아이템 배치의 변수가 많아서, 같은 맵을 여러 번 플레이해도 새로운 전략을 시도할 수 있는 재미가 있다. 또한, 멀티플레이어 환경에서 상대방의 행동을 예측하고 아이템 확보 우선순위를 정하는 과정이 흥미로운 포인트다. 다만, 경비원의 AI가 다소 단순해지면 재미가 떨어질 수 있으므로, 제작자의 의도에 따라 AI가 개선된 버전이 있다면 플레이해 보는 것도 좋다. 전체적으로 ‘(6)Shop Lift!’는 아이템 수집과 디펜스의 조화를 통해 독특한 게임플레이를 제공하는 맵으로, 스타크래프트 유즈맵의 매력을 느낄 수 있는佳作다. This StarCraft: Brood War custom map, ‘(6)Shop Lift!’, blends defense and item collection into a unique genre, inviting up to six players to compete in a themed shopping mall undergoing construction. The title hints at the setting—a sprawling interior with elevators and corridors—where players spawn in designated zones to collect scattered items before adversaries or automated guards claim them. The map’s standout mechanic involves ‘guards,’ AI-controlled units that patrol key areas. Players must balance speed and caution: grabbing items quickly while avoiding or neutralizing guard patrols to prevent losing collected loot. Items are strategically placed in corridors, elevator shafts, and hidden corners, rewarding map awareness and route optimization. Central elevators serve as high-traffic zones, making them both treasure-rich and perilous. Gameplay hinges on competitive timing and spatial strategy. A real-time counter tracks items collected by each player, offering a tactical advantage for those who monitor opponents’ progress. With only 20 minutes on the clock, securing items early is critical, though the finite supply ensures no single player can dominate permanently. The map’s simplicity in layout contrasts with the depth of item placement and guard behavior, allowing replayability as players refine tactics across multiple sessions. ‘(6)Shop Lift!’ excels in blending light action with resource management, appealing to both casual and hardcore custom map enthusiasts. Its straightforward premise belies nuanced decision-making, from prioritizing item routes to outmaneuvering guards. While guard AI may feel rudimentary in later stages, the map’s core loop—exploration, collection, and evasion—delivers consistent engagement. For players seeking a compact but strategic challenge, this UMS title offers a polished and replayable experience within the Brood War modding ecosystem.
글래디에이터스 RPG 2 (Gladiators RPG 2)
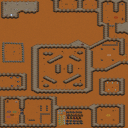
스타크래프트 브루드워의 대표적인 RPG 유즈맵인 〈Gladiators RPG 2〉는 전투를 통해 최강의 왕권을 차지하는 경쟁심을 자극하는 흥미로운 플레이 경험을 제공한다. 맵은 대규모의 전투가 벌어질 수 있도록 넓은 맵 공간을 활용하며, 플레이어는 각자 자신의 왕을 대표하는 신으로 변신하여 전투에 참여한다. 맵의 중앙에는 거대한 전투장이 마련되어 있어 다수의 유닛이 동시에 교전할 수 있으며, 주변부는 안전한 시작 지역으로 활용되어 전략적인 움직임을 풍부하게 한다. 전투는 주로 근접 유닛 간의 싸움으로 진행되며, 맵 곳곳에 배치된 아이템과 보물 상자는 전투력을 강화하거나 보조 능력을 제공하여 플레이어 간의 격차를 좁히거나 넓힐 수 있는 요소가 된다. 맵의 구조는 플레이어들이 각각의 영웅을 조종하며 팀 간 또는 개인 간 경쟁을 펼칠 수 있도록 설계되어 있으며, 승리 조건은 명시되지 않았지만 전투에서의 성과와 생존 여부가 핵심으로 보인다. 초보 플레이어는 맵의 넓은 공간과 다수의 적 유닛으로 인해 다소 혼란스러울 수 있지만, 각 영웅의 특성과 아이템의 활용법을 익히면 전략적인 전투를 즐길 수 있다. 또한, 맵 곳곳에 배치된 장애물과 좁은 통로는 전투의 흐름을 끊어 전략의 다양성을 높이는 장치로 활용된다. 〈Gladiators RPG 2〉는 대규모의 전투와 영웅 간의 경쟁을 즐기고자 하는 플레이어들에게 특히 매력적인 선택지가 될 것이다. 복잡한 전략보다는 순간의 판단과 영웅의 스킬 활용이 승부를 가르는 만큼, 빠른 판단력과 전투 감각을 키우고 싶은 유저들에게 추천할 만한 맵이다. 다만, 맵의 넓은 공간 때문에 초반에는 적의 위치를 파악하기 어려울 수 있으므로, 시작 지점에서 주변을 정찰하는 습관을 들이는 것이 중요하다. 또한, 아이템의 위치를 숙지하고 전투 전에 영웅의 능력치를 확인하는 것이 승률을 높이는 핵심 포인트가 될 것이다. 맵의 디자인과 플레이 방식은 클래식한 RPG의 feel을 살리면서도 전략적인 전투 요소를 강하게 내포하고 있어, 유즈맵의 장점을 극대화한 작품으로 평가할 수 있다. 특히, 팀 플레이보다는 개인 간의 경쟁을 즐기고자 하는 플레이어들에게는 더욱 흥미로운 경험을 선사할 것이다. 전투가 치열해질수록 맵의 전체적인 분위기는 열정적이고 박진감 넘치며, 이는 곧 유즈맵의 재미를 극대화하는 요소로 작용한다. 플레이 전 준비 사항으로는 맵의 주요 아이템 위치와 영웅의 스킬 구성을 미리 숙지하는 것이 중요하며, 특히 전투 중에는 맵의 넓은 공간을 활용한 우회 공격과 기습 전략을 고려해 볼 필요가 있다. 이 맵은 넓은 맵 공간과 다수의 유닛을 활용한 전투로 인해 플레이 시간이 다소 길어질 수 있지만, 그만큼 긴장감과 재미를 동시에 제공하는 훌륭한 유즈맵이라 할 수 있다. StarCraft: Brood War’s classic RPG custom map, *Gladiators RPG 2*, delivers an engaging competitive experience that fuels players’ drive to claim the throne through battle. The expansive map allows for large-scale combat, where players transform into gods representing their kings and join the fray. A massive arena in the center enables multiple units to clash simultaneously, while the surrounding safe zones provide strategic starting points that enrich movement and planning. Combat primarily unfolds through melee unit battles, with scattered items and treasure chests scattered across the map boosting combat power or granting auxiliary abilities—elements that can either narrow or widen the gap between players. Designed for players to control individual heroes and compete in team or solo matches, the victory condition remains undefined, with performance and survival in battle serving as the core focus. While newcomers may feel overwhelmed by the vast space and numerous enemy units, mastering each hero’s traits and item utilization unlocks strategic depth. Obstacles and narrow passages scattered throughout the map disrupt combat flow, enhancing tactical variety. *Gladiators RPG 2* stands out as an appealing choice for players seeking large-scale battles and hero-driven competition, where split-second decisions and skill mastery determine victory rather than complex strategies. For those looking to sharpen reflexes and combat instincts, this map is a strong recommendation. However, the wide-open space can make locating enemies difficult early on, so developing a habit of scouting from the starting point is crucial. Memorizing item locations and reviewing hero stats before battle are key to improving win rates. The map’s design and gameplay blend classic RPG elements with deep strategic combat, maximizing the strengths of custom maps. It particularly shines for players who prefer solo competition over team play, as the intensity of battle builds an energetic, adrenaline-fueled atmosphere that amplifies the fun. Before diving in, familiarize yourself with key item spots and hero skill sets, and consider flanking maneuvers or ambush tactics to exploit the map’s open terrain. While the extended playtime from large-scale combat may test patience, the map excels in delivering sustained tension and enjoyment, making it a standout custom map experience.
폴라리스 프라임 (Polaris Prime)
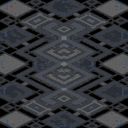
스타크래프트 브루드워의 대표적인 다인용 유즈맵으로, 폴라리스 프라임(Polaris Prime)은 우주 공간을 배경으로 한 경쟁형 디펜스 맵이다. 맵의 핵심은 중앙에 위치한 거대한 메인 플랫폼을 둘러싼 주변 섬들을 차지하는 것이며, 각 플레이어는 자신의 기지를 건설하고 자원을 확보해 공격과 방어에 나서야 한다. 맵의 구조는 중앙 플랫폼을 중심으로 육각형 형태로 배치된 섬들이 특징으로, 각 섬은 방어와 자원 확보의 중요 거점이 된다. 섬들 사이에는 좁은 통로가 있어 이동과 공격 루트가 제한적이므로, 전략적 배치와 병력 운용이 필수적이다. 특히, 섬 간의 연결 통로를 통제하는 것이 승리의 열쇠가 되며, 다수의 멀티 지역을 확보하는 것이 중요하다. 맵의 분위기는 우주 공간의 광활함과 고요함을 살리면서도, 전장의 긴장감을 조성하는 디자인으로 구성되어 있다. 플레이어는 초반에 자원을 확보해 빠르게 확장하고, 중반부터는 중앙 플랫폼을 둘러싼 섬들 간의 주도권 싸움이 본격화된다. 섬의 소유권을 두고 벌어지는 전투는 치열하며, 한 번 밀리기 시작하면 복구가 어려운 구조이기 때문에 초반의 안정이 무엇보다 중요하다. 이 맵은 2~6명의 플레이어가 경쟁하는 포맷으로, 팀전보다는 개별 경쟁이 주를 이루며, 자원과 병력 관리뿐만 아니라 적의 움직임을 예측하는 전략적 사고가 요구된다. 특히, 섬 간의 통로를 활용한 기습 공격이나 방어는 승패를 좌우하는 핵심 요소로, 초보자와 숙련자 간의 실력차가 명확히 드러나는 맵이기도 하다. 또한, 맵의 symmetrical한 구조 덕분에 모든 플레이어에게 공정한 시작 조건이 제공되며, 다양한 전략을 구사할 수 있는 여지가 많다. 이 맵을 즐기기 위해서는 맵의 지형과 통로의 위치를 정확히 숙지하고, 자원과 병력의 균형을 잘 맞추는 것이 중요하다. 초보자의 경우, 섬의 중요성과 통로의 함정을 이해하지 못해 쉽게 무너질 수 있으므로, 여러 번 플레이를 통해 맵의 패턴을 익히는 것이 좋다. 또한, 상대방의 동선을 예측하고 방어선을 구축하는 능력이 승리의 열쇠가 된다. 이 맵은 다인용 밀리 유즈맵의 정석으로, 경쟁과 전략의 묘미를 느낄 수 있는佳作이라 할 수 있다. 이 맵을 즐기는 플레이어는 맵의 구조와 섬 간의 관계를 이해하고, 효율적인 자원 관리와 전략적 전투를 펼치는 데 주안점을 둬야 한다. Polaris Prime is a renowned multiplayer custom map in *StarCraft: Brood War*, set in a cosmic space where players compete in a defensive-style battle. The core objective revolves around controlling the surrounding islands that encircle a massive central platform, each requiring players to build their bases, gather resources, and engage in both offense and defense. The map’s structure features hexagonal islands arranged around the central platform, with each island serving as a critical hub for defense and resource collection. Narrow pathways between the islands restrict movement and attack routes, making strategic positioning and troop management essential. Controlling the connecting corridors between islands is key to victory, and securing multiple expansion zones is crucial. The map’s design captures the vastness and tranquility of space while maintaining the tension of a battlefield. In the early game, players must secure resources and expand quickly, shifting to a fierce struggle for dominance over the islands surrounding the central platform in the mid-game. Battles for island control are intense, and once a player starts losing ground, recovery becomes difficult due to the map’s unforgiving structure, making a stable opening phase vital. Designed for 2 to 6 players, the format emphasizes individual competition over team play, requiring not only resource and troop management but also strategic foresight to predict enemy movements. Surprise attacks or defenses leveraging the island corridors can determine the outcome, making this a map where skill gaps between beginners and veterans are starkly evident. The symmetrical layout ensures fair starting conditions for all players, allowing for diverse strategies to be employed. To fully enjoy the map, players must memorize the terrain and corridor positions while balancing resources and troop production. Beginners often struggle due to a lack of understanding of the islands’ importance and the traps posed by the corridors, so repeated play is essential to grasp the map’s patterns. Predicting opponent movements and constructing defensive lines are critical to success. As a quintessential multiplayer custom map, Polaris Prime exemplifies the thrill of competition and strategy, making it a masterpiece worth mastering. Players who enjoy the map should focus on understanding its structure, the relationships between islands, and executing efficient resource management alongside strategic combat.
저격 마을 (Sniper Town)
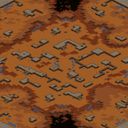
스타크래프트 브루드워 유즈맵 <Sniper Town>은 저격이 메인 콘텐츠인 4인용 디펜스 맵입니다. 맵 곳곳에 배치된 저격수 포지션에서 적 유닛을 조준 사격하는 방식으로 진행되며, 플레이어는 각자의 영역에서 최대한 많은 적을 처치해야 합니다. 맵 중앙에는 넓은 개활지가 펼쳐져 있어 저격 각도가 다양하게 확보되며, 건물이나 언덕 지형을 활용한 엄폐와 기습이 핵심 전략이 됩니다. 내부 맵 설명에 'Sniping just got a whole lot better... Can you dominate Sniper Town?'라는 문구가 있는 것으로 보아, 저격의 재미와 경쟁을 중시한 디자인으로 보입니다. 플레이어의 조준 실력과 패턴 읽기가 승부를 가를 것으로 예상되며, 적의 대량 진출 타이밍이나 패턴을 예측해 미리 자리를 잡는 것이 중요합니다. 맵의 황혼 타일셋 덕분에 분위기가 차분하면서도 전장 feel을 잘 살린 것이 특징입니다. 초보자는 저격 실력이 떨어질 수 있어 어려울 수 있지만, 익숙해지면 저격의 긴장감과 재미를 동시에 느낄 수 있는 맵입니다. 적절한 엄폐물과 시야 확보가 가능한지, 맵을 플레이하기 전 미리 시야를 체크해 보는 것이 좋습니다. 또한, 적의 움직임 패턴을 분석해 공격 타이밍을 잡는 연습도 필요합니다. 저격의 묘미를 즐기고 싶은 플레이어들에게 강력히 추천합니다. Sniper Town is a 4-player defense custom map in StarCraft: Brood War where sniping takes center stage. Players engage in long-range combat from designated sniper positions scattered across the map, with the goal of eliminating as many enemy units as possible within their zones. The central area features open terrain, allowing for diverse sniping angles, while buildings and elevated terrain offer cover for strategic positioning. The internal map description—"Sniping just got a whole lot better... Can you dominate Sniper Town?"—suggests a design focused on the thrill and precision of sniping. Success hinges on players' aiming skills and their ability to predict enemy movement patterns, with timing and positioning being critical. The Twilight tileset enhances the map's ambiance, blending a calm atmosphere with a battle-ready feel. While beginners may find the sniping mechanics challenging, those who adapt quickly will appreciate the tension and excitement of long-range combat. It's advisable to scout the map beforehand to identify key cover points and optimal sniper vantage spots, as well as to study enemy movement patterns to anticipate attack waves. This map is highly recommended for players seeking to experience the art of sniping in StarCraft: Brood War.
데스 노트 (Death Note)
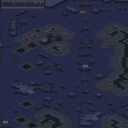
이 맵은 스타크래프트 브루드워의 유즈맵으로, 화산 테마의 디자인과 함께 특유의 어두운 분위기가 인상적인 작품이다. 맵 제목인 ÐÉÂTH ÑØTÉ는 내부 설명을 바탕으로 'DeathNote'로 추정되는 한글 깨짐 현상이 발생한 제목으로, 정식 명칭은 'Death Note' (데스 노트)로 보인다. 내부 메타데이터에서도 동일한 제목이 사용되며, 제작자는 Gorthaur[EoC]로 기록되어 있다. 맵의 크기는 3072x3072 타일이며, 화산 타일셋을 기반으로 만들어진 이 유즈맵은 플레이는 8명으로 진행되는 것으로 추정된다. 이미지 상에서도 여러 플레이어의 기지가 배치되어 있는 모습이 보이며, 이는 다중 플레이어간 경쟁 구조를 가질 가능성이 높다. 플레이 방식은 디펜스와 유사한 구조를 띄고 있으며, 맵 중앙에 위치한 주요 목표물을 보호하거나 파괴하는 경쟁형 구도가 예상된다. 화산 테마 덕분에 지형이 복잡하고 방어하기 어려운 요소가 많을 것으로 보이며, 이는 플레이어들에게 전략적인 대비를 요구할 것이다. 또한, 맵 상단에 있는 붉은색 원형 기호와 화산 지형은 일종의 방어 시설이나 핵심 포인트로 기능할 가능성이 크다. 맵의 디자인과 배치로 미루어보아, 플레이어들은 자원 수집, 기지 건설, 방어 구조물 배치에 집중하면서도 상대방을 견제하는 플레이를 해야 할 것이다. 이 맵은 초보자보다는 어느 정도의 전략적 감각과 맵 리딩 능력이 필요한 유즈맵으로 보이며, 다중 플레이어 간의 상호작용이 핵심인 만큼 팀 플레이가 중요할 것으로 예상된다. 또한, 화산 테마의 분위기상 다소 어두운 스토리나 설정이 포함될 가능성도 있어, 단순히 전투뿐만 아니라 맵의 분위기를 즐기는 플레이어들에게도 매력적인 요소로 작용할 것이다. 추천 대상은 스타크래프트 유즈맵을 즐겨 플레이하는 중급 이상의 유저들이며, 특히 디펜스와 경쟁형 맵을 좋아하는 플레이어들에게 적합할 것으로 보인다. 플레이 전에는 맵의 주요 목표와 승리 조건을 미리 확인하는 것이 중요할 것이다. The map is a custom Starcraft: Brood War UMS (Use Map Settings) title featuring a volcanic theme and a distinct dark atmosphere. The title ÐÉÂTH ÑØTÉ appears to be a corrupted version of 'DeathNote,' as inferred from the internal description and metadata, where the correct name is likely 'Death Note.' The map is created by Gorthaur[EoC] and spans 3072x3072 tiles using a volcanic tileset. The gameplay is estimated to support up to 8 players, as suggested by the presence of multiple player bases in the image. The gameplay structure suggests a defense-oriented or competitive format, where players must either protect or destroy a central objective located in the middle of the map. The volcanic terrain implies a complex and challenging environment, requiring strategic preparation and adaptability. The red circular symbols and volcanic features at the top of the map likely represent defensive structures or key points. Players will need to focus on resource gathering, base building, and deploying defensive structures while also engaging in tactics to counter opponents. This map appears to be designed for intermediate to advanced players who enjoy strategic depth and multiplayer interaction. The volcanic theme hints at a potentially darker narrative or setting, which may appeal to players looking for an immersive experience beyond pure combat. It is recommended for those who favor defense-based and competitive custom maps. Before playing, it is essential to understand the primary objectives and victory conditions, as these will significantly influence strategy.
대시 9 (Dash 9)
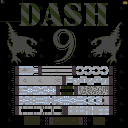
《Dash 9》는 스타크래프트: 브루드워의 유즈맵으로, 플레이어들이 각자 독립된 맵을 차지한 채 진행하는 독특한 RPG형 레이드 맵이다. 맵의 이름은 'Dash'와 '9'의 조합으로, 빠른 진행과 9개의 주요 구역 또는 보스전을 암시하는 듯한 느낌을 준다. 내부 제목과 파일명에서도 동일한 명칭을 확인할 수 있으며, 제작자 RoyClan이 밝힌 이메일 주소는 Roy_Gallant@hotmail.com과 Roy@USWest로, 북미 서부 유저를 겨냥한 제작임을 짐작케 한다. 이 맵은 6명의 플레이어가 각자 독자적인 시작 지점을 확보한 후, 맵 곳곳에 배치된 적들과 구조물을 상대하면서 진행한다. 맵 중앙에는 거대한 십자형 구조물이 눈에 띄며, 각 팔 부분에는 'Dash'라는 글자가 반복적으로 배치되어 있어 맵의 테마를 강조한다. 또한, 맵 외곽의 높은 지대와 내부의 복잡한 통로 구조는 플레이어들이 전술을 펼치기에 충분한 공간을 제공한다. 특히 맵의 가장자리로 갈수록 지형이 평평해지면서 넓은 시야를 확보할 수 있어, 정찰과 시야 싸움에서 우위를 점할 수 있다. 플레이 방식은 개별 진행형 RPG로 추정되며, 각 플레이어는 자신의 영역을 지키면서 맵 내부에 산발적으로 출현하는 적들을 처치하거나 특정 목표를 완수해야 한다. 맵의 디자인과 구조상으로는 팀플레이보다는 개인전 또는 경쟁형 RPG에 가깝지만, 6인이 동시에 플레이할 수 있도록 배치되어 있어 다인 플레이를 고려한 설계로 보인다. 맵의 난이도는 제작자 정보가 없어 명확하지 않지만, 6명의 플레이어가 각자 독립적으로 진행해야 하므로 초보자가 플레이하기에는 다소 어려울 수 있으며, 보통 이상의 실력을 가진 플레이어에게 적합할 것으로 추정된다. 이 맵을 추천하는 대상은 스타크래프트의 유즈맵을 즐기며, 특히 RPG형 레이드나 개별 진행형 게임을 선호하는 유저들이다. 맵의 구조와 디자인이 복잡하지 않고, 플레이어 수에 맞춰 균형 있게 배치되어 있어 초보자와 숙련자 모두 즐길 수 있을 것으로 보이나, 진행 방식에 따라서는 개인별 스킬과 전략이 중요하게 작용할 것으로 보인다. 또한, 맵의 크기와 구조상으로는 30분 내외의 플레이 타임을 가질 것으로 예상되지만, 정확한 진행 방식과 목표가 공개되지 않아 플레이 시간은 플레이어의 진행 속도에 따라 달라질 수 있다. 이 맵을 플레이하기 전에는 맵의 목표와 진행 방식, 그리고 각 플레이어의 역할 분담을 충분히 숙지하는 것이 중요하다. 맵의 복잡한 구조와 넓은 시야가 제공하는 장점과 단점을 미리 파악하고, 각자의 스타일에 맞게 전략을 세우는 것이 승리의 핵심 요소가 될 것이다. 《Dash 9》 is a user-made map for *StarCraft: Brood War*, featuring a unique RPG-style raid where players each occupy their own separate sections of the map. The name "Dash 9" suggests fast-paced progression and nine major zones or boss battles, as reflected in the internal title and file name. The creator, RoyClan, provided two email addresses—Roy_Gallant@hotmail.com and Roy@USWest—indicating the map was designed with North American West Coast users in mind. Six players start in isolated locations and progress by battling enemies and structures scattered across the map. A massive cross-shaped structure dominates the center, with the word "Dash" repeated along each arm, reinforcing the map’s theme. The high ground around the edges and the intricate interior corridors offer ample space for tactical maneuvering. As players move toward the outskirts, the terrain flattens, providing wide visibility that favors scouting and vision control. The gameplay appears to be an individual RPG format, where each player must defend their area while defeating randomly spawned enemies or completing specific objectives. While the map allows six players to participate simultaneously, its design leans more toward solo or competitive RPG rather than team play. Without official difficulty details, the map likely poses a challenge for beginners, as six players must progress independently, making it better suited for intermediate to advanced players. This map is recommended for *StarCraft* custom map enthusiasts, particularly those who enjoy RPG-style raids or solo progression games. While the layout is not overly complex and balances well for the number of players, success may hinge on individual skill and strategy. The map’s size and structure suggest a playtime of around 30 minutes, though the actual duration depends on how quickly players complete objectives, as the exact goals and progression rules remain undisclosed. Before playing, it’s crucial to fully understand the map’s objectives, progression mechanics, and each player’s role. Familiarizing yourself with the layout’s advantages and drawbacks—such as the wide visibility and complex terrain—and tailoring your strategy accordingly will be key to victory.
침몰 디펜스 대회 (Sunken Defense Competition)
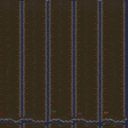
스타크래프트 브루드워의 디펜스 유즈맵 'Sunken Defense Competition'은 이름 그대로 침몰한 방어전을 펼치는 독특한 구조의 맵이다. 맵의 배경은 물속으로, 중앙에 넓은 수중 지역이 펼쳐져 있으며 플레이어는 각자의 본진에서 시작해 적을 제거하고 레벨을 클리어해야 한다. 맵은 5인용으로 설계되어 있으며, 한 명씩 탈락시키며 최후의 1인이 남거나 10단계를 모두 클리어하는 것이 목표로 보인다. 맵의 특징은 '레벨 클리어' 시스템으로, 각 레벨을 통과할 때마다 추가 드론 8기를 획득할 수 있어 자원 관리와 병력 증강이 전략의 핵심이다. 맵의 진행 방식은 다소 공격적으로 느껴질 수 있는데, '한 명씩 통과시켜 탈락시킨다'는 설명이 반복되는 것으로 보아 일종의 경쟁형 디펜스가 아닐까 추정된다. 맵의 구조는 수중 지역을 중심으로 각 플레이어의 본진이 분리되어 있어, 병력 이동이나 방어선 구축 시 지형 활용이 중요할 것으로 보인다. 방어와 공격의 균형을 맞추는 것이 관건이며, 초보자는 물론 숙련자까지 즐길 수 있는 균형 잡힌 밸런스가 특징으로 보인다. 특히 레벨 클리어 보상 시스템은 플레이어에게 끊임없는 동기를 부여하며, 전략적 깊이를 더하는 요소로 작용할 것이다. 이 맵을 플레이하기 전에는 자신의 병력 운용 전략과 방어 태세를Points to check before playing this map include the strategy for clearing each level efficiently and managing the additional drones obtained as rewards. It's also important to understand the terrain and how to utilize the underwater areas for both offense and defense. Familiarity with the map's layout and the flow of each level will significantly enhance the gaming experience and chances of victory.을 미리 점검하는 것이 좋다. 수중 지형의 특성상 병력 이동 속도나 시야가 제한될 수 있으므로, 해당 요소에 대한 사전 학습도 필수적이다. Sunken Defense Competition is a unique defense-type custom map in StarCraft: Brood War, where players engage in underwater combat in a sunken environment. The map features a central water area with isolated player bases, emphasizing strategic resource management and troop reinforcement. Designed for up to 5 players, the objective involves eliminating opponents one by one or completing 10 levels to emerge victorious. A standout feature is the level-clearing system, which rewards players with 8 additional drones upon completion, adding depth to resource allocation and troop strategy. The map's structure encourages both offensive and defensive playstyles, with terrain utilization being crucial for movement and base defense. The balance between aggression and caution is key, making it accessible for both beginners and experienced players. Before diving into the game, players should familiarize themselves with the map's layout, particularly the underwater terrain, and plan their troop movements and defense strategies accordingly. Understanding the flow of each level and the mechanics of level completion will greatly improve performance and enjoyment.
망가진 황무지의 노움 (Mangy Desert Gnomes)
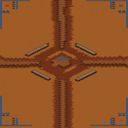
스타크래프트 브루드워의 4인용 밀리 맵 '망가진 황무지의 노움(Mangy Desert Gnomes)'은 황량한 사막 지형을 배경으로 한 경쟁형 맵으로, 플레이어 간Resource 기반 경쟁과 전략적 위치 선정이 핵심인 재미를 제공합니다. 맵의 중앙에는 거대한 오아시스가 자리 잡고 있으며, 각 플레이어의 시작 지점은 사막의 가장자리를 따라 배치되어 있습니다. 맵의 특징은 넓은 개활지와 제한된 mineral field 분포로,Resource 확보를 둘러싼 긴장감이 throughout gameplay 내내 지속됩니다. 시작 지점 주변의 미네랄과 가스 채취장소는 상대방과의 Resource 전쟁에서 유리한 위치를 점하기 위해 빠른 판단과 이동이 요구됩니다. 또한, 맵의 중앙 오아시스는 strategic choke point 역할을 하며,Resource 확보와 동시에 상대방을 견제할 수 있는 요충지가 됩니다. 초반에는Resource 확보와 유닛 생산에 집중해야 하지만, 중반으로 접어들수록 상대방의Resource 채취를 방해하거나 방어선을 구축하는 등 다양한 전략이 요구됩니다. 맵의 균형 잡힌 구조는 초보자와 숙련자 모두에게 공정한 경쟁을 제공하며,Resource 관리와 위치 선정의 중요성이 돋보이는 classic한 4인용 밀리 맵입니다. 특히Resource 확보 경쟁과 함께Resource를 둘러싼 전략적 플레이가 가능한 점이 이 맵의 큰 매력이라 할 수 있습니다. 초보자도 쉽게 접근할 수 있지만,Resource 관리와 위치 선정을 얼마나 잘하느냐에 따라 승패가 갈릴 수 있는 depth 있는 맵입니다. 플레이 전에는Resource 분포와 각 시작 지점의 입구 형태를 반드시 확인하고,Resource 확보를 위한 초반 전략을 미리 세워두는 것이 좋습니다. 또한,중앙 오아시스를 둘러싼 지형이 유닛 이동에 미치는 영향을 숙지하고,Resource 확보와 방어선을 어떻게 구축할 것인지에 대한 계획을 미리 세워두면 보다 수월한 플레이가 가능합니다. StarCraft: Brood War’s four-player melee map "Mangy Desert Gnomes" is a competitive map set in a desolate desert landscape, offering fun through player resource competition and strategic positioning. At its center lies a massive oasis, while each player’s starting position is arranged along the desert’s edge. The map’s defining traits—a vast open area and sparsely distributed mineral fields—keep the tension over resource control alive throughout the entire game. Quick decisions and movement are required to secure the minerals and gas geysers near your starting base, as they become key battlegrounds in the early resource war. The central oasis also serves as a strategic choke point, acting as a vital hub where you can contest resources while pressuring opponents. Early on, focus on gathering resources and producing units, but as the game progresses, you’ll need to disrupt enemy resource gathering or fortify defensive lines with varied tactics. The map’s balanced design ensures fair competition for both beginners and veterans, highlighting the importance of resource management and positioning in this classic four-player melee map. Its standout appeal lies in combining resource competition with strategic plays centered around those resources. While accessible to newcomers, victory hinges on how well you handle resource control and positioning, giving the map real depth. Before playing, check the resource distribution and the shape of each starting base’s entrance, and prepare an early-game strategy for securing resources. Familiarize yourself with how the terrain around the central oasis affects unit movement, and plan ahead for both resource gathering and defensive line construction to make your gameplay smoother.
SuNkEn D oN YoUr OwN
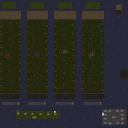
스타크래프트: 브루드워의 유즈맵 'SuNkEn D oN YoUr OwN'은 4인이 참가하는 경쟁형 디펜스 맵으로, 30개의 레벨을 차례로 돌파하며 진행하는 심플하면서도 긴장감 넘치는 구조가 특징입니다. 맵의 전체적인 분위기는 사막 테마로 구성되어 있으며, 각 레벨이 올라갈수록 점점 더 복잡해지는 방어 라인과 적절한 배치의 적 유닛들이 플레이어의 전략적 선택을 요구합니다. 특히, 맵의 중앙에 위치한 넓은 공간은 중앙 교전과 flank(측면 공격)을 유도하는 디자인으로, 초보 플레이어는 수비에 집중하는 기본 전략을, 숙련된 플레이어는 빠른 공세를 펼치며 리드를 잡는 플레이가 가능하도록 설계되었습니다. 레벨 진행 방식은 일종의 '스테이지 클리어' 방식으로, 각 레벨마다 주어지는 제한 시간 내에 모든 적을 제거하거나 특정 조건을 만족해야 다음 레벨로 넘어갈 수 있습니다. 맵 상단에 표시되는 레벨 카운터가 진행도를 직관적으로 알려주며, 실패 시에는 해당 레벨의 재도전이 가능합니다. 방어 포인트는 맵 곳곳에 균등하게 배치되어 있어, 팀원이 한 곳에 몰려 방어하는 '찌르기' 전략을 방지하고 전체적인 균형을 유지할 수 있도록 돕습니다. 또한, 레벨 10을 넘어서면 새로운 적 유닛이나 특수 능력이 추가되는 등, 게임의 난이도가 점차 상승하는 구조를 가지고 있어 플레이어의 적응력을 테스트합니다. 이 맵을 즐기기 위해서는 기본적인 스타크래프트의 조작법과 유닛의 특성을 숙지하고 있어야 하며, 특히 테란의 시즈 탱크, 저그의 뮤탈리스크, 프로토스의 셔틀 등 특정 유닛의 효율적인 활용이 승패를 좌우할 수 있습니다. 또한, 맵의 해상도가 4096x4096으로 매우 넓기 때문에, 미니맵을 자주 확인하며 전략적인 움직임을 연습하는 것이 중요합니다. 추천 대상은 스타크래프트의 다양한 유즈맵을 즐겨 플레이하는 유저들이며, 특히 디펜스와 공격의 밸런스를 맞추며 긴장감을 느낄 수 있는 맵을 선호하는 분들에게 적합할 것입니다. 플레이 전에는 자신의 주력 종족과 선호하는 전략을 미리 준비하고, 맵의 지형과 적 배치 패턴을 숙지하는 것이 좋습니다. SuNkEn D oN YoUr OwN is a competitive defense-style custom map for StarCraft: Brood War designed for up to 4 players. The game challenges players to progress through 30 levels, each with increasing difficulty and complexity, offering a mix of strategic defense and offensive gameplay. The map features a desert theme with a central open area that encourages both direct confrontations and flanking maneuvers, making it suitable for players who enjoy dynamic and tactical decision-making. The gameplay revolves around clearing waves of enemy units within a time limit or fulfilling specific objectives to advance to the next level. A level counter at the top of the screen provides clear progression feedback, and players can retry failed levels. Defense points are evenly distributed across the map to prevent overcrowding and promote balanced team play. From level 10 onwards, new enemy units and special abilities are introduced, gradually ramping up the challenge and testing players' adaptability and strategic depth. To enjoy this map, players should have a solid understanding of StarCraft's unit mechanics and basic controls. Efficient use of key units like Terran Siege Tanks, Zerg Mutalisks, or Protoss Shuttles can significantly influence the outcome. Given the large 4096x4096 map size, frequent use of the minimap is essential for tracking enemy movements and coordinating team strategies. This map is recommended for StarCraft custom map enthusiasts, especially those who prefer defense-based gameplay with a balance of offensive pressure. Before playing, it’s advisable to prepare your main race, preferred strategy, and familiarize yourself with the terrain and enemy patterns to maximize your performance.
구매자와 판매자 (Buyers And Sellers)
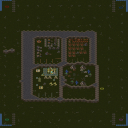
스타크래프트 브루드워 유즈맵 〈구매자와 판매자(Buyers And Sellers)〉는 이름 그대로 유닛을 사고파는 경제 시스템을 핵심 메커니즘으로 삼은 독특한 디펜스 장르의 맵입니다. 맵의 목표는 '판매자(Sellers)'와 '구매자(Buyers)' 두 진영으로 나뉘어 경쟁하는 방식으로 진행되며, 판매자는 유닛을 생산해 돈을 벌어들이고, 구매자는 그 유닛을 구매해 다른 구매자들과 전투를 벌이는 구조입니다. 맵 중앙에는 넓은 중앙 지역이 펼쳐져 있으며, 여기에서 유닛 거래가 활발히 일어납니다. 판매자들은 유닛을 생산해 중앙의 거래소로 보내 돈을 벌고, 구매자들은 돈을 모아 유닛을 구매한 뒤 상대 구매자 진영을 공격하는 방식으로 게임이 전개됩니다. 맵의 지형은 사막 타일셋을 기반으로 하며, 곳곳에 배치된Resource Miniature(자원 미니어처)나 구조물이 플레이어의 전략적 선택에 영향을 미치는 요소로 보입니다. 특히, 유닛의 종류와 가격, 생산 속도, 전투력 등은 맵의 밸런스를 좌우할 핵심 변수로 작용할 텐데, 이 부분은 맵 제작자의 밸런싱에 따라 크게 달라질 수 있습니다. 플레이어는 각자 맡은 역할에 맞게 자원을 효율적으로 관리하고 전략을 세워야 하며, 특히 중앙 거래소의 통제권을 장악하는 것이 승리의 관건이 될 것입니다. 이 맵은 단순히 유닛을 사고파는 것뿐만 아니라, 모든 플레이어가 동시에 경쟁하는 동시다발적 전투가 특징으로, 전략적 사고와 자원 관리가 요구됩니다. 초보자는 물론, 경제 시스템과 전략적 타이밍을 즐기는 플레이어들에게도 흥미로운 경험을 제공할 것입니다. 단, 유닛의 종류와 가격, 전투력 등이 맵 내부에 숨겨져 있거나 조정 가능한 변수로 존재할 수 있으니, 게임을 시작하기 전에 맵 설명이나 제작자 노트를 꼼꼼히 확인하는 것이 좋습니다. 또한, 7인 플레이를 지원하는 만큼, 팀전 구도보다는 다수의 개인전 혹은 연합전을 전제로 한 플레이 스타일이 될 가능성이 높습니다. Buyers And Sellers is a unique defense-style custom map from StarCraft: Brood War that revolves around an economic system centered on buying and selling units. The game splits players into two factions: Sellers, who produce units to earn money, and Buyers, who purchase units to battle other Buyers. A wide central area serves as the hub for unit trading, where Sellers generate units and send them to the marketplace to accumulate funds, while Buyers pool their resources to buy units and attack rival Buyers. The map uses a desert tileset, with Resource Miniature and structures scattered across the terrain, influencing players' strategic decisions. Key variables such as unit types, prices, production speed, and combat effectiveness likely depend on the map creator's balancing, making economic management and strategy crucial. Players must efficiently manage resources and tactics, with control over the central marketplace potentially being decisive for victory. The game features simultaneous multiplayer combat, requiring strategic thinking and resource management. It offers an engaging experience for both beginners and players who enjoy economic systems and strategic timing. However, since unit types, prices, and combat stats may be hidden or adjustable, checking the map description or creator notes before starting is advised. With support for seven players, the gameplay likely emphasizes individual competition or coalition-based strategies rather than strict team play.
최근 등록된 맵
새로 추가된 파일과 버전을 확인하세요.
침몰 디펜스 대회 (Sunken Defense Competition)
스타크래프트 브루드워의 디펜스 유즈맵 'Sunken Defense Competition'은 이름 그대로 침몰한 방어전을 펼치는 독특한 구조의 맵이다. 맵의 배경은 물속으로, 중앙에 넓은 수중 지역이 펼쳐져 있으며 플레이어는 각자의 본진에서 시작해 적을 제거하고 레벨을 클리어해야 한다. 맵은 5인용으로 설계되어 있으며, 한 명씩 탈락시키며 최후의 1인이 남거나 10단계를 모두 클리어하는 것이 목표로 보인다. 맵의 특징은 '레벨 클리어' 시스템으로, 각 레벨을 통과할 때마다 추가 드론 8기를 획득할 수 있어 자원 관리와 병력 증강이 전략의 핵심이다. 맵의 진행 방식은 다소 공격적으로 느껴질 수 있는데, '한 명씩 통과시켜 탈락시킨다'는 설명이 반복되는 것으로 보아 일종의 경쟁형 디펜스가 아닐까 추정된다. 맵의 구조는 수중 지역을 중심으로 각 플레이어의 본진이 분리되어 있어, 병력 이동이나 방어선 구축 시 지형 활용이 중요할 것으로 보인다. 방어와 공격의 균형을 맞추는 것이 관건이며, 초보자는 물론 숙련자까지 즐길 수 있는 균형 잡힌 밸런스가 특징으로 보인다. 특히 레벨 클리어 보상 시스템은 플레이어에게 끊임없는 동기를 부여하며, 전략적 깊이를 더하는 요소로 작용할 것이다. 이 맵을 플레이하기 전에는 자신의 병력 운용 전략과 방어 태세를Points to check before playing this map include the strategy for clearing each level efficiently and managing the additional drones obtained as rewards. It's also important to understand the terrain and how to utilize the underwater areas for both offense and defense. Familiarity with the map's layout and the flow of each level will significantly enhance the gaming experience and chances of victory.을 미리 점검하는 것이 좋다. 수중 지형의 특성상 병력 이동 속도나 시야가 제한될 수 있으므로, 해당 요소에 대한 사전 학습도 필수적이다. Sunken Defense Competition is a unique defense-type custom map in StarCraft: Brood War, where players engage in underwater combat in a sunken environment. The map features a central water area with isolated player bases, emphasizing strategic resource management and troop reinforcement. Designed for up to 5 players, the objective involves eliminating opponents one by one or completing 10 levels to emerge victorious. A standout feature is the level-clearing system, which rewards players with 8 additional drones upon completion, adding depth to resource allocation and troop strategy. The map's structure encourages both offensive and defensive playstyles, with terrain utilization being crucial for movement and base defense. The balance between aggression and caution is key, making it accessible for both beginners and experienced players. Before diving into the game, players should familiarize themselves with the map's layout, particularly the underwater terrain, and plan their troop movements and defense strategies accordingly. Understanding the flow of each level and the mechanics of level completion will greatly improve performance and enjoyment.
침몰 디펜스 대회 (Sunken Defense Competition)
스타크래프트 브루드워의 유즈맵 장르 중 디펜스 장르에 속하는 ‘Sunken Defense Competition’은 침수된 전투 공간에서 펼쳐지는 흥미로운 방어형 게임으로, 최대 5명의 플레이어가 순차적으로 적의 공격을 막아내며 경쟁하는 구조로 구성되어 있다. 맵의 핵심 메커니즘은 ‘한 명만 통과시켜라’라는 간단한 규칙에 기반하며, 각 플레이어는 자신의 방어선을 구축하고 적 유닛을 섬멸해 다음 레벨로 넘어가야 한다. 맵 내부 설명에 따르면, 레벨을 완료할 때마다 8기의 추가 드론을 획득할 수 있으며, 10레벨을 먼저 클리어하거나 마지막까지 살아남은 플레이어가 승리하는 것으로 보인다. 해상도 4096x4096의 넓은 맵에서 펼쳐지는 전투는 전략적 배치와Micro 컨트롤이 요구되며, 특히 좁은 통로나 다리 지역에서의 전투가 승패를 좌우할 가능성이 높아 보인다. 맵의 분위기는 황무지 타일셋을 활용한 어두운 색감으로 침울한 바다 밑바닥을 연상시키며, 이는 디펜스 게임의 긴장감을 한층 더해준다. 초보자도 쉽게 진입할 수 있는 단순한 목표와 규칙이지만, 차근차근 레벨을 올라가며 전략을 다듬어야만 높은 레벨에서 승리할 수 있다. 특히 타워 배치와 자원 관리, 유닛 조합에 따라 난이도가 급변할 수 있어, 플레이어의 적응력이 중요하다. 추천 대상은 스타크래프트 유즈맵을 좋아하는 모든 유저로, 디펜스 장르에 익숙하지 않은 경우에도 규칙을 익히면 재미있게 플레이할 수 있다. 다만, 맵의 밸런스가 제작자의 의도대로 맞춰져 있는지는 확인되지 않았으므로, 플레이 전에는 레벨당 적의 구성과 배치에 대한 사전 조사나 시연 영상을 보는 것이 좋다. 플레이 전 확인 포인트는 자신의 방어선 구축 위치, 레벨 진행 시 드론 획득 타이밍, 그리고 적의 패턴 변화에 대응할 수 있는 유연성이다. 이 맵은 좁은 공간에서 벌어지는 치열한 전투를 선호하는 유저들에게 특히 어울릴 것으로 예상된다. This StarCraft: Brood War custom map, titled ‘Sunken Defense Competition’, falls under the defense genre, offering a unique underwater battlefield where up to five players compete to survive by eliminating enemies and advancing through levels. The core gameplay revolves around the simple yet strategic rule of allowing only one player to pass through while defending your position. Each player builds their own defense line, and upon completing a level, they receive eight additional drones, which can be crucial for progressing further. The map’s large 4096x4096 resolution provides ample space for tactical positioning, though tight corridors and bridges will likely become critical choke points during intense battles. The dark, murky aesthetic created by the wasteland tileset enhances the oppressive atmosphere of the sunken environment, making every encounter feel more immersive. While the rules are straightforward, mastering the game requires careful planning of tower placements, resource management, and unit combinations, especially as the difficulty ramps up in later levels. Beginners can easily start playing due to the simple objectives, but long-term success depends on adapting strategies to counter increasingly complex enemy patterns. This map is ideal for fans of StarCraft custom maps and defense games who enjoy high-stakes, close-quarters combat. Before diving in, players should check the enemy composition and layout per level or watch gameplay demonstrations to understand the balancing mechanics, as the difficulty curve may vary based on individual playstyles. Key points to verify before playing include optimal defense line positioning, drone acquisition timing, and adaptability to enemy strategies.
SuNkEn D oN YoUr OwN
스타크래프트: 브루드워의 유즈맵 'SuNkEn D oN YoUr OwN'은 4인이 참가하는 경쟁형 디펜스 맵으로, 30개의 레벨을 차례로 돌파하며 진행하는 심플하면서도 긴장감 넘치는 구조가 특징입니다. 맵의 전체적인 분위기는 사막 테마로 구성되어 있으며, 각 레벨이 올라갈수록 점점 더 복잡해지는 방어 라인과 적절한 배치의 적 유닛들이 플레이어의 전략적 선택을 요구합니다. 특히, 맵의 중앙에 위치한 넓은 공간은 중앙 교전과 flank(측면 공격)을 유도하는 디자인으로, 초보 플레이어는 수비에 집중하는 기본 전략을, 숙련된 플레이어는 빠른 공세를 펼치며 리드를 잡는 플레이가 가능하도록 설계되었습니다. 레벨 진행 방식은 일종의 '스테이지 클리어' 방식으로, 각 레벨마다 주어지는 제한 시간 내에 모든 적을 제거하거나 특정 조건을 만족해야 다음 레벨로 넘어갈 수 있습니다. 맵 상단에 표시되는 레벨 카운터가 진행도를 직관적으로 알려주며, 실패 시에는 해당 레벨의 재도전이 가능합니다. 방어 포인트는 맵 곳곳에 균등하게 배치되어 있어, 팀원이 한 곳에 몰려 방어하는 '찌르기' 전략을 방지하고 전체적인 균형을 유지할 수 있도록 돕습니다. 또한, 레벨 10을 넘어서면 새로운 적 유닛이나 특수 능력이 추가되는 등, 게임의 난이도가 점차 상승하는 구조를 가지고 있어 플레이어의 적응력을 테스트합니다. 이 맵을 즐기기 위해서는 기본적인 스타크래프트의 조작법과 유닛의 특성을 숙지하고 있어야 하며, 특히 테란의 시즈 탱크, 저그의 뮤탈리스크, 프로토스의 셔틀 등 특정 유닛의 효율적인 활용이 승패를 좌우할 수 있습니다. 또한, 맵의 해상도가 4096x4096으로 매우 넓기 때문에, 미니맵을 자주 확인하며 전략적인 움직임을 연습하는 것이 중요합니다. 추천 대상은 스타크래프트의 다양한 유즈맵을 즐겨 플레이하는 유저들이며, 특히 디펜스와 공격의 밸런스를 맞추며 긴장감을 느낄 수 있는 맵을 선호하는 분들에게 적합할 것입니다. 플레이 전에는 자신의 주력 종족과 선호하는 전략을 미리 준비하고, 맵의 지형과 적 배치 패턴을 숙지하는 것이 좋습니다. SuNkEn D oN YoUr OwN is a competitive defense-style custom map for StarCraft: Brood War designed for up to 4 players. The game challenges players to progress through 30 levels, each with increasing difficulty and complexity, offering a mix of strategic defense and offensive gameplay. The map features a desert theme with a central open area that encourages both direct confrontations and flanking maneuvers, making it suitable for players who enjoy dynamic and tactical decision-making. The gameplay revolves around clearing waves of enemy units within a time limit or fulfilling specific objectives to advance to the next level. A level counter at the top of the screen provides clear progression feedback, and players can retry failed levels. Defense points are evenly distributed across the map to prevent overcrowding and promote balanced team play. From level 10 onwards, new enemy units and special abilities are introduced, gradually ramping up the challenge and testing players' adaptability and strategic depth. To enjoy this map, players should have a solid understanding of StarCraft's unit mechanics and basic controls. Efficient use of key units like Terran Siege Tanks, Zerg Mutalisks, or Protoss Shuttles can significantly influence the outcome. Given the large 4096x4096 map size, frequent use of the minimap is essential for tracking enemy movements and coordinating team strategies. This map is recommended for StarCraft custom map enthusiasts, especially those who prefer defense-based gameplay with a balance of offensive pressure. Before playing, it’s advisable to prepare your main race, preferred strategy, and familiarize yourself with the terrain and enemy patterns to maximize your performance.
저격 마을 (Sniper Town)
스타크래프트 브루드워 유즈맵 <Sniper Town>은 저격이 메인 콘텐츠인 4인용 디펜스 맵입니다. 맵 곳곳에 배치된 저격수 포지션에서 적 유닛을 조준 사격하는 방식으로 진행되며, 플레이어는 각자의 영역에서 최대한 많은 적을 처치해야 합니다. 맵 중앙에는 넓은 개활지가 펼쳐져 있어 저격 각도가 다양하게 확보되며, 건물이나 언덕 지형을 활용한 엄폐와 기습이 핵심 전략이 됩니다. 내부 맵 설명에 'Sniping just got a whole lot better... Can you dominate Sniper Town?'라는 문구가 있는 것으로 보아, 저격의 재미와 경쟁을 중시한 디자인으로 보입니다. 플레이어의 조준 실력과 패턴 읽기가 승부를 가를 것으로 예상되며, 적의 대량 진출 타이밍이나 패턴을 예측해 미리 자리를 잡는 것이 중요합니다. 맵의 황혼 타일셋 덕분에 분위기가 차분하면서도 전장 feel을 잘 살린 것이 특징입니다. 초보자는 저격 실력이 떨어질 수 있어 어려울 수 있지만, 익숙해지면 저격의 긴장감과 재미를 동시에 느낄 수 있는 맵입니다. 적절한 엄폐물과 시야 확보가 가능한지, 맵을 플레이하기 전 미리 시야를 체크해 보는 것이 좋습니다. 또한, 적의 움직임 패턴을 분석해 공격 타이밍을 잡는 연습도 필요합니다. 저격의 묘미를 즐기고 싶은 플레이어들에게 강력히 추천합니다. Sniper Town is a 4-player defense custom map in StarCraft: Brood War where sniping takes center stage. Players engage in long-range combat from designated sniper positions scattered across the map, with the goal of eliminating as many enemy units as possible within their zones. The central area features open terrain, allowing for diverse sniping angles, while buildings and elevated terrain offer cover for strategic positioning. The internal map description—"Sniping just got a whole lot better... Can you dominate Sniper Town?"—suggests a design focused on the thrill and precision of sniping. Success hinges on players' aiming skills and their ability to predict enemy movement patterns, with timing and positioning being critical. The Twilight tileset enhances the map's ambiance, blending a calm atmosphere with a battle-ready feel. While beginners may find the sniping mechanics challenging, those who adapt quickly will appreciate the tension and excitement of long-range combat. It's advisable to scout the map beforehand to identify key cover points and optimal sniper vantage spots, as well as to study enemy movement patterns to anticipate attack waves. This map is highly recommended for players seeking to experience the art of sniping in StarCraft: Brood War.
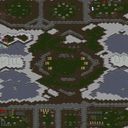
넥서스 킬 2005 익스트림 2X (NexusKill 2005 Extreme 2X)
스타크래프트 브루드워의 UMS(유즈맵) 장르로, 넥서스 파괴를 주 목표로 삼는 독특한 콘셉트의 맵인 <넥서스 킬 2005 익스트림 2X>는 플레이어들에게 전략적 긴장감을 제공합니다. 맵의 중앙에서 두 개의 거대한 넥서스가 대치하는 구조로, 각 플레이어는 자신의 본진을 지키며 상대방의 넥서스를 먼저 파괴하는 것이 목표로 보입니다. 맵 곳곳에 배치된 미네랄과 가스 지역을 활용해 자원을 확보하고, 병력을 생산해 상대방을 압박하는 동시에 방어선을 구축해야 합니다. 특히 익스트림 2X 버전은 맵의 규모가 4096x4096으로 매우 크며, 타일 단위가 128x128로 디테일한 지형 디자인이 특징입니다. 플랫폼 타일셋을 사용해 깔끔한 시각적 구성을 이루고 있으며, 맵 곳곳에 배치된 지형적 요소가 전략적 플레이를 유도합니다. 이 맵은 기본적으로 6인 플레이를 상정하고 제작된 것으로 추정되며, 각 플레이어는 개별적인 본진에서 시작해 자원을 채취하고 병력을 생산합니다. 맵의 중앙부는 넓은 평야로 이루어져 있어 대규모 병력 교전이 벌어질 수 있는 공간을 제공하며, 주변부는 언덕과 협곡으로 둘러싸여 있어 방어와 기습에 유리한 지형을 제공합니다. 맵의 제목과 설명에서 느껴지는 'Are U Ready?'라는 메시지는 플레이어들에게 도전 정신을 자극하며, 익스트림 버전답게 빠른 판 скоро와 치열한 전투가 예상됩니다. 이 맵은 주로 실력 있는 플레이어들이 즐기는 경쟁형 UMS로, 전략적 사고와 빠른 판단력이 요구됩니다. 초보자들은 넥서스의 위치와 맵의 구조를 숙지한 후, 자원 관리와 병력 조합을 연습하는 것이 좋습니다. 또한, 상대방의 전략에 대응하기 위해 방어 시설과 탐지기 배치도 중요합니다. 맵의 난이도는 보통 수준으로, 기본적인 스타크래프트 전략을 익힌 플레이어라면 도전해 볼 만한 가치가 있습니다. 플레이 전에는 맵의 지형적 특징과 자원 분포를 미리 확인하고, 각 플레이어의 시작 위치와 주요 교전 지역을 숙지하는 것이 중요합니다. 또한, 병력의 조합과 업그레이드 전략을 사전에 계획해 두면 더 효율적인 플레이가 가능합니다. 이 맵은 단순히 넥서스를 파괴하는 것에서 그치는 것이 아니라, 상대방의 전략을 읽고 counter를 치는 지적 전투의 장으로 느껴질 것입니다. NexusKill2005Extreme2X is a unique UMS (User-Made Scenario) map for StarCraft: Brood War, featuring a core gameplay loop centered around destroying the opponent's Nexus. The map presents a symmetrical layout with two massive Nexuses positioned in the center, challenging players to defend their own while aggressively targeting their rival's base. The large 4096x4096 map, with a tile size of 128x128 and a platform tileset, offers a clean yet strategic design that emphasizes terrain control and resource management. Designed for up to six players, the map likely encourages competitive play where each participant starts in an isolated base, gathering resources and producing units to outmaneuver opponents. The central plain area serves as a high-traffic combat zone, while the surrounding hills and ravines provide tactical advantages for defense and ambushes. The title and description's 'Are U Ready?' tagline hints at a high-stakes, fast-paced experience tailored for experienced players seeking a challenge. This extreme version demands sharp strategic thinking and quick decision-making, making it ideal for players familiar with StarCraft's core mechanics. Beginners may find it helpful to study the map's terrain and resource distribution before diving into matches, focusing on resource gathering, unit compositions, and defensive setups. The difficulty is estimated to be moderate, requiring players to adapt their strategies dynamically to counter opponents' moves. Before playing, it's crucial to analyze the map's key features, such as starting positions, resource clusters, and potential choke points. Planning unit compositions and upgrades in advance can significantly enhance performance. Beyond merely destroying the Nexus, the map transforms into a cerebral battle of wits, where reading the opponent's strategy and executing the right counterplay become the keys to victory.
포켓몬 캐쳐스 2 GS2 (Pokémon Catchers2 GS2)
포켓몬스터를 모티브로 한 스타크래프트 브루드워 유즈맵 「포켓몬 캐쳐스 2 GS2(Pokémon Catchers2 GS2)」는 2~6명이 참가하는 경쟁형 디펜스 맵으로, 상대 팀보다 더 많은 포켓몬을 잡는 것이 목표다. 맵은 사막 테마로 꾸며졌으며, 넓은 평야와 흩어져 있는 바위 지형이 특징이다. 플레이어는 시작 지점에서 각자 포켓몬을 획득할 수 있는 영역을 확보한 뒤, 맵 곳곳에 배치된 「포켓몬 스폿」을 차지해 포켓몬을 획득하거나 방어해야 한다. 스폿은 중앙의 넓은 평야와 언덕, 협곡 등에 위치해 있으며, 방어에 성공하면 포켓몬을 지속적으로 획득할 수 있다. 상대방의 스폿을 점령하거나 방해하는 전략도 중요하며, 맵의 지형을 활용한 진입로 통제도 핵심이다. 공격과 방어의 균형을 맞추는 것이 중요하며, 초반에는 스폿 확보에 주력하고 중반부터는 상대방을 견제하거나 방어를 강화하는 플레이가 필요하다. 맵의 규모가 크기 때문에 빠른 이동과 효율적인 자원 관리가 관건이다. 특히 2인 팀플레이 시에는 역할 분담을 통해 더 효과적인 전략을 구사할 수 있으며, 4~6인 풀방에서는 동맹과 배신, 또는 연합 플레이가 게임의 재미를 더한다. 맵의 특성상 포켓몬의 종류나 능력은 직접적으로 등장하지 않지만, 「잡는 것」에 집중된 간단한 목표 덕분에 진입 장벽이 낮고 누구나 즐길 수 있다. 다만, 상대방을 방해하는 능력이 제한적이기 때문에, 방어와 스폿 확보에 더욱 신경 써야 한다. 이 맵은 스타크래프트의Classic UMS 스타일을 계승한 유즈맵으로, 포켓몬이라는 친숙한 소재를 활용해 개성 있는 재미를 제공한다. 맵의 구조상 한 곳에 모여 있는 것보다 넓게 퍼지는 플레이가 유리하며, 중앙 지역을 장악하는 것이 게임의 흐름을 좌우할 수 있다. 초보자가 플레이하기에는 맵의 규모가 다소 크고 전략적 요소가 복잡할 수 있지만, 반복 플레이를 통해 지형과 스폿의 위치, 상대의 움직임을 익히면 점차 실력이 향상될 것이다. 무엇보다도, 팀원과의 조율과 소통이 승리의 열쇠가 될 것이다. 「Pokémon Catchers 2 GS2」 is a competitive defense-style custom map for *StarCraft: Brood War* inspired by Pokémon, where 2 to 6 players compete to catch more Pokémon than the opposing team. The map features a desert theme with wide plains and scattered rocky terrain. Players secure their starting areas to acquire Pokémon, then capture and defend "Pokémon Spots" scattered across the map to collect Pokémon continuously. Spots are located in central plains, hills, and canyons, and controlling them is key to sustained gains. Strategically capturing or disrupting enemy spots is crucial, as is leveraging the terrain to control access routes. Balancing offense and defense is essential—prioritize securing spots early, then shift to pressuring opponents or reinforcing defenses mid-game. The map’s large scale demands quick movement and efficient resource management. In 2-player team games, role specialization enhances strategy, while 4-to-6-player full matches add layers of alliances, betrayals, and coalition play for deeper engagement. Though Pokémon types and abilities aren’t directly featured, the simple objective of "catching" keeps the entry barrier low for all players. However, limited disruptive tools mean defense and spot control should be the primary focus. As a classic UMS-style map, it inherits *StarCraft*’s legacy while offering unique fun through Pokémon. Spreading out and controlling central areas proves more advantageous than clustering, with dominance in the midfield shaping the game’s flow. The map’s size and strategic depth may overwhelm beginners, but repeated play helps players learn terrain, spot locations, and opponent behaviors to steadily improve. Above all, coordination and communication with teammates will be the deciding factor in victory.
망가진 황무지의 노움 (Mangy Desert Gnomes)
스타크래프트 브루드워의 4인용 밀리 맵 '망가진 황무지의 노움(Mangy Desert Gnomes)'은 황량한 사막 지형을 배경으로 한 경쟁형 맵으로, 플레이어 간Resource 기반 경쟁과 전략적 위치 선정이 핵심인 재미를 제공합니다. 맵의 중앙에는 거대한 오아시스가 자리 잡고 있으며, 각 플레이어의 시작 지점은 사막의 가장자리를 따라 배치되어 있습니다. 맵의 특징은 넓은 개활지와 제한된 mineral field 분포로,Resource 확보를 둘러싼 긴장감이 throughout gameplay 내내 지속됩니다. 시작 지점 주변의 미네랄과 가스 채취장소는 상대방과의 Resource 전쟁에서 유리한 위치를 점하기 위해 빠른 판단과 이동이 요구됩니다. 또한, 맵의 중앙 오아시스는 strategic choke point 역할을 하며,Resource 확보와 동시에 상대방을 견제할 수 있는 요충지가 됩니다. 초반에는Resource 확보와 유닛 생산에 집중해야 하지만, 중반으로 접어들수록 상대방의Resource 채취를 방해하거나 방어선을 구축하는 등 다양한 전략이 요구됩니다. 맵의 균형 잡힌 구조는 초보자와 숙련자 모두에게 공정한 경쟁을 제공하며,Resource 관리와 위치 선정의 중요성이 돋보이는 classic한 4인용 밀리 맵입니다. 특히Resource 확보 경쟁과 함께Resource를 둘러싼 전략적 플레이가 가능한 점이 이 맵의 큰 매력이라 할 수 있습니다. 초보자도 쉽게 접근할 수 있지만,Resource 관리와 위치 선정을 얼마나 잘하느냐에 따라 승패가 갈릴 수 있는 depth 있는 맵입니다. 플레이 전에는Resource 분포와 각 시작 지점의 입구 형태를 반드시 확인하고,Resource 확보를 위한 초반 전략을 미리 세워두는 것이 좋습니다. 또한,중앙 오아시스를 둘러싼 지형이 유닛 이동에 미치는 영향을 숙지하고,Resource 확보와 방어선을 어떻게 구축할 것인지에 대한 계획을 미리 세워두면 보다 수월한 플레이가 가능합니다. StarCraft: Brood War’s four-player melee map "Mangy Desert Gnomes" is a competitive map set in a desolate desert landscape, offering fun through player resource competition and strategic positioning. At its center lies a massive oasis, while each player’s starting position is arranged along the desert’s edge. The map’s defining traits—a vast open area and sparsely distributed mineral fields—keep the tension over resource control alive throughout the entire game. Quick decisions and movement are required to secure the minerals and gas geysers near your starting base, as they become key battlegrounds in the early resource war. The central oasis also serves as a strategic choke point, acting as a vital hub where you can contest resources while pressuring opponents. Early on, focus on gathering resources and producing units, but as the game progresses, you’ll need to disrupt enemy resource gathering or fortify defensive lines with varied tactics. The map’s balanced design ensures fair competition for both beginners and veterans, highlighting the importance of resource management and positioning in this classic four-player melee map. Its standout appeal lies in combining resource competition with strategic plays centered around those resources. While accessible to newcomers, victory hinges on how well you handle resource control and positioning, giving the map real depth. Before playing, check the resource distribution and the shape of each starting base’s entrance, and prepare an early-game strategy for securing resources. Familiarize yourself with how the terrain around the central oasis affects unit movement, and plan ahead for both resource gathering and defensive line construction to make your gameplay smoother.
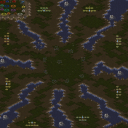
커비 매드니스 eXe- (Kirby Madness eXe-)
스타크래프트: 브루드워의 대표적인 유즈맵 중 하나인 '커비 매드니스 eXe-'는 8인의 플레이어가 참여하는 경쟁형 디펜스 맵으로, 맵 전체가 사막 타일셋으로 구성되어 있으며 중앙에 거대한 거대 기계형 건물이 자리 잡고 있다. 맵의 구조는 동심원 형태로 배치된 방어 건물과 자원 채취 지역, serta 중간 지점의 전투 지역으로 나뉘며, 플레이어는 각자의 기지에서 자원을 수집하고 방어 타워를 건설해 적의 공격을 막아내야 한다. 맵 중앙의 거대 기계는 일정 주기마다 공격 패턴을 발동하며, 이를 저지하지 못할 경우 맵 전체가 파괴되면서 패배하게 된다. 방어 건물의 종류는 다양하며, 각 플레이어는 개인의 전략에 따라 타워 배치를 최적화할 수 있다. 맵의 특징은 빠른 진행과Resource management(자원 관리)의 중요성으로, 초반 자원 확보가 승패를 좌우할 수 있다. 또한, 중앙 기계의 공격 패턴을 예측하고 대응하는 것이 핵심 전략 요소로 꼽힌다. 추천 대상은 스타크래프트 유즈맵을 즐기는 플레이어, 특히 디펜스와 전략적 자원 관리에 관심이 있는 유저들에게 적합하며, 팀 플레이보다는 각자 독립적인 플레이가 요구되는 맵 구조로 인해 경쟁심과 전략적 사고를 동시에 요구한다. 플레이 전 확인해야 할 포인트는 중앙 기계의 공격 주기, 방어 타워의 배치 가능 위치, 그리고 자원 채취 지역 간의 이동 경로다. 이 맵은 특히 방어 건물의 효율적인 배치와 자원 수집의 균형이 잘 맞춰져야만 안정적인 방어가 가능하다는 점을 기억해야 한다. StarCraft: Brood War’s classic custom map, *Kirby Madness eXe-*, is a competitive defense map for eight players set entirely in a desert tileset, featuring a massive mechanical structure at its center. The map is divided into concentric rings of defensive buildings, resource-gathering zones, and midfield battle areas. Players must harvest resources from their bases, construct defensive towers, and fend off enemy assaults while preventing the central machine from activating its periodic attack patterns—failure to stop it results in total map destruction and defeat. The map offers a variety of defensive structures, allowing players to optimize tower placements based on their strategies. Its fast-paced gameplay and heavy emphasis on resource management mean early resource control can decide the match. Predicting and countering the central machine’s attack patterns is also a key strategic element. Ideal for players who enjoy Brood War custom maps—especially those interested in defense and strategic resource handling—the map demands independent play rather than team coordination, testing both competitive drive and tactical thinking. Before jumping in, check the central machine’s attack cycle, valid tower placement spots, and the best routes between resource zones. Success hinges on balancing efficient tower placement with steady resource collection to maintain stable defenses.
맵 선택 가이드
태그는 맵의 핵심 특징을 빠르게 설명하지만 제작 버전마다 규칙이 다를 수 있습니다. 상세 설명에서 권장 인원, 난이도, 플레이 시간과 버전을 함께 확인한 뒤 다운로드하세요.