
견제 스타크래프트 맵 모음
'견제' 태그가 등록된 맵을 모았습니다. 장르 하나로 찾기 어려운 플레이 방식, 난이도와 특징을 중심으로 인기 맵과 최신 맵을 비교해 보세요.
- 등록 맵
- 2개
- 누적 다운로드
- 0
- 누적 조회
- 113
인기 맵
다운로드와 조회 반응이 높은 맵입니다.
![[UED] The Wall (더 월) 맵 미리보기](https://cdn-star-data.huzy.net/thumbnail_aa64c918450647489d803633e40d5c78.jpg)
[UED] The Wall (더 월)
스타크래프트 브루드워의 유즈맵 《[UED] The Wall》은 밀리 기반의 맵이지만, 그 이름처럼 거대한 벽을 사이에 두고 벌어지는 독특한 대결 구조를 지닌 맵입니다. 맵 중앙을 가로지르는 거대한 벽이 양 진영을 분리하고 있으며, 이 벽은 일방 통행이 가능한 좁은 통로 여러 개로만 통과할 수 있어 전략적인 대결을 유도합니다. 벽 너머에서 상대방의 기지를 확인할 수 있지만, 직접 공격할 수 있는 길은 제한되어 있어 견제와 확장의 중요성이 부각됩니다. 벽의 좁은 통로를 통제하는 플레이어는 상대방의 자원 채취와 expansion을 방해할 수 있으며, 반대로 통로를 잘 방어하지 못하면 일방적으로 밀리는 상황이 발생할 수 있습니다. 이 맵은 8명의 플레이어가 1대 1로 대결하는 구조를 기본으로 하며, 벽을 사이에 두고 벌어지는 견제와 방어, expansion 싸움으로 긴장감을 유지합니다. 벽의 통로를 두고 벌어지는 스나이핑이나 러시, 그리고 빠른 멀티 테스팅 등이 주요 전략 포인트입니다. 또한, 벽 너머의 시야를 확보하기 위해 오버로드나 스캔을 적극 활용하는 것이 관건이며, 통로의 좁은 지형 덕분에 치고 빠지기 전술이나 방어 타워의 효율성이 매우 높아집니다. 맵의 중앙 통로가 좁고 길게 뻗어 있어 테란의 벙커링이나 프로토스의 포톤 캐논 방어망 구축이 용이하다는 점도 특징입니다. 《[UED] The Wall》은 밀리 기반의 맵이지만, 벽을 사이에 둔 독특한 구조로 인해 밀리만의 전략과 유즈맵만의 재미를 동시에 느낄 수 있는 작품입니다. 벽의 통로를 두고 벌어지는 심리전과Resource Management가 핵심이므로, 좁은 길목에서의 싸움에 익숙한 플레이어라면 더욱 즐겁게 플레이할 수 있을 것입니다. 또한, 벽 너머의 시야 싸움과 빠른 판단이 요구되므로, 단순히 자원과 병력만 모으는 것이 아니라 적절한 타이밍에 공격을 감행하거나 방어를 굳히는 전략적 선택이 중요합니다. 벽을 넘는 것이 쉽지 않은 만큼, 초보보다는 어느 정도 경험이 있는 플레이어에게 더욱 추천할 수 있는 맵입니다. StarCraft: Brood War's custom map *<UED> The Wall>* is a melee-based map, but as its name suggests, it features a unique battle structure centered around a massive wall that divides the two sides. A giant wall runs through the center of the map, separating both bases, and the only way to pass through is via several narrow one-way passages, forcing strategic confrontations. While players can see the enemy base beyond the wall, direct attacks are limited, emphasizing the importance of harassment and expansion. Controlling the narrow passages allows players to disrupt enemy resource gathering and expansions, while failing to defend them can lead to one-sided defeats. The map is primarily designed for eight players battling in 1v1 matches, maintaining tension through wall-based harassment, defense, and expansion struggles. Key strategic points include sniping, rushes, and rapid multi-base testing through the wall’s passages. Securing vision beyond the wall using Overlords or scans is crucial, and the narrow terrain makes hit-and-run tactics or defensive towers highly effective. The map’s long, narrow central pathways also make it easy for Terran to deploy bunker rushes or for Protoss to establish photon cannon defenses. Though *<UED> The Wall>* is a melee-based map, its unique wall structure blends traditional melee strategies with custom map-specific fun. The core of the gameplay revolves around psychological warfare and resource management through the wall’s passages, making it especially enjoyable for players familiar with narrow-path combat. Beyond just gathering resources and amassing forces, success requires quick decision-making—knowing when to attack or when to fortify defenses. Since crossing the wall isn’t easy, this map is better suited for players with some experience rather than beginners.
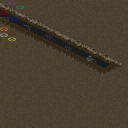
상점까지 가기 (Get To The Store)
스타크래프트 브루드워의 유즈맵 <Get To The Store>는 황무지 지형을 배경으로 한 디펜스 장르의 유닛 견제형 미션이다. 맵 중앙의 주요 루트를 따라 적 유닛이 끊임없이 몰려오며, 플레이어는 이를 저지하거나 우회시켜야 한다. 맵 곳곳에 배치된 자원 지역과 건물을 활용해 방어선을 구축하거나, 반대로 적의 진격을 방해하는 전략을 구사할 수 있다. 이미지의 초록색/파란색/빨간색 경로들은 플레이어가 예상할 수 있는 주요 진입로를 표시한 것으로 보이며, 각 색상은 서로 다른 방향으로의 공격을 의미할 가능성이 있다. 맵의 구조는 비교적 간단하지만, 플레이어의 기지에 도달하는 적의 수가 많고 지속적이기 때문에 방어 자원과 전략의 균형이 중요하다. 또한, 맵의 황무지 타일셋은 시원한 분위기를 연출하며, 넓은 필드는 유닛의 움직임을 크게 제한하지 않아 전투가 다채롭게 전개될 수 있도록 돕는다. 이 맵은 초보자보다는 중간 이상의 전략적 감각을 요구하며, 특히 유닛의 배치와 자원의 활용을 신중히 고려해야 한다. 방어선 구축에 실패하면 순식간에 자원이 고갈되어 패배로 이어질 수 있기 때문에, 지속적인 관리가 필수적이다. 또한, 맵의 루트가 복잡하지 않지만 예상치 못한 지점에서 적의 공격을 받을 수 있으므로, 방심은 금물이다. 추천하는 플레이 방식은 초반에 방어선을 구축하고, 중반에는 자원을 확보해 보강하는 전략으로, 이를 위해서는 맵의 주요 경로를 미리 숙지하고 있어야 한다. 맵의 난이도는 중간 정도로, 기본적인 유닛 운용 능력이 있다면 충분히 도전해 볼 만한 수준이다. 디펜스 장르에 익숙한 플레이어라면 흥미롭게 즐길 수 있을 것이다. Get To The Store is a defense-style custom map set in a wasteland terrain of StarCraft: Brood War, where players must block or redirect waves of enemy units advancing along the central routes. The map features resource-rich areas and buildings that can be used to establish defense lines or disrupt enemy progress. The colored paths in the image (green, blue, red) likely indicate major attack routes that players must anticipate and defend against. While the map's structure is straightforward, the continuous and numerous enemy attacks demand careful resource management and strategic planning. This map is more suited for players with intermediate or higher strategic thinking, as failing to maintain defenses can quickly lead to resource depletion and defeat. Players are advised to prioritize building strong early defenses and securing resources in the mid-game. It is crucial to familiarize oneself with the main attack routes to avoid unexpected threats. The difficulty is moderate, making it accessible to players with basic unit control skills. Fans of defense games will find this map engaging and rewarding to master.
최근 등록된 맵
새로 추가된 파일과 버전을 확인하세요.
상점까지 가기 (Get To The Store)
스타크래프트 브루드워의 유즈맵 <Get To The Store>는 황무지 지형을 배경으로 한 디펜스 장르의 유닛 견제형 미션이다. 맵 중앙의 주요 루트를 따라 적 유닛이 끊임없이 몰려오며, 플레이어는 이를 저지하거나 우회시켜야 한다. 맵 곳곳에 배치된 자원 지역과 건물을 활용해 방어선을 구축하거나, 반대로 적의 진격을 방해하는 전략을 구사할 수 있다. 이미지의 초록색/파란색/빨간색 경로들은 플레이어가 예상할 수 있는 주요 진입로를 표시한 것으로 보이며, 각 색상은 서로 다른 방향으로의 공격을 의미할 가능성이 있다. 맵의 구조는 비교적 간단하지만, 플레이어의 기지에 도달하는 적의 수가 많고 지속적이기 때문에 방어 자원과 전략의 균형이 중요하다. 또한, 맵의 황무지 타일셋은 시원한 분위기를 연출하며, 넓은 필드는 유닛의 움직임을 크게 제한하지 않아 전투가 다채롭게 전개될 수 있도록 돕는다. 이 맵은 초보자보다는 중간 이상의 전략적 감각을 요구하며, 특히 유닛의 배치와 자원의 활용을 신중히 고려해야 한다. 방어선 구축에 실패하면 순식간에 자원이 고갈되어 패배로 이어질 수 있기 때문에, 지속적인 관리가 필수적이다. 또한, 맵의 루트가 복잡하지 않지만 예상치 못한 지점에서 적의 공격을 받을 수 있으므로, 방심은 금물이다. 추천하는 플레이 방식은 초반에 방어선을 구축하고, 중반에는 자원을 확보해 보강하는 전략으로, 이를 위해서는 맵의 주요 경로를 미리 숙지하고 있어야 한다. 맵의 난이도는 중간 정도로, 기본적인 유닛 운용 능력이 있다면 충분히 도전해 볼 만한 수준이다. 디펜스 장르에 익숙한 플레이어라면 흥미롭게 즐길 수 있을 것이다. Get To The Store is a defense-style custom map set in a wasteland terrain of StarCraft: Brood War, where players must block or redirect waves of enemy units advancing along the central routes. The map features resource-rich areas and buildings that can be used to establish defense lines or disrupt enemy progress. The colored paths in the image (green, blue, red) likely indicate major attack routes that players must anticipate and defend against. While the map's structure is straightforward, the continuous and numerous enemy attacks demand careful resource management and strategic planning. This map is more suited for players with intermediate or higher strategic thinking, as failing to maintain defenses can quickly lead to resource depletion and defeat. Players are advised to prioritize building strong early defenses and securing resources in the mid-game. It is crucial to familiarize oneself with the main attack routes to avoid unexpected threats. The difficulty is moderate, making it accessible to players with basic unit control skills. Fans of defense games will find this map engaging and rewarding to master.
[UED] The Wall (더 월)
스타크래프트 브루드워의 유즈맵 《[UED] The Wall》은 밀리 기반의 맵이지만, 그 이름처럼 거대한 벽을 사이에 두고 벌어지는 독특한 대결 구조를 지닌 맵입니다. 맵 중앙을 가로지르는 거대한 벽이 양 진영을 분리하고 있으며, 이 벽은 일방 통행이 가능한 좁은 통로 여러 개로만 통과할 수 있어 전략적인 대결을 유도합니다. 벽 너머에서 상대방의 기지를 확인할 수 있지만, 직접 공격할 수 있는 길은 제한되어 있어 견제와 확장의 중요성이 부각됩니다. 벽의 좁은 통로를 통제하는 플레이어는 상대방의 자원 채취와 expansion을 방해할 수 있으며, 반대로 통로를 잘 방어하지 못하면 일방적으로 밀리는 상황이 발생할 수 있습니다. 이 맵은 8명의 플레이어가 1대 1로 대결하는 구조를 기본으로 하며, 벽을 사이에 두고 벌어지는 견제와 방어, expansion 싸움으로 긴장감을 유지합니다. 벽의 통로를 두고 벌어지는 스나이핑이나 러시, 그리고 빠른 멀티 테스팅 등이 주요 전략 포인트입니다. 또한, 벽 너머의 시야를 확보하기 위해 오버로드나 스캔을 적극 활용하는 것이 관건이며, 통로의 좁은 지형 덕분에 치고 빠지기 전술이나 방어 타워의 효율성이 매우 높아집니다. 맵의 중앙 통로가 좁고 길게 뻗어 있어 테란의 벙커링이나 프로토스의 포톤 캐논 방어망 구축이 용이하다는 점도 특징입니다. 《[UED] The Wall》은 밀리 기반의 맵이지만, 벽을 사이에 둔 독특한 구조로 인해 밀리만의 전략과 유즈맵만의 재미를 동시에 느낄 수 있는 작품입니다. 벽의 통로를 두고 벌어지는 심리전과Resource Management가 핵심이므로, 좁은 길목에서의 싸움에 익숙한 플레이어라면 더욱 즐겁게 플레이할 수 있을 것입니다. 또한, 벽 너머의 시야 싸움과 빠른 판단이 요구되므로, 단순히 자원과 병력만 모으는 것이 아니라 적절한 타이밍에 공격을 감행하거나 방어를 굳히는 전략적 선택이 중요합니다. 벽을 넘는 것이 쉽지 않은 만큼, 초보보다는 어느 정도 경험이 있는 플레이어에게 더욱 추천할 수 있는 맵입니다. StarCraft: Brood War's custom map *<UED> The Wall>* is a melee-based map, but as its name suggests, it features a unique battle structure centered around a massive wall that divides the two sides. A giant wall runs through the center of the map, separating both bases, and the only way to pass through is via several narrow one-way passages, forcing strategic confrontations. While players can see the enemy base beyond the wall, direct attacks are limited, emphasizing the importance of harassment and expansion. Controlling the narrow passages allows players to disrupt enemy resource gathering and expansions, while failing to defend them can lead to one-sided defeats. The map is primarily designed for eight players battling in 1v1 matches, maintaining tension through wall-based harassment, defense, and expansion struggles. Key strategic points include sniping, rushes, and rapid multi-base testing through the wall’s passages. Securing vision beyond the wall using Overlords or scans is crucial, and the narrow terrain makes hit-and-run tactics or defensive towers highly effective. The map’s long, narrow central pathways also make it easy for Terran to deploy bunker rushes or for Protoss to establish photon cannon defenses. Though *<UED> The Wall>* is a melee-based map, its unique wall structure blends traditional melee strategies with custom map-specific fun. The core of the gameplay revolves around psychological warfare and resource management through the wall’s passages, making it especially enjoyable for players familiar with narrow-path combat. Beyond just gathering resources and amassing forces, success requires quick decision-making—knowing when to attack or when to fortify defenses. Since crossing the wall isn’t easy, this map is better suited for players with some experience rather than beginners.
맵 선택 가이드
태그는 맵의 핵심 특징을 빠르게 설명하지만 제작 버전마다 규칙이 다를 수 있습니다. 상세 설명에서 권장 인원, 난이도, 플레이 시간과 버전을 함께 확인한 뒤 다운로드하세요.