
건물 보호 스타크래프트 맵 모음
'건물 보호' 태그가 등록된 맵을 모았습니다. 장르 하나로 찾기 어려운 플레이 방식, 난이도와 특징을 중심으로 인기 맵과 최신 맵을 비교해 보세요.
- 등록 맵
- 6개
- 누적 다운로드
- 13
- 누적 조회
- 306
인기 맵
다운로드와 조회 반응이 높은 맵입니다.
![개인 랜덤 디펜스 [Gold] 다크99 (Personal Random Defense [Gold] Dark99) 맵 미리보기](https://cdn-star-data.huzy.net/thumbnail_43ab35d6a0de45289d7667ae70cd48a2.jpg)
개인 랜덤 디펜스 [Gold] 다크99 (Personal Random Defense [Gold] Dark99)
이 맵은 스타크래프트: 브루드워의 개인전 랜덤 디펜스 유즈맵으로, 플레이어는 매 라운드마다 랜덤하게 배치되는 적들을 상대하며 건물을 보호하는 것이 주된 목표다. 맵 중앙에 위치한 건물이 보호 대상이 되며, 각 라운드가 시작될 때마다 다양한 종류의 적들이 지정된 경로를 따라 공격을 시도한다. 적들은 맵 상단과 하단에서 등장해 중앙 건물을 향해 이동하는데, 플레이어는 미네랄과 가스를 수집해 건물을 건설하고 유닛을 생산하거나 업그레이드할 수 있다. 미네랄과 가스가 맵 곳곳에 배치되어 있어 자원 관리가 중요하며, 잘못된 배치나 공격 타이밍은 맵을 위기로 몰아넣을 수 있다. 맵의 특징은 랜덤한 적 배치와 함께 각 라운드별로 증가하는 적의 수와 종류에 있다. 초반 라운드는 상대적으로 약한 저글링이나 질럿 위주로 구성되지만, 후반부로 갈수록 하이템플러, 울트라리스크, 캐리어 등 강력한 유닛들이 등장한다. 또한, 맵 곳곳에 배치된 방어 시설이나 포톤 캐논을 활용해 적을 저지하는 것도 중요하다. 이 맵은 특히 방어와 자원 관리에 중점을 둔 전략적 요소와 함께, 랜덤한 요소로 인해 매 플레이마다 다른 경험을 제공한다는 점이 매력적이다. 초보 플레이어는 방어선을 차근차근 구축하며 경험을 쌓는 것이 좋으며, 숙련자들은 자원 채취 효율과 라운드별 적 대응 전략을 최적화하는 데 중점을 두어야 한다. 맵의 디자인과 타일셋은 정글 테마로 구성되어 있어 시각적 즐거움도 제공한다. 다만, 랜덤성이Strongly Random으로 작용하기 때문에, 예측 불가능한 적 배치에 따라 플레이어의 전략이 크게 좌우될 수 있다. 따라서, 맵을 플레이하기 전에는 방어 시설의 배치와 자원 채취 경로를 미리 계획해 두는 것이 중요하다. 이 맵은 디펜스 장르에 익숙한 플레이어들이라면 즐겁게 플레이할 수 있으며, 특히 개인전으로 진행되는 만큼 각 플레이어의 능력과 전략이 직접적으로 반영된다는 점이 매력적이다. 최종적으로, 이 맵은 전략적 깊이와 랜덤한 재미를 동시에 제공하는 훌륭한 디펜스 유즈맵으로 평가할 수 있다. 초보자부터 숙련자까지 모두 즐길 수 있지만, 방어와 자원 관리의 중요성을 충분히 이해하고 있어야만 높은 점수를 얻을 수 있을 것이다. 맵의 난이도는 개인전 디펜스 장르답게 대체로 보통 수준으로 설정되어 있지만, 후반부로 갈수록 급격히 어려워지는 경향이 있다. 따라서, 플레이어는 초반 라운드에서 최대한의 자원을 확보하고, 방어선을 견고히 구축하는 데 주력해야 한다. This map is a custom *StarCraft: Brood War* personal random defense game where players defend a central building against waves of randomly spawned enemies each round. The main goal is to protect the central structure while managing resources and constructing defenses. Enemies spawn from the top and bottom of the map, moving toward the central building along designated paths, and players must gather minerals and gas to build structures, train units, or research upgrades. Resources are scattered across the map, making resource management crucial—poor placement or mistimed attacks can quickly turn the tide against the player. A key feature of the map is its random enemy spawns, with enemy numbers and types increasing each round. Early rounds consist mostly of weaker units like Zerglings and Zealots, but later rounds introduce powerful units such as High Templars, Ultralisks, and Carriers. Utilizing defensive structures like Photon Cannons placed throughout the map is also essential for holding off waves. The map’s appeal lies in its strategic focus on defense and resource management, combined with the unpredictable nature of each playthrough, offering a fresh experience every time. Beginners should gradually build their defenses while gaining experience, while advanced players should optimize resource collection and adapt their strategies for each round. The map’s jungle-themed design and tileset provide visual enjoyment, though the strong randomness means players must adapt quickly to unpredictable enemy placements. Planning defensive layouts and resource paths in advance is highly recommended before playing. This map is perfect for fans of the defense genre, especially since it’s a personal match where each player’s skill and strategy are directly reflected in their performance. Overall, it’s an excellent custom defense map that balances strategic depth with random fun, appealing to both beginners and experts alike. However, to achieve high scores, players must fully grasp the importance of defense and resource management. While the difficulty is generally moderate for a personal defense game, it escalates sharply in later rounds, so securing resources and reinforcing defenses early is critical for success.
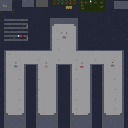
아티카 디펜스 V.1.5 (Arctic Defense V.1.5)
아티카 디펜스 V.1.5는 스타크래프트 브루드워의 디펜스 장르 유즈맵으로, 차가운 북극 기지Fried에서 적군의 끊임없는 공격을 방어하면서 건물을 보호하고 적을 섬멸하는 것이 목표다. 이 맵은 총 6명의 플레이어가 참여할 수 있으며, 중앙의 본진과 주변의 요새를 방어하는 구조로 구성되어 있다. 플레이어는 시작 시 각자 자원과 건물을 배치할 수 있는 간단한 준비 시간을 가지며, 본진의 핵심 건물인 커맨드 센터를 보호하는 것이 가장 중요하다. 적군은 여러 경로로 공격을 시도하는데, 주로 우회로와 정면 루트를 통해 끊임없이 몰려오므로 방어선을 제대로 구축하지 않으면 순식간에 무너질 수 있다. 방어 건물로 주로 사용되는 것은 터렛, 미사일 터렛, 그리고 방어탑으로, 이들을 적절한 위치에 배치하여 효율적인 방어망을 형성해야 한다. 또한, 적의 공격을 막아내면서 동시에 자원을 확보하여 추가 방어 시설이나 공격 유닛을 생산하는 것이 관건이다. 게임의 난이도는 방어선의 복잡성과 적의 공격 패턴에 따라 달라지는데, 초반에는 비교적 약한 적들이 등장하지만 후반으로 갈수록 강력한 유닛과 다수의 적이 출연하므로 플레이어의 전략과 대처 능력이 중요하다. 아티카 디펜스 V.1.5는 디펜스 장르의 정석을 잘 구현한 맵으로, 특히 방어 시설의 배치와 자원 관리가 핵심 포인트다. 초보자들은 간단한 방어선을 구축하는 데서부터 시작하여 점차 복잡한 전략을 연마할 수 있으며, 숙련자들은 빠른 판단과 효율적인 자원 운용으로 높은 점수를 노릴 수 있다. 맵의 분위기는 차가운 북극이라는 설정이 잘 반영되어 있어 시각적으로도 매력적이며, 긴장감 있는 전투가 지속되는 동안 플레이어는 끊임없는 집중력을 요구받게 된다. 이 맵을 즐기기 위해서는 방어 시설의 배치와 적의 공격 패턴을 잘 분석하는 능력이 필수적이다. 추천하는 플레이 스타일은 방어 우선주의로, 초반 자원 확보 후 방어 시설을 최우선으로 구축하고, 이후 여유가 생기면 공격 유닛을 보충하는 방식으로 진행하는 것이다. 또한, 팀원과의 원활한 소통이 중요하므로 4인 이상의 멀티 플레이 시에는 역할 분담을 clearly 하는 것이 좋다. 아티카 디펜스 V.1.5는 디펜스 장르를 좋아하는 플레이어들에게 강력히 추천할 만한 맵으로, 전략성과 재미를 동시에 제공하는佳作다. 특히 디펜스 장르의 기본기를 다지고 싶거나, 방어 시설 배치와 자원 관리에 숙련되고자 하는 유저들에게 최적의 선택지가 될 것이다. 게임을 시작하기 전에는 반드시 맵의 구조와 주요 방어 포인트를 숙지한 후, 각자 맡은 구역의 방어에 집중하는 것이 성공의 열쇠다. Atika Defense V.1.5 is a defense genre custom map in *StarCraft: Brood War*, where players must defend against relentless enemy attacks from the icy Arctic base *Fried*, protecting their buildings and eliminating foes. The map supports up to six players and is structured around defending a central main base and surrounding fortresses. At the start, players receive a brief preparation phase to allocate resources and place buildings, with protecting the Command Center—the core structure of the main base—being the top priority. Enemies attack through multiple paths, primarily using flanking routes and frontal assaults, so a poorly constructed defense line can collapse instantly. Common defensive structures include turrets, missile turrets, and bunkers, which must be strategically positioned to form an effective defensive network. Securing resources while fending off attacks to build additional defenses or offensive units is key to success. The difficulty escalates as the game progresses, with early waves featuring weaker enemies but later stages introducing powerful units and large-scale assaults, making player strategy and adaptability crucial. Atika Defense V.1.5 exemplifies the defense genre at its finest, emphasizing proper defensive structure placement and resource management. Beginners can start with simple defensive setups and gradually refine their tactics, while experienced players can aim for high scores with quick decision-making and efficient resource allocation. The map’s cold Arctic setting enhances its visual appeal, creating an immersive and tense atmosphere that demands constant focus. To excel, players must analyze enemy attack patterns and optimize defensive layouts. Recommended playstyle prioritizes defense: secure early resources, establish defensive structures first, and supplement with offensive units when possible. Strong team communication is vital, especially in 4+ player multiplayer, where clear role distribution is essential. Atika Defense V.1.5 is highly recommended for fans of the defense genre, offering a perfect blend of strategy and fun. It’s an ideal choice for players looking to master defensive fundamentals, refine structure placement, or improve resource management. Before starting, familiarize yourself with the map layout and key defensive points, and focus on securing your assigned sector for the best chance at victory.
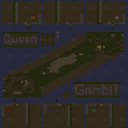
디저트 스트라이크 v퀸 베타 (Desert Strike vQueen Beta)
〈디저트 스트라이크 v퀸 베타〉는 스타크래프트 브루드워의 유즈맵으로, 사막 지형을 배경으로 한 디펜스 장르의 맵이다. 맵의 전체적인 구조는 중앙에 넓은 통로가 있으며, 그 주변으로 건물이 배치되어 있다. 플레이어는 건물을 파괴하거나 보호하는 방식으로 진행되며, 맵의 양쪽 끝에는 각각의 진영이 배치되어 있다. 건물을 보호해야 하는지, 파괴해야 하는지 여부는 맵에서 제공되는 추가 정보에 따라 달라질 수 있다. 맵의 중앙 통로에는 적의 유닛이 끊임없이 몰려오며, 이를 방어하는 것이 주요 목표로 보인다. 맵의 배경은 사막 타일셋으로 구성되어 있으며, 건물이 배치된 지역과 통로가 뚜렷하게 구분되어 있어 진행을 파악하기 쉽다. 이 맵은 디펜스 장르에 속하지만, 건물을 보호하는지 파괴하는지 여부에 따라 플레이 스타일이 크게 달라질 수 있다. inoltre, 맵의 구조상 중앙 통로의 길이가 길기 때문에 유닛의 이동 경로가 비교적 단순하다는 특징이 있다. 맵의 전체적인 밸런스는 건물을 중심으로 한 방어 또는 공격 전략에 따라 좌우될 것으로 예상되며, 플레이어는 맵의 구조를 충분히 숙지하고 다양한 유닛 조합을 시도해 볼 필요가 있다. 맵의 난이도는 건물을 보호해야 한다면 어려울 수 있으며, 반대로 건물을 파괴하는 것이 목적이라면 비교적 쉬운 편에 속할 수 있다. 이 맵을 플레이하기 전에 맵의 승리 조건과 플레이어의 역할을 정확히 숙지하는 것이 중요하다. 또한, 맵의 중앙 통로가 길기 때문에 유닛의 이동 속도와 생산 시간을 고려하여 전략을 세워야 한다. 건물을 보호하거나 파괴하는 데 필요한 자원과 유닛의 종류, 생산 시간 등을 미리 확인하고 준비하는 것이 좋다. 〈Dessert Strike vQueen Beta〉 is a *StarCraft: Brood War* custom map featuring a defense genre set in a desert terrain. The map’s overall layout includes a wide central corridor flanked by buildings. Players progress by either destroying or protecting these structures, with victory conditions depending on additional in-game information. The central corridor is constantly flooded with enemy units, making defense the primary objective. The desert-themed tileset clearly distinguishes building zones from pathways, aiding navigation. While classified as a defense map, the gameplay shifts dramatically depending on whether players must protect or destroy buildings. Additionally, the elongated central corridor simplifies unit movement paths. The map’s balance hinges on defensive or offensive strategies centered around the buildings, requiring players to familiarize themselves with the layout and experiment with unit compositions. Difficulty varies—protecting buildings can be challenging, whereas a destruction-focused approach tends to be easier. Before playing, it’s crucial to understand the victory conditions and your role. Given the long corridor, account for unit speed and production times when planning strategies. Pre-check the required resources, unit types, and production timings for building protection or destruction.
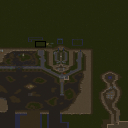
헬름스 딥 v제로글링 퍼펙트 (Helms Deep vZerglingPerfect)
스타크래프트 브루드워의 고전 유즈맵이자 컴까기 장르의 대표작으로 손꼽히는 <헬름스 딥 v제로글링 퍼펙트(Helms Deep vZerglingPerfect)>는 오크의 맹공에 맞서는 인간과 엘프의 결전지를 배경으로 한 디펜스 타입의 맵입니다. 맵 제목에서 짐작할 수 있듯이, 반지의 제왕 실사영화 <왕의 귀환>의 헬름즈 딥 전투를 모티브로 삼아 제작되었으며, 제로글링과 베어울프가 끊임없이 밀려오는 가운데 플레이어는 건물을 보호하고 승리를 쟁취해야 합니다. 맵의 핵심은 오크의 스파이더 마인, 제로글링, 베어울프, 그리고 드물게 등장하는 히드라리스크까지 다양한 유닛을 상대하는 데 있으며, 이를 통해 긴장감 넘치는 방어전을 펼쳐야 합니다. 맵의 구조는 중앙에 위치한 인간 기지(헬름스 딥)를 중심으로 동서남북으로 뻗어나가는 길목이 세밀하게 배치되어 있습니다. 각 길목에는 방어 타워와 건물을 보호하는 요새가 있으며, 플레이어는 제한된 자원으로 적의 공격을 버텨내며 점차 확장해 나가야 합니다. 특히, 맵의 가장자리로 갈수록 적의 공격 빈도가 높아지므로, 초반 방어 라인을 철저히 구축하는 것이 중요합니다. 또한, 맵 곳곳에 숨겨진 자원 채취 지역이 있어 자원을 확보하면서 방어선을 강화할 수 있습니다. 제로글링이 끊임없이 밀려오는 특성상, 자원 관리는 물론이고 방어 타워의 배치와 업그레이드 타이밍이 승패를 좌우합니다. 이 맵은 초보자부터 숙련자까지 폭넓은 플레이어층을 대상으로 하며, 특히 컴까기 경험이 적은 유저에게는 적절한 난이도로 구성되어 있습니다. 그러나 제로글링의 끊임없는 공세와 히드라리스크의 갑작스러운 출현은 숙련자들에게도 긴장감을 선사합니다. 맵의 플레이 시간은 약 30분 내외로 예상되며, 이는 적의 공격 패턴과 방어 라인의 안정화에 따라 변동될 수 있습니다.Helms Deep vZerglingPerfect는 단순히 방어전을 펼치는 것 이상의 재미를 제공합니다. 맵의 배경을 감안하면 오크의 침공을 막아내는 영웅적인 스토리를 상상할 수 있으며, 이는 플레이어에게 긴장감과 몰입감을 동시에 안겨줍니다. 또한, 맵의 디자인과 타일셋(사막)이 잘 어우러져 있어 시각적인 즐거움도 considerable합니다.Defense, 유즈맵, 컴까기, 반지의 제왕, 디펜스 타입, 제로글링, 베어울프, 헬름스 딥, 오크, 인간, 엘프, 타워 디펜스, 스파이더 마인, 히드라리스크, 방어전, 자원 관리, 타워 배치, 플레이 시간 30분, 초보자, 숙련자, 긴장감, 몰입감, 영웅 스토리, 맵 디자인 *Helms Deep vZerglingPerfect* is a classic custom map from *StarCraft: Brood War* and a standout in the "camp vs. AI" genre. Set against the backdrop of a desperate battle between humans and elves against the relentless Orc onslaught, this is a defense-type map where players must protect their buildings and secure victory as Zerglings and Bearwolves continuously swarm the battlefield. As the title suggests, the map draws inspiration from the Helm’s Deep battle in *The Lord of the Rings: The Return of the King*, featuring a tense defense where players face a variety of threats—Spider Mines, Zerglings, Bearwolves, and even the occasional Hydralisk—to maintain their stronghold. The map’s structure centers around the human base at Helm’s Deep, with meticulously placed pathways extending in all four directions. Each route is guarded by defensive towers and fortified structures, forcing players to manage limited resources while expanding under constant pressure. Enemy attacks intensify toward the edges of the map, making early defense crucial. Hidden resource nodes scattered throughout the map allow for strategic resource gathering to reinforce defenses, while the relentless Zergling waves demand careful tower placement and timely upgrades to secure survival. Designed for players of all skill levels, *Helms Deep vZerglingPerfect* offers an accessible challenge for beginners while still providing a thrilling test for experienced players with sudden Hydralisk appearances and escalating Zergling assaults. Matches typically last around 30 minutes, though the duration can vary based on attack patterns and defensive stability. Beyond its mechanical depth, the map immerses players in an epic narrative, evoking the heroic struggle to repel the Orc invasion. The well-crafted desert-themed design and cohesive tile set further enhance the visual appeal, making every defensive stand a visually satisfying experience.
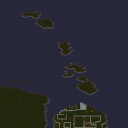
Sims in Hawaii (시뮬스 인 하와이)
스타크래프트 브루드워의 유즈맵 〈Sims in Hawaii〉는 섬으로 구성된 맵에서 진행되는 독특한 디펜스 게임으로, 플레이어는 각각의 섬에 위치한 건물을 보호하며 적의 공격을 방어해야 한다. 맵은 총 8개의 섬으로 나뉘어 있으며, 각 섬은 해안가와 내륙으로 구성되어 있어 전략적인 배치와 자원 관리가 중요하다. 섬 간의 연결은 바다와 좁은 다리로 이루어져 있어 이동 경로가 제한적이므로, 방어선 구축 시 섬의 지형을 충분히 고려해야 한다. 게임은 주로 밤과 낮의 주기적 변화가 있으며, 밤에는 적이 더 자주 등장하는 것으로 보인다. 플레이어는 각 섬에 배치된 건물을 업그레이드하고 방어 시설(예: 포탑, 벽)을 설치하여 적의 공격을 막아야 한다. 섬에 따라 지형적 특징이 다르기 때문에, 초반에는 섬의 구조를 파악하고 방어 라인을 효율적으로 배치하는 것이 승리의 열쇠가 된다. 또한, 섬 간 이동을 통해 자원(예: 미네랄, 가스)을 확보하거나 방어력을 강화할 수 있는 요소들이 존재하는 것으로 추정된다. 이 맵은 디펜스 장르의 특성을 살리면서도 섬이라는 독특한 공간 디자인을 통해 전략적 깊이를 더하고 있다. 섬 간의 상대적 고립과 제한된 자원, 그리고 밤낮의 변화는 플레이어에게 끊임없는 긴장감을 제공한다. 특히, 섬의 지형을 살린 방어 전략과 자원 관리, 그리고 적의 공격 패턴을 예측하는 능력이 요구된다. 추천 대상은 디펜스 게임을 좋아하는 플레이어, 섬이라는 독특한 공간에서 전략을 펼치고 싶은 유저, 그리고 팀 플레이를 통해 협력하고 싶은 분들에게 적합할 것이다. 플레이 전에는 각 섬의 지형과 연결 구조를 미리 확인하고, 방어 시설의 배치 계획을 세워두는 것이 좋다. Sims in Hawaii는 스타크래프트 브루드워의 유즈맵으로, 섬으로 구성된 맵에서 진행되는 디펜스 게임이다. 플레이어는 8개의 섬에 위치한 건물을 보호하며 적의 공격을 방어해야 한다. 맵은 해안가와 내륙으로 구성되어 있어 지형에 따라 전략적 배치와 자원 관리가 중요하다. 밤낮의 주기적 변화가 있으며, 밤에는 적이 더 자주 등장하는 특징이 있다. 각 섬은 바다와 좁은 다리로 연결되어 있어 이동 경로가 제한적이다. 플레이어는 건물을 업그레이드하고 방어 시설(예: 포탑, 벽)을 설치하여 적의 공격을 막아야 한다. 섬의 지형적 특징이 다르므로, 초반에는 구조를 파악하고 방어 라인을 효율적으로 배치하는 것이 중요하다. 섬 간 이동을 통해 자원을 확보하거나 방어력을 강화할 수 있는 요소들이 존재한다. 이 맵은 디펜스 장르의 전략성을 섬의 고유한 공간 디자인으로 보완하고 있다. 섬 간의 고립과 제한된 자원, 밤낮의 변화는 긴장감을 더한다. 섬의 지형을 활용한 방어 전략, 자원 관리, 그리고 적의 공격 패턴 예측 능력이 요구된다. 추천 대상은 디펜스 게임을 좋아하는 플레이어, 섬 디자인에서 전략을 즐기는 유저, 팀 플레이를 선호하는 분들에게 적합하다. 플레이 전에는 각 섬의 지형과 연결 구조를 확인하고 방어 시설 배치 계획을 세우는 것이 좋다. Sims in Hawaii is a unique defense game set on a map composed of islands in StarCraft: Brood War. Players must protect buildings located on each island and fend off enemy attacks. The map is divided into eight islands, each featuring coastlines and inland areas, making strategic positioning and resource management crucial. Connections between islands are limited to the sea and narrow bridges, restricting movement paths and requiring careful consideration of terrain when establishing defensive lines. The game features a day-night cycle, with enemies appearing more frequently at night. Players must upgrade buildings on each island and install defensive structures (e.g., turrets, walls) to counter attacks. Since each island has distinct geographical features, understanding the terrain early on and efficiently arranging defensive lines are key to victory. Additionally, there are elements that allow players to secure resources (e.g., minerals, gas) or strengthen defenses by moving between islands. This map enhances the depth of strategy in the defense genre through its distinctive island-based design. The relative isolation of the islands, limited resources, and the day-night cycle create constant tension. Players are challenged to devise defense strategies tailored to the terrain, manage resources effectively, and anticipate enemy attack patterns. It is recommended for those who enjoy defense games, players looking to strategize in a unique island setting, and those who prefer team-based cooperation. Before playing, it is advisable to study the terrain and connection structures of each island and plan where to place defensive structures.
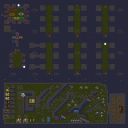
미니타운 D 에어리어 힐 (MiniTown D AREA HEAL)
스타크래프트 브루드워의 유즈맵인 'MiniTown D AREA HEAL'은 이름 그대로 작은 마을 형태의 맵에 치유와 생존 요소가 결합된 디펜스 장르의 맵입니다. 맵 제목에 'HEAL'이 포함된 것처럼, 플레이어는 지속적인 체력 회복을 통해 적의 공격을 버텨내야 합니다. 맵의 구조는 중앙에 위치한 넓은 잔디 광장과 그 주변으로 배치된 건물, 샛길, 언덕 등으로 구성되어 있으며, 특히 광장 주변의 언덕과 건물 뒤는 страте적 요충지로 활용할 수 있습니다. 적들은 광장 중심에서 끊임없이 몰려오며, 플레이어는 건물을 지키거나 치유를 통해 체력을 유지해야 합니다. 맵의 지형은 사막 타일셋을 기반으로 하지만, 잔디와 도로가 조화를 이루어 마을 feel을 살리고 있습니다. 맵의 설명에 'Full house / mini town vets recommended'라는 문구가 있는 것으로 보아, 초보보다는 어느 정도 경험이 있는 플레이어에게 적합한 맵으로 보입니다. 또한 '2high @useast - April 4th 2013'은 맵의 제작일과 서버 지역을 의미하는 것으로 추정됩니다. 이 맵을 플레이하기 위해서는 건물을 지키면서 체력을 관리하는 전략과 동시에 끊임없이 몰려오는 적을 상대해야 하는 멀티태스킹 능력이 필요합니다. 치유가 가능한 구조물이 맵 곳곳에 배치되어 있어, 이를 잘 활용하는 것이 관건입니다. 초보 플레이어의 경우 적의 공격 패턴을 숙지하고, 건물의 보호와 자신의 체력 관리를 동시에 해내기 어려울 수 있어 어려움을 느낄 수 있습니다. 하지만 치유 요소가 있기 때문에 초보도 천천히 적응하며 할 만하다는 점이 특징입니다. MiniTown D AREA HEAL is a UMS (Use Map Settings) map in StarCraft: Brood War that combines healing mechanics with a defense-style gameplay in a small town setting. As suggested by the title, players must survive waves of enemies while maintaining their health through healing structures scattered across the map. The terrain features a central grassy plaza surrounded by buildings, pathways, and hills, creating strategic vantage points for defense. Enemies spawn near the plaza and continuously attack, requiring players to defend key structures or rely on healing to sustain their units. The map uses a desert tileset but incorporates grass and roads to enhance the town aesthetic. The description mentions that it is recommended for players experienced with "Full house" or "mini town" maps, indicating a moderate difficulty level. The '2high @useast - April 4th 2013' likely refers to the map's release date and server region. Success in this map depends on balancing defense strategy with effective use of healing points while managing incoming enemy waves. Beginners may struggle with the simultaneous demands of protecting structures and maintaining health, but the healing mechanics provide a forgiving element that allows for gradual adaptation.
최근 등록된 맵
새로 추가된 파일과 버전을 확인하세요.
헬름스 딥 v제로글링 퍼펙트 (Helms Deep vZerglingPerfect)
스타크래프트 브루드워의 고전 유즈맵이자 컴까기 장르의 대표작으로 손꼽히는 <헬름스 딥 v제로글링 퍼펙트(Helms Deep vZerglingPerfect)>는 오크의 맹공에 맞서는 인간과 엘프의 결전지를 배경으로 한 디펜스 타입의 맵입니다. 맵 제목에서 짐작할 수 있듯이, 반지의 제왕 실사영화 <왕의 귀환>의 헬름즈 딥 전투를 모티브로 삼아 제작되었으며, 제로글링과 베어울프가 끊임없이 밀려오는 가운데 플레이어는 건물을 보호하고 승리를 쟁취해야 합니다. 맵의 핵심은 오크의 스파이더 마인, 제로글링, 베어울프, 그리고 드물게 등장하는 히드라리스크까지 다양한 유닛을 상대하는 데 있으며, 이를 통해 긴장감 넘치는 방어전을 펼쳐야 합니다. 맵의 구조는 중앙에 위치한 인간 기지(헬름스 딥)를 중심으로 동서남북으로 뻗어나가는 길목이 세밀하게 배치되어 있습니다. 각 길목에는 방어 타워와 건물을 보호하는 요새가 있으며, 플레이어는 제한된 자원으로 적의 공격을 버텨내며 점차 확장해 나가야 합니다. 특히, 맵의 가장자리로 갈수록 적의 공격 빈도가 높아지므로, 초반 방어 라인을 철저히 구축하는 것이 중요합니다. 또한, 맵 곳곳에 숨겨진 자원 채취 지역이 있어 자원을 확보하면서 방어선을 강화할 수 있습니다. 제로글링이 끊임없이 밀려오는 특성상, 자원 관리는 물론이고 방어 타워의 배치와 업그레이드 타이밍이 승패를 좌우합니다. 이 맵은 초보자부터 숙련자까지 폭넓은 플레이어층을 대상으로 하며, 특히 컴까기 경험이 적은 유저에게는 적절한 난이도로 구성되어 있습니다. 그러나 제로글링의 끊임없는 공세와 히드라리스크의 갑작스러운 출현은 숙련자들에게도 긴장감을 선사합니다. 맵의 플레이 시간은 약 30분 내외로 예상되며, 이는 적의 공격 패턴과 방어 라인의 안정화에 따라 변동될 수 있습니다.Helms Deep vZerglingPerfect는 단순히 방어전을 펼치는 것 이상의 재미를 제공합니다. 맵의 배경을 감안하면 오크의 침공을 막아내는 영웅적인 스토리를 상상할 수 있으며, 이는 플레이어에게 긴장감과 몰입감을 동시에 안겨줍니다. 또한, 맵의 디자인과 타일셋(사막)이 잘 어우러져 있어 시각적인 즐거움도 considerable합니다.Defense, 유즈맵, 컴까기, 반지의 제왕, 디펜스 타입, 제로글링, 베어울프, 헬름스 딥, 오크, 인간, 엘프, 타워 디펜스, 스파이더 마인, 히드라리스크, 방어전, 자원 관리, 타워 배치, 플레이 시간 30분, 초보자, 숙련자, 긴장감, 몰입감, 영웅 스토리, 맵 디자인 *Helms Deep vZerglingPerfect* is a classic custom map from *StarCraft: Brood War* and a standout in the "camp vs. AI" genre. Set against the backdrop of a desperate battle between humans and elves against the relentless Orc onslaught, this is a defense-type map where players must protect their buildings and secure victory as Zerglings and Bearwolves continuously swarm the battlefield. As the title suggests, the map draws inspiration from the Helm’s Deep battle in *The Lord of the Rings: The Return of the King*, featuring a tense defense where players face a variety of threats—Spider Mines, Zerglings, Bearwolves, and even the occasional Hydralisk—to maintain their stronghold. The map’s structure centers around the human base at Helm’s Deep, with meticulously placed pathways extending in all four directions. Each route is guarded by defensive towers and fortified structures, forcing players to manage limited resources while expanding under constant pressure. Enemy attacks intensify toward the edges of the map, making early defense crucial. Hidden resource nodes scattered throughout the map allow for strategic resource gathering to reinforce defenses, while the relentless Zergling waves demand careful tower placement and timely upgrades to secure survival. Designed for players of all skill levels, *Helms Deep vZerglingPerfect* offers an accessible challenge for beginners while still providing a thrilling test for experienced players with sudden Hydralisk appearances and escalating Zergling assaults. Matches typically last around 30 minutes, though the duration can vary based on attack patterns and defensive stability. Beyond its mechanical depth, the map immerses players in an epic narrative, evoking the heroic struggle to repel the Orc invasion. The well-crafted desert-themed design and cohesive tile set further enhance the visual appeal, making every defensive stand a visually satisfying experience.
Sims in Hawaii (시뮬스 인 하와이)
스타크래프트 브루드워의 유즈맵 〈Sims in Hawaii〉는 섬으로 구성된 맵에서 진행되는 독특한 디펜스 게임으로, 플레이어는 각각의 섬에 위치한 건물을 보호하며 적의 공격을 방어해야 한다. 맵은 총 8개의 섬으로 나뉘어 있으며, 각 섬은 해안가와 내륙으로 구성되어 있어 전략적인 배치와 자원 관리가 중요하다. 섬 간의 연결은 바다와 좁은 다리로 이루어져 있어 이동 경로가 제한적이므로, 방어선 구축 시 섬의 지형을 충분히 고려해야 한다. 게임은 주로 밤과 낮의 주기적 변화가 있으며, 밤에는 적이 더 자주 등장하는 것으로 보인다. 플레이어는 각 섬에 배치된 건물을 업그레이드하고 방어 시설(예: 포탑, 벽)을 설치하여 적의 공격을 막아야 한다. 섬에 따라 지형적 특징이 다르기 때문에, 초반에는 섬의 구조를 파악하고 방어 라인을 효율적으로 배치하는 것이 승리의 열쇠가 된다. 또한, 섬 간 이동을 통해 자원(예: 미네랄, 가스)을 확보하거나 방어력을 강화할 수 있는 요소들이 존재하는 것으로 추정된다. 이 맵은 디펜스 장르의 특성을 살리면서도 섬이라는 독특한 공간 디자인을 통해 전략적 깊이를 더하고 있다. 섬 간의 상대적 고립과 제한된 자원, 그리고 밤낮의 변화는 플레이어에게 끊임없는 긴장감을 제공한다. 특히, 섬의 지형을 살린 방어 전략과 자원 관리, 그리고 적의 공격 패턴을 예측하는 능력이 요구된다. 추천 대상은 디펜스 게임을 좋아하는 플레이어, 섬이라는 독특한 공간에서 전략을 펼치고 싶은 유저, 그리고 팀 플레이를 통해 협력하고 싶은 분들에게 적합할 것이다. 플레이 전에는 각 섬의 지형과 연결 구조를 미리 확인하고, 방어 시설의 배치 계획을 세워두는 것이 좋다. Sims in Hawaii는 스타크래프트 브루드워의 유즈맵으로, 섬으로 구성된 맵에서 진행되는 디펜스 게임이다. 플레이어는 8개의 섬에 위치한 건물을 보호하며 적의 공격을 방어해야 한다. 맵은 해안가와 내륙으로 구성되어 있어 지형에 따라 전략적 배치와 자원 관리가 중요하다. 밤낮의 주기적 변화가 있으며, 밤에는 적이 더 자주 등장하는 특징이 있다. 각 섬은 바다와 좁은 다리로 연결되어 있어 이동 경로가 제한적이다. 플레이어는 건물을 업그레이드하고 방어 시설(예: 포탑, 벽)을 설치하여 적의 공격을 막아야 한다. 섬의 지형적 특징이 다르므로, 초반에는 구조를 파악하고 방어 라인을 효율적으로 배치하는 것이 중요하다. 섬 간 이동을 통해 자원을 확보하거나 방어력을 강화할 수 있는 요소들이 존재한다. 이 맵은 디펜스 장르의 전략성을 섬의 고유한 공간 디자인으로 보완하고 있다. 섬 간의 고립과 제한된 자원, 밤낮의 변화는 긴장감을 더한다. 섬의 지형을 활용한 방어 전략, 자원 관리, 그리고 적의 공격 패턴 예측 능력이 요구된다. 추천 대상은 디펜스 게임을 좋아하는 플레이어, 섬 디자인에서 전략을 즐기는 유저, 팀 플레이를 선호하는 분들에게 적합하다. 플레이 전에는 각 섬의 지형과 연결 구조를 확인하고 방어 시설 배치 계획을 세우는 것이 좋다. Sims in Hawaii is a unique defense game set on a map composed of islands in StarCraft: Brood War. Players must protect buildings located on each island and fend off enemy attacks. The map is divided into eight islands, each featuring coastlines and inland areas, making strategic positioning and resource management crucial. Connections between islands are limited to the sea and narrow bridges, restricting movement paths and requiring careful consideration of terrain when establishing defensive lines. The game features a day-night cycle, with enemies appearing more frequently at night. Players must upgrade buildings on each island and install defensive structures (e.g., turrets, walls) to counter attacks. Since each island has distinct geographical features, understanding the terrain early on and efficiently arranging defensive lines are key to victory. Additionally, there are elements that allow players to secure resources (e.g., minerals, gas) or strengthen defenses by moving between islands. This map enhances the depth of strategy in the defense genre through its distinctive island-based design. The relative isolation of the islands, limited resources, and the day-night cycle create constant tension. Players are challenged to devise defense strategies tailored to the terrain, manage resources effectively, and anticipate enemy attack patterns. It is recommended for those who enjoy defense games, players looking to strategize in a unique island setting, and those who prefer team-based cooperation. Before playing, it is advisable to study the terrain and connection structures of each island and plan where to place defensive structures.
미니타운 D 에어리어 힐 (MiniTown D AREA HEAL)
스타크래프트 브루드워의 유즈맵인 'MiniTown D AREA HEAL'은 이름 그대로 작은 마을 형태의 맵에 치유와 생존 요소가 결합된 디펜스 장르의 맵입니다. 맵 제목에 'HEAL'이 포함된 것처럼, 플레이어는 지속적인 체력 회복을 통해 적의 공격을 버텨내야 합니다. 맵의 구조는 중앙에 위치한 넓은 잔디 광장과 그 주변으로 배치된 건물, 샛길, 언덕 등으로 구성되어 있으며, 특히 광장 주변의 언덕과 건물 뒤는 страте적 요충지로 활용할 수 있습니다. 적들은 광장 중심에서 끊임없이 몰려오며, 플레이어는 건물을 지키거나 치유를 통해 체력을 유지해야 합니다. 맵의 지형은 사막 타일셋을 기반으로 하지만, 잔디와 도로가 조화를 이루어 마을 feel을 살리고 있습니다. 맵의 설명에 'Full house / mini town vets recommended'라는 문구가 있는 것으로 보아, 초보보다는 어느 정도 경험이 있는 플레이어에게 적합한 맵으로 보입니다. 또한 '2high @useast - April 4th 2013'은 맵의 제작일과 서버 지역을 의미하는 것으로 추정됩니다. 이 맵을 플레이하기 위해서는 건물을 지키면서 체력을 관리하는 전략과 동시에 끊임없이 몰려오는 적을 상대해야 하는 멀티태스킹 능력이 필요합니다. 치유가 가능한 구조물이 맵 곳곳에 배치되어 있어, 이를 잘 활용하는 것이 관건입니다. 초보 플레이어의 경우 적의 공격 패턴을 숙지하고, 건물의 보호와 자신의 체력 관리를 동시에 해내기 어려울 수 있어 어려움을 느낄 수 있습니다. 하지만 치유 요소가 있기 때문에 초보도 천천히 적응하며 할 만하다는 점이 특징입니다. MiniTown D AREA HEAL is a UMS (Use Map Settings) map in StarCraft: Brood War that combines healing mechanics with a defense-style gameplay in a small town setting. As suggested by the title, players must survive waves of enemies while maintaining their health through healing structures scattered across the map. The terrain features a central grassy plaza surrounded by buildings, pathways, and hills, creating strategic vantage points for defense. Enemies spawn near the plaza and continuously attack, requiring players to defend key structures or rely on healing to sustain their units. The map uses a desert tileset but incorporates grass and roads to enhance the town aesthetic. The description mentions that it is recommended for players experienced with "Full house" or "mini town" maps, indicating a moderate difficulty level. The '2high @useast - April 4th 2013' likely refers to the map's release date and server region. Success in this map depends on balancing defense strategy with effective use of healing points while managing incoming enemy waves. Beginners may struggle with the simultaneous demands of protecting structures and maintaining health, but the healing mechanics provide a forgiving element that allows for gradual adaptation.
디저트 스트라이크 v퀸 베타 (Desert Strike vQueen Beta)
〈디저트 스트라이크 v퀸 베타〉는 스타크래프트 브루드워의 유즈맵으로, 사막 지형을 배경으로 한 디펜스 장르의 맵이다. 맵의 전체적인 구조는 중앙에 넓은 통로가 있으며, 그 주변으로 건물이 배치되어 있다. 플레이어는 건물을 파괴하거나 보호하는 방식으로 진행되며, 맵의 양쪽 끝에는 각각의 진영이 배치되어 있다. 건물을 보호해야 하는지, 파괴해야 하는지 여부는 맵에서 제공되는 추가 정보에 따라 달라질 수 있다. 맵의 중앙 통로에는 적의 유닛이 끊임없이 몰려오며, 이를 방어하는 것이 주요 목표로 보인다. 맵의 배경은 사막 타일셋으로 구성되어 있으며, 건물이 배치된 지역과 통로가 뚜렷하게 구분되어 있어 진행을 파악하기 쉽다. 이 맵은 디펜스 장르에 속하지만, 건물을 보호하는지 파괴하는지 여부에 따라 플레이 스타일이 크게 달라질 수 있다. inoltre, 맵의 구조상 중앙 통로의 길이가 길기 때문에 유닛의 이동 경로가 비교적 단순하다는 특징이 있다. 맵의 전체적인 밸런스는 건물을 중심으로 한 방어 또는 공격 전략에 따라 좌우될 것으로 예상되며, 플레이어는 맵의 구조를 충분히 숙지하고 다양한 유닛 조합을 시도해 볼 필요가 있다. 맵의 난이도는 건물을 보호해야 한다면 어려울 수 있으며, 반대로 건물을 파괴하는 것이 목적이라면 비교적 쉬운 편에 속할 수 있다. 이 맵을 플레이하기 전에 맵의 승리 조건과 플레이어의 역할을 정확히 숙지하는 것이 중요하다. 또한, 맵의 중앙 통로가 길기 때문에 유닛의 이동 속도와 생산 시간을 고려하여 전략을 세워야 한다. 건물을 보호하거나 파괴하는 데 필요한 자원과 유닛의 종류, 생산 시간 등을 미리 확인하고 준비하는 것이 좋다. 〈Dessert Strike vQueen Beta〉 is a *StarCraft: Brood War* custom map featuring a defense genre set in a desert terrain. The map’s overall layout includes a wide central corridor flanked by buildings. Players progress by either destroying or protecting these structures, with victory conditions depending on additional in-game information. The central corridor is constantly flooded with enemy units, making defense the primary objective. The desert-themed tileset clearly distinguishes building zones from pathways, aiding navigation. While classified as a defense map, the gameplay shifts dramatically depending on whether players must protect or destroy buildings. Additionally, the elongated central corridor simplifies unit movement paths. The map’s balance hinges on defensive or offensive strategies centered around the buildings, requiring players to familiarize themselves with the layout and experiment with unit compositions. Difficulty varies—protecting buildings can be challenging, whereas a destruction-focused approach tends to be easier. Before playing, it’s crucial to understand the victory conditions and your role. Given the long corridor, account for unit speed and production times when planning strategies. Pre-check the required resources, unit types, and production timings for building protection or destruction.
아티카 디펜스 V.1.5 (Arctic Defense V.1.5)
아티카 디펜스 V.1.5는 스타크래프트 브루드워의 디펜스 장르 유즈맵으로, 차가운 북극 기지Fried에서 적군의 끊임없는 공격을 방어하면서 건물을 보호하고 적을 섬멸하는 것이 목표다. 이 맵은 총 6명의 플레이어가 참여할 수 있으며, 중앙의 본진과 주변의 요새를 방어하는 구조로 구성되어 있다. 플레이어는 시작 시 각자 자원과 건물을 배치할 수 있는 간단한 준비 시간을 가지며, 본진의 핵심 건물인 커맨드 센터를 보호하는 것이 가장 중요하다. 적군은 여러 경로로 공격을 시도하는데, 주로 우회로와 정면 루트를 통해 끊임없이 몰려오므로 방어선을 제대로 구축하지 않으면 순식간에 무너질 수 있다. 방어 건물로 주로 사용되는 것은 터렛, 미사일 터렛, 그리고 방어탑으로, 이들을 적절한 위치에 배치하여 효율적인 방어망을 형성해야 한다. 또한, 적의 공격을 막아내면서 동시에 자원을 확보하여 추가 방어 시설이나 공격 유닛을 생산하는 것이 관건이다. 게임의 난이도는 방어선의 복잡성과 적의 공격 패턴에 따라 달라지는데, 초반에는 비교적 약한 적들이 등장하지만 후반으로 갈수록 강력한 유닛과 다수의 적이 출연하므로 플레이어의 전략과 대처 능력이 중요하다. 아티카 디펜스 V.1.5는 디펜스 장르의 정석을 잘 구현한 맵으로, 특히 방어 시설의 배치와 자원 관리가 핵심 포인트다. 초보자들은 간단한 방어선을 구축하는 데서부터 시작하여 점차 복잡한 전략을 연마할 수 있으며, 숙련자들은 빠른 판단과 효율적인 자원 운용으로 높은 점수를 노릴 수 있다. 맵의 분위기는 차가운 북극이라는 설정이 잘 반영되어 있어 시각적으로도 매력적이며, 긴장감 있는 전투가 지속되는 동안 플레이어는 끊임없는 집중력을 요구받게 된다. 이 맵을 즐기기 위해서는 방어 시설의 배치와 적의 공격 패턴을 잘 분석하는 능력이 필수적이다. 추천하는 플레이 스타일은 방어 우선주의로, 초반 자원 확보 후 방어 시설을 최우선으로 구축하고, 이후 여유가 생기면 공격 유닛을 보충하는 방식으로 진행하는 것이다. 또한, 팀원과의 원활한 소통이 중요하므로 4인 이상의 멀티 플레이 시에는 역할 분담을 clearly 하는 것이 좋다. 아티카 디펜스 V.1.5는 디펜스 장르를 좋아하는 플레이어들에게 강력히 추천할 만한 맵으로, 전략성과 재미를 동시에 제공하는佳作다. 특히 디펜스 장르의 기본기를 다지고 싶거나, 방어 시설 배치와 자원 관리에 숙련되고자 하는 유저들에게 최적의 선택지가 될 것이다. 게임을 시작하기 전에는 반드시 맵의 구조와 주요 방어 포인트를 숙지한 후, 각자 맡은 구역의 방어에 집중하는 것이 성공의 열쇠다. Atika Defense V.1.5 is a defense genre custom map in *StarCraft: Brood War*, where players must defend against relentless enemy attacks from the icy Arctic base *Fried*, protecting their buildings and eliminating foes. The map supports up to six players and is structured around defending a central main base and surrounding fortresses. At the start, players receive a brief preparation phase to allocate resources and place buildings, with protecting the Command Center—the core structure of the main base—being the top priority. Enemies attack through multiple paths, primarily using flanking routes and frontal assaults, so a poorly constructed defense line can collapse instantly. Common defensive structures include turrets, missile turrets, and bunkers, which must be strategically positioned to form an effective defensive network. Securing resources while fending off attacks to build additional defenses or offensive units is key to success. The difficulty escalates as the game progresses, with early waves featuring weaker enemies but later stages introducing powerful units and large-scale assaults, making player strategy and adaptability crucial. Atika Defense V.1.5 exemplifies the defense genre at its finest, emphasizing proper defensive structure placement and resource management. Beginners can start with simple defensive setups and gradually refine their tactics, while experienced players can aim for high scores with quick decision-making and efficient resource allocation. The map’s cold Arctic setting enhances its visual appeal, creating an immersive and tense atmosphere that demands constant focus. To excel, players must analyze enemy attack patterns and optimize defensive layouts. Recommended playstyle prioritizes defense: secure early resources, establish defensive structures first, and supplement with offensive units when possible. Strong team communication is vital, especially in 4+ player multiplayer, where clear role distribution is essential. Atika Defense V.1.5 is highly recommended for fans of the defense genre, offering a perfect blend of strategy and fun. It’s an ideal choice for players looking to master defensive fundamentals, refine structure placement, or improve resource management. Before starting, familiarize yourself with the map layout and key defensive points, and focus on securing your assigned sector for the best chance at victory.
개인 랜덤 디펜스 [Gold] 다크99 (Personal Random Defense [Gold] Dark99)
이 맵은 스타크래프트: 브루드워의 개인전 랜덤 디펜스 유즈맵으로, 플레이어는 매 라운드마다 랜덤하게 배치되는 적들을 상대하며 건물을 보호하는 것이 주된 목표다. 맵 중앙에 위치한 건물이 보호 대상이 되며, 각 라운드가 시작될 때마다 다양한 종류의 적들이 지정된 경로를 따라 공격을 시도한다. 적들은 맵 상단과 하단에서 등장해 중앙 건물을 향해 이동하는데, 플레이어는 미네랄과 가스를 수집해 건물을 건설하고 유닛을 생산하거나 업그레이드할 수 있다. 미네랄과 가스가 맵 곳곳에 배치되어 있어 자원 관리가 중요하며, 잘못된 배치나 공격 타이밍은 맵을 위기로 몰아넣을 수 있다. 맵의 특징은 랜덤한 적 배치와 함께 각 라운드별로 증가하는 적의 수와 종류에 있다. 초반 라운드는 상대적으로 약한 저글링이나 질럿 위주로 구성되지만, 후반부로 갈수록 하이템플러, 울트라리스크, 캐리어 등 강력한 유닛들이 등장한다. 또한, 맵 곳곳에 배치된 방어 시설이나 포톤 캐논을 활용해 적을 저지하는 것도 중요하다. 이 맵은 특히 방어와 자원 관리에 중점을 둔 전략적 요소와 함께, 랜덤한 요소로 인해 매 플레이마다 다른 경험을 제공한다는 점이 매력적이다. 초보 플레이어는 방어선을 차근차근 구축하며 경험을 쌓는 것이 좋으며, 숙련자들은 자원 채취 효율과 라운드별 적 대응 전략을 최적화하는 데 중점을 두어야 한다. 맵의 디자인과 타일셋은 정글 테마로 구성되어 있어 시각적 즐거움도 제공한다. 다만, 랜덤성이Strongly Random으로 작용하기 때문에, 예측 불가능한 적 배치에 따라 플레이어의 전략이 크게 좌우될 수 있다. 따라서, 맵을 플레이하기 전에는 방어 시설의 배치와 자원 채취 경로를 미리 계획해 두는 것이 중요하다. 이 맵은 디펜스 장르에 익숙한 플레이어들이라면 즐겁게 플레이할 수 있으며, 특히 개인전으로 진행되는 만큼 각 플레이어의 능력과 전략이 직접적으로 반영된다는 점이 매력적이다. 최종적으로, 이 맵은 전략적 깊이와 랜덤한 재미를 동시에 제공하는 훌륭한 디펜스 유즈맵으로 평가할 수 있다. 초보자부터 숙련자까지 모두 즐길 수 있지만, 방어와 자원 관리의 중요성을 충분히 이해하고 있어야만 높은 점수를 얻을 수 있을 것이다. 맵의 난이도는 개인전 디펜스 장르답게 대체로 보통 수준으로 설정되어 있지만, 후반부로 갈수록 급격히 어려워지는 경향이 있다. 따라서, 플레이어는 초반 라운드에서 최대한의 자원을 확보하고, 방어선을 견고히 구축하는 데 주력해야 한다. This map is a custom *StarCraft: Brood War* personal random defense game where players defend a central building against waves of randomly spawned enemies each round. The main goal is to protect the central structure while managing resources and constructing defenses. Enemies spawn from the top and bottom of the map, moving toward the central building along designated paths, and players must gather minerals and gas to build structures, train units, or research upgrades. Resources are scattered across the map, making resource management crucial—poor placement or mistimed attacks can quickly turn the tide against the player. A key feature of the map is its random enemy spawns, with enemy numbers and types increasing each round. Early rounds consist mostly of weaker units like Zerglings and Zealots, but later rounds introduce powerful units such as High Templars, Ultralisks, and Carriers. Utilizing defensive structures like Photon Cannons placed throughout the map is also essential for holding off waves. The map’s appeal lies in its strategic focus on defense and resource management, combined with the unpredictable nature of each playthrough, offering a fresh experience every time. Beginners should gradually build their defenses while gaining experience, while advanced players should optimize resource collection and adapt their strategies for each round. The map’s jungle-themed design and tileset provide visual enjoyment, though the strong randomness means players must adapt quickly to unpredictable enemy placements. Planning defensive layouts and resource paths in advance is highly recommended before playing. This map is perfect for fans of the defense genre, especially since it’s a personal match where each player’s skill and strategy are directly reflected in their performance. Overall, it’s an excellent custom defense map that balances strategic depth with random fun, appealing to both beginners and experts alike. However, to achieve high scores, players must fully grasp the importance of defense and resource management. While the difficulty is generally moderate for a personal defense game, it escalates sharply in later rounds, so securing resources and reinforcing defenses early is critical for success.
맵 선택 가이드
태그는 맵의 핵심 특징을 빠르게 설명하지만 제작 버전마다 규칙이 다를 수 있습니다. 상세 설명에서 권장 인원, 난이도, 플레이 시간과 버전을 함께 확인한 뒤 다운로드하세요.