
개인디펜스 스타크래프트 맵 모음
'개인디펜스' 태그가 등록된 맵을 모았습니다. 장르 하나로 찾기 어려운 플레이 방식, 난이도와 특징을 중심으로 인기 맵과 최신 맵을 비교해 보세요.
- 등록 맵
- 15개
- 누적 다운로드
- 89
- 누적 조회
- 990
인기 맵
다운로드와 조회 반응이 높은 맵입니다.
개인 성큰 디팬스 (Individual Sunken Defence)
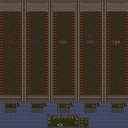
개인 성큰 디팬스(Individual Sunken Defence)는 스타크래프트 브루드워 맵 중에서도 클래식한 재미를 주는 대표적인 유즈맵 장르의 방어형 시나리오다. 이번에 소개할 버전은 기존 지형을 다듬고 플레이 편의성을 높인 지형수정 버전 0.1로, 전통적인 디펜스 형식의 구조를 충실히 따르고 있다. 맵 전체의 구성을 살펴보면, 각 플레이어마다 독립된 진영과 방어 구역이 명확하게 구분되어 있는 구조를 띤다. 사막 타일셋을 배경으로 한 공간 속에서, 각 플레이어는 자신에게 주어진 개인 라인을 철저하게 사수해야 하는 임무를 맡게 된다. 중앙 혹은 특정 위치로 몰려오는 적의 공세에 맞서 성큰 콜로니와 같은 방어 건물을 효율적으로 배치하고, 자원을 관리하며 웨이브를 버텨내는 것이 이 맵의 핵심적인 진행 방식이다. 협동 플레이의 요소도 중요하지만, 무엇보다 각자 자신의 진영을 완벽하게 책임져야 하므로 개인의 방어 능력이 매우 크게 작용하는 특징을 지닌다. 플레이 경험 측면에서는 초반의 소규모 공세부터 후반으로 갈수록 거세지는 강력한 적들의 웨이브까지 단계별로 긴장감을 느낄 수 있다. 방어 건물의 사거리와 배치 위치, 그리고 자원의 효율적인 투자 타이밍이 승패를 가르는 중요한 요소로 작용한다. 특히 혼자서 라인을 막아내야 하는 부담감과 함께, 웨이브를 차근차근 정리해 나가는 과정에서 오는 몰입감이 상당하다. 평소 스타크래프트 브루드워 맵 중에서 개인 방어 위주의 유즈맵을 선호하는 유저들이나, 친구들과 함께 각자의 방어 실력을 시험해 보고 싶은 플레이어들에게 추천할 만한 가치가 있다. 플레이를 시작하기 전에는 각 진영의 입구 구조와 지형적 특성을 미리 파악하고, 초반 자원 배분 계획을 세워두는 것이 생존 확률을 높이는 좋은 방법이 될 것이다. Individual Sunken Defence is a classic defensive scenario within the custom map genre of StarCraft: Brood War, offering timeless entertainment. The version introduced here is the terrain-modified version 0.1, which refines the existing layout and enhances playability while faithfully adhering to the traditional defense format. Looking at the overall composition of the map, it features a structure where each player has a clearly separated, independent base and defensive zone. Set against a desert tileset background, each player is tasked with thoroughly defending the individual lane assigned to them. The core gameplay revolves around efficiently placing defensive structures such as sunken colonies against enemy waves converging on specific locations, managing resources, and surviving the onslaught. While cooperative elements remain important, the map heavily emphasizes individual defensive capability since each person must fully take responsibility for their own zone. In terms of gameplay experience, players can feel a progressive sense of tension, starting from small early-game offensives to increasingly powerful enemy waves in the later stages. The range and placement of defensive structures, along with the timing of efficient resource investment, serve as crucial factors determining victory or defeat. In particular, the pressure of holding a lane alone combined with the immersion of steadily clearing waves provides substantial engagement. This map is worth recommending to users who generally prefer individual defense-oriented custom maps in StarCraft: Brood War, or players who want to test their defensive skills alongside others. Before starting a play session, it is a good strategy to understand the entrance structures and terrain characteristics of each lane in advance and establish an early resource allocation plan to increase survival rates.
네모네모 디펜스 E3 UP
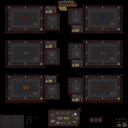
네모네모 디펜스 E3 UP은 스타크래프트 브루드워 유즈맵 중에서도 독특한 구성을 자랑하는 개인형 공중 디펜스 장르의 대표적인 작품입니다. 이 맵은 맵 전체의 구조가 일정한 사각형 형태의 독립된 공간들로 나누어져 있으며, 각 플레이어는 배정된 개인 구역에서 몰려오는 적의 공중 유닛을 상대로 치열한 방어를 펼쳐야 합니다. 게임이 시작되면 6시 방향에 위치한 특정 구역에서 원하는 유닛을 선택할 수 있으며, 이를 통해 각자의 전략에 맞는 방어 라인을 구축하는 것이 핵심 진행 방식입니다. 단순히 유닛을 배치하는 것에 그치지 않고, 제한된 자원과 주어진 환경 속에서 효율적인 유닛 조합을 찾아내는 재미를 느낄 수 있습니다. 특히 공중 유닛 위주로 적들이 몰려오기 때문에 대공 화력의 집중과 타이밍에 맞는 방어 대책이 매우 중요하게 작용합니다. 방어에 실패하여 누적되는 적의 유닛 수가 100기를 넘어가면 곧바로 패배로 이어지기 때문에, 긴장을 놓을 수 없는 스릴 넘치는 플레이 경험을 선사합니다. 소모성 아이템인 커세어나 뭉치기 같은 팁 요소를 적절히 활용하면 위기 상황을 극복하는 데 큰 도움이 됩니다. 개별 구역에서 자신만의 방어 라인을 굳건히 지키면서도 전체적인 전황을 살피는 협력과 경쟁의 묘미를 동시에 느낄 수 있어, 디펜스 장르를 선호하는 유저들에게 강력히 추천할 만한 맵입니다. 플레이 전에는 6시 방향의 유닛 선택 구역과 각 개인 구역의 위치를 미리 파악하고, 공중 유닛 방어에 특화된 유닛 조합을 구상해 두는 것이 원활한 클리어에 큰 도움이 됩니다. Nemo Nemo Defense E3 UP is a representative work of the individual-style aerial defense genre, boasting a unique configuration among StarCraft Brood War use maps. The map's overall structure is divided into independent spaces in a regular rectangular shape, and each player must wage a fierce defense against swarming enemy aerial units in their assigned private area. When the game starts, players can choose their desired units from a specific area located at the 6 o'clock position, and building a defensive line tailored to each strategy through this is the core progression method. Beyond simply placing units, players can feel the fun of finding efficient unit combinations within limited resources and a given environment. In particular, since enemies flock mainly with aerial units, the concentration of anti-air firepower and timely defense measures play a very important role. Because failing to defend and accumulating more than 100 enemy units leads directly to defeat, it provides a thrilling play experience where you cannot let your guard down. Properly utilizing tip elements such as consumable items like Corsair and clumping can be of great help in overcoming crisis situations. It allows players to simultaneously feel the subtlety of cooperation and competition while firmly guarding their own defense lines in individual areas, making it a map strongly recommended for users who prefer the defense genre. Before playing, it is very helpful for a smooth clear to grasp the unit selection area at 6 o'clock and the location of each personal area in advance, and to devise unit combinations specialized in aerial unit defense.
개인 타워 디펜스 L (Individual Tower Defense L)
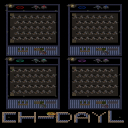
개인 타워 디펜스 L (Individual Tower Defense L)은 스타크래프트 브루드워 맵 유즈맵 장르 중에서도 많은 이들이 즐겨 찾는 전통적인 타워 디펜스 스타일의 작품이다. 사막 타일셋을 배경으로 펼쳐지는 이 맵은 각 플레이어에게 독립된 공간을 제공하며, 주어진 구역 안에서 효율적인 타워 배치를 통해 몰려오는 적들을 막아내는 방식으로 진행된다. 게임 내 제공된 내부 맵 설명에 따르면 제작자는 Day.X로 확인되며, 개별 진영마다 독립된 방어 라인과 자원 수급 공간이 마련되어 있어 협동보다는 온전히 개인의 방어 능력을 시험하는 구조를 띤다. 전체적인 맵 구조는 각 플레이어가 자신만의 구역을 책임지는 개인전 형태의 구성을 취하고 있으며, 밀집된 통로와 구조물 배치를 고려해 최적의 화력을 투사하는 것이 핵심 전략으로 작용한다. 플레이어는 제한된 공간 속에서 타워를 효과적으로 건설하고 업그레이드하며 웨이브를 처치해야 하므로, 초반 자원 관리와 빌드 오더 선택이 승패를 가르는 중요한 요인으로 작용할 것으로 보인다. 특히 혼자서 완벽한 방어선을 구축해야 하는 독특한 진행 방식 덕분에 개인의 방어 타이밍 조절과 유닛 사거리 계산 등 전략적인 재미를 깊게 느낄 수 있다. 스타크래프트 브루드워 유즈맵 특유의 클래식한 타워 디펜스 감성을 온전히 느끼고 싶은 유저나, 자신만의 방어 전략을 세워 웨이브를 처치하는 쾌감을 선호하는 플레이어에게 추천할 만하다. 플레이하기 전 각 구역의 지형적 특징과 타워 건설 가능 위치를 미리 파악한다면 훨씬 수월하게 게임을 풀어갈 수 있을 것이다. Individual Tower Defense L is a traditional tower defense map within the StarCraft Brood War use map genre, beloved by many strategic game enthusiasts. Set against a desert tileset background, this map provides each player with an independent space, progressing in a manner where incoming enemies must be blocked through efficient tower placement within the given zone. According to the internal map description, the creator is Day.X, and each faction is equipped with an independent defense line and resource supply area, creating a structure that tests individual defensive capabilities rather than strict cooperation. The overall map layout adopts a solo-style configuration where every player is responsible for their own sector, making the projection of optimal firepower by considering congested paths and structure placements a core strategy. Players must effectively construct and upgrade towers within a limited space to clear waves, suggesting that early resource management and build order selection serve as crucial factors determining victory or defeat. Thanks to the unique progression method where one must build a flawless defense line single-handedly, players can deeply experience strategic enjoyment such as adjusting defensive timings and calculating unit ranges. It is recommended for users who want to fully experience the classic tower defense sentiment unique to StarCraft Brood War use maps, or for players who prefer the thrill of establishing their own defensive strategies to defeat incoming waves. Before playing, understanding the geographical features of each sector and the available tower construction locations in advance will allow for a much smoother gameplay experience.
개인러커디펜스 (Lurker Defense)
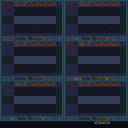
개인러커디펜스 (Lurker Defense)는 스타크래프트 브루드워 맵 유즈맵으로, 저그 종족의 대표적인 유닛인 러커를 활용하여 몰려오는 적의 공세를 막아내는 독특한 장르의 디펜스 게임이다. 게임의 전체적인 구조를 살펴보면, 플레이어는 화산 지형을 배경으로 한 독립된 구역에서 각자 진지를 구축하고 방어 라인을 형성하게 된다. 맵 이미지에서 확인할 수 있듯이 여러 개의 독립된 플레이어 진형이 대칭적이거나 유사한 형태로 배치되어 있어, 다수 플레이어가 동시에 참여하여 각자의 진지를 책임지는 방식을 취하고 있는 것으로 보인다. 각 구역에는 유닛 생산과 방어에 필요한 건물 및 자원 유닛들이 배치되어 있으며, 러커의 특유의 잠복 공격과 광역 스플래시 데미지를 활용해 밀려오는 적들을 효율적으로 제압하는 것이 이 게임의 핵심 진행 방식이다. 플레이어들은 제한된 공간 속에서 자원을 관리하고 최적의 러커 배치 위치를 선정해야 하며, 웨이브가 거듭될수록 강해지는 적의 공격에 맞춰 방어선을 보강해야 한다. 이 과정에서 단순한 유닛 배치뿐만 아니라 유닛의 사거리와 지형지물을 활용한 전략적 판단이 요구되므로, 클래식한 디펜스 유즈맵을 선호하는 이들에게 색다른 몰입감을 제공한다. 스타크래프트 브루드워 맵 탐색을 즐기는 유저들이나 독특한 유닛 중심의 디펜스 장르를 좋아하는 플레이어에게 추천할 만하며, 특히 친구들과 함께 각자의 방어 라인을 점검하며 협동하거나 경쟁하는 재미를 느낄 수 있다. 플레이하기 전에는 각 진영의 자원 수급 구조와 유닛 배치 가능한 공간의 제약을 미리 파악해 두는 것이 원활한 방어에 도움이 될 것이다. Lurker Defense is a custom use map for StarCraft: Brood War that offers a unique defense game genre where players utilize lurkers, iconic units of the Zerg race, to fend off waves of incoming enemies. Examining the overall structure of the game, players establish their own bases and form defensive lines within isolated zones set against a volcanic terrain background. As observed in the map image, multiple independent player positions are arranged in symmetrical or similar patterns, suggesting a gameplay style where several participants join simultaneously and take responsibility for their respective sectors. Each area features buildings and resource units necessary for unit production and defense, and the core gameplay revolves around efficiently subduing encroaching enemies using the lurker's signature burrowed attack and area-of-effect splash damage. Players must manage resources within limited spaces, select optimal lurker placement locations, and reinforce their defense lines to match increasingly powerful enemy attacks across successive waves. This process requires not only simple unit placement but also strategic judgment utilizing unit ranges and terrain features, providing a distinct sense of immersion for enthusiasts of classic defense use maps. It is recommended for users who enjoy exploring StarCraft: Brood War maps or those who like unit-centric defense genres, offering an opportunity to experience the fun of cooperating or competing while inspecting each other's defensive lines with friends. Before playing, understanding the resource supply structure of each faction and the spatial constraints for unit placement will be helpful for smooth defense.
개인 럭커 디펜스 (Personal Lurker Defense)
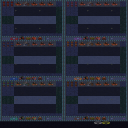
개인 럭커 디펜스(Personal Lurker Defense)는 스타크래프트 브루드워에서 즐길 수 있는 대표적인 유즈맵 디펜스 장르의 맵이다. 전체적인 맵 구조를 살펴보면, 플레이어들이 각각 독립된 공간에서 럴커를 활용해 몰려오는 적들의 공세를 방어하는 방식으로 진행되는 것으로 보인다. 화산 타일셋을 바탕으로 설계된 각 진영은 독립적인 방어 라인을 구축하기 용이하게 배치되어 있으며, 중앙 혹은 전방으로 이어지는 이동 경로를 통해 적들이 지속적으로 압박해오는 형태를 띤다. 플레이어는 제한된 자원과 유닛 배치를 효율적으로 관리하며 각자의 기지를 지켜내야 하므로, 초반 빌드와 유닛 위치 선정 같은 전략적 판단이 중요한 요소로 작용한다. 특히 혼자서 방어선을 구축하는 재미뿐만 아니라 다수 플레이어가 동시에 각자의 구역을 책임지는 협동 플레이 경험을 선사할 것으로 기대된다. 디펜스 유즈맵을 선호하거나 친구들과 함께 몰입감 넘치는 방어전을 즐기고 싶은 유저들에게 알맞은 선택지가 될 수 있으며, 본격적인 플레이에 앞서 유닛의 공격 사거리와 적의 웨이브 타이밍을 미리 파악하는 것이 클리어에 도움이 될 것이다. Personal Lurker Defense is a classic custom defense map in StarCraft: Brood War where players utilize lurkers in independent areas to fend off incoming enemy waves. The map features a volcanic tileset layout designed so that each player can easily establish their own defensive line while enemies advance through designated paths. Players must efficiently manage limited resources and unit positioning to protect their respective bases, making strategic decisions like early builds and placement crucial. It offers both the satisfaction of solo defense and a cooperative experience where multiple participants hold their own zones simultaneously. This map is recommended for fans of defense custom maps who enjoy immersive tactical challenges with friends, and reviewing attack ranges and wave timings beforehand will help ensure success.
개인리버디펜스 (Individual Reaver Defense)
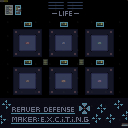
개인리버디펜스[0.6](Individual Reaver Defense)는 스타크래프트 브루드워 팬들이 즐겨 찾는 디펜스 장르의 독특한 유즈맵입니다. 이 맵은 화산 타일셋을 배경으로 펼쳐지며, 다수의 플레이어가 각자의 구역에서 몰려오는 적들을 상대하는 개인 플레이 중심의 방어 구조를 가지고 있습니다. 맵 전체의 구조를 살펴보면 각 플레이어마다 독립된 사각형 형태의 방어 공간이 명확하게 나누어져 있어, 타인의 간섭을 최소화하고 오롯이 자신의 컨트롤과 빌드업에 집중할 수 있는 환경을 제공합니다. 상단부에는 공통으로 관리되는 생명력(LIFE) 지표가 배치되어 있어 팀 전체의 긴장감을 유지하며, 각 진영 주변에는 유닛 생산이나 방어 배치를 위한 공간이 유기적으로 연결되어 있습니다. 특히 유닛의 특성과 공격 타이밍을 정확히 파악해야 하는 디펜스 유즈맵의 특성상, 초보자부터 숙련된 유저까지 각자의 페이스에 맞춰 플레이를 즐길 수 있는 것이 큰 장점입니다. 플레이어는 제한된 공간 안에서 효율적인 자원 운용과 리버를 활용한 전략적인 화력 배치를 고민해야 하며, 웨이브가 거듭될수록 증가하는 적의 공세를 막아내기 위해 끊임없는 유닛 위치 선정과 업그레이드가 요구됩니다. 친구들과 함께 다인원으로 모여 각자의 방어력을 시험하고 생존 경쟁을 펼치기에 적합하며, 전통적인 디펜스 유즈맵의 재미를 깔끔하고 정돈된 맵 레이아웃 속에서 온전히 느끼고 싶은 유저들에게 추천할 만한 작품입니다. 게임을 시작하기 전 각 플레이어의 진영 위치와 자원 공급 방식을 미리 숙지하고, 초반 웨이브를 안정적으로 넘기기 위한 빌드를 구상하고 참여하는 것이 원활한 플레이를 위한 포인트입니다. Individual Reaver Defense [0.6] is a unique defense genre Use Map frequently enjoyed by StarCraft: Brood War fans. Set against a volcanic tileset background, this map features a solo-play-oriented defense structure where multiple players handle incoming enemies within their own designated zones. Examining the overall map structure, each player is provided with a clearly divided, independent rectangular defense space, creating an environment that minimizes outside interference and allows players to focus entirely on their own control and build-ups. At the top section, a centrally managed life indicator is placed to maintain tension for the entire group, while spaces for unit production or defensive placement are organically connected around each camp. Particularly due to the characteristics of defense Use Maps, where players must accurately understand unit traits and attack timings, it offers the great advantage of letting both beginners and experienced users enjoy play at their own pace. Players must ponder efficient resource management and strategic firepower deployment using Reavers within a limited space, and constant unit positioning and upgrades are required to fend off increasingly formidable enemy waves as the game progresses. It is well-suited for gathering with friends in larger player counts to test individual defensive capabilities and experience survival competition, making it a recommended work for users who want to fully feel the fun of traditional defense Use Maps within a clean and organized map layout. Before starting the game, it is helpful for smooth gameplay to familiarize yourself with each player's starting position and resource supply method in advance, and to devise a build plan that can securely clear the early waves.
개인 사각 디펜스 초대물량 (Individual Square Defense Mega Volume)
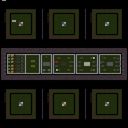
개인 사각 디펜스 초대물량(Individual Square Defense Mega Volume)은 스타크래프트 브루드워 맵 유즈맵 장르 중에서도 독특한 구성을 자랑하는 디펜스 계열의 맵이다. 제공된 미니맵 이미지와 맵의 전체적인 구조를 살펴보면, 각 플레이어마다 독립적으로 분리된 사각형 형태의 개인 방어 구역이 존재하며, 중앙 및 측면 공간에는 유닛 생산이나 자원 관리, 혹은 거대한 물량 공세가 펼쳐지는 별도의 구역들이 마련되어 있는 것으로 추정된다. 이러한 구조는 클래식한 디펜스 장르의 문법을 따르면서도, 사방에서 몰려오는 적들을 각자의 진영에서 철저하게 방어해야 하는 긴장감을 선사한다. 특히 타이틀에 명시된 '초대물량'이라는 키워드처럼, 게임 후반부로 갈수록 화면을 가득 채우는 엄청난 규모의 적 유닛들이 등장하여 플레이어의 방어선을 시험할 것으로 보인다. 이 맵은 최대 6인이 함께 즐길 수 있도록 설계되어 있어, 다수의 플레이어가 동시에 각자의 구역을 틀어막고 협력하거나 경쟁하는 양상으로 진행된다. 혼자서 모든 라인을 방어해야 하는 솔로 플레이와는 달리, 멀티플레이 시 아군과의 소통과 유닛 조합, 그리고 각 진영의 생존 여부가 전체 게임의 승패를 가르는 중요한 요소로 작용한다. 플레이어는 자신에게 주어진 사각형 진영 안에서 효율적으로 타워나 유닛을 배치하고, 끊임없이 몰려오는 적의 공세에 대비해 방어 체계를 업그레이드해야 한다. 각 구역이 명확하게 구분되어 있기 때문에 시각적으로 전황을 파악하기 쉽고, 대규모 전투가 벌어질 때 화면 연출에서 오는 타격감과 몰입감이 뛰어날 것으로 기대된다. 전통적인 디펜스 유즈맵을 선호하거나 거대한 물량과의 사투를 즐기는 유저들에게 이 맵은 매력적인 선택지가 될 수 있다. 게임을 시작하기 전에는 방어 구역의 지형적 특성과 적의 진격 경로를 미리 파악하고, 함께 플레이하는 아군과의 협력 방안을 미리 구상해 두는 것이 좋다. 각자 고립된 사각형 공간에서 각개전투를 벌이는 형상이기 때문에, 한쪽 진영이 무너졌을 때의 파급 효과를 고려한 전략적인 유닛 배치와 빠른 대처가 필수적이다. 시원시원한 대규모 적 처치와 방어의 재미를 동시에 느끼고 싶은 스타크래프트 유저라면 꼭 한 번 플레이해 볼 만한 가치가 있는 흥미로운 맵이다. Individual Square Defense Mega Volume is a defense-style map featuring a unique layout within the StarCraft Brood War UMS genre. Looking at the provided minimap image and the overall map structure, it appears that each player has an independently separated square-shaped personal defense zone, with central and side areas designated for unit production, resource management, or massive wave attacks. This structure follows the grammar of the classic defense genre while delivering the tension of thoroughly defending against enemies approaching from all sides within individual bases. True to the keyword 'Mega Volume' specified in the title, an enormous scale of enemy units is expected to fill the screen in the later stages of the game, testing the players' defensive lines. Designed for up to 6 players to enjoy together, this map unfolds in a pattern where multiple players simultaneously lock down their respective areas to cooperate or compete. Unlike solo play where a single player must defend all lines, multiplayer sessions involve communication with allies, unit combinations, and the survival of each base as crucial factors determining the outcome. Players must efficiently deploy towers and units within their assigned square bases and upgrade their defense systems against ceaseless enemy offensives. Because each zone is clearly demarcated, it is easy to visually grasp the battlefield situation, and the impact and immersion of large-scale combat are expected to be high. For users who prefer traditional defense UMS maps or enjoy struggling against massive waves, this map can be an attractive option. Before starting the game, it is recommended to examine the topographical features of the defense zones and enemy advance routes, and to plan cooperative strategies with allies. Since it features isolated square spaces for individual combat, strategic unit placement and quick responses considering the ripple effects of one base collapsing are essential. For StarCraft users who want to simultaneously experience the thrill of massive enemy elimination and defensive gameplay, it is an interesting map well worth playing at least once.
캐논 디 온 유어 오운 (Cannon D On Your Own)
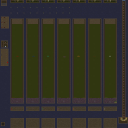
캐논 디 온 유어 오운(Cannon D On Your Own)은 스타크래프트 브루드워의 대표적인 유즈맵 장르 중 하나로, 플레이어 각자가 독립된 공간에서 포탑을 활용해 몰려오는 적의 공세를 방어하는 독특한 구조를 가진 디펜스 유형의 맵이다. 전체적인 맵 레이아웃을 살펴보면, 플레이어들이 각각 독립적으로 배치될 수 있는 길쭉한 세로형 라인 구조가 여러 개 나란히 늘어선 형태를 취하고 있다. 이러한 구조 덕분에 여러 명의 플레이어가 동시에 참여하더라도 서로의 자리를 침범하지 않고 오롯이 자신의 진영에 집중하며 개별적인 생존 능력을 시험할 수 있는 환경이 조성된다. 제목에서 유추할 수 있듯이 포탑 건설과 방어가 핵심 메커니즘으로 작용할 것으로 보이며, 각 라인마다 주어진 자원과 공간을 얼마나 효율적으로 활용하느냐가 승패를 가르는 중요한 요인이 된다. 플레이어는 자신에게 주어진 구역 내에서 최적의 방어 진지를 구축하고, 끊임없이 몰려오는 적 유닛들의 파상공세를 저지해야 한다. 협동 플레이의 요소도 존재하지만 기본적으로 각자도생의 성격이 강해 개인의 유닛 배치 능력과 판단력이 중요하게 작용하며, 친구들과 함께 각자의 실력을 겨루거나 각자 맡은 라인을 철저하게 사수하는 재미를 느낄 수 있다. 스타크래프트 브루드워 유즈맵 중에서도 깔끔하게 구획된 라인 디펜스 형식을 선호하는 유저들이나, 개인 기량을 바탕으로 방어 미션을 클리어하는 것을 즐기는 플레이어들에게 추천할 만한 맵이다. 본격적으로 게임을 시작하기 전에는 각 라인의 지형적 특성과 자원 배치를 꼼꼼히 확인하고, 초반 공세에 대비해 어떤 방식으로 포탑과 건물을 배치할 것인지 미리 전략을 세우는 것이 안전하다. Cannon D On Your Own is a defense-type custom map for StarCraft: Brood War featuring a unique structure where each player defends against incoming enemy waves using turrets in an independent space. Looking at the overall map layout, it consists of multiple elongated vertical lane structures arranged side by side, allowing players to be positioned separately. This design creates an environment where multiple participants can focus entirely on their own territory without encroaching on others, testing individual survival skills. As the title suggests, turret construction and defense act as the core mechanics, making the efficient use of resources and space in each lane a crucial factor for success. Players must build optimal defensive positions within their assigned zones and withstand relentless enemy waves. While cooperative elements exist, the map leans heavily toward a self-reliance style where individual unit placement and judgment matter greatly, offering the fun of competing with friends or strictly holding one's assigned line. It is recommended for users who prefer cleanly partitioned line defense maps among StarCraft custom maps or those who enjoy clearing defensive missions based on personal skill. Before starting the game, it is advisable to carefully check the terrain characteristics and resource layouts of each lane, planning out how to position turrets and buildings to prepare for the early enemy waves.
인디비주얼 랜덤 콜로니 디펜스 (Individual Random Colony DEF)
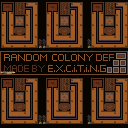
인디비주얼 랜던 콜로니 디펜스(Individual Random Colony DEF)는 스타크래프트 브루드워 맵에서 즐길 수 있는 독특한 형식의 디펜스 장르 유즈맵입니다. 이 맵은 플레이어가 각자의 독립된 공간에서 몰려오는 적들을 막아내는 방식으로 진행됩니다. 전체적인 맵 구조를 살펴보면, 각 플레이어마다 개별적인 기지와 방어 라인이 나뉘어 배치되어 있어 협력하면서도 개인의 방어 능력을 철저하게 시험받게 됩니다. 황혼 타일셋을 바탕으로 구성된 독창적인 지형은 시각적인 몰입감을 더해주며, 무작위 요소가 가미된 진행 방식 덕분에 매 게임마다 색다른 전략을 고민하게 만듭니다. 특히 각 진지의 입구와 통로 배치가 전략적으로 설계되어 있어, 유닛의 효율적인 배치와 자원 관리가 승패를 가르는 중요한 요인으로 작용합니다. 게임이 시작되면 플레이어는 자신에게 주어진 구역을 지키며 점차 거세지는 공세에 대비해야 합니다. 적들의 공격 패턴에 맞춰 방어 건물을 건설하거나 병력을 적절한 위치에 주둔시켜야 하며, 동료들과의 유기적인 소통과 지원이 원활할수록 생존 확률이 높아집니다. 혼자서 방어선을 구축하고 운영하는 재미를 즐기는 유저뿐만 아니라, 여러 플레이어와 함께 각자의 진지를 책임지며 협동 플레이를 펼치고 싶은 유저들에게 매우 매력적인 선택지가 됩니다. 복잡한 컨트롤보다는 전체적인 빌드와 방어선 배치가 중요하므로, 디펜스 유즈맵을 선호하는 이들이라면 한 번쯤 도전해 볼 만한 가치가 있습니다. 플레이를 시작하기 전, 각 기지의 지형적 특성과 자원 줄의 위치를 미리 파악해 두는 것이 유리하며, 초반 공세를 안정적으로 넘길 수 있는 빌드 오더를 미리 구상하고 진입하는 것을 권장합니다. Individual Random Colony DEF is a unique defense-style custom map available in StarCraft: Brood War, designed to challenge players in independent yet connected arenas. In this map, participants are assigned separate base locations where they must individually fend off incoming enemy waves while maintaining their defensive perimeters. The terrain layout, built upon the twilight tileset, features distinct lanes and bases that emphasize strategic positioning and resource management. Players must carefully construct defensive structures and position units to counter escalating threats, making individual tactical decisions crucial for survival. Because the map incorporates randomized elements, each session offers a fresh experience that requires adaptable strategies rather than relying on a single fixed build. Cooperation and communication among players in separate zones further enhance the cooperative dynamics, as supporting neighboring allies can prevent localized collapses. It is an ideal choice for enthusiasts of defense custom maps who enjoy managing isolated bases while coordinating with a team. Before jumping into the game, players are advised to analyze the terrain layout of their starting colony and plan an efficient early-game build order to successfully withstand the initial onslaught.
러커 인디비주얼 디펜스 3 (LurkerIndivisualDefense3)
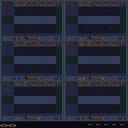
러커 인디비주얼 디펜스 3(LurkerIndivisualDefense3)은 스타크래프트 브루드워 맵 중에서 개인전 형식으로 쏟아지는 적을 막아내는 독특한 플레이 특징을 지닌 디펜스 장르의 유즈맵입니다. 이 맵은 화산 타일셋을 배경으로 하여 다수의 플레이어가 각각 독립된 진형을 구축하고 몰려오는 적 유닛을 상대하는 구조를 보여줍니다. 게임이 시작되면 각 플레이어는 자신만의 방어 구역을 배정받으며, 주어진 자원과 유닛을 활용해 기지를 방어해야 합니다. 개인 디펜스 맵인 만큼 협력보다는 각자의 생존과 효율적인 자원 관리가 승패를 가르는 핵심 요소로 작용합니다. 각 진형은 대칭적이면서도 독립적인 공간으로 나뉘어 있어, 플레이어들은 외부의 도움 없이 오직 자신의 빌드와 유닛 배치 능력으로 웨이브를 돌파해야 합니다. 적들이 몰려오는 라인과 방어 구조물의 배치를 세밀하게 조율하는 전략적 판단이 요구되며, 게임 중반 이후로 갈수록 강력해지는 적의 공세를 버텨내기 위한 집중력이 필요합니다. 친구들과 함께 개인 실력을 겨루거나 각자의 방어 라인을 얼마나 튼튼하게 구축하는지 시험해보고 싶은 유저들에게 알맞은 맵입니다. 플레이를 시작하기 전에 각 진영의 자원 수급 방식과 유닛 배치 가능한 공간을 미리 파악해두면 원활한 진행에 도움이 됩니다. LurkerIndivisualDefense3 is a defense genre usemap in StarCraft: Brood War that features a unique gameplay style where players fend off waves of enemies in an individual format. Set against a volcanic tileset, the map presents a structure where multiple players build independent formations and deal with incoming enemy units. When the game begins, each participant is assigned their own defensive zone, requiring them to defend their base using given resources and units. As an individual defense map, personal survival and efficient resource management rather than cooperation act as key factors determining victory or defeat. Each base is divided into symmetrical yet independent spaces, forcing players to break through waves solely through their own builds and unit placement skills without outside help. Strategic judgment is required to finely tune the lines where enemies approach and the placement of defensive structures, and concentration is needed to withstand increasingly powerful enemy offensives as the game progresses into the mid and late stages. This map is well suited for users who want to compete in individual skills with friends or test how solidly they can build their own defensive lines. Before starting play, grasping the resource supply method of each faction and the space available for unit placement in advance will help ensure a smooth progression.
개인 Lurker Defense
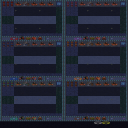
개인 Lurker Defense (Personal Lurker Defense)는 스타크래프트 브루드워 맵 유즈맵 환경에서 독특한 방어 형식의 플레이를 즐길 수 있는 재미있는 디펜스 장르의 작품이다. 화산 타일셋을 배경으로 펼쳐지는 이 맵은 최대 6명이 함께 참여할 수 있는 구조를 갖추고 있으며, 각 플레이어는 자신에게 주어진 독립된 구역에서 몰려오는 적의 공세에 맞서 기지를 방어해야 하는 임무를 맡게 된다. 본 맵의 가장 큰 특징은 개인이라는 타이틀에 걸맞게 타인의 도움 없이 온전히 자신의 방어력과 전술적 판단으로 웨이브를 극복해야 한다는 점이다. 중앙의 넓은 진군로를 통해 적들이 이동하는 동안, 플레이어는 제한된 자원과 주어진 유닛 조합을 활용해 효율적인 방어 라인을 구축해야 한다. 저거넛이나 러커 같은 특수한 유닛 배치와 포지셔닝이 생존을 결정짓는 핵심 요소로 작용하며, 웨이브가 거듭될수록 강력해지는 적들을 상대하기 위해 빠른 판단력과 자원 관리 능력이 요구된다. 친구들과 함께 각자의 실력을 겨루며 방어선이 무너지는 위기를 극복하는 과정에서 큰 몰입감을 느낄 수 있으며, 클래식한 유즈맵 특유의 레트로한 감성과 함께 긴장감 넘치는 디펜스 플레이를 선호하는 유저들에게 안성맞춤인 선택이 될 것이다. 플레이 전 각 플레이어의 구역 배치와 초기 자원 상태를 꼼꼼히 확인하고, 밀려오는 적의 속성과 공격 타이밍에 맞춰 유닛을 적절히 배치하는 전략적 접근이 필수적이다. Personal Lurker Defense is an interesting defense genre map in the StarCraft Brood War usemap environment where players can enjoy a unique defensive gameplay style. Set against a volcanic tileset background, this map is structured to accommodate up to six players, with each assigned to an independent zone where they must defend their base against incoming enemy waves. The defining characteristic of this map is that, true to its individual title, players must overcome waves entirely through their own defensive capabilities and tactical judgment without relying on external assistance. While enemies march along the central advancing paths, players must utilize limited resources and given unit compositions to establish efficient defensive lines. The specific placement and positioning of units such as lurkers serve as crucial elements determining survival, and rapid decision-making and resource management skills are required to face increasingly powerful enemies as the waves progress. Players can experience high immersion while overcoming the crisis of collapsing defense lines and testing their skills alongside others, making it an ideal choice for users who prefer tense defense gameplay combined with the retro sensibility of classic usemaps. Before playing, it is essential to carefully check each player's zone layout and initial resource status, and adopt a strategic approach by properly positioning units according to the attributes and attack timing of the advancing enemies.
에이프릴 디펜스 2 (April Defense 2)
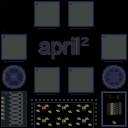
스타크래프트 브루드워 맵을 즐기는 유저들이라면 독특한 구조와 긴장감 넘치는 플레이를 제공하는 유즈맵에 주목하기 마련이다. 에이프릴 디펜스 2(April Defense 2)는 화산 타일셋을 배경으로 펼쳐지는 개성 있는 디펜스 장르의 스타크래프트 맵으로, 플레이어의 협동과 전략적 판단을 시험하는 무대를 제공한다. 맵 전체의 구조를 살펴보면 다수의 유닛 배치 구역과 방어 거점이 체계적으로 나누어져 있으며, 개인별로 주어진 공간에서 몰려오는 적들을 상대하는 방식을 취하고 있다. 내부 설명에 언급된 것처럼 무작위 요소와 개별적인 방어선 구축이 핵심으로 작용하며, 럴커를 활용한 방어 메커니즘이나 독특한 유닛 배치 형태가 게임의 재미를 한층 더 끌어올린다. 전체적인 진행 방식은 각 플레이어가 자신의 진지를 철저히 지켜내면서 장기적인 웨이브를 버텨내는 형태이며, 정교한 유닛 컨트롤과 효율적인 자원 운용이 승패를 가르는 중요한 요인으로 작용한다. 특히 다인용 플레이 환경에 최적화되어 있어 여러 명이 함께 참여할 때 더욱 흥미진진한 협동 플레이를 경험할 수 있다. 초보자부터 숙련된 디펜스 장르 팬들까지 폭넓게 즐길 수 있는 구조를 갖추고 있으며, 매 판마다 달라지는 상황에 맞춰 최적의 방어 전략을 찾아내는 것이 이 맵을 온전히 즐기는 방법이다. 플레이를 시작하기 전 각 진영의 위치와 방어 유닛의 특성을 미리 파악해 두는 것이 유리하며, 동료 플레이어들과의 호흡을 맞추어 웨이브를 효율적으로 방어해 나가는 것을 추천한다. 전략적인 디펜스 유즈맵을 선호하는 유저들에게 색다른 도전 과제가 될 수 있는 완성도 높은 맵이다. For users who enjoy StarCraft: Brood War maps, custom maps that offer unique structures and tense gameplay always capture attention. April Defense 2 is an individual defense genre StarCraft map set against a volcanic tileset, providing a stage that tests players' cooperation and strategic judgment. Looking at the overall structure of the map, multiple unit placement zones and defensive strongholds are systematically divided, adopting a method where players deal with incoming enemies within their individually assigned spaces. As mentioned in the map's internal description, random elements and individual defense line construction act as the core, while defense mechanisms utilizing Lurkers and unique unit placement layouts further elevate the fun of the game. The overall progression method involves each player thoroughly defending their own base while surviving long-term waves, where precise unit control and efficient resource management act as crucial factors determining victory or defeat. In particular, it is optimized for multiplayer environments, allowing players to experience much more exciting cooperative play when multiple people participate together. It features a structure that can be enjoyed broadly from beginners to experienced defense genre fans, and finding the optimal defensive strategy tailored to changing situations in every match is the way to fully enjoy this map. Before starting the game, it is advantageous to understand the positions of each base and the characteristics of defensive units in advance, and it is recommended to match rhythms with fellow players to efficiently defend against waves. It is a well-crafted map that can serve as a refreshing challenge for users who prefer strategic defense custom maps.
최근 등록된 맵
새로 추가된 파일과 버전을 확인하세요.
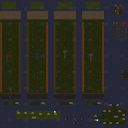
썬컨 디펜스 온 유어 오wn (Sunken Defence ON YOUR OWN)
를 통해 살펴볼 '썬컨 디펜스 온 유어 오wn (Sunken Defence ON YOUR OWN)'은 플레이어 간의 치열한 경쟁과 방어 전략을 동시에 요구하는 독특한 스타일의 디펜스 유즈맵이다. 전체적인 맵 구조를 살펴보면, 각 플레이어는 독립된 수직 형태의 라인을 배정받아 자신만의 방어 영역을 구축하게 된다. 맵 이미지에서 확인할 수 있듯 길게 뻗은 네 개의 독립된 구역이 나란히 배치되어 있으며, 각각의 라인에는 저그의 썬컨 콜로니를 활용한 방어선이 일렬로 늘어서 있는 형태를 띤다. 내부 설명에서 언급되듯 이 맵의 핵심 목표는 다른 누구보다 먼저 30단계의 웨이브를 돌파하고 생존하는 것이다. 단순한 협동 방어를 넘어 제한된 공간 속에서 효율적인 자원 관리와 빠른 유닛 배치 능력을 겨루는 구조이기 때문에, 타임 어택과 개인 기량을 중시하는 유저들에게 안성맞춤인 플레이 경험을 선사한다. 각 라인은 물리적으로 분리되어 있어 협공보다는 온전히 자신의 실력으로 물밀듯이 밀려오는 적들을 막아내야 하므로 고도의 집중력이 요구된다. 특히 라인 주변의 지형적 제약과 배치된 구조물들을 활용해 최적의 방어 진지를 완성하는 과정이 이 맵의 가장 큰 묘미라 할 수 있다. 평소 개인형 디펜스 장르나 속도감 있는 경쟁형 유즈맵을 선호하는 플레이어라면 도전해 볼 가치가 충분하며, 친구들과 함께 각자의 방어 라인 속도 경쟁을 펼치며 즐기기에 알맞은 스타크래프트 맵이다. 플레이를 시작하기 앞서 각 라인별 적의 공세 타이밍과 업그레이드 효율을 빠르게 파악하는 것이 승리를 위한 중요한 포인트가 될 것이다. Sunken Defence ON YOUR OWN is a unique defense use map that requires both intense competition and defensive strategy among players. Looking at the overall map structure, each player is assigned an independent vertical lane to build their own defensive territory. As seen in the map image, four long, independent areas are arranged side by side, and each lane features a defensive line utilizing Zerg Sunken Colonies. As mentioned in the internal description, the core objective of this map is to break through 30 waves of enemies and survive before anyone else. Since it is structured to compete in efficient resource management and rapid unit placement within a limited space rather than simple cooperative defense, it delivers a tailored play experience for users who value time attacks and individual skills. Each lane is physically separated, requiring high concentration as players must fend off overwhelming enemies entirely with their own abilities rather than joint attacks. In particular, the process of completing the optimal defensive position by utilizing the topographical constraints and structures around the lane can be considered the greatest charm of this map. Players who usually prefer individual defense genres or fast-paced competitive use maps will find it well worth a try, making it an appropriate StarCraft map to enjoy while competing for speed across individual defense lines with friends. Before starting play, quickly grasping the enemy attack timing and upgrade efficiency for each lane will be an important point for victory.
러커 인디비주얼 디펜스 3 (LurkerIndivisualDefense3)
러커 인디비주얼 디펜스 3(LurkerIndivisualDefense3)은 스타크래프트 브루드워 맵 중에서 개인전 형식으로 쏟아지는 적을 막아내는 독특한 플레이 특징을 지닌 디펜스 장르의 유즈맵입니다. 이 맵은 화산 타일셋을 배경으로 하여 다수의 플레이어가 각각 독립된 진형을 구축하고 몰려오는 적 유닛을 상대하는 구조를 보여줍니다. 게임이 시작되면 각 플레이어는 자신만의 방어 구역을 배정받으며, 주어진 자원과 유닛을 활용해 기지를 방어해야 합니다. 개인 디펜스 맵인 만큼 협력보다는 각자의 생존과 효율적인 자원 관리가 승패를 가르는 핵심 요소로 작용합니다. 각 진형은 대칭적이면서도 독립적인 공간으로 나뉘어 있어, 플레이어들은 외부의 도움 없이 오직 자신의 빌드와 유닛 배치 능력으로 웨이브를 돌파해야 합니다. 적들이 몰려오는 라인과 방어 구조물의 배치를 세밀하게 조율하는 전략적 판단이 요구되며, 게임 중반 이후로 갈수록 강력해지는 적의 공세를 버텨내기 위한 집중력이 필요합니다. 친구들과 함께 개인 실력을 겨루거나 각자의 방어 라인을 얼마나 튼튼하게 구축하는지 시험해보고 싶은 유저들에게 알맞은 맵입니다. 플레이를 시작하기 전에 각 진영의 자원 수급 방식과 유닛 배치 가능한 공간을 미리 파악해두면 원활한 진행에 도움이 됩니다. LurkerIndivisualDefense3 is a defense genre usemap in StarCraft: Brood War that features a unique gameplay style where players fend off waves of enemies in an individual format. Set against a volcanic tileset, the map presents a structure where multiple players build independent formations and deal with incoming enemy units. When the game begins, each participant is assigned their own defensive zone, requiring them to defend their base using given resources and units. As an individual defense map, personal survival and efficient resource management rather than cooperation act as key factors determining victory or defeat. Each base is divided into symmetrical yet independent spaces, forcing players to break through waves solely through their own builds and unit placement skills without outside help. Strategic judgment is required to finely tune the lines where enemies approach and the placement of defensive structures, and concentration is needed to withstand increasingly powerful enemy offensives as the game progresses into the mid and late stages. This map is well suited for users who want to compete in individual skills with friends or test how solidly they can build their own defensive lines. Before starting play, grasping the resource supply method of each faction and the space available for unit placement in advance will help ensure a smooth progression.
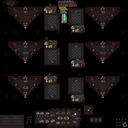
세모디펜스 G1 (Semo Defense G1)
스타크래프트 브루드워 맵 중에서도 색다른 방식의 방어전을 즐기고 싶어 하는 유저들에게 세모디펜스 G1 (Semo Defense G1)은 꽤 흥미로운 선택지가 될 수 있는 유즈맵입니다. 이 맵은 전통적인 밀리 방식에서 벗어나, 플레이어들이 각자 자신에게 주어진 독립된 공간에서 몰려오는 적들을 상대하며 생존을 도모하는 개인형 디펜스 장르를 표방하고 있습니다. 전체적인 구조를 살펴보면 맵 하단에 유닛을 선택하고 준비할 수 있는 별도의 공간이 마련되어 있으며, 이곳에서 원하는 유닛을 신중하게 골라 각 플레이어의 개인 방어 구역으로 배치하는 방식으로 게임이 진행됩니다. 특히 공중 유닛을 주력으로 활용하거나 적의 공세에 대처하는 요소를 강조한 형태로 추정되며, 각자의 구역에서 몰려오는 적들을 효율적으로 처치하지 못하고 누적되도록 방치할 경우 패배로 이어지는 긴장감 있는 승리 조건을 가지고 있습니다. 내부 설명에 따르면 화면에 남아있는 적 유닛이 100기를 넘어설 경우 그대로 게임이 끝나기 때문에, 플레이어는 한순간도 방심하지 않고 화력을 집중하거나 방어선을 정비해야 합니다. 여러 명이 동시에 참여해 각자의 실력을 겨루며 협동과 생존을 동시에 도모할 수 있는 구조를 갖추고 있어, 친구들과 함께 가볍게 즐기면서도 집중력을 발휘하기 좋은 플레이 경험을 선사합니다. 평소 독특한 규칙 속에서 몰려오는 적들을 막아내는 타워 디펜스나 개인 디펜스 유즈맵을 선호하는 플레이어라면 한 번쯤 도전해볼 가치가 있는 맵입니다. 플레이를 시작하기 전에는 맵 하단의 유닛 선택 구역 위치와 적 유닛 누적 패배 조건 등 기본적인 진행 방식을 미리 숙지하는 것이 원활한 방어와 생존에 큰 도움이 될 것입니다. Semo Defense G1 is an interesting Use Map for users who want to enjoy a different style of defensive warfare in Starcraft Brood War. Moving away from traditional melee gameplay, this map features a personal defense genre where players operate in their own independent spaces to deal with incoming enemies and strive for survival. Looking at the overall structure, a separate area is provided at the bottom of the map where players can select and prepare units, and the game proceeds by carefully choosing desired units from this area and placing them into each player's personal defense zone. It is designed to emphasize utilizing air units as a primary force or dealing with enemy offensives, and it has a tense win condition where failing to efficiently eliminate incoming enemies in each zone and allowing them to accumulate leads to defeat. According to the internal description, if more than 100 enemy units remain on the screen, the game ends immediately, so players must focus their firepower and reorganize their defense lines without a single moment of carelessness. With a structure that allows multiple people to participate simultaneously to test their skills while pursuing cooperation and survival together, it delivers a pleasant gameplay experience that is great for enjoying lightly with friends while exercising concentration. Players who usually prefer tower defense or personal defense use maps where they fend off waves of enemies under unique rules will find this map worth a try. Before starting the game, familiarizing yourself with the basic progression methods, such as the location of the unit selection area at the bottom of the map and the defeat condition for accumulated enemy units, will be of great help for smooth defense and survival.
개인 사각 디펜스 초대물량 (Individual Square Defense Mega Volume)
개인 사각 디펜스 초대물량(Individual Square Defense Mega Volume)은 스타크래프트 브루드워 맵 유즈맵 장르 중에서도 독특한 구성을 자랑하는 디펜스 계열의 맵이다. 제공된 미니맵 이미지와 맵의 전체적인 구조를 살펴보면, 각 플레이어마다 독립적으로 분리된 사각형 형태의 개인 방어 구역이 존재하며, 중앙 및 측면 공간에는 유닛 생산이나 자원 관리, 혹은 거대한 물량 공세가 펼쳐지는 별도의 구역들이 마련되어 있는 것으로 추정된다. 이러한 구조는 클래식한 디펜스 장르의 문법을 따르면서도, 사방에서 몰려오는 적들을 각자의 진영에서 철저하게 방어해야 하는 긴장감을 선사한다. 특히 타이틀에 명시된 '초대물량'이라는 키워드처럼, 게임 후반부로 갈수록 화면을 가득 채우는 엄청난 규모의 적 유닛들이 등장하여 플레이어의 방어선을 시험할 것으로 보인다. 이 맵은 최대 6인이 함께 즐길 수 있도록 설계되어 있어, 다수의 플레이어가 동시에 각자의 구역을 틀어막고 협력하거나 경쟁하는 양상으로 진행된다. 혼자서 모든 라인을 방어해야 하는 솔로 플레이와는 달리, 멀티플레이 시 아군과의 소통과 유닛 조합, 그리고 각 진영의 생존 여부가 전체 게임의 승패를 가르는 중요한 요소로 작용한다. 플레이어는 자신에게 주어진 사각형 진영 안에서 효율적으로 타워나 유닛을 배치하고, 끊임없이 몰려오는 적의 공세에 대비해 방어 체계를 업그레이드해야 한다. 각 구역이 명확하게 구분되어 있기 때문에 시각적으로 전황을 파악하기 쉽고, 대규모 전투가 벌어질 때 화면 연출에서 오는 타격감과 몰입감이 뛰어날 것으로 기대된다. 전통적인 디펜스 유즈맵을 선호하거나 거대한 물량과의 사투를 즐기는 유저들에게 이 맵은 매력적인 선택지가 될 수 있다. 게임을 시작하기 전에는 방어 구역의 지형적 특성과 적의 진격 경로를 미리 파악하고, 함께 플레이하는 아군과의 협력 방안을 미리 구상해 두는 것이 좋다. 각자 고립된 사각형 공간에서 각개전투를 벌이는 형상이기 때문에, 한쪽 진영이 무너졌을 때의 파급 효과를 고려한 전략적인 유닛 배치와 빠른 대처가 필수적이다. 시원시원한 대규모 적 처치와 방어의 재미를 동시에 느끼고 싶은 스타크래프트 유저라면 꼭 한 번 플레이해 볼 만한 가치가 있는 흥미로운 맵이다. Individual Square Defense Mega Volume is a defense-style map featuring a unique layout within the StarCraft Brood War UMS genre. Looking at the provided minimap image and the overall map structure, it appears that each player has an independently separated square-shaped personal defense zone, with central and side areas designated for unit production, resource management, or massive wave attacks. This structure follows the grammar of the classic defense genre while delivering the tension of thoroughly defending against enemies approaching from all sides within individual bases. True to the keyword 'Mega Volume' specified in the title, an enormous scale of enemy units is expected to fill the screen in the later stages of the game, testing the players' defensive lines. Designed for up to 6 players to enjoy together, this map unfolds in a pattern where multiple players simultaneously lock down their respective areas to cooperate or compete. Unlike solo play where a single player must defend all lines, multiplayer sessions involve communication with allies, unit combinations, and the survival of each base as crucial factors determining the outcome. Players must efficiently deploy towers and units within their assigned square bases and upgrade their defense systems against ceaseless enemy offensives. Because each zone is clearly demarcated, it is easy to visually grasp the battlefield situation, and the impact and immersion of large-scale combat are expected to be high. For users who prefer traditional defense UMS maps or enjoy struggling against massive waves, this map can be an attractive option. Before starting the game, it is recommended to examine the topographical features of the defense zones and enemy advance routes, and to plan cooperative strategies with allies. Since it features isolated square spaces for individual combat, strategic unit placement and quick responses considering the ripple effects of one base collapsing are essential. For StarCraft users who want to simultaneously experience the thrill of massive enemy elimination and defensive gameplay, it is an interesting map well worth playing at least once.
개인리버디펜스 (Individual Reaver Defense)
개인리버디펜스[0.6](Individual Reaver Defense)는 스타크래프트 브루드워 팬들이 즐겨 찾는 디펜스 장르의 독특한 유즈맵입니다. 이 맵은 화산 타일셋을 배경으로 펼쳐지며, 다수의 플레이어가 각자의 구역에서 몰려오는 적들을 상대하는 개인 플레이 중심의 방어 구조를 가지고 있습니다. 맵 전체의 구조를 살펴보면 각 플레이어마다 독립된 사각형 형태의 방어 공간이 명확하게 나누어져 있어, 타인의 간섭을 최소화하고 오롯이 자신의 컨트롤과 빌드업에 집중할 수 있는 환경을 제공합니다. 상단부에는 공통으로 관리되는 생명력(LIFE) 지표가 배치되어 있어 팀 전체의 긴장감을 유지하며, 각 진영 주변에는 유닛 생산이나 방어 배치를 위한 공간이 유기적으로 연결되어 있습니다. 특히 유닛의 특성과 공격 타이밍을 정확히 파악해야 하는 디펜스 유즈맵의 특성상, 초보자부터 숙련된 유저까지 각자의 페이스에 맞춰 플레이를 즐길 수 있는 것이 큰 장점입니다. 플레이어는 제한된 공간 안에서 효율적인 자원 운용과 리버를 활용한 전략적인 화력 배치를 고민해야 하며, 웨이브가 거듭될수록 증가하는 적의 공세를 막아내기 위해 끊임없는 유닛 위치 선정과 업그레이드가 요구됩니다. 친구들과 함께 다인원으로 모여 각자의 방어력을 시험하고 생존 경쟁을 펼치기에 적합하며, 전통적인 디펜스 유즈맵의 재미를 깔끔하고 정돈된 맵 레이아웃 속에서 온전히 느끼고 싶은 유저들에게 추천할 만한 작품입니다. 게임을 시작하기 전 각 플레이어의 진영 위치와 자원 공급 방식을 미리 숙지하고, 초반 웨이브를 안정적으로 넘기기 위한 빌드를 구상하고 참여하는 것이 원활한 플레이를 위한 포인트입니다. Individual Reaver Defense [0.6] is a unique defense genre Use Map frequently enjoyed by StarCraft: Brood War fans. Set against a volcanic tileset background, this map features a solo-play-oriented defense structure where multiple players handle incoming enemies within their own designated zones. Examining the overall map structure, each player is provided with a clearly divided, independent rectangular defense space, creating an environment that minimizes outside interference and allows players to focus entirely on their own control and build-ups. At the top section, a centrally managed life indicator is placed to maintain tension for the entire group, while spaces for unit production or defensive placement are organically connected around each camp. Particularly due to the characteristics of defense Use Maps, where players must accurately understand unit traits and attack timings, it offers the great advantage of letting both beginners and experienced users enjoy play at their own pace. Players must ponder efficient resource management and strategic firepower deployment using Reavers within a limited space, and constant unit positioning and upgrades are required to fend off increasingly formidable enemy waves as the game progresses. It is well-suited for gathering with friends in larger player counts to test individual defensive capabilities and experience survival competition, making it a recommended work for users who want to fully feel the fun of traditional defense Use Maps within a clean and organized map layout. Before starting the game, it is helpful for smooth gameplay to familiarize yourself with each player's starting position and resource supply method in advance, and to devise a build plan that can securely clear the early waves.
인디비주얼 랜덤 콜로니 디펜스 (Individual Random Colony DEF)
인디비주얼 랜던 콜로니 디펜스(Individual Random Colony DEF)는 스타크래프트 브루드워 맵에서 즐길 수 있는 독특한 형식의 디펜스 장르 유즈맵입니다. 이 맵은 플레이어가 각자의 독립된 공간에서 몰려오는 적들을 막아내는 방식으로 진행됩니다. 전체적인 맵 구조를 살펴보면, 각 플레이어마다 개별적인 기지와 방어 라인이 나뉘어 배치되어 있어 협력하면서도 개인의 방어 능력을 철저하게 시험받게 됩니다. 황혼 타일셋을 바탕으로 구성된 독창적인 지형은 시각적인 몰입감을 더해주며, 무작위 요소가 가미된 진행 방식 덕분에 매 게임마다 색다른 전략을 고민하게 만듭니다. 특히 각 진지의 입구와 통로 배치가 전략적으로 설계되어 있어, 유닛의 효율적인 배치와 자원 관리가 승패를 가르는 중요한 요인으로 작용합니다. 게임이 시작되면 플레이어는 자신에게 주어진 구역을 지키며 점차 거세지는 공세에 대비해야 합니다. 적들의 공격 패턴에 맞춰 방어 건물을 건설하거나 병력을 적절한 위치에 주둔시켜야 하며, 동료들과의 유기적인 소통과 지원이 원활할수록 생존 확률이 높아집니다. 혼자서 방어선을 구축하고 운영하는 재미를 즐기는 유저뿐만 아니라, 여러 플레이어와 함께 각자의 진지를 책임지며 협동 플레이를 펼치고 싶은 유저들에게 매우 매력적인 선택지가 됩니다. 복잡한 컨트롤보다는 전체적인 빌드와 방어선 배치가 중요하므로, 디펜스 유즈맵을 선호하는 이들이라면 한 번쯤 도전해 볼 만한 가치가 있습니다. 플레이를 시작하기 전, 각 기지의 지형적 특성과 자원 줄의 위치를 미리 파악해 두는 것이 유리하며, 초반 공세를 안정적으로 넘길 수 있는 빌드 오더를 미리 구상하고 진입하는 것을 권장합니다. Individual Random Colony DEF is a unique defense-style custom map available in StarCraft: Brood War, designed to challenge players in independent yet connected arenas. In this map, participants are assigned separate base locations where they must individually fend off incoming enemy waves while maintaining their defensive perimeters. The terrain layout, built upon the twilight tileset, features distinct lanes and bases that emphasize strategic positioning and resource management. Players must carefully construct defensive structures and position units to counter escalating threats, making individual tactical decisions crucial for survival. Because the map incorporates randomized elements, each session offers a fresh experience that requires adaptable strategies rather than relying on a single fixed build. Cooperation and communication among players in separate zones further enhance the cooperative dynamics, as supporting neighboring allies can prevent localized collapses. It is an ideal choice for enthusiasts of defense custom maps who enjoy managing isolated bases while coordinating with a team. Before jumping into the game, players are advised to analyze the terrain layout of their starting colony and plan an efficient early-game build order to successfully withstand the initial onslaught.
캐논 디 온 유어 오운 (Cannon D On Your Own)
캐논 디 온 유어 오운(Cannon D On Your Own)은 스타크래프트 브루드워의 대표적인 유즈맵 장르 중 하나로, 플레이어 각자가 독립된 공간에서 포탑을 활용해 몰려오는 적의 공세를 방어하는 독특한 구조를 가진 디펜스 유형의 맵이다. 전체적인 맵 레이아웃을 살펴보면, 플레이어들이 각각 독립적으로 배치될 수 있는 길쭉한 세로형 라인 구조가 여러 개 나란히 늘어선 형태를 취하고 있다. 이러한 구조 덕분에 여러 명의 플레이어가 동시에 참여하더라도 서로의 자리를 침범하지 않고 오롯이 자신의 진영에 집중하며 개별적인 생존 능력을 시험할 수 있는 환경이 조성된다. 제목에서 유추할 수 있듯이 포탑 건설과 방어가 핵심 메커니즘으로 작용할 것으로 보이며, 각 라인마다 주어진 자원과 공간을 얼마나 효율적으로 활용하느냐가 승패를 가르는 중요한 요인이 된다. 플레이어는 자신에게 주어진 구역 내에서 최적의 방어 진지를 구축하고, 끊임없이 몰려오는 적 유닛들의 파상공세를 저지해야 한다. 협동 플레이의 요소도 존재하지만 기본적으로 각자도생의 성격이 강해 개인의 유닛 배치 능력과 판단력이 중요하게 작용하며, 친구들과 함께 각자의 실력을 겨루거나 각자 맡은 라인을 철저하게 사수하는 재미를 느낄 수 있다. 스타크래프트 브루드워 유즈맵 중에서도 깔끔하게 구획된 라인 디펜스 형식을 선호하는 유저들이나, 개인 기량을 바탕으로 방어 미션을 클리어하는 것을 즐기는 플레이어들에게 추천할 만한 맵이다. 본격적으로 게임을 시작하기 전에는 각 라인의 지형적 특성과 자원 배치를 꼼꼼히 확인하고, 초반 공세에 대비해 어떤 방식으로 포탑과 건물을 배치할 것인지 미리 전략을 세우는 것이 안전하다. Cannon D On Your Own is a defense-type custom map for StarCraft: Brood War featuring a unique structure where each player defends against incoming enemy waves using turrets in an independent space. Looking at the overall map layout, it consists of multiple elongated vertical lane structures arranged side by side, allowing players to be positioned separately. This design creates an environment where multiple participants can focus entirely on their own territory without encroaching on others, testing individual survival skills. As the title suggests, turret construction and defense act as the core mechanics, making the efficient use of resources and space in each lane a crucial factor for success. Players must build optimal defensive positions within their assigned zones and withstand relentless enemy waves. While cooperative elements exist, the map leans heavily toward a self-reliance style where individual unit placement and judgment matter greatly, offering the fun of competing with friends or strictly holding one's assigned line. It is recommended for users who prefer cleanly partitioned line defense maps among StarCraft custom maps or those who enjoy clearing defensive missions based on personal skill. Before starting the game, it is advisable to carefully check the terrain characteristics and resource layouts of each lane, planning out how to position turrets and buildings to prepare for the early enemy waves.
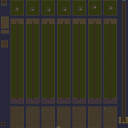
캐논 디 온 유어 오wn (Cannon D On Your Own)
캐논 디 온 유어 오wn(Cannon D On Your Own)은 스타크래프트 브루드워에서 즐길 수 있는 대표적인 개인전 형태의 디펜스 유즈맵입니다. 이 맵은 맵 전체가 여러 개의 독립된 구역으로 나뉘어 구성되어 있으며, 플레이어들은 각각 자신만의 공간에서 밀려오는 적들을 상대하게 됩니다. 전체적인 구조를 살펴보면 각 플레이어에게 공평하게 분할된 라인이 제공되며, 중앙 혹은 상단에서 내려오는 적의 공세를 자신만의 방어 시설로 막아내는 방식으로 게임이 진행됩니다. 다른 유저들과 자원을 공유하거나 유닛을 서로 돕는 협동 요소보다는, 오롯이 자신의 방어력과 컨트롤 능력을 시험하는 개인 서바이벌 성격이 강하게 드러납니다. 맵의 타일셋은 사막 분위기를 바탕으로 깔끔하게 정돈되어 있어 유닛의 이동과 전투 상황을 한눈에 파악하기에 용이합니다. 각 진영마다 배치된 공간 속에서 효율적인 건조 위치를 잡고, 웨이브마다 강화되는 적들을 어떻게 상대할지 고민하는 재미가 이 맵의 핵심 플레이 포인트입니다. 특히 자신만의 독자적인 라인을 책임져야 하므로 초보 플레이어라면 방어 건물의 사거리와 배치 효율을 꼼꼼히 따져보는 것이 중요하며, 후반으로 갈수록 거세지는 공세를 버티기 위한 빌드 체계를 미리 구상해 두는 편이 좋습니다. 다인원이 각자 실력을 겨루거나 고립된 라인 방어의 재미를 느끼고 싶은 유저들에게 추천할 만한 스타크래프트 맵입니다. Cannon D On Your Own is a popular individual defense use map in StarCraft: Brood War where players test their independent survival skills. The map layout is divided into several isolated lanes, providing each participant with a dedicated area to fend off incoming waves of enemies entirely on their own. Rather than focusing on cooperative resource sharing or joint unit management, the gameplay emphasizes personal defensive strategy, placement efficiency, and individual control under pressure. Featuring a clean desert tileset structure, the map allows players to easily monitor combat situations and manage their defensive lines from start to finish. Because everyone must hold their own ground without direct backup, analyzing structure ranges, optimizing placement, and planning ahead for scaling enemy waves are essential tactics for success. This custom map is a great choice for users who enjoy competitive isolation defense and want to test their tactical resilience in a structured, individual environment.
맵 선택 가이드
태그는 맵의 핵심 특징을 빠르게 설명하지만 제작 버전마다 규칙이 다를 수 있습니다. 상세 설명에서 권장 인원, 난이도, 플레이 시간과 버전을 함께 확인한 뒤 다운로드하세요.