
개인 디펜스 스타크래프트 맵 모음
'개인 디펜스' 태그가 등록된 맵을 모았습니다. 장르 하나로 찾기 어려운 플레이 방식, 난이도와 특징을 중심으로 인기 맵과 최신 맵을 비교해 보세요.
- 등록 맵
- 5개
- 누적 다운로드
- 1
- 누적 조회
- 137
인기 맵
다운로드와 조회 반응이 높은 맵입니다.
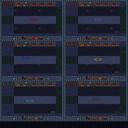
개인 Lurker Defense
화산 타일셋의 이글거리는 배경이 압박감을 더하는 이 맵은 전형적인 개인 디펜스 장르로 설계되었다. 여섯 명의 플레이어가 각자 독립된 구역에서 러커 웨이브를 막아내는 구조이며, 자원이 무한으로 제공되기 때문에 초반부터 부담 없이 유닛을 생산하고 방어선을 구축할 수 있다. 맵의 핵심은 단순히 많은 병력을 모으는 것이 아니라, 러커의 강력한 스플래시 공격을 어떻게 분산시키고 무력화하느냐에 달려 있다. 지형은 좁은 통로와 넓은 교전 공간이 혼합되어 있어 유닛 배치에 신중함을 요구한다. 초반에는 소수의 러커가 간격을 두고 등장해 아군 진영을 시험하지만, 웨이브가 거듭될수록 그 밀도와 속도가 급격히 증가한다. 특히 후반부에는 지속적으로 쏟아지는 러커의 가시가 방어선을 순식간에 무너뜨릴 수 있기 때문에, 지속적인 유닛 보충과 함께 시즈 탱크나 사이오닉 스톰 같은 범위 제압 능력을 적절히 배치하는 것이 생존의 관건이다. 플레이어는 각자 고립된 공간에서 싸우지만, 다른 플레이어의 방어 상황을 간접적으로 확인할 수 있어 심리적인 경쟁이 자연스럽게 유발된다. 누군가 무너지는 순간 긴장감이 극대화되며, 끝까지 버티는 플레이어에게 승리의 희열이 집중된다. 무한 자원이라는 설정 때문에 초보자도 진입 장벽 없이 시작할 수 있지만, 웨이브가 거듭될수록 단순한 물량만으로는 한계가 명확해져 상급자들도 전술을 고민하게 만든다. 이 맵은 스타크래프트의 기본 유닛 조작과 병력 배치 감각을 익히려는 유저에게 훌륭한 연습장이 되며, 친구들과 함께 가볍게 즐기기에도 부담이 없다. 다만, 게임이 길어질수록 반복적인 패턴에 익숙해질 수 있으므로 적당한 난이도 조절이 아쉬운 점이다. 또한 무한 자원 맵 특성상 후반부에 유닛이 과도하게 쌓여 렉이 발생할 가능성이 있으니, 사양이 낮은 컴퓨터에서는 미리 그래픽 설정을 낮추는 것이 바람직하다. 이 맵은 정교한 전략보다는 직관적인 방어와 지속적인 컨트롤에 초점을 맞춘, 묵직하고 직선적인 재미를 제공한다. The smoldering backdrop of the volcanic tileset amplifies the tension in this map, which is designed as a classic defense scenario. Six players each hold their own isolated zone against relentless waves of Lurkers, and the infinite resource setting allows everyone to build their defenses and produce units without early economic pressure. The core challenge of the map is not simply amassing a large army, but learning how to mitigate and neutralize the devastating splash damage of the Lurker attacks. The terrain mixes narrow choke points with wider open areas, demanding careful unit placement and tactical foresight. Early waves test the defenses with a manageable trickle of Lurkers, but the density and speed of the assault escalate rapidly as time passes. In the later stages, the ceaseless shower of subterranean spines can shred through defensive lines in seconds, making it essential to constantly replenish forces and deploy area control units like Siege Tanks or Psionic Storms to survive. Although each player fights in an isolated pocket, the indirect awareness of others' struggles creates a natural psychological competition. When one ally collapses, the tension peaks, and the hope of victory concentrates on the last remaining survivors. The infinite resource system removes entry barriers for beginners, yet the increasingly brutal waves expose the limits of simple mass production, forcing even experienced players to refine their tactical approach. This map serves as an excellent training ground for mastering basic unit control and army positioning in StarCraft, while also providing a casual and enjoyable experience with friends. However, the repetitive pattern of later waves can become predictable, so a lack of adjustable difficulty might be felt. Due to the infinite resource nature, excessive unit accumulation in the late game may cause performance drops, so players on lower-end systems should optimize their graphic settings beforehand. Ultimately, this map delivers a heavy, instinctive fun that emphasizes sustained attention and reactive control over intricate strategic planning.
![개인랜덤디펜스[Final] 맵 미리보기](https://cdn-star-data.huzy.net/thumbnail_2873edb602be4c78aa24b30eb6e70541.jpg)
개인랜덤디펜스[Final]
스타크래프트 브루드워 유즈맵 '개인랜덤디펜스[Final]'은 6인용 정글 타일셋에서 진행되는 개인 단위 랜덤 디펜스 맵이다. 각 플레이어는 독립된 구역에서 무작위로 소환되는 유닛을 조합해 몰려오는 적 웨이브를 막아내야 한다. 맵 크기는 4096x4096으로 넓은 전장을 제공하며, 128x128 타일 단위로 세밀한 지형 배치가 눈에 띈다. 제작자 E.x.c.i.t.i.n.g이 최종 버전으로 배포한 만큼 밸런스 조정과 버그 수정이 마무리된 상태로 보인다. 진행 방식은 일반적인 타워 디펜스와 달리 직접 유닛을 컨트롤하며 실시간으로 병력을 보충하고 업그레이드하는 액션성이 강조된다. 랜덤 요소로 매 게임마다 다른 유닛 조합이 나와 반복 플레이 가치가 높고, 개인별 난이도 조절이 가능해 초보자부터 고수까지 두루 즐길 수 있다. 정글 테마의 울창한 수풀과 지형 장애물이 시야를 제한해 긴장감을 더하며, 아군 간 협력보다는 개인 생존 경쟁이 핵심이라 팀플레이 부담이 적다. 플레이 전 확인할 점은 맵 설명에 명시된 제작자 사이트(intothemap.com)와 블로그에서 추가 패치나 공략 정보를 찾아보는 것이다. 6인 풀방 기준 30~50분 내외 소요될 것으로 추정되며, 난이도는 보통 수준으로 입문용으로 적당하다. 혼자서도 부담 없이 디펜스 장르의 재미를 느끼고 싶은 유저에게 추천한다. StarCraft Brood War UMS map 'Individual Random Defense [Final]' is a 6-player individual random defense map set on the Jungle tileset. Each player defends an independent zone, combining randomly spawned units to hold back incoming enemy waves. The map size is 4096x4096, providing a spacious battlefield with detailed terrain placement at 128x128 tile units. Released as a final version by creator E.x.c.i.t.i.n.g, it appears to have completed balance adjustments and bug fixes. Unlike typical tower defenses, gameplay emphasizes real-time unit control, reinforcing and upgrading forces on the fly. Random elements ensure different unit combinations each game, increasing replay value, while individual difficulty scaling allows both beginners and veterans to enjoy. The dense jungle foliage and terrain obstacles limit vision, adding tension. Since core gameplay revolves around personal survival rather than team coordination, the burden of teamplay is low. Before playing, check the creator's site (intothemap.com) and blog linked in the map description for potential patches or strategy guides. Estimated playtime for a full 6-player lobby is around 30–50 minutes, with a moderate difficulty suitable for newcomers. Recommended for users who want to experience defense genre fun solo without pressure.
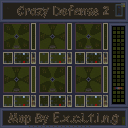
인디비주얼 크레이지 디펜스 2 (Individual Crazy Defense 2)
인디비주얼 크레이지 디펜스 2 버전 3.0은 6인용 개인 디펜스 맵으로, 각 플레이어가 독립된 레인에서 몰려오는 적 웨이브를 막아내는 구조다. 사막 타일셋 위에 128×128 타일 크기로 배치된 맵은 상하 대칭형 6개 레인이 나란히 놓인 형태이며, 중앙에는 공통 보스 구간이나 상점 구역이 자리한 것으로 보인다. 제작자 E.x.c.i.t.i.n.g 표기에서 알 수 있듯 크레이지 디펜스 시리즈 계승작으로, 기존 시리즈의 빠른 템포와 유닛 강화, 스킬 선택, 보스전 패턴이 그대로 이어진다. 게임 초반에는 기본 유닛으로 저글링·히드라리스크·울트라리스크 같은 지상 웨이브를 상대하고, 중반부터 공중 유닛과 특수 능력이 섞인 웨이브가 등장해 대공·탐지·범위 딜링 조합이 필수다. 각 레인 입구에 벙커·미사일 터렛·캐논 등 고정 방어 건물을 짓고, 미네랄·가스를 모아 유닛 생산·업그레이드·스킬 구매를 병행하는 전형적인 디펜스 루프가 돋보인다. 버전 3.0에 이르러 밸런스 조정과 버그 수정, 신규 유닛·스킬 추가가 이뤄진 것으로 추정되며, 난이도는 초반 쉬움에서 후반 매우 어려움까지 단계적으로 오른다. 6명이 동시에 진행하므로 파티 플레이나 랜덤 매칭 모두 적합하며, 한 명이 무너져도 나머지 인원이 버티면 클리어 가능성이 남아 있어 협동 요소가 강하다. 플레이 전에는 레인별 시작 자원, 업그레이드 트리, 보스 출현 타이밍, 공중·은폐 웨이브 대처용 탐지기 확보 시점을 미리 숙지하면 초반 붕괴를 줄일 수 있다. 솔로 연습용으로는 난이도가 높을 수 있으니 2~3인 이상 파티를 권장한다. Individual Crazy Defense 2 Version 3.0 is a six-player individual defense map where each player holds an independent lane against incoming enemy waves. Built on the Desert tileset at 128×128 tiles, the layout arranges six symmetrical lanes side by side with a central boss or shop area. Credited to maker E.x.c.i.t.i.n.g, it continues the Crazy Defense series with fast pacing, unit upgrades, skill choices, and scripted boss patterns. Early waves feature ground units like Zerglings, Hydralisks, and Ultralisks, while mid-to-late game adds air units and special abilities requiring detection, anti-air, and splash damage. Players construct static defenses at lane entrances—bunkers, missile turrets, photon cannons—and spend minerals and gas on unit production, upgrades, and skill purchases in a classic defense loop. Version 3.0 likely includes balance tweaks, bug fixes, and new units or skills. Difficulty ramps from easy early on to very hard in later stages. Since all six players progress simultaneously, it suits both party play and random matching; one player's loss does not immediately end the game, encouraging teamwork. Before starting, check starting resources per lane, upgrade trees, boss spawn timings, and when to secure detectors for air and cloaked waves to avoid early collapses. Solo practice may be too difficult, so a party of two or more is recommended.
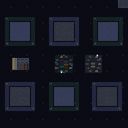
개인 사각디펜스 4.02정식 (Sagak Defense 4.02 Official)
‘개인 사각디펜스 4.02정식’은 스타크래프트 브루드워의 대표적인 개인 디펜스 유즈맵으로, 좁은 공간에서 끊임없이 밀려드는 적을 상대로 생존과 자원 관리를 동시에 요구하는 재미있는 플레이를 제공한다. 맵 중앙에 위치한 넓은 공간은 플레이어의 본진 역할을 하며, 사방에서 몰려드는 적 유닛을 방어용 건물과 유닛으로 처리해야 한다. 맵의 특징은 사각형 형태의 방어 구역이 чет하게 구분되어 있어 전략적인 배치와 업그레이드, 자원 활용이 필수적이라는 점이다. 특히, 맵의 네 모서리에는 자원 미네랄과 가스가 배치되어 있어 이를 확보하면서 방어 라인을 구축해야 한다. 방어 건물의 종류와 업그레이드 시스템, 그리고 적의 웨이브 패턴이 게임의 핵심 요소로 작용하며, 플레이어는 매 웨이브가 끝날 때마다 주어지는 보상과 업그레이드 포인트를 활용해 점차 방어력을 강화해야 한다. 맵의 밸런스는 비교적 안정적이지만, 후반부로 갈수록 적의 공격력이 급격히 상승하기 때문에 초반 자원 관리와 방어 라인 구축이 무엇보다 중요하다. 초보자도 쉽게 접근할 수 있도록 디자인되었지만, 고난이도로 갈수록 전략적인 깊이와 집중력이 요구되는 만큼 숙련자도 충분히 즐길 수 있는 구조다. 추천 대상은 스타크래프트 유즈맵을 처음 접하는 플레이어부터 디펜스 장인까지 폭넓은 유저층이며, 특히 자원 관리와 전략적 배치에 대한 감각을 키우고자 하는 게이머에게 적합하다. 플레이 전에는 맵의 구역별 기능과 방어 건물의 특성을 숙지하는 것이 중요하며, 초반 자원 확보와 방어 라인의 초기 구축을 소홀히 하지 않도록 주의해야 한다. 맵의 난이도는 점차 상승하는 구조로 되어 있어, 처음 플레이하는 경우 낮은 난이도부터 시작해 점차 높이는 것이 바람직하다. 또한, 맵의 디자인과 진행 방식은 단순하지만, 세부적인 전략과 타이밍이 게임의 승패를 좌우하기 때문에 꾸준한 연습과 경험이 필요하다. ‘Personal Square Defense 4.02 Final’ is a classic custom defense map in StarCraft: Brood War, offering an engaging gameplay experience that demands both survival and resource management against relentless waves of enemies in a confined space. The large central area serves as the player’s main base, where they must defend against enemy units approaching from all directions using defensive structures and units. The map features clearly defined square-shaped defensive zones, making strategic placement, upgrades, and resource utilization essential. Notably, minerals and vespene gas are placed in each of the four corners, requiring players to secure these resources while building their defensive lines. The types of defensive buildings, the upgrade system, and the enemy’s wave patterns are core elements of the game, as players must use rewards and upgrade points earned at the end of each wave to gradually strengthen their defenses. While the map’s balance is relatively stable, the enemy’s attack power escalates sharply in the late game, making early resource management and defensive line construction crucial. Designed to be accessible to beginners, the map also offers deep strategic challenges for advanced players, requiring focus and tactical thinking. It appeals to a wide range of users, from those new to StarCraft custom maps to seasoned defense experts, especially gamers looking to hone their resource management and strategic placement skills. Before playing, it’s important to understand the functions of each zone and the characteristics of defensive buildings, and players should avoid neglecting early resource collection and the initial setup of their defenses. The difficulty gradually increases, so beginners are advised to start at lower levels and work their way up. Though the map’s design and progression are straightforward, fine-tuned strategies and precise timing can determine victory or defeat, making consistent practice and experience vital.
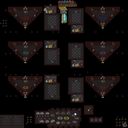
세모세모 디펜스 (Semosemo Defense)
「세모세모 디펜스」는 스타크래프트: 브루드워의 유즈맵으로, 6명의 플레이어가 각자 배치된 자리에서 공중 유닛을 조종해 끊임없이 몰려오는 적군 100기를 방어하는 개인형 디펜스 게임이다. 맵은 중앙을 기준으로 여섯 방향으로 나뉘어 있으며, 각 플레이어는 자신의 영역에 등장하는 적군을 사살해야 한다. 적군은 공중 유닛으로만 구성되어 있으며, 3가스를 차지하는 가스 유닛을 우선적으로 제거해야 게임에서 승리할 수 있다. 내부 맵 설명에 따르면 플레이어는 방장에게 도발하면 사망하는 페널티가 존재하는데, 이는 맵의 긴장감을 높이는 요소로 작용한다. 타일셋은 정글을 사용했으며, 맵 크기는 1024×1024이며 해상도는 3072×3072로 상당히 넓게 구성되어 있어 넓은 시야와 전략적 움직임을 요구한다. 적군의 지속적인 공격과 제한된 자원 활용이 주요 특징으로, 안정적인 컨트롤과 빠른 반응력이 요구되는 하드코어한 디펜스 장르에 속한다. 초보자보다는 중수 이상 플레이어에게 적합하며, 팀플레이가 아닌 개인전이라는 점에서 경쟁심과 전략적 깊이를 느낄 수 있는 맵이다. 플레이 전에는 각자의 배치 위치와 적군의 등장 패턴, 가스 유닛의 우선 제거 necessity를 숙지하는 것이 중요하다. 또한, 방장의 제재 시스템이 포함되어 있어 커뮤니티 내의 규율도 고려해야 한다. 개인형 디펜스라는 장르의 특성상 반복 플레이를 통해 적군의 패턴을 익히고, 유닛 컨트롤 숙련도를 높이는 것이 핵심이다. 「Semo Semo Defense」 is a custom map for *StarCraft: Brood War*, where six players each control an air unit to defend against waves of 100 enemy units from their assigned positions in a personal defense-style game. The map is divided into six directions from the center, and each player must eliminate enemies appearing in their zone. The enemies consist solely of air units, and victory is achieved by prioritizing the elimination of gas-gathering units, which occupy three gas resources. According to the in-map description, players face a penalty for taunting the host, which adds tension to the gameplay. The tileset features a jungle theme, and the map is designed on a large scale—1024×1024 in-game tiles with a resolution of 3072×3072—requiring wide vision and strategic movement. Its core mechanics revolve around constant enemy attacks and limited resource management, making it a hardcore defense genre that demands stable control and quick reactions. The map is best suited for intermediate to advanced players rather than beginners, offering a competitive and strategically deep experience in a 1v1 format. Before playing, it’s crucial to understand each player’s starting position, enemy spawn patterns, and the necessity of targeting gas units first. Additionally, the host’s disciplinary system should be considered for community etiquette. As a personal defense map, mastering enemy patterns and improving unit control through repeated plays are key to success.
최근 등록된 맵
새로 추가된 파일과 버전을 확인하세요.
세모세모 디펜스 (Semosemo Defense)
「세모세모 디펜스」는 스타크래프트: 브루드워의 유즈맵으로, 6명의 플레이어가 각자 배치된 자리에서 공중 유닛을 조종해 끊임없이 몰려오는 적군 100기를 방어하는 개인형 디펜스 게임이다. 맵은 중앙을 기준으로 여섯 방향으로 나뉘어 있으며, 각 플레이어는 자신의 영역에 등장하는 적군을 사살해야 한다. 적군은 공중 유닛으로만 구성되어 있으며, 3가스를 차지하는 가스 유닛을 우선적으로 제거해야 게임에서 승리할 수 있다. 내부 맵 설명에 따르면 플레이어는 방장에게 도발하면 사망하는 페널티가 존재하는데, 이는 맵의 긴장감을 높이는 요소로 작용한다. 타일셋은 정글을 사용했으며, 맵 크기는 1024×1024이며 해상도는 3072×3072로 상당히 넓게 구성되어 있어 넓은 시야와 전략적 움직임을 요구한다. 적군의 지속적인 공격과 제한된 자원 활용이 주요 특징으로, 안정적인 컨트롤과 빠른 반응력이 요구되는 하드코어한 디펜스 장르에 속한다. 초보자보다는 중수 이상 플레이어에게 적합하며, 팀플레이가 아닌 개인전이라는 점에서 경쟁심과 전략적 깊이를 느낄 수 있는 맵이다. 플레이 전에는 각자의 배치 위치와 적군의 등장 패턴, 가스 유닛의 우선 제거 necessity를 숙지하는 것이 중요하다. 또한, 방장의 제재 시스템이 포함되어 있어 커뮤니티 내의 규율도 고려해야 한다. 개인형 디펜스라는 장르의 특성상 반복 플레이를 통해 적군의 패턴을 익히고, 유닛 컨트롤 숙련도를 높이는 것이 핵심이다. 「Semo Semo Defense」 is a custom map for *StarCraft: Brood War*, where six players each control an air unit to defend against waves of 100 enemy units from their assigned positions in a personal defense-style game. The map is divided into six directions from the center, and each player must eliminate enemies appearing in their zone. The enemies consist solely of air units, and victory is achieved by prioritizing the elimination of gas-gathering units, which occupy three gas resources. According to the in-map description, players face a penalty for taunting the host, which adds tension to the gameplay. The tileset features a jungle theme, and the map is designed on a large scale—1024×1024 in-game tiles with a resolution of 3072×3072—requiring wide vision and strategic movement. Its core mechanics revolve around constant enemy attacks and limited resource management, making it a hardcore defense genre that demands stable control and quick reactions. The map is best suited for intermediate to advanced players rather than beginners, offering a competitive and strategically deep experience in a 1v1 format. Before playing, it’s crucial to understand each player’s starting position, enemy spawn patterns, and the necessity of targeting gas units first. Additionally, the host’s disciplinary system should be considered for community etiquette. As a personal defense map, mastering enemy patterns and improving unit control through repeated plays are key to success.
개인 사각디펜스 4.02정식 (Sagak Defense 4.02 Official)
‘개인 사각디펜스 4.02정식’은 스타크래프트 브루드워의 대표적인 개인 디펜스 유즈맵으로, 좁은 공간에서 끊임없이 밀려드는 적을 상대로 생존과 자원 관리를 동시에 요구하는 재미있는 플레이를 제공한다. 맵 중앙에 위치한 넓은 공간은 플레이어의 본진 역할을 하며, 사방에서 몰려드는 적 유닛을 방어용 건물과 유닛으로 처리해야 한다. 맵의 특징은 사각형 형태의 방어 구역이 чет하게 구분되어 있어 전략적인 배치와 업그레이드, 자원 활용이 필수적이라는 점이다. 특히, 맵의 네 모서리에는 자원 미네랄과 가스가 배치되어 있어 이를 확보하면서 방어 라인을 구축해야 한다. 방어 건물의 종류와 업그레이드 시스템, 그리고 적의 웨이브 패턴이 게임의 핵심 요소로 작용하며, 플레이어는 매 웨이브가 끝날 때마다 주어지는 보상과 업그레이드 포인트를 활용해 점차 방어력을 강화해야 한다. 맵의 밸런스는 비교적 안정적이지만, 후반부로 갈수록 적의 공격력이 급격히 상승하기 때문에 초반 자원 관리와 방어 라인 구축이 무엇보다 중요하다. 초보자도 쉽게 접근할 수 있도록 디자인되었지만, 고난이도로 갈수록 전략적인 깊이와 집중력이 요구되는 만큼 숙련자도 충분히 즐길 수 있는 구조다. 추천 대상은 스타크래프트 유즈맵을 처음 접하는 플레이어부터 디펜스 장인까지 폭넓은 유저층이며, 특히 자원 관리와 전략적 배치에 대한 감각을 키우고자 하는 게이머에게 적합하다. 플레이 전에는 맵의 구역별 기능과 방어 건물의 특성을 숙지하는 것이 중요하며, 초반 자원 확보와 방어 라인의 초기 구축을 소홀히 하지 않도록 주의해야 한다. 맵의 난이도는 점차 상승하는 구조로 되어 있어, 처음 플레이하는 경우 낮은 난이도부터 시작해 점차 높이는 것이 바람직하다. 또한, 맵의 디자인과 진행 방식은 단순하지만, 세부적인 전략과 타이밍이 게임의 승패를 좌우하기 때문에 꾸준한 연습과 경험이 필요하다. ‘Personal Square Defense 4.02 Final’ is a classic custom defense map in StarCraft: Brood War, offering an engaging gameplay experience that demands both survival and resource management against relentless waves of enemies in a confined space. The large central area serves as the player’s main base, where they must defend against enemy units approaching from all directions using defensive structures and units. The map features clearly defined square-shaped defensive zones, making strategic placement, upgrades, and resource utilization essential. Notably, minerals and vespene gas are placed in each of the four corners, requiring players to secure these resources while building their defensive lines. The types of defensive buildings, the upgrade system, and the enemy’s wave patterns are core elements of the game, as players must use rewards and upgrade points earned at the end of each wave to gradually strengthen their defenses. While the map’s balance is relatively stable, the enemy’s attack power escalates sharply in the late game, making early resource management and defensive line construction crucial. Designed to be accessible to beginners, the map also offers deep strategic challenges for advanced players, requiring focus and tactical thinking. It appeals to a wide range of users, from those new to StarCraft custom maps to seasoned defense experts, especially gamers looking to hone their resource management and strategic placement skills. Before playing, it’s important to understand the functions of each zone and the characteristics of defensive buildings, and players should avoid neglecting early resource collection and the initial setup of their defenses. The difficulty gradually increases, so beginners are advised to start at lower levels and work their way up. Though the map’s design and progression are straightforward, fine-tuned strategies and precise timing can determine victory or defeat, making consistent practice and experience vital.
개인 Lurker Defense
화산 타일셋의 이글거리는 배경이 압박감을 더하는 이 맵은 전형적인 개인 디펜스 장르로 설계되었다. 여섯 명의 플레이어가 각자 독립된 구역에서 러커 웨이브를 막아내는 구조이며, 자원이 무한으로 제공되기 때문에 초반부터 부담 없이 유닛을 생산하고 방어선을 구축할 수 있다. 맵의 핵심은 단순히 많은 병력을 모으는 것이 아니라, 러커의 강력한 스플래시 공격을 어떻게 분산시키고 무력화하느냐에 달려 있다. 지형은 좁은 통로와 넓은 교전 공간이 혼합되어 있어 유닛 배치에 신중함을 요구한다. 초반에는 소수의 러커가 간격을 두고 등장해 아군 진영을 시험하지만, 웨이브가 거듭될수록 그 밀도와 속도가 급격히 증가한다. 특히 후반부에는 지속적으로 쏟아지는 러커의 가시가 방어선을 순식간에 무너뜨릴 수 있기 때문에, 지속적인 유닛 보충과 함께 시즈 탱크나 사이오닉 스톰 같은 범위 제압 능력을 적절히 배치하는 것이 생존의 관건이다. 플레이어는 각자 고립된 공간에서 싸우지만, 다른 플레이어의 방어 상황을 간접적으로 확인할 수 있어 심리적인 경쟁이 자연스럽게 유발된다. 누군가 무너지는 순간 긴장감이 극대화되며, 끝까지 버티는 플레이어에게 승리의 희열이 집중된다. 무한 자원이라는 설정 때문에 초보자도 진입 장벽 없이 시작할 수 있지만, 웨이브가 거듭될수록 단순한 물량만으로는 한계가 명확해져 상급자들도 전술을 고민하게 만든다. 이 맵은 스타크래프트의 기본 유닛 조작과 병력 배치 감각을 익히려는 유저에게 훌륭한 연습장이 되며, 친구들과 함께 가볍게 즐기기에도 부담이 없다. 다만, 게임이 길어질수록 반복적인 패턴에 익숙해질 수 있으므로 적당한 난이도 조절이 아쉬운 점이다. 또한 무한 자원 맵 특성상 후반부에 유닛이 과도하게 쌓여 렉이 발생할 가능성이 있으니, 사양이 낮은 컴퓨터에서는 미리 그래픽 설정을 낮추는 것이 바람직하다. 이 맵은 정교한 전략보다는 직관적인 방어와 지속적인 컨트롤에 초점을 맞춘, 묵직하고 직선적인 재미를 제공한다. The smoldering backdrop of the volcanic tileset amplifies the tension in this map, which is designed as a classic defense scenario. Six players each hold their own isolated zone against relentless waves of Lurkers, and the infinite resource setting allows everyone to build their defenses and produce units without early economic pressure. The core challenge of the map is not simply amassing a large army, but learning how to mitigate and neutralize the devastating splash damage of the Lurker attacks. The terrain mixes narrow choke points with wider open areas, demanding careful unit placement and tactical foresight. Early waves test the defenses with a manageable trickle of Lurkers, but the density and speed of the assault escalate rapidly as time passes. In the later stages, the ceaseless shower of subterranean spines can shred through defensive lines in seconds, making it essential to constantly replenish forces and deploy area control units like Siege Tanks or Psionic Storms to survive. Although each player fights in an isolated pocket, the indirect awareness of others' struggles creates a natural psychological competition. When one ally collapses, the tension peaks, and the hope of victory concentrates on the last remaining survivors. The infinite resource system removes entry barriers for beginners, yet the increasingly brutal waves expose the limits of simple mass production, forcing even experienced players to refine their tactical approach. This map serves as an excellent training ground for mastering basic unit control and army positioning in StarCraft, while also providing a casual and enjoyable experience with friends. However, the repetitive pattern of later waves can become predictable, so a lack of adjustable difficulty might be felt. Due to the infinite resource nature, excessive unit accumulation in the late game may cause performance drops, so players on lower-end systems should optimize their graphic settings beforehand. Ultimately, this map delivers a heavy, instinctive fun that emphasizes sustained attention and reactive control over intricate strategic planning.
인디비주얼 크레이지 디펜스 2 (Individual Crazy Defense 2)
인디비주얼 크레이지 디펜스 2 버전 3.0은 6인용 개인 디펜스 맵으로, 각 플레이어가 독립된 레인에서 몰려오는 적 웨이브를 막아내는 구조다. 사막 타일셋 위에 128×128 타일 크기로 배치된 맵은 상하 대칭형 6개 레인이 나란히 놓인 형태이며, 중앙에는 공통 보스 구간이나 상점 구역이 자리한 것으로 보인다. 제작자 E.x.c.i.t.i.n.g 표기에서 알 수 있듯 크레이지 디펜스 시리즈 계승작으로, 기존 시리즈의 빠른 템포와 유닛 강화, 스킬 선택, 보스전 패턴이 그대로 이어진다. 게임 초반에는 기본 유닛으로 저글링·히드라리스크·울트라리스크 같은 지상 웨이브를 상대하고, 중반부터 공중 유닛과 특수 능력이 섞인 웨이브가 등장해 대공·탐지·범위 딜링 조합이 필수다. 각 레인 입구에 벙커·미사일 터렛·캐논 등 고정 방어 건물을 짓고, 미네랄·가스를 모아 유닛 생산·업그레이드·스킬 구매를 병행하는 전형적인 디펜스 루프가 돋보인다. 버전 3.0에 이르러 밸런스 조정과 버그 수정, 신규 유닛·스킬 추가가 이뤄진 것으로 추정되며, 난이도는 초반 쉬움에서 후반 매우 어려움까지 단계적으로 오른다. 6명이 동시에 진행하므로 파티 플레이나 랜덤 매칭 모두 적합하며, 한 명이 무너져도 나머지 인원이 버티면 클리어 가능성이 남아 있어 협동 요소가 강하다. 플레이 전에는 레인별 시작 자원, 업그레이드 트리, 보스 출현 타이밍, 공중·은폐 웨이브 대처용 탐지기 확보 시점을 미리 숙지하면 초반 붕괴를 줄일 수 있다. 솔로 연습용으로는 난이도가 높을 수 있으니 2~3인 이상 파티를 권장한다. Individual Crazy Defense 2 Version 3.0 is a six-player individual defense map where each player holds an independent lane against incoming enemy waves. Built on the Desert tileset at 128×128 tiles, the layout arranges six symmetrical lanes side by side with a central boss or shop area. Credited to maker E.x.c.i.t.i.n.g, it continues the Crazy Defense series with fast pacing, unit upgrades, skill choices, and scripted boss patterns. Early waves feature ground units like Zerglings, Hydralisks, and Ultralisks, while mid-to-late game adds air units and special abilities requiring detection, anti-air, and splash damage. Players construct static defenses at lane entrances—bunkers, missile turrets, photon cannons—and spend minerals and gas on unit production, upgrades, and skill purchases in a classic defense loop. Version 3.0 likely includes balance tweaks, bug fixes, and new units or skills. Difficulty ramps from easy early on to very hard in later stages. Since all six players progress simultaneously, it suits both party play and random matching; one player's loss does not immediately end the game, encouraging teamwork. Before starting, check starting resources per lane, upgrade trees, boss spawn timings, and when to secure detectors for air and cloaked waves to avoid early collapses. Solo practice may be too difficult, so a party of two or more is recommended.
개인랜덤디펜스[Final]
스타크래프트 브루드워 유즈맵 '개인랜덤디펜스[Final]'은 6인용 정글 타일셋에서 진행되는 개인 단위 랜덤 디펜스 맵이다. 각 플레이어는 독립된 구역에서 무작위로 소환되는 유닛을 조합해 몰려오는 적 웨이브를 막아내야 한다. 맵 크기는 4096x4096으로 넓은 전장을 제공하며, 128x128 타일 단위로 세밀한 지형 배치가 눈에 띈다. 제작자 E.x.c.i.t.i.n.g이 최종 버전으로 배포한 만큼 밸런스 조정과 버그 수정이 마무리된 상태로 보인다. 진행 방식은 일반적인 타워 디펜스와 달리 직접 유닛을 컨트롤하며 실시간으로 병력을 보충하고 업그레이드하는 액션성이 강조된다. 랜덤 요소로 매 게임마다 다른 유닛 조합이 나와 반복 플레이 가치가 높고, 개인별 난이도 조절이 가능해 초보자부터 고수까지 두루 즐길 수 있다. 정글 테마의 울창한 수풀과 지형 장애물이 시야를 제한해 긴장감을 더하며, 아군 간 협력보다는 개인 생존 경쟁이 핵심이라 팀플레이 부담이 적다. 플레이 전 확인할 점은 맵 설명에 명시된 제작자 사이트(intothemap.com)와 블로그에서 추가 패치나 공략 정보를 찾아보는 것이다. 6인 풀방 기준 30~50분 내외 소요될 것으로 추정되며, 난이도는 보통 수준으로 입문용으로 적당하다. 혼자서도 부담 없이 디펜스 장르의 재미를 느끼고 싶은 유저에게 추천한다. StarCraft Brood War UMS map 'Individual Random Defense [Final]' is a 6-player individual random defense map set on the Jungle tileset. Each player defends an independent zone, combining randomly spawned units to hold back incoming enemy waves. The map size is 4096x4096, providing a spacious battlefield with detailed terrain placement at 128x128 tile units. Released as a final version by creator E.x.c.i.t.i.n.g, it appears to have completed balance adjustments and bug fixes. Unlike typical tower defenses, gameplay emphasizes real-time unit control, reinforcing and upgrading forces on the fly. Random elements ensure different unit combinations each game, increasing replay value, while individual difficulty scaling allows both beginners and veterans to enjoy. The dense jungle foliage and terrain obstacles limit vision, adding tension. Since core gameplay revolves around personal survival rather than team coordination, the burden of teamplay is low. Before playing, check the creator's site (intothemap.com) and blog linked in the map description for potential patches or strategy guides. Estimated playtime for a full 6-player lobby is around 30–50 minutes, with a moderate difficulty suitable for newcomers. Recommended for users who want to experience defense genre fun solo without pressure.
맵 선택 가이드
태그는 맵의 핵심 특징을 빠르게 설명하지만 제작 버전마다 규칙이 다를 수 있습니다. 상세 설명에서 권장 인원, 난이도, 플레이 시간과 버전을 함께 확인한 뒤 다운로드하세요.