
골렘 매드니스 with 매스 어택 (Golem Madness with Mass Attack) 맵 시리즈와 버전
파일명과 제목을 기준으로 같은 시리즈로 분류된 2개 버전입니다. 등록일, 버전명, 파일 크기와 이용자 반응을 비교해 원하는 파일을 선택하세요.
 최근 등록 버전
골렘 매드니스 with 매스 어택 (Golem Madness with Mass Attack)
v1.0 · Golem_MadnessWithMassAttack.scx
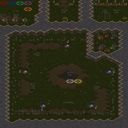
스타크래프트 브루드워의 유즈맵 <골렘 매드니스 with 매스 어택>은 5명의 플레이어가 참여하는 대규모 군단 전투형 디펜스로, 골렘을 파괴하고 동시에 새로운 골렘을 건설하는 전략적 균형감을 요구하는 맵이다. 게임의 핵심은 골렘의 파괴와 재건축 사이클을 얼마나 효율적으로 관리하느냐에 있으며, 다수의 유닛을 동시 제어해야 하는 복잡한 컨트롤이 필요하다. 맵은 사막 타일셋을 기반으로 펼쳐지며, 중앙 지역을 중심으로 골렘의 생산과 파괴가 일어나는 구조로 설계되어 있다. 플레이어는 골렘의 체력을 관리하면서도 상대방의 골렘을 효율적으로 파괴해야 하며, 이는 단순히 공격력만 높은 것이 아니라 골렘의 재건 속도와 자원 관리까지 고려해야 하는 종합적인 전략이 요구된다. 특히 ‘매스 어택’이라는 이름에서 짐작할 수 있듯, 다수의 골렘을 동시에 운용하는 것이 필수적인데, 이는 마우스 컨트롤과 키보드 단축키를 능숙하게 활용할 수 있는 플레이어에게 더욱 유리한 구조로 보인다. 맵의 진행은 파괴와 건설의 반복으로 이루어지며, 골렘의 체력이 낮아지면 파괴가 용이해지지만 재건 시간이 길어지는 등 타임 라인이 존재한다. 이러한 패턴을 읽고 상대방의 움직임을 예측하는 능력이 승리의 열쇠가 될 것이다. 초보자보다는 골렘 컨트롤과 자원 관리 경험이 있는 중급 이상의 플레이어에게 적합한 맵으로, 특히 다인 플레이에서 팀워크와 전략적 의사소통이 중요한 역할을 한다. 추천 플레이 전에는 맵의 골렘 생산 지역과 파괴 지점, 주요 길목을 미리 숙지하고, 골렘의 체력 바와 재건 타이머를 빠르게 확인할 수 있도록 UI 설정을 조정하는 것이 좋다. 또한, 골렘의 이동 경로와 공격 우선순위를 설정하는 커스텀 키 설정을 미리 준비하면 게임 중 혼란을 줄일 수 있을 것이다. 이 맵은 단순히 골렘을 파괴하는 것 이상의 전략적 깊이를 제공하며, 스타크래프트 유즈맵의 재미와 전략성을 동시에 느낄 수 있는佳品이라 할 수 있다. StarCraft: Brood War's custom map *Golem Madness with Mass Attack* is a large-scale legion combat defense-style game for five players, requiring strategic balance between destroying golems and constructing new ones. The core of the game lies in efficiently managing the cycle of destruction and reconstruction, demanding complex control over multiple units simultaneously. Set in a desert tile environment, the map is designed with a central area where golems are produced and destroyed. Players must balance maintaining their own golems' health while efficiently destroying opponents', requiring not just high offensive power but also consideration of reconstruction speed and resource management for a comprehensive strategy. As the name *Mass Attack* suggests, operating multiple golems at once is essential, favoring players who can skillfully use mouse control and keyboard shortcuts. The game progresses through repeated cycles of destruction and construction, with a time limit where golems become easier to destroy as their health decreases but take longer to rebuild. Reading these patterns and predicting opponents' moves will be key to victory. This map is best suited for intermediate or higher players experienced in golem control and resource management, where teamwork and strategic communication are crucial in multiplayer. Before playing, it's recommended to familiarize yourself with the golem production areas, destruction zones, and key pathways, and adjust UI settings to quickly check golem health bars and reconstruction timers. Setting up custom keybindings for golem movement paths and attack priorities beforehand can also reduce confusion during the game. Beyond simply destroying golems, this map offers deep strategic layers, making it a gem that delivers both the fun and strategic depth of StarCraft custom maps.
다운로드 0조회 1좋아요 0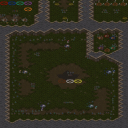 이전 버전 1
골렘 매드니스 with 매스 어택 v11 (Golem Madness with Mass Attack v11)
v11 · Golem MadnessWithMassAttack.scx
스타크래프트 브루드워의 유즈맵 〈골렘 매드니스 with 매스 어택 v11〉은 파괴와 건설의 조화를 통해 전략을 펼치는 독특한 디펜스 및 빌드업을 요구하는 맵이다. 맵의 중앙에는 거대한 골렘이 위치하고 있으며, 플레이어는 이를 파괴하거나 재건하는 두 가지 핵심 목표를 동시에 고민해야 한다. 골렘을 파괴하면 일정량의 자원이 제공되어 건물을 건설하거나 유닛을 생산할 수 있으며, 반대로 골렘을 재건하면 방어력을 강화하거나 추가 자원을 획득할 수 있는 구조로 추정된다. 맵의 사막 타일셋은 건조한 분위기를 연출하며, 넓은 개활지와 협소한 길목이 조화를 이루며 플레이어의 움직임과 전략을 제한한다. 골렘 주변의 좁은 통로는 유닛의 진입을 어렵게 만들어 방어 측에 유리한 환경을 제공하며, 이는 골렘을 지키려는 플레이어와 파괴하려는 플레이어 간의 긴장감을 고조시킨다. 맵의 난이도는 골렘의 체력과 방어력, 그리고 제공되는 자원의 양에 따라 크게 좌우되며, 초보자의 경우 골렘을 재건하는 데 중점을 두는 것이 효과적일 수 있다. 반면 숙련된 플레이어는 골렘을 신속히 파괴하여 자원을 확보한 뒤 방어선을 구축하는 전략을 선호할 가능성이 높다. 맵의 진행은 일정 주기 또는 조건에 따라 골렘이 재생성되는 시스템으로 보이며, 이를 예측하여 자원 확보와 방어 준비를 동시에 진행해야 한다. 게임의 승리는 골렘의 파괴와 재건을 두고 벌어지는 자원 경쟁과 방어戦略의 균형에 달려 있으며, 플레이어 간의 협력이나 경쟁이 예상된다. 〈골렘 매드니스 with 매스 어택 v11〉은 특히 파괴와 건설의 Trade-off를 즐기는 유저들에게 강력히 추천되며, 전략적 깊이와 빠른 진행이 어우러진 재미를 제공할 것으로 보인다. 플레이 전에는 골렘의 재생성 주기와 자원 획득 조건, 그리고 맵의 주요 통로와 지형지물을 미리 숙지하는 것이 중요하다. 또한, 팀플레이가 가능하다면 골렘 파괴와 방어 임무를 분담하여 효율성을 높일 수 있을 것이다. 이 맵은 단순한 디펜스가 아니라 골렘을 둘러싼 전략적 선택과 자원 관리 능력을 동시에 시험하는 유즈맵으로, 스타크래프트의Classic한 재미와 전략성을 동시에 느낄 수 있는佳作라 할 수 있다. 4인 이상의 플레이가 권장되며, 특히 5인 플레이 시 각 플레이어의 역할 분담이 게임의 승패를 가를 가능성이 높다. 맵의 난이도는 보통 수준으로, 골렘의 재생성 주기와 자원 획득량을 조절한다면 초보자도 충분히 즐길 수 있을 것이지만, 고난이도 모드로 전환하면 전략의 깊이가 한층 깊어질 것으로 예상된다. StarCraft: Brood War's custom map *Golem Madness with Mass Attack v11* is a unique defense and build-up map that demands a balance between destruction and construction to execute strategies. At the center of the map lies a massive golem, forcing players to constantly weigh two core objectives: destroying or rebuilding it. Destroying the golem grants a set amount of resources to construct buildings or produce units, while rebuilding it appears to strengthen defenses or yield additional resources. The desert-themed tileset creates a dry atmosphere, and the contrast between open spaces and narrow pathways restricts player movement and strategy. The tight corridors around the golem make unit entry difficult, favoring defenders and heightening the tension between those trying to protect the golem and those attempting to destroy it. The map's difficulty heavily depends on the golem's health, defense, and resource rewards. Beginners may find it effective to focus on rebuilding the golem, while experienced players likely prefer quickly destroying it to secure resources and establish defensive lines. The golem appears to regenerate at set intervals or under specific conditions, requiring players to anticipate its respawn to balance resource acquisition and defense preparation. Victory hinges on the strategic balance between golem destruction, reconstruction, resource competition, and defensive tactics, with both cooperation and competition among players expected. *Golem Madness with Mass Attack v11* is highly recommended for players who enjoy the trade-offs between destruction and construction, offering strategic depth and fast-paced fun. Before playing, it's crucial to familiarize yourself with the golem's respawn cycle, resource acquisition conditions, key pathways, and terrain features. If team play is possible, dividing roles between golem destruction and defense can boost efficiency. This isn't just a simple defense map—it's a custom game that tests both strategic decision-making around the golem and resource management skills, delivering classic StarCraft fun and depth. The map is best enjoyed with four or more players, and in five-player matches, role distribution among teammates can significantly impact the outcome. While the difficulty is moderate—adjusting the golem's respawn rate and resource rewards can make it accessible to beginners—switching to a high-difficulty mode would further deepen the strategic challenges.
다운로드 0조회 54좋아요 0