
더 월 (The Wall) 맵 시리즈와 버전
파일명과 제목을 기준으로 같은 시리즈로 분류된 2개 버전입니다. 등록일, 버전명, 파일 크기와 이용자 반응을 비교해 원하는 파일을 선택하세요.
 최근 등록 버전
더 월 (The Wall)
버전 정보 없음 · The_Wall.scm
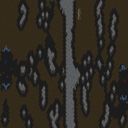
더 월(The Wall)은 황무지 타일셋을 바탕으로 한 1024×1024 크기의 전형적인 밀리 맵이다. 기본 목표는 적의 모든 건물을 파괴하는 것으로, 이는 오리지널 스타크래프트 브루드워의 메lee 승리 조건과 동일하다. 지형은 광활한 평야와 occasional한 절벽이 혼합되어 있어 초반 자원 채취와 기지 건설에 ample한 공간을 제공하며, 동시에 좁은 협곡 지점을 통해 전략적 요충지를 형성한다. 플레이어는 두 명의 적 혹은 아군과 대결하며, 자원 광물과 가스는 맵 중앙과 가장자리에 균등하게 배치되어 초기 스카우트와 확전의 타이밍이 중요하다. 건물을 모두 파괴해야 승리가 주어지므로, 공격 타이밍을 조율하고 방어선을 유지하며 동시에 경제를 꾸준히 성장시키는 것이 핵심 전략이다. 이 맵은 초보자에게는 기본적인 빌드 순서와 유닛 컨트롤을 연습하기에 적합하며, 숙련된 플레이어에게는 맵 특유의 지형 요소를 활용한 타이밍 공격을 시도해 볼 수 있는 테스트베드가 된다. 플레이 전 확인해야 할 사항은 시작 위치의 자원 분포, 지형의 막힘 여부, 그리고 적의 가능한 루시 경로이다. 전체적으로 더 월은 단순하면서도 깊이 있는 메lee 경험을 제공하며, 2인 대결을 중심으로 한 빠른 전개를 선호하는 유저에게 추천한다. 재플레이 value는 지형의 변수와 상대 전략에 따라 매번 다른 전개가 일어나며, 특히 rush와 macro 전략 간의 균형을 탐구하는 데 좋은 소재가 된다. The Wall is a typical melee map built on the wasteland tileset with a size of 1024×1024. The basic goal is to destroy all enemy buildings, which is identical to the victory condition of the original StarCraft: Brood War melee. The terrain mixes expansive plains with occasional cliffs, providing ample space for early resource gathering and base construction while forming strategic chokepoints through narrow passages. Players face off against two opponents or allies, with minerals and gas evenly distributed across the map’s center and edges, making early scouting and expansion timing crucial. Since victory requires destroying all buildings, coordinating attack timing, maintaining defensive lines, and steadily growing the economy are key strategies. This map is suitable for beginners to practice basic build orders and unit control, while experienced players can use it as a testbed to attempt timing attacks that exploit the map’s unique terrain features. Before playing, check the resource distribution at start positions, any terrain blockages, and the enemy’s possible rush routes. Overall, The Wall offers a simple yet deep melee experience and is recommended for users who prefer fast-paced 1v1 encounters. Replay value varies with terrain variables and opponent strategies, providing different engagements each time and serving as good material to explore the balance between rush and macro strategies.
다운로드 0조회 0좋아요 0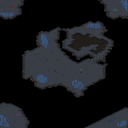 이전 버전 1
더 월 (The Wall)
v1.0 · the wall.scm
스타크래프트 브루드워의 ‘Untitled Scenario’라는 이름의 맵이지만 파일명 ‘the wall.scm’을 보면 알 수 있듯이 ‘벽’이라는 이름에 걸맞게 좁은 통로를 사이에 두고 적과 대치하는 디펜스형 맵이다. 맵의 구조는 가운데를 가로지르는 좁고 긴 통로로 양쪽으로 나뉘며, 각 측면에 건물이 배치되어 있다. 통로 양옆에는 벽이 세워져 있어 아군과 적군의 통로가 제한되어 있지만, 중앙 통로의 폭이 좁아 병력 이동이 다소 불편한 구조로 보인다. 이미지에서 확인되는 적 건물 배치와 플레이어의 시작 지점을 고려할 때, 주로 중앙 통로를 통해 적을 공격하거나 방어하는 방식으로 진행되는 컴까기 형식의 맵으로 추정된다. 플레이어는 시작하자마자 좁은 길목을 통과해야 하며, 상대방의 본진으로 진격하거나 중앙 통로를 방어하는 두 가지 전략을 선택할 수 있다. 그러나 통로의 길이가 길고 양옆으로 방어 시설이 배치되어 있는 만큼, 무턱대고 돌격하기보다는 미네랄과 가스를 확보하며 병력을 효율적으로 운영하는 것이 중요할 것으로 보인다. 또한, 벽을 사이에 둔 대치 구도에서 원거리 유닛의 활용이 필수적일 것으로 예상된다. 맵의 전체적인 분위기는 우주 테마의 타일셋을 사용해 조화롭게 구성되어 있으며, 어두운 색감의 밤하늘 배경이 전략적 긴장감을 더한다. 이 맵은 초보자보다는 어느 정도 전략적 감각이 필요한 플레이어에게 권장되며, 특히 좁은 공간에서의 전투 경험이 부족한 유저에게는 도전적인 요소로 작용할 수 있다. 또한, 팀플레이가 필요 없는 1:1 대결 구조이므로 개인전으로 즐기기에 적합하다. 맵의 난이도는 중앙 통로의 좁은 폭과 방어 시설의 존재로 인해 보통 수준으로 예상된다. 플레이 전에는 미네랄과 가스의 분포를 확인하고, 통로 양옆의 방어 시설을 미리 파악해 두는 것이 중요할 것이다. This StarCraft: Brood War map, officially named "Untitled Scenario" but commonly referred to as "The Wall" (thewall.scm), is a defensive-style map centered around a narrow passage where players face off against opponents. The layout splits into two sides divided by a long, tight corridor, with buildings positioned along each side. Walls flank the pathway, restricting movement between allied and enemy territories, though the narrow central passage makes troop movement somewhat cumbersome. Based on the visible enemy structures and starting positions in the screenshot, the map likely follows a comp-stomp format where players either attack or defend through the central corridor. Upon spawning, players must navigate the tight passage, choosing between advancing toward the opponent’s main base or defending the central corridor. Given the corridor’s length and the defensive structures lining its sides, reckless rushes are ill-advised; instead, securing minerals and gas while deploying forces efficiently is key. The map’s design emphasizes the importance of ranged units, particularly in the stalemate created by the walls separating the two sides. The overall aesthetic blends a space-themed tileset harmoniously with a dark, nighttime sky, enhancing the strategic tension. This map is better suited for players with some strategic experience rather than beginners, and it can be particularly challenging for those unfamiliar with close-quarters combat. As a 1v1 structure that doesn’t require teamwork, it’s ideal for solo play. The difficulty is moderate, primarily due to the narrow corridor and defensive setups. Before starting, players should check mineral and gas distributions and scout the defensive structures along the passage to plan their approach.
다운로드 0조회 41좋아요 0