
에어 골렘즈 v3.1 (Air Golems v3.1) 맵 시리즈와 버전
파일명과 제목을 기준으로 같은 시리즈로 분류된 3개 버전입니다. 등록일, 버전명, 파일 크기와 이용자 반응을 비교해 원하는 파일을 선택하세요.
 최근 등록 버전
에어 골렘즈 v3.1 (Air Golems v3.1)
v3.1 · Air_Golems.scx
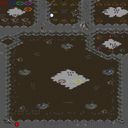
에어 골렘즈 v3.1은 스타크래프트 브루드워의 컴까기 장르 유즈맵으로, 5명의 플레이어가 공중 유닛인 골렘을 조종하며 지상에 있는 적들을 섬멸하는 전투를 펼치는 맵이다. 맵은 넓은 평야와 중앙에 위치한 산맥으로 나뉘어 있으며, 골렘은 공중 이동이 가능해 지형 제약 없이 유연한 전투가 가능하다. 플레이어들은 각자의 골렘을 업그레이드하고, 중앙의 자원 지역을 점령해 추가 자원을 확보하며, 적 팀을 전멸시키거나 주요 건물을 파괴하는 것이 목표로 보인다. 골렘의 체력과 공격력이 점차 증가하는 구조로, 후반부로 갈수록 전투의 강도가 높아지는 특징이 있으며, 중앙 산맥은 방어 거점으로 활용할 수 있는 요충지 역할을 한다. 맵의 밸런스는 골렘의 속도와 체력, 자원 수급량에 따라 좌우되며, 초보자는 쉬운 조작으로 입문할 수 있지만, 골렘의 능력을 효율적으로 활용하지 못하면 어려움을 느낄 수 있다. 추천 대상은 스타크래프트 유즈맵을 즐기는 플레이어들로, 특히 공중 유닛을 활용한 전략적인 전투를 선호하는 유저들에게 적합하다. 플레이 전에는 골렘의 업그레이드 경로와 자원 수급 전략을 미리 숙지하는 것이 원활한 플레이에 도움이 될 것이다. Air Golems v3.1 is a UMS-style custom map for StarCraft: Brood War where five players control air-based golems to eliminate ground enemies. The map features a wide plain divided by a central mountain range, allowing golems to maneuver freely due to their aerial movement. Players upgrade their golems, capture resource areas in the center for additional income, and aim to destroy enemy structures or wipe out opposing teams. The map scales in intensity, with golems gaining increased health and attack power as the game progresses. The central mountain acts as a strategic defensive position. Balance hinges on golem speed, health, and resource management, making it accessible for beginners but challenging if upgrades and tactics aren’t optimized. Ideal for players who enjoy strategic air-unit combat in StarCraft custom maps. Before playing, familiarizing yourself with golem upgrade paths and resource strategies will enhance the experience.
다운로드 0조회 0좋아요 0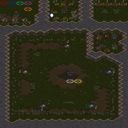 이전 버전 1
에어 골렘즈 (AirGolem/wMassAttack)
버전 정보 없음 · AirGolems.scx
스타크래프트 브루드워 맵을 즐기는 유저들이라면 독특한 규칙과 요소를 지닌 유즈맵을 찾기 마련입니다. 이번에 살펴볼 에어 골렘즈 (AirGolem/wMassAttack)는 사막 지형을 배경으로 골렘 유닛을 파괴하고 건설하는 독특한 플레이 방식을 제공하는 스타크래프트 맵입니다. 내부 설명에 따르면 골렘을 만들고 부수는 과정과 함께 대규모 공격 요소를 포함하고 있어, 기존 밀리 장르나 일반적인 컴까기 맵과는 다른 차별화된 경험을 선사할 것으로 추정됩니다. 플레이어는 제한된 공간 안에서 유닛을 전략적으로 생산하고 파괴하는 메커니즘을 마주하게 되며, 이 과정에서 효율적인 자원 운용과 타이밍 조절이 중요한 포인트가 됩니다. 대규모 전투 상황이 연출되는 만큼 빠른 판단력과 유닛 조합 능력이 요구되며, 친구들과 함께 색다른 규칙 속에서 합을 맞춰보는 재미를 느낄 수 있습니다. 특히 복잡한 컨트롤보다는 유닛 생산과 파괴라는 직관적인 목표에 집중할 수 있어, 가볍게 전략적 요소를 즐기고 싶은 유저들에게 적합합니다. 플레이를 시작하기 전에는 맵 내부의 설명과 승리 조건을 꼼꼼히 확인하고, 함께 참여하는 인원들과 호흡을 맞춰 대규모 공격 타이밍을 조율하는 것이 좋습니다. 사막 타일셋 특유의 분위기 속에서 펼쳐지는 독특한 유즈맵 매력을 느껴보시길 바랍니다. For users who enjoy StarCraft: Brood War maps, finding Use Map Settings (UMS) maps with unique rules and elements is always exciting. AirGolem/wMassAttack, set against a desert tileset, offers a distinct gameplay experience centered around destroying and building golems. According to the internal description, the map incorporates mechanics involving creating and destroying golems alongside mass attack elements, suggesting a differentiated experience from traditional melee or standard computer-opponent maps. Players encounter mechanisms where they strategically produce and destroy units within a limited space, making efficient resource management and timing crucial points of the game. Since large-scale combat situations are expected, quick decision-making and unit composition skills are required, allowing players to enjoy coordinating with others under unconventional rules. Especially focusing on intuitive goals such as unit production and destruction rather than overly complex control, it is suitable for users who want to casually enjoy strategic elements. Before starting the play, it is recommended to carefully check the internal map description and win conditions, and coordinate large-scale attack timings with participating players. Experience the unique charm of this custom map unfolding in a desert tileset atmosphere.
다운로드 0조회 27좋아요 0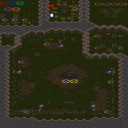 이전 버전 2
에어 골렘즈 v2.0 (Air Golems v2.0)
v2.0 · Air Golems v2.0.scx
스탠다드한 스타크래프트 브루드워의 UMS 유즈맵인 <Air Golems v2.0>은 플레이어가 5명의 인원으로 진행하는 디펜스 장르의 맵이다. 맵의 중심에 위치한 거대한 bunkers(요새)를 파괴하거나, 일정량의 mineral을 모아 승리 조건을 달성하는 방식으로 진행된다. 맵은 사막 타일셋으로 구성되어 있으며, 넓은 평야와 요새 주변의 협소한 통로, 그리고 중앙 광장이 특징적으로 배치되어 있다. 오브젝트로는 커다란 bunkers가 맵 중앙에 자리 잡고 있으며, 주변에는 미네랄 멀티와 가스 멀티가 균등하게 배치되어 있어 자원 관리가 중요한 요소로 작용한다. 플레이어는 각자 커맨드 센터를 보유하고 있으며, 이를 통해 생산한 유닛으로 bunkers를 파괴하거나 요새 주변의 방어선을 구축해야 한다. bunkers는 맵의 중앙에 위치하고 있어 접근이 용이하지만, 요새 주변의 통로가 좁고 진입로가 제한적이기 때문에 전략적인 유닛 배치가 필요하다. 미네랄 멀티는 맵 외곽에 배치되어 있어 자원 확보와 멀티 관리에도 신경을 써야 한다. 방어와 공격의 균형을 맞추는 것이 승리의 관건으로, 초반에는 방어에 집중하다가 자원이 충분히 모이면 bunkers 파괴를 시도하는 플레이가 효과적이다. 또한, 요새 주변의 좁은 길목에서는 유닛의 이동 경로가 제한되므로, 대형 유닛보다는 소형 유닛을 활용한 기동전이 유리한 경우가 많다. 이 맵은 초보자보다는 중급 이상의 플레이어에게 적합하며, 특히 방어와 자원 관리, 그리고 유닛 조합을 잘 이해하고 있는 플레이어에게 추천된다. 또한, 5명의 인원이 한 팀을 이뤄 진행하는 구조이기 때문에 팀워크가 중요하며, 팀원 간의 역할 분담과 전략적인 협력이 승리에 큰 영향을 미친다. 맵의 난이도는 moderate로 설정되어 있지만, bunkers의 구조와 요새 주변의 지형이 복잡하여 초보자에게는 다소 어려울 수 있다. 따라서, 해당 맵을 처음 플레이하는 경우, 맵의 지형을 숙지하고 자원 관리와 유닛 생산의 효율성을 높이는 연습이 필요하다. 플레이 전에 확인해야 할 포인트는 bunkers의 위치와 요새 주변의 통로, 그리고 미네랄 멀티의 배치다. bunkers는 중앙에 위치하고 있지만, 요새 주변의 통로가 좁고 진입로가 제한적이므로, 유닛의 이동 경로를 미리 계획하는 것이 중요하다. 또한, 미네랄 멀티는 맵 외곽에 배치되어 있어 멀티 관리가 필요하며, 자원 확보가 원활하지 않으면 승리에 큰 영향을 미칠 수 있다. 마지막으로, 팀원의 역할 분담과 전략적인 협력이 원활하게 이뤄질 수 있도록 준비하는 것이 좋다. <Air Golems v2.0> is a UMS custom map in the standard StarCraft: Brood War genre where players compete in a 5-player defense format. The game revolves around either destroying the massive bunker at the map’s center or accumulating a set amount of minerals to meet the victory condition. The map features a desert tileset, with wide open plains, narrow corridors around the fortress, and a central plaza as its defining layout. Key objects include the enormous central bunker, flanked by evenly distributed mineral and gas multi-bases that make resource management a critical factor. Each player starts with their own Command Center and must deploy units to either destroy the central bunker or fortify defenses around the fortress. While the central bunker is easily accessible, the surrounding pathways are tight and entry points are limited, requiring strategic unit positioning. The mineral expansions are located on the map’s outskirts, so players must balance resource collection and multi-base control. Balancing defense and offense is key to victory—early focus on defense is advised, followed by bunker assaults once sufficient resources are gathered. Due to the confined paths near the fortress, smaller, more mobile units tend to outperform larger ones in maneuver warfare. This map is better suited for intermediate to advanced players who understand defense, resource management, and unit composition. Designed for five players working as a team, coordination and role distribution are vital, with teamwork significantly influencing the outcome. Though classified as moderate difficulty, the bunker’s structure and the fortress’s terrain complexity can pose challenges for beginners. New players should familiarize themselves with the map layout, practice efficient resource management, and optimize unit production before jumping in. Before starting, players should note the central bunker’s location, the narrow pathways around the fortress, and the placement of mineral expansions. Since entry points are restricted, planning unit movement routes in advance is crucial. The mineral expansions on the map’s edges require careful management, as poor resource collection can severely hinder victory. Lastly, ensuring clear role distribution and strategic coordination among teammates is essential for smooth gameplay.
다운로드 0조회 15좋아요 0