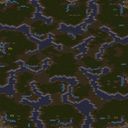
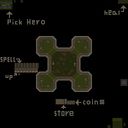
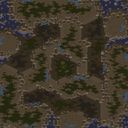
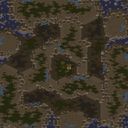
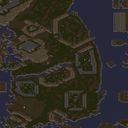
황무지 한가운데 세 방향으로 갈라진 크립 위에 자리 잡은 이 디펜스 맵은 전형적인 생존 협동 플레이를 지향하면서도 몇 가지 독특한 변주를 더해 반복 플레이의 피로를 덜어준다. 플레이어는 다섯 명이 한 팀으로 시작하며, 각자 지정된 구역에서 제한된 자원과 건물을 받아 적의 파도를 막아내야 한다. 핵심은 크립 콜로니와 썬큰 콜로니의 호환성이다. 일반적인 유즈맵에서는 두 구조물이 별개로 작동하지만, 여기서는 크립 콜로니를 지으면 자동으로 썬큰 콜로니로 전환할 수 있도록 설계되어 방어 라인 구축이 훨씬 유연하다. 이 작은 변화만으로도 초반 빌드가 단조롭지 않고, 자원이 부족한 순간에도 효율적으로 병력을 배치할 수 있다. 가장 눈에 띄는 시스템은 10킬마다 드론을 하나씩 지급하는 보상 구조다. 일반적인 디펜스 맵들이 킬 수 상한을 두고 보상을 끊는 것과 달리, 이 맵은 100킬 이후에도 계속 드론이 들어온다. 덕분에 중후반으로 갈수록 자원 수급이 안정되고, 극후반까지 템포가 죽지 않는 긴장감을 유지할 수 있다. 또한 무작위 배치가 사라지고 자리가 고정되어 있어, 팀원끼리 포지션을 미리 상의하거나 약한 자리를 보조하는 전략적 접근이 가능하다. 적 유닛은 중앙에서 출발하여 세 갈래 길을 따라 각 진영으로 몰려든다. 직선적인 경로가 아니라 중앙을 거쳐 뻗어 나가기 때문에, 특정 방향으로 적이 집중되는 현상 없이 모든 플레이어가 비슷한 부담을 나누게 된다. 다만 가운데에서 쏟아져 나오는 속도가 점점 빨라지고 유닛의 조합도 다양해지므로, 혼자서 모든 각을 커버하려 하기보다는 팀 차원에서 방어 타워의 교차 화망을 설계하는 편이 생존 확률을 높인다. 난이도는 초반에는 여유롭지만, 20분을 넘기면서 대규모 물량이 밀려들 때 급격히 올라간다. 이 맵은 혼자 플레이하기보다는 다섯 명이 각자 역할을 분담하는 협동 플레이에 최적화되어 있다. 입구가 셋인 구조상 한 명이 무너지면 연쇄적으로 옆 라인까지 위험해질 수 있어서, 단순한 타워 도배보다는 살아남은 자원을 공유하거나 위기 구역에 일꾼을 보내 긴급 복구하는 팀워크가 중요하다. 자동화된 드론 보상은 초보자도 꾸준히 싸우기만 하면 자연스럽게 자원을 확보하게 해주므로, 디펜스 장르에 익숙하지 않은 유저도 쉽게 적응할 수 있다. 다만 중앙에서 오는 적 유닛의 경로를 미리 파악하지 않으면 타워를 엉뚱한 곳에 배치할 수 있으니, 게임 시작 전에 맵 구조를 한 번 살펴보는 것이 좋다. This defense map, set upon a three-way cross of creep-covered ground in the wasteland, aims for cooperative survival while adding a few distinct twists that reduce the fatigue of repeated play. Five players start together and each receives limited resources and building options in their own zone, tasked with holding back waves of enemies. The key lies in the compatibility between creep colonies and sunken colonies. Unlike standard maps where these structures function separately, here building a creep colony allows it to be converted directly into a colony colony, making defensive lines far easier to establish. This single change alone keeps the early build from feeling repetitive and lets you place bottlenecks even when resources are tight. The most striking system is the reward structure that grants one drone for every ten kills. While typical defense maps cap the kill count and stop handing out rewards, this map keeps feeding you drones well past one hundred kills. As a result, resource income stabilizes during the mid-to-late game and the tension holds without losing tempo even in the deepest stages. The removal of random placement also means positions are fixed, so teammates can discuss roles beforehand or reinforce weaker spots with a strategic approach. Enemy units start at the center and pour out through all three lanes. Because they do not follow a straight line but spread outward from the middle, no single player gets an unfair share of pressure. However, the spawning speed accelerates and the unit composition grows more varied, so trying to cover every angle alone will collapse under weight. Designing overlapping tower fields as a team is the more reliable way to survive. The difficulty feels gentle early on but spikes sharply once the twenty-minute mark passes and massive volumes begin to rush in. This map is optimized for five players sharing distinct roles rather than solo attempts. With three entrances, a single collapse can quickly endanger the neighboring lane, so teamwork matters more than simply spamming towers. Sharing leftover resources or sending workers to emergency-repair a crumbling front often makes the difference between holding and folding. The automated drone reward system helps newcomers steadily build up an economy just by fighting, making the map accessible even to those new to the defense genre. Still, placing towers without first checking the enemy path from the center can waste precious build time, so taking a quick look at the layout before the game starts is a wise move.

로그인 하시고 댓글을 남겨 볼까요?