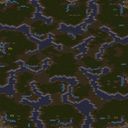
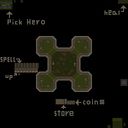
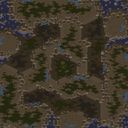
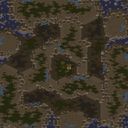
이 맵은 스타크래프트 브루드워의 플랫폼 타일셋을 사용한 6인 유즈맵 디펜스로, 제목에서 드러나듯 썬큰 콜로니를 중심으로 한 방어 전투가 핵심이다. 내부 설명에는 러커와 저글링을 추가로 만들었다는 점과 복권 시스템을 추가했다는 점이 기재되어 있어, 단순한 디펜스에서 벗어나 유닛 강화나 변수를 가미한 구성임을 짐작할 수 있다. 일반적인 디펜스 맵의 정석적인 흐름을 따르지만, 적 유닛이 러커와 저글링처럼 땅을 파고드는 유닛이나 빠르게 밀고 들어오는 물량형 유닛으로 구성되어 있어 긴장감을 유지하게 만든다. 아군은 썹은 콜로니를 주력 방어선으로 삼아 지속적으로 적을 저지해야 하며, 중간중간 복권을 통해 추가 자원이나 특수 유닛을 획득할 가능성이 있어 운 요소가 전략에 개입한다. 복권 시스템은 반복 플레이에도 새로운 자극을 주며, 어떤 보상이 나오느냐에 따라 방어 난이도가 크게 달라지므로 초반 운빨이 게임 흐름에 유의미한 영향을 줄 수 있다. 맵은 플랫폼 타일셋의 좁은 통로와 인공 구조물을 활용해 적의 진입 경로를 제한하고 있으며, 6명의 플레이어가 각자 독립된 방어 구역을 맡아 협력보다는 개인 생존과 화력 경쟁에 초점이 맞춰져 있다. 개별 영역이 분리되어 있어 한쪽이 무너지더라도 게임이 즉시 종료되는 방식은 아니지만, 밀려오는 적의 강도가 점차 세지므로 초반 자원 관리와 건물 배치가 중요하다. 이 맵은 클래식한 썹은 디펜스의 재미를 기대하는 유저에게 적합하며, 특히 저글링과 러커가 추가된 점은 단순한 원거리 유닛 디펜스에 익숙한 플레이어에게 신선한 도전이 된다. 다만 복권 요소가 운에 크게 의존하기 때문에 안정적인 운영을 선호하는 사람은 초반 몇 번의 시행착오를 겪을 수 있다. 난이도에 관한 정보는 제공되지 않았지만, 저글링의 빠른 돌파와 러커의 지하 공격을 동시에 대비해야 하므로 초보자보다는 중급자 이상에게 권장된다. 플레이 전에 복권 보상 목록이나 적 유닛의 등장 순서를 사전에 알 수 없으므로, 첫 판은 탐색적으로 시도하는 것이 좋다. 전반적으로 친숙한 디펜스 장르에 소소한 변주를 가미하여 짧은 시간 안에 긴장감과 운의 재미를 동시에 맛볼 수 있는 구성이다. This is a six-player Use Map Settings defense map built on the Platform tileset of StarCraft: Brood War, and as the title suggests, the core mechanic revolves around defensive battles centered on Sunken Colonies. The internal description notes that additional Lurkers and Zerglings have been added, along with a lottery system, which suggests the map moves beyond a simple defense format by introducing unit reinforcement and random variables. While the map follows the orthodox flow of a defense scenario, the enemy composition includes burrowing units like Lurkers and fast, mass-charging Zerglings, which keeps the tension consistently high. Players must rely on Sunken Colonies as their primary defensive line and continuously repel waves of enemies, while the lottery system offers opportunities to gain extra resources or special units, allowing luck to influence tactical decisions. This lottery element adds a fresh sensation even during repeated play, and the difficulty of holding the line can shift dramatically depending on what reward you roll, meaning early luck can meaningfully alter the game’s trajectory. The map uses the narrow corridors and artificial structures of the Platform tileset to channel enemy movement, and six players each hold individual defensive zones, placing the focus on personal survival and firepower competition rather than direct cooperation. While the separate zones mean that one player’s collapse does not immediately end the game, the escalating strength of the attacking forces makes early resource management and building placement crucial. This map is well-suited for those who enjoy the classic Sunken Defense experience, and the addition of Zerglings and Lurkers provides a refreshing challenge for players accustomed to standard ranged unit defense. However, since the lottery system relies heavily on luck, players who prefer stable progression may encounter a few early trial-and-error runs. No official difficulty rating is provided, but the need to simultaneously counter fast Zergling breakthroughs and invisible Lurker attacks makes the map more recommendable for intermediate players rather than complete beginners. Given that the lottery reward table and enemy wave composition are not revealed in advance, it is wise to approach the first playthrough as an exploratory attempt. Overall, this map adds a modest twist to the familiar defense genre, allowing players to enjoy sustained tension and the thrill of chance within a short play session.

로그인 하시고 댓글을 남겨 볼까요?