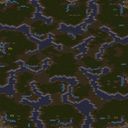
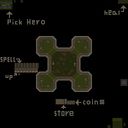
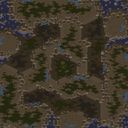
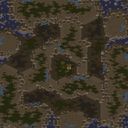
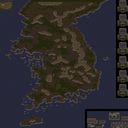
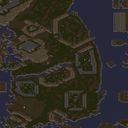
스타크래프트: 브루드워의 유즈맵 장인 'Horrible_Itch'가 제작한 《Special Forces Advanced II》는 6명의 플레이어가 참가하는 컴까기 스타일의 디펜스 맵입니다. 맵의 전체적인 구조는 중앙에 위치한 거점 주변을 적들이 끊임없이 밀려드는 방식으로 구성되어 있으며, 플레이어는 각자의 기지에서 건물을 짓고 유닛을 생산하여 방어선을 구축해야 합니다. 맵의 중앙 지역은 넓은 평야로 이루어져 있어 대규모 병력이 동시에 전투를 벌일 수 있는 공간을 제공하지만, 반대로 방비가 허술한 플레이어는 순식간에 전멸당할 위험이 있습니다. 맵의 양쪽 끝에는 각 플레이어의 기지가 배치되어 있으며, 기지 주변으로는 좁은 통로가 있어 적의 침입을 늦추는 역할을 합니다. 초반에는 소규모 유닛을 활용한 견제가 가능하지만, 후반으로 갈수록 강력한 유닛과 방어 시설이 요구됩니다. 맵의 가장 큰 특징은 적의 공격 루트가 맵 중앙을 통과하는 'S'자형 계곡으로 집중되어 있어, 방어에 유리한 지형을 활용할 수 있다는 점입니다. 또한, 맵 곳곳에 배치된 자원 지대에서 미네랄과 가스를 채집할 수 있어 자원의 중요성도 강조됩니다. 초보자도 쉽게 접근할 수 있는 구조이지만, 적절한 방어 전략과 유닛 조합이 없으면 순식간에 무너질 수 있어 플레이어의 판단력이 중요합니다. 특히, 중앙 지역을 장악하는 것이 승리의 관건으로 보이며, 이를 위해 건물을 효율적으로 배치하고 방어선을 구축해야 합니다. 맵의 난이도는 보통 수준으로 추정되며, 적절한 난이도 조절을 통해 초보자부터 숙련자까지 즐길 수 있습니다. 이 맵은_DEFENSE_ 장르의 유즈맵으로, 디펜스와 컴까기 요소가 결합된 하이브리드 형식의 플레이 경험을 제공합니다. 추천 대상은 스타크래프트 유즈맵을 즐기는 모든 플레이어이며, 특히 디펜스와 전략적 플레이를 좋아하는 유저들에게 적합합니다. 플레이 전, 맵의 중앙 지역과 방어 가능한 지형을 미리 파악하고, 각 플레이어의 기지 배치와 자원 분배 계획을 세워두는 것이 중요합니다. 또한, 적의 공격 패턴을 분석하여 방어 건물과 유닛을 효율적으로 배치하는 것이 승리의 열쇠가 될 것입니다. 맵의 볼륨이 크고 전략적 깊이가 있어 한 판당 약 30분 내외의 플레이 시간을 예상할 수 있습니다. 맵을 플레이하기 전, 각 플레이어의 시작 위치와 중앙 지역을 둘러싼 지형적 특징을 숙지하는 것이 좋습니다. 또한, 자원 관리와 유닛 생산 타이밍을 잘 조절하여 적의 공격을 효과적으로 방어할 수 있도록 준비해야 합니다. 이 맵은_DEFENSE_ 장르의 유즈맵으로, 디펜스와 컴까기 요소가 결합된 하이브리드 형식의 플레이 경험을 제공합니다. 추천 대상은 스타크래프트 유즈맵을 즐기는 모든 플레이어이며, 특히 디펜스와 전략적 플레이를 좋아하는 유저들에게 적합합니다. 플레이 전, 맵의 중앙 지역과 방어 가능한 지형을 미리 파악하고, 각 플레이어의 기지 배치와 자원 분배 계획을 세워두는 것이 중요합니다. 또한, 적의 공격 패턴을 분석하여 방어 건물과 유닛을 효율적으로 배치하는 것이 승리의 열쇠가 될 것입니다. Special Forces Advanced II, a custom defense map created by Horrible_Itch, one of the renowned StarCraft: Brood War custom map artisans, is a six-player versus-computer-style defense map. The overall structure of the map is designed with a central base constantly under siege by waves of enemies, requiring players to construct buildings and produce units from their respective bases to establish a defensive line. The central area consists of vast plains, allowing large-scale battles to unfold simultaneously, but leaves poorly defended players vulnerable to swift annihilation. At both ends of the map are player bases, each connected by narrow passages that slow enemy advances. While early-game harassment is possible with small-scale units, the late game demands powerful units and defensive structures. The map’s defining feature is its 'S'-shaped valley running through the center, where enemy attacks converge, offering players advantageous terrain for defense. Additionally, scattered resource zones across the map provide minerals and vespene gas, emphasizing the importance of resource management. Though the layout is accessible even to beginners, the map can collapse quickly without proper defensive strategies and unit compositions, making player judgment crucial. Controlling the central area appears to be key to victory, requiring efficient building placement and well-constructed defensive lines. The difficulty is estimated to be moderate, balancing accessibility for beginners and depth for experienced players. This map blends defense and versus-computer elements, offering a hybrid play experience. It is recommended for all StarCraft custom map enthusiasts, particularly those who enjoy strategic defense gameplay. Before playing, it is important to familiarize yourself with the central region and defensible terrain, plan base layouts and resource distribution, and analyze enemy attack patterns to deploy defensive structures and units efficiently. With substantial scale and strategic depth, each match is expected to last around 30 minutes. Prior to starting, players should understand their starting positions, the terrain surrounding the central area, and manage resources and unit production timing to effectively counter incoming attacks.

로그인 하시고 댓글을 남겨 볼까요?