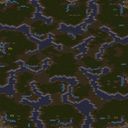
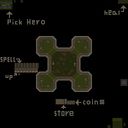
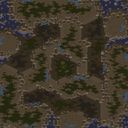
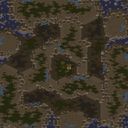
이 맵은 우주 정거장을 배경으로 한 1인용 유즈맵 캠페인으로, 정밀한 유닛 컨트롤과 제한된 자원 운용이 핵심이다. 플레이어는 소수의 유령, 해병, 벌처, 시즈 탱크, 골리앗으로 구성된 테란 병력을 지휘하며, 곳곳에 포진한 저그와 프로토스를 제압하고 감금된 프로토스 동맹을 구출해 세력을 불려나간다. 초반에는 시야가 제한된 좁은 통로에서 저글링과 히드라리스크의 급습을 처리해야 하며, 지뢰 매설과 시즈 모드 전환이 생존의 열쇠가 된다. 중반으로 접어들면 공간이 넓어지고 질럿과 드라군이 추가되지만, 여전히 소수 정예 운용이 요구되므로 유닛 하나하나의 체력 관리가 중요하다. 맵 곳곳에는 시민, 민간인, 테란 건물 같은 중립 오브젝트가 배치되어 스토리의 긴박감을 더하고, 우주 정거장 특유의 메탈릭한 타일셋이 어두운 분위기를 강조한다. 진행은 선형적이지 않으며, 플레이어가 어떤 경로로 구조를 먼저 시도하는지에 따라 후반 교전 양상이 크게 달라진다. 자원은 미네랄 크리스탈을 직접 채취하는 대신 처치한 적 유닛이 드롭하는 미네랄과 가스를 통해 획득하는 방식이어서, 교전을 회피하면 오히려 빈곤해지는 설계가 돋보인다. 난이도는 초반 구간이 상당히 가혹한 편이라 중간 저장 기능을 적극 활용해야 하며, 시즈 탱크의 포격 범위를 활용한 시야 장악과 벌처의 기동성을 살린 정찰이 매우 중요하다. 스타크래프트 브루드워의 전술적 깊이를 즐기면서도 정통 캠페인과는 다른 변칙적인 자원 시스템과 비선형적인 전장을 경험하고 싶은 플레이어에게 추천한다. 플레이 전에 반드시 유즈맵 설정을 활성화해야 하며, 저장 기능을 수시로 사용하는 습관을 들이는 것이 좋다. 대사나 이벤트 트리거가 부분적으로 작동하지 않을 수 있으므로, 특정 구간에서 진행이 막히면 병력 배치를 달리하거나 접근 순서를 바꿔보는 유연한 사고가 필요하다. This map is a single-player Use Map Settings campaign set aboard a space station, where precise unit control and tight resource management define the experience. The player commands a small Terran force composed of marines, vultures, siege tanks, goliaths, and a few special units, fighting through entrenched Zerg and Protoss positions to free captive Protoss allies and gradually expand their army. The early stages take place in narrow corridors with limited visibility, so aggressive Zergling and Hydralisk rushes demand careful spider mine placement and siege mode positioning just to survive. As the map opens up, Dragoons and Zealots join the opposition, but the squad remains small enough that every unit’s hit points matter. Neutral civilians, marines, and Terran structures are scattered throughout the layout, reinforcing a tense narrative atmosphere while the metallic space platform tileset amplifies the dark mood. Progression is non-linear; the order in which you rescue different Protoss groups significantly changes subsequent battles, giving the mission a genuine sense of branching consequence. Resources are not gathered from mineral patches but are instead dropped by slain enemies as mineral chunks and gas capsules, creating a risk-versus-reward loop where avoiding combat leaves you dangerously under-supplied. The difficulty spikes early, so frequent saving is essential, and success hinges on mastering siege tank sight lines to control chokepoints while using vulture mobility to scout ahead. This map is recommended for players who enjoy the tactical depth of Brood War but want a campaign that replaces traditional base building with scavenged resources and non-linear strategy. Before playing, ensure that Use Map Settings is enabled in the game lobby, and make saving a habit since some trigger events may not fire consistently. If progression stalls, try rearranging unit formations or changing the order of approach rather than assuming a trigger is broken; the map rewards patience and careful experimentation.

로그인 하시고 댓글을 남겨 볼까요?