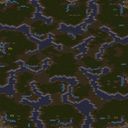
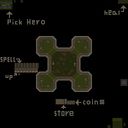
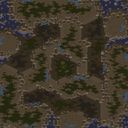
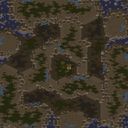
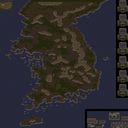
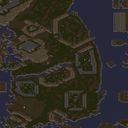
스타크래프트 브루드워의 유즈맵인 <3line D (3line Defense)>는 디펜스 장르에 속하는 맵으로, 플레이어는 끊임없이 몰려오는 적의 공격을 막아내며 생존을 시도하는 구조를 지녔다. 맵은 세로로 3개의 주요 라인이 나뉘어 있으며, 각 라인마다 방어 건물을 배치하고 미네랄과 베스핀 가스를 확보해 병력을 생산하거나 방어력을 강화하는 것이 핵심이다. 화면 중앙에 위치한 자원 기지 주변으로 적의 공격로가 집중되어 있어, 적절한 자원 관리와 병력 컨트롤이 성공의 열쇠가 된다. 맵 이미지를 보면 왼쪽으로 갈수록 푸른색과 녹색의 타일이 반복되고, 중앙과 오른쪽은 붉은색과 회색의 타일이 배치되어 있어 시각적으로도 각 구역의 역할을 구분하기 쉽다. 특히 하단 중앙에 위치한 자원 기지 위에는 보라색과 빨간색의 마커가 배치되어 있어, 이곳이 방어의 핵심 지역임을 직관적으로 알 수 있다. 초반에는 소수의 저글링과 질럿 같은 기본 유닛이 끊임없이 몰려오며, 시간이 지날수록 하이템플러나 캐리어 같은 강력한 유닛이 포함된 혼성 병력이 공격해오므로, 방어선을 끊임없이 보강하고 자원을 효율적으로 활용해야 한다. 맵의 난이도는 초반엔 비교적 쉬운 편이지만, 후반부로 갈수록 적의 공격이 강해지고 변칙적인 패턴으로 공격해오므로, 플레이어는 방어 전략을 유연하게 변경해야 한다. 추천하는 플레이 방식은 자원 수급을 최우선으로 하며, 초반에 가능한 한 많은 미네랄과 가스를 확보해 방어 건물이나 유닛 생산을 서두르는 것이다. 또한, 각 라인의 방어선을 균형 있게 유지하지 않으면 한 라인이 무너지면서 전체 방어가 붕괴될 위험이 있으니, 라인별로 병력을 배치하고 필요에 따라 병력을 재배치하는 것이 중요하다. 이 맵은 혼자서도 플레이할 수 있지만, 팀전으로 구성한다면 각 라인별로 역할을 분담해 더 효율적인 방어가 가능하다. 특히 디펜스 장르를 좋아하는 플레이어나 스타크래프트의 전략적 재미를 즐기는 유저들에게 적합한 맵으로, 반복 플레이를 통해 점차 난이도를 높여가며 도전해 볼 만한 가치가 있다. 플레이 전에는 맵의 세로 3라인과 중앙 자원 기지의 중요성을 반드시 숙지하고, 방어 건물의 배치와 자원 관리에 대한 기본 전략을 미리 세워두는 것이 좋다. 또한, 후속 버전인 v2.1에서는 편의성이 개선되었을 가능성이 있으니, 맵 설명이나 커스텀 데이터에서 버전별 차이점을 확인하는 것도 좋은 방법이다. StarCraft: Brood War's custom map, *3line D (3line Defense)*, is a defense-style map where players must survive by fending off endless waves of enemy attacks. The map is divided vertically into three main lanes, with each lane requiring players to place defensive structures, secure minerals and Vespene gas, and produce units or strengthen defenses. The resource base at the center of the screen acts as a focal point for enemy attack paths, making efficient resource management and unit control crucial for success. The map's visual design features repeating blue and green tiles on the left, while the center and right sides use red and gray tiles, clearly distinguishing each zone's role. A purple and red marker above the resource base in the lower center intuitively signals this as the core defensive area. Early waves consist of basic units like Zerglings and Zealots, but over time, mixed forces including powerful units like High Templars and Carriers emerge. Players must continuously reinforce their defenses and allocate resources wisely. While the early game is relatively manageable, the difficulty escalates as enemy attacks grow stronger and adopt more unpredictable patterns, demanding flexible defensive strategies. A recommended approach is prioritizing resource collection, securing as much mineral and gas as early as possible to quickly build defenses or produce units. Balancing defenses across all three lanes is critical—if one lane collapses, the entire defense can crumble, so distributing forces and adjusting deployments as needed is essential. While the map can be played solo, team play allows for role specialization across lanes, enhancing efficiency. It’s well-suited for fans of the defense genre or those who enjoy StarCraft’s strategic depth, offering replay value by gradually increasing difficulty through repeated attempts. Before playing, it’s important to understand the importance of the three vertical lanes and the central resource base, and to plan a basic strategy for defensive structure placement and resource management. Additionally, the v2.1 update may include improved convenience, so checking version-specific changes in the map description or custom data is a good idea.

로그인 하시고 댓글을 남겨 볼까요?