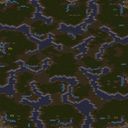
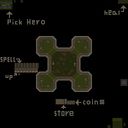
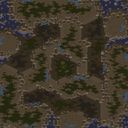
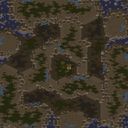
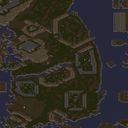
페�레노르 평원은 반지의 제왕 3부작에서 가장 장대하게 묘사된 회전을 브루드워 엔진으로 옮겨낸 4인 협동 유즈맵이다. 황혼 타일셋이 깔린 광활한 들판 한가운데 성채 하나가 외롭게 서 있고, 그 주변을 수많은 오크와 동부인간 병력이 파도처럼 에워싸는 구조로 시작된다. 플레이어는 곤도르와 로한 연합의 지휘관이 되어 나즈굴과 트롤, 올리펀트까지 포함된 적의 대군세를 막아내야 한다. 맵은 단순한 병력 교전을 넘어, 전장 곳곳에 배치된 영웅 유닛과 특수 건물을 활용하는 방식으로 영화적 연출을 끌어낸다. 예를 들어 초반에는 성벽을 따라 배치된 궁수와 보병으로 방어선을 유지하면서, 후방에서 증원군이 도착할 시간을 벌어야 한다. 중반 이후 로한 기마대가 전장 외곽에서 등장해 적의 측면을 강타하는 타이밍이 주어지는데, 이 타이밍을 얼마나 잘 맞추느냐에 따라 전황이 극적으로 바뀐다. 병력 구성은 일반적인 밀리와 달리 영웅 유니터 중심으로 편성되어 있고, 각 플레이어가 담당하는 구역이나 역할이 암묵적으로 나뉘어 있어 협동의 맛이 강하다. 예컨대 한 명이 성문을 지키는 동안 다른 플레이어는 공성 무기를 운용하거나, 전장을 가로지르는 나즈굴에게 대공 사격을 퍼붓는 식이다. 적의 공세는 예측 가능한 패턴으로 밀려오지만, 물량 자체가 상당하기 때문에 방심하면 성벽이 순식간에 뚫린다. 다만 유닛의 이동 속도가 느리고 맵이 넓기 때문에, 긴급 상황에서 병력을 재배치하는 데 시간이 걸리는 점은 주의해야 한다. 원작의 명장면을 재현하려는 의도가 곳곳에 느껴지며, 특히 마지막 단계에서 성문 앞까지 밀고 들어오는 적의 대규모 공세를 막아낼 때의 성취감은 상당하다. 이 맵은 반지의 제왕 세계관에 익숙하거나 대규모 협동 방어를 즐기는 플레이어에게 강하게 추천하며, 시작 전에 동료들과 간단한 역할 분담을 상의하면 훨씬 수월하게 진행할 수 있다. The Pelennor Fields map translates the most spectacular battle from The Lord of the Rings trilogy into a four-player cooperative UMS experience for Brood War. The vast open plain built with the Twilight tileset centers on a lone citadel, which from the very beginning is surrounded by waves of orcs and allied human soldiers. Players take command of the Gondor and Rohan coalition forces and must hold back an enormous enemy host that includes Nazgûl, trolls, and Oliphaunts. The map goes beyond simple unit clashes by using key hero units and special structures scattered around the battlefield to create a cinematic feel. During the early phase, you maintain the defensive line with archers and infantry along the wall while buying time for reinforcements to arrive from the rear. Later, the Riders of Rohan appear on the edge of the field and strike the enemy's back line, a timing window that can dramatically swing the course of the fight depending on how well it is coordinated. Unlike standard melee, the army composition revolves around hero units, and each player implicitly takes responsibility for a different sector, which makes cooperation essential. While one player holds the main gate, another might operate siege weapons or focus anti-air fire on the Nazgûl sweeping across the field. The enemy attacks come in predictable patterns, but the sheer volume is so overwhelming that a moment of carelessness will see the wall breached immediately. The map is vast and unit movement is slow, so repositioning forces in an emergency takes time and requires foresight. The design is filled with deliberate nods to iconic scenes from the films, and the sense of triumph when you finally repel the massive final assault pushing against the gate is deeply satisfying. This map is strongly recommended for players who are familiar with Middle-Earth or who enjoy large-scale cooperative defense, and discussing a rough division of roles with your teammates before starting will make the fight far more manageable.

로그인 하시고 댓글을 남겨 볼까요?