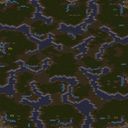
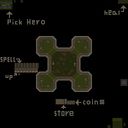
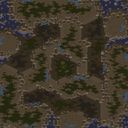
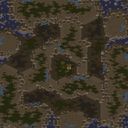
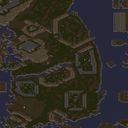
이 맵은 스타크래프트 브루드워 유즈맵 장르의 대표적인 연습용 전장으로, 사막 타일셋 위에 펼쳐진 대칭형 지형이 인상적이다. 네 명의 플레이어가 각각 정해진 위치에서 시작하며, 중앙을 가로지르는 넓은 대지와 좁은 입구가 교차하는 전형적인 로스트 템플 계열 레이아웃을 보여준다. 본진 지역은 언덕 위에 자리 잡고 있어 초반 방어에 유리하며, 앞마당 확장 기지는 좁은 진입로를 통해 연결되어 있어 효율적인 수비가 가능하다. 중앙 지역은 여러 갈래의 길이 교차하며 시야 확보가 중요한 핵심 요충지로 작용한다. 이곳을 장악하면 상대의 이동 경로를 예측하고 견제하는 데 큰 이점을 얻을 수 있다. 맵 곳곳에 배치된 자원 지대는 초반 확장을 유도하면서도 과도한 멀티 확보를 방지하기 위해 일부 미네랄 필드의 양이 제한적으로 설계된 느낌이다. 이 버전은 원작 로스트 템플의 구조를 바탕으로 2004년 수정된 형태이며, 유즈맵 형식으로 제공되기 때문에 일반적인 래더 게임과는 다른 플레이 경험을 제공한다. 입구가 좁고 지형이 제한된 만큼 대규모 병력 운용보다는 소수 유닛을 활용한 국지전과 전술적 요충지 싸움이 빈번하게 발생한다. 실제 플레이에서는 중앙을 중심으로 한 끊임없는 견제와 시야 싸움이 벌어지며, 한 번의 교전 실패가 곧바로 확장 기지 손실로 이어질 수 있어 긴장감이 높다. 이 맵은 특히 2대2 팀플레이에 최적화되어 있으며, 아군과의 호흡이 승패를 크게 좌우한다. 유즈맵 특성상 개별 유닛 성능이나 빌드 오더보다는 팀워크와 전술적 판단력이 더 중요하게 요구된다. 다만 좁은 길목과 제한된 시야 때문에 초보자가 접근하기에는 다소 어려울 수 있고, 반복된 플레이로 지형을 완전히 익히는 것이 좋은 성과를 내는 지름길이다. 플레이 전에는 반드시 맵 전체 지형을 한 번 살펴보고, 주요 교전 지점과 확장 위치를 숙지하는 것이 중요하다. 이 맵은 고전적인 로스트 템플의 감성을 즐기면서도 유즈맵 특유의 변형된 전략성을 맛보고 싶은 플레이어에게 추천한다. This map is a classic cooperative battlefield in the StarCraft Brood War Use Map Settings genre, built on a desert tileset with a striking symmetrical layout. Four players start at fixed positions on a terrain that follows the familiar Lost Temple design philosophy, where a broad central plain intersects with narrow chokepoints. The main bases sit on elevated ground, giving a natural defensive edge in the early game, while the natural expansions require careful movement through tight access routes. The center is divided into multiple intersecting paths, making vision control a decisive factor, and whoever holds this area can effectively track and intercept enemy movements. Resource nodes scattered across the map encourage early expansion, but several mineral fields appear deliberately reduced to discourage excessive base proliferation. This version was modified in October 2004, preserving the core Lost Temple structure while introducing subtle adjustments suited for UMS play, so the experience differs noticeably from standard ladder matches. Because of the narrow passages and restricted terrain, large-scale army clashes are less common than small-unit skirmishes and tactical ambushes. Control of the center leads to constant harassment and vision battles, where a single lost engagement can result in the immediate loss of an expansion. The map is best suited for two-versus-two team play, where coordination with an ally determines the outcome far more than individual build orders. Due to the UMS nature, raw unit stats matter less than teamwork and strategic foresight, making it a rewarding challenge for players who enjoy reading the flow of a game. Beginners may find the tight corridors and limited sightlines intimidating, so it is wise to study the full layout and memorize critical chokepoints and expansion locations before playing. This map is recommended for those who love the nostalgic feel of the classic Lost Temple but want to experience the unpredictable strategic twists that only a UMS setting can provide.

로그인 하시고 댓글을 남겨 볼까요?