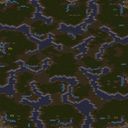
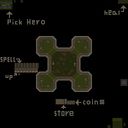
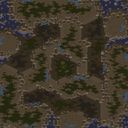
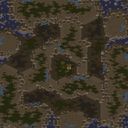
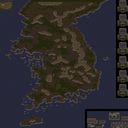
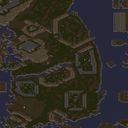
저글링과 성큰 촉수가 만들어내는 단순한 달리기 맵인 줄 알았다면 큰 오산이다. 이 맵은 제목 그대로 저글링이 엄청나게 빠르게 생성되며, 그 물량을 뚫고 살아남는 구조의 협동 생존형 유즈맵이다. 여섯 명의 플레이어가 중앙에서 시작해 사방에서 몰려오는 저글링 무리를 막아내야 하며, 각자 주어진 공간에서 건물을 배치하고 병력을 생산하며 버티는 방식으로 진행된다. 내부 설명에 명시된 것처럼 원작보다 클리어 가능성이 높아졌지만, 그렇다고 해서 쉬운 난이도를 의미하지는 않는다. 여전히 빠른 판단과 효율적인 빌드 없이는 초반 러시조차 넘기기 어렵다. 맵의 구조는 단순하지만 그 안에서 요구되는 전략은 매우 정교하다. 황혼 타일셋 특유의 어두운 배경은 시야 확보를 방해하며, 좁은 입구를 방어 건물로 막는 고전적인 테란·프로토스 조합이 가장 무난하지만, 저그를 선택할 경우 성큰 라인을 얼마나 촘촘히 구축하느냐에 따라 생존 시간이 극명하게 갈린다. 후반으로 갈수록 저글링의 업그레이드 수치와 이동 속도가 급격히 상승하기 때문에 단순히 병력을 쌓는 것만으로는 한계가 있고, 유닛 간 시너지와 지형 활용 능력이 승패를 가른다. 특히 아군 여섯이 각자 독립된 구역에서 버티면서도 간간이 병력을 교류하거나 과잉 자원을 지원해주는 소통이 중요한데, 이 맵은 그런 미세한 협력이 쌓여야 후반을 바라볼 수 있도록 설계되어 있다. 플레이 경험은 극한의 긴장감으로 요약된다. 화면을 가득 메우는 저글링 떼가 쏟아질 때의 시각적 압박은 상당하며, 한순간 방어선이 무너지면 복구가 거의 불가능하기 때문에 매 순간이 결말로 이어질 수 있다는 압박이 지속된다. 다만 반복 플레이를 통해 최적의 건물 배치와 유닛 조합을 찾아가는 재미가 뚜렷해, 전략 시뮬레이션을 즐기는 유저라면 금방 몰입할 수 있다. 여섯 명이 모두 살아남아 최후의 웨이브를 넘겼을 때의 성취감은 상당히 깊다. 이 맵은 빠른 손놀림보다도 사전 설계와 팀원 간 역할 분담을 더 중요하게 여기는 플레이어에게 추천한다. 시작하기 전에 반드시 모든 플레이어가 같은 이해도를 공유해야 하며, 한 명이라도 준비 없이 시작하면 초반 붕괴로 이어질 수 있다는 점을 염두에 두어야 한다. 원작을 경험한 유저라면 개선된 클리어 조건을 체감하며 협력의 재미를 다시 느낄 수 있고, 처음 접하는 유저라면 브루드워 유즈맵 특유의 원초적인 생존 감각을 제대로 만끽할 수 있을 것이다. If you thought this was just a simple running map with zerglings and sunken colonies, you are sorely mistaken. As the title suggests, zerglings spawn at an overwhelmingly fast rate, and this is a cooperative survival UMS map where six players must break through the relentless swarm and endure. All players start in the center and must fend off waves of zerglings rushing in from every direction, placing buildings and producing units in their own designated spaces to hold out. According to the internal description, the map has been made more beatable than the original, but that does not mean the difficulty has become forgiving. Without quick decision-making and an efficient build order, surviving even the early rush remains a serious challenge. The map layout is simple, yet the strategy it demands is remarkably precise. The dark backdrop of the Twilight tileset hinders visibility, and the classic Terran-Protoss combination of blocking narrow entrances with defensive structures tends to be the most stable approach. However, if you choose Zerg, your survival hinges entirely on how tightly you weave your sunken colony lines. As the game progresses into later stages, the zerglings upgrade levels and movement speed increase dramatically, so simply amassing units has clear limits. Unit synergy and terrain judgment become essential. Crucially, the six players must hold out in their separate zones while occasionally exchanging troops or sharing surplus resources. The map is designed so that only through such subtle cooperation can you hope to reach the final waves. The play experience is filled with extreme tension. The visual pressure of zergling swarms flooding the screen is immense, and since a single breach in your defense is almost impossible to recover from, the constant threat that any moment could be your last keeps you on edge. However, the joy of optimizing building placements and unit compositions through repeated attempts is distinct, and players who enjoy strategic simulations will find themselves deeply immersed. The sense of achievement when all six members survive the final wave is profoundly satisfying. This map is recommended for players who value pre-planning and role distribution among teammates more than raw clicking speed. Before starting, it is essential that all players share the same understanding of the strategy, and you must keep in mind that even one unprepared member can lead to an early collapse for the entire team. If you have experienced the original, you will notice the improved clear conditions and rediscover the joy of cooperation. If you are a newcomer, you will get a proper taste of the raw, primal survival instincts that Brood War UMS maps are known for.

로그인 하시고 댓글을 남겨 볼까요?