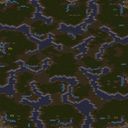
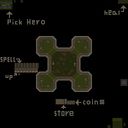
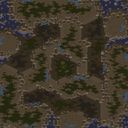
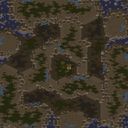
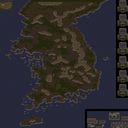
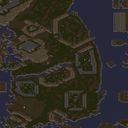
스타크래프트 브루드워의 대표적인 디펜스 장르 유즈맵인 <마린 디펜스 10웨이 V12>는 10개의 서로 다른 방향으로 펼쳐지는 기지 방어 루트를 제공하는 흥미로운 구조를 자랑한다. 맵의 중앙에 위치한 플레이어 기지에서 광물을 확보한 후, 각 방향의 입구에서 끊임없이 몰려드는 적이 쉴 틈 없이 공격해 오는 것이 이 맵의 핵심 메커니즘이다. 특히, 10개의 방향이 균등하게 퍼져 있어 어느 한 곳을 소홀히 하면 순식간에 기지가 무너질 위험이 크므로, 초보자는 물론 숙련자까지 긴장감을 놓을 수 없는 전략적 깊이를 느낄 수 있다. 내부 설명에 언급된 'Minerals and 1 SCV'는 초반 자원 관리와 SCV 생산의 중요성을 강조하며, 'Much Harder!'라는 코멘트는 난이도 조절이 이뤄졌음을 시사한다. 각 방향의 기지 구조가 유사하면서도 조금씩 차이가 있는 점이 특징으로, 플레이어는 입구, 자원 위치, 방어 시설 배치 등을 숙지하고 빠르게 대응해야 한다. 또한, 'Heros-Sides get equal kills!'라는 설명은 각 방향의 공격력을 균등하게 맞춰 밸런스를 맞추려는 제작자의 의도를 엿볼 수 있게 한다. 이 맵의 가장 큰 특징은 6명의 플레이어가 동시에 방어전을 펼치면서도 각자의 방향을 책임지는 구조로, 팀워크와 개인 실력이 모두 요구된다. 특히, 중앙 광물 지대와 SCV 하나라는 극도로 제한된 초기 자원 조건은 플레이어에게 신중한 자원 운용과 방어 시설 구축을 강요한다. 맵의 구조상 입구마다의 공격 패턴과 적이 오는 타이밍이 조금씩 다르므로, 반복 플레이를 통해 각 방향의 특성을 파악하는 것이 중요하다. 초보자의 경우, 각 방향의 기지 배치와 공격 루트를 익히기까지 다소 시간이 걸릴 수 있지만, 익숙해지면 그야말로 손에 땀을 쥐는 긴장감과 성취감을 느낄 수 있는 맵이다. 이 맵을 플레이하기 전에는 반드시 각 방향의 입구 위치와 중앙 자원 지대, 그리고_SCVD의 역할을 숙지하고, 방어 시설(벙커, 터렛, 미사일 터렛 등)을 적재적소에 배치하는 연습을 추천한다. 또한, 광물 부족 시에는 SCV를 추가 생산해 자원 확보에 힘써야 하며, 적이 몰려오는 타이밍을 예측해 미리 대비하는 자세가 필요하다. 이 맵의 난이도는 결코 만만치 않지만, 그만큼 플레이어의 전략적 사고와 빠른 판단력을 길러주는 훌륭한 훈련 도구가 될 것이다. StarCraft: Brood War’s classic defense genre custom map, *Marine Defense 10-Way V12*, features a fascinating layout with ten distinct base defense routes spreading out in different directions. The core gameplay revolves around securing minerals at the central player base while relentless waves of enemies continuously assault each entrance. With all ten paths evenly distributed, neglecting even one can lead to a swift base collapse, creating intense strategic pressure that keeps both beginners and veterans on edge. The in-map description’s note *"Minerals and 1 SCV"* underscores the critical early-game resource management and SCV production, while *"Much Harder!"* hints at the map’s deliberate difficulty scaling. Each direction shares a similar base structure but introduces subtle variations in entrance placement, resource locations, and defensive setup, requiring players to adapt quickly. The explanation *"Heros-Sides get equal kills!"* reveals the creator’s effort to balance offensive power across all paths. What truly sets this map apart is its six-player co-op defense structure, where each player guards their assigned direction—demanding both teamwork and individual skill. The extreme initial scarcity of just one SCV and a central mineral patch forces players to optimize resource use and defensive build orders meticulously. Since enemy attack patterns and timings vary slightly at each entrance, mastering the map comes down to repeated play and recognizing each path’s unique characteristics. Beginners may struggle to memorize the base layouts and attack routes at first, but once familiar, the map delivers heart-pounding tension and a deep sense of accomplishment. Before playing, study the entrance locations, central resource area, and the SCV’s role, and practice placing defensive structures like bunkers, turrets, and missile turrets in strategic spots. When minerals run low, prioritize producing more SCVs to secure income, and always anticipate enemy waves to prepare defenses in advance. Though challenging, this map is an excellent training ground for sharpening strategic thinking and quick decision-making.

로그인 하시고 댓글을 남겨 볼까요?