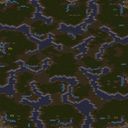
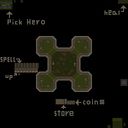
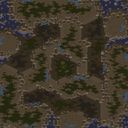
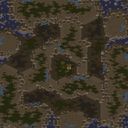
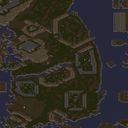
이 맵은 전형적인 유즈맵 디펜스 장르에 속하지만, 특유의 단순함과 속도감이 주는 중독성이 돋보인다. 제목 그대로 플레이어는 럴커만을 생산해 몰려오는 적 유닛을 막아야 하며, 'Fast'라는 수식어가 붙을 만큼 초반부터 자원이 넉넉히 지급되어 빠르게 전력이 갖춰진다. 화산 타일셋의 어두운 용암 지형이 배경을 이루고, 좁은 입구가 여러 갈래로 나뉘어 있어 각 플레이어가 하나의 통로를 전담하는 협동 구조다. 공격 경로가 단순해 보이지만 물량이 누적될수록 진형 유지와 럴커의 재배치 타이밍이 승패를 가르는 핵심 요소로 작용한다. 자원은 사실상 무한에 가깝게 공급되므로, 전략보다는 지속적인 생산과 빠른 컨트롤이 더 큰 비중을 차지한다. 이 점이 일부 플레이어에게는 다소 반복적이라는 인상을 줄 수 있지만, 오히려 생각 없이 즐기기에 좋은 피로 해소용 맵으로서의 가치를 지닌다. 초반에는 느긋하게 버로우와 어택 땅을 반복하다가도, 중반을 넘어서면 한순간의 빈틈이 라인 붕괴로 이어진다는 긴장감이 생긴다. 적 유닛의 체력과 속도가 점점 상승하기 때문에 럴커의 수만으로는 부족하고, 가시 지옥의 간격을 얼마나 촘촘하게 유지하느냐가 관건이 된다. 7인 협동을 기준으로 설계되었지만, 인원이 적어도 난이도가 극단적으로 높아지지는 않아 친구와 소수로도 부담 없이 즐길 수 있다. 다만 이 맵은 지나치게 오래 버티는 것을 상정하지 않은 구성이므로, 장기전보다는 짧고 강렬한 한 판을 원할 때 적합하다. 플레이 전에는 반드시 공격로가 어떻게 나뉘는지 확인하고, 동료 간 방어 구역을 명확히 나누는 것이 좋다. 사소한 말 한마디로도 합이 맞지 않으면 후반부에 라인이 한꺼번에 밀리는 상황이 발생할 수 있다. 복잡한 트리거나 특수 이벤트는 없지만, 그 순수한 방어 기믹 자체가 럴커라는 유닛의 매력을 극대화한다는 점에서 이 맵은 무시할 수 없는 존재감을 지닌다. 단순하지만 강력한 이 디펜스는 특히 스타크래프트의 원초적인 전투 쾌감을 갈망하는 유저에게 추천할 만하다. This map belongs to the classic use map defense genre, standing out through the addictive power of its stark simplicity and relentless speed. As the title implies, players produce only Lurkers to hold back waves of enemies, and the "Fast" tag is justified by the abundant resources provided right from the start, allowing defenses to take shape almost immediately. Set against the dark lava terrain of the volcanic tileset, the map splits the enemy approach into several narrow, straightforward paths, with each player typically assigned to guard one lane. The layout appears plain at first, but once the enemy numbers begin to pile up, the real challenge shifts to maintaining a tight formation and timing the repositioning of Lurkers precisely. Resources are virtually infinite, which means sustained production and quick control matter far more than any elaborate strategy. This can feel somewhat repetitive to certain players, yet it is precisely what makes the map a perfect low-stress outlet for unwinding without much thought. The early game unfolds in a relaxed rhythm of burrowing and attack-moving, but after the midpoint, a single moment of carelessness can trigger a full lane collapse, injecting real tension into the session. As enemy units grow tougher and more varied, sheer numbers of Lurkers are not enough; the real defense lies in how tightly the spine lines are maintained and how well the overlapping fields of fire are set. Although designed for seven players, the difficulty does not spike unfairly with fewer participants, making it comfortable for small groups of friends to jump in casually. This map is not meant for prolonged, indefinite survival, so it suits those seeking a short, intense burst of action rather than a drawn-out siege. Before starting, it is wise to check how the lanes are split and to clearly divide defensive zones among teammates. A slight miscommunication can easily result in a flank collapsing during the later stages. There are no complex triggers or special events, but the pure defensive mechanic itself amplifies the unique charm of the Lurker, giving the map a lasting presence. Simple yet forceful, this defense scenario is recommended especially for those who crave the primal combat satisfaction that StarCraft delivers.

로그인 하시고 댓글을 남겨 볼까요?