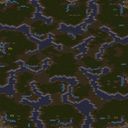
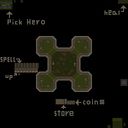
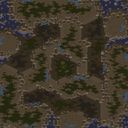
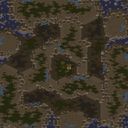
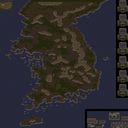
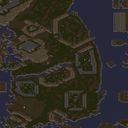
이 맵은 여섯 명이 함께하는 협동 유즈맵으로, 정해진 구역에서 러커를 배치하고 업그레이드하며 몰려오는 적 유닛을 막아내는 디펜스 장르입니다. 우주 타일셋을 배경으로 한 어두운 우주 공간 시각 효과가 몰입감을 높이며, 제한된 공간 안에서 러커의 잠복 공격 특성을 극대화한 배치 전략이 핵심입니다. 플레이어는 시작과 동시에 일정량의 미네랄을 받고, 정해진 지점에 러커를 소환해 방어선을 형성합니다. 웨이브가 진행될수록 적 유닛의 체력과 속성이 점점 강해지기 때문에, 단순히 수를 늘리는 것만으로는 버티기 어렵고 업그레이드 선택이 승패를 가릅니다. 업그레이드는 공격력, 공격 속도, 체력 재생 등으로 나뉘어 있어 자원 분배에 신중을 기해야 하며, 팀원 간 러커 배치 간격을 조율하지 않으면 특정 지점이 뚫리기 쉬운 구조입니다. 후반으로 갈수록 대규모 물량이 한꺼번에 쏟아지며, 러커의 딜레이와 가시 공격의 범위를 고려한 진형 유지가 요구됩니다. 개별 유닛 컨트롤보다 전체 라인의 균형과 업그레이드 타이밍을 맞추는 메타 플레이에 집중하게 되므로, 소통이 원활한 파티에서 특히 재미를 느낄 수 있습니다. 이 맵은 난이도가 상당히 높은 편이기 때문에, 디펜스 초보자보다는 브루드워 유즈맵에 익숙한 숙련자에게 추천합니다. 플레이 전에 팀원들과 역할 분담과 업그레이드 우선순위를 간단히 상의하면 생존 확률이 크게 올라가며, 초반 자원을 어디에 집중할지 미리 정해두는 것이 좋습니다. 또한 러커가 배치된 타일의 정확한 위치에 따라 공격 범위가 달라질 수 있으니, 초반 테스트 웨이브에서 약간의 조정을 거치는 섬세함이 요구됩니다. 깔끔한 인터페이스와 빠른 진행 속도 덕분에 한 판이 지나치게 길어지지 않으며, 실패하더라도 다시 도전하고 싶게 만드는 중독성이 강한 것이 이 맵의 특징입니다. This is a six-player cooperative Use Map Settings defense map where you arrange Lurkers, upgrade them, and hold off waves of incoming enemy units. The dark space atmosphere created by the space tileset enhances immersion, and the core gameplay revolves around strategic placement that maximizes the Lurker's burrow attack within a confined area. Players start with a set amount of minerals and summon Lurkers at designated spots to build a defensive line. As waves progress, enemy units gain more health and stronger attributes, so simply adding more Lurkers won't be enough; upgrade choices become the deciding factor. Upgrades include attack power, attack speed, and hit point increases, requiring careful resource allocation. If the team does not coordinate the spacing of their Lurkers, certain points will easily break under pressure. In the later stages, massive numbers of enemies rush in at once, making it crucial to maintain positioning that accounts for the Lurker's attack delay and spine radius. The focus is less on individual unit micro and more on the macro balance of the entire line and the timing of upgrades, which makes it especially fun for parties with good communication. The difficulty is quite high, so this map is recommended for experienced Brood War UMS players rather than defense beginners. Before playing, discussing roles and upgrade priorities with your teammates will greatly improve your survival rate, and it helps to decide early where to concentrate your initial resources. Also, the attack coverage can vary depending on the exact tile placement of the Lurkers, so fine-tuning during the early test waves is necessary. The clean interface and fast pacing keep each round from dragging on too long, and the strong desire to try again even after a failure is one of this map's most addictive qualities.

로그인 하시고 댓글을 남겨 볼까요?