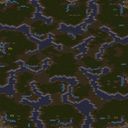
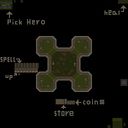
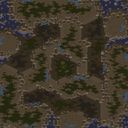
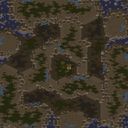
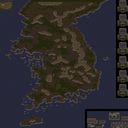
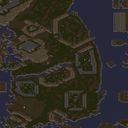
이 맵은 여섯 명이 함께 버티는 고전 디펜스 장르로, 럴커가 쏟아지는 단순한 규칙 안에서도 빠른 판단과 빈틈없는 진형 유지가 승패를 가른다. 황무지 타일셋 특유의 황량한 색감과 좁은 골짜기 지형이 시각적으로도 압박감을 주며, 유닛 하나가 밀리면 순식간에 전선 전체가 무너지는 긴장감을 선사한다. 제목에 적힌 18 way는 단순한 경로 수를 넘어 여러 방향에서 동시에 몰려오는 물량 공세를 암시하며, 후반으로 갈수록 저글링과 히드라리스크가 섞여 들어와 단순한 탱킹만으로는 버티기 어렵게 설계되어 있다. 여섯 명의 협동이 강제되기 때문에 한 명이라도 자원을 독점하거나 병력을 전방 배치하지 않으면 특정 방향의 방어선이 허물어지고, 그 틈으로 럴커가 포진하여 아군 전체가 궤멸하는 장면이 자주 연출된다. 특히 추가로 제공되는 여덟 개의 보충 영웅 유닛은 초반 배치와 중반 위기 대처에 결정적인 변수로 작용하며, 이 유닛들을 어느 타이밍에 어느 진영에 투입하느냐에 따라 판도가 완전히 달라진다. 맵 자체의 구조는 대칭에 가깝지만 각 플레이어가 맡은 구역에 따라 러시 강도와 타이밍이 미묘하게 달라서, 한 번 해본 경험만으로는 최적의 빌드를 찾기 어렵다. 사운드나 트리거 장치는 절제되어 있으나, 럴커의 가시가 연이어 박히는 타격음만으로도 충분히 전장의 공포를 체감할 수 있다. 난이도가 높은 편이라 스타크래프트 디펜스 맵에 익숙한 숙련자들에게 추천하며, 초보자는 먼저 혼자서 시뮬레이션해보거나 음성 채팅이 가능한 파티원과 함께 플레이할 것을 권한다. 아군 유닛 간의 충돌 판정이 큰 좁은 통로에서 병력을 뭉치면 아군끼리 길을 막아 전멸하는 경우가 빈번하므로, 진형을 겹치지 않게 유지하는 세심한 건트롤이 생존의 핵심이다. 플레이 전에는 반드시 맵 파일명에 적힌 여덟 개의 추가 영웅이 어떤 유닛인지 파악하고, 각 플레이어가 초반 방어 구역을 미리 합의하지 않으면 시작과 동시에 혼선이 생기기 쉬우므로 주의해야 한다. This is a six-player cooperative defense map where survival hinges on quick decision-making and flawless entrance control, even within the simple rule of endless Lurker waves. The Badlands tileset’s arid golden tones and narrow ravine-like passages create visual pressure, and the moment a single unit falls the entire frontline tends to collapse in an instant. The number 18 in the title does not merely indicate a path count but implies simultaneous multi-directional assaults, and as the game progresses mixed waves of Zerglings and Hydralisks join the Lurkers so that simple tanking becomes insufficient. Because cooperation among all six players is mandatory, if one person hoards resources or fails to position forces forward the defensive line in that direction breaks, and the Lurkers that burrow through the gap often stack and wipe out the entire team. The eight extra hero units provided act as decisive variables for early positioning and mid-game crisis response, and the timing and placement of these units can completely reverse the tide. The layout appears nearly symmetrical, but the rush intensity and timing differ subtly depending on each player’s assigned sector, making it difficult to find an optimal build order even after several attempts. Sound and trigger effects are restrained, yet the repetitive impact noise of Lurker spines is more than enough to convey the terror of the battlefield. Because the difficulty is on the higher side, this map is recommended for experienced StarCraft defense players, and newcomers should first run a solo simulation or start with a party capable of voice communication. The narrow corridors have large unit collision boxes, so stacking forces frequently leads to self-blocking and total annihilation, making meticulous formation control the absolute key to survival. Before playing, it is essential to check the map file to understand exactly which eight extra heroes are provided, and the team must agree on each player’s initial defense zone in advance, because confusion erupts immediately without that coordination.

로그인 하시고 댓글을 남겨 볼까요?