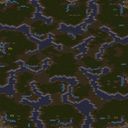
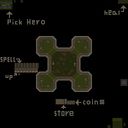
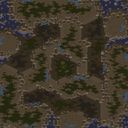
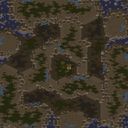
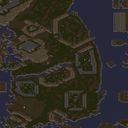
넥서스 뿌시기 엽기완벽버전은 이름 그대로 상대의 넥서스를 먼저 파괴하는 진영이 승리하는 단순 명쾌한 목표를 중심으로 전개되는 6인 전용 유즈맵이다. 사막 타일셋을 배경으로 펼쳐지는 이 맵은 이전 버전보다 확장된 지형을 제공하며, 넓어진 전장 덕분에 병력 간 충돌이 더욱 자주 일어나고 교전의 규모도 자연스럽게 커진다. 각 비콘에는 어떤 유닛이 소환되는지 설명이 표시되어 있어, 초보자도 부담 없이 유닛의 역할을 파악하고 즉시 전투에 적응할 수 있는 배려가 돋보인다. 유닛 밸런스가 정밀하게 조정되었다는 제작자의 설명처럼, 특정 유닛이 지나치게 강력하거나 무력한 상황이 적어 플레이어는 선택의 재미와 함께 전술적 고민을 동시에 느끼게 된다. 가장 눈에 띄는 변주는 전장 왼쪽에 마련된 자살 구역이다. 단순한 도주로가 아니라 적에게 경험치나 자원을 넘겨주지 않으려는 의도적인 선택지로 기능하며, 위기 상황에서 과감한 결단을 유도하는 장치로 작용한다. 이 요소 덕분에 게임 후반까지 긴장감이 유지되고 예측 불가능한 변수가 발생하는 즐거움이 생긴다. 넥서스라는 거대한 목표물을 중심으로 끊임없이 소규모 접전과 대규모 충돌이 반복되는 구성은 마치 사막 한가운데서 벌어지는 요새 공방전을 연상시키며, 유닛이 계속 쏟아져 나오는 비콘의 특성상 소모전 양상으로 흐르기 쉬우나 자살 구역과 지형의 넓이가 이러한 단순함을 성공적으로 상쇄한다. 팀 구성이 정해져 있지 않아 개인전 혹은 즉흥적인 동맹이 형성될 여지가 있으며, 이는 매 판 색다른 정치적 긴장과 심리전을 만들어내는 원동력이 된다. 이 맵은 복잡한 트리거나 스토리 없이 순수하게 전투와 파괴라는 즉각적인 재미를 원하는 플레이어에게 적합하다. 특히 짧은 시간 안에 최대한 많은 교전을 경험하고 싶은 이들에게 만족감을 줄 것이다. 플레이 전에 반드시 확인해야 할 점은 유닛 소환 방식의 특성상 비콘 점령의 우선순위가 승패를 크게 좌우한다는 사실이다. 초반에 어떤 비콘을 확보하느냐에 따라 중반 이후의 전력 차이가 현저하게 벌어지므로, 시작과 동시에 주변 비콘의 설명을 빠르게 읽고 자신만의 빌드업 순서를 머릿속에 그리는 것이 중요하다. 또한 자살 구역의 존재는 막다른 골목처럼 보일 수 있으나, 때로는 아군과의 연계를 통해 적을 그쪽으로 유인하는 전략적 활용도 가능하다는 점을 기억하면 더욱 다채로운 플레이를 즐길 수 있다. 전반적으로 이 맵은 단순한 목표 안에 다양한 전술적 선택지를 녹여낸, 완성도 높은 유즈맵이다. Nexus Bbushigi Yeopgi Perfect Version is a six-player Use Map Setting game built around a clear and immediate objective: destroy the opposing Nexus before anyone else does. Set against a desert tileset, the map offers an expanded terrain compared to its earlier versions, which naturally increases the frequency of skirmishes and the scale of engagements. Each beacon is clearly labeled with a description of the unit it spawns, making it remarkably easy for beginners to understand unit roles and jump straight into combat without confusion. The creator explicitly notes that unit balance has been finely tuned, and this attention to balance is felt during play; no single unit type dominates excessively or feels useless, allowing players to enjoy both the fun of choice and the depth of tactical decision-making. The most distinctive feature is the self-destruct zone placed on the left side of the battlefield. This is not merely an escape route but a deliberate option designed to deny the enemy experience or a kill, forcing players to make split-second judgments under pressure. This mechanic sustains tension well into the late game and introduces unpredictable variables that enrich the overall experience. The constant cycle of small clashes and larger collisions centered around the Nexus makes the match feel like a desert fortress siege, and although the endless stream of units from the beacons naturally pushes the game toward a war of attrition, the suicide zone and the broader layout successfully offset that simplicity. Since there are no fixed teams, the game naturally allows for free-for-all chaos or impromptu alliances, which becomes a rich source of political tension and psychological warfare that changes every single round. This map is highly recommended for players who crave immediate combat and destruction without the burden of complex triggers or storylines. It particularly suits those who want to pack as many engagements as possible into a short session. Before starting, it is crucial to understand that the priority of securing beacons heavily dictates the flow of power. The difference in army strength after the early game depends almost entirely on which beacons you capture first, so reading the beacon descriptions quickly and forming a personal build order from the very first second is essential. Also, while the self-destruct zone may look like a dead end, remembering that it can be used to lure enemies in through coordinated team play adds a layer of strategic depth. Overall, this is a well-crafted UMS map that wraps a simple objective in a package of diverse tactical choices.

로그인 하시고 댓글을 남겨 볼까요?