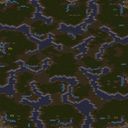
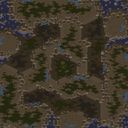
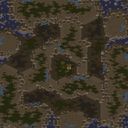
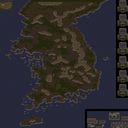
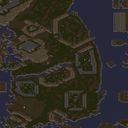
이 맵은 황무지 타일셋 위에 펼쳐진 대칭형 2인용 밀리 전장으로, 제목이 없는 만큼 모든 것이 플레이어의 기본기와 전략적 판단에 달려 있다. 내부 설명에 명시된 승리 조건은 단순하게 모든 적 건물을 파괴하는 것이며, 이는 스타크래프트 브루드워의 가장 원형적인 대결 구도를 그대로 따른다. 지형은 두 기지가 중앙을 가로지르는 능선과 좁은 경사로로 연결되어 있어 초반에는 안정적인 빌드업이 가능하지만, 확장을 시도하거나 중앙 장악에 나서는 순간 예상치 못한 교전이 빈발하는 구조를 보인다. 특히 중앙 지역은 시야가 제한된 언덕과 개활지가 혼재되어 있어 저그의 러커나 테란의 시즈 탱크 같은 유닛이 큰 위력을 발휘할 수 있는 반면, 프로토스는 좁은 입구를 활용한 포톤 캐논 심시티로 안정성을 확보해야 하는 전형적인 종족별 운영 차이를 보여준다. 앞마당 확장은 비교적 가까운 거리에 있지만 좁은 진입로로 인해 적의 소수 병력 견제에도 쉽게 노출되기 때문에, 공격 타이밍을 계산하지 않고 무리하게 가져가는 것은 되레 패배의 빌미가 될 수 있다. 자원 배치는 각 본진에 미네랄과 베스핀 가스가 충실히 제공되지만 중앙에 추가 멀티가 놓여 있어 후반으로 갈수록 이 지점을 둘러싼 교전이 치열해진다. 맵의 전반적인 흐름은 초반 소규모 유닛 교전 이후 빠르게 앞마당을 확보하고, 중앙을 중심으로 한 병력 대치 국면으로 이어지는 전통적인 밀리 템포를 따른다. 다만 지형이 전반적으로 좁고 우회로가 제한적이어서 대규모 한방 교전이 자주 발생하며, 한 번의 큰 실수가 곧바로 게임의 승패를 결정짓는 긴장감을 유발한다. 이 맵은 특별한 트리거나 사용자 정의 요소 없이 오직 기본 유닛과 건물만의 싸움을 원하는 플레이어에게 적합하며, 복잡한 변수를 배제한 채 순수하게 전투 실력과 운영 능력을 겨루고 싶은 이들에게 추천한다. 플레이 전에 확인할 점은 이 맵이 완전히 평등한 대칭 구조이므로 선호하는 종족의 초반 빌드 오더를 얼마나 정교하게 가져가느냐가 승률을 크게 좌우한다는 사실이다. This map is a symmetrical two-player melee battlefield set on a Badlands tileset, and as its untitled nature suggests, everything is focused solely on the players' fundamental skills and strategic judgment. The internal description states the victory condition is simply to destroy all enemy buildings, which follows the most archetypal confrontation structure of StarCraft Brood War. The terrain connects the two bases through a central ridge and narrow pathways, allowing for a stable early-game buildup, but the moment players attempt to expand or seize control of the center, frequent and unexpected skirmishes become inevitable. The central area is a mix of wide-open high ground and confined spaces, allowing units like Zerg Lurkers or Terran Siege Tanks to exert tremendous influence, while Protoss players must rely on Photon Cannon sim-city at chokepoints to secure stability, revealing distinct racial strategic differences. The natural expansion is relatively close but is easily exposed to harassment due to its narrow entrance, meaning that recklessly taking it without calculating the opponent's attack timing can easily become the cause of defeat. Each main base offers a solid supply of minerals and Vespene Gas, but additional resource nodes placed in the center make this area the focal point of intense late-game skirmishes. The overall flow follows a traditional melee tempo: early small-unit engagements transition into securing the natural expansion, which then escalates into a full-scale standoff over the central territory. However, because the terrain is generally tight and lacks alternative flanking routes, large-scale decisive battles occur frequently, and a single major mistake can instantly determine the outcome of the match, creating constant tension. This map is best suited for players who want to fight purely with basic units and core mechanics, without any special triggers or custom elements, and it is recommended for those who wish to test their combat prowess and macro management in an environment free of complex variables. Before playing, it is crucial to understand that the perfectly symmetrical layout means victory heavily depends on how precisely you execute your preferred race’s build order.

로그인 하시고 댓글을 남겨 볼까요?