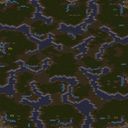
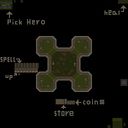
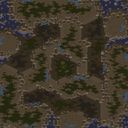
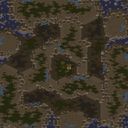
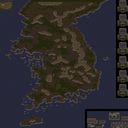
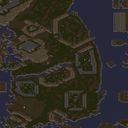
스타크래프트: 브루드워의 유즈맵 중에서도 독특한 재미를 제공하는 ‘Impossible Scenarios 7’은 기존 밀리 맵과는 차별화된 난이도와 전략적 깊이를 자랑하는 맵입니다. 맵 제목에서부터 느껴지듯, 이 맵은 플레이어에게 ‘불가능해 보이는 시나리오’를 강제하며, 이를 해결하기 위한 창의적인 플레이가 요구됩니다. 황혼 타일셋을 기반으로 한 오렌지빛 배경의 맵은 시각적으로도 인상적이며, 곳곳에 배치된 장애물과 좁은 통로는 전략적 움직임을 제한하는 동시에 예측 불가능한 전투를 유도합니다. 맵의 구조는 중앙을 가로지르는 좁은 길과 이를 둘러싼 넓은 평지로 나뉘어 있으며, 각 플레이어는 시작 지점부터 상대방의 본진으로 향하는 길목에서 끊임없이 압박과 방어의 균형을 잡아야 합니다. 특히, 유닛들의 이동 경로가 제한적이기 때문에 스팸 전술이나 컨트롤보다는 한정된 자원을 최대한 효율적으로 활용하는micro management가 핵심으로 다가옵니다. 또한, 맵 곳곳에 숨겨진 보급품이나 특수 아이템으로 추정되는 요소들이 배치되어 있어, 이를 활용한 타이밍 공격이나 방어가 승부를 갈랐습니다. 이 맵의 가장 큰 매력은 ‘불가능해 보이는 상황’을 극복하는 짜릿한 성취감과 함께, 상대방의 예상치 못한 전략에 대응하며 변수를 창출하는 재미에 있습니다. 초보자는 물론, 밀리 경험이 많은 유저들도 새로운 전략적 접근법을 요구받기 때문에, 다양한 플레이 스타일을 시도해볼 수 있는 장점이 있습니다. 다만, 좁은 길목과 제한된 시야로 인해 예기치 못한 일격에 패배할 수 있는 리스크도 크므로, 신중한 판단과 빠른 판단력이 요구됩니다. 이 맵은 주로 1대1 또는 2대2 팀전에서의 긴장감 있는 대결을 즐기고자 하는 플레이어들에게 강력히 추천합니다. 맵의 난이도와 변칙성 때문에 처음 접하는 유저는 어려움을 느낄 수 있지만, 반복 플레이를 통해 맵의 패턴을 익히고 전략을 다듬다 보면 그만큼의 보람을 느낄 수 있습니다. 특히, 상대방의 행동을 예측하고 자원의 흐름을 읽는 능력이 승패를 좌우하므로, 단순히 유닛을 많이 찍어내는 것보다 효율적인 자원 관리가 중요합니다. 또한, 맵의 특성상 빠른 판단과 순간적인 컨트롤이 요구되기 때문에, 브루드워의 기본기를 다진 숙련자들에게 더욱 어울리는 맵이라 할 수 있습니다. 플레이 전에는 맵의 좁은 길목과 장애물을 미리 숙지하고, 상대방의 예상 진입로를 차단하는 전략을 세워보는 것이 좋습니다. 또한, 초반 자원 확보와 유닛 구성을 신중히 결정하여, 중반 이후 예상치 못한 상황에 대비해야 합니다. 이 맵은 단순히 ‘이기는 것’이 아니라, ‘어떻게 이기느냐’에 중점을 둔 전략적 깊이와 재미를 제공하므로, 스타크래프트의 진정한 묘미를 느끼고자 하는 유저들에게 꼭 한 번 시도해볼 가치가 있습니다. "Impossible Scenarios 7" is a unique custom map in *StarCraft: Brood War* that stands out from standard melee maps with its challenging difficulty and deep strategic gameplay. As the name suggests, the map forces players into seemingly impossible scenarios, demanding creative solutions to overcome them. Set against an orange-hued backdrop based on the Twilight tileset, the map is visually striking, with obstacles and narrow pathways that restrict movement while encouraging unpredictable combat. The layout features a central narrow path flanked by wide open areas, requiring players to balance constant pressure and defense from their starting positions all the way to their opponent’s main base. Due to the limited unit movement paths, the map emphasizes efficient micro-management over mass-unit tactics or advanced control. Scattered throughout the map are hidden supplies or special items that can be used to execute well-timed attacks or defenses, often deciding the outcome of battles. The true appeal of this map lies in the thrilling sense of achievement from overcoming "impossible" situations, as well as the excitement of adapting to unexpected enemy strategies and creating new variables. While the map can be tough for beginners, even experienced players will need to approach it with fresh strategic perspectives, making it a great opportunity to experiment with different playstyles. However, the narrow pathways and restricted vision make it easy to lose to sudden, unexpected strikes, so careful decision-making and quick reflexes are essential. It’s highly recommended for players who enjoy high-stakes 1v1 or 2v2 team matches. Newcomers may struggle with the map’s difficulty and unpredictability at first, but repeated play allows them to recognize patterns and refine their strategies for a rewarding experience. Predicting opponent behavior and managing resources wisely are key to victory, as efficient resource use matters more than simply producing large numbers of units. The map also demands quick judgment and precise control, making it best suited for seasoned players who have mastered *Brood War*’s fundamentals. Before playing, it’s wise to familiarize yourself with the narrow paths and obstacles, and to plan strategies that block likely enemy entry points. Early resource gathering and unit composition choices should be made carefully to prepare for unexpected mid-game developments. More than just about winning, this map offers rich strategic depth and fun in *how* you win, making it a must-try for players looking to experience the true essence of *StarCraft*.

로그인 하시고 댓글을 남겨 볼까요?